
Garden Variety
Posted: February 24, 2021 Filed under: fresh ferns, garden variety, Penny Black, Uncategorized | Tags: distress markers, Penny Black stamps, Ranger Distress inks 7 Comments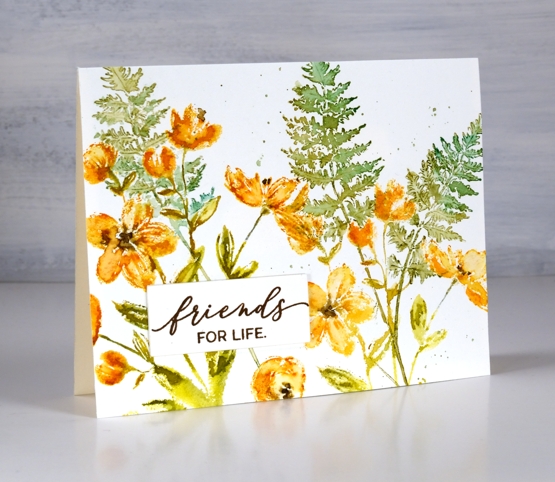
I’m enjoying having new flowers to arrange, stamp-wise, that is. Penny Black’s new ‘Daydream collection has some lovely floral stamps including the ‘garden variety’ I’ve used for today’s card alongside ‘fresh fern’, another new one. I used distress inks and markers to ink the stamps; I generally pick at least two colours for the flowers and two colours for the foliage then give the stamp a spritz so the inks begin to blend.
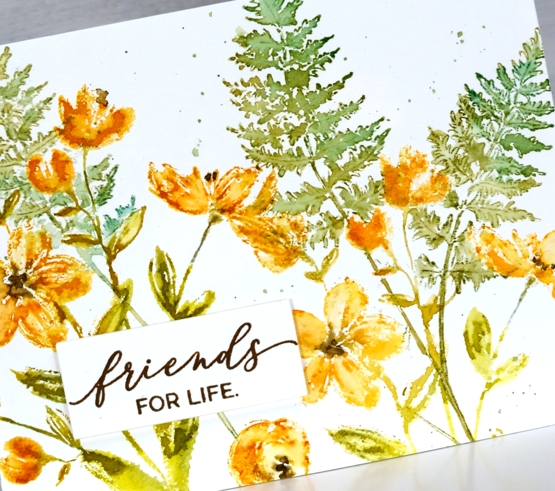
Once I’ve stamped the images I decide whether to blend further with a paint brush and water, for this card I kept it minimal but sometimes I do more blending for a looser watery look. I stamped the ferns after the flowers which required some partial stamping and as well as a little masking to make the ferns appear to be behind.

I finished the panel off with splatter then stamped a sentiment and stacked it up on three layers. I have an art journal page in process with the ‘garden variety’ stamp which I will hopefully finish and share with you next week.
Have a great day; thanks for spending some of it here on the blog with me.
Supplies
(Compensated affiliate links used when possible)
Christmas Stars
Posted: February 22, 2021 Filed under: Cuttlebug, lighting the way, Papertrey Inks, Penny Black | Tags: Penny Black stamps 3 Comments
Last month I made a shaker card with five star cuts outs and sparkly sequins and beads inside to shake around. As the stars were cut out of a watercoloured panel I saved them for another project. My friend Stamping Matilda does this every weekend, her Sunday posts are called ‘Sunday Scraps’ and she features leftovers from that week in a new card or project. I don’t do that anywhere near as often but occasionally I have some scraps, like these stars, which inspire me to turn them into something new. I’m also committed to making a few Christmas cards every month so I don’t leave it all to the last few months of the year.

I used two of the cut out stars as backgrounds for some Christmas themed silhouette stamping, backed them with blue foam then mounted them on embossed backgrounds. On the card above I stamped the Bethlehem scene from the PB ‘lighting the way’ set along with a sentiment from PB ‘Christmas sentiments’. The embossed background was made with neenah solar white cardstock in the Tim Holtz ‘snowflakes – speckles’ embossing folder.
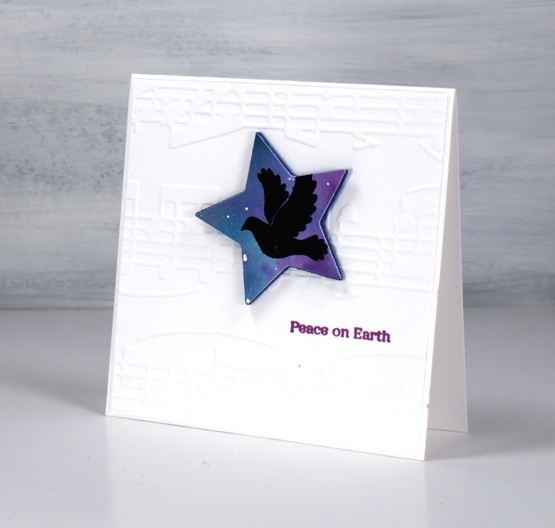
This smaller star was big enough to feature the dove from the PB ‘joy filled’ set and I added sentiment from the PB ‘holiday snippets’ set underneath in versafine clair purple delight ink. The embossed background was made with the ‘allegro’ embossing folder which has been sitting around since my cuttlebug days.

The star dies from We R Memory Keepers seem to be retired but I linked to some similar dies in the supply list below. The original shaker card these stars were cut from contained five stars but I deemed two too small to use. I did stamp the remaining star and it auditioned for a spot on a card but didn’t make the cut. You know it happens sometimes!
Supplies
(Compensated affiliate links used when possible)
You’re a star
Posted: February 19, 2021 Filed under: Alexandra Renke, Heather lowercase die set, My Favorite Things, ornamental star stencil, Pink Fresh studio, YAY for you | Tags: Alexandra Renke, My Favorite Things, Pink Fresh studio, Ranger Distress stains 7 Comments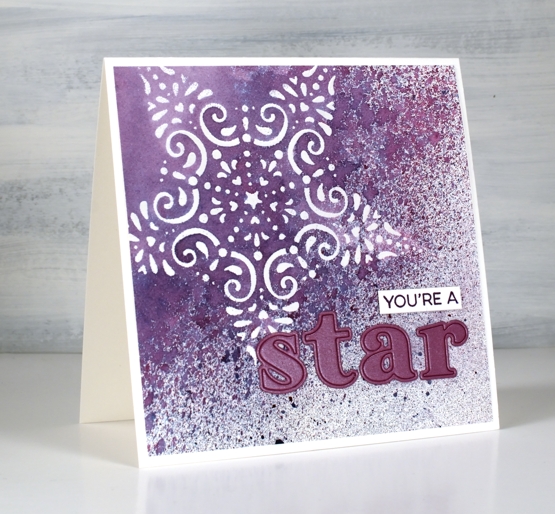
I’ve been wanting to work with some of my new stencils and the CAS Mix Up challenge is currently a embossed stencil challenge so I got to work. I taped the Alexandra Renke ornament star stencil to a piece of hot pressed watercolour paper and started sponging some versamark ink through the stencil. I soon switched to just squishing the versamark ink pad directly on the stencil as that was faster. I embossed the star in clear powder then put the panel in a box so I could spray some stain over it without decorating myself or my desk.
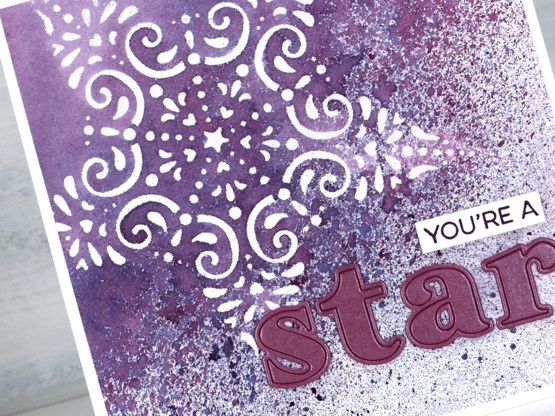
I sprayed seedless preserves, faded jeans and speckled eggs distress stains over the panel from 20-30cm away and ended up with a pretty speckled panel. I wanted to make the spotted sprayed area transition from speckled to solid so I painted water over one edge then spritzed water next to the painted area which achieved my goal leaving some of the panel barely touched by water. It took quite a while to dry and impatient me did smudge some of the speckles but they are underneath the die cut letters now so no harm done.
I applied tape to the back of a piece of co-ordiating cardstock then cut the letters s,t,a,r out using the ‘Heather lowercase alphabet’ die set from Pink Fresh studio. I searched through my stamps and dies to find a sentiment I could alter to say ‘you’re a’ and ended up using part of a stamp from the MFT ‘Yay for You’ set stamped in versafine monarch ink.

When I was doing the spray over embossing step I realised this stencil is probably going to pair up with spray stains again in an art journal page, the speckled effect over the lacy star is just so pretty.
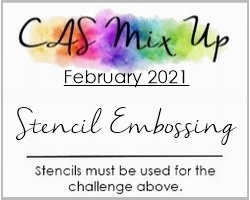
I’m excited to participate in a challenge again, it has been a while! There is still time to get involved if, like me you have stencils that are waiting patiently to be the star or even the background of a card.
Supplies
(Compensated affiliate links used when possible)
Daydream Watercoloured Flowers -Video
Posted: February 18, 2021 Filed under: daydream, Karin brushmarkers, Penny Black, Tutorial | Tags: Karin brushmarkers, Penny Black creative dies, Penny Black stamps, Tutorial 7 Comments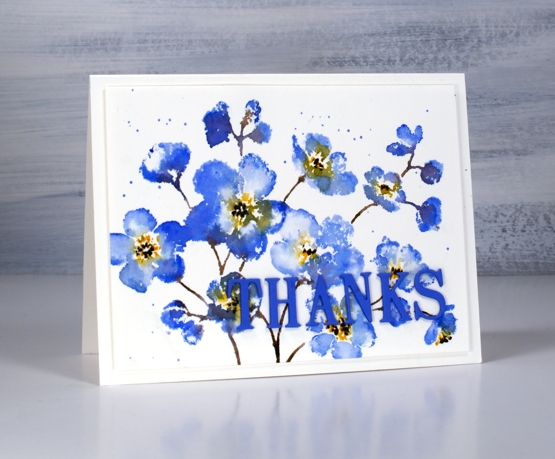
Penny Black has a new release called ‘Daydream’ and it’s filled with spring goodness. I guess many of us start daydreaming about spring in February. The stamp featured in my card today is called ‘daydream’ and I’ve paired it up with a new die, ‘thanks & hello’.
I’m enjoying working with the Karin brushmarkers both for watercolouring line images and for inking stamps. In today’s video I ink the stamp with four markers but my technique is slightly different to my usual method and involves some ‘water stamping’
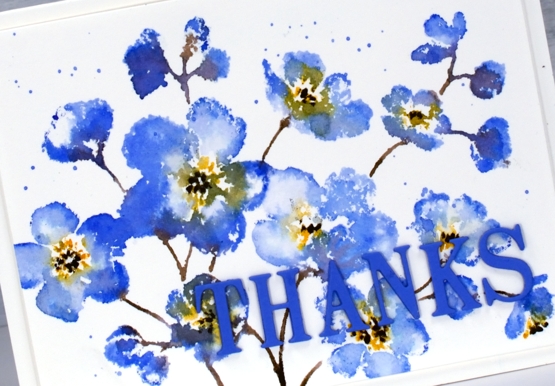
In the video below you can see why the juicy Karin markers are perfect for this technique. As I’ve mentioned in previous posts, a little ink goes a long way. I’m looking forward to trying this technique again on a different stamp with even less ink for a paler more subtle look.
I chose to keep the panel simple on a white background but you could add a pale wash before starting or do some second generation stamping for background flowers. Maybe I’ll try that next.

This blue which has a hint of purple is my favourite blue. It reminds me of cornflowers which featured in my bridal bouquet and was the colour of my bridesmaid’s skirts.
Supplies
(Compensated affiliate links used when possible)
Faith & floral journal page
Posted: February 16, 2021 Filed under: A Pocket Full, Art Journal, Arteza, Footnotes, illustrious, Penny Black, springtime sigh, tranquil buds, watercolour real brush pens | Tags: Art Journal, Arteza, Penny Black creative dies, Penny Black stamps 6 Comments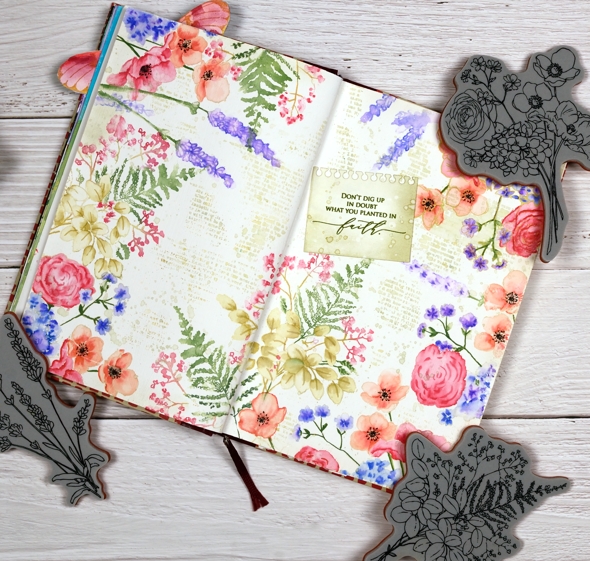
I know it is not spring yet, in fact it is still very winter where I am; we’ve had some of our coldest days and nights just in the last few days. Maybe because it’s so cold now is a nice time to muse about spring.
Sometimes I have a plan for a journal page, other times I work it out as I go along. To begin this one I painted absorbant ground on the journal double page. It is a base preparation a bit like gesso which makes the paper act a little more like watercolour paper. I should probably just switch to a journal with watercolour paper pages but I stubbornly want to keep adding to the this one.
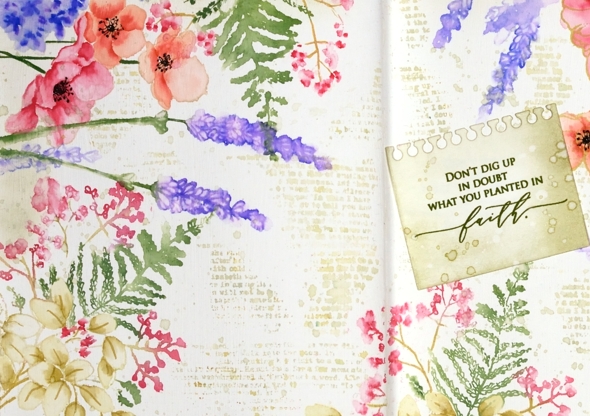
Once the base dried I stamp the Penny Black ‘springtime sigh’ stamp in one corner then coloured with Arteza real brush pens. The colouring is not precise, the surface doesn’t react the same as watercolour paper but I found blending with very little water gave me the most control.

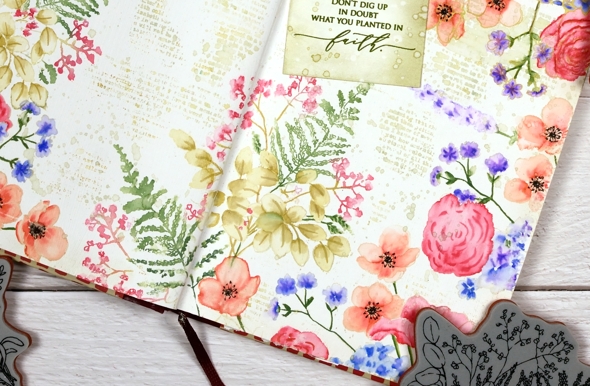
I stamped first with Gina K skeleton leaves amalgam ink which I have used for no-line watercolour in the past but it remained too distinct on the journal page so I switched to antique linen which worked a bit better. I restamped and coloured springtime sigh several times then decided I wanted fewer little flowers to colour! I switched to the new Penny Black ‘illustrious’ stamp which co-ordinated well. I don’t know for sure but I wonder if both stamps were drawn by the same artist, the scale and style is similar.

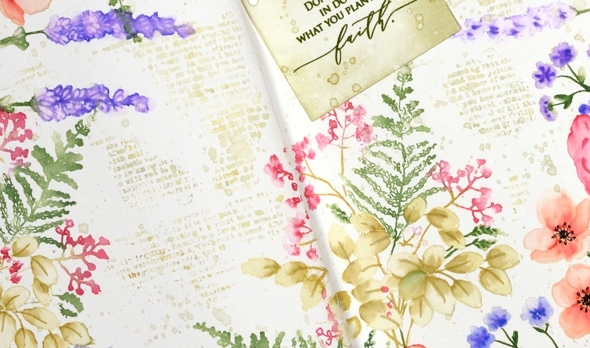
When stamping the ‘illustrious’ stamp I was able to ink most of the stamp with Arteza real brush pens which cut down on the colouring. I still used antique linen ink on the large open leaves then blended with a marker to shade the leaves. When I had almost framed the double page spread I switched to the PB ‘tranquil buds’ stamp to add some lavender.
Next came the tricky stage when I had to decide what was happening with the empty area of the journal page. Writing, stamping, hand lettering or empty space were all options. I decided a bit of ‘filler’ in the shape of a text stamp would be nice and instead of the large script one I often use I chose the smaller typed text stamp from the PB ‘footnotes’ set. I stamped it here, there and everywhere in old paper ink, often spritzing with water before stamping so it just stamped a blurry pattern. I also added splatter then chose a phrase from the new PB ‘inspirational sentiments’ set.
Is that cute notebook die-cut covering a failed stamping attempt? Yes it is but I’m quite happy with that because the notebook page looks sweet. I cut it with a die from the PB ‘a pocket full’ set. I love how this page turned out even though I had no idea at the beginning it would progress this way. That’s the beauty of a journal page.
Supplies
(Compensated affiliate links used when possible)
Freshly cut flowers
Posted: February 15, 2021 Filed under: Foiled Fox store, fresh cut, love you Mom, Papertrey Inks, Penny Black | Tags: Fabriano Watercolour Paper, Papertrey ink, Penny Black creative dies, Penny Black stamps 2 Comments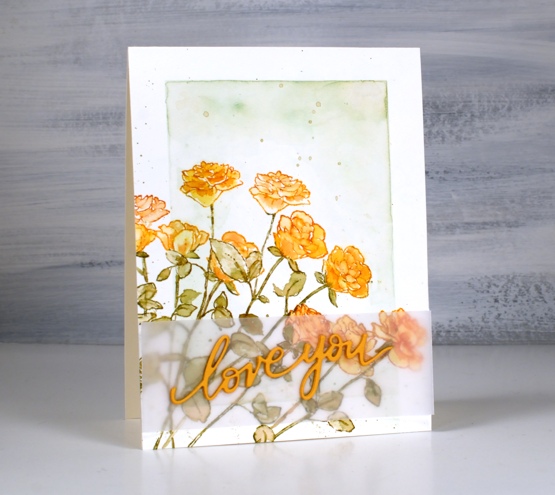
I’ve teamed up with the Foiled Fox again to share a post on their blog. If you pop over there you can read all the process details for this floral card featuring a stamp and a die from Penny Black.
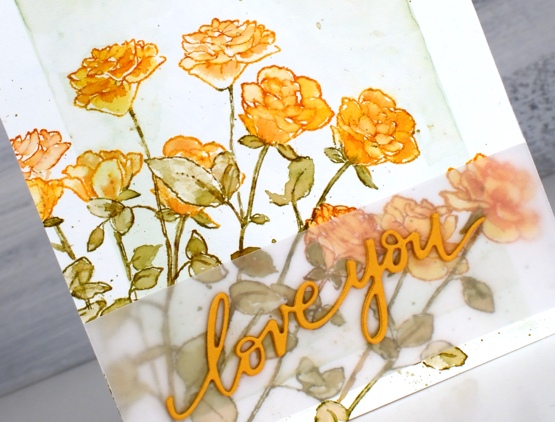
This stamp is called Fresh Cut and it is a rubber cling stamp of five long stem roses. I did some masking and partial stamping to fill the corner of my panel with eleven orange roses. I guess I should have added one more to have a dozen!
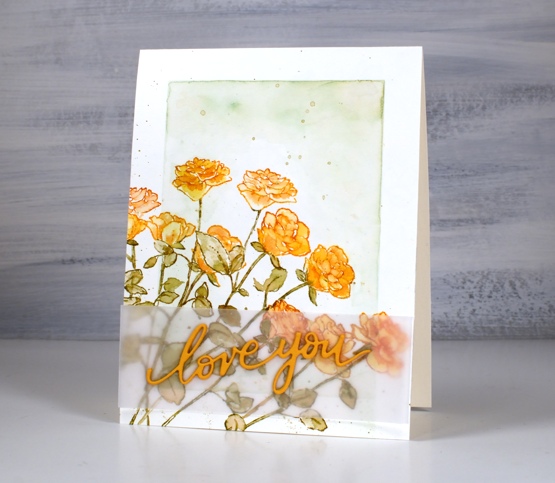
You might recognise the background style on this card; it is inspired by some of Jill Foster’s amazing cards for Penny Black. Because all those roses make the panel a little busy I separated the stacked die-cut words from the roses with a piece of vellum, just to make it easier to read. Don’t forget to visit the Foiled Fox blog today for all the details and while you are there browse awhile for more inspiration.
Supplies
(Compensated affiliate links used when possible)
Rose Dance on black
Posted: February 12, 2021 Filed under: Brutus Monroe, Finetec paints, Penny Black, rose dance | Tags: brutus monroe embossing powder, Finetec artist mica watercolour paint, Penny Black stamps 6 Comments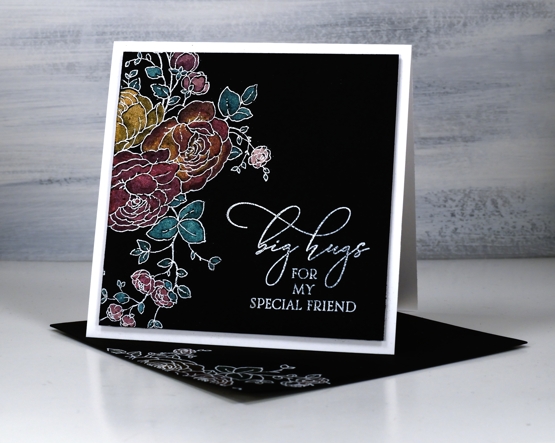
Today’s rosy card features just a portion of the Penny Black rubber cling stamp, ‘rose dance’. I’ve been creating with this stamp for a couple of days, coming up with different ways to use it. It is quite a large stamp, 6″ x 4″ but you don’t need to use the whole stamp on a card. I used only a section to create an embossed white border on a square panel of black watercolour paper.

I painted the outline design with Finetec Mica Pearlescent watercolours; I didn’t spend much time being detailed or doing blending because the pearlescent on black is very pretty without too much fussing. I wish you could see the shimmer a little better in the photo but trust me it is there in real life.
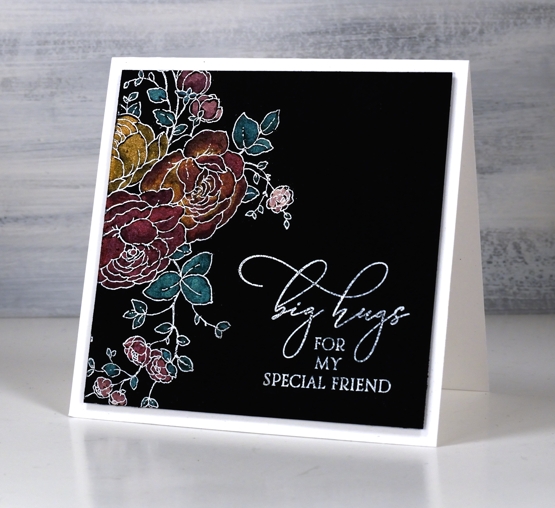
I embossed a sentiment from the PB special sentiments set in Brutus Monroe alabaster ink and popped the panel up on two pieces of black cardstock to lift it above the card base. And you might have noticed I remembered to make a matching envelope this time.
Supplies
(Compensated affiliate links used when possible)
Sea Turtle
Posted: February 11, 2021 Filed under: Brusho, Finetec paints, Pink Ink Designs, Sea Turtle | Tags: Finetec artist mica watercolour paint, Pink Ink Designs 9 Comments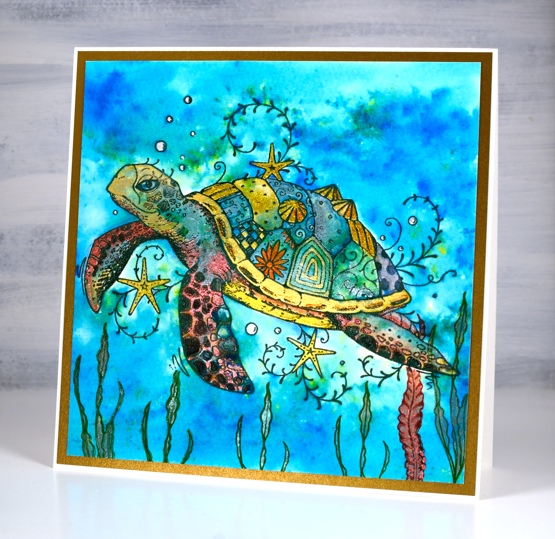
I’ve never been one to stamp or paint many animals so when I saw this stamp by Pink Ink Designs I surprised myself and the owner at Crop A While by snapping it up. I have to admit I’ve been intrigued by sea turtles over the last little while. There is a youtuber we watch pretty regularly who lives on the West Australian coast who often shares footage of sea turtles. They’re graceful in the water but pretty challenged when they make their way onto land to nest. And the baby turtles who have to fight their way to the ocean to survive, that is fascinating and nerve wracking to watch.

You will probably notice this sea turtle is rather unique with a patchwork shell. I have another one painted ready for a journal page where I ignored all the patchwork and tried to paint it more realistically. This one was fun however as I chose colours to fill all those little patterns.
The turtle is embossed in black on hot pressed watercolour paper. I added the background first by wetting the panel then sprinkling brusho over it. I can’t remember which brusho powder it was, maybe a blue and a green. I kept the strongest colour away from the turtle as much as I could with water and a paper towel but I didn’t need the turtle to be white; it was fine to paint over the brusho colour.
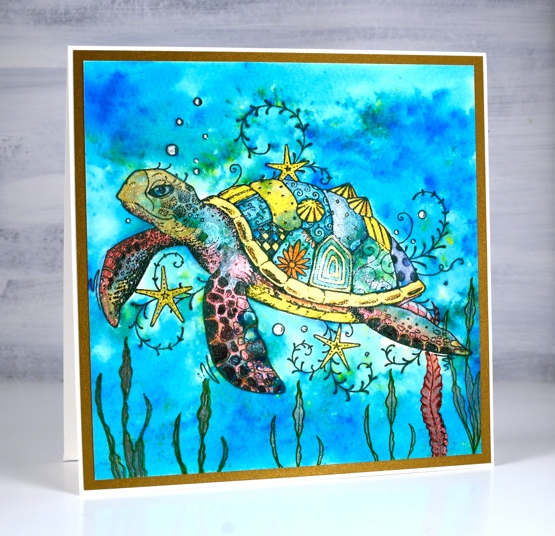
I used pearlescent paints to paint most of the turtle but there are areas just painted with brusho also. To co-ordinate with the pearlescent paint I matted with antique gold shimmer cardstock.
Hope your day is going swimmingly!
Supplies
(Compensated affiliate links used when possible)

Alcohol Ink Flowers – Video
Posted: February 10, 2021 Filed under: Alcohol Ink, grafix | Tags: grafix, grafix craft plastic, Penny Black creative dies, Ranger Alcohol Ink 15 Comments
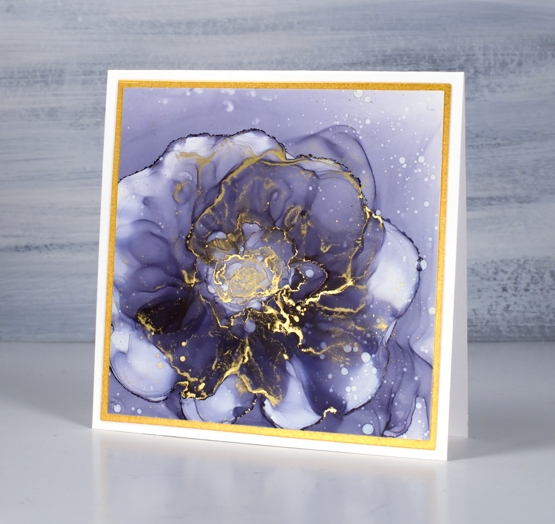
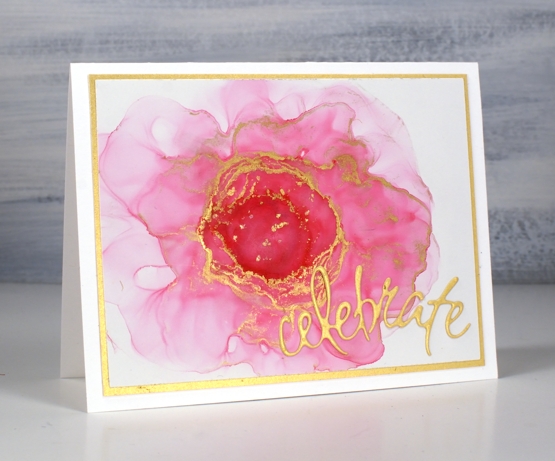
Last week I posted a video showing my method for abstract alcohol ink backgrounds. This week’s video is less abstract. In it I show you how I created the purple flower in the card above. I’ve been experimenting with creating flowers and sometimes have more success than other times. I’ve included four cards in this post but there are several panels that I will probably wipe clean.Did you know you can wipe your yupo or craft plastic clean with rubbing alcohol? I don’t always get the panels back to pristine white but so close it doesn’t matter.

To create this rose I used only two alcohol inks, eggplant and gilded alloy along with plenty of isopropyl alcohol. You can see my process in the video below.
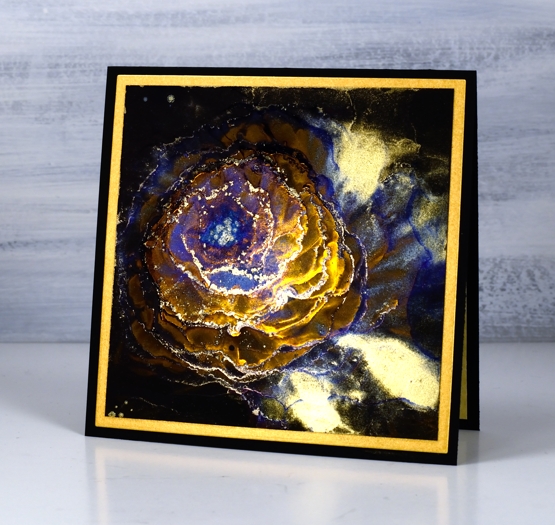
The next flower is on black craft plastic, messier and more experimental but a similar process of moving the inks towards the centre leaving rims of gilded and indigo ink as I went.
On the panel below I used Ranger flamingo and gilded alloy inks. The pattern is a bit lopsided but it’s definitely floralish. I added a gold mat and gold die cut from the PB set ‘celebrations’.
Have you tried alcohol ink flowers? Do you think you might?
Supplies
(Compensated affiliate links used when possible)

Flower truck…is coming
Posted: February 8, 2021 Filed under: ...is coming, A2 layers, Additional A2 layers, buckets of flowers, hanging planters, Penny Black, pretty picket, silver linings, Waffle Flower | Tags: Penny Black creative dies, Waffle Flower dies 3 Comments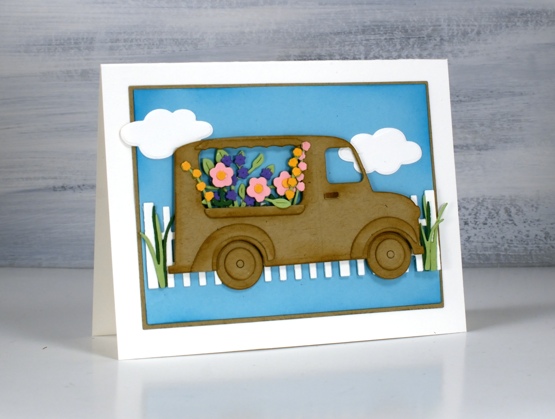
Not my usual style, you know I don’t often take the cute route (pun intended) but this little truck really appealed to me. As I worked on this card and looked through my dies for flowers I realised I could also turn it into an icecream truck or a pumpkin truck and maybe a postal delivery truck.
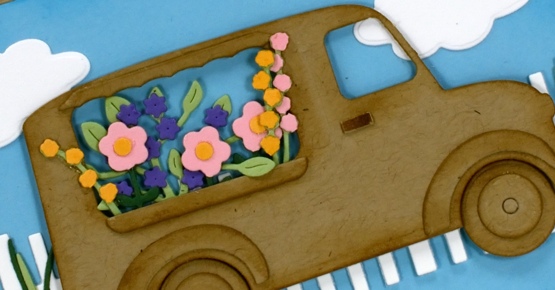
My initial plan was to die cut everything from kraft cardstock except for the flowers but once I’d done the truck and flowers I decided to add more colour with a picket fence and some clouds on a bright blue background. I used a blending brush to add ‘brushed corduroy’ distress ink around all the pieces of the truck and ‘mermaid lagoon’ around the blue panel. I’ve listed all the dies below; as you can imagine the fiddliness factor on this card was high but I persevered and the satisfaction factor is also high.
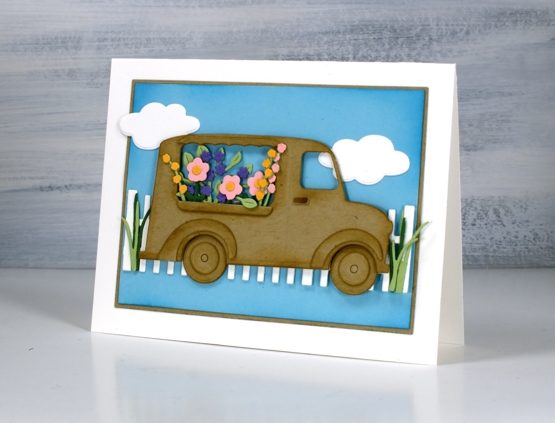
I haven’t added a sentiment but feel that it could be good for many occasions so I will wait and see. I’d be happy to see a truck bursting with flowers in my driveway right about now when everything is covered in snow.
Supplies
(Compensated affiliate links used when possible)


