Black Christmas Tags
Posted: December 12, 2024 Filed under: Baubles, Christmas filigree, Christmas stockings digital stamp set, Echidna Studios, grafix, mittens | Tags: Echidna Studios, grafix, grafix craft plastic 2 Comments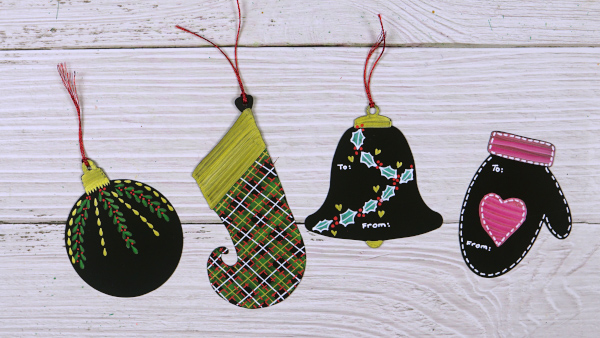
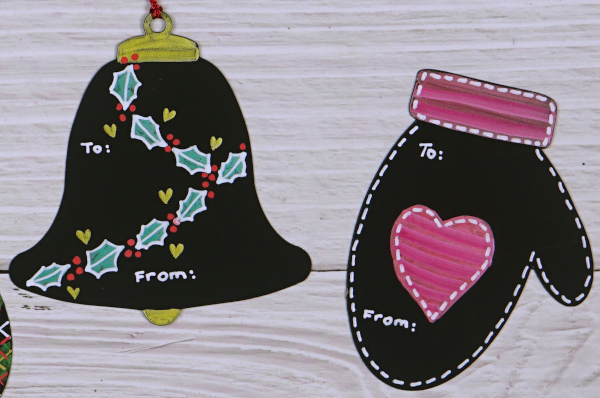
Last year I decorated some black glass balls for Christmas using a selection of paint pens and metallic brush pens. The opaque colours really pop on black so I decided to do something similar on black craft plastic from Grafix. You can see my process in the video below.
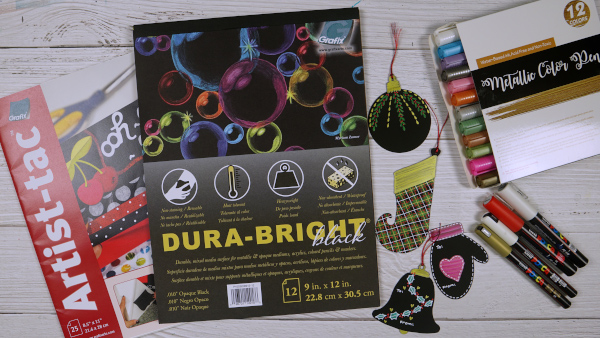
I cut the four different shapes on the cricut using digital cutting files from Echidna Studios (bell, mitten, stocking and bauble) The paint pens were all Posca and the metallic brush pens a brand I found on Amazon.
The dura-bright black (black craft plastic) from Grafix is a good surface for paint pens. It is very smooth and I found writing and drawing on it is very relaxing.
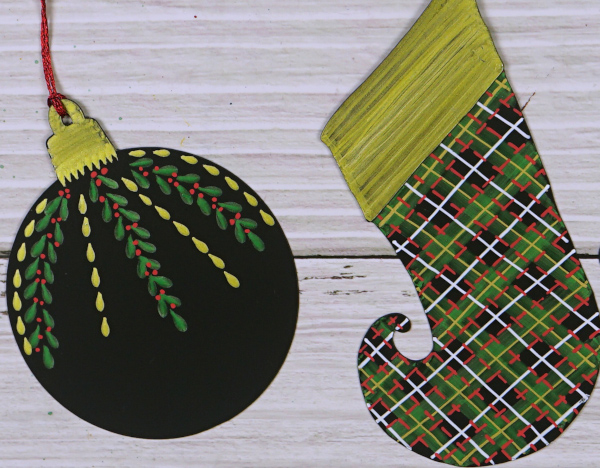
You might not think of black as a Christmas colour but the shine of the metallics and the chalkboard pop of the white is quite fun.
Grafix Window Journal – Video
Posted: July 29, 2024 Filed under: Alcohol Ink, cricut, grafix, mixed media journal | Tags: Alcohol Ink, Art Journal, grafix, grafix craft plastic, Mixed Media, Ranger Alcohol Ink 1 Comment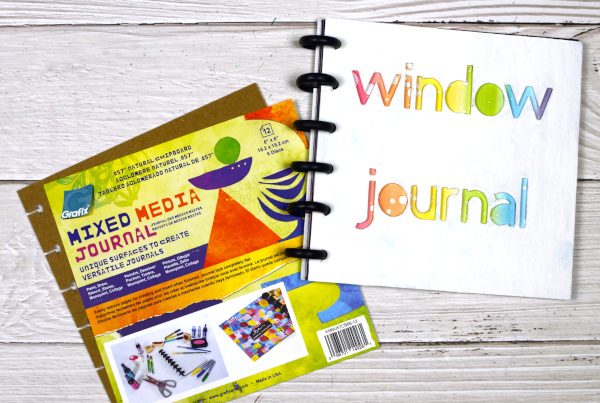
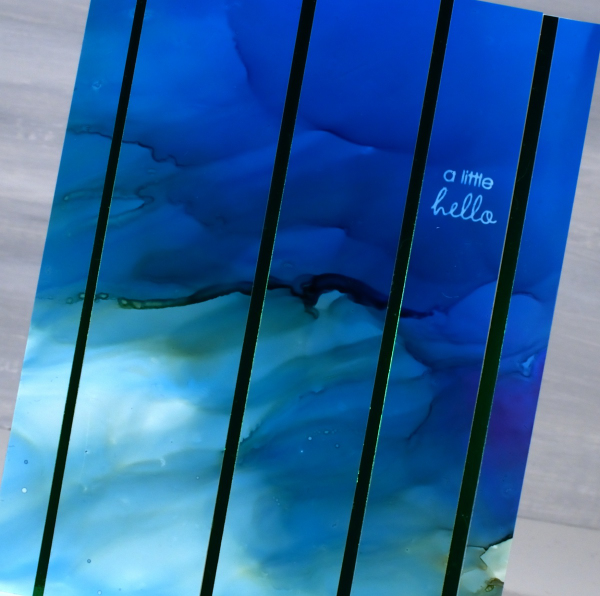
I’ve featured the Grafix Mixed Media Journal in videos a few times. I’ve made a swatch book for alcohol inks and markers and a sample book for alcohol ink techniques. Both books are good for reference. Today’s post and video feature the mixed media journal as a ‘window journal. I have added pages in pairs of black and white using the handy disc system. I have cut windows in the black pages and created alcohol ink patterns on the white pages.
You can configure the Grafix mixed media journals however you like as the pages and covers are available in separate packs or as a complete journal with different types of pages. Check out the video below to see how I put my window journal together.
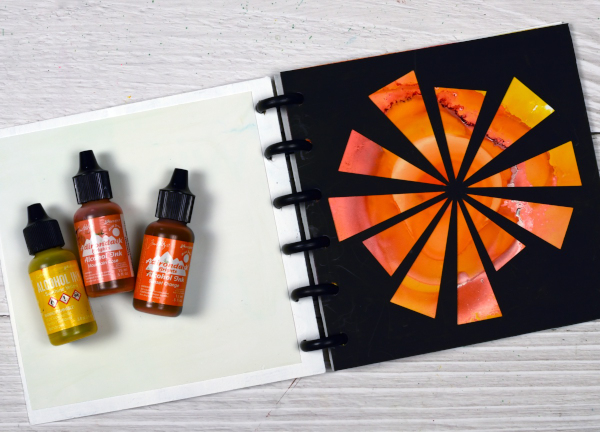
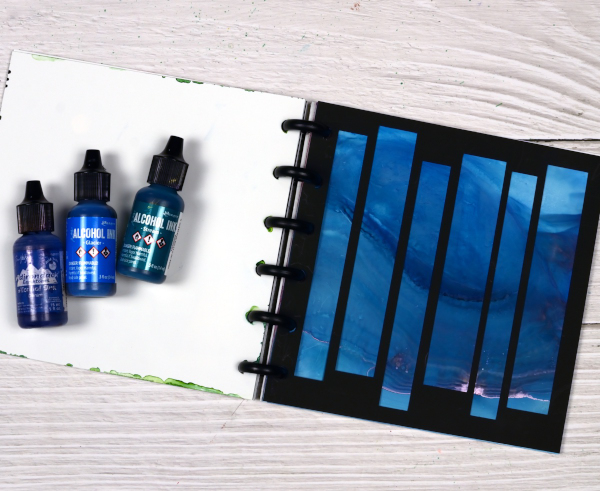
You could create a window journal in many ways. I have added colour and pattern to only one side of the white pages but it would be fun to add a design on both sides so you could see the pattern through the window before the pattern and the window after.

You can see in the video that I reworked the ‘ocean’ page shown below several times. That is the beauty of white craft plastic; it is possible to take the page back to white or just dilute the ink with isopropyl alcohol and move it into a new pattern.
The final page in the book features a stencil design with alcohol inks, so simple but so effective. I cut all the windows on my Cricut using free shapes available in Cricut design space but you could cut them with dies or with a craft knife.
To see my other videos featuring the Grafix Mixed Media journal click the following links: Swatch book Swatch book cover Technique book
Stencils + Alcohol Inks
Posted: July 5, 2024 Filed under: Alcohol Ink, brush lowercase alphabet, coloring book stencil, cricut, grafix, Picket Fence, Spellbinders | Tags: Alcohol Ink, cricut, grafix craft plastic, picket fence, Spellbinders 6 Comments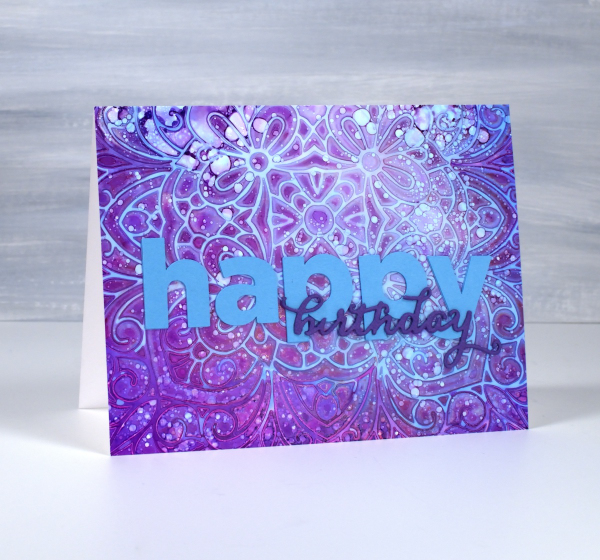
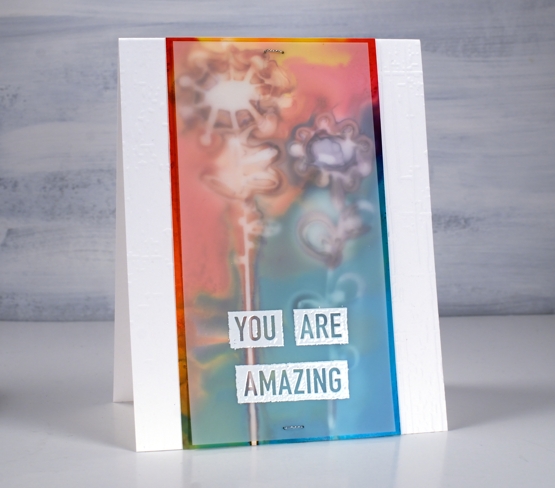
An amazing thing happened with this card. It arrived on the birthday, after being sent from Canada to Australia by an unreliable sender(me)! So now the recipient has it I am posting it here on the blog.
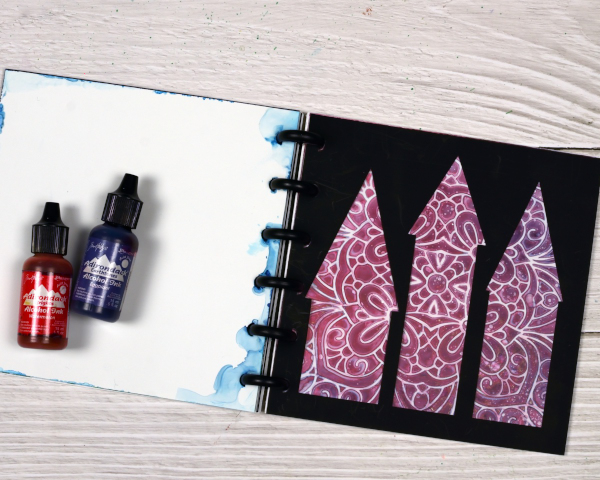
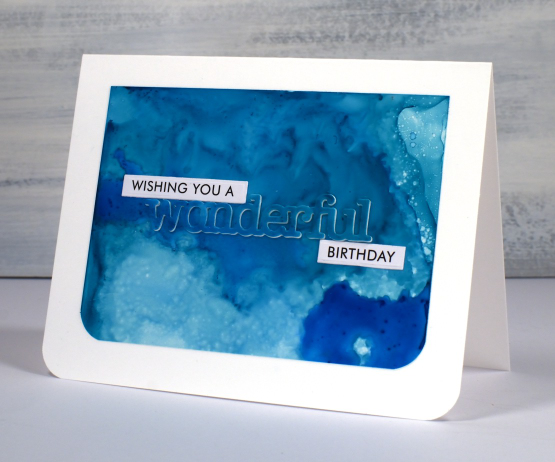
I have shared cards made with this technique before; it’s a fun one. I used alcohol inks on Grafix white craft plastic and for both cards I only used two inks along with isopropyl alcohol.

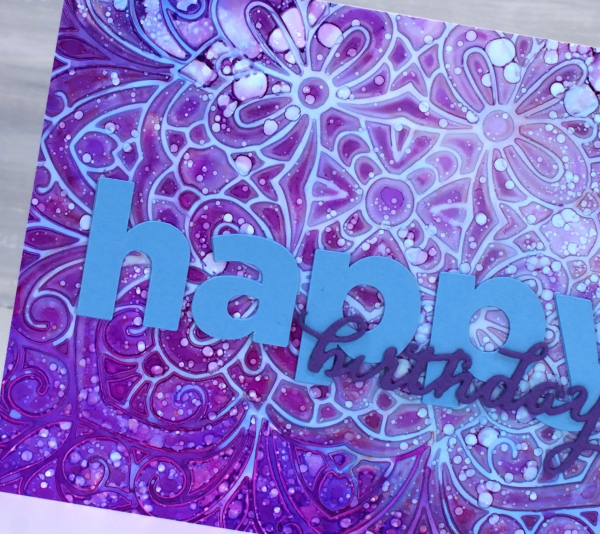
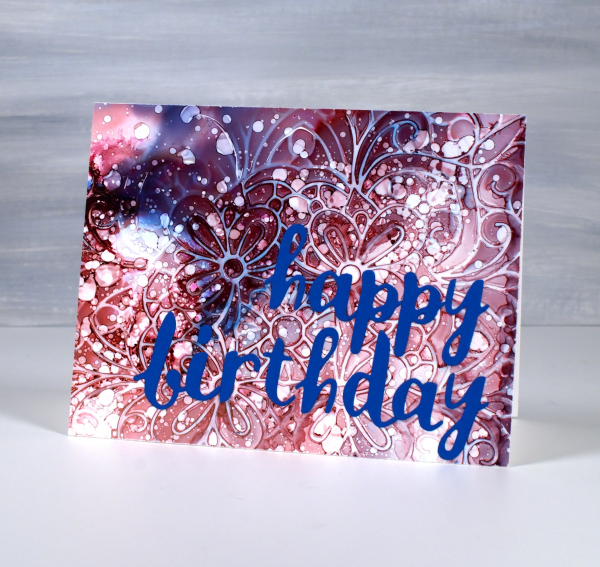
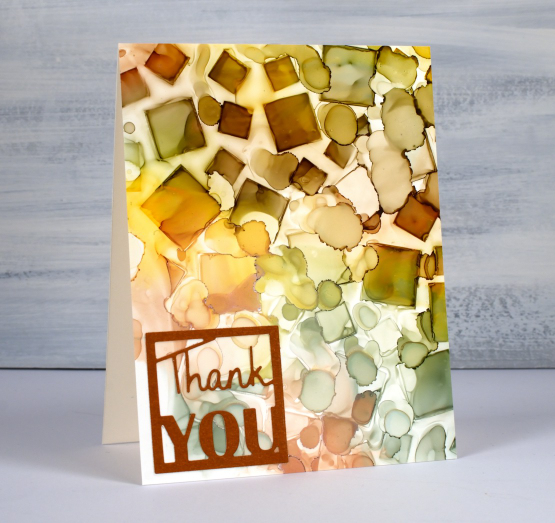
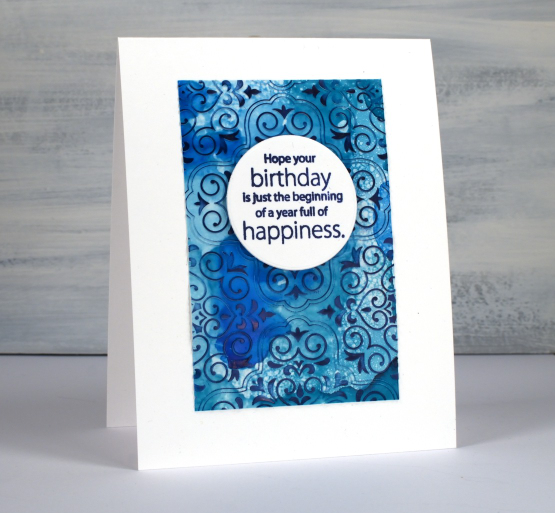
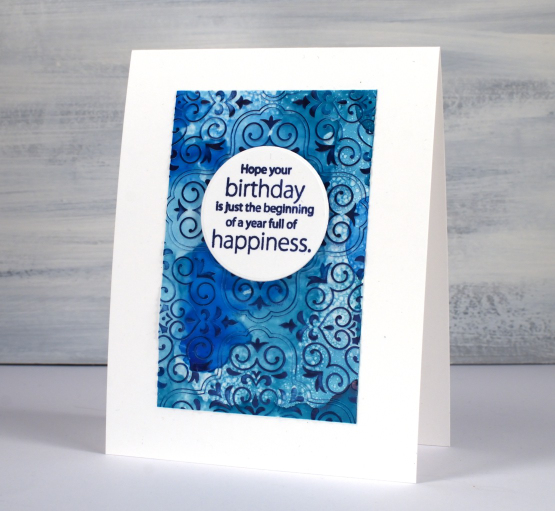
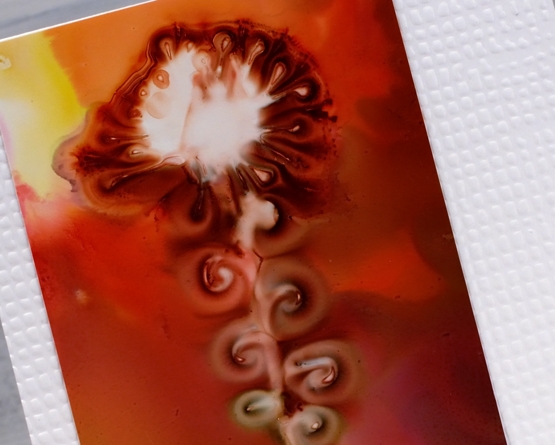
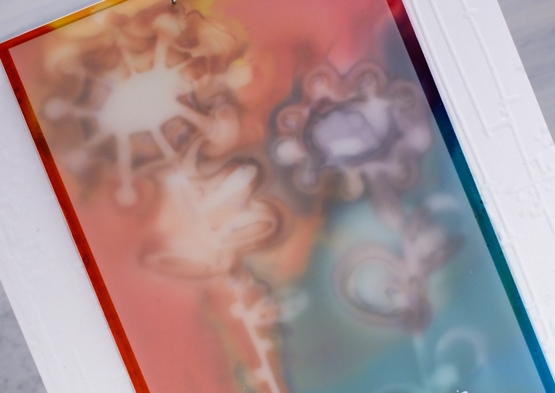
I start with a layer of isopropyl alcohol on the panel, then add a couple of alcohol inks and tilt the panel to move the inks and cover the whole panel. Next I drop a stencil on top, for both these cards I used the Picket Fence ‘coloring book’ stencil; it’s 6″x6″ so the panel was larger than needed for my finished card.
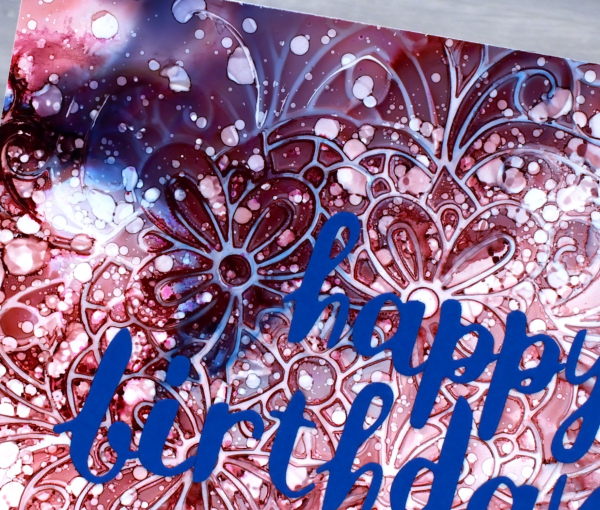
Because the ink is trapped under the stencil it takes a while to dry. Sometimes I help it along with an air pump, not a heat tool. When it is dry I like to splatter some isopropyl alcohol lightly over the panel to get little dots here and there. I don’t flood it because that would take me back to the beginning of the process. When the ink is dry I lift the stencil to reveal the intricate pattern, then choose which part of the panel I want for my card front. If I don’t like the finished panel I add more isopropyl alcohol and tilt the panel to dilute all the ink and start again. That is the beauty of working on grafix white craft plastic; you get second chances and even third or fourth if you’re fussy like me!
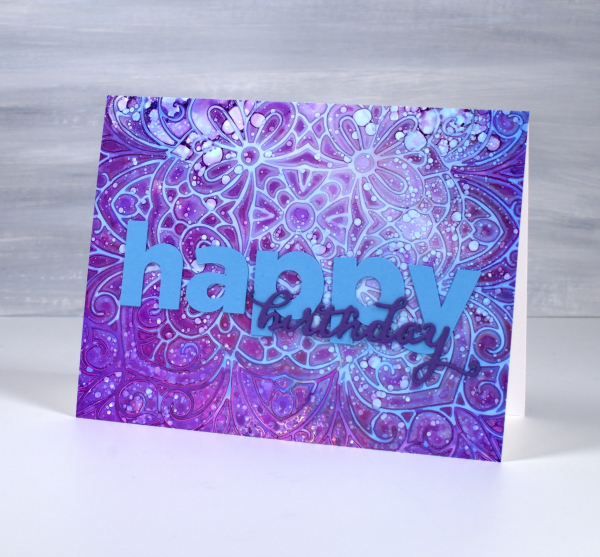
The sentiment on the card above is a combination of cricut letters and a Penny Black birthday die. On the card below I used the Spellbinders brush The sentiment on the card above is a combination of cricut letters and a Penny Black birthday die. On the card below I used the Spellbinders brush lowercase alphabet dies.
Alcohol Ink & Foil – Video
Posted: April 17, 2024 Filed under: Alcohol Ink, grafix, Penny Black, Tutorial | Tags: Alcohol Ink, grafix, grafix craft plastic, Penny Black stamps, Ranger Alcohol Ink, video 4 Comments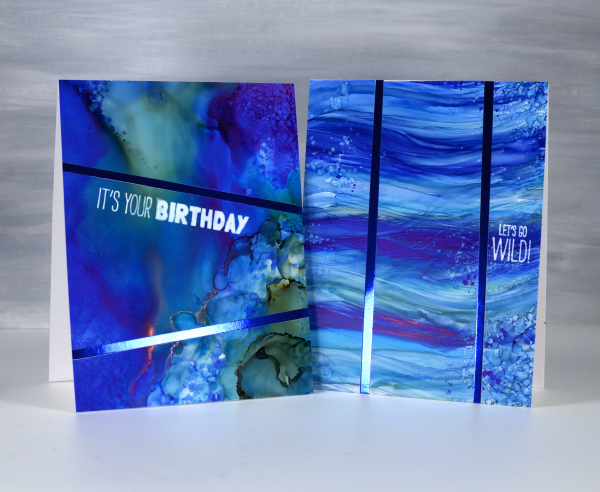
Recently I spent a happy few days creating with alcohol inks after quite a break. They did not disappoint! I am looking forward to more experimenting and maybe some Christmas card designs.
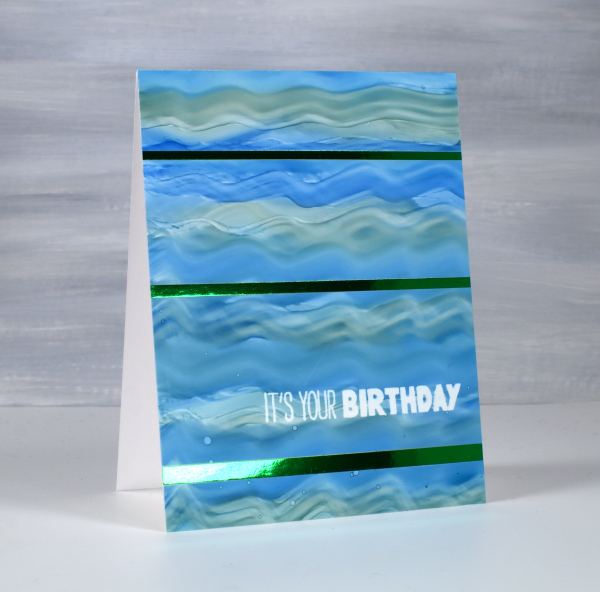
I created some cards using Grafix white craft plastic (also called bright white dura-lar), Grafix metallic foil board and Grafix double tack adhesive. These are all products I’ve used before and definitely recommend. You can see my process in the video below.

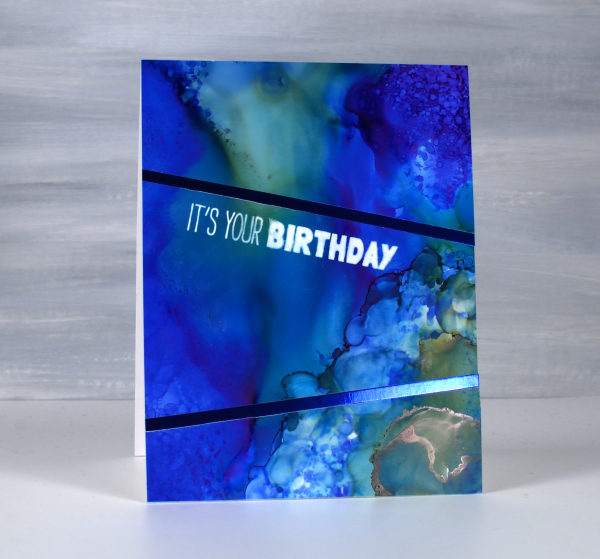
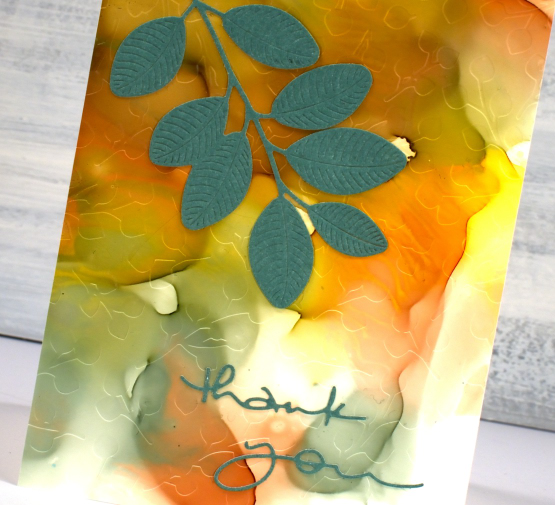
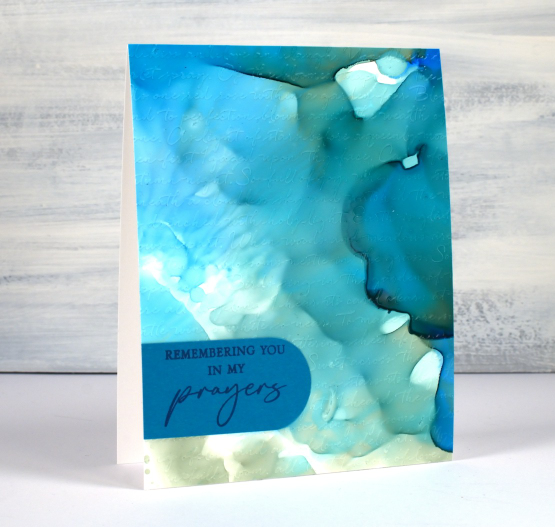
In the cards above and below you can see the wavy ocean effects I achieved easily by applying alcohol inks with a felt applicator. I love watching the inks continue to move after I lift the applicator.
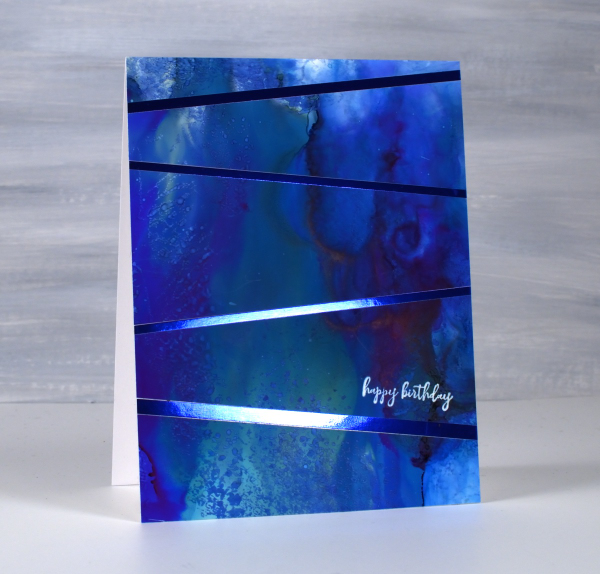
The panels below were all made by moving the alcohol inks and isopropyl alcohol around. I tilt the panel and use an air blower to move the the ink. Where there was too much of one colour or too much intensity of colour I diluted with isopropyl alcohol or just dabbed ink off the panel with a paper towel
I used some of the green and the blue metallic foil board from Grafix to add to my designs. To see another project using the foil board click here.
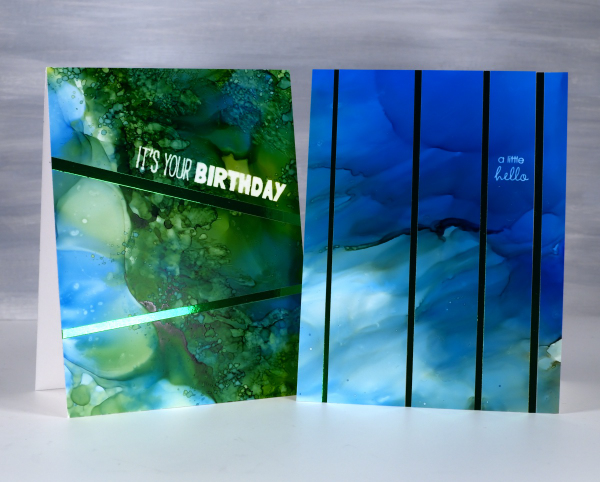
To add the sentiments I used an alcohol lift inkpad from Ranger. Its been a while since I’ve used alcohol lift ink and I was thrilled with how well it lifted the ink from the grafix white craft plastic. With a few repeat impressions and removal of diluted ink I was able to remove the bold green and blue inks to reveal sharp white words.
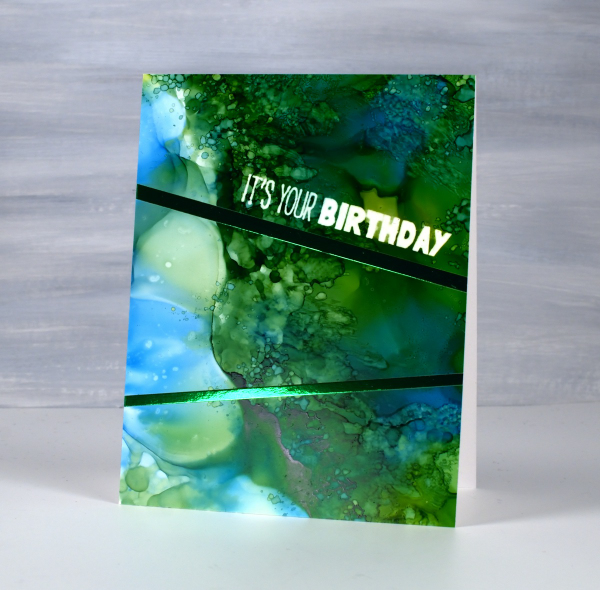
The sentiments are from the Penny Black ‘how sweet!’ set and ‘Let’s Go Wild’ set. Both are rubber cling sets which seem to hold the lift ink well and apply it evenly. This post includes affiliate links from Foiled Fox and Scrap’n’Stamp . If you buy through these links I receive a small commission at no extra cost to you.
New YouTube channel – New Video
Posted: February 11, 2023 Filed under: Alcohol Ink, baby blue leaf embossing folder, Branch 9 die, cricut, Dies, grafix, Moda Scrap, my designs, ornate tile embossing folder, Paper Rose, Penny Black, Pink & Main, scripty, silhouette birds, so extra supporting sentiments, Stampin Up, thank you squares, Tim Holtz, Tutorial | Tags: cricut, grafix, grafix craft plastic, Penny Black creative dies, Penny Black stamps, Ranger Alcohol Ink, Stampin Up, Tim Holtz 6 Comments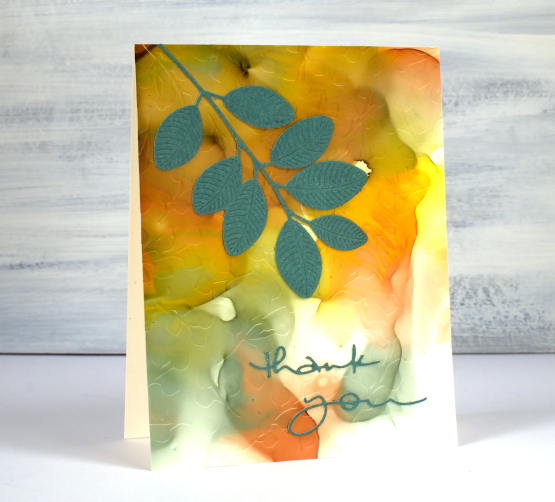
If you have been visiting this blog for a while you will know I had a youtube channel for many years. In 2022 after ten years of adding videos and gathering a community of 7000 subscribers my channel was deleted. In recent weeks I have started again with a new channel and some videos ‘from the archive’. My new channel is called Heather Telford Art and I would be very happy if you decided to like, subscribe and tell your friends! There is content on there that you may remember from the last few years and starting today there is new content also! The new ‘2 for 1 Alcohol Ink Panels’ is freshly filmed for my new channel and I hope it will be the first of many!
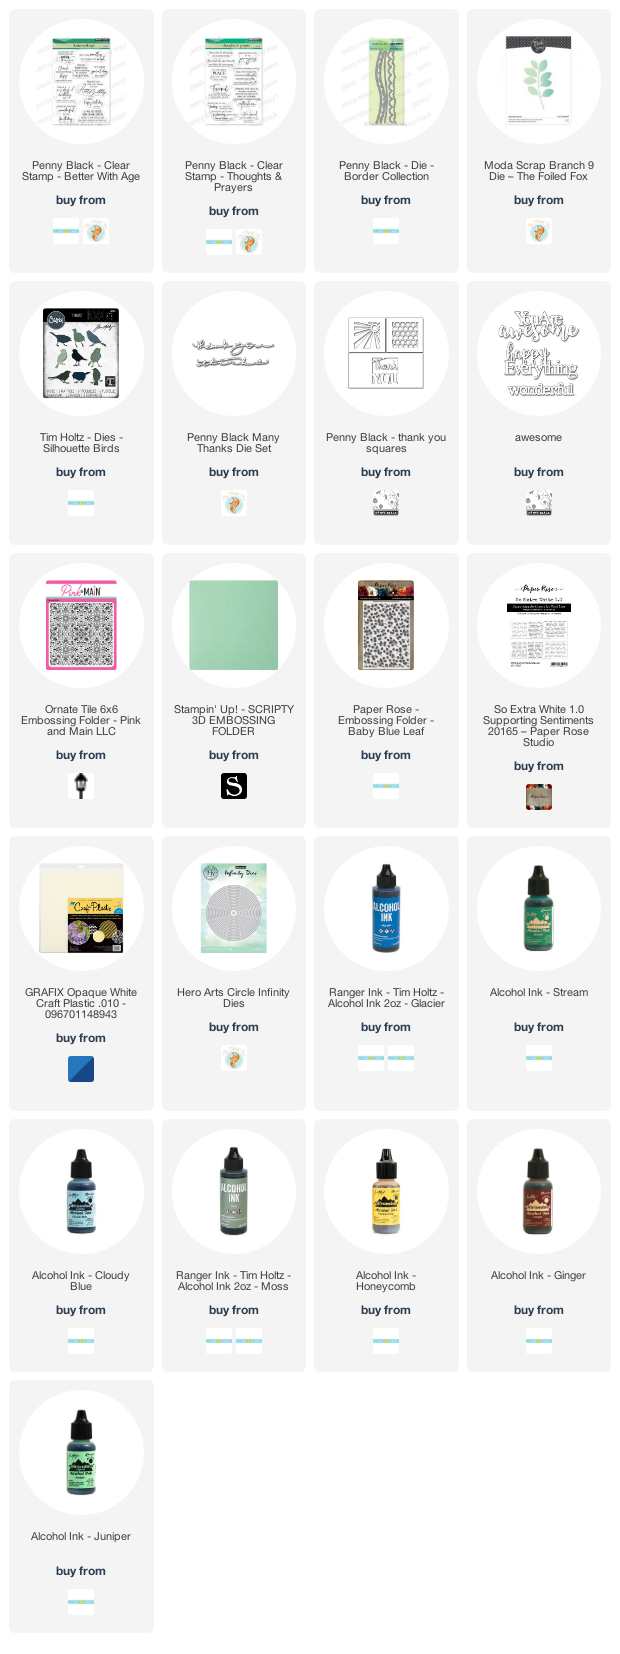
There are quite a few photos in this post because, well, this is a 2 for 1 technique and I created three panels which of course became six panels and one was cut in half so there are seven cards to show you in this blog post! Grab a cup of tea. I have added a linked supply list at the very bottom of this long post.
As well as a new youtube channel I am also a new Cricut owner. The stencil used on the card below was designed by me and cut on my Cricut. It is available as a cutting file from Echidna Studios etsy store.
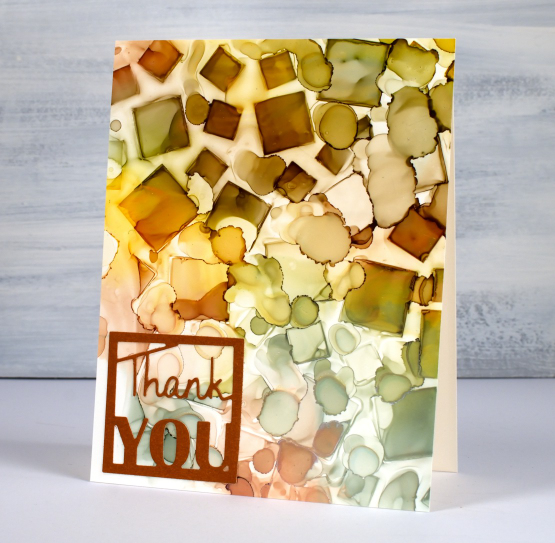
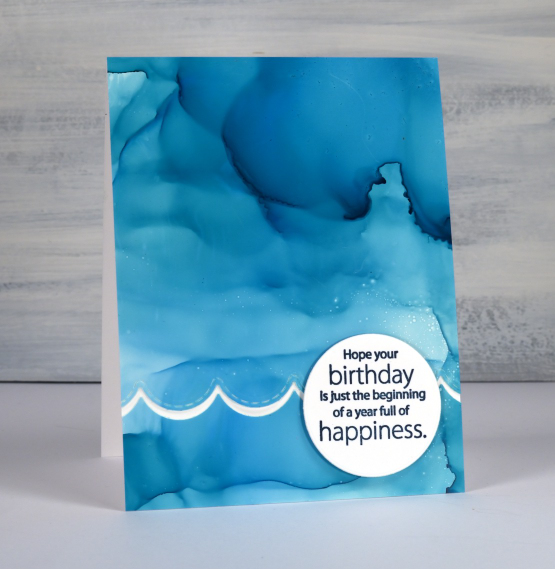
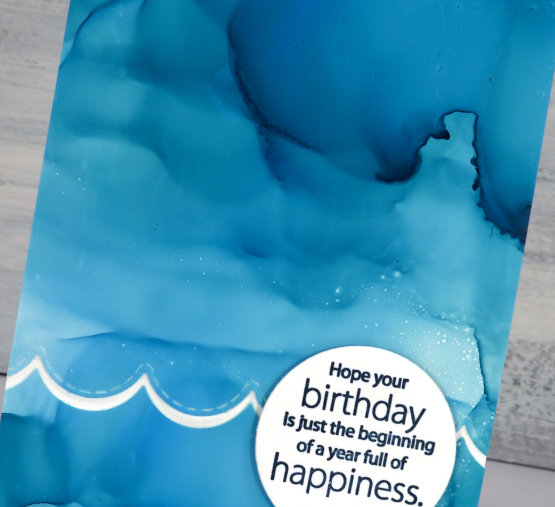
Most of the 2 for 1 smooshed panels I left as a full card fronts adding only a sentiment or some die-cutting. As the panel below reminded me of the ocean, the PB wavy scallop border seemed a nice touch.
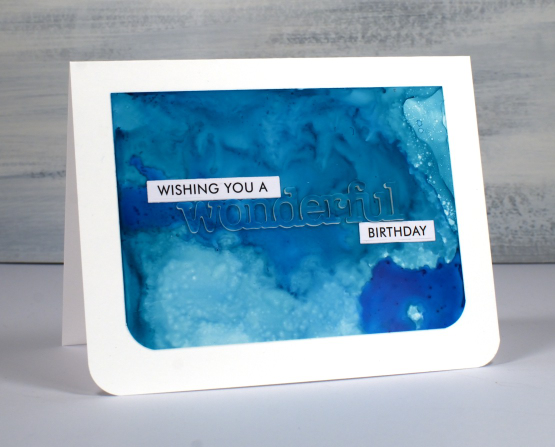
The panel below is a half panel from the first one I showed on the video. I love the patterns from the isopropyl alcohol ink spray even though they don’t stay distinct. Even when die-cutting the word from the panel I couldn’t leave it off so I popped it up. Not so funny story: I guess I haven’t popped up a die cut word in a while because I flicked those little shapes inside the letters into the garbage when I poked the word from the die. So yes, I had to hunt through my garbage to complete the card.
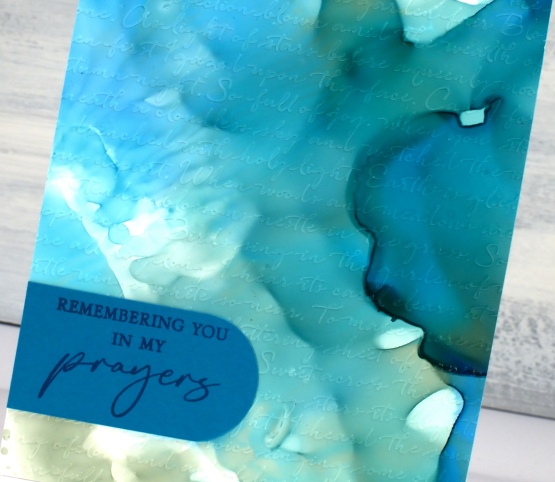
I don’t know why I hadn’t tried it before but seeing how well Grafix craft plastic responds when put in an embossing folder has been a revelation! I thought it might crack but it doesn’t so you can have the subtle impression of your embossing folder on a panel or the bold inked pattern as I’ve done on the card below. Sentiments in circles might be a little fad I go with for a while too; they look cute!
You can see the soft look of embossed script on the panel below, especially in the close up. This detailed embossing folder is from Stampin’ Up and is called ‘scripty’. I don’t think it is available anymore but you might something similar.
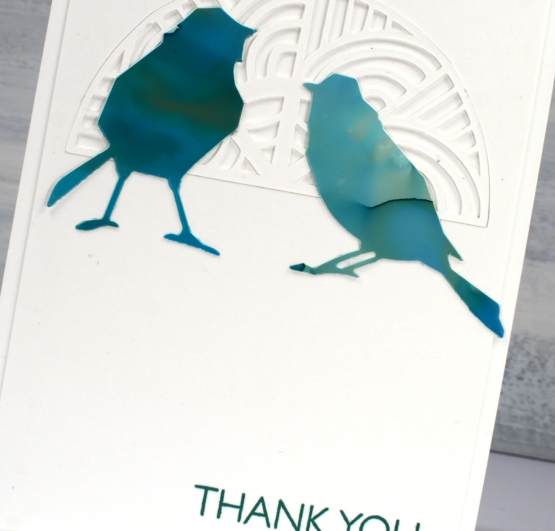
For this final card I cut six little birds from the panel and played with layouts for quite a while. I ended up just using two which means I have four birds in hand for another project. (pun definitely intended)
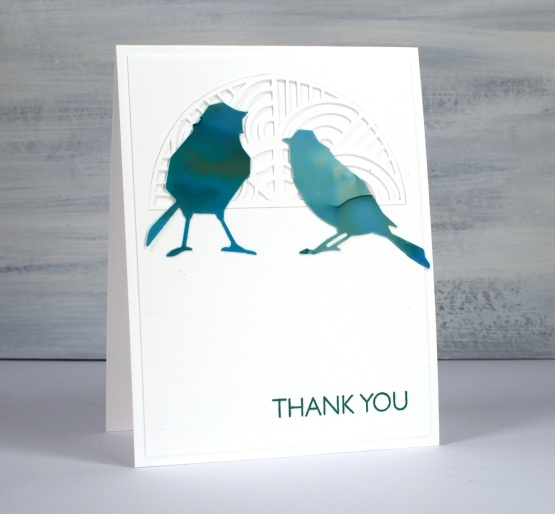
The intricate half circle cut out behind the birds is also one of my new cricut cutting files but more about that in another post. If you got this far, you’re a champion. Thank you for supporting me here on my blog and I would love to see you over on youtube as well.
(Compensated affiliate links from Foiled Fox, Scrap n Stamp)
Blossom Birthday
Posted: February 7, 2023 Filed under: Alcohol Ink, blossom stencil, Darkroom Door, grafix, Stencils | Tags: craft roulette, Darkroom Door stamps, Darkroom Door stencils, grafix, grafix craft plastic, Ranger Alcohol Ink 4 Comments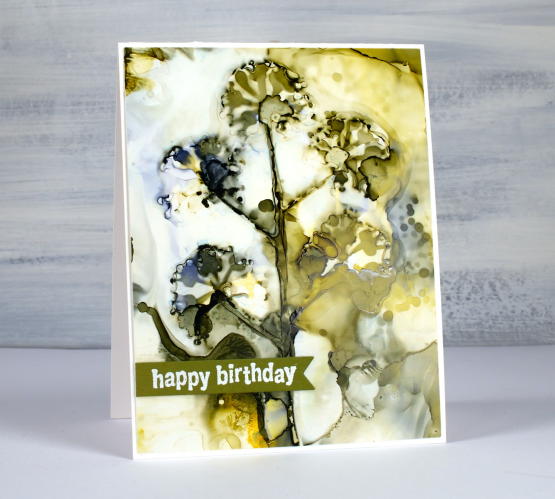
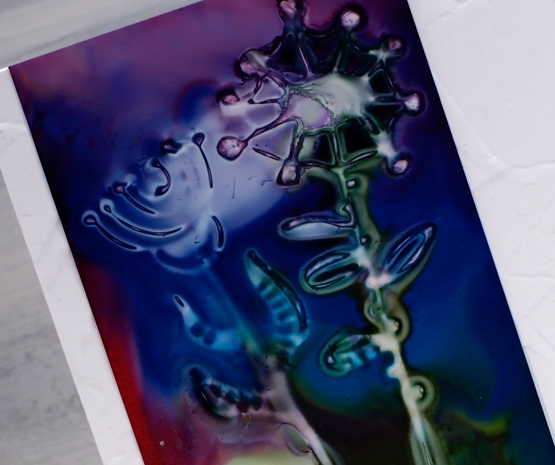
Yes, I have more alcohol in projects! Like gel printing, alcohol inks are quite addictive. When you work with them on plastic film (such as grafix craft plastic or yupo) you can keep changing the design with the addition of more ink or isopropyl alcohol. You can also remove ink with isopropyl. Depending on the amount of staining from whichever colours you choose you can even get the plastic white again to start fresh. I think that is why there is always on more thing I want to try when experimenting with alcohol inks.
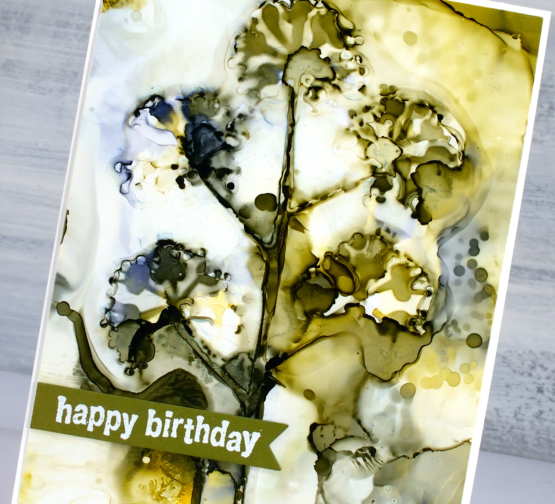
Last year I posted a video where I used a stencil to create a pattern on craft plastic with alcohol inks. I used a more open stencil that the one featured today but the process is similar. The Darkroom Door stencil ‘blossom’ has a lot of plastic surrounding the blossom cut out. When laid on the wet alcohol ink there is contact with most of the craft plastic panel and only a small area where the alcohol ink is drying in the air. This means you need way more patience as you let the ink dry under the stencil.
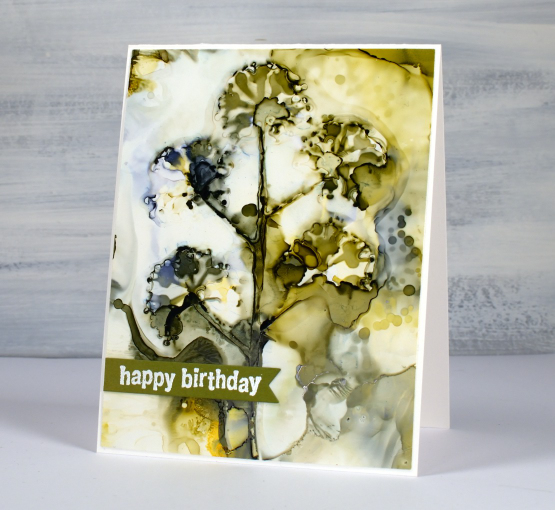
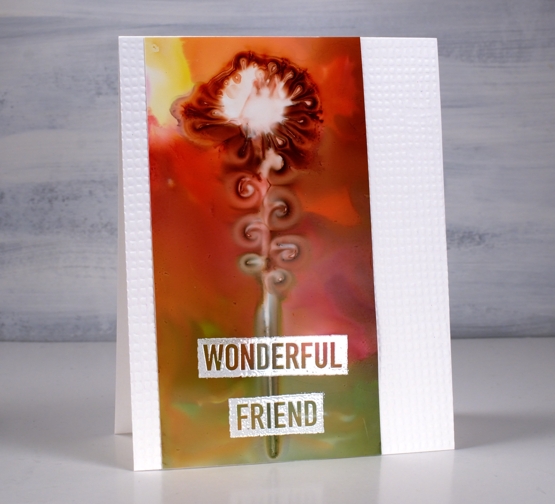
Not all my experiments with stencils work but I love the way this one ended up with distinct flowers and soft background. I finished the card with a sentiment from the DD ‘all occasions’ stamp set embossed in white on olive cardstock.
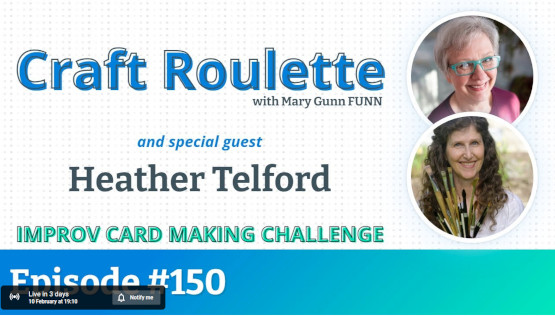
In other news I will be on Craft Roulette on Friday February 10 which is three days away! Craft Roulette is a live improv card making challenge on YouTube. I have no idea what kind of card I will be making, I only find out what the parameters are while I am on the show. Hope you can drop in a join the chat on Friday 7:10 pm EST
(Compensated affiliate links from Foiled Fox, Ecstasy Crafts & Scrap n Stamp)
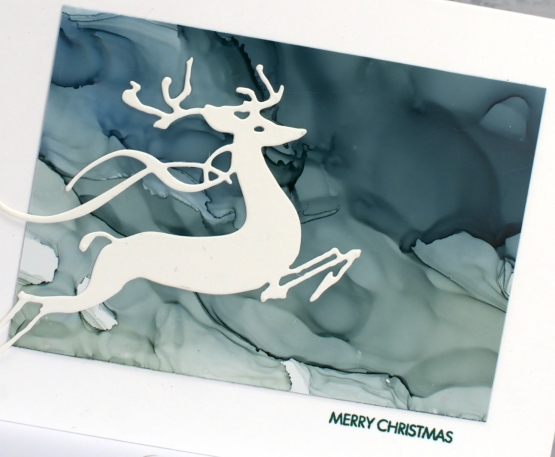
Deer and Alcohol Ink Skies
Posted: January 20, 2023 Filed under: Alcohol Ink, grafix, leap of joy, Penny Black | Tags: grafix, grafix craft plastic, Penny Black creative dies, Ranger Alcohol Ink 8 Comments
I know it is yet another alcohol ink sky post! If you look closely at the panel below you will see one of the things I love about alcohol inks and dye inks and that is the separation of pigments when a colour is diluted. It is more obvious in some inks that others but you can see it in the eggplant ink below. There is purple, grey, blue and shades of maroon. So yummy!

The panel above was diluted with isopropyl alcohol more that the panel below but I definitely used it on both to move the inks around.
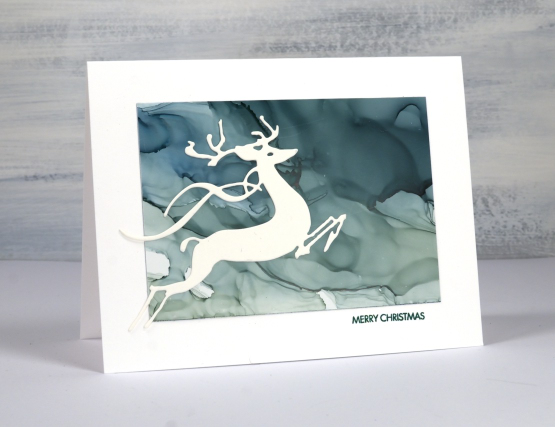
To complete the cards I die cut the PB deer from white cardstock and add small simple sentiments. Small sentiments are my favourite; I think I’ve mentioned that before.
I think my next post might not be alcohol inks! Stay tuned!
(Compensated affiliate links from Foiled Fox & Scrap n Stamp)

Alcohol Ink Sky Baubles
Posted: January 17, 2023 Filed under: Alcohol Ink, around town, Dies, grafix, Penny Black, trees and hills | Tags: grafix, grafix craft plastic, Penny Black creative dies, Ranger Alcohol Ink, Taylored Expressions 10 Comments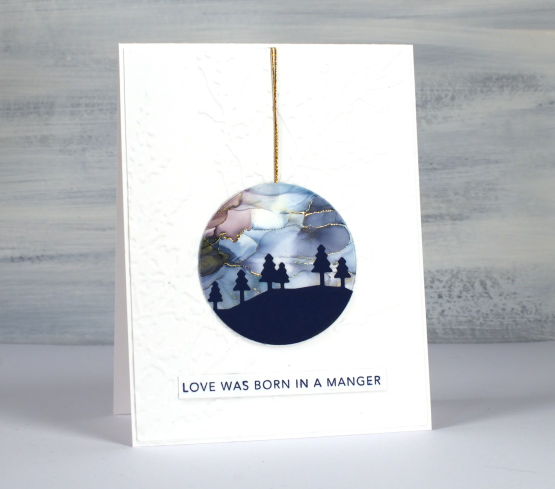
Yes, I have a few more alcohol ink skies to share. This time I have layered navy die-cuts over the alcohol ink panels and cut them into circles so they look like Christmas tree baubles. These ones were already cut and ready in my pile of possibility I just had to find suitable backgrounds and add cord and sentiments.
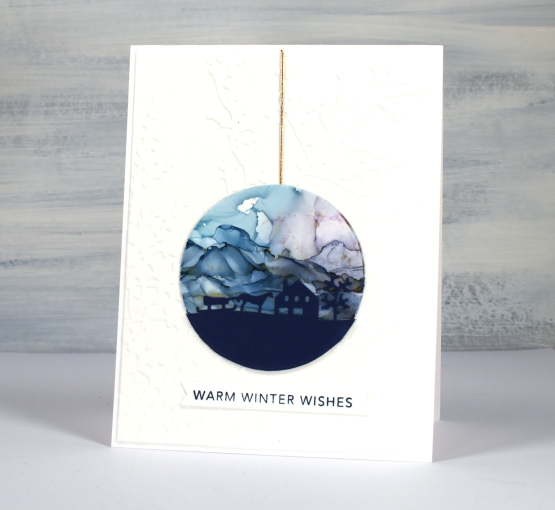
The skies were part of a big panel, alcohol ink on white craft plastic and there are some hints of gold here and there. Some is from gold alcohol ink but there are also threads of gold foil pressed onto the panel.
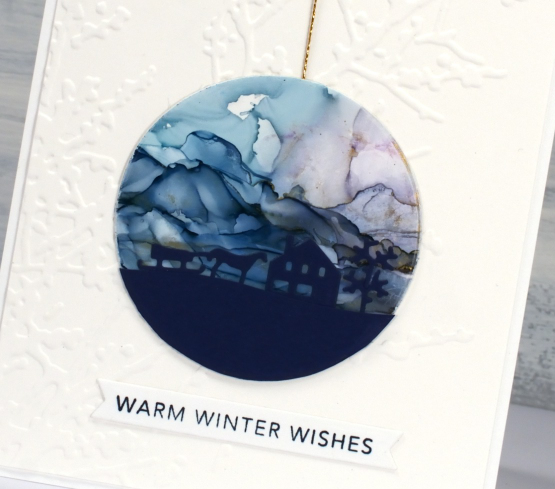
The backgrounds are embossed panels; sorry I don’t know the name of the lovely branch one, it doesn’t belong to me so I’m not sure who made it. The dies are Penny Black, ‘trees & hills’ and ‘around town’.
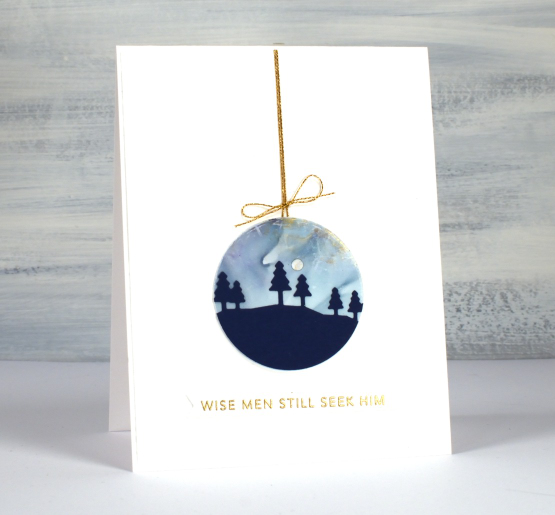
I added some gold cord and Taylored Expression sentiments to finish them off.
(Compensated affiliate links from Foiled Fox & Scrap n Stamp)
Alcohol Ink Winter Skies
Posted: January 12, 2023 Filed under: Alcohol Ink, Dies, Penny Black, tall trees, Taylored Expressions | Tags: grafix, grafix craft plastic, Penny Black creative dies, Ranger Alcohol Ink, Taylored Expressions 11 Comments
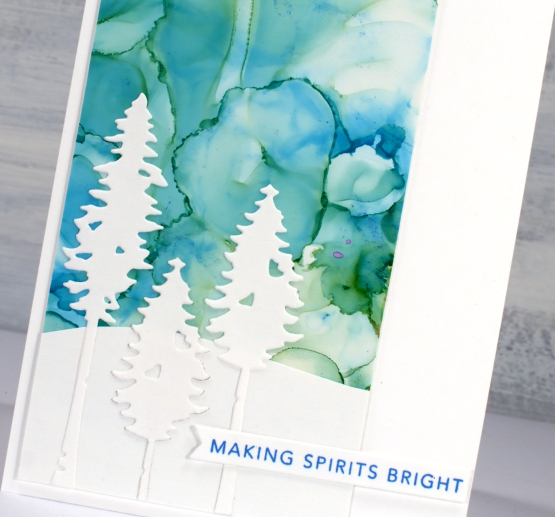
It is unusual for me to be making Christmas cards in January but the supplies are still handy and I will be happy to see the cards in October! I have a small stash of alcohol ink panels in my pile of possibility so the next few blog posts will feature those backgrounds paired with wintry scenery and Christmas greetings.
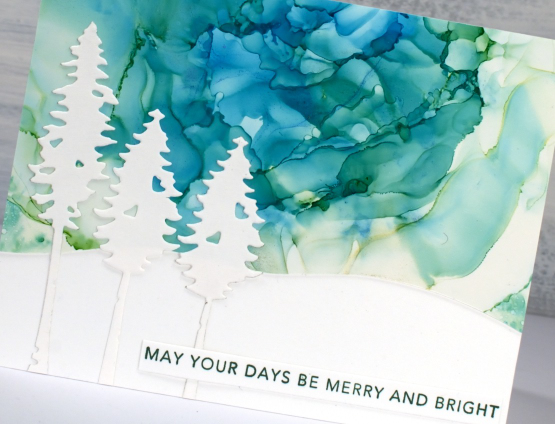
I’m sorry I can’t tell you exactly what techniques I used for these panels but it looks like I added blue and green inks to white craft plastic, added a generous amount of isopropyl alcohol then blew the liquids around the panel with a hand held air blower. I love the frilly ribbon look on the sky above.

I chose the wonderful ‘tall trees’ dies from Penny Black and hand cut some snowy hills from white cardstock. The sentiments are once again from Taylored Expression because they are so handy and neat!
(Compensated affiliate links from Foiled Fox & Scrap n Stamp)
Alcohol Ink + Masks
Posted: July 13, 2022 Filed under: Alcohol Ink, artsy stems, classic motorcycles, Darkroom Door, grafix, Sizzix, you are everything | Tags: Darkroom Door stamps, grafix, grafix craft plastic 6 Comments
I’ve played with stencils and alcohol inks before so it wasn’t much of a stretch to try the same with masks. Masks are basically stencils without any frame around them. The ones I used for today’s cards are homemade from Grafix white craft plastic (also known as white opaque dura-lar).
I used the Sizzix ‘artsy stems’ dies to cut flowers from craft plastic. I also used craft plastic for the alcohol ink panels. I first tried this technique when making bookmarks for a Grafix video tutorial. I used the same funky die-cuts and alcohol inks so check out the video below for the process.
One thing I really like about working with Grafix craft plastic and matt dura-lar (in the final card) is that you can emboss on it. I make sure I preheat the heat tool so I can quickly activate the embossing powder. The craft plastic doesn’t melt or warp if you keep the heat tool moving.
All the sentiments are from Darkroom Door sets (linked below) two were embossed and the other stamped with a new ink from Ciao Bella. It took a while to dry on the craft plastic but I am impressed with the solid matte look once dry.
You can see on this last card I had to come up with a way to attach the semi transparent matte dura-lar to the coloured panel underneath. I didn’t want to use tape which would show so I poked a couple of holes through both layers and sewed the panels together with some silver cord.
All the alcohol ink panels are attached to white card bases embossed with embossing folders for some subtle texture and interest.
Supplies
(Compensated affiliate links used when possible)