
Grafix Window Journal – Video
Posted: July 29, 2024 Filed under: Alcohol Ink, cricut, grafix, mixed media journal | Tags: Alcohol Ink, Art Journal, grafix, grafix craft plastic, Mixed Media, Ranger Alcohol Ink 1 Comment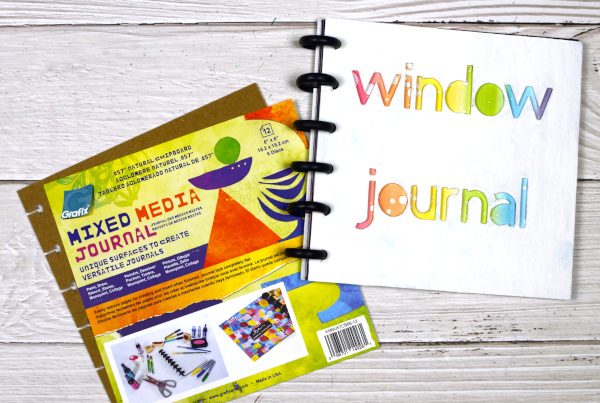
I’ve featured the Grafix Mixed Media Journal in videos a few times. I’ve made a swatch book for alcohol inks and markers and a sample book for alcohol ink techniques. Both books are good for reference. Today’s post and video feature the mixed media journal as a ‘window journal. I have added pages in pairs of black and white using the handy disc system. I have cut windows in the black pages and created alcohol ink patterns on the white pages.
You can configure the Grafix mixed media journals however you like as the pages and covers are available in separate packs or as a complete journal with different types of pages. Check out the video below to see how I put my window journal together.
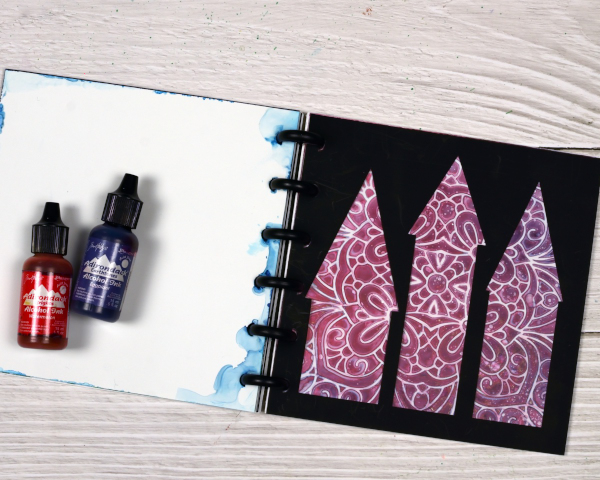
You could create a window journal in many ways. I have added colour and pattern to only one side of the white pages but it would be fun to add a design on both sides so you could see the pattern through the window before the pattern and the window after.

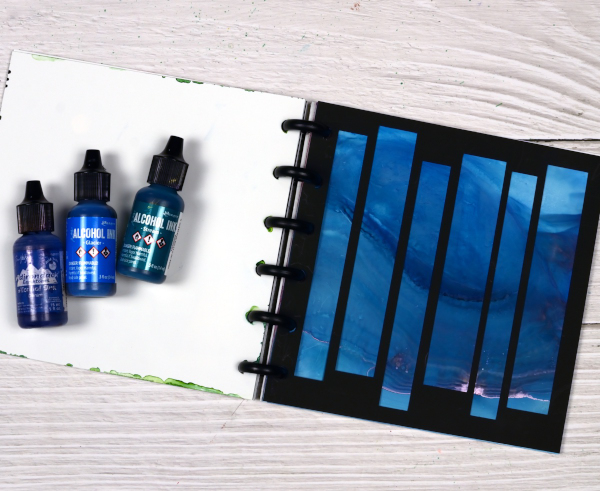
You can see in the video that I reworked the ‘ocean’ page shown below several times. That is the beauty of white craft plastic; it is possible to take the page back to white or just dilute the ink with isopropyl alcohol and move it into a new pattern.
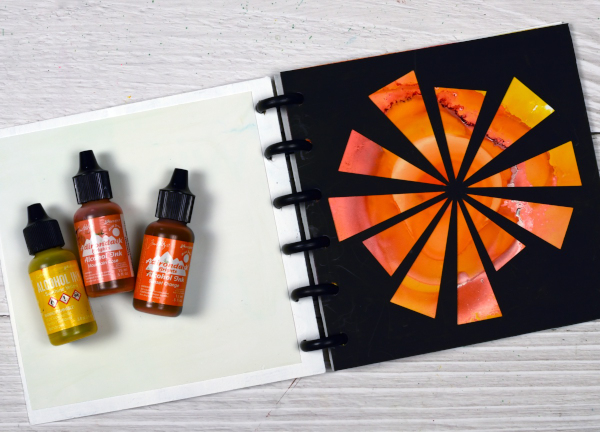
The final page in the book features a stencil design with alcohol inks, so simple but so effective. I cut all the windows on my Cricut using free shapes available in Cricut design space but you could cut them with dies or with a craft knife.
To see my other videos featuring the Grafix Mixed Media journal click the following links: Swatch book Swatch book cover Technique book
Alcohol Ink & Foil – Video
Posted: April 17, 2024 Filed under: Alcohol Ink, grafix, Penny Black, Tutorial | Tags: Alcohol Ink, grafix, grafix craft plastic, Penny Black stamps, Ranger Alcohol Ink, video 4 Comments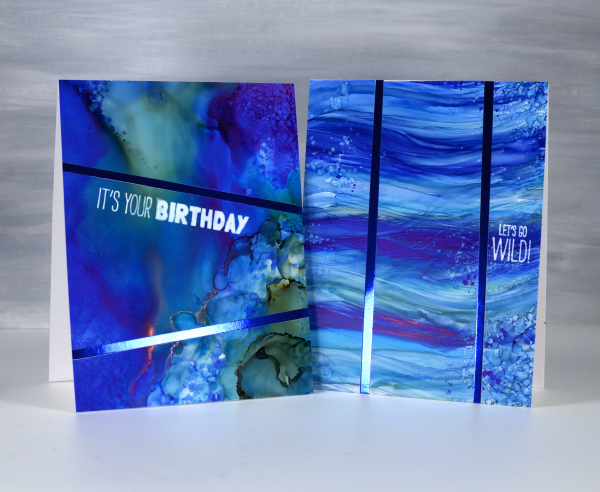
Recently I spent a happy few days creating with alcohol inks after quite a break. They did not disappoint! I am looking forward to more experimenting and maybe some Christmas card designs.
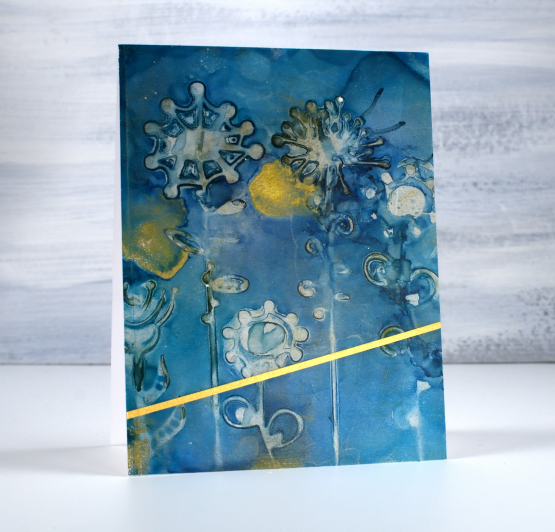
I created some cards using Grafix white craft plastic (also called bright white dura-lar), Grafix metallic foil board and Grafix double tack adhesive. These are all products I’ve used before and definitely recommend. You can see my process in the video below.

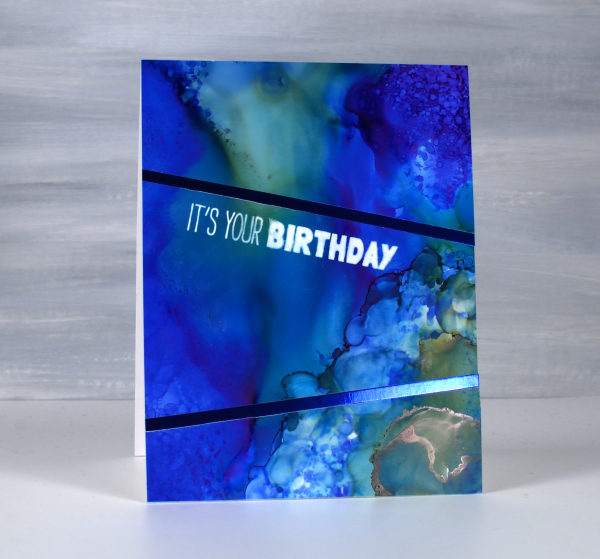
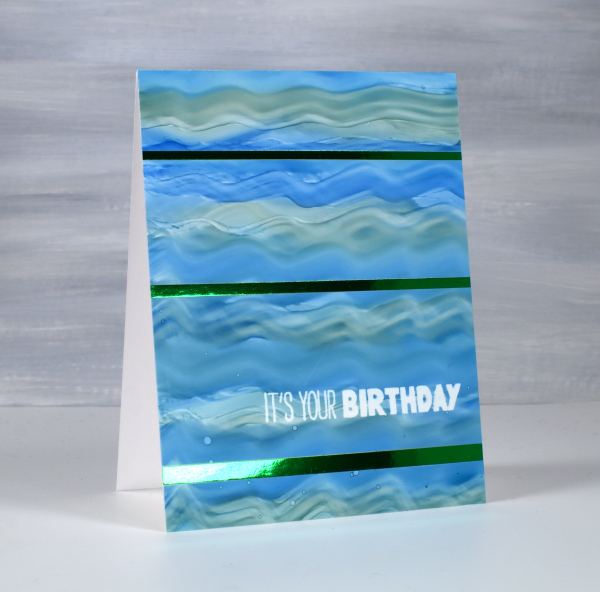
In the cards above and below you can see the wavy ocean effects I achieved easily by applying alcohol inks with a felt applicator. I love watching the inks continue to move after I lift the applicator.
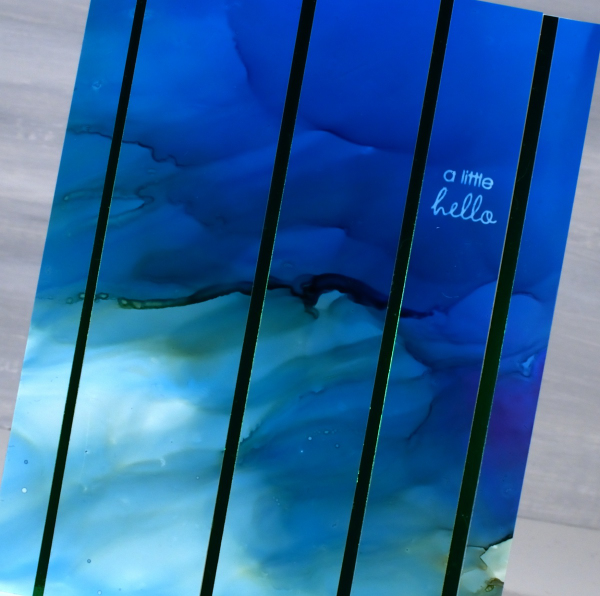
The panels below were all made by moving the alcohol inks and isopropyl alcohol around. I tilt the panel and use an air blower to move the the ink. Where there was too much of one colour or too much intensity of colour I diluted with isopropyl alcohol or just dabbed ink off the panel with a paper towel
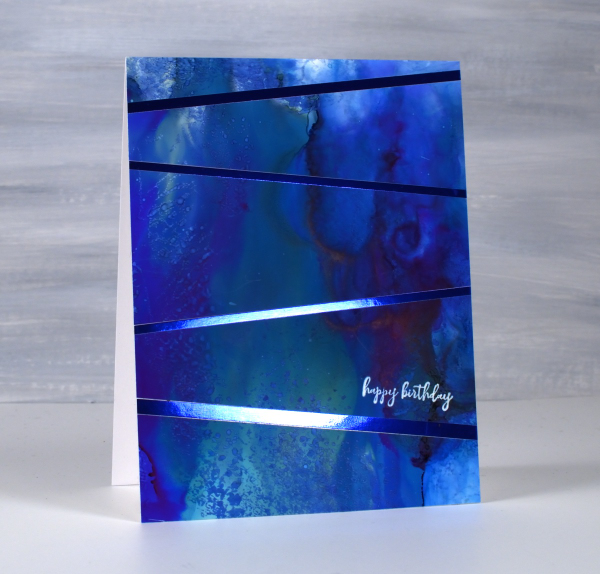
I used some of the green and the blue metallic foil board from Grafix to add to my designs. To see another project using the foil board click here.
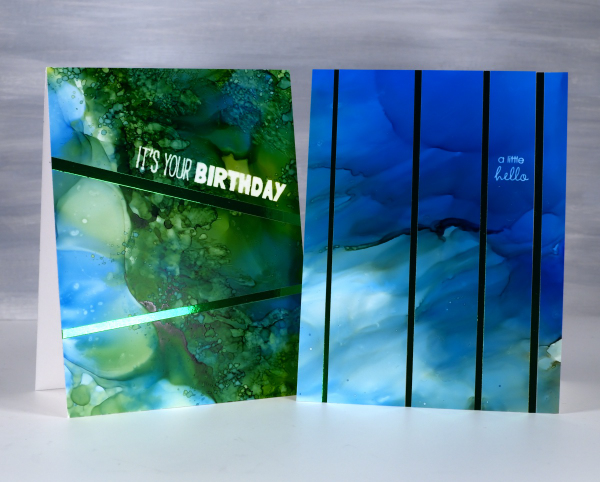
To add the sentiments I used an alcohol lift inkpad from Ranger. Its been a while since I’ve used alcohol lift ink and I was thrilled with how well it lifted the ink from the grafix white craft plastic. With a few repeat impressions and removal of diluted ink I was able to remove the bold green and blue inks to reveal sharp white words.
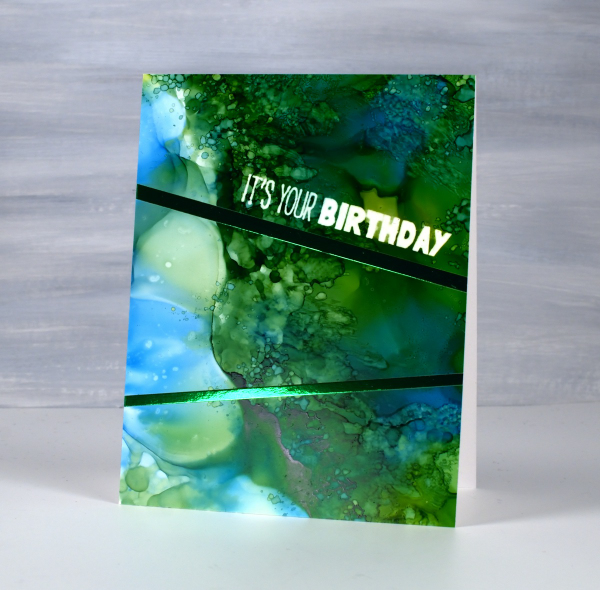
The sentiments are from the Penny Black ‘how sweet!’ set and ‘Let’s Go Wild’ set. Both are rubber cling sets which seem to hold the lift ink well and apply it evenly. This post includes affiliate links from Foiled Fox and Scrap’n’Stamp . If you buy through these links I receive a small commission at no extra cost to you.
Framed Flowers
Posted: January 24, 2024 Filed under: framed flowers stencil, gel press, The Crafters Workshop | Tags: Alcohol Ink, gel press, gel printing, Ranger Alcohol Ink 5 Comments
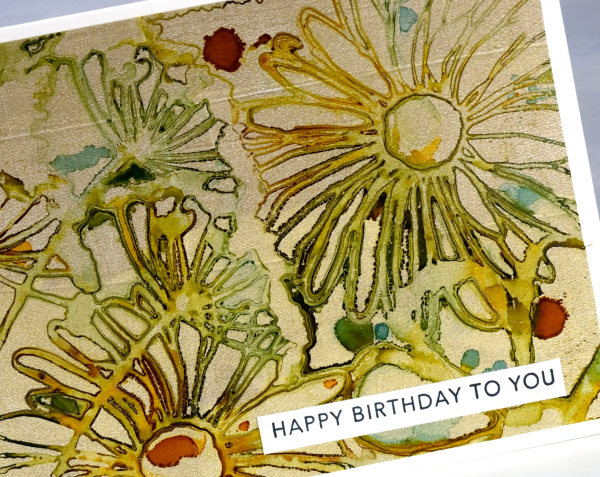
These bold bright flowers were printed using alcohol inks and the TCW stencil ‘framed flowers’ on the gel plate. I created several prints from one application of alcohol ink and each print became lighter and less distinct than the last. I have a video on my youtube channel showing the same process using a different stencil and ink colours. (Speaking of YouTube, I’m a guest on Craft Roulette this week! Just click here on Friday round 7:30 EST
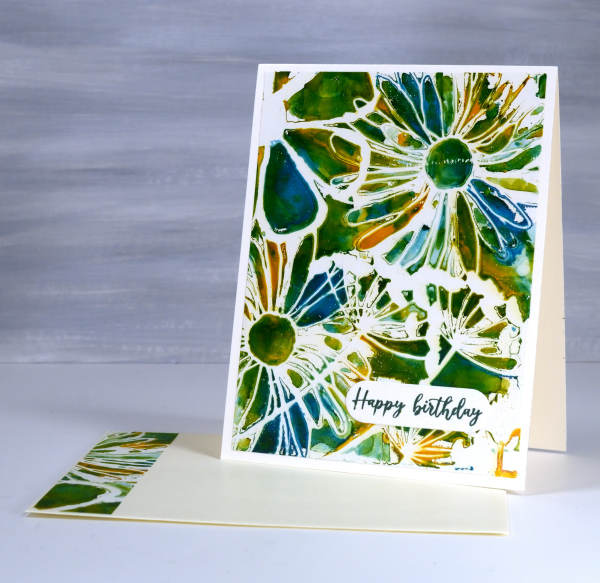
Today I am posting two rather different results but the application of alcohol ink was done only once, with isopropyl alcohol added to dilute the remaining ink on subsequent prints. I have posted another print from the same session, you can see it here.

Today’s prints do look very different and that is not only because this muted one pulled less ink from the plate. The first print at the top of the post was pulled with white acrylic paint which shows the colours at their brightest. This second print was pulled with gold paint which leaves a subtle shimmer on the panel and dulls the colours of the inks. I love playing with the variables and the fact that I get very different results from one application of ink.
Whether I used a 5″x7″ or a 6″x6″ gel plate I can usually save a strip of printed pattern for my envelope. Today’s post features affiliate links to the following companies. If you buy through these links I receive a small commission at no extra cost to you. The Foiled Fox & Scrap’n’Stamp.
See you on Friday in the Craft Roulette chat!
Artsy Alcohol Ink on the Gel Plate
Posted: September 26, 2023 Filed under: Alcohol Ink, artsy stems, Darkroom Door, gel press, Tim Holtz | Tags: Alcohol Ink, Darkroom Door stamps, gel press, gel printing, Ranger Alcohol Ink 4 Comments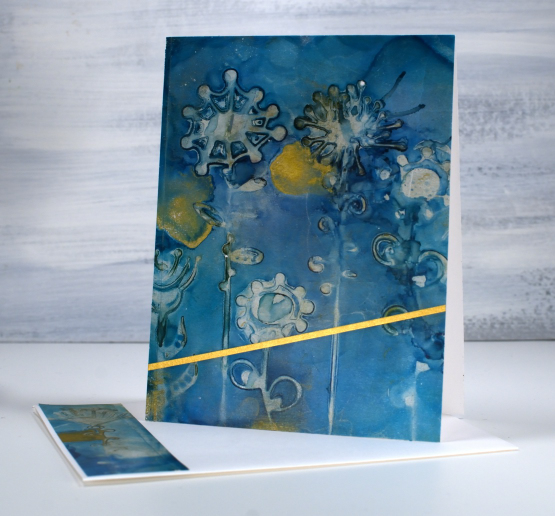
I have a couple of cards made from alcohol prints on the gel plate which is the technique feature in my last two youtube videos. I love the colours in this one and the funky patterns made using die-cut artsy stems, which are Tim Holtz dies.

The technique used in the recent youtube videos involves stencils not die-cuts but the effect is the same when the die-cuts are cut from stencil film or similar thin non-porous material. I use films from Grafix, either matte duralar or craft plastic.
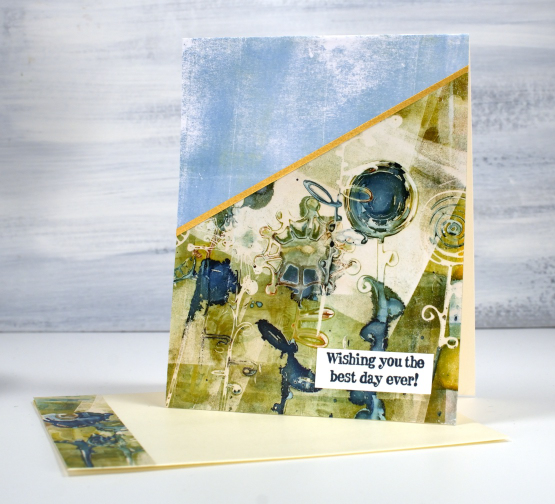
I can’t remember the exact inks I used for the panel above but my guess is a deep blue such as glacier as well as some gold mixative or alloy ink. I pulled the print with the transparent gold paint used in this video so the panel has a subtle shimmer to it in real life. I loved the pattern so much I decided to add the narrow strip of gold but no sentiment.
The second card was also made using alcohol inks on the gel plate but is a more grungy print due to the mix of green and cream paint used to pull the print and the mix of yellow, green and blue alcohol inks used to make the pattern on the gel plate.
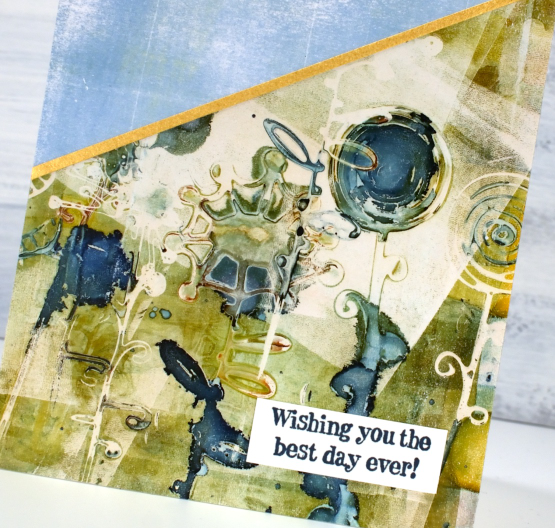
Rather than use the whole panel I added a simple blue gel printed piece to the top of the card front and once again a gold strip of cardstock. The sentiment is from the Darkroom Door happy birthday set.

I hope you enjoy these two examples of what can be made from alcohol ink gel prints. Let me know if you try the technique.
This post features affiliate links to the Scrap’n’Stamp. If you buy through these links I receive a small commission at no extra cost to you.
Botanical Dream
Posted: August 30, 2023 Filed under: Alcohol Ink, botanical dream stencil, gel press, gelli plate, Taylored Expressions, The Crafter's Workshop, The Crafters Workshop | Tags: gel press, gel printing, Ranger Alcohol Ink, Taylored Expressions, The Crafter's Workshop 7 Comments
I think you’ve noticed my love of gel printing. Let me assure you it hasn’t diminished at all. Today’s card features an alcohol ink and stencil print completed on the gel plate then lifted with a layer of acrylic paint.

I’m not sure which alcohol inks I used but I am pretty sure there was a cloudy blue and a brown involved. I’ve learned to like blue and brown combos over recent years which has surprised me a bit. Often we use alcohol inks only on plastic surfaces such as yupo or craft plastic. What I like about using alcohol inks on the gel plate is the way I can lift the print with any paper at all. I plan to make a video showing this technique so stay tuned.

The lovely stencil featured here is called botanical dream from The Crafters Workshop. All the little spaces trap alcohol really well making it a great choice for this technique. I let the stencil sit on the alcohol ink pattern for a while so it dries then lift the print with acrylic paint. I finished the card with a cute greeting from the Taylored Expressions set ‘In & Out Birthday. The set is full of pretty fonts.
My blog features affiliate links to the following companies. If you buy through these links I receive a small commission at no extra cost to you.
Ecstasy Crafts (Ecstasy Crafts offers a discount code heathertecs10 you can use for a 10% discount at checkout)
Alcohol Ink Gel Print
Posted: June 19, 2023 Filed under: Alcohol Ink, artsy stems, gel press, little lowercase letters, My Favorite Things, Tim Holtz | Tags: gel press, gel printing, My Favorite Things, Ranger Alcohol Ink, Tim Holtz 3 Comments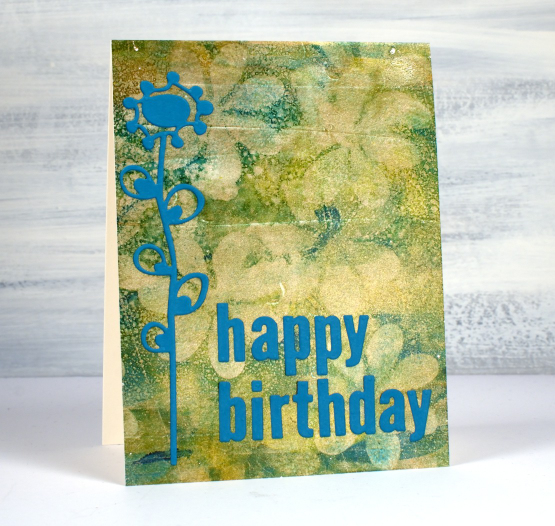
Last Monday I posted a faux batik look created on the gel plate. Today’s card is not faux alcohol ink; I did create a design on the gel plate with alcohol inks then picked it up with acrylic paint. Alcohol inks dry quite quickly so they are fun to fiddle with on a gel plate.

I can’t remember exactly which inks I used but I imagine there was a blue and yellow alcohol ink involved and perhaps ‘stream’ which is a deep teal colour. I sprinkled them on the gel plate, added some isopropyl alcohol to get the colours moving and then used a homemade stamp to add the flower shapes. In my online gel printing course I have a whole lesson about making and using homemade stamps with acrylic paints. Using them with alcohol inks is also an option as shown on this card. The speckled look over the panel is from adding a spritz of isopropyl alcohol to the plate before letting it dry.

I pulled the print with gold acrylic paint which has given the whole panel a goldish tint and in real life a bit of shine and shimmer. To finish the card I added a die-cut flower and letters in a co-ordinating colour. The letters were cut with MFT ‘little lowercase letters’ which might not be available anymore but I have linked to a similar set.
(Compensated affiliate links from Foiled Fox & Scrap n Stamp)
Turning
Posted: April 27, 2023 Filed under: Alcohol Ink, delicate daisies, Echidna Studios, grafix, Paper Rose, Penny Black, skewed squares, turning | Tags: Echidna Studios, Penny Black creative dies, Penny Black stamps, Ranger Alcohol Ink, Ranger Distress inks 2 Comments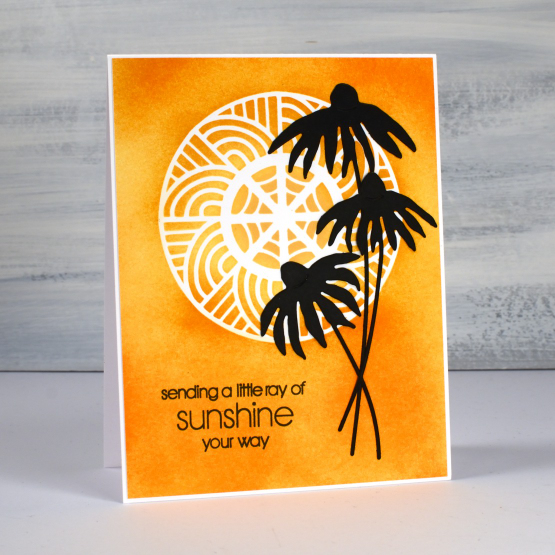
As you know I have recently been featuring some designs from my daughter’s etsy store Echidna Studios. They are available as digital stamps/cutting files. What I haven’t mentioned is that some of the designs in her store are designed by me! She has just added a batch of digital images that I designed as stencils but they can also be printed. The circle masked on the card above and the half circle on the second card are from a digital set called ‘turning‘. The beauty of digital designs is that they can be cut or printed in any size. I cut both stencils from Grafix matte duralar using my cricut.
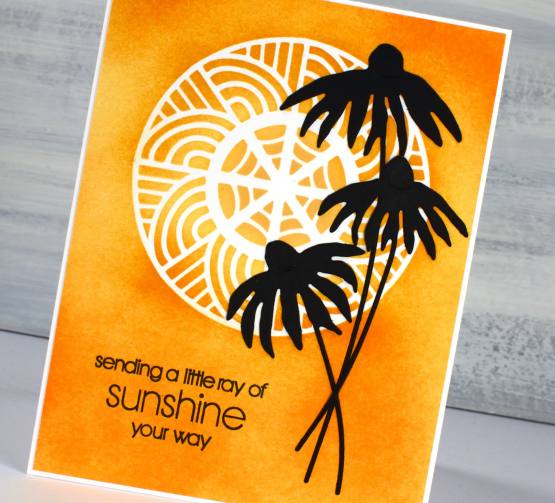
I blended three distress inks through the stencil onto neenah solar white cardstock then added the PB delicate daisies die-cuts and a PB sentiment.
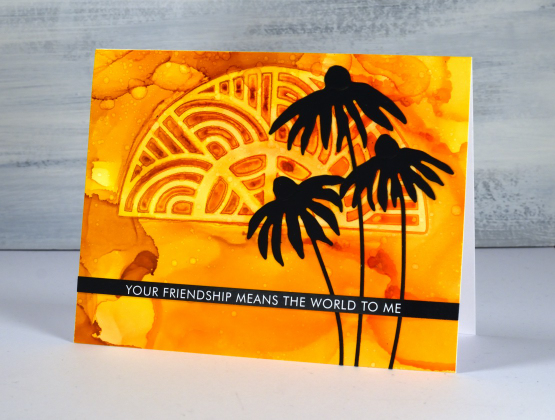
To create the half turn stenciled card I worked on Grafix white craft plastic with three alcohol inks. I dropped isopropyl alcohol and alcohol inks on the panel then dropped the stencil into position. I tried to be patient so the inks would dry and give me a complete impression of the stencil. I did help it along with an air blower and managed not to lift it too early! I splattered a little isopropyl over the top for extra interest.

Once again I finished the card with black elements: the PB daisies and a sentiment strip from Paper Rose Studio. I hope you visit Echidna Studios store and check out the designs there. I will be featuring more in the weeks ahead. See if you can guess which of the stamp sets I designed, they are different from my daughter’s very realistic style. If you are on IG we would love you to follow Echidna Studios there too. And if you do happen to be on Instagram check out Gina Ferrari and see if you recognise anyone among her portraits.
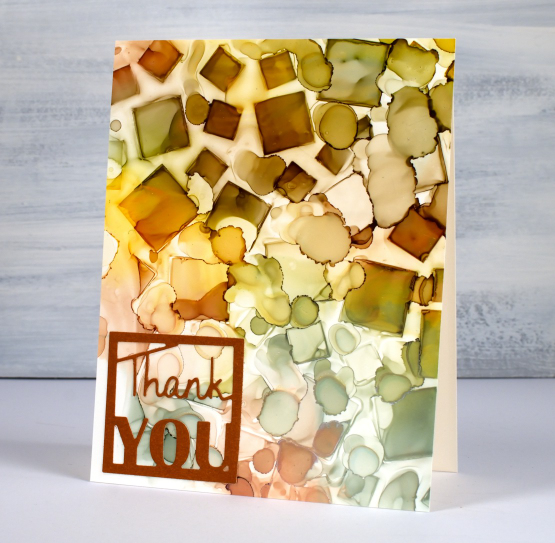
By the way, a while back I showed a sneak peak of a squares stencil I had designed and cut. You can see I used it on the card below and in the video here. The stencil is called skewed squares and it is now available as a digital file in the Echidna Studios store.
Thanks for dropping by today. I hope the sun is shining where you are; it is peeping through the clouds here.
(Compensated affiliate links from Foiled Fox, Ecstasy Crafts & Scrap n Stamp)
New YouTube channel – New Video
Posted: February 11, 2023 Filed under: Alcohol Ink, baby blue leaf embossing folder, Branch 9 die, cricut, Dies, grafix, Moda Scrap, my designs, ornate tile embossing folder, Paper Rose, Penny Black, Pink & Main, scripty, silhouette birds, so extra supporting sentiments, Stampin Up, thank you squares, Tim Holtz, Tutorial | Tags: cricut, grafix, grafix craft plastic, Penny Black creative dies, Penny Black stamps, Ranger Alcohol Ink, Stampin Up, Tim Holtz 6 Comments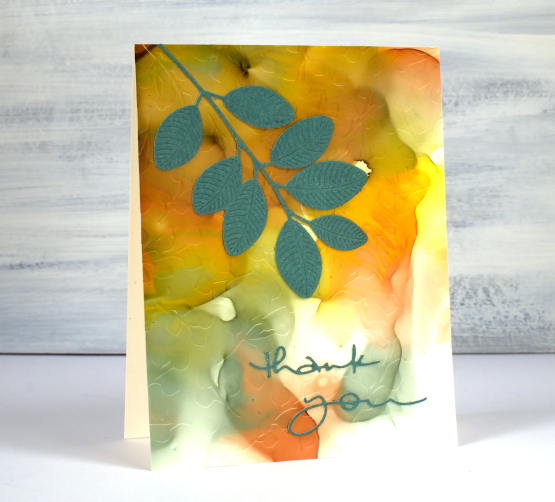
If you have been visiting this blog for a while you will know I had a youtube channel for many years. In 2022 after ten years of adding videos and gathering a community of 7000 subscribers my channel was deleted. In recent weeks I have started again with a new channel and some videos ‘from the archive’. My new channel is called Heather Telford Art and I would be very happy if you decided to like, subscribe and tell your friends! There is content on there that you may remember from the last few years and starting today there is new content also! The new ‘2 for 1 Alcohol Ink Panels’ is freshly filmed for my new channel and I hope it will be the first of many!
There are quite a few photos in this post because, well, this is a 2 for 1 technique and I created three panels which of course became six panels and one was cut in half so there are seven cards to show you in this blog post! Grab a cup of tea. I have added a linked supply list at the very bottom of this long post.
As well as a new youtube channel I am also a new Cricut owner. The stencil used on the card below was designed by me and cut on my Cricut. It is available as a cutting file from Echidna Studios etsy store.
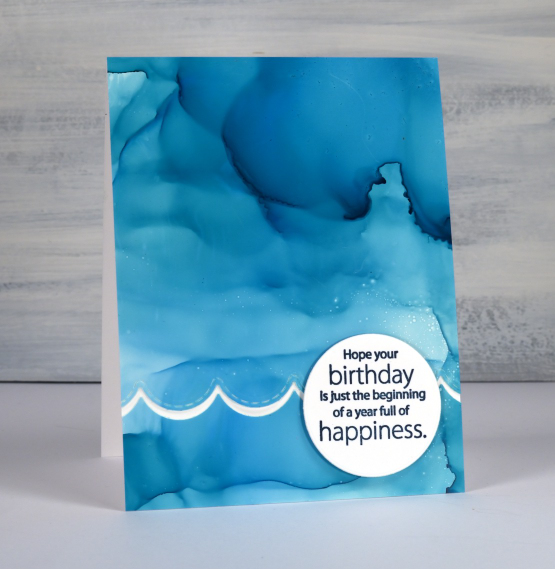
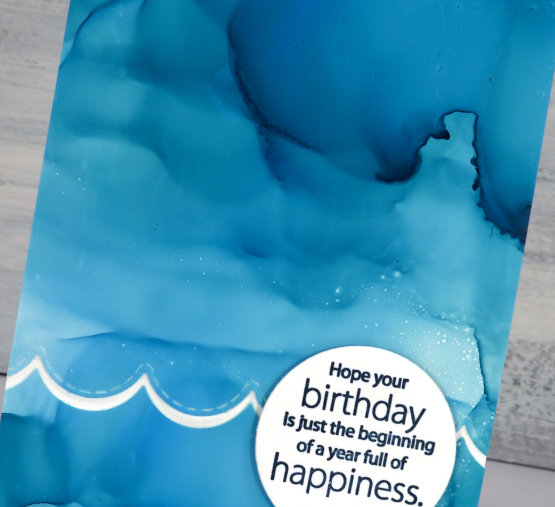
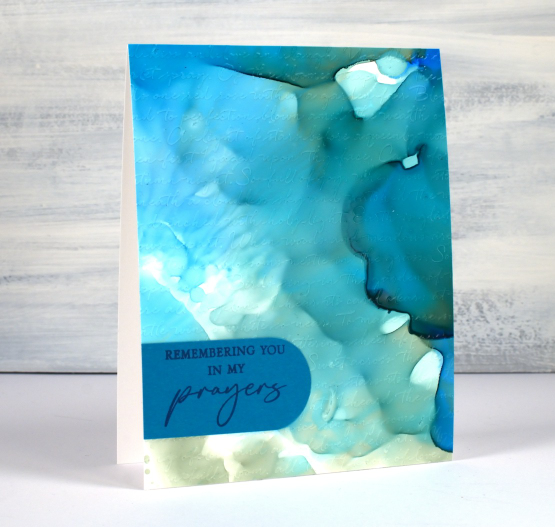
Most of the 2 for 1 smooshed panels I left as a full card fronts adding only a sentiment or some die-cutting. As the panel below reminded me of the ocean, the PB wavy scallop border seemed a nice touch.
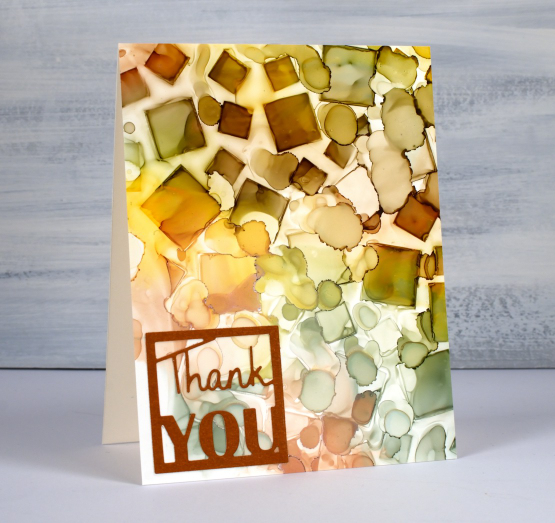
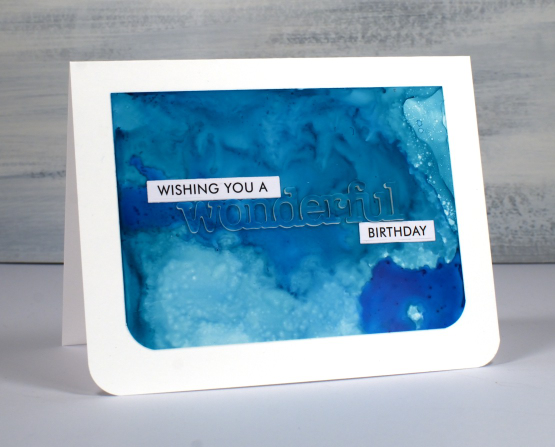
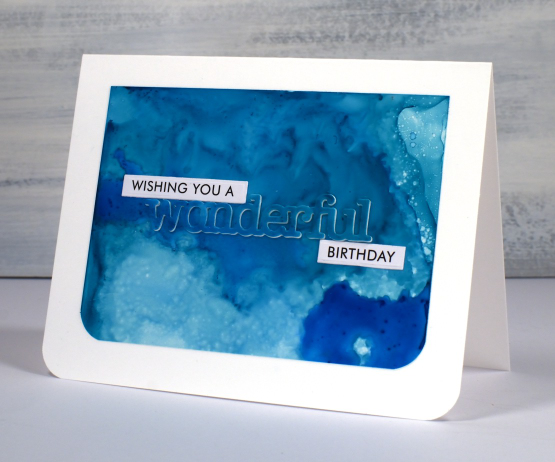
The panel below is a half panel from the first one I showed on the video. I love the patterns from the isopropyl alcohol ink spray even though they don’t stay distinct. Even when die-cutting the word from the panel I couldn’t leave it off so I popped it up. Not so funny story: I guess I haven’t popped up a die cut word in a while because I flicked those little shapes inside the letters into the garbage when I poked the word from the die. So yes, I had to hunt through my garbage to complete the card.
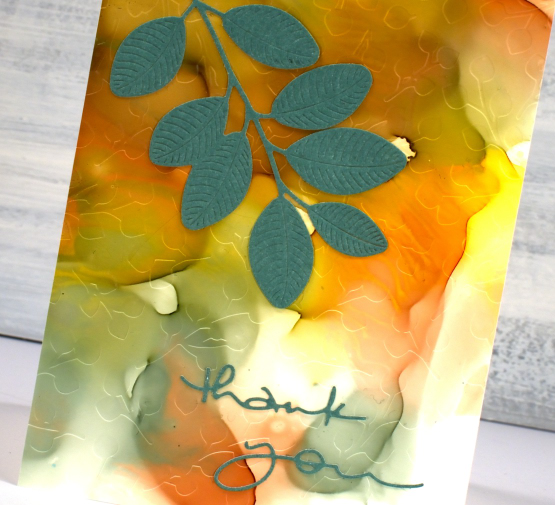
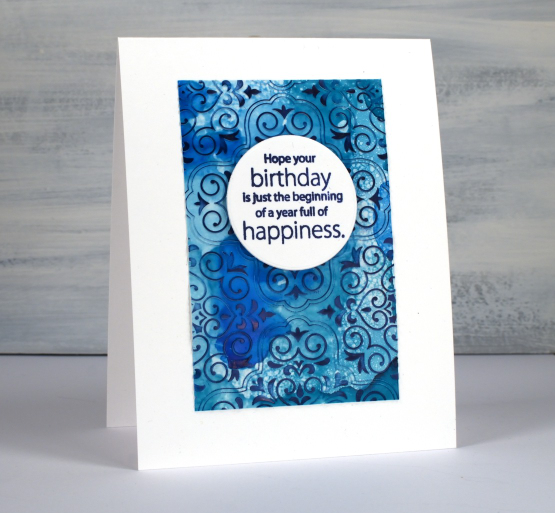
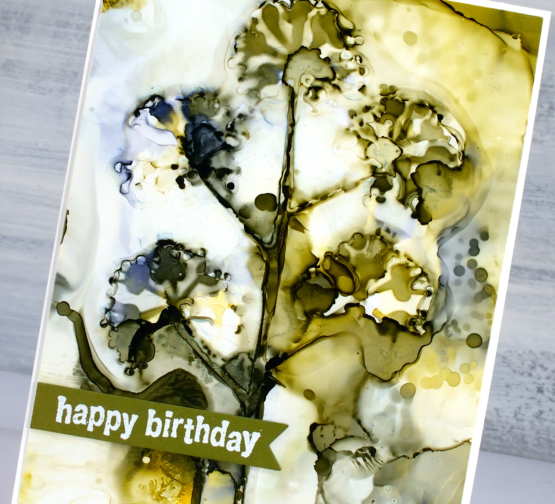
I don’t know why I hadn’t tried it before but seeing how well Grafix craft plastic responds when put in an embossing folder has been a revelation! I thought it might crack but it doesn’t so you can have the subtle impression of your embossing folder on a panel or the bold inked pattern as I’ve done on the card below. Sentiments in circles might be a little fad I go with for a while too; they look cute!
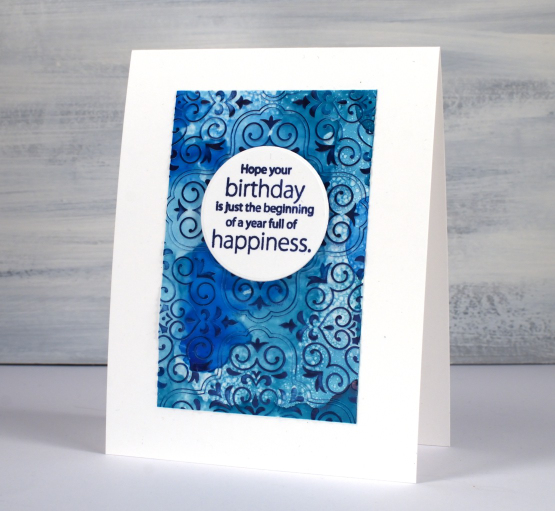
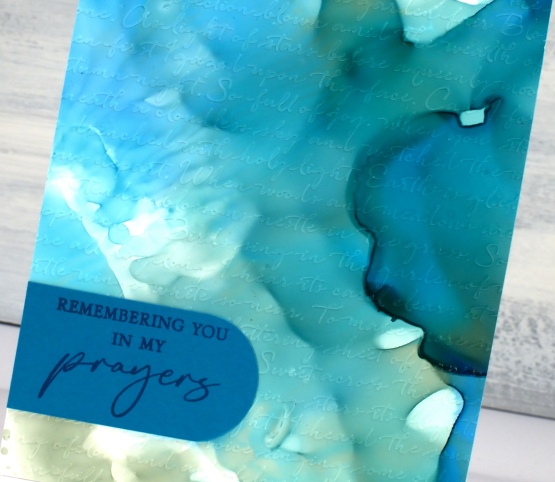
You can see the soft look of embossed script on the panel below, especially in the close up. This detailed embossing folder is from Stampin’ Up and is called ‘scripty’. I don’t think it is available anymore but you might something similar.
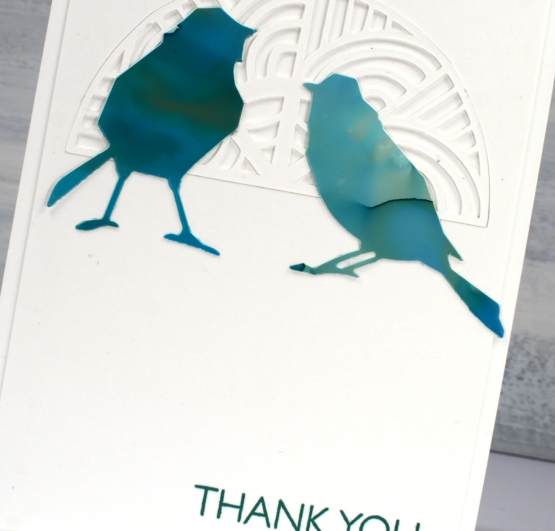
For this final card I cut six little birds from the panel and played with layouts for quite a while. I ended up just using two which means I have four birds in hand for another project. (pun definitely intended)
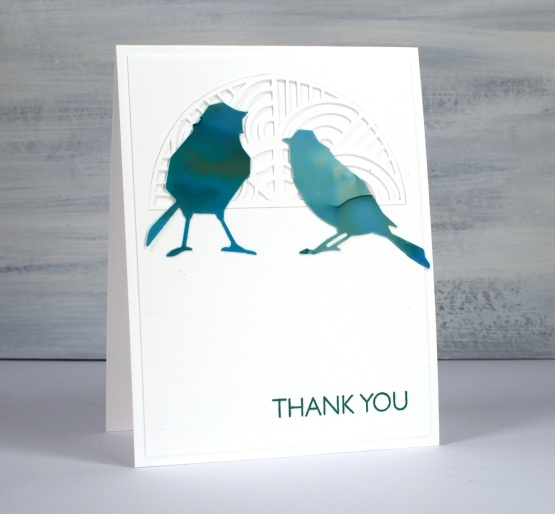
The intricate half circle cut out behind the birds is also one of my new cricut cutting files but more about that in another post. If you got this far, you’re a champion. Thank you for supporting me here on my blog and I would love to see you over on youtube as well.
(Compensated affiliate links from Foiled Fox, Scrap n Stamp)
Blossom Birthday
Posted: February 7, 2023 Filed under: Alcohol Ink, blossom stencil, Darkroom Door, grafix, Stencils | Tags: craft roulette, Darkroom Door stamps, Darkroom Door stencils, grafix, grafix craft plastic, Ranger Alcohol Ink 4 Comments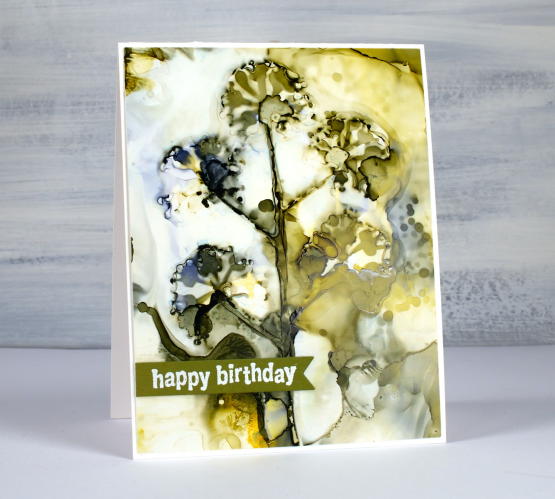
Yes, I have more alcohol in projects! Like gel printing, alcohol inks are quite addictive. When you work with them on plastic film (such as grafix craft plastic or yupo) you can keep changing the design with the addition of more ink or isopropyl alcohol. You can also remove ink with isopropyl. Depending on the amount of staining from whichever colours you choose you can even get the plastic white again to start fresh. I think that is why there is always on more thing I want to try when experimenting with alcohol inks.
Last year I posted a video where I used a stencil to create a pattern on craft plastic with alcohol inks. I used a more open stencil that the one featured today but the process is similar. The Darkroom Door stencil ‘blossom’ has a lot of plastic surrounding the blossom cut out. When laid on the wet alcohol ink there is contact with most of the craft plastic panel and only a small area where the alcohol ink is drying in the air. This means you need way more patience as you let the ink dry under the stencil.
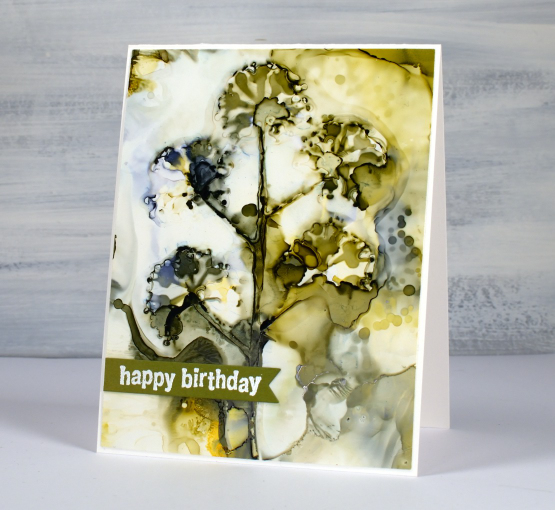
Not all my experiments with stencils work but I love the way this one ended up with distinct flowers and soft background. I finished the card with a sentiment from the DD ‘all occasions’ stamp set embossed in white on olive cardstock.
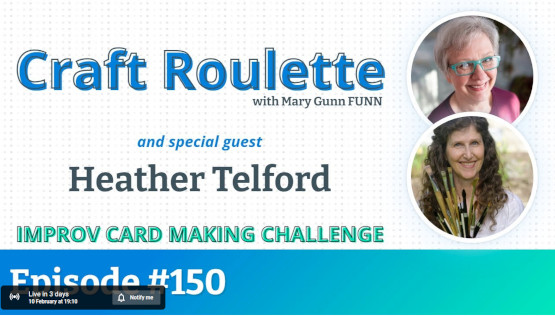
In other news I will be on Craft Roulette on Friday February 10 which is three days away! Craft Roulette is a live improv card making challenge on YouTube. I have no idea what kind of card I will be making, I only find out what the parameters are while I am on the show. Hope you can drop in a join the chat on Friday 7:10 pm EST
(Compensated affiliate links from Foiled Fox, Ecstasy Crafts & Scrap n Stamp)
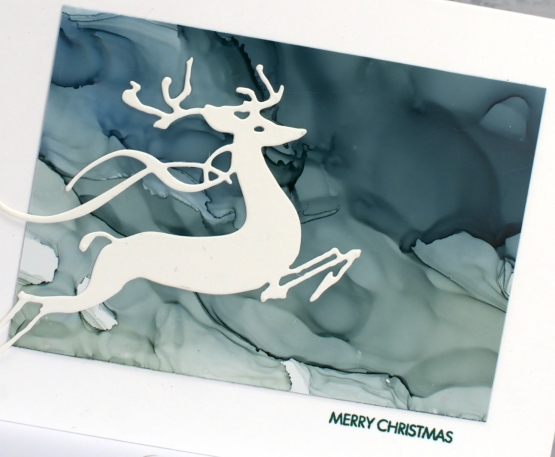
Deer and Alcohol Ink Skies
Posted: January 20, 2023 Filed under: Alcohol Ink, grafix, leap of joy, Penny Black | Tags: grafix, grafix craft plastic, Penny Black creative dies, Ranger Alcohol Ink 8 Comments
I know it is yet another alcohol ink sky post! If you look closely at the panel below you will see one of the things I love about alcohol inks and dye inks and that is the separation of pigments when a colour is diluted. It is more obvious in some inks that others but you can see it in the eggplant ink below. There is purple, grey, blue and shades of maroon. So yummy!

The panel above was diluted with isopropyl alcohol more that the panel below but I definitely used it on both to move the inks around.
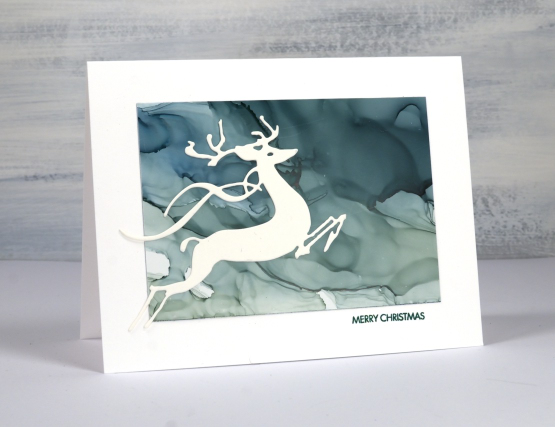
To complete the cards I die cut the PB deer from white cardstock and add small simple sentiments. Small sentiments are my favourite; I think I’ve mentioned that before.
I think my next post might not be alcohol inks! Stay tuned!
(Compensated affiliate links from Foiled Fox & Scrap n Stamp)


