
Roses Stencil in Blue
Posted: April 7, 2026 Filed under: Brusho, Classes, cricut, Echidna Studios, grafix, Roses digital stamp set, Watercolour | Tags: Fabriano Watercolour Paper, Brusho, Classes, grafix, Echidna Studios, Stencils 3 Comments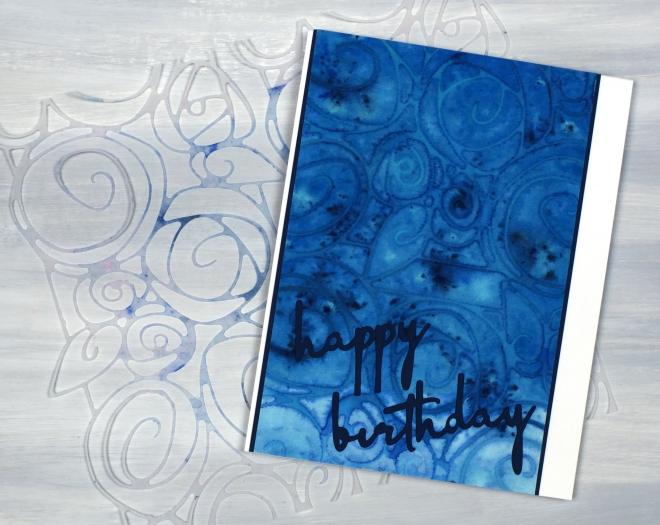
I’m continuing to enjoy my stencil and watercolour experimenting, this time featuring a stencil I designed myself and cut on the cricut. The stencil is made from two sections from a rose border digital design which is part of a trio of rose themed images available in the Echidna Studios etsy store. To create more of a square stencil I joined two parts of the border design together in cricut workspace before cutting them from Grafix matte dura-lar. I know many people don’t use cricuts or digital cutting machines but the technique would work with any fine line stencil.
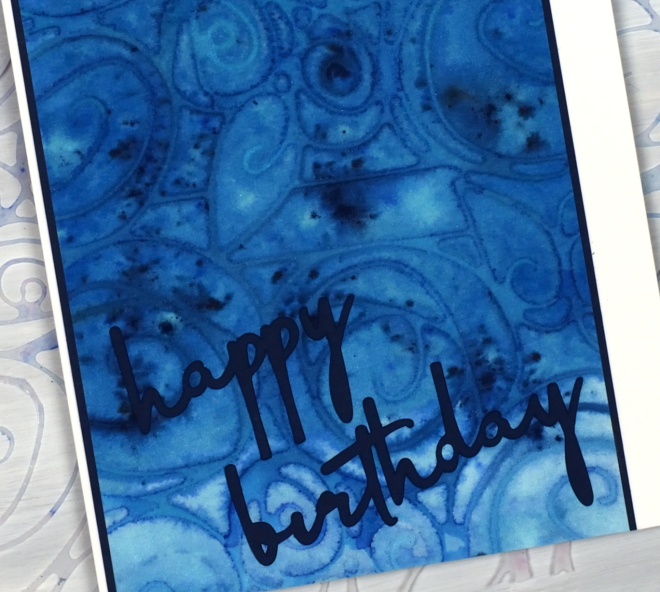
I painted the panel in blue paint before dropping the stencil on top, then added brusho powder and some spritzes of water. I am continuing to finalise techniques for my Stencils & Watercolour workshop here in Ottawa and this was one of the panels I created on watercolour paper. (there is one space left in the Monday workshop and several spaces in the Saturday workshop)
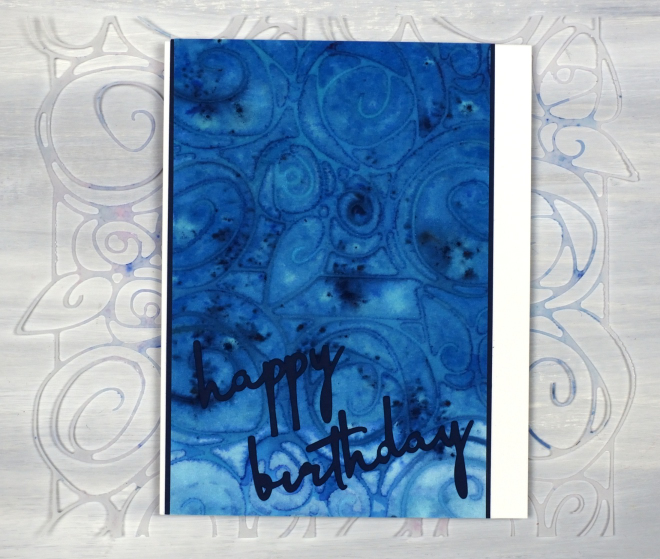
The sentiment was also cut on the cricut from the navy cardstock which also frames the stencil print. I know the cricut can be used for many things but my favourite use for it is definitely stencils! Looking at the photos as I write this I notice I did not glue the tittle over the ‘i’ in birthday. I had better try and find it!
It’s been snowing
Posted: January 8, 2026 Filed under: Brusho, cricut, Darkroom Door, Echidna Studios, snow flakes, snowflake digital stamp set | Tags: cricut, Darkroom Door stamps, digital stamps, Echidna Studios, Fabriano Watercolour Paper 4 Comments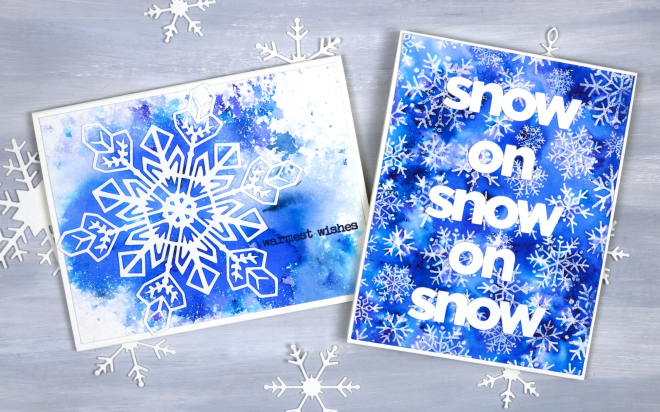
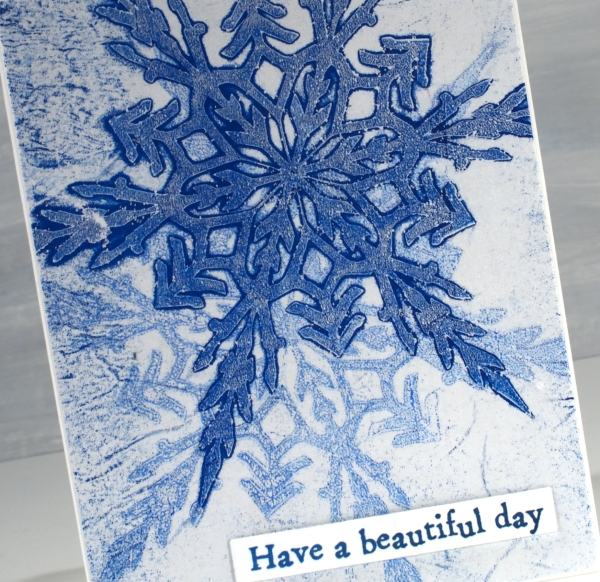
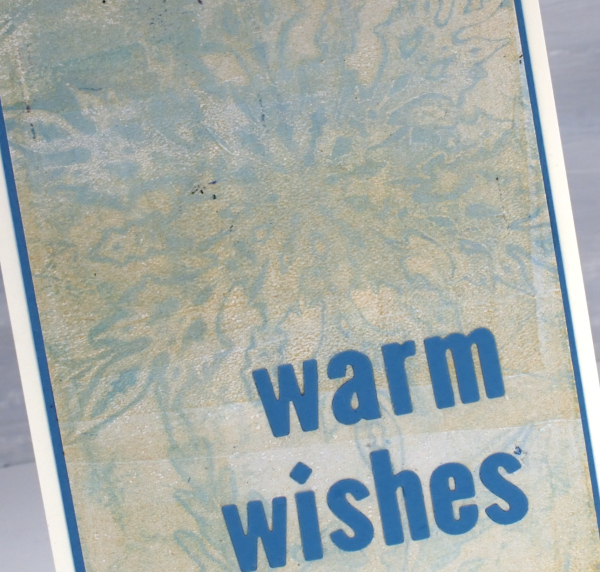
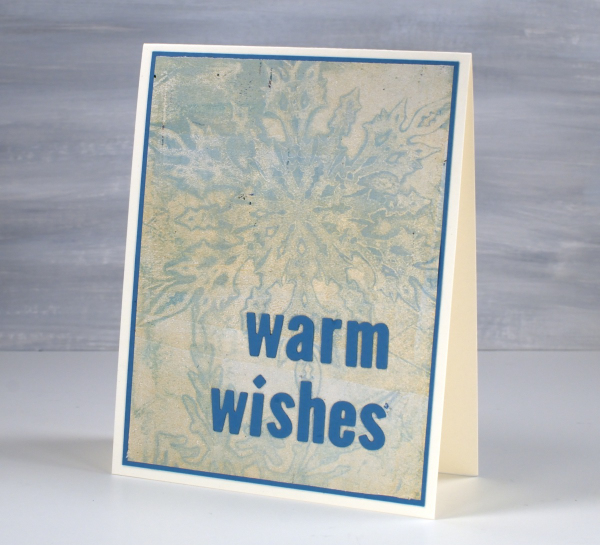
It’s been snowing quite a bit around here and we’ve had some very cold nights. A few of those nights happened to be while our furnace was not working but it’s fixed now and all is warm and cosy again! I am sending these out to a couple of friends who will totally get the snowy themed greetings, people who know about the beauty and length of a Canadian winter.
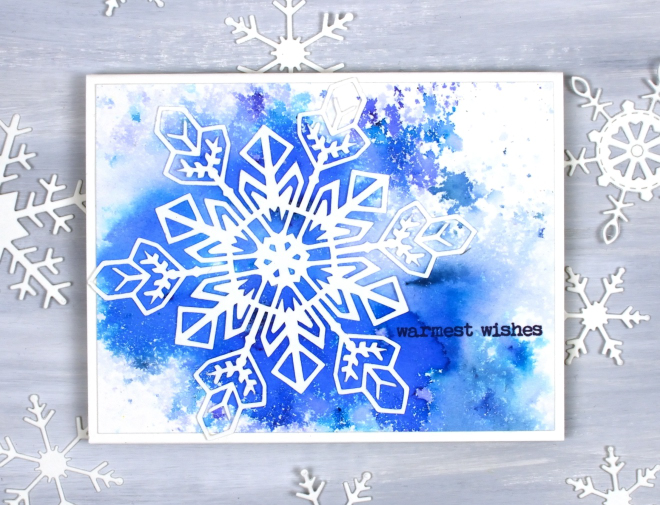
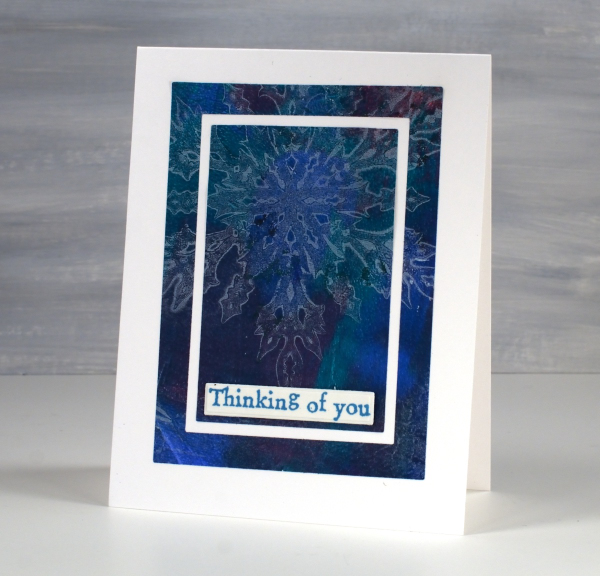
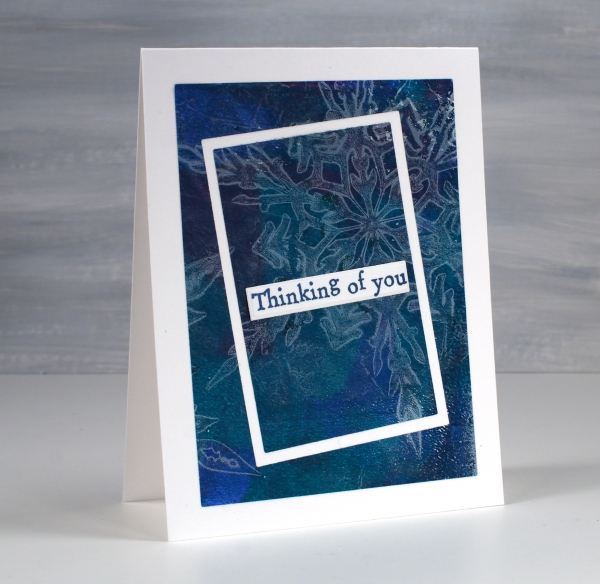
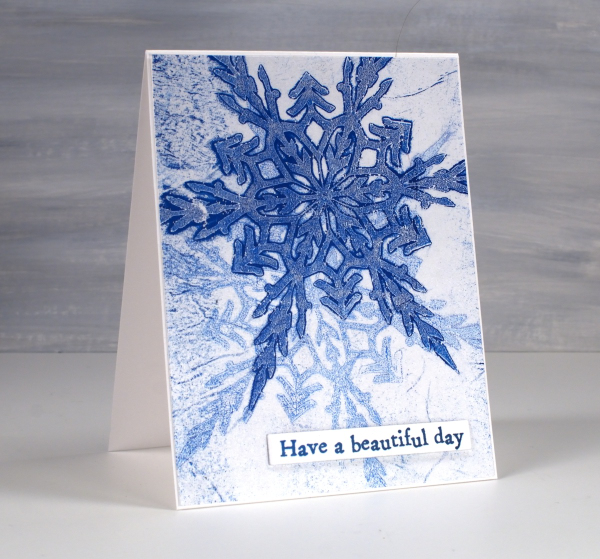
Believe it or not I did not create these cards at the same time but I’m pretty sure I ended up using the same supplies. The single snowflake card above was made with a watercolour panel I made years ago when experimenting with brusho. I probably sprinkled the brusho on watercolour paper then spritzed it with water until I was happy with the result. Even after you are happy with the result it can change as the paper and paint dry. I liked the panel so much I hoarded it, waiting for the right design. I am trying not to do that so much any more as I am very keen to Use What I Have (UWIH does not make a catchy acryonym so I am still playing with the category title). I paired the panel with one of my daughter’s snowflake designs available in the Echidna Studios etsy store as a print or cutting file. There are 6 snowflake designs in the set and I think they are beautiful.
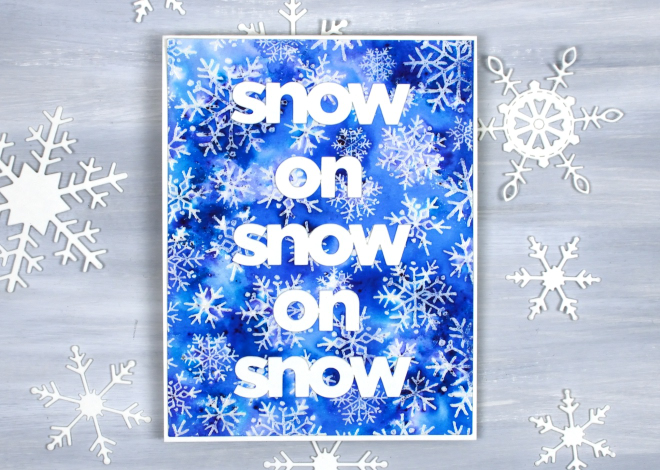
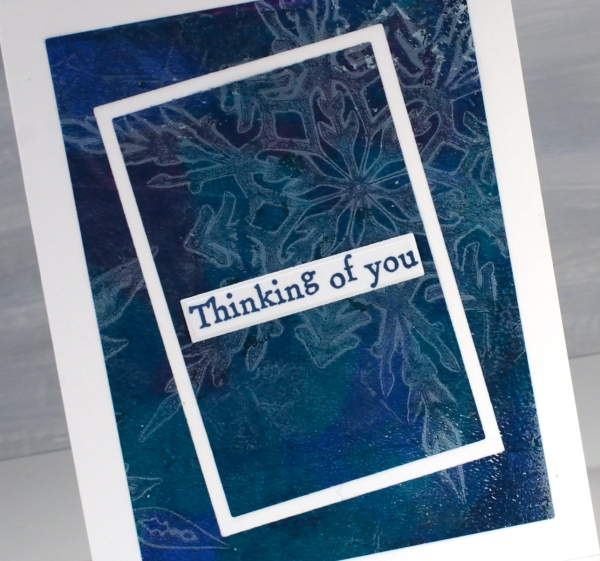
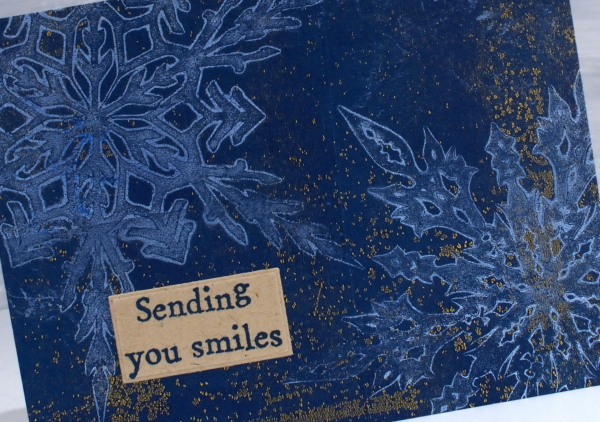
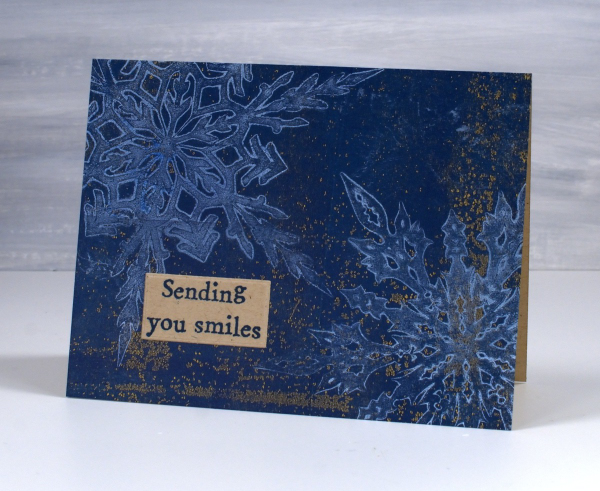
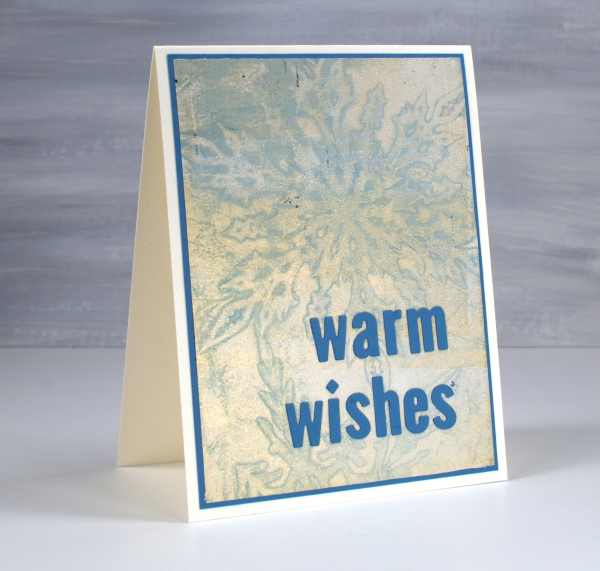
The second card was also made with brusho but I sprinkled it over an embossed panel. I embossed the Darkroom Door snow flakes background stamp with clear powder then covered it with brusho watercolour. I cut the words with my cricut to get a size that would show up on the busy background. Happy New Year and thank you for dropping in here.
The Tulip Mix
Posted: May 12, 2025 Filed under: AALL & Create, Echidna Studios, tulip background, Watercolour | Tags: AALL & Create, Echidna Studios, Fabriano Watercolour Paper, sennelier watercolours 5 Comments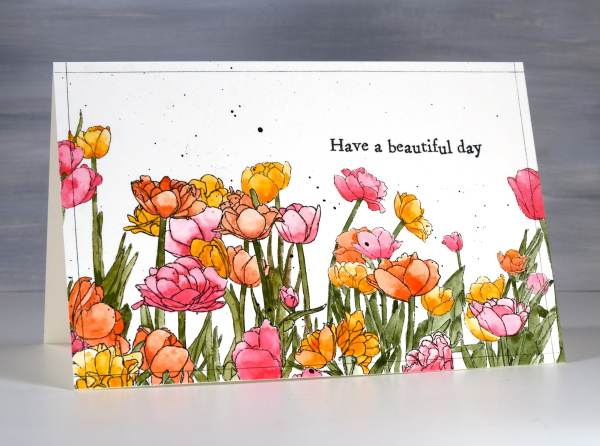
The tulip festival officially started here in Ottawa on Saturday but definitely not in my yard. There are potential blooms on a few lonely tulips but nothing looking showy or colourful yet. It doesn’t matter how many I plant, most do not shown up the following year! The tulips on today’s card are from Echidna Studios, the ‘tulip background digital stamp‘ printed on hot pressed watercolour paper.
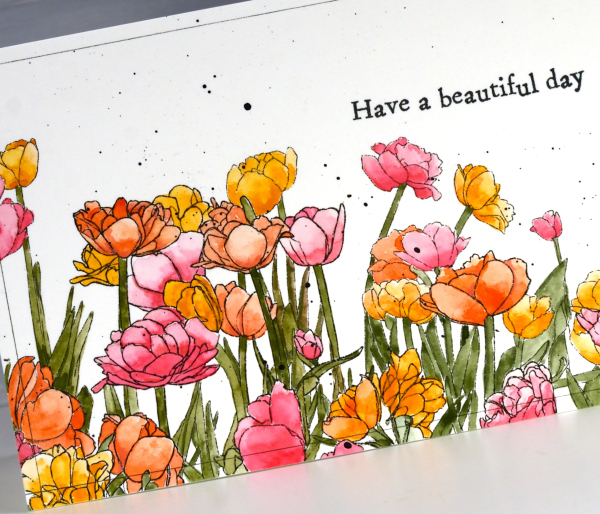
I used a limited palette of Sennelier watercolour paints, creating a pink, an orange and a yellow from a mix of opera pink and gold ochre. The green stems and leaves were mix of greenish umber and prussian blue. I’ve been painting patterns and experiments in one of my handmade art journals so the paints were already on the table and in the palette.
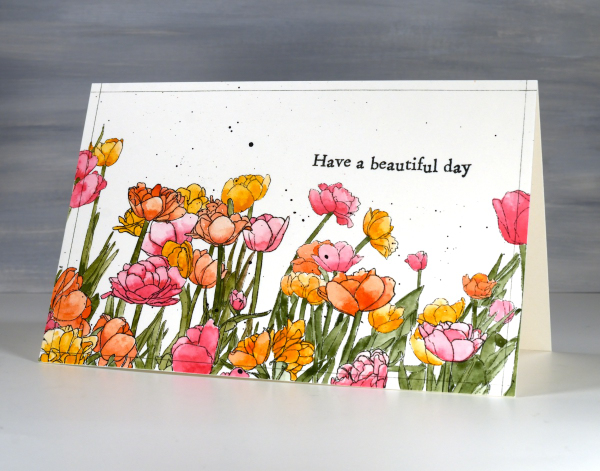
To finish the design I splattered black paint, stamped an Aall & Create sentiment and ruled very fine black lines around the border with the a .01 micron pen. I hope you do have a beautiful day!
Frames in frames
Posted: March 24, 2025 Filed under: A2 layers, AALL & Create, Additional A2 layers, Echidna Studios, gel press, grafix, snowflake digital stamp set, Waffle Flower | Tags: digital stamps, Echidna Studios, gel press, Waffle Flower dies 3 Comments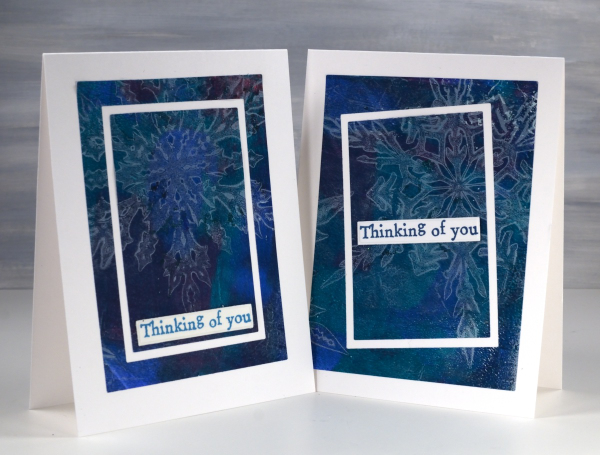
As I write this post I realise that these cards feature snowflakes when probably all you want to see is flowers! Nevertheless I see snow falling outside this morning; it’s not over yet where I live. I used snowflake masks cut from Grafix matte duralar using my cricut and the digital snowflake set from Echidna Studios.
In my mind this post is more about the layouts than the images. I have featured the frame in frames idea before as a way to feature a large patterned panel but add some extra interest as you do so. I used the Waffle Flower A2 layer dies to cut my frames and cut all three rectangles at one time taping dies to panel to plate to keep everything in place.
On one card I kept the frames parallel to each other but on the one above I offset the two centre dies for a wonky look. The print is a gel print created with a white snowflake layer then lifted with a mixed layer of blue, turquoise and red paint. I expected the mixed layer to be much bolder but I’m happy the paints blended into a muted mix. The sentiments are from the AALL & Create ‘everyday sentiments’ set.
Rustic Snowflakes
Posted: January 20, 2025 Filed under: AALL & Create, Echidna Studios, gel press, snowflake digital stamp set | Tags: AALL & Create, Echidna Studios, gel press, gel printing 2 Comments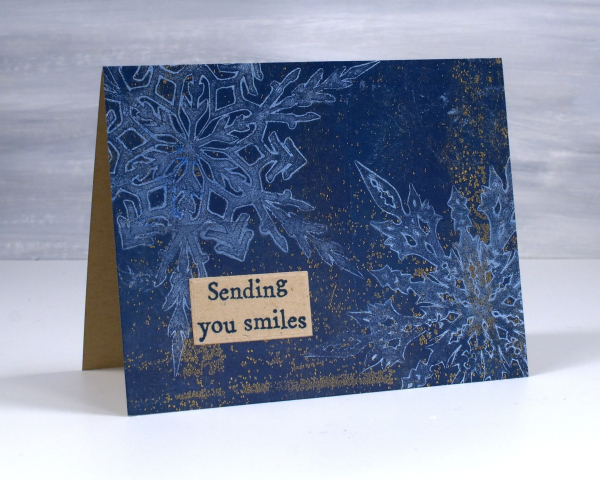
Another snowflake print for you because, of course I didn’t stop at one or two! There are six different snowflakes in the Echidna Studios ‘snowflake digital stamp set‘ so the gel printing possibilities are definitely endless. I created snowflake masks using the Cricut and Grafix matte duralar.
I hope to soon make a video showing my process but to put it briefly, I cover the gel plate in a layer of white paint, lay the masks on top and then remove paint using some tissue paper which lifts paint all around and within the patterned mask. I remove the masks, let the paint dry then pull the print on kraft paper with dark blue paint. The combination of white, blue and kraft is rustic and beautiful in my opinion. The quirky sentiment is another from the AALL & Create ‘everyday sentiments’ set.
I have some Australian family visiting this week so I plan to be playing with real snow not gel printed snow! Have a great week.
Snow on snow on snow
Posted: January 13, 2025 Filed under: cricut, Echidna Studios, gel press, grafix, My Favorite Things, snowflake digital stamp set | Tags: cricut, Echidna Studios, gel press, gel printing, grafix 6 Comments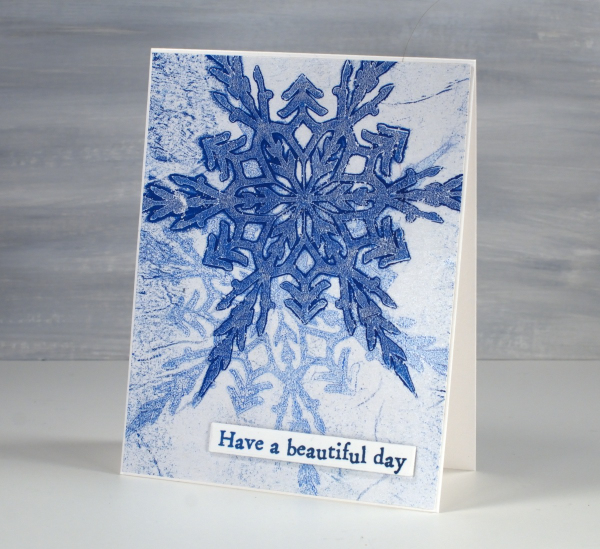
Today’s cards were gel printed using snowflake masks I cut on the cricut using the Snowflake Digital Stamp Set from Echidna Studios. I love how detailed these snowflakes are; there are six in the set and I have printed them, foiled them, cut them and now gel printed with them.
I remember when I first saw the six pointed detail of a snowflake that had landed on me. It is not always possible but occasionally the flakes are very distinct and separate instead of in clumps and I am always amazed by their beauty.
I cut my stencils from Grafix matte dura-lar as it is semi-transparent and light weight. On the panel above I made a pale print with blue and white then, after it had dried created a dark print on the plate which I pulled on the same paper but with a transparent medium (either transparent white paint or more likely matte medium). The little sentiment is from AALL & Create ‘everyday sentiments’ set.
On this second card I used a pale blue paint which didn’t give me a very bold print but pulling it with gold paint created a soft shimmery effect.
Always looking for the matchy-matchy, I found a scrap of cardstock in the same blue tone and cut a mat and sentiment using MFT little lowercase letter dies.
Black Christmas Tags
Posted: December 12, 2024 Filed under: Baubles, Christmas filigree, Christmas stockings digital stamp set, Echidna Studios, grafix, mittens | Tags: Echidna Studios, grafix, grafix craft plastic 2 Comments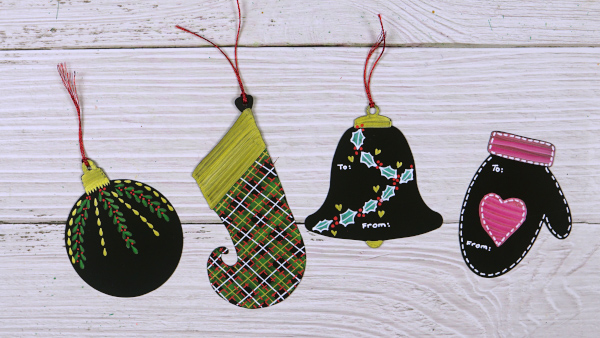
Last year I decorated some black glass balls for Christmas using a selection of paint pens and metallic brush pens. The opaque colours really pop on black so I decided to do something similar on black craft plastic from Grafix. You can see my process in the video below.
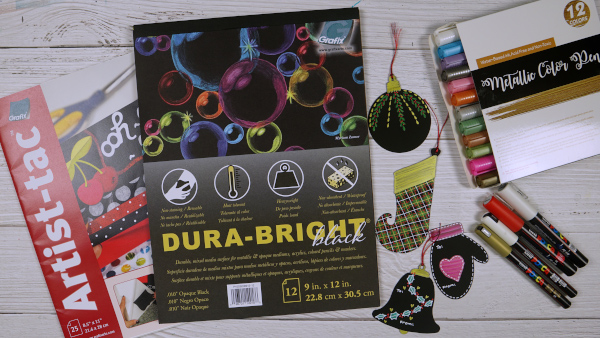
I cut the four different shapes on the cricut using digital cutting files from Echidna Studios (bell, mitten, stocking and bauble) The paint pens were all Posca and the metallic brush pens a brand I found on Amazon.
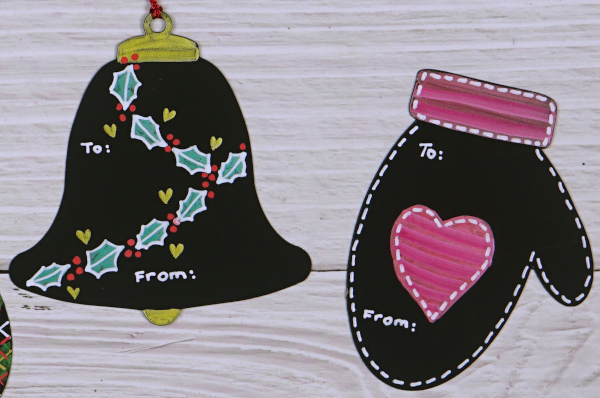
The dura-bright black (black craft plastic) from Grafix is a good surface for paint pens. It is very smooth and I found writing and drawing on it is very relaxing.
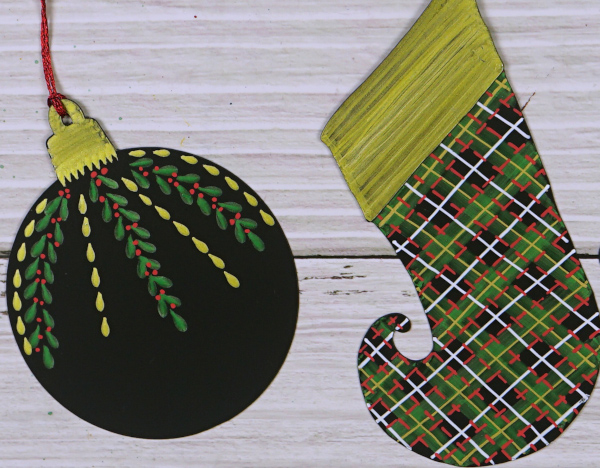
You might not think of black as a Christmas colour but the shine of the metallics and the chalkboard pop of the white is quite fun.
Gingerbread Set
Posted: December 10, 2024 Filed under: cricut, Echidna Studios, gingerbread set | Tags: cricut, Echidna Studios, Ranger Distress inks 3 Comments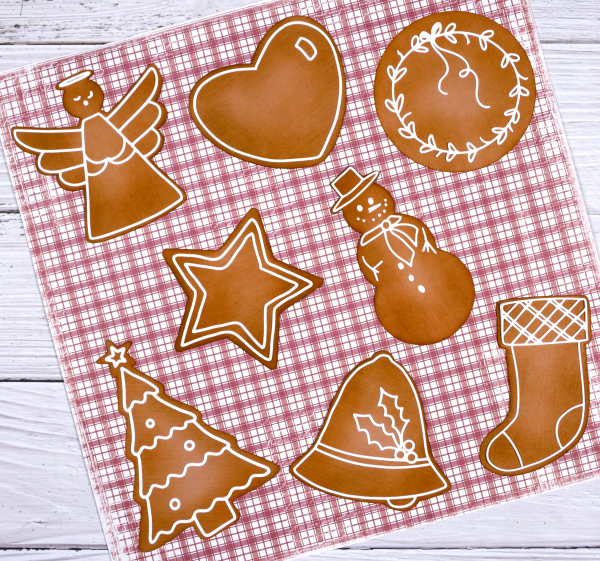
So far I have baked two batches of gingerbread for eating and cut one cardstock batch for card-making! The gingerbread set is a digital stamp and cut-file set from Echidna Studios and I have had a delightful time baking/making these samples.

I used the cricut to cut all the gingerbread shapes from a light brown cardstock which wasn’t gingerbread coloured. It was just for a test run. As it turned out when I blended rusty hinge distress ink over most of the cookies and vintage photo over just the edges the colour was very much like my real gingerbread!
I cut all the ‘icing bits’ on the cricut from white cardstock. I added double sided adhesive to the back before cutting so I wouldn’t have to use liquid glue for all that icing!
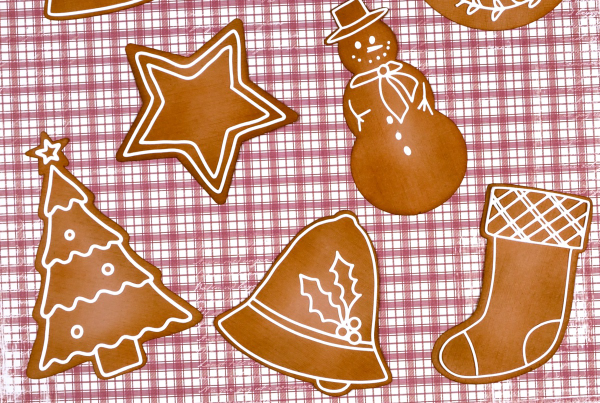
I don’t need nine gingerbread themed cards right now so I arranged eight of the cookies on cute check patterned paper for a photo and made the gingerbread man into a card.

I glued two more gingerbread men to the back of the decorated one for more dimension and added him to my card. The festive striped paper is from Simple Stories ‘Simple Vintage Yuletide’ paper pad. To tone down the vibrancy a bit I layered a piece of vellum on top cut with scallop scissors which I still have from long ago. The sentiment is from the PB ‘holiday snippets’ set.

I might make a few more cards or perhaps use some of the ‘cookies’ as gift tags. For now I just think they look very cute on that check paper.

Bethlehem Mask
Posted: December 4, 2024 Filed under: Bethlehem skyline, Echidna Studios, Finetec paints, gel press, gelli plate | Tags: Echidna Studios, Finetec artist mica watercolour paint, gel press, gel printing 4 Comments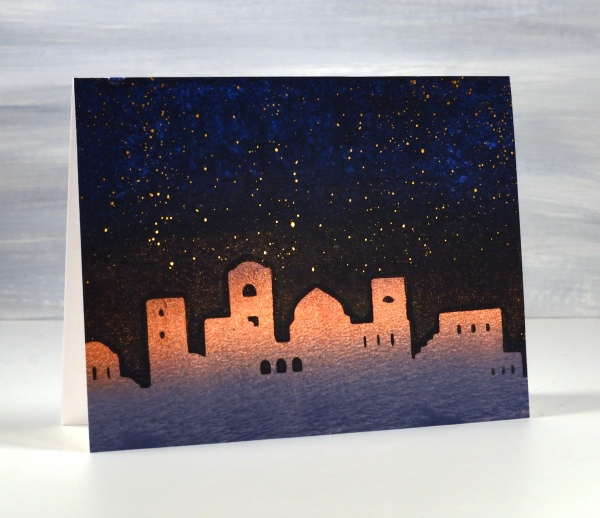
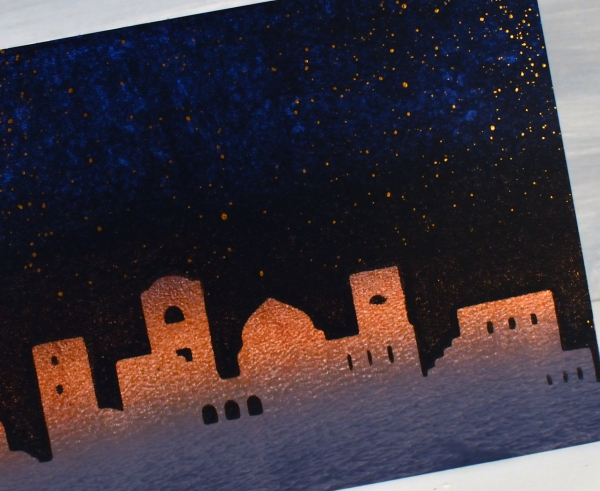
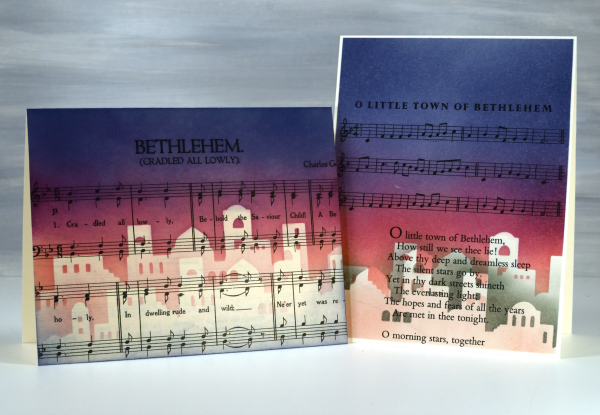
It’s been quite a while since the gel plates have been out of their tins but I was able to do a few prints recently to turn into Christmas cards. I cut a stencil using the Bethlehem Skyline digital cut file from Echidna Studios. To create the scene above I gel printed a blended grey, copper and blue panel. Next I brayered black onto the plate then lay the Bethlehem mask (cut on the Cricut) on the black before pressing the three coloured panel down on the plate. Once I had put the card together I splattered bronze watercolour paint in the sky as stars.
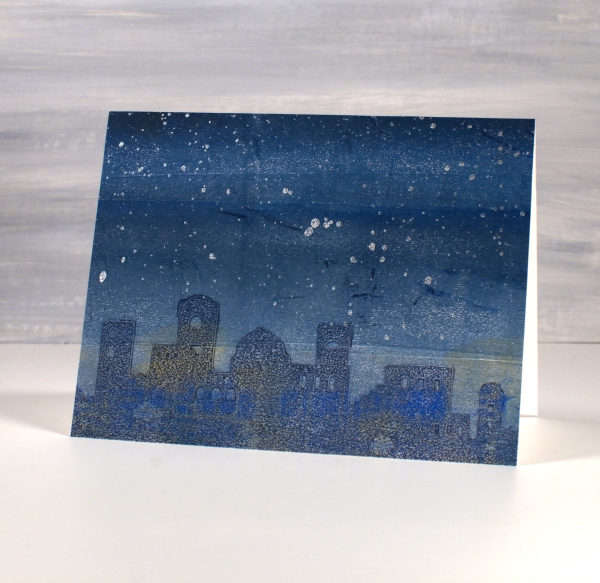
The panel below is less distinct as I pressed the mask into a layer of Paynes grey paint on the gel plate, removed all paint around the mask then lifted it to reveal a shadowy Bethlehem. Once it was dry I brayered blue and gold paints over the top before pulling the print. Once again I added metallic paint splatter to sky, this time lunar silver.
In a similar style to the carol and stencil cards I shared last week I used the Bethlehem mask cut from Matte Dura-lar to blend a scene on two carol panels cut from vintage carol books.

I blended pale peony over the top edge of the mask then switched to seedless preserves, then to chipped sapphire at the top of the panel. To add depth to the buildings I lifted the mask and positioned it below the first silhouette blended with either pink or grey ink
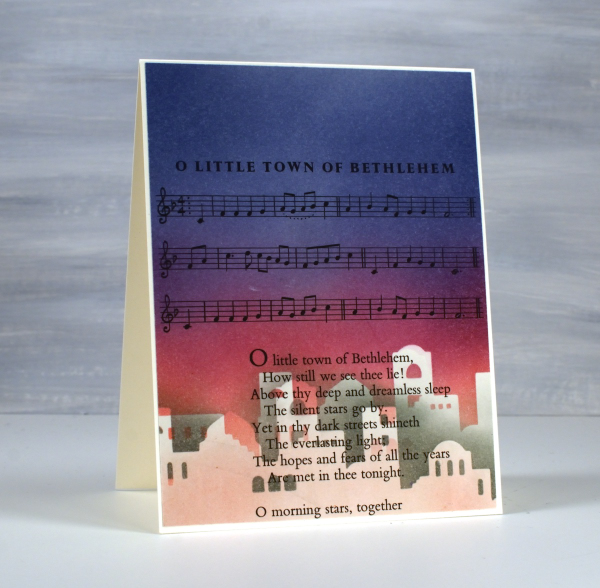
Once again no need for sentiments on the front but I will stamp a message inside.
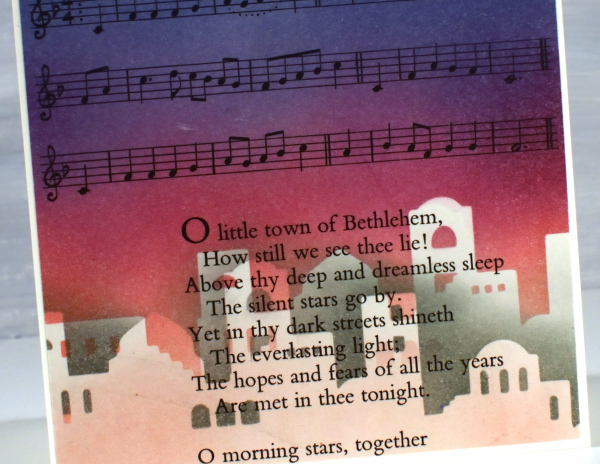
To see more cards made with this digital set click here. The set includes two versions of the silhouette plus a outline image for printing. Today’s post features affiliate links to The Foiled Fox. If you buy through these links I receive a small commission at no extra cost to you.
The Red Vintage Truck
Posted: November 29, 2024 Filed under: Coloured pencil, Vintage Truck | Tags: Echidna Studios, Faber-Castell Polychromos Colour Pencil 7 Comments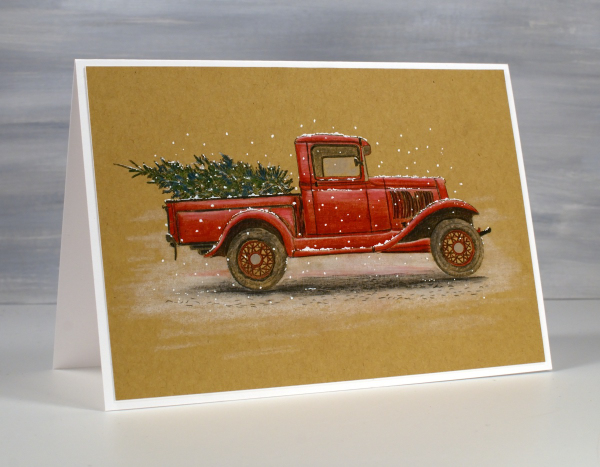
I’m just a wee bit excited about this lovely truck. As you might have guessed, it is one of my daughter’s digital designs and is available as a digital stamp from Echidna Studios to print any size you like. She took a photo of a vintage truck one day and this design is inspired by that truck. It wasn’t in winter and it didn’t have a tree in the back but she added the tree as an optional addition! The digital stamp is called Vintage Truck + Bonus Christmas Tree!
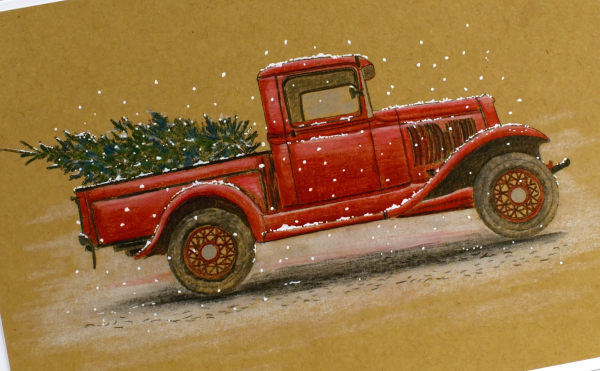
I haven’t done any pencil colouring but I thought it would pop on kraft paper so I printed it on my laser printer. I used Polychromos pencils to colour it and added the snow at the end with a white gel pen
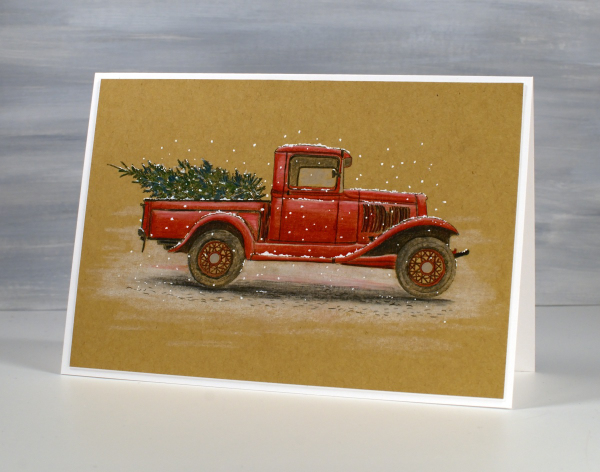
The kraft paper is a thick paper which I bought on Amazon; I like the warmth of the colour. Some kraft papers are a bit more grey. The card is 7″x5″ which is unusual for me but I found an envelope that works. I think I might do more of a burgandy coloured truck next. My daughter did blue on her samples so check them out on the Echidna Studios instagram account. (We’d love you to follow us there and on Pinterest if you’d like to.)


