
Grass Print Sympathy cards
Posted: August 28, 2024 Filed under: Alexandra Renke, gel press | Tags: Alexandra Renke, gel press, gel printing, gelli plate 2 Comments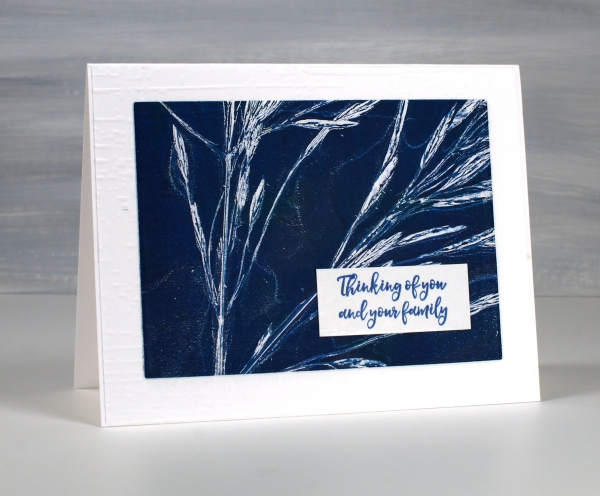
As I mentioned in my last post life has been busy with different crafting lately (children’s crafts for camp) so I am sharing more botanical gel prints from earlier in the summer.

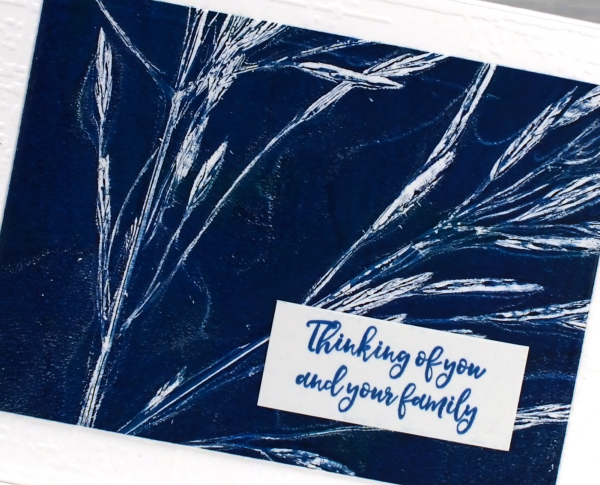
I filmed a short video for this one; it’s the same process I used with the lacy leaves but this time with long stalks of grass.
It is good to pick the grass before it gets too dry, that way the seeds don’t separate from the stalk and end up in the paint or on the print.

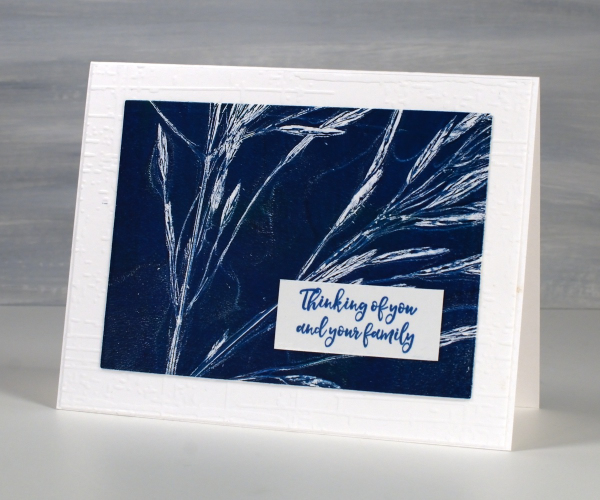
Once again I turned the 5″x 7″ print into sympathy cards and embossed a background for both cards using the ‘exposed brick’ embossing folder from Stampin Up. For the card above I cut tags using lovely stitched edge tag dies from Alexandra Renke.
As summer is drawing to a close I will mention that I keep the grasses and flowers that I have used for gel printing for a few more months. The layers of paint hold them together making it possible to continue to do botanical gel printing for a little longer.
This post includes affiliate links from Foiled Fox. If you buy through these links I receive a small commission at no extra cost to you.
Collage the Blues
Posted: July 31, 2024 Filed under: Darkroom Door, gel press, Nature Walk | Tags: collage, Darkroom Door stamps, gel press, gel printing, gelli plate 11 Comments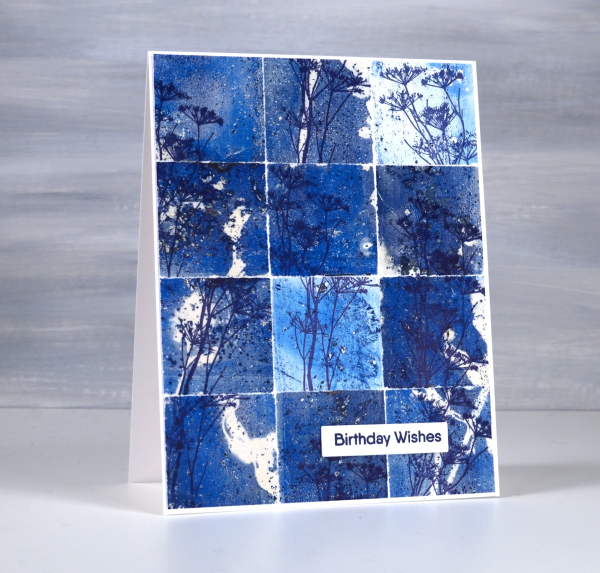
You might wonder what I do with all my gel prints, and believe me I have many, many gel prints! If I got rid of the partial prints that didn’t really work I would have less to deal with but sometimes the partial prints can become favourite cards or journal pages.
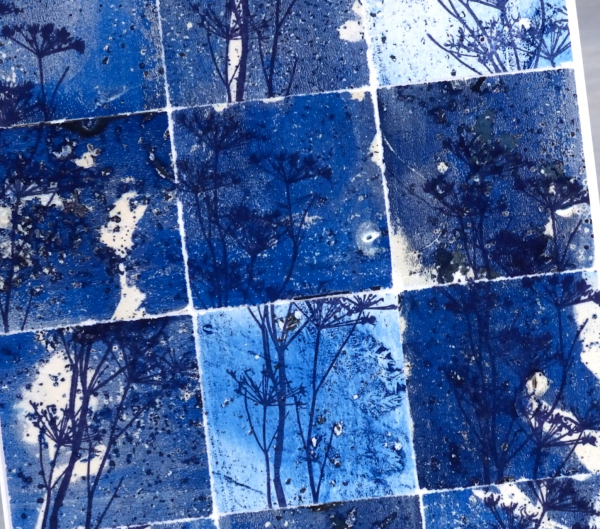
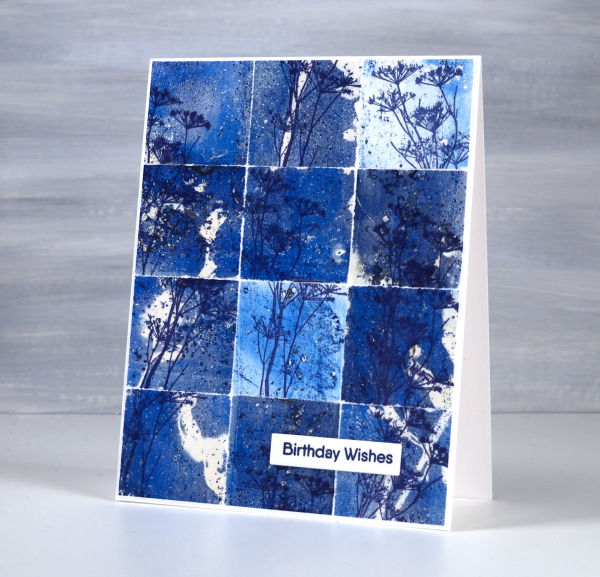
To create this collage of blues I tore a couple of partial prints into squares and stamped the delicate stamp from Darkroom Door’s nature walk set at different angles on the the squares. I put these ‘scraps’ back together and the partial prints brought shades of blue, pops of white and bits of pattern and texture.
So, how many gel prints is too many? You can’t have too many!
Hello Leaves and Lines
Posted: April 19, 2024 Filed under: cricut, Echidna Studios, gel press, leaves and lines | Tags: cricut, Echidna Studios, gel printing, gelli plate, Penny Black creative dies 2 Comments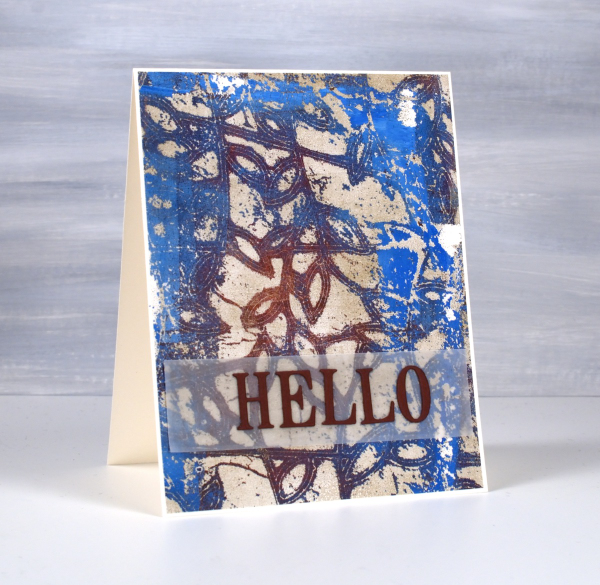
This distressed multicoloured look is one of my favourite gel printing looks. I don’t know that I could recreate it but I usually get at least a couple of these aged looking prints during a gel printing session. The pattern is achieved using a stencil laid over paint on the gel plate. This stencil is called ‘leaves and lines‘ and the digital file is available from Echidna Studios etsy store. To make today’s card I cut a 5″x 6″ stencil from Grafix matte duralar using my Cricut. I also cut it as a larger stencil which I used for a print you can see here.
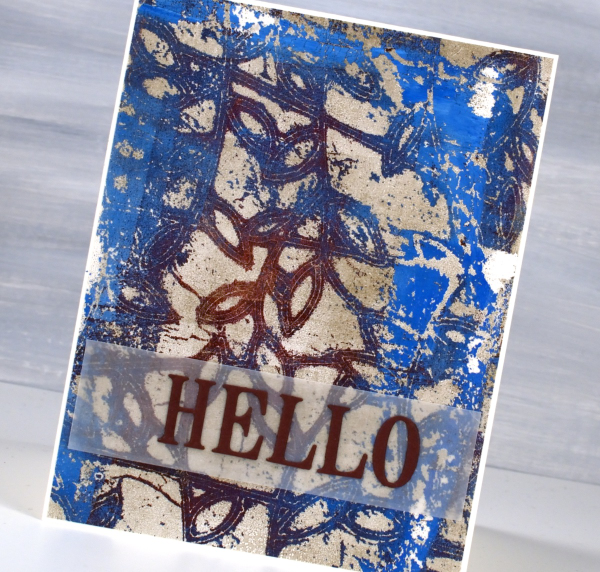
You can see on this print that I used a maroon paint and a bright blue paint; the darker blue is a mix of the two colours. I pulled the print with a pale gold paint so the surface has a bit of shimmer to it.
Because the background is very busy I placed the Penny Black ‘hello’ die-cut sentiment on a strip of vellum to stop it from getting lost in the leaves and lines. This post includes affiliate links from Foiled Fox. If you buy through these links I receive a small commission at no extra cost to you.
Dragonfly on text
Posted: April 15, 2022 Filed under: Dies, Dragonfly Frame, gel press, gelli plate, Penny Black | Tags: gel press, gel printing, gelli plate, Penny Black creative dies 4 Comments
All the coloured sections of this pretty dragonfly are inlaid between the outlines of the cream die-cut! Does it look the same as if I had just glued the cream die-cut over the top? Yes, I’m afraid it does. Perhaps if gel print had been on cardstock the same thickness as the dragonfly it might have been more noticeable. Lesson learned.

One branch of my current gel printing obsession is image transfer. In the past I have tried it mainly with high contrast photos of people but it works with text as well so I added interest to this blue, gold and red print with some black magazine text. I notice now as I stare at the screen the random line across the panel makes it look a little like an ocean view.
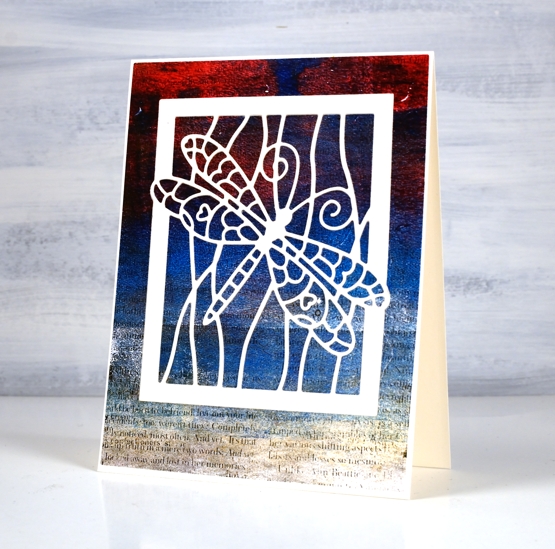
While I was painstakingly inlayaing every little bit of dragonfly wing I was listening to the audio book version of The Salt Path, a memoir with many references to ocean views, cliffs, weather and unexpected encounters. The author and her husband hiked the South West Coast path in the UK in rather traumatic and totally unexpected circumstances. I found the whole account fascinating and heartrending in places. By the end I had google maps open so I could see where the path was taking them.
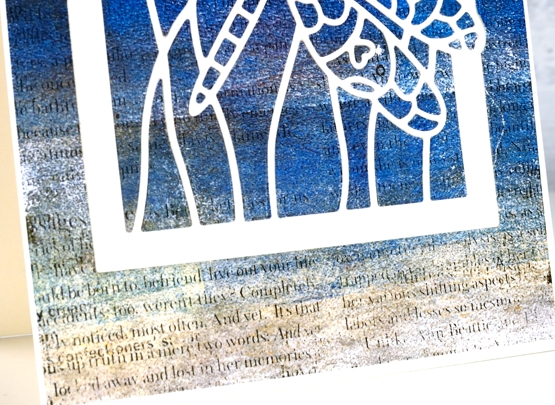
Once again the photos don’t show the shimmer of the finished project. The sand coloured foreground is actually gold paint so there is shimmer spreading half way up the panel. Can you see why I love gel printing?
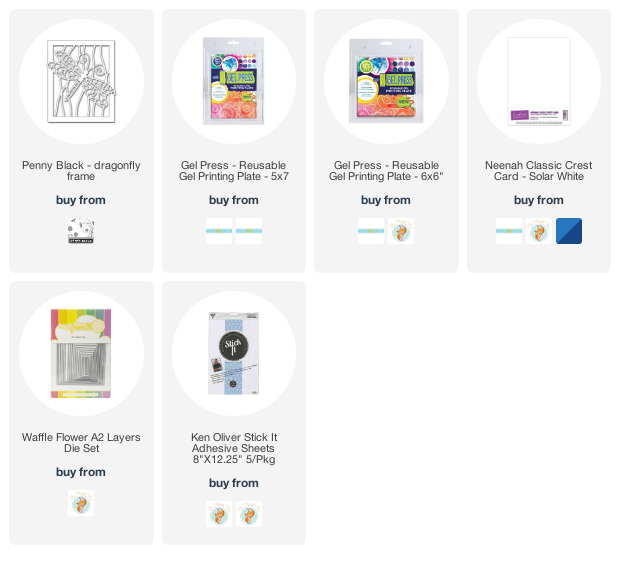
Supplies
(Compensated affiliate links used when possible)
Artful August Circle Journal Page
Posted: August 5, 2021 Filed under: Art Journal, basket weave, Christmas bush, Darkroom Door, fragments, gel press, gelli plate, little swirls, mesh, Nature Walk, Paper Rose, Wildflowers Vol 2 | Tags: Art Journal, Darkroom Door stamps, gel press, gel printing, gelli plate 6 Comments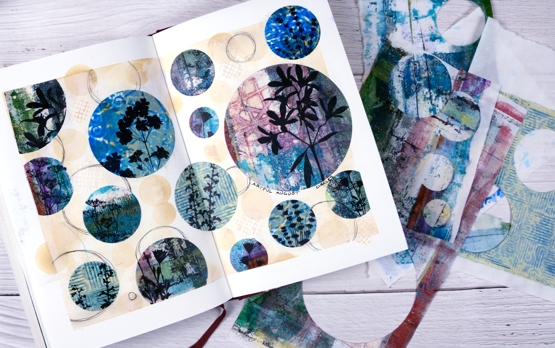
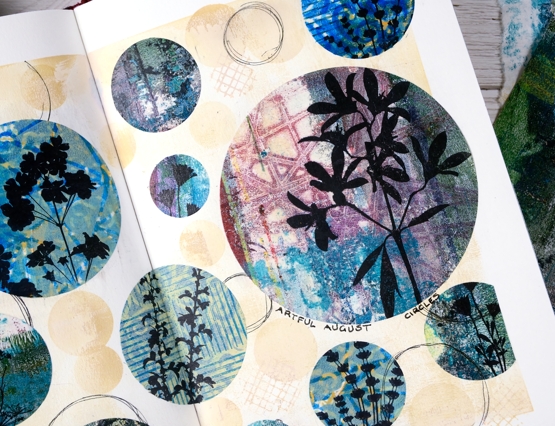
Rachel Greig from Darkroom Door is hosting ‘Artful August’, a challenge to make something arty each day in August. She has provided 31 prompts and I am going to play along as often as I can. Circles was the prompt yesterday so I cut circles from a just few of the many gel print panels I have piling up. I used only gelprints done on rice paper and they cut and adhered very easily.
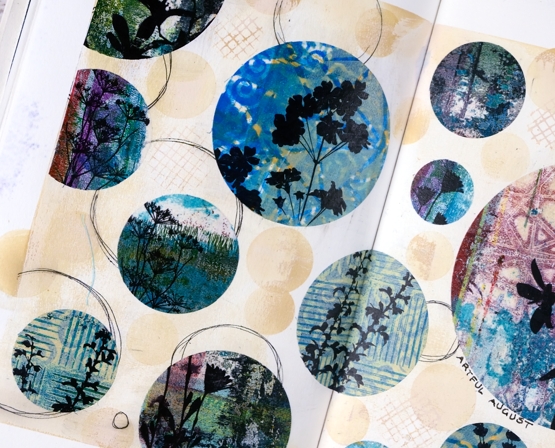
Once I had cut circles in different sizes from different gel printed panels I stamped flower silhouettes from several Darkroom Door sets. Before gluing the circles to the pages I painted the pages with a base of gesso + light brown paint and added some scribbly circles by tracing inside circle dies.

I glued the printed, stamped circles with matte medium both on the back of the paper and over the top to seal it. To add a bit more interest around the circles I blended antique linen ink through a homemade paper stencil.
The prompts in the challenge are very open and participants are encouraged to interpret them in any way and with any medium. If you are on instagram you can view the submissions by searching for #artfulaugust or #rachelgreigartfulaugustchallenge
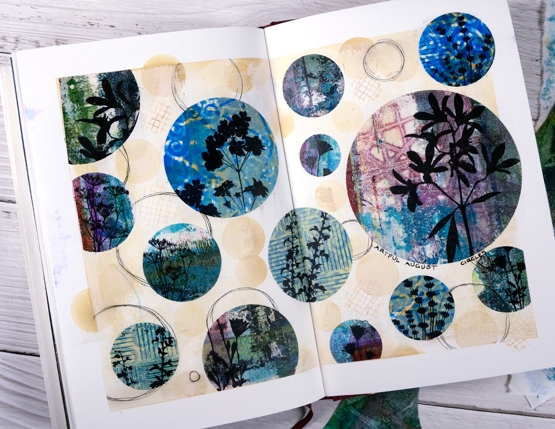
As I participate in the challenge I will have simple experiments along with some completed projects like this one. The fun is simply playing with the prompts. In making today’s journal pages I was very happy to use some pretty scraps, experiments and clean up pages from gel printing sessions. There are always too many to turn into cards but each one has a unique texture and colour mix.
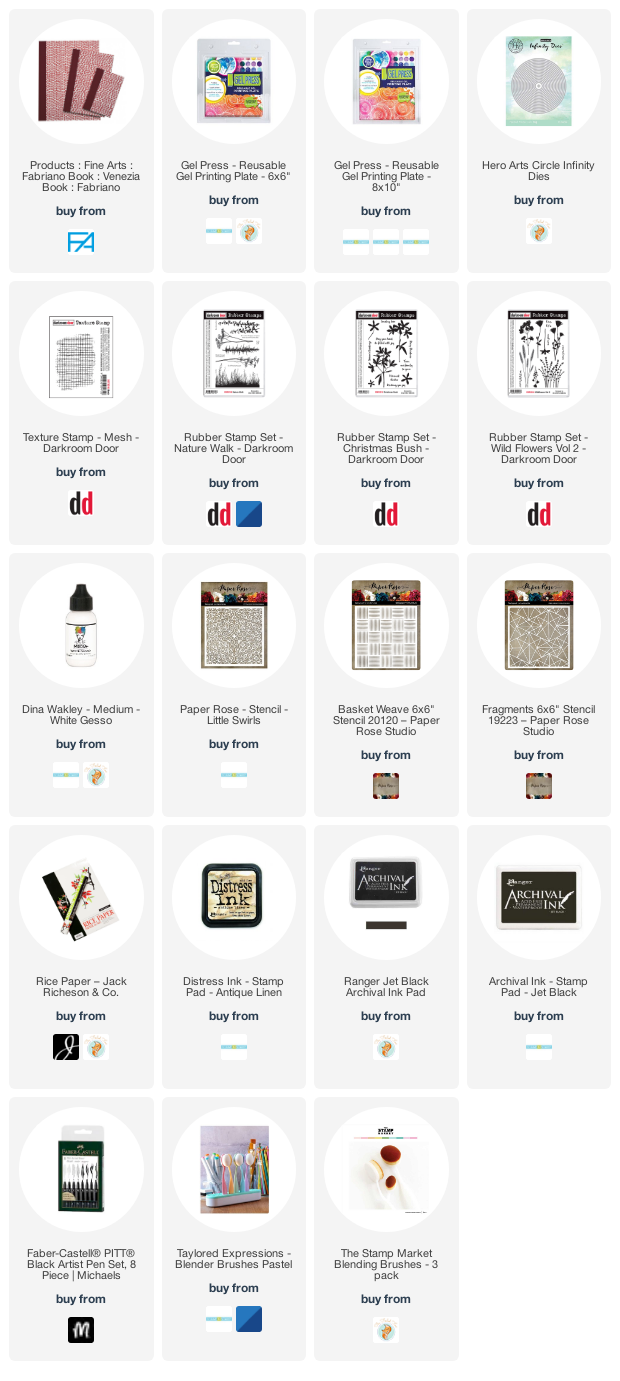
Supplies
(Compensated affiliate links used when possible)
Gel print city journal page
Posted: June 17, 2021 Filed under: Art Journal, gel press, Waffle Flower | Tags: Fabriano art journal, gel press, gel printing, gelli plate, Waffle Flower dies 5 Comments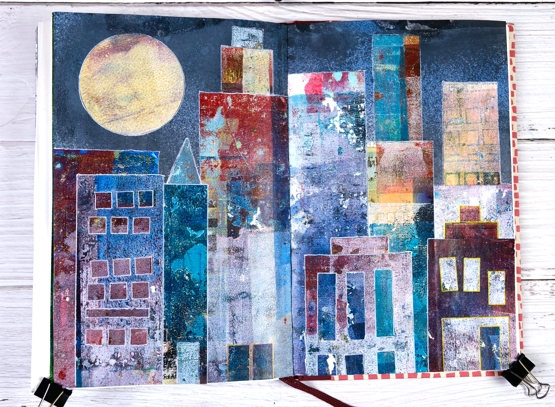
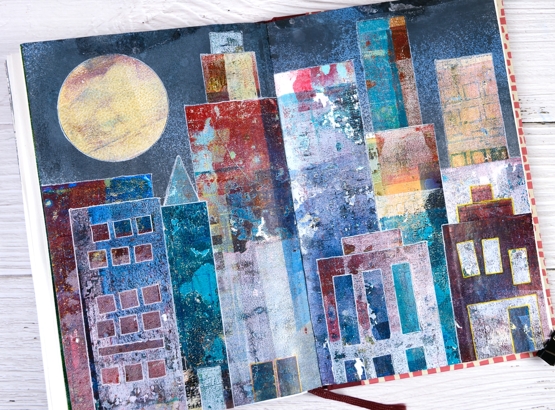
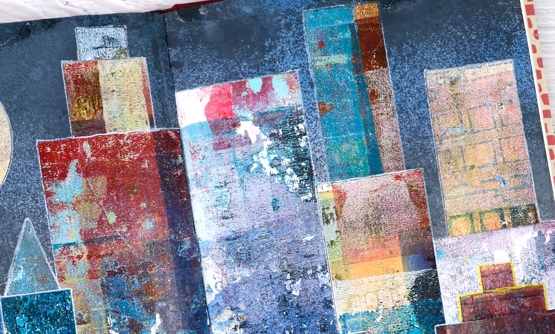
Continuing my week of gel prints you might see a resemblance between yesterday’s projects and todays. I posted large cityscape projects yesterday made by masking areas of the gel plate with paper rectangles cut from stiff magazine paper. Some of the masks had little shapes cut from them with dies. I used the magazine masks over and over on several prints and experiments so by the end they were covered in paint and way more interesting than they started out.
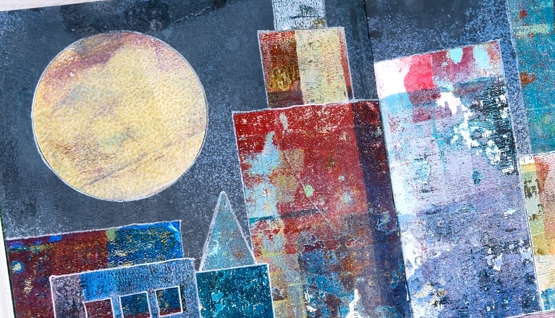
Rather than save the masks or throw them away I turned them into a city scape art journal page. Once again my scraps are prettier than some of my prints! Every time I brayered a new colour onto the gel plate I lay the rectangle masks paint side down so they ended up picking up paint, pattern and texture while occasionally letting a bit of text or photo show through.
The background sky was done with distress sprays, a few blues and a black (listed below) spritzed over the open spread to cover the top half of both pages.
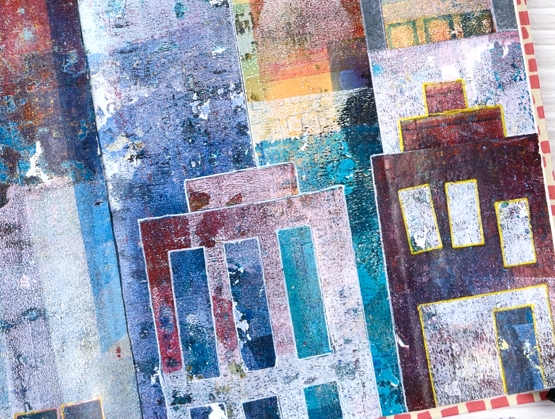
Once the sky was dry I arranged and rearranged the ‘buildings’ so I would have contrasting heights and colours across the scene. Some of the tiny shapes die cut from the masks also had paint on them so I used a few as doors on this scene. The windows are all cut outs revealing some of the prints underneath. I used matte medium and a Tim Holtz collage brush to glue everything down then decided to outline the shapes with gel pens to separate them a little more.
This art journal design was one of those rare ones that turned out as I imagined it might. Doesn’t always go that way!
I mentioned a couple of days ago I am appearing on Craft Roulette Live Improv show on Friday night. I’d love to see you there if you are free. You can hop on the chat and say hello. The details are here and here
Supplies
(Compensated affiliate links used when possible)
Gelli butterflies and blossoms
Posted: April 10, 2019 Filed under: Alexandra Renke, cherry blossom, gelli plate, monarch, Script | Tags: gelli plate, Penny Black creative dies, Penny Black stamps, Tsukineko Versafine inks 3 Comments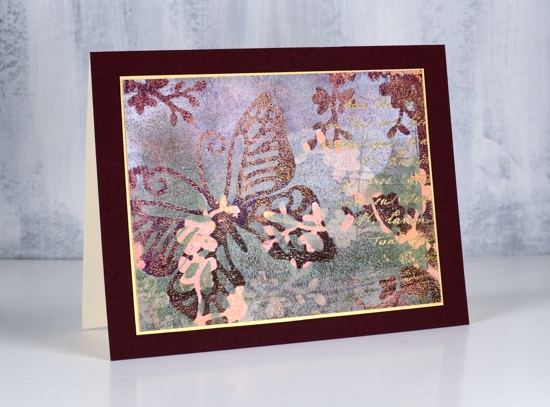
Thank you for all your lovely comments about my recent art journal page. I’m glad you enjoyed it. I have a couple more pages in process in my journals which I look forward to showing you in the future. I would love to hear from other art journallers. What are some of your favourite mediums and techniques?
Today’s cards are made with my latest fave: the gelli plate! I am very much a beginner but learning as I go and watching the myriad of techniques shared on the Gelli Arts youtube channel. The panels in today’s cards were made by printing layer after layer while rearranging die cut paper butterflies and blossoms on top of each new layer of paint. The dies are Penny Black ‘monarch’ and cherry blossom’.
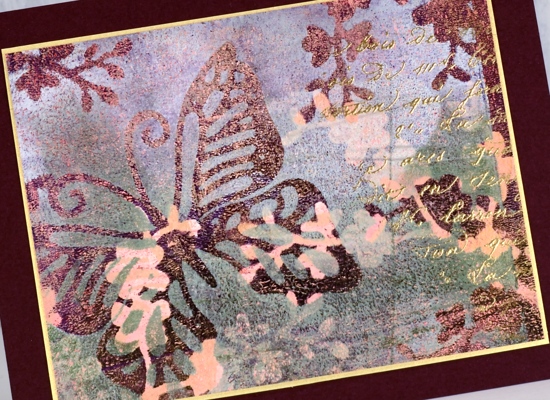
I wont’ try to describe my process because I don’t remember exactly what my order was or what paint colours I used. I know there was green, white, burgandy, gold and pink liquitex basic acrylics but there could have been more. Like many artistic techniques success with a layered gelli print can be knowing when to stop. Once I was happy with the one above I still had paint and pattern showing on the gelli plate so I added one more layer of paint then pulled a ghost print (I’m learning the lingo!) on patterned paper. The paper I chose was a woodgrain print from Alexandra Renke.
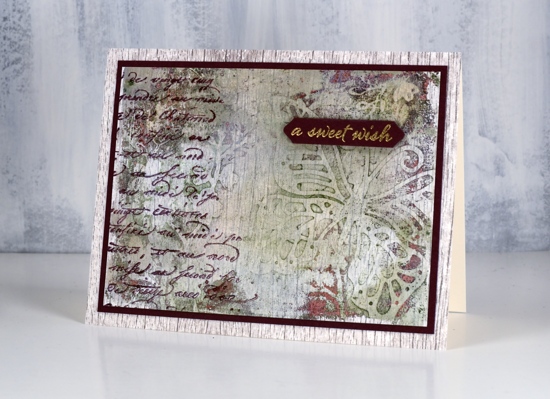
You can see the woodgrain print through the paint and pattern. I ended up matting both panels in burgandy cardstock then attaching them to a base panel of the same AR woodgrain paper.
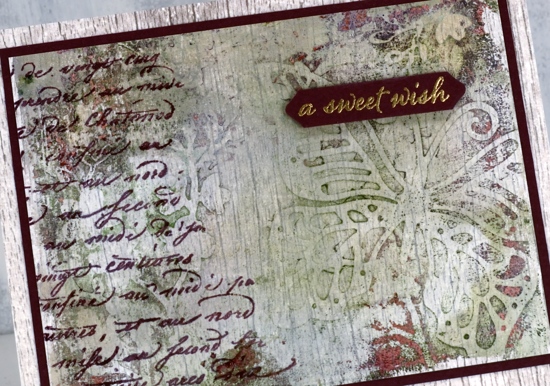
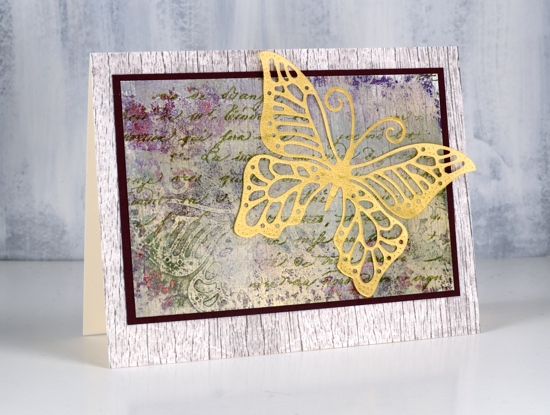
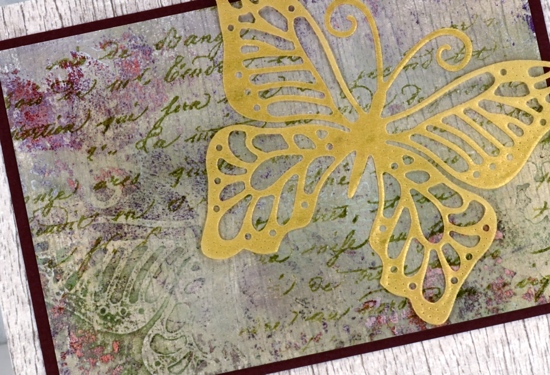
It’s always hard to capture shimmer on camera but all three panels have gold shimmer on them so I added some gold accents to each one. On the top panel I stamped the PB script stamp, embossed in gold powder and matted the panel with gold cardstock. On the card above I added a gold embossed sentiment from the PB set happy snippets and stamped the same script stamp in chianti versafine clair. On the card below I stamped the script stamp in shady lane versafine clair ink and added a gold vellum die cut butterfly, the same butterfly used as a mask in the gel printing process.
I love all the texture from the gelli printing process, the paint which builds up after several layers of printing adds so much interest
I did another butterfly and blossom print in a different colour scheme but I’ll share that another day. Thanks for dropping in.
.
Gelli plate feathers
Posted: April 1, 2019 Filed under: Darkroom Door, diamonds, Feathers, gelli plate | Tags: Darkroom Door stamps, gelli plate, My Favorite Things 22 Comments
I spent a delightful day learning how to use my gelli plate last week. I have had it for years and only used it once or twice so everything my friends showed me was new and exciting.
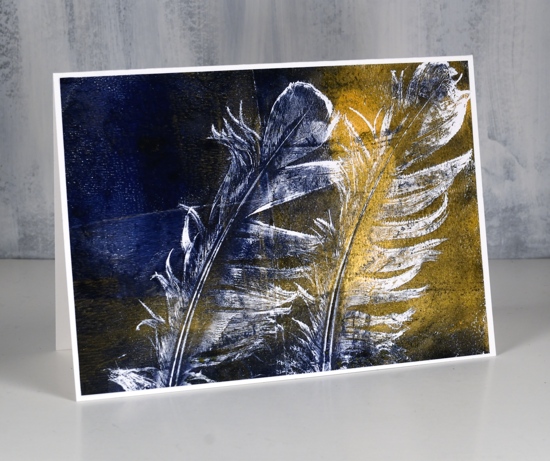
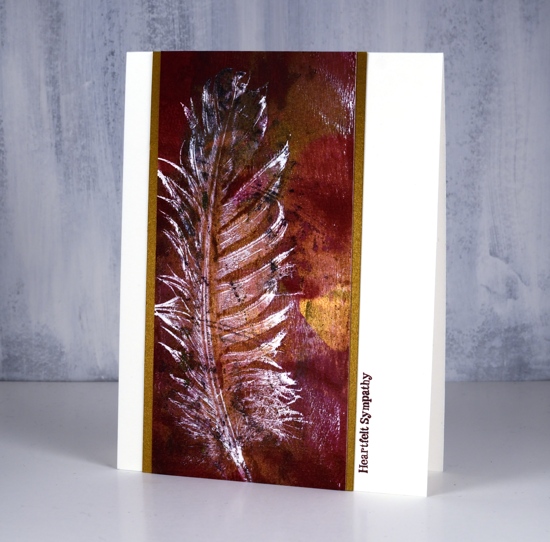
I was so happy with these feather prints, I couldn’t believe the detail using real feathers. If you want to see how it’s done check out this video on the gelli arts youtube channel.
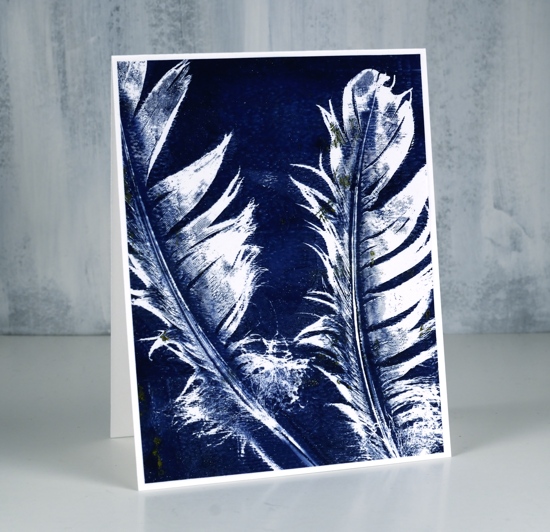
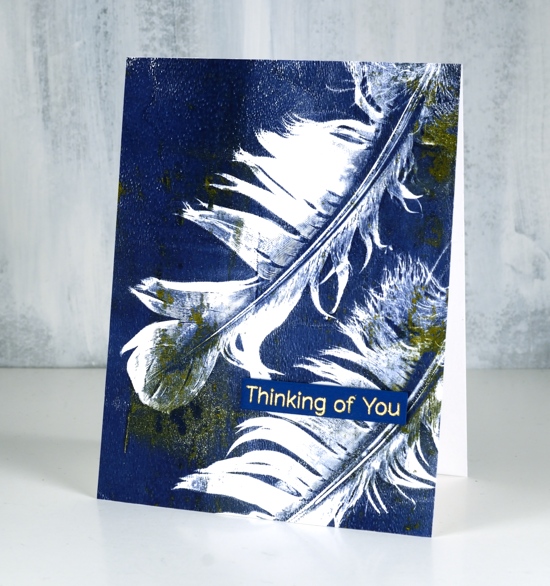
I did a few with navy and shimmery gold paint as well as some with burgandy and gold. Half of them got sentiments but only small ones as I didn’t want to cover up the lovely detail. I had a MFT sentiment already stamped and die cut which matched the panel below. I haven’t listed or linked any of the paints because I don’t remember what brands I used or colour names. If I continue with my gelli plate (and I’m pretty sure I will!) I will let you know what paints I buy.
My favourite panel is the one at the top of the post which also has the texture of the new ‘diamonds’ stencil from Darkroom Door in the background. As I was learning and experimenting I used computer paper for most prints, not the weight of cardstock I would usually use for panels on my cards. To make sure I didn’t tear or buckle the panels with glue or narrow adhesive I covered the back of all the panels with double sided adhesive sheets.
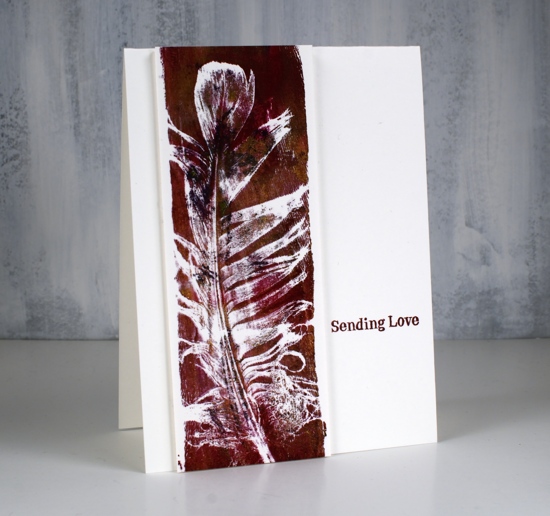
These last two narrow panels were done on watercolour paper strips. I decided to add sentiments from the new Darkroom Door sentiment strip ‘Sympathy’
Have you used a gelli plate? I love to hear what your favourite techniques are.
Supplies
A mixed media card!
Posted: January 13, 2016 Filed under: Camelia | Tags: gelli plate, Penny Black creative dies, Penny Black stamps 6 Comments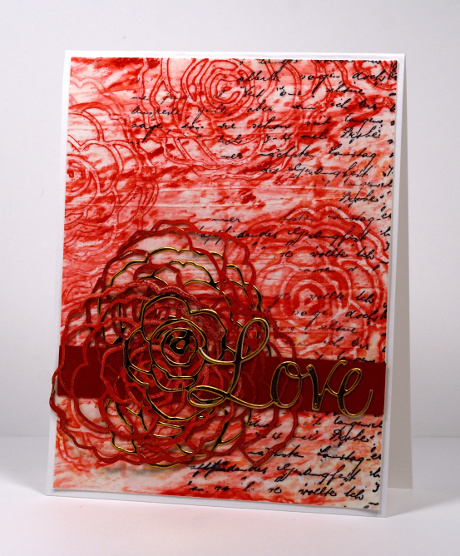
It seems that mixed media doesn’t appear on this blog very often but if I make a bit more progress in my art journals that might change. The card above features the first and only use of my gelli plate. I have seen lots of wonderful creating done with gelli plates but mine is currently stranded on Mount Techniques-To-Try along with other cool stuff!
I began by laying rose die cuts on my gelli plate then brayering red printing ink over plate and roses. I removed the roses before making a print of the pattern on deli paper. Out of several prints this one showed the most detail. I was going to throw away the very messy rose die cuts but a friend who was busy creating at the same time convinced me to hold onto them. Once they were dry they made delicate details which co-ordinated with the paper. I added some text to the paper, a solid strip to ground the embellishments and some gold die cuts for the focal element.
Have you gelli-printed? I intend to get back to my plate and would love to hear your favourite way to use one.
Supplies:
Stamps: Letter Background (PB)
Dies: Camelia die, Love & Joy die (PB)
Inks: Red Printing ink (Speedball), Black archival ink (Ranger)
Cardstock: Mixed media paper, deli paper, gold foil cardstock


