Christmas Storefront
Posted: December 21, 2023 Filed under: Christmas bush, Christmas storefront, Darkroom Door | Tags: Darkroom Door stamps, digital stamps, Echidna Studios, Fabriano Watercolour Paper 3 Comments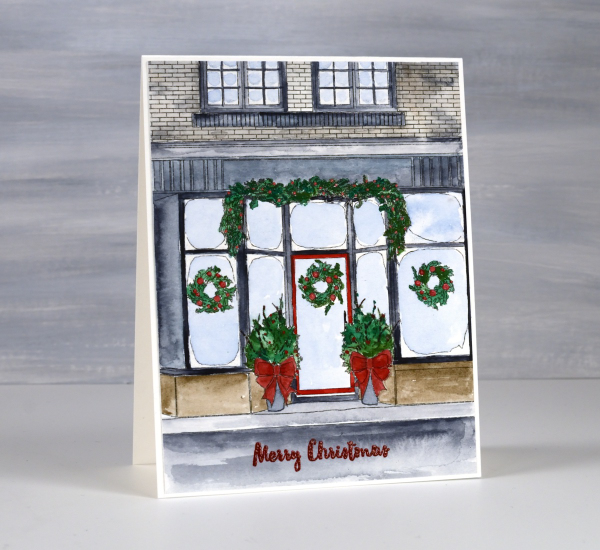
This delightful Christmas storefront is a digital design from Echidna Studios. Once again my daughter took a photo and sketched it into a digital stamp. I was delighted with the result as I had taken photos of a similar store front in Wakefield Quebec last January and sadly my photos did not represent well the beauty of the decorated store.
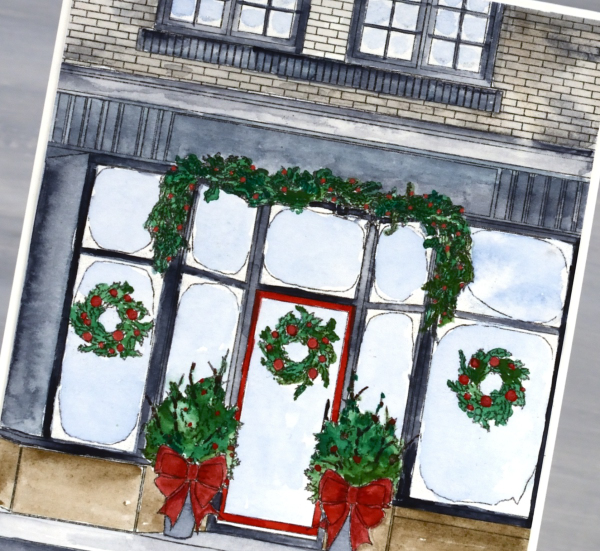
I printed the image on hot pressed watercolour paper then painted the scene with Sennelier watercolours. I kept the palette simple, painting the building in pale brown and Payne’s grey so the decorations would stand out. I don’t think you can see in the photo but all the icy edges of the window are coloured with wink of stella markers both the white and the clear, for a little sparkle.
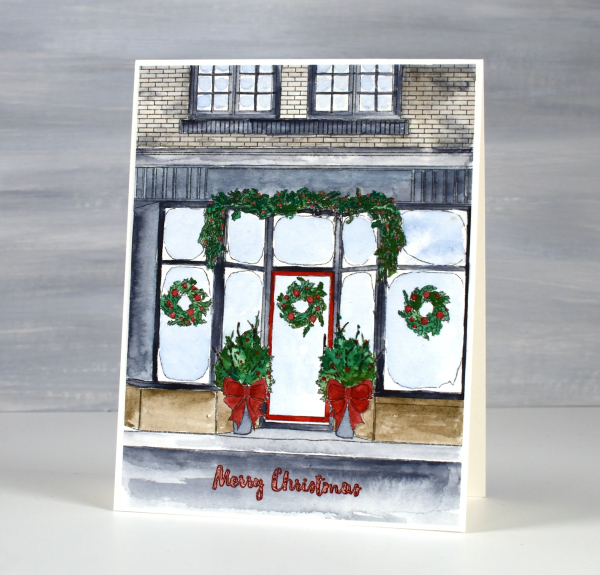
Once finished, the grey in the foreground seemed like a good place for the Darkroom Door sentiment from the ‘Christmas Bush‘ set stamped and embossed in red to match the bows and berries.
I mentioned in one of my posts that I sprained my ankle in November. An aircast has made it possible to walk on it but subsequent x-rays showed a fracture so it has now been in an aircast for over five weeks. I had a follow up and more x-rays today and have been approved to walk around without the aircast at home. So it is getting better…literally one step at a time. As you can imagine I haven’t really been strolling around pretty little stores this year, my family has been running errands for me and there have been a few deliveries to our door.
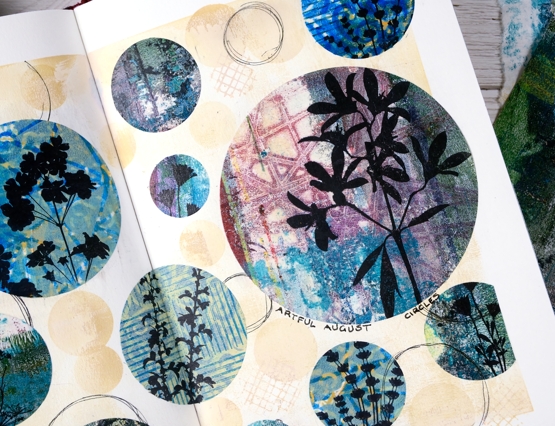
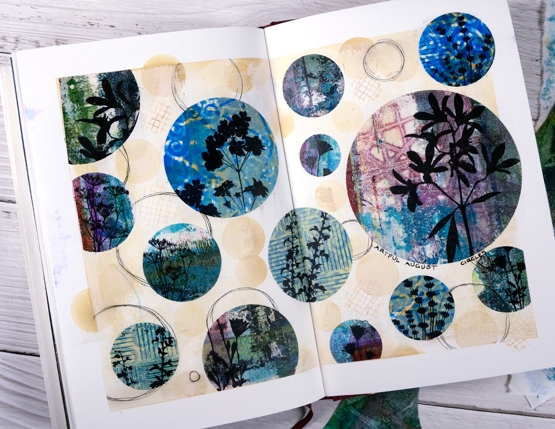
Artful August Circle Journal Page
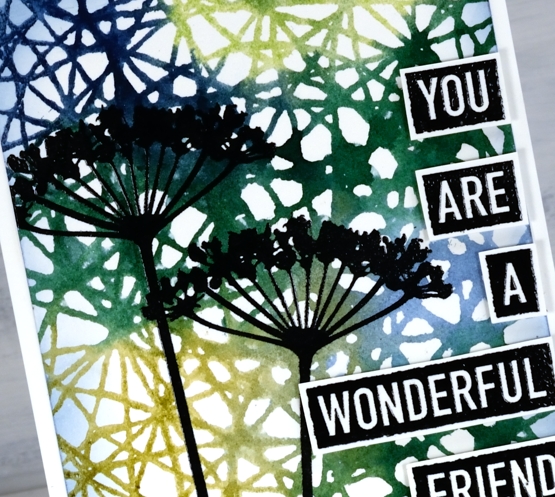
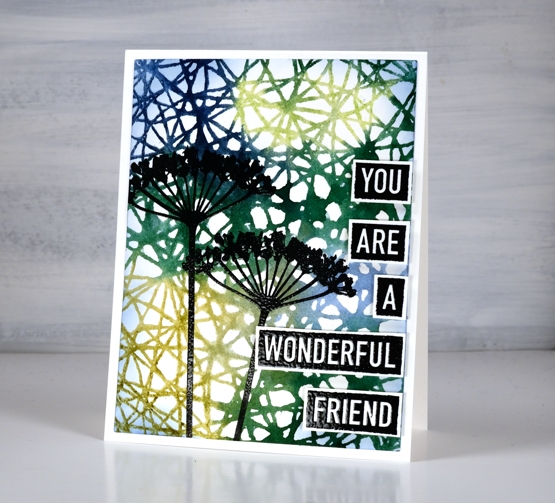
Posted: August 5, 2021 Filed under: Art Journal, basket weave, Christmas bush, Darkroom Door, fragments, gel press, gelli plate, little swirls, mesh, Nature Walk, Paper Rose, Wildflowers Vol 2 | Tags: Art Journal, Darkroom Door stamps, gel press, gel printing, gelli plate 6 Comments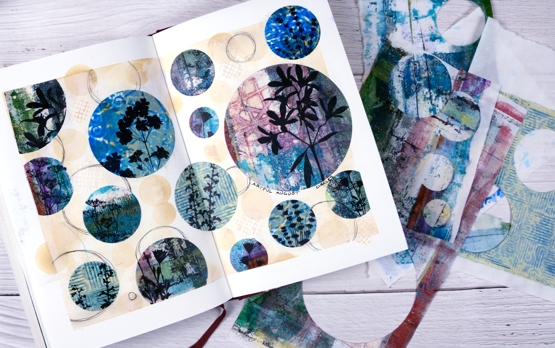
Rachel Greig from Darkroom Door is hosting ‘Artful August’, a challenge to make something arty each day in August. She has provided 31 prompts and I am going to play along as often as I can. Circles was the prompt yesterday so I cut circles from a just few of the many gel print panels I have piling up. I used only gelprints done on rice paper and they cut and adhered very easily.
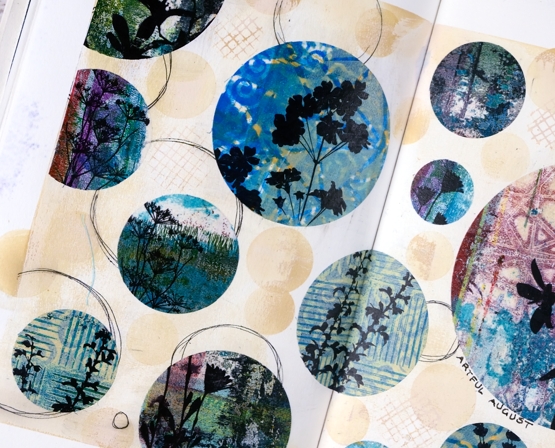
Once I had cut circles in different sizes from different gel printed panels I stamped flower silhouettes from several Darkroom Door sets. Before gluing the circles to the pages I painted the pages with a base of gesso + light brown paint and added some scribbly circles by tracing inside circle dies.

I glued the printed, stamped circles with matte medium both on the back of the paper and over the top to seal it. To add a bit more interest around the circles I blended antique linen ink through a homemade paper stencil.
The prompts in the challenge are very open and participants are encouraged to interpret them in any way and with any medium. If you are on instagram you can view the submissions by searching for #artfulaugust or #rachelgreigartfulaugustchallenge
As I participate in the challenge I will have simple experiments along with some completed projects like this one. The fun is simply playing with the prompts. In making today’s journal pages I was very happy to use some pretty scraps, experiments and clean up pages from gel printing sessions. There are always too many to turn into cards but each one has a unique texture and colour mix.
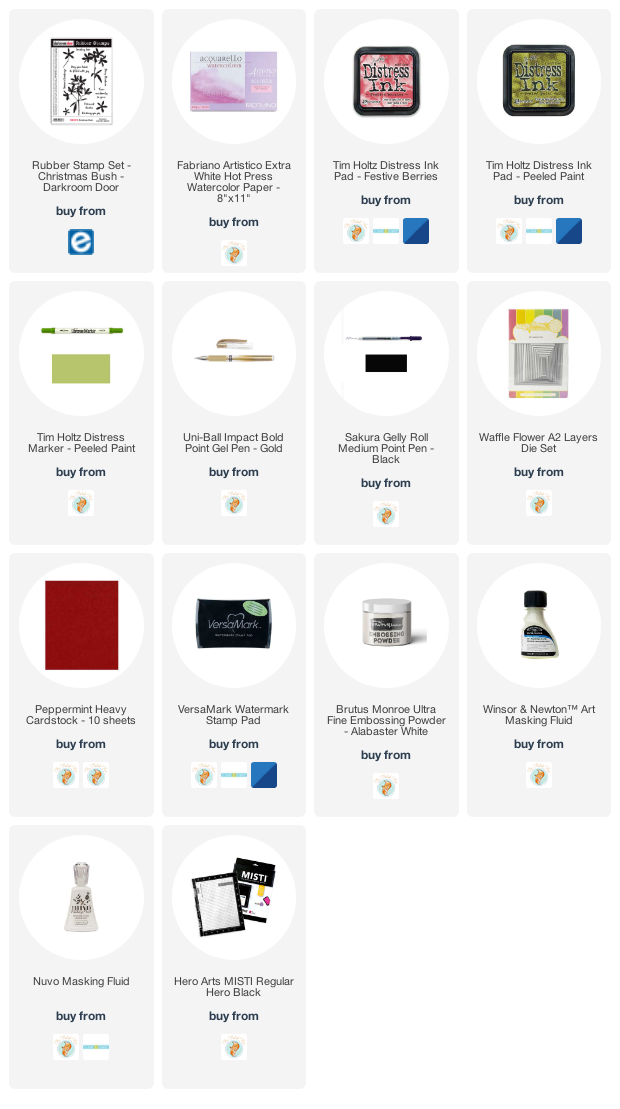
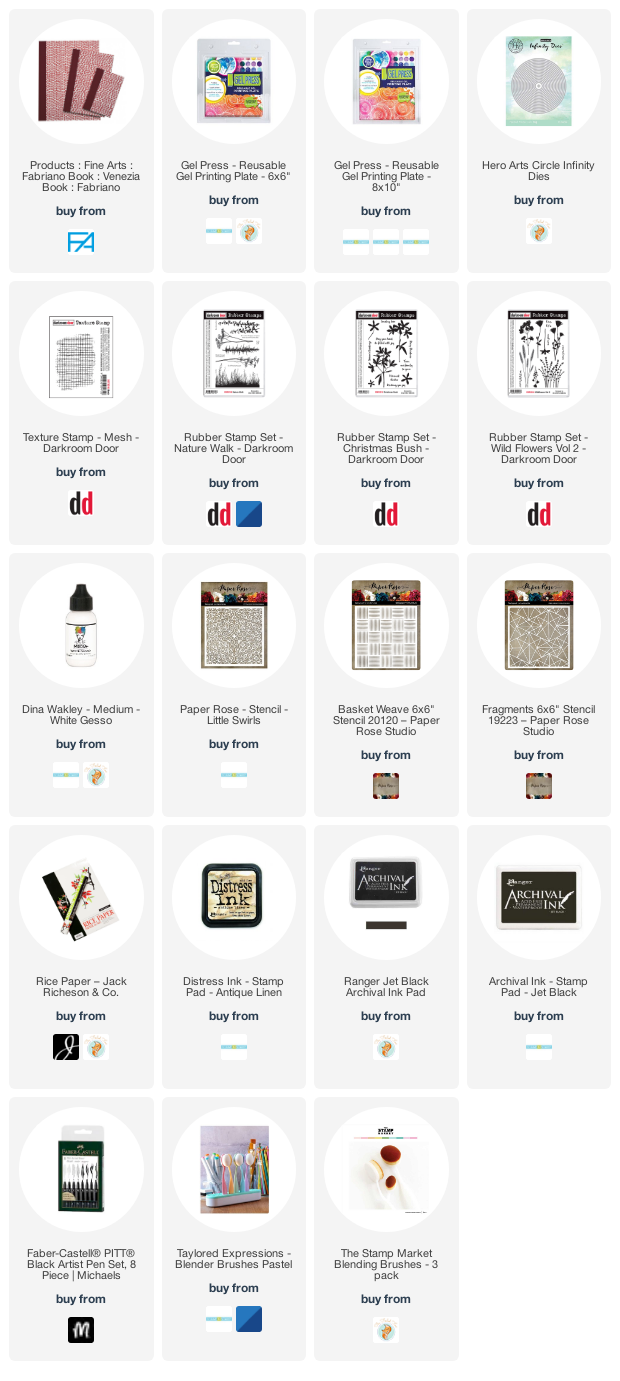
Supplies
(Compensated affiliate links used when possible)
Delighted with Daisies
Posted: March 30, 2021 Filed under: Christmas bush, daisy delight, Darkroom Door, Papertrey Inks | Tags: Darkroom Door stamps, Fabriano Watercolour Paper, Papertrey ink 5 Comments
This is the second card I’ve created with the new Darkroom Door background stamp ‘daisy delight‘. Once again I ended up using the whole stamp because it is just so happy and bright. At some stage I must try cutting a strip or some squares because I’m sure that would look pretty too.
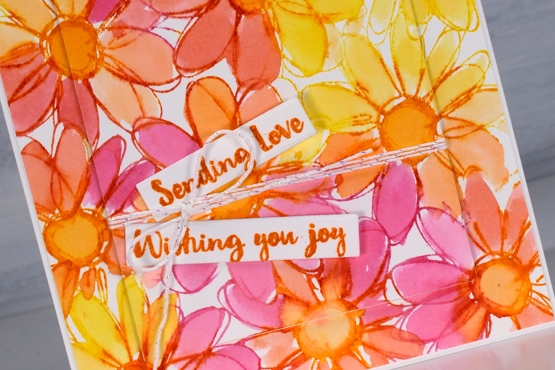
Using the stamp in a positioner with hot pressed watercolour paper I first inked the centres of the daisies with an orange ink cube. I wasn’t careful to ink only the circles; I just gave each daisy a twist of orange ink then stamped. I cleaned the stamp and inked sections with raspberry fizz ink then stamped and finally inked remaining sections with bright buttercup ink. I gave it a spritz of water to help the inks blend before stamping the last time.
To fill the petals I smooshed the same three inks on my glass mat then used a paintbrush and water to paint loosely inside the petals and centres. I also mixed new blends with the pink, orange and yellow inks.
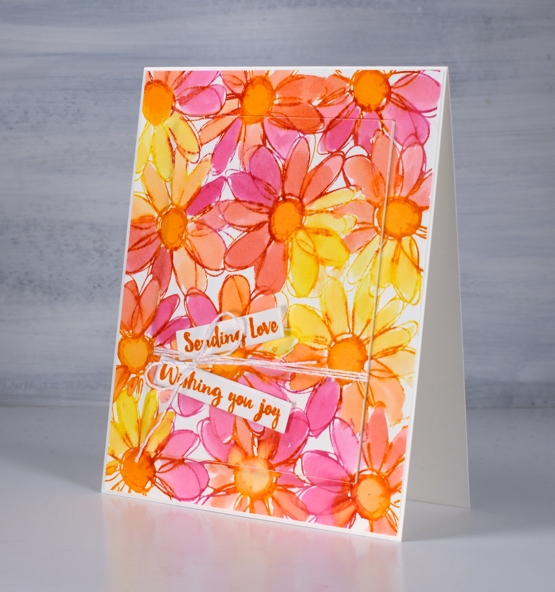
To put the card together I die cut a rectangle from the centre of the panel, popped in up on three layers of cardstock and wrapped some white and silver twine around it before attaching it to the card base. The sentiments are from the DD ‘Christmas bush’ set and they are perfect for many occasions; possibly a birthday this time.
Did you know Darkroom Door has a blog where they post oodles of inspiration for using their huge range of stamps and stencils? They also have a newsletter so you can receive emails full of inspiration.
Thanks for joining me today, see you again soon.
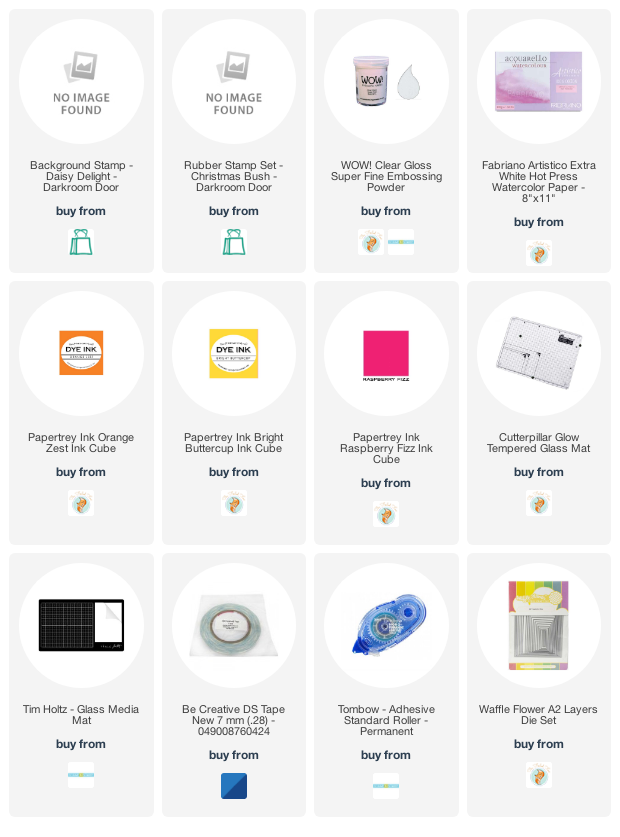
Supplies
(Compensated affiliate links used when possible)
Handwoven
Posted: March 29, 2021 Filed under: Christmas bush, Coliro paints, Darkroom Door, Finetec paints, handwoven, Papertrey Inks, you are everything | Tags: Coliro paints, Darkroom Door stamps, Fabriano Watercolour Paper, Papertrey ink, Stonehenge black watercolour paper 8 Comments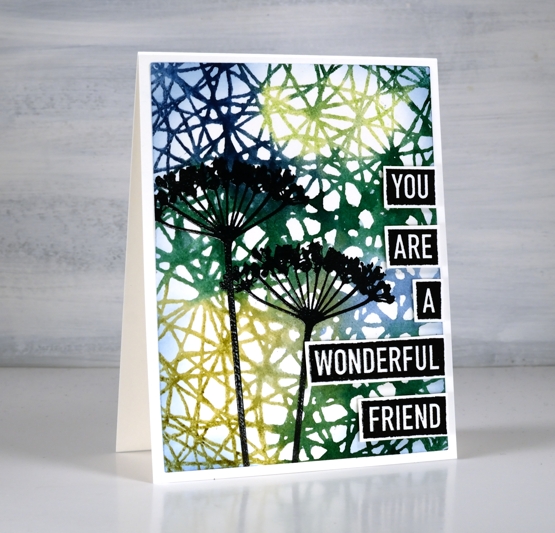
Today’s cards feature the new ‘handwoven’ background stamp from Darkroom Door it two quite different ways.
To create this first card I inked the handwoven stamp with blue and green papertrey ink cubes, spritzed the stamp then pressed it on hot pressed watercolour paper. The result was some green areas, some blue areas and some pretty blended areas where the inks overlap. The blue-green background created a pretty pattern as it was and I could have just added a sentiment and called it complete but I decided to take the risk of adding some flowers. I would understand if you wish I had left it flower free because it is a busy panel but I like the look of a patterned geometric roof or canopy over the flowers.
The flowers are from the new DD set ‘you are everything’ as are the words. The words in this set are great; there are eighteen negative space words that can be stamped and cut out to make countless sentiments. I embossed both the flowers and the words to give them more prominence over the busy background.
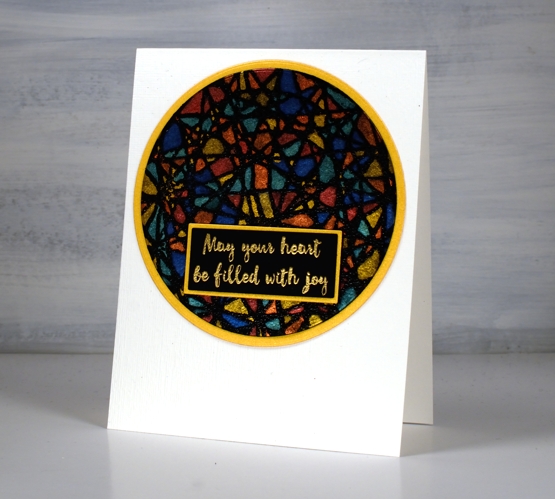
The second card I am planning to use as an Easter card. Filling the spaces of the handwoven pattern with pearlescent paint reminded me of a stain glass window so I looked through my sentiments and found this one in the DD ‘Christmas bush’ set and decided it works for many occasions, including Easter. I stamped the handwoven stamp on black watercolour paper in versamark then embossed in clear powder before painting all the little spaces with Coliro paints and a fine point brush. It did take a while and I didn’t do it in one sitting as the fiddliness factor was high!
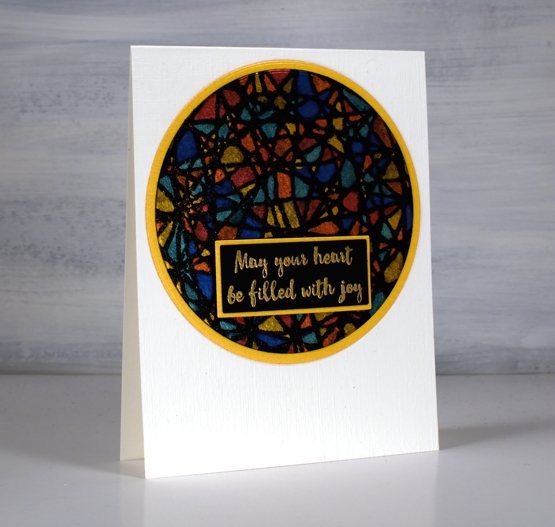
I matted both the patterned circle and the sentiment in gold shimmer cardstock and embossed the front of the card base using the ‘subtle’ embossing folder from SU.
Supplies
(Compensated affiliate links used when possible)
Bloom Art Journal page
Posted: October 26, 2020 Filed under: Art Journal, Christmas bush, Darkroom Door, sketched alphabet, torn text | Tags: Art Journal, Darkroom Door stamps, Fabriano art journal 2 Comments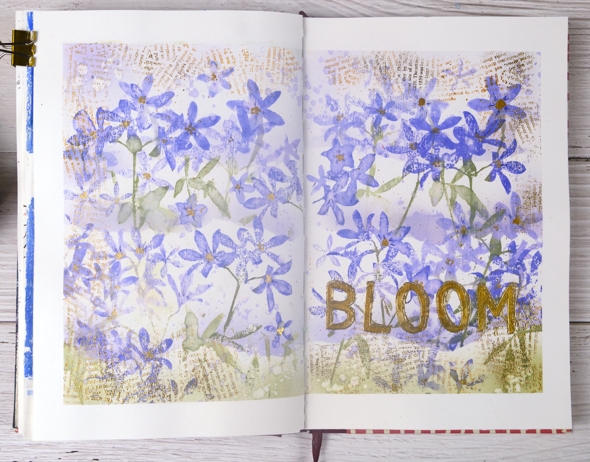
After making a Christmas card with the new Darkroom Door Christmas Bush stamp set I was keen to use the silhouette stamps for a different project. I decided to fill a journal page spread with them and chose a different colour scheme to do so. I think they look a bit like violets.
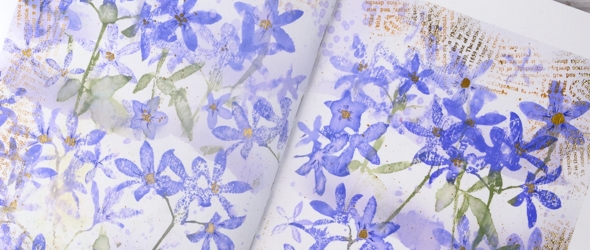
I taped the edges of the pages which frames the layout, keeps the pages flat and protects any pages underneath which are poking out. I painted absorbant ground over the whole area as a base before stamping and painting.
I wanted to have layers of flowers and so I tore a ripped edge on some masking paper and attached it across both pages. I used blending brushes to apply colour over the torn edge then did generational stamping in blueprint sketch, shaded lilac and peeled paint distress inks. Once the top section was completed I masked again, further down the page this time and repeated the process twice.
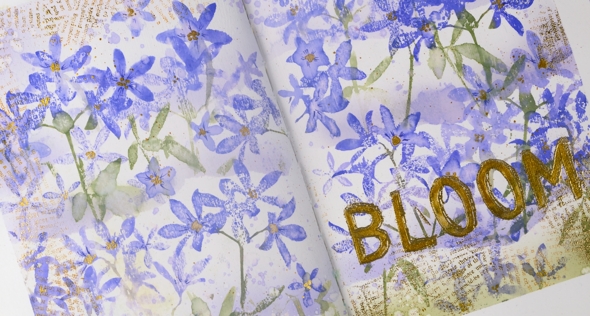
For highlights and details I used markers and gold paint to add details to the petals and centres to the flowers. I also used gold embossing to make a print border and title with the Darkroom Door ‘torn text’ and ‘sketched alphabet’ stamps. The Christmas Bush stamps proved to be very versatile as I thought they would when I first saw them.
Supplies
Christmas Bush
Posted: October 19, 2020 Filed under: Christmas bush | Tags: brutus monroe embossing powder, Darkroom Door stamps, Ranger Distress inks 4 Comments
Christmas Bush is a both a plant that grows in Australia and a new stamp set from Darkroom Door. This is my first project featuring the set but there will be more. I’m not sure if my parents ever had a Christmas Bush in their garden; I don’t remember one in any of my own gardens. I have just read about the plant and apparently it has white flowers which are not that prominent but the sepals grow large and red and they provide the drama.
I worked on hot pressed watercolour paper that I’d splattered earlier with masking fluid. I wasn’t wanting the look of snow; I know the Christmas bush blooms in summer. I wanted the white splatter to add some texture and variation to the design. I started by stamping one of the large sprays of flowers on the panel with plenty of water spritzed on both paper and stamp so it diluted and bled into the surrounding area. Once the background dried I stamped the flowers several times in festive berries and peeled paint distress inks.
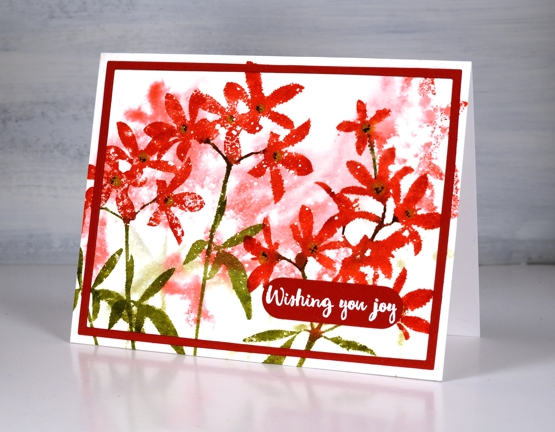
Rather than mat the panel I used two Waffleflower A2 layer dies taped together to cut a narrow frame from red cardstock then embossed a sentiment from the ‘Christmas Bush’ set on the same cardstock.
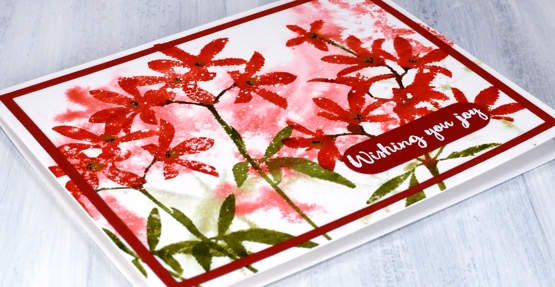
I must admit it was the floral silhouettes that first drew me to this stamp set not the plan of making Christmas cards. Now that I have made one with the bold contrast of red and green I will be designing some more. My dad usually asks me if I’m going to make some Australian Christmas cards because I tend to make many wintery looking ones. Here is my first one for 2020 and it has an Australian theme, so that’s a good start.
Supplies