Bethlehem Mask
Posted: December 4, 2024 Filed under: Bethlehem skyline, Echidna Studios, Finetec paints, gel press, gelli plate | Tags: Echidna Studios, Finetec artist mica watercolour paint, gel press, gel printing 4 Comments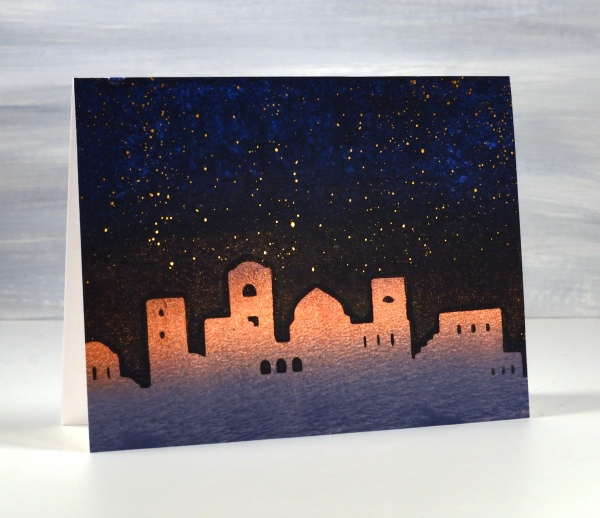
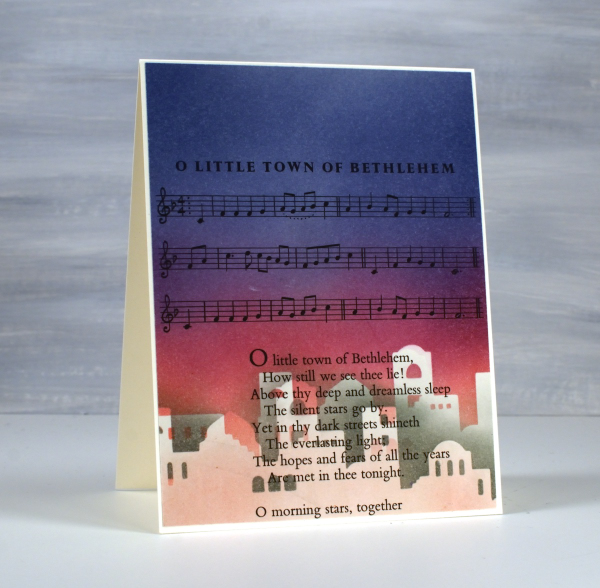
It’s been quite a while since the gel plates have been out of their tins but I was able to do a few prints recently to turn into Christmas cards. I cut a stencil using the Bethlehem Skyline digital cut file from Echidna Studios. To create the scene above I gel printed a blended grey, copper and blue panel. Next I brayered black onto the plate then lay the Bethlehem mask (cut on the Cricut) on the black before pressing the three coloured panel down on the plate. Once I had put the card together I splattered bronze watercolour paint in the sky as stars.
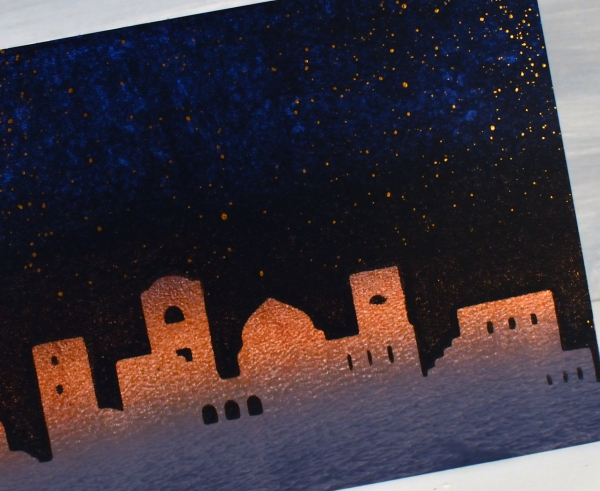
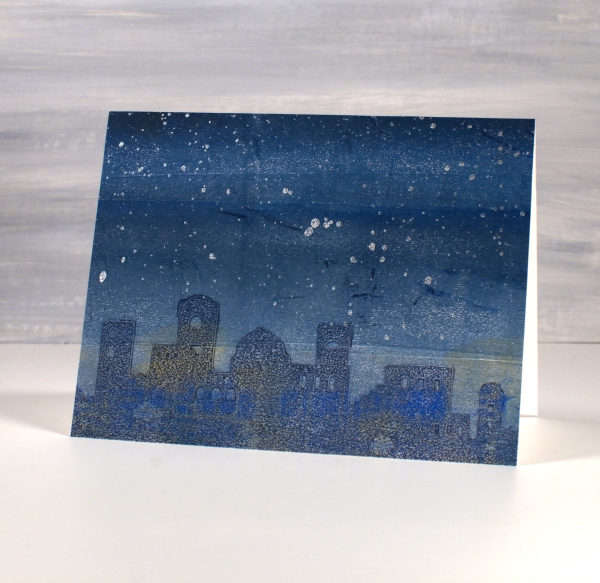
The panel below is less distinct as I pressed the mask into a layer of Paynes grey paint on the gel plate, removed all paint around the mask then lifted it to reveal a shadowy Bethlehem. Once it was dry I brayered blue and gold paints over the top before pulling the print. Once again I added metallic paint splatter to sky, this time lunar silver.
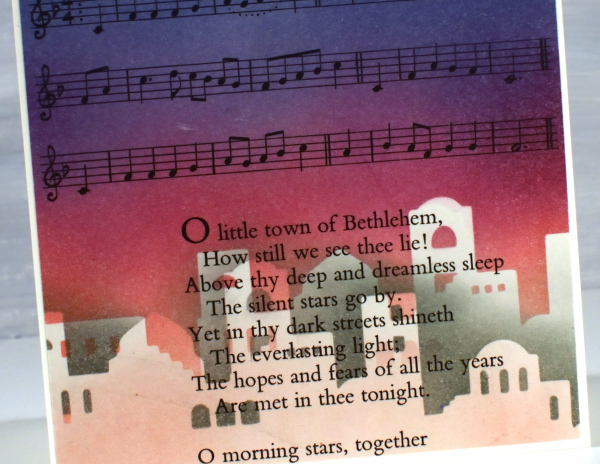
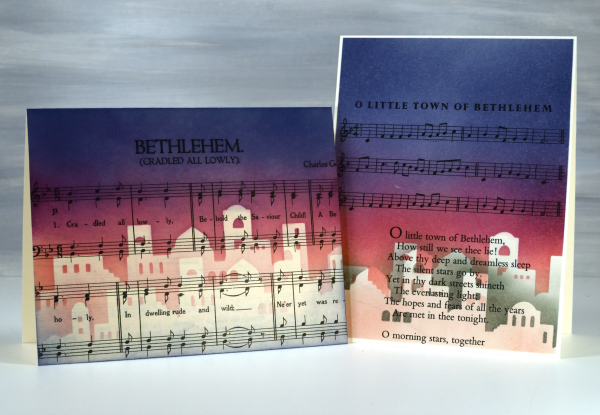
In a similar style to the carol and stencil cards I shared last week I used the Bethlehem mask cut from Matte Dura-lar to blend a scene on two carol panels cut from vintage carol books.

I blended pale peony over the top edge of the mask then switched to seedless preserves, then to chipped sapphire at the top of the panel. To add depth to the buildings I lifted the mask and positioned it below the first silhouette blended with either pink or grey ink
Once again no need for sentiments on the front but I will stamp a message inside.
To see more cards made with this digital set click here. The set includes two versions of the silhouette plus a outline image for printing. Today’s post features affiliate links to The Foiled Fox. If you buy through these links I receive a small commission at no extra cost to you.
Green leaf print
Posted: October 10, 2024 Filed under: Darkroom Door, gel press, gelli plate | Tags: Darkroom Door stamps, gel press, gel printing 3 Comments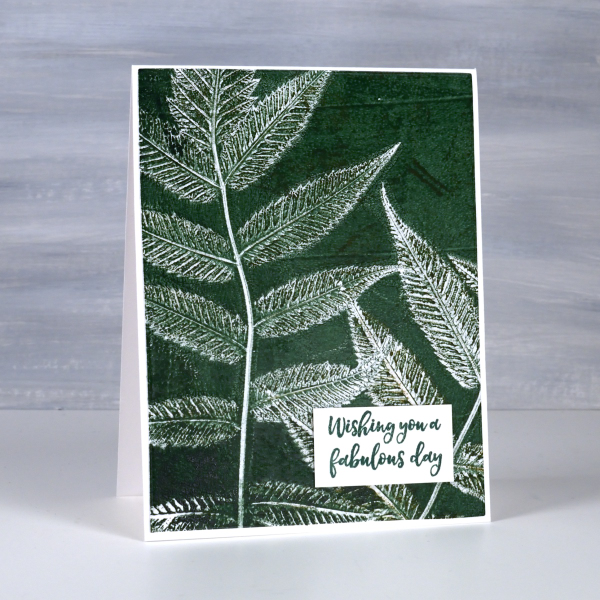
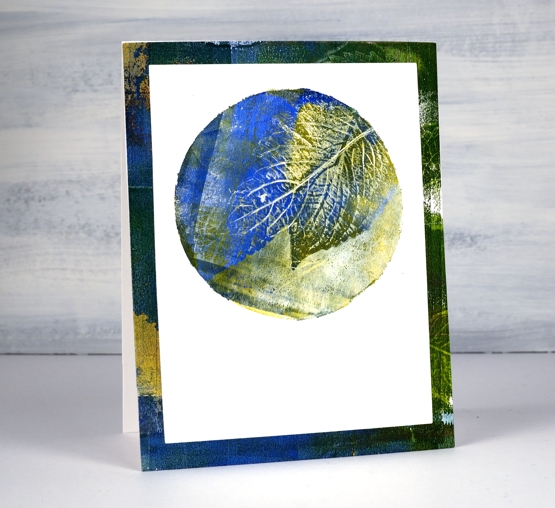
More leaf prints on the blog! Yes, I have a few more leaf print projects to share before I move into Christmas cards. To see the technique for this type of print pop over to my youtube channel and take a look at my last two videos. This plant is called false spirea and it prints very clearly showing all those lovely veins on the back of the leaves.
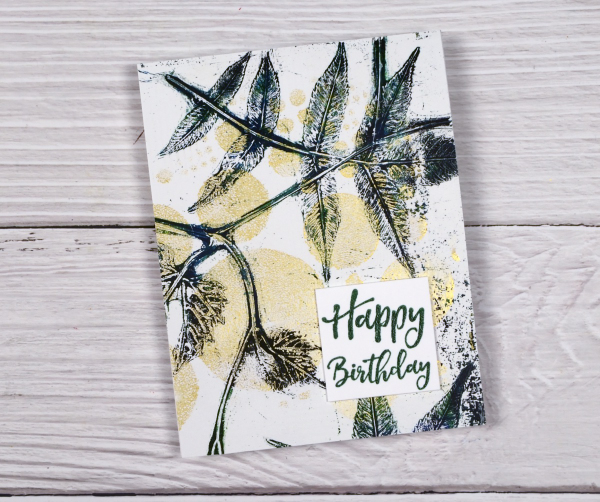
I’ve been playing with colour mixing when using acrylics and watercolours and it is definitely worth experimenting. Adding a little black to a bright green paint gave me a deeper and darker green as shown on this card.

I used this card as a birthday card yesterday as the sentiment from Darkroom Door is useful for any special day. I’ve been thinking that the leaves are late in changing this year. What is it like where you are? We are now seeing some nice reds, yellows and oranges around. Of course after the leaves change they fall so that’s another task coming up in the next few weeks.
Leaf & Stencil print – Video
Posted: July 16, 2024 Filed under: Darkroom Door, gel press, gelli plate, simply perfect mix & match sentiments, Tutorial | Tags: Darkroom Door stamps, gel press, gel printing, Spellbinders, video 6 Comments
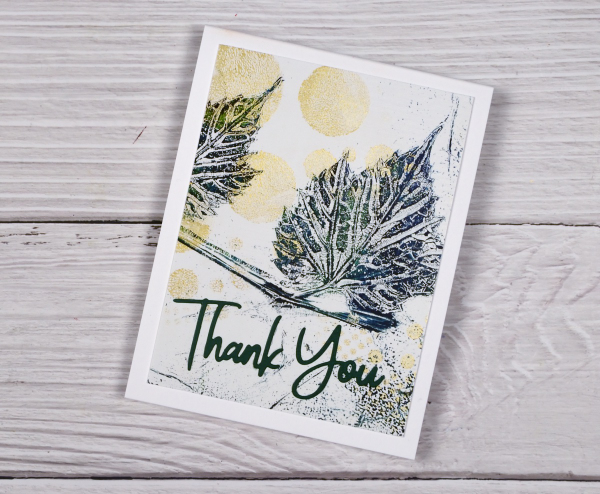
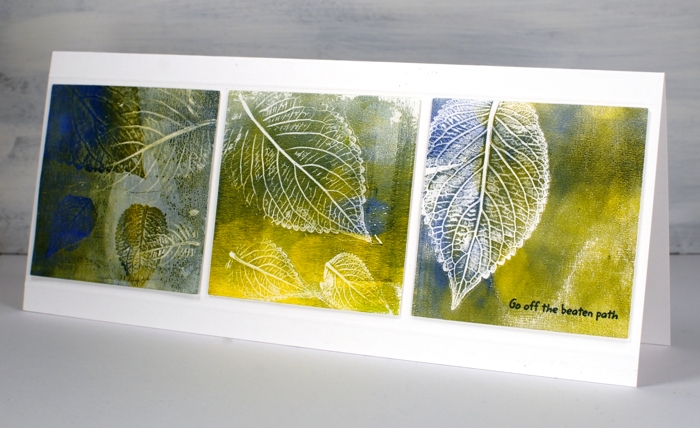
Last week I shared a leaf and lavender gel print video; in today’s video I have added some gold dots through the totally dotty stencil for some shimmer and extra interest. In the video you will see the gel printing process. I turned the printed panel into five cards and I have listed the added stamps or dies below each card photo. I have an in-person botanical gel printing class coming up on Saturday July 27th and there are a couple of spaces left if you’re interested.
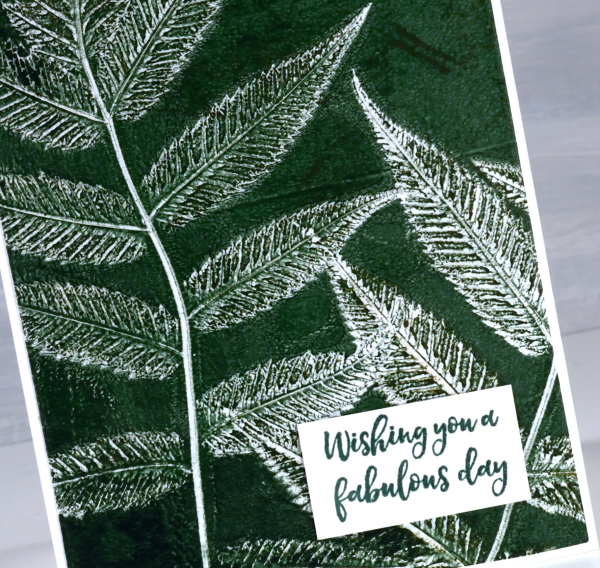
I added a die-cut sentiment in dark green to the panel above using the Spellbinders ‘simply perfect mix & match’ sentiment dies.
Even though I brayered blue, green and black paint very randomly on the plate, I like the way patches of one colour or another appear on the leaves.
To create the card above I embossed a white panel using the Stampin’ Up embossing folder scripty, added a gold mat behind the gel printed panel and added a Darkroom Door sentiment from the ‘happy birthday’ sentiment strip.
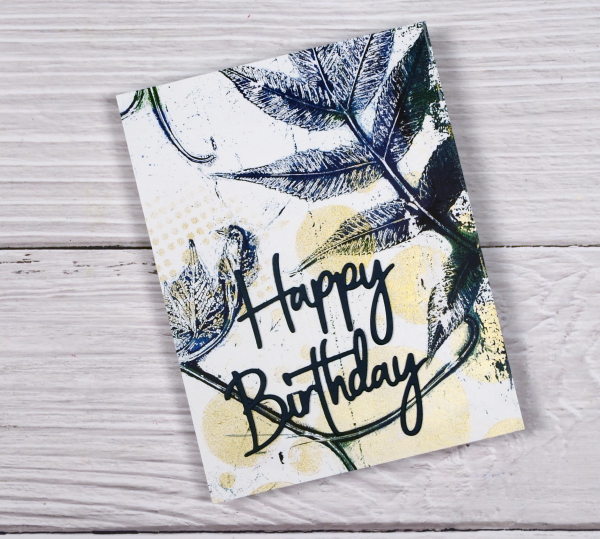
The panel above covers the whole card front and has a stacked green die-cut sentiment from the same Spellbinders set mentioned earlier. I stacked two layers for the sentiment to help it stand out from the stems on the gel print.
Another full card front panel above with a Darkroom Door sentiment. The gold looks shinier in real life but I think you can see some shimmer on both the card above and below.
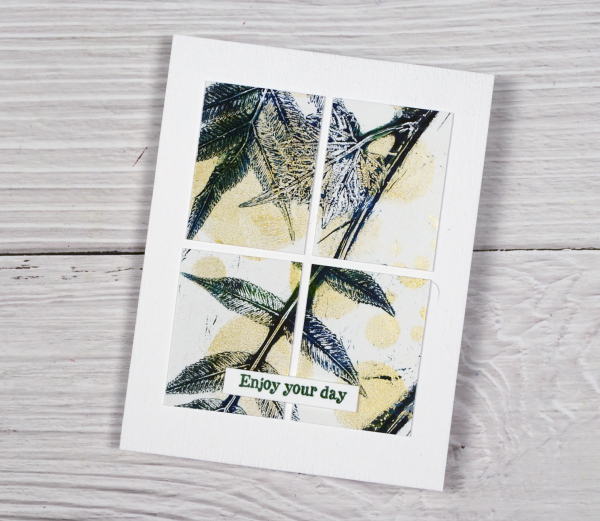
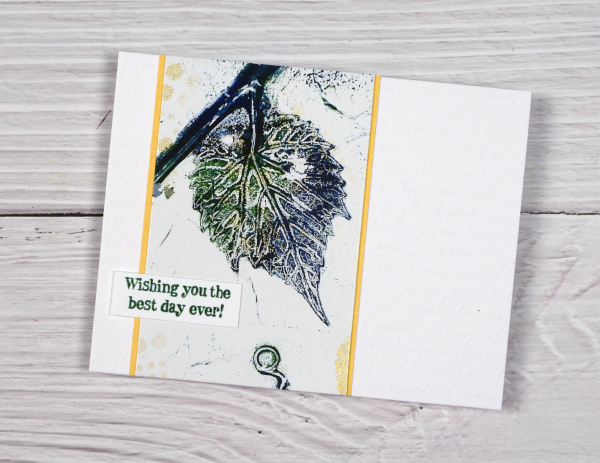
You can cut your gel print panels to any size, sometimes cutting a large shape into smaller shapes is a good way to add interest to a layout. I’ve added another DD sentiment to the card above. I had fun printing the panel and working out how to get the most out of it for cards. I can give these away individually but I think I might keep them together as a gift set.
Botanical Dream
Posted: August 30, 2023 Filed under: Alcohol Ink, botanical dream stencil, gel press, gelli plate, Taylored Expressions, The Crafter's Workshop, The Crafters Workshop | Tags: gel press, gel printing, Ranger Alcohol Ink, Taylored Expressions, The Crafter's Workshop 7 Comments
I think you’ve noticed my love of gel printing. Let me assure you it hasn’t diminished at all. Today’s card features an alcohol ink and stencil print completed on the gel plate then lifted with a layer of acrylic paint.

I’m not sure which alcohol inks I used but I am pretty sure there was a cloudy blue and a brown involved. I’ve learned to like blue and brown combos over recent years which has surprised me a bit. Often we use alcohol inks only on plastic surfaces such as yupo or craft plastic. What I like about using alcohol inks on the gel plate is the way I can lift the print with any paper at all. I plan to make a video showing this technique so stay tuned.

The lovely stencil featured here is called botanical dream from The Crafters Workshop. All the little spaces trap alcohol really well making it a great choice for this technique. I let the stencil sit on the alcohol ink pattern for a while so it dries then lift the print with acrylic paint. I finished the card with a cute greeting from the Taylored Expressions set ‘In & Out Birthday. The set is full of pretty fonts.
My blog features affiliate links to the following companies. If you buy through these links I receive a small commission at no extra cost to you.
Ecstasy Crafts (Ecstasy Crafts offers a discount code heathertecs10 you can use for a 10% discount at checkout)
Dragonfly on text
Posted: April 15, 2022 Filed under: Dies, Dragonfly Frame, gel press, gelli plate, Penny Black | Tags: gel press, gel printing, gelli plate, Penny Black creative dies 4 Comments
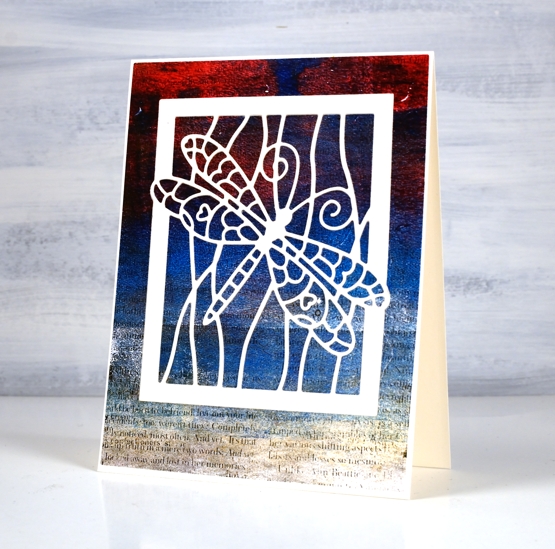
All the coloured sections of this pretty dragonfly are inlaid between the outlines of the cream die-cut! Does it look the same as if I had just glued the cream die-cut over the top? Yes, I’m afraid it does. Perhaps if gel print had been on cardstock the same thickness as the dragonfly it might have been more noticeable. Lesson learned.

One branch of my current gel printing obsession is image transfer. In the past I have tried it mainly with high contrast photos of people but it works with text as well so I added interest to this blue, gold and red print with some black magazine text. I notice now as I stare at the screen the random line across the panel makes it look a little like an ocean view.
While I was painstakingly inlayaing every little bit of dragonfly wing I was listening to the audio book version of The Salt Path, a memoir with many references to ocean views, cliffs, weather and unexpected encounters. The author and her husband hiked the South West Coast path in the UK in rather traumatic and totally unexpected circumstances. I found the whole account fascinating and heartrending in places. By the end I had google maps open so I could see where the path was taking them.
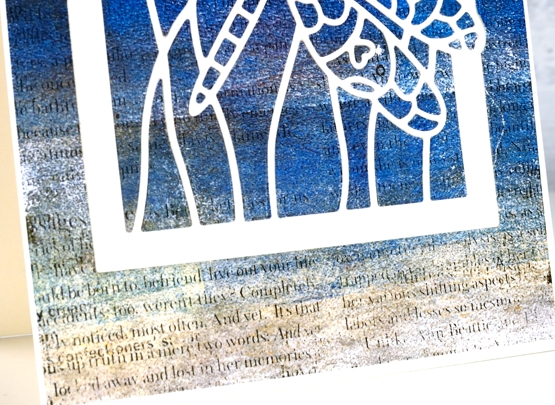
Once again the photos don’t show the shimmer of the finished project. The sand coloured foreground is actually gold paint so there is shimmer spreading half way up the panel. Can you see why I love gel printing?
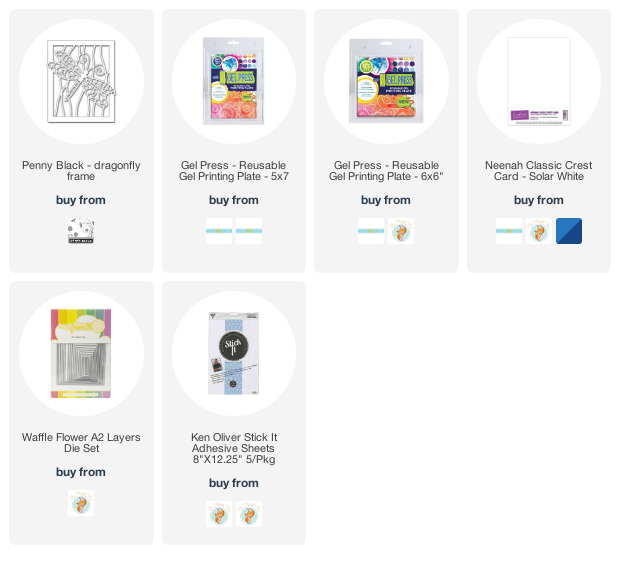
Supplies
(Compensated affiliate links used when possible)
Artful August Circle Journal Page
Posted: August 5, 2021 Filed under: Art Journal, basket weave, Christmas bush, Darkroom Door, fragments, gel press, gelli plate, little swirls, mesh, Nature Walk, Paper Rose, Wildflowers Vol 2 | Tags: Art Journal, Darkroom Door stamps, gel press, gel printing, gelli plate 6 Comments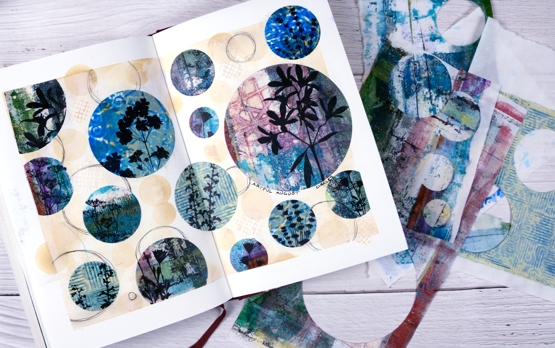
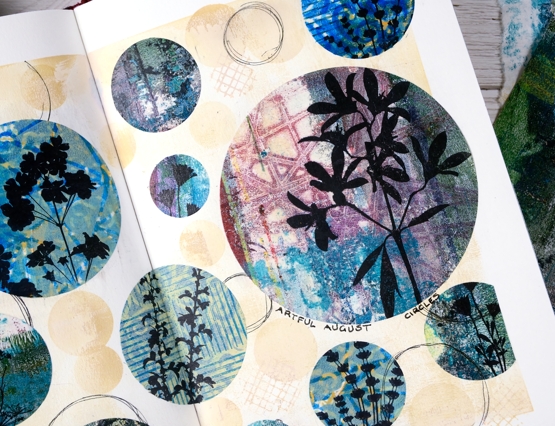
Rachel Greig from Darkroom Door is hosting ‘Artful August’, a challenge to make something arty each day in August. She has provided 31 prompts and I am going to play along as often as I can. Circles was the prompt yesterday so I cut circles from a just few of the many gel print panels I have piling up. I used only gelprints done on rice paper and they cut and adhered very easily.
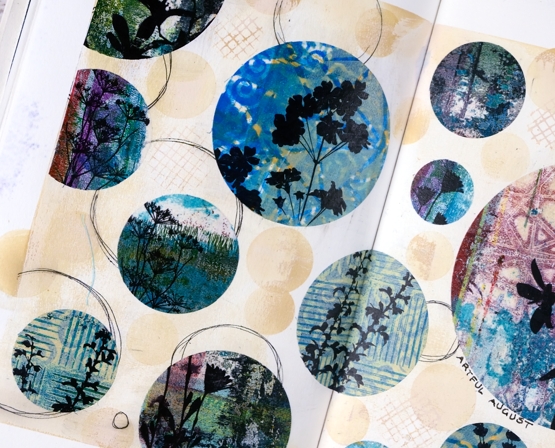
Once I had cut circles in different sizes from different gel printed panels I stamped flower silhouettes from several Darkroom Door sets. Before gluing the circles to the pages I painted the pages with a base of gesso + light brown paint and added some scribbly circles by tracing inside circle dies.

I glued the printed, stamped circles with matte medium both on the back of the paper and over the top to seal it. To add a bit more interest around the circles I blended antique linen ink through a homemade paper stencil.
The prompts in the challenge are very open and participants are encouraged to interpret them in any way and with any medium. If you are on instagram you can view the submissions by searching for #artfulaugust or #rachelgreigartfulaugustchallenge
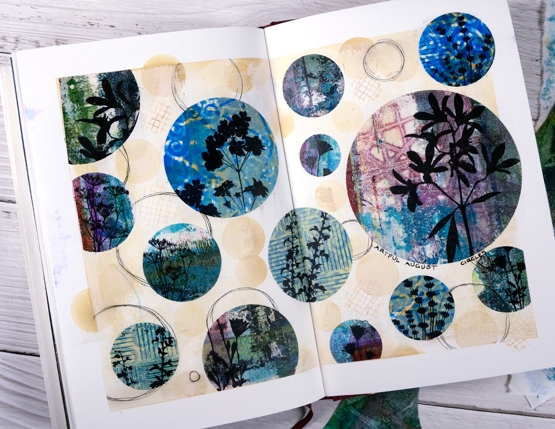
As I participate in the challenge I will have simple experiments along with some completed projects like this one. The fun is simply playing with the prompts. In making today’s journal pages I was very happy to use some pretty scraps, experiments and clean up pages from gel printing sessions. There are always too many to turn into cards but each one has a unique texture and colour mix.
Supplies
(Compensated affiliate links used when possible)
Gel Printing with stencils + video
Posted: July 12, 2021 Filed under: Butterflies, classic cars vol 1, Darkroom Door, fragments, gel press, gelli plate, Heather lowercase stamp set, little swirls, Nature Walk, Paper Rose, Pink Fresh studio, so extra supporting sentiments | Tags: Darkroom Door stamps, gel press, gel printing, Paper Rose, Pink Fresh studio 7 Comments
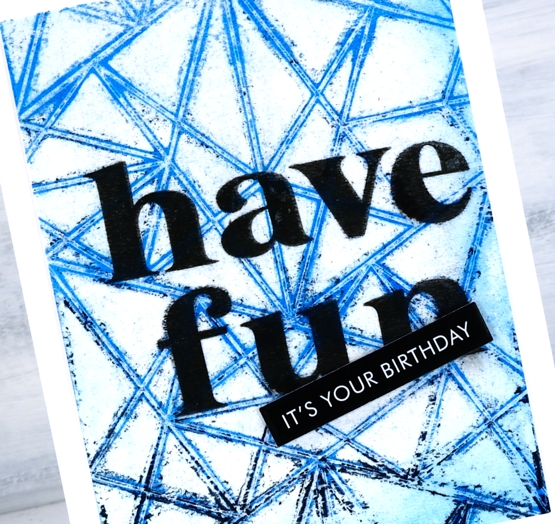
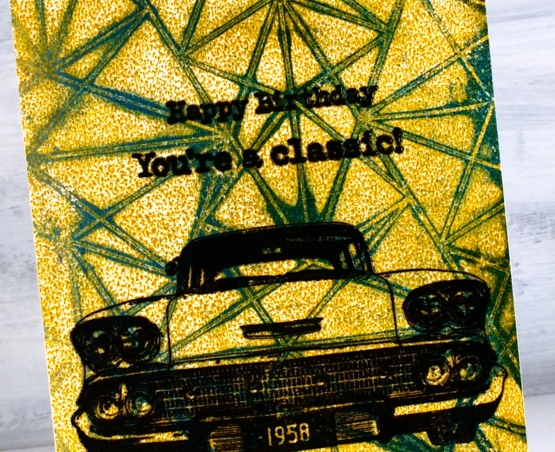
In recent gel printing sessions I have used some of my intricate stencils from Paper Rose Studio. This stencil, ‘little swirls‘ makes a particularly beautiful background. I’ve been printing on a 6″x6″ gel plate with a 6″x6″ stencil but I cut the print down to make a 4¼” x 5½” card.

I used stamps from Darkroom Door’s nature walk , butterflies and happy birthday sets. (all linked at the end of the post). The process for making this type of print is shown in the video below.
After any gel printing session I usually have quite a pile of prints, some become cards but I am hoping to use more in my art journal. I have to be a bit more adventurous in tearing and layering and turning them into more than just a patterned print.
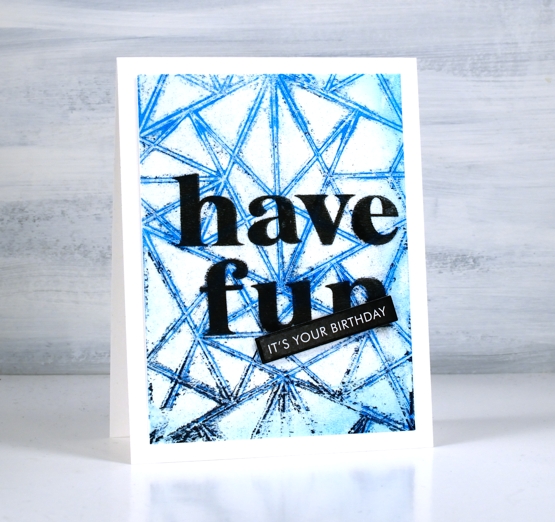
The making of the background above is included in the video. To turn it into a birthday card I stamped ‘have fun’ directly on the print then popped up a sentiment strip on top. The words are stamped in Gina K obsidian amalgam ink using the Pink Fresh Studio ‘Heather’ lowercase alphabet set.
The making of the background below is also part of the video and you can see the mustard paint beaded on the surface of the gel plate making an allover pattern when printed. I didn’t necessarily want the beading but was happy when it ended up uniform. Paints of different brands perform differently on the gel press so experimentation is necessary to work out how much paint and which brands will give you the results you want.
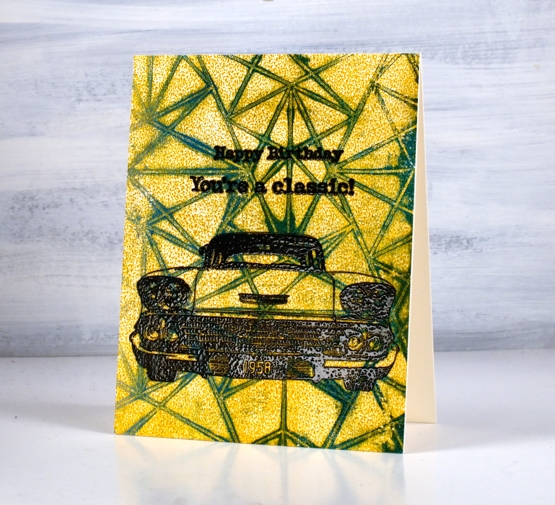
I turned this background into another birthday card by embossing a car from the Darkroom Door Classic Cars vol 1 set along with a sentiment from the same set plus one from the Happy Birthday set.
I also filmed some gel printing with a few textured surfaces from the recycling box; I’ll be sharing that video soon.
I’d love to hear how you use your gel prints; I’m always open to ideas.
Supplies
(Compensated affiliate links used when possible)
Gel Print Leaves video
Posted: August 28, 2020 Filed under: Darkroom Door, gel press, gelli plate, Nature Walk | Tags: Darkroom Door stamps, gel printing, Wendy Vecchi 18 Comments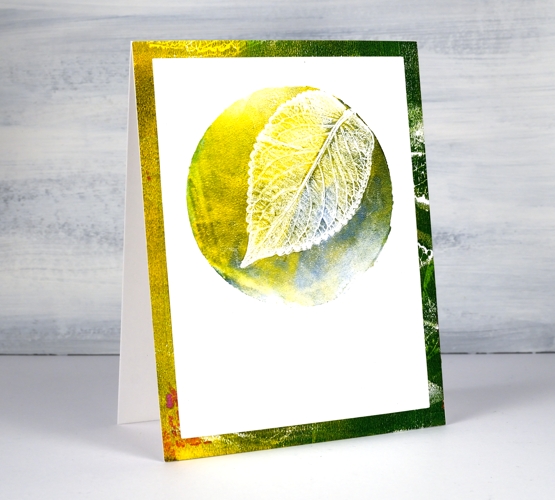
Last week I posted a card featuring gel printed leaves from herbs I grew. I tried to explain my process but a few of you wished for a video so I picked some more leaves and had some fun printing them.
I used two different methods in the video, the leaf printed in yellow at the top of the page uses a two step method. The blue + green leaf above uses three steps and has one technique layered over the other technique.
I think the part of gel printing that gives me most inconsistent results is the way I apply ink. I’m getting better but I still get unwanted lines from the edge of the brayer. That wasn’t so evident on these prints as I was working on little gel plates called ‘petites’ from Gel Press.
I did a bunch of prints for this video on the square and the circle ‘petite’ plates as shown on the top cards. For the ‘slimline’ card I used three of the square prints but die-cut them smaller so I could fit them side by side on a 8¾” x 3¾” card.
I hope you give this a try, it’s quite satisfying and addicting once you get going!

….And did I mention I now have an online class called COLOUR CLUES?…
Supplies
Ferns & friendship
Posted: July 17, 2020 Filed under: Brusho, Butterflies, Darkroom Door, gelli plate, global postmarks, Leaves, mesh | Tags: Brusho, Darkroom Door stamps, gel printing 4 Comments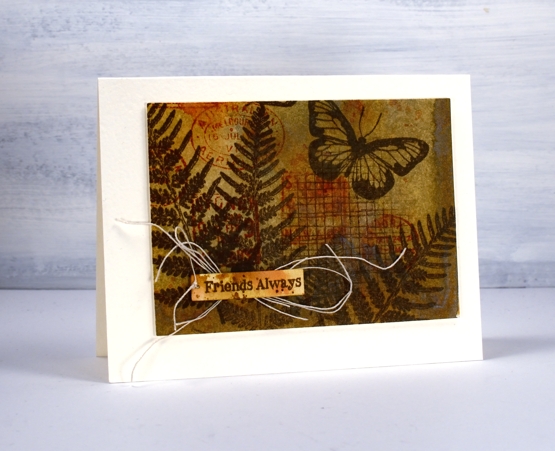
It is a long time since I had my gel plate out for monoprinting; I’m definitely keen, but for the last few months my time has been taken up by an exciting new project I’ll be sharing with you soon. I decided to go through prints from previous gel print adventures to make a few cards with Darkroom Door stamps.
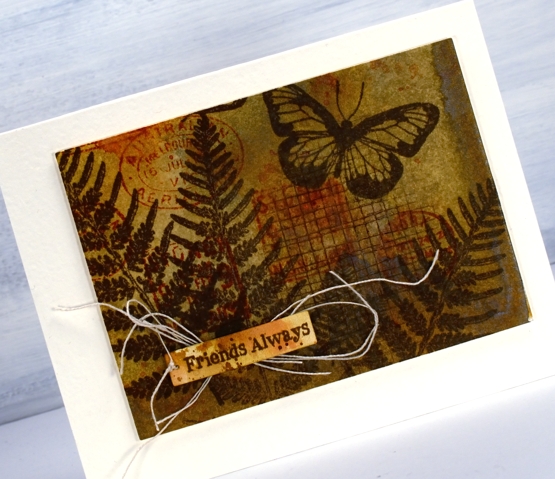
Most often I use acrylic paints on my gel plate but to make this natural coloured background I used water colour powders. I can’t remember which paint colours I used, possibly only one like sandstone which can give a range of browny orange tones. To turn the monoprints into cards I used stamps from DD sets ‘leaves’, ‘butterflies’ and ‘global postmarks’. I also used the small ‘mesh’ texture stamp.
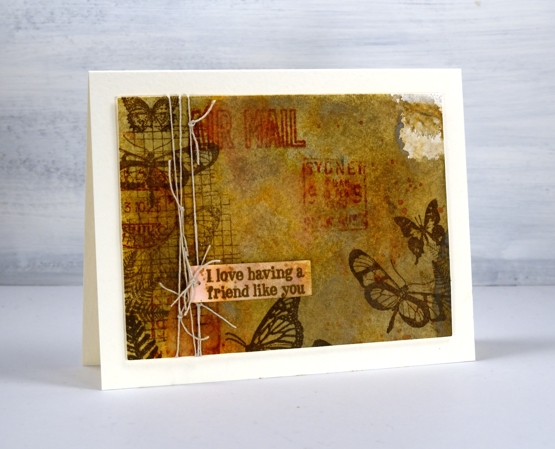
I stamped in ‘vintage sepia’ versafine ink, brushed corduroy and rusty hinge distress inks. Initially I stamped the sentiments from the ‘friendship’ sentiment strips on watercolour paper scraps but they looked too stark and clean so I splattered and swiped some ink on them so they blended into the background a bit more.
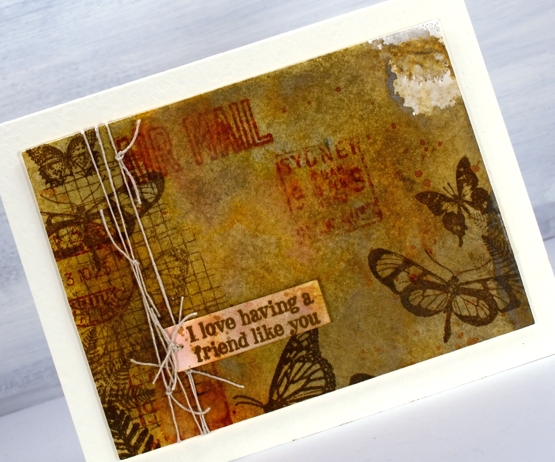
I also added some linen thread which worked with the natural tones and the postal images. I popped up the panels with a couple of cardstock layers on white luxe textured card bases.
Supplies
Classic car
Posted: March 25, 2020 Filed under: classic cars vol 1, Darkroom Door, diamonds, gelli plate, number medley, starry night, Stencils | Tags: Darkroom Door stamps, Darkroom Door stencils, gel printing 7 Comments
I have some mixed media goodness for you today. I know it’s pretty flat and doesn’t involve any fibres or other funky textured things but it is mixed media and currently my favourite mixed media option – gel printing. I spent a day with a friend a few weeks ago, and we printed up a storm on our gel presses. This is one of my backgrounds patterned with Darkroom Door stencils then stamped with DD stamps.

The textures in the background were made with the DD small stars stencil, diamond stencil and some corrugated cardboard. This background was cut from a bigger panel and I chose a section that had a pop of yellow in the corner; it’s only a small thing but it provides some contrast and leads the eye from left to right.
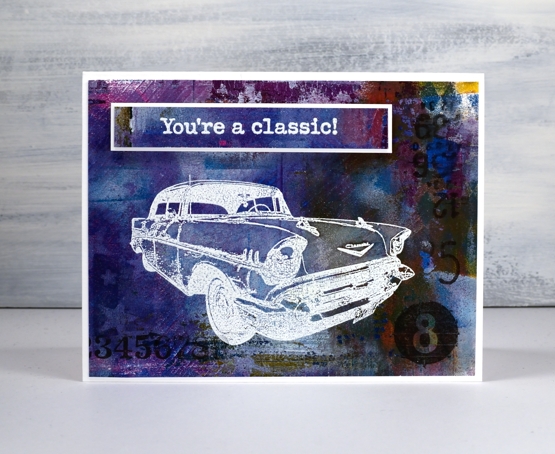
Once I’d trimmed my panel I stamped one of the cars from ‘classic cars vol 1’ in versamark ink and embossed in white. The background is so busy I needed to do something to make the car stand out a bit more so I coloured it with a white pencil which softened the area inside the stamped car just enough to make a difference. I added numbers from the new ‘number medley’ set in black so they would subtle but noticeable. The sentiment also from ‘classic cars’ set is embossed on a strip of the gel print then matted in white and popped up on some foam tape.
Supplies