
Big Leafy Hugs
Posted: September 27, 2021 Filed under: Darkroom Door, French Script, Leaves, scratches, warm wishes | Tags: Darkroom Door stamps, Ranger Distress inks 10 Comments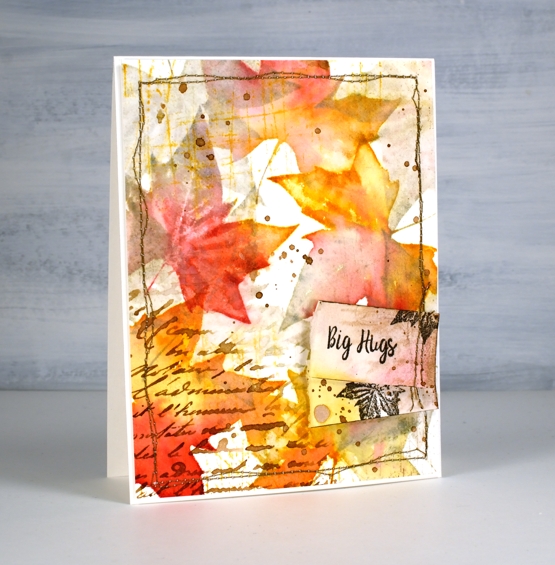
No need to guess where my current inspiration is coming from. I went for three walks last week through the same woods and could see the colours spread over just five days. These leaves are all stamped by one stamp in the Darkroom Door ‘leaves’ set on Fabriano hot pressed watercolour paper. For each impression I inked with a combination of wild honey, old paper and barn door distress inks. After stamping I blended over the image with a pearlescent water mix.
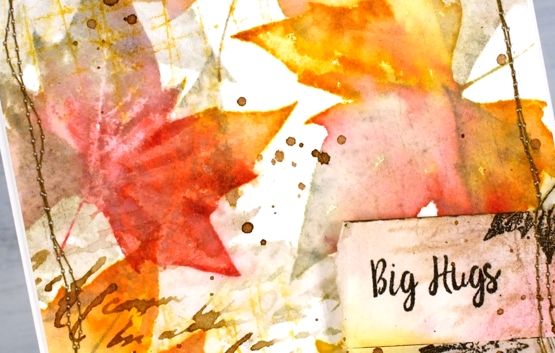
Once I had filled the panel with coloured leaves I stamped over them with the same stamp but just old paper ink which filled the remaining white area with pale leaves. I added more texture with some script, some scratches (both DD background stamps listed below) and some gathered twigs splatter.
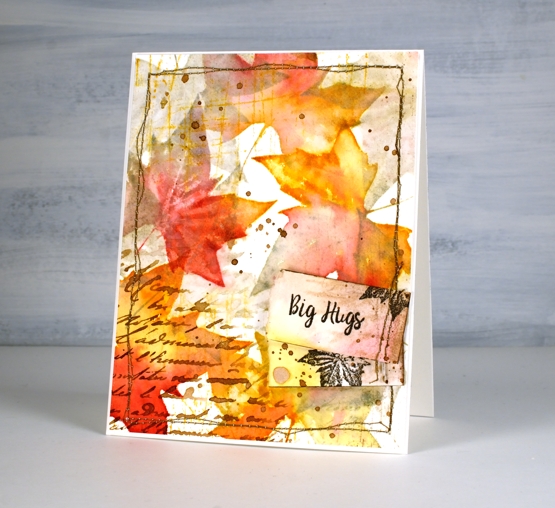
Once the panel was dry I sewed around the edges then made a couple of tags featuring a sentiment from the DD ‘warm wishes’ set and a small leaf from the DD ‘leaves’ set. I hope you see some delightful colours outside this week whether they are autumnal or springy!
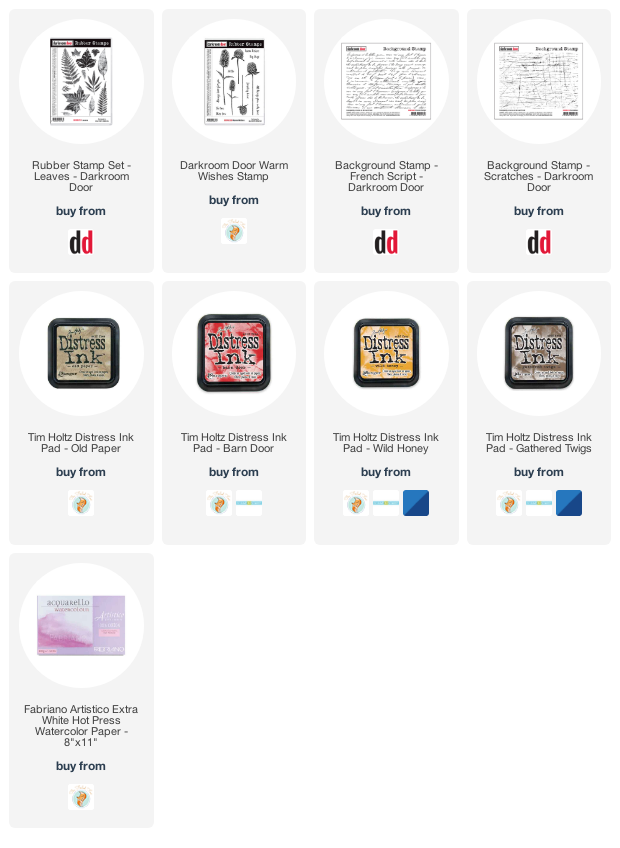
Supplies
(Compensated affiliate links used when possible)
Rustic Birthday
Posted: September 28, 2020 Filed under: Darkroom Door, Leaves, sketched alphabet | Tags: Darkroom Door stamps, Ranger Distress inks, Ranger Distress stains 5 Comments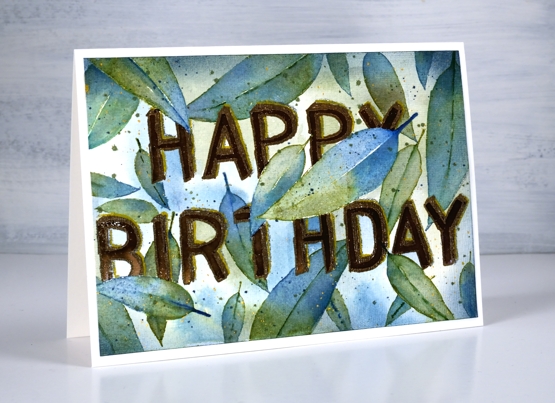
I’ve been creating with Darkroom Door products over the weekend including the new ‘sketched alphabet’ set. I thought the sketched letters looked a bit like pieces of wood which set me thinking about branches and leaves, which made me think of the eucalyptus leaves in the DD ‘ leaves’ set which made me want to have the letters hidden among some leaves, which led to this card.
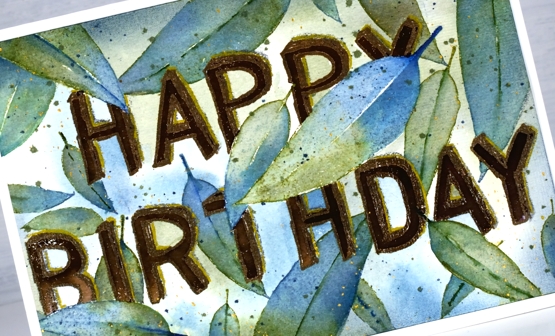
I can tell you it wasn’t a quick card to make. A fair amount of time was taken working out how I would make the concept work. On the back of this panel there is an unfinished attempt which helped me simplify my concept a bit. I stamped all the letters I was using on masking paper and cut them out. Then I stuck them out on the watercolour panel to get the spacing right. I removed a few of the masks and stamped some leaves in faded jeans and peeled paint distress inks, just a few which would appear to be in front of the letters. I stamped the leaves then, masked them and stamped and embossed the letters with versafine vintage sepia. Once the letters were embossed it wasn’t too hard to paint around them with bundled sage and stormy sky distress stains.

Once the background was dry I masked all the letters and leaves and stamped more leaves to fill the panel. I painted all the leaves in peeled paint, faded jeans and forest moss distress inks then added some splatter. After I removed the letter masks I decided to colour them in with a brown marker to make them stand out more. I blended some faded jeans around the edges of the panel to frame the design.
I was just about finished by this point but thought some gold splatter would be nice, which it was, but that led to gold edges on one side of all the letters. There were a couple more steps in there somewhere but you get the idea and I think I would be able to do it faster a second time!
Supplies
Sunflower journal page
Posted: September 23, 2020 Filed under: Art Journal, brick wall, Darkroom Door, French Script, Leaves, mesh, plaid, Stencils, stone, sun, tickets, wildflowers | Tags: Art Journal, Darkroom Door stamps, Darkroom Door stencils, distress oxide inks, dylusions paint 6 Comments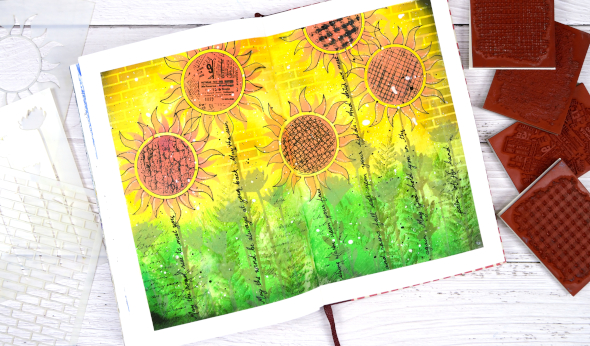
I’ve dones some more experimenting in my art journal with Darkroom Door stencils and stamps. As with some of my previous pages I finished and wished I done a few things differently but on the whole I was happy with the bright, happy look.

I began by taping the edges of the double page with painter’s tape which helps keep the pages flattish and creates a clean frame for the design. I painted the pages with absorbant ground in case I wanted to do some watercolour techniques then, when it was dry I painted the top of the page with dylusions pure sunshine paint and the bottom of the page with a mix of dylusions lemon zest & blue lagoon.
I blended oxide inks through the new small sun stencil to make sunflowers, the small wildflowers stencil to make stems and extra flowers and the brick stencil to fill in background. I also traced inside the flower stencil with a black gel pen to make the flowers stand out a little more.
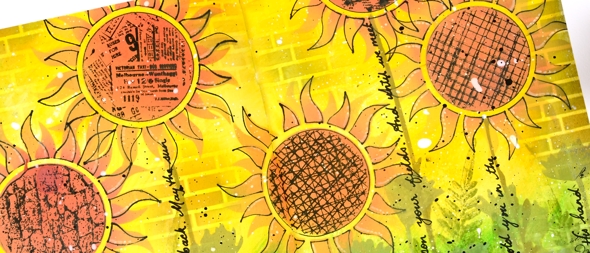
Although I worked mainly with stencils I filled the centre of the sunflowers with texture stamps, added extra leaves around the stems with a fern stamp from the ‘leaves’ set and stamped some script along the lower edge of the page. After adding all the different textures to the centre of the sunflowers, I wished I used the ticket one on all the flowers; it really does look the cutest.
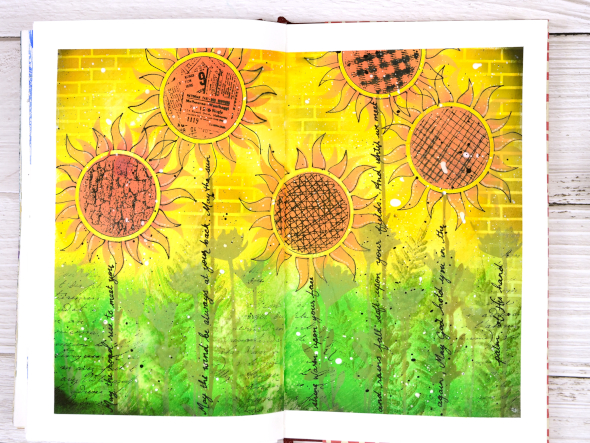
I added splatters of black and white gessos over the panel and wrote the words of the ‘Irish Blessing’ along the sunflower stems. It was the line ‘may the sun shine warm upon your face’ that I thought fitted with the page but decided to include the whole blessing.
There is a collection of fabulous new stamps and stencils in the latest Darkroom Door release so pop over and check them out. You will be seeing more of them around here over the next few weeks.
Supplies
Painting atmosphere
Posted: July 29, 2020 Filed under: Brusho, Coliro paints, Darkroom Door, Finetec paints, Hand painted, Leaves, tall flowers, Wings | Tags: Brusho, Darkroom Door stamps, Faber-Castell Albrecht Durer Watercolour pencils, Fabriano Watercolour Paper, Hand painted 27 Comments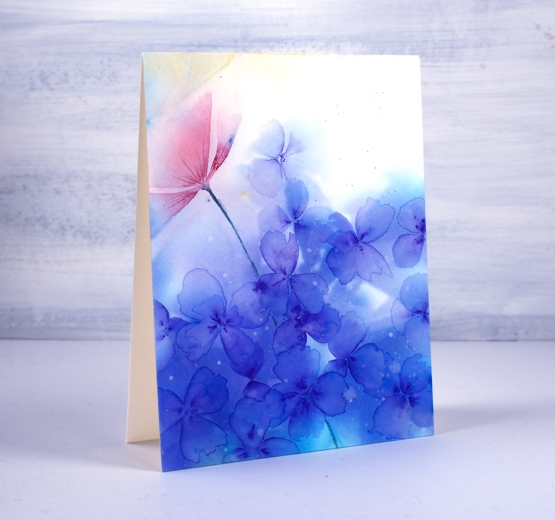
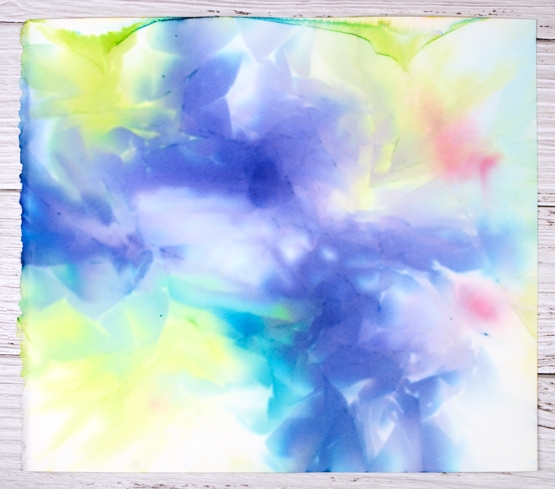
I’ve done some more playing with watercolours and clingwrap. Quite a lot of playing actually; it’s addictive. I don’t even remember if the panel above was painted initially with brusho powders or pan watercolours or both. I do know I started with a large piece of cold pressed watercolour paper taped to a glass mat. I wet the panel then added the paint and let it move around and blend a little before I placed the cling wrap on top. I did remember to take a photo of the panel after it had dried and I’d removed the cling wrap. The card above which looks a bit like some hydrangea flowers was painted on the bottom right corner below.
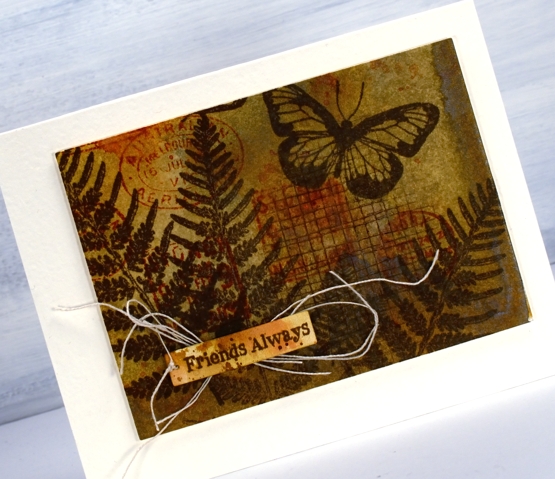
The butterfly card below was made from the top left corner of the large panel and the flower card was made from the top right corner. I did work on the bottom left corner but didn’t end up liking what I’d made.


For the butterfly card I used a stamp from Darkroom Door ‘wings’ set and stamped it on the panel in blueprint sketch distress ink. After stamping I blended the ink plus some pearlescent paint from a finetec palette to fill the butterfly’s wings. It’s not obvious in the photo but the wings shimmer.
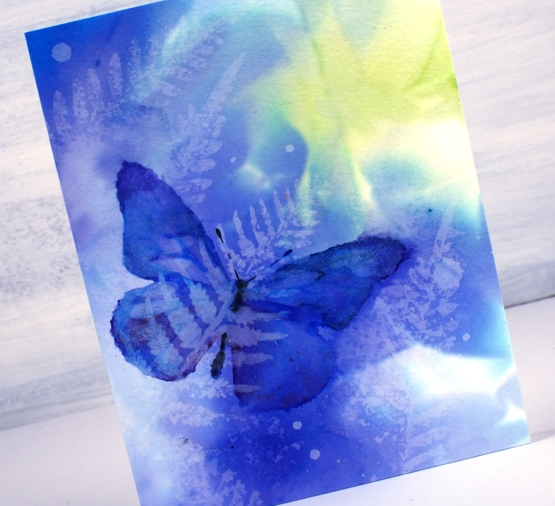
Once the butterfly was dry I did some water stamping using a fern stamp from the DD ‘leaves ‘ set.

The flowers are from the DD ‘tall flowers’ set and were stamped in festive berries, mowed lawn and wild honey distress inks. I also added gold paint to the flower centre. You can see some more water stamped ferns and some second generation stamping with the flowers also. The little circles on all three cards were made just by adding some droplets of water, letting them sit on the panel then dabbing them up with a paper towel.
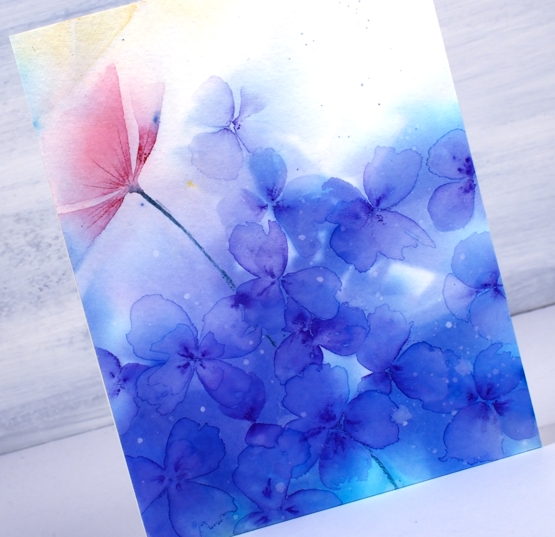
The card above with the purple flowers doesn’t feature any stamping, the patterns made by the cling wrap made me think of a hydrangea flower head so I painted a bunch of little flowers using a purple watercolour pencil to draw centres then a paintbrush and water to blend the pencil into petals. While the petals were still wet I used the pencil again to add some darker areas in the centres.
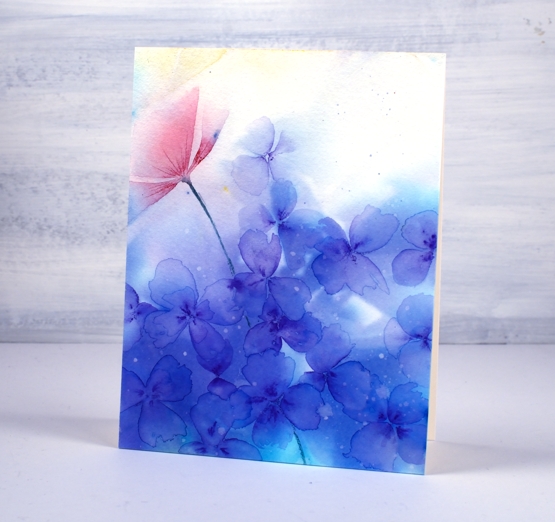
The red shape on the left hand side looked a bit like a flower so again I used a watercolour pencil to add a bit more colour and followed the lines left by the cling wrap.
Whether painting or stamping over the panel, I love the patterns and play of light and dark in the background; I think it creates atmosphere. Have I finished with this technique now I hear you ask? No, definitely not. Have you tried it?
Supplies
Ferns & friendship
Posted: July 17, 2020 Filed under: Brusho, Butterflies, Darkroom Door, gelli plate, global postmarks, Leaves, mesh | Tags: Brusho, Darkroom Door stamps, gel printing 4 Comments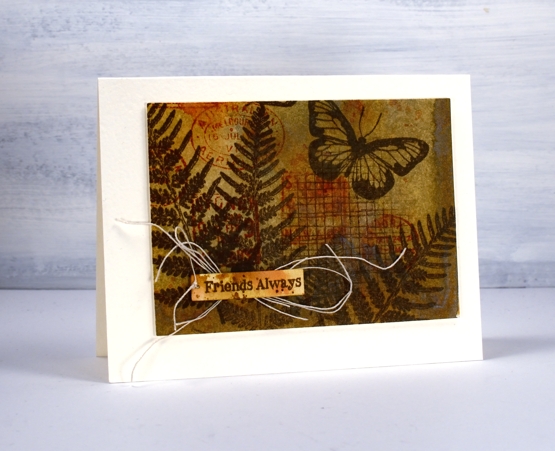
It is a long time since I had my gel plate out for monoprinting; I’m definitely keen, but for the last few months my time has been taken up by an exciting new project I’ll be sharing with you soon. I decided to go through prints from previous gel print adventures to make a few cards with Darkroom Door stamps.
Most often I use acrylic paints on my gel plate but to make this natural coloured background I used water colour powders. I can’t remember which paint colours I used, possibly only one like sandstone which can give a range of browny orange tones. To turn the monoprints into cards I used stamps from DD sets ‘leaves’, ‘butterflies’ and ‘global postmarks’. I also used the small ‘mesh’ texture stamp.
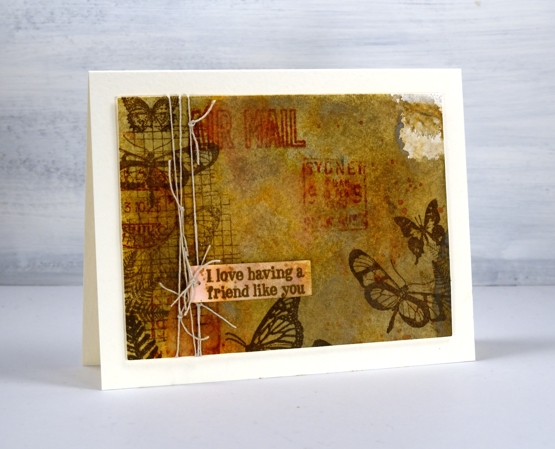
I stamped in ‘vintage sepia’ versafine ink, brushed corduroy and rusty hinge distress inks. Initially I stamped the sentiments from the ‘friendship’ sentiment strips on watercolour paper scraps but they looked too stark and clean so I splattered and swiped some ink on them so they blended into the background a bit more.
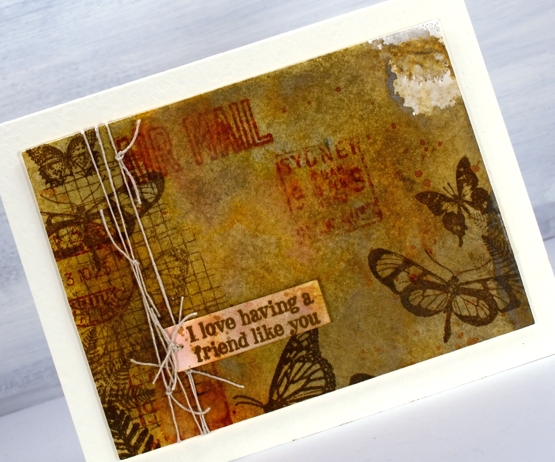
I also added some linen thread which worked with the natural tones and the postal images. I popped up the panels with a couple of cardstock layers on white luxe textured card bases.
Supplies
Tall Flowers
Posted: February 19, 2019 Filed under: Darkroom Door, Leaves, Nature Walk, tall flowers | Tags: Darkroom Door stamps, Ranger Distress inks, Ranger Distress stains 9 Comments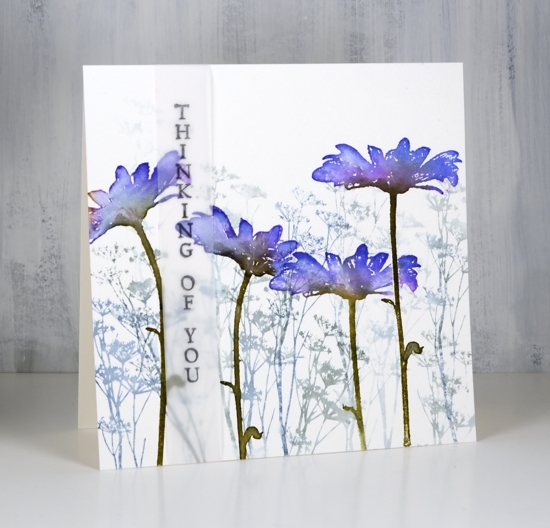
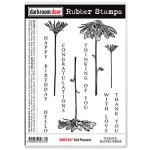
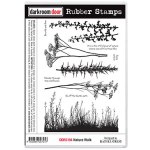
I am excited to feature some new stamps from Darkroom Door today. The tall flowers are from the new ‘Tall Flowers’ set and the background flowers are from the delightful ‘Nature Walk’ set. I am a guest over on the Darkroom Door blog today, if you haven’t visited you definitely should check out all the inspiration shared there.
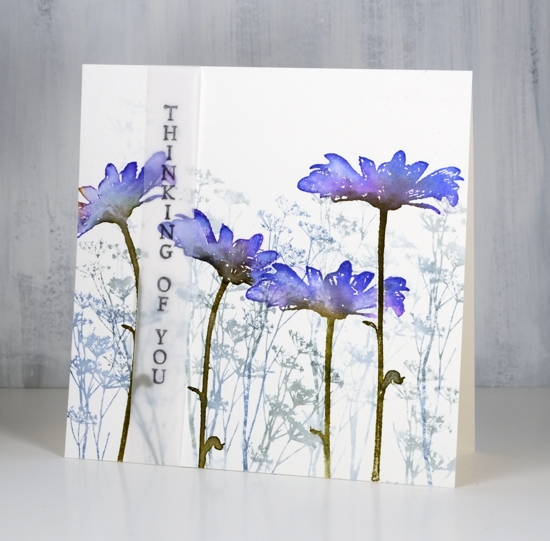
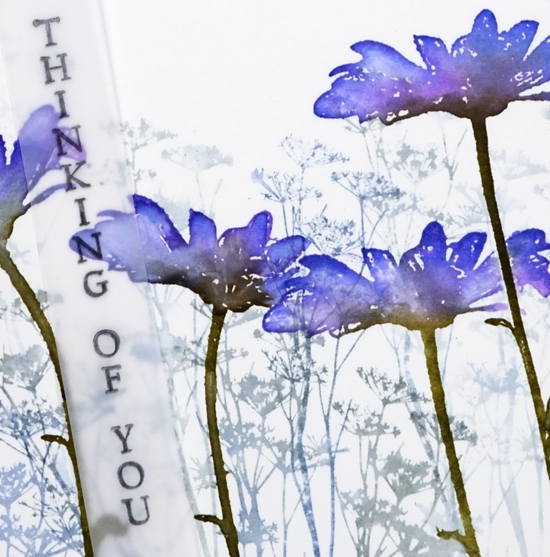
My first card features a cold pressed watercolour panel filled with one of the stamps from ‘nature walk’ set inked in iced spruce and stormy sky distress inks. I diluted the ink with a spritz of water and stamped first, second and third generation impressions. Over the top I stamped the tall daisy from ‘tall flowers’ four times with wilted violet, blueprint sketch and forest moss distress inks. Because the stems are long and thin I was able to orient them in different directions. I used a mask a couple of times to overlap the daisies. Once stamped I blended the colours with a paintbrush and water.
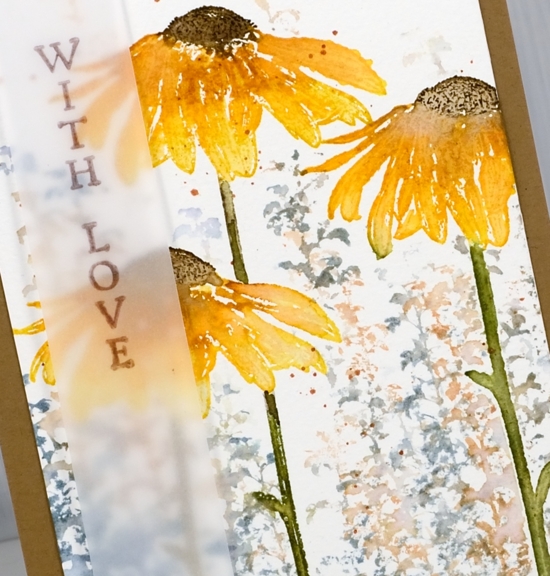
I used a similar process to create the orange toned daisy card but this time I did the background foliage after the foreground flowers by using stamped and cut out masks. The daisies are stamped in peeled paint and fossilized amber distress inks. I added extra colours one at a time with spiced marmalade marker, rusty hinge marker close to flower centre and finally ground espresso marker on the centre of the flower. I blended the inks with water then after it was dry stamped the centres again to add some texture back in. The background stamping is another stamp from the DD ‘nature walk’ set stamped with weathered wood and tea dye distress inks. I added some splatter because, well, why not!
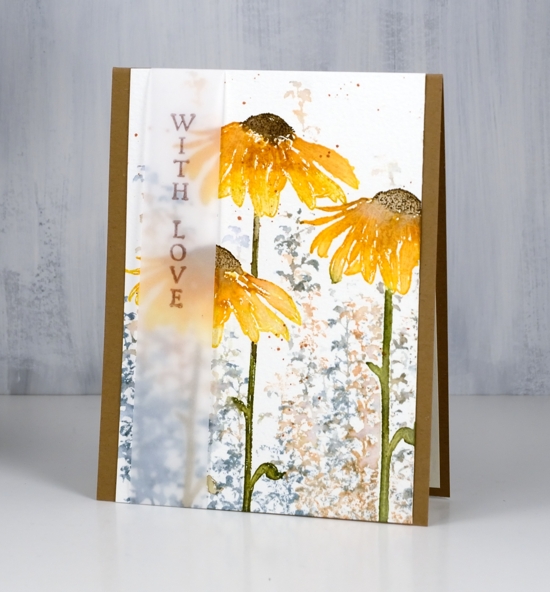
On both the daisy cards I decided to add the sentiment on a vellum strip. I liked the floral scenes too much to stamp words over them so the vellum seemed like a subtle way to do it. The recipient could even snip the sentiment off and have a picture to display if they wanted to. For this tall thin panel I used the kraft card base to frame it on two sides.
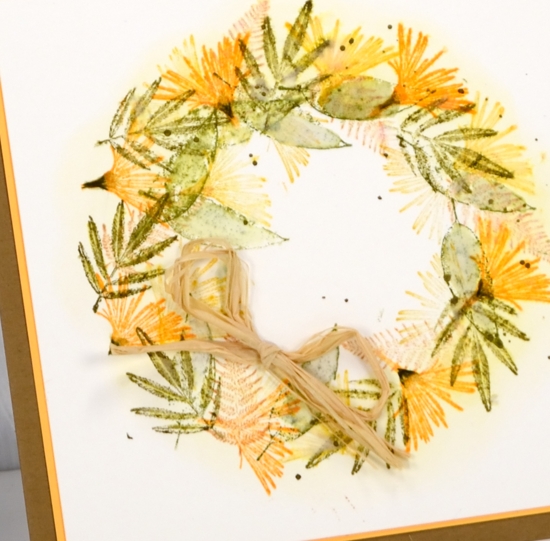
The last card is a little different; I used the small flower from ‘tall flowers’ and some little leaves from ‘leaves’ set to make a wreath.
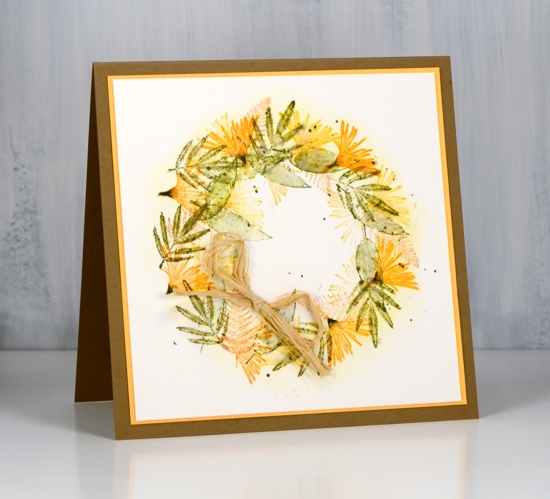
To guide my stamping I traced a circle onto my watercolour panel. I sponged fossilized amber distress ink around circle then erased the pencil line. With the sponging as a guide, I stamped the small flower heads from ‘Tall Flowers’ set round the circle in carved pumpkin ink, holding the stamp so only flower(not stem) was inked and stamped. I repeated the process with small leaves and ferns from ‘Leaves’ set in fossilized amber, peeled paint, forest moss and tea dye distress inks. You know I splattered forest moss ink over wreath because that’s what I do then matted the panel in orange cardstock, attached to a kraft card base and added a raffia bow.
I loved creating with these beautiful tall flower stamps and couldn’t help myself from using the ‘nature walk’ stamps again because they work so well together!
Supplies
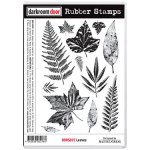
Stamps: tall flowers, nature walk, leaves
Inks: stormy sky, iced spruce, blueprint sketch, wilted violet, forest moss (purple flower card)

fossilized amber, peeled paint, weathered wood, tea dye & distress markers: spiced marmalade, rusty hinge, forest moss, ground espresso (orange flowers)


fossilized amber, peeled paint, carved pumpkin, forest moss, tea dye (flower wreath)
Papers: hot pressed watercolour, cold pressed watercolour, vellum, kraft

Also: stamp positioner, raffia
Ferns
Posted: January 16, 2018 Filed under: ferns, Leaves, Stencils | Tags: Darkroom Door stamps, Darkroom Door stencils, Ranger Distress inks, Tsukineko Stazon inks 4 Comments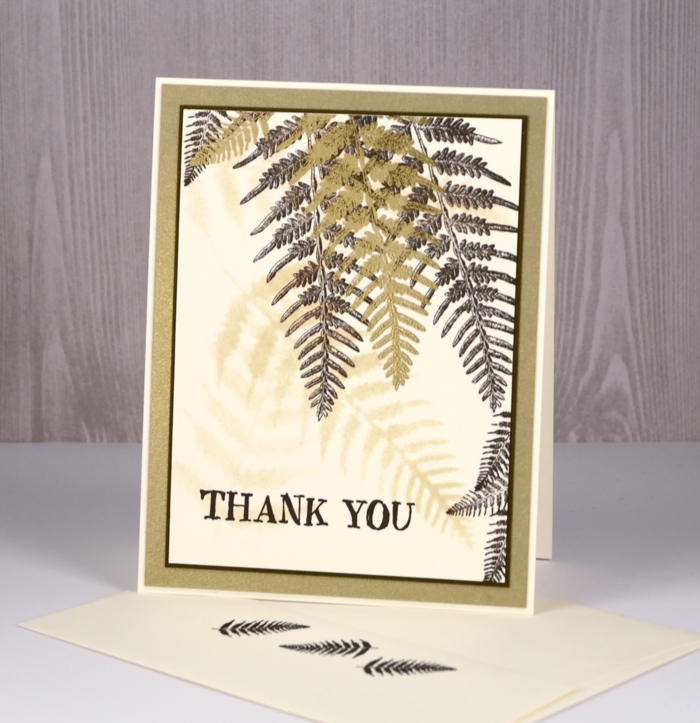
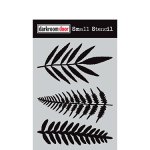
Darkroom Door has a wonderful range of stencils that co-ordinate with quite a few of their stamps. I used the ferns stencil to create a soft background for the fern stamps from the ‘leaves’ set. I used neenah natural white paper and sponged with the antique linen distress ink through the stencil. I did it three times to create a few soft background images.
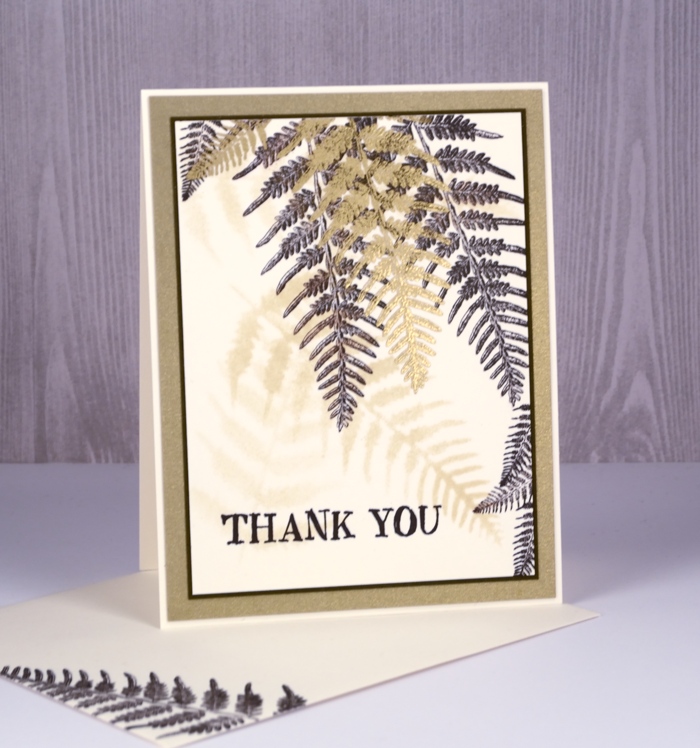
Over the top I stamped both the large and small ferns from the leaves set in stazon ganache ink. I have been pulling out the stazon inks whenever I’m working with the fine details of some of the Darkroom Door stamps. Initially I bought the stazon inks to pair up with my alcohol ink backgrounds but they are very good for fine detail stamping.
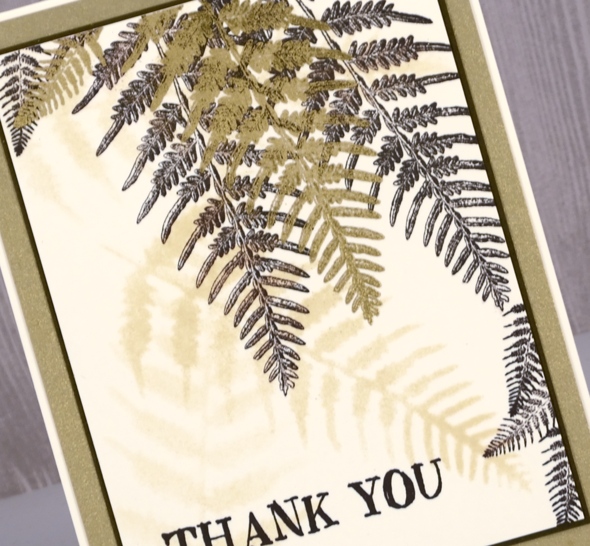
Once I had stamped quite a few ferns in ganache ink I stamped one large fern and one small in versamark then embossed them in gold. The sentiment and ferns on the envelope are stamped in stazon ganache. I added a narrow dark brown mat and a wider brushed gold mat also and attached it all to a natural white card base.
Supplies
Stamps: Leaves, Thank you

Stencil: ferns
Paper: neenah natural white, brushed gold, textured brown
Inks: antique linen distress, stazon ganache, versamark
Also: metallic gold rich embossing powder
Thank you for your kindness
Posted: November 2, 2017 Filed under: Leaves, Woodgrain 22 CommentsIt is nice to be back with my family in Canada, back in my workroom and back on my blog. Before I talk about today’s card, however, I would like to thank you, my blog readers for the outpouring of kindness I received in the comment section last month when I let you know my mother had died. I read every message; my dad did also and we deeply appreciate the time you took and the words you wrote to me and my family. I am grateful for your prayers, your thoughts and your words of understanding. Many of you shared that you have been through the same sadness. All you of you wrote to me with such kindness and concern that I feel very blessed to be part of such a caring community. I waited until I returned home to respond as I wanted to make a thank you card to post here on the blog along with my heartfelt thanks. I’m sorry it isn’t a real life card turning up in your mail box but it is made especially for you all the same. I recognised many names but there were many others who commented for the first time just to extend their sympathy to me; thank you all for taking the time. My father left his thanks to you, my blog readers, in a comment on that post; it is towards the end of the comments section if you care to pop back and read it.
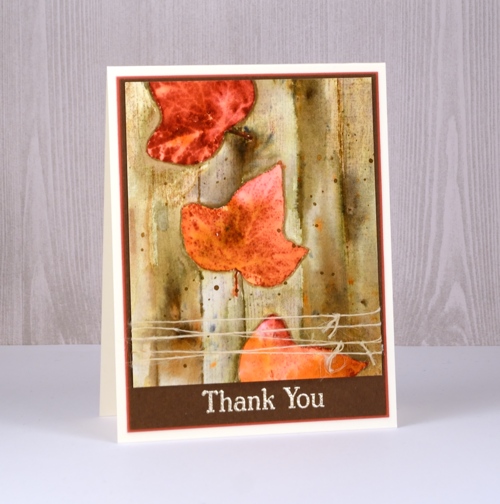
While I was in Australia I enjoyed some warm weather extending my summer by a few weeks. When I returned to Canada I was surprised to find many trees with leaves still changing colour and a yard full of leaves still to be collected. My first full day back was delightfully warm – sandals weather actually – but that seems to be over now; the temperatures have fallen along with a whole lot of rain! My card is inspired by the season here at home and stamped with Darkroom Door stamps. I used a leaf from the Leaves set and the woodgrain background stamp.
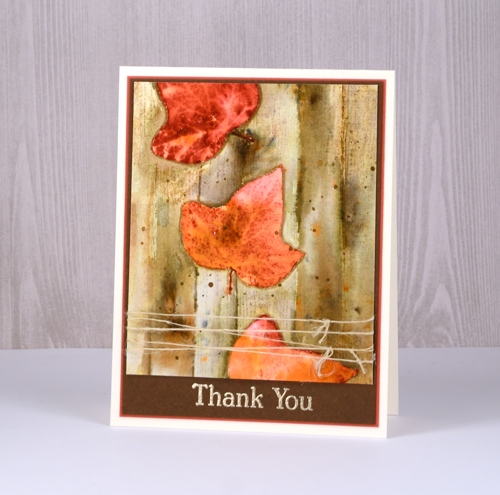
I stamped the leaf three times on hot pressed watercolour paper without re-inking in between, that way I was able to get a dark red, medium and a pale red impression (inks listed below). I stamped the leaf on post-it notes also and cut them out to use as masks. With masks in place I inked the woodgrain stamp in three shades of brown and stamped over the leaves. With all the stamping done I switched to painting using a small watercolour brush and some water to blend the distress inks. As I blended I sprinkled some brusho into the leaves and later onto the woodgrain to add some extra shades of colour and appearance of texture.
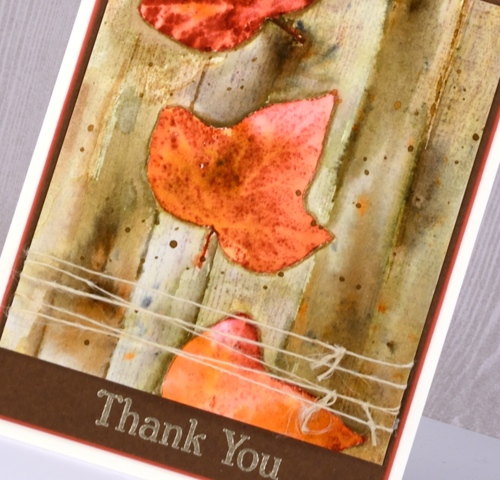
The panel is matted with two different browns and the sentiment stamped then embossed with platinum embossing powder. Its the first time I’ve used platinum and it seems to have co-ordinated well with the brown tones. I hope its one of those magical tones that looks good with a whole range of colours. I finished off the panel by wrapping some vintage French twine around then attached it all to a natural cardbase.
Thank you, again for your kindness; I read through your comments again as I wrote this post and I’m sure will I return to them in the future.
Supplies
Stamps: Leaves, Woodgrain, Thank you (made by Darkroom Door)
Distress Inks: frayed burlap, fired brick, antique linen, vintage photo (made by Ranger)
Paint: brusho sandstone & light brown
Papers: Neenah natural white 110lb, Fabriano hot pressed watercolour paper, brown toned cardstock
Also: versamark ink pad, WOW metallic platinum superfine embossing powder
Watercolour pencil: Faber Castell Albrecht Durer raw umber


