Flowers and Tiles
Posted: April 22, 2026 Filed under: Classes, cricut, Darkroom Door, Rockwell art, Watercolour, wildflowers | Tags: cricut, Darkroom Door stencils, Rockwell art 3 Comments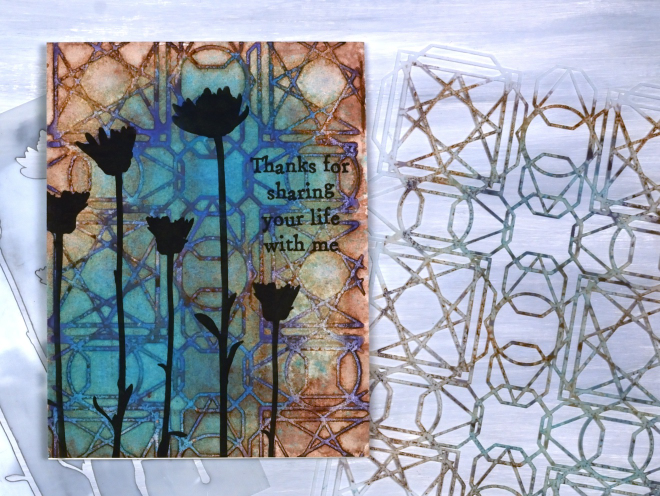
The experiments with watercolour and stencils keep on happening as I prepare for the in-person workshops next week. This one ended up being very satisfying. I designed the stencil to look like Moroccan tiles and chose the paint colours to look aged and stained. I was happy to see those effects in the final panel.
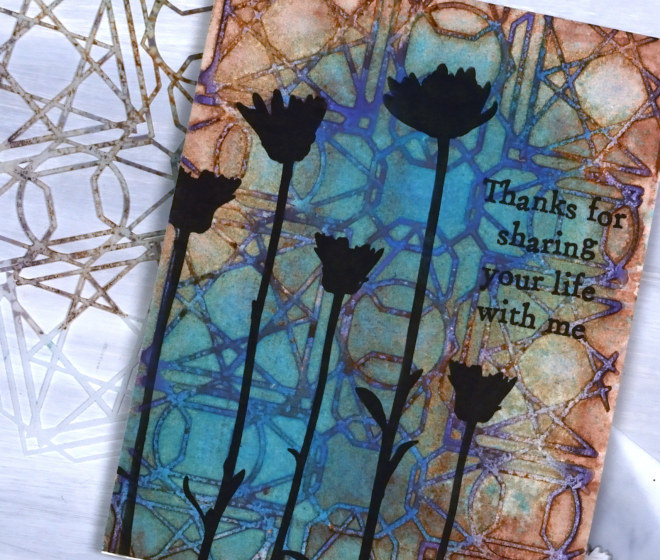
Because the panel looked a bit like a tiled floor or wall I wanted to add flower silhouettes like shadows. I inked through the Darkroom Door small ‘Wildflowers‘ stencil with Gina K obsidian ink and added an AAll & Create ‘everyday sentiment with the same ink.
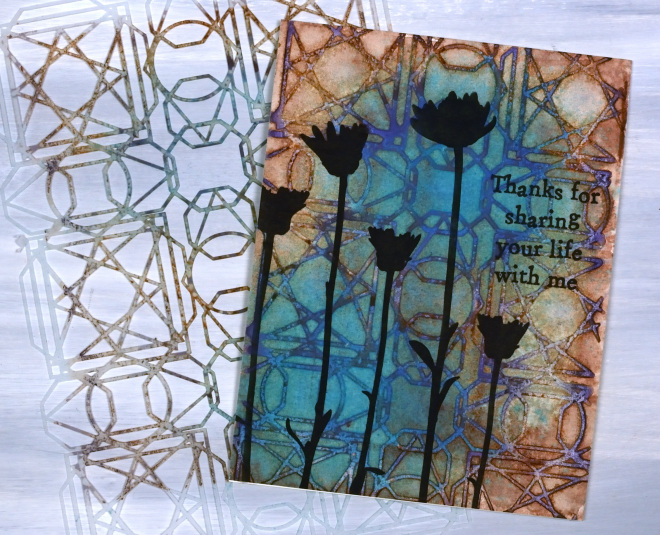
I used a combination of paints and distress oxide spray to get the unique mix of colours. Some of the paints were the Rockwell self evolving mineral watercolours which always give great multicolour effects.
Hats Off
Posted: April 19, 2023 Filed under: Darkroom Door, hat's off, mixed boxes, Penny Black 4 Comments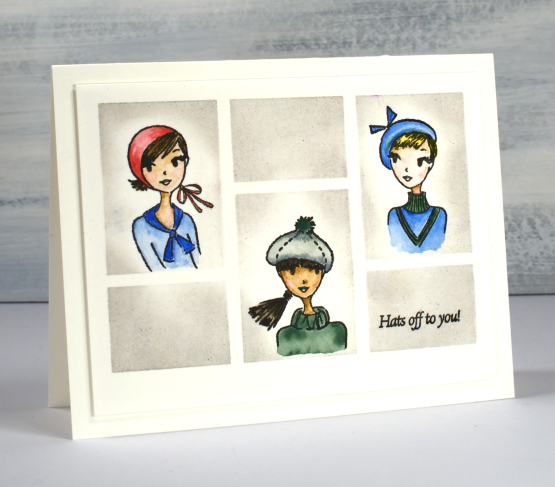
As you know I don’t often stamp, draw or paint people but these cute stamps featuring hats called to me and I decided to feature them in a grid pattern, Brady Bunch style. I taped the small Darkroom Door ‘mixed boxes’ stencil to hot pressed watercolour paper to provide the grid. Working in a stamp positioner I stamped the three hatted women in the large boxes and the sentiment from the same set in the small right hand box using Gina K’s obsidian amalgam ink.

I painted the women in their hats first using Albrecht Dürer watercolour pencils, some colouring directly on the paper and some picking up paint from the tip of the pencil. As I had kept the stencil taped to the panel I was able to blend lost shadow distress ink in the spaces to frame the faces.
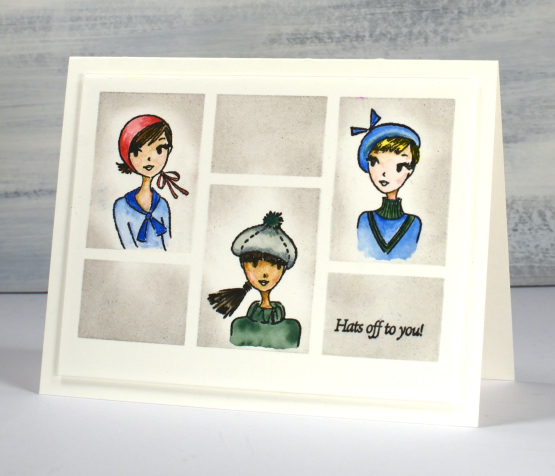
I’m thinking ‘hats off to you!’ might be a congratulatory sentiment. How would you use a card like this with that jaunty little phrase?
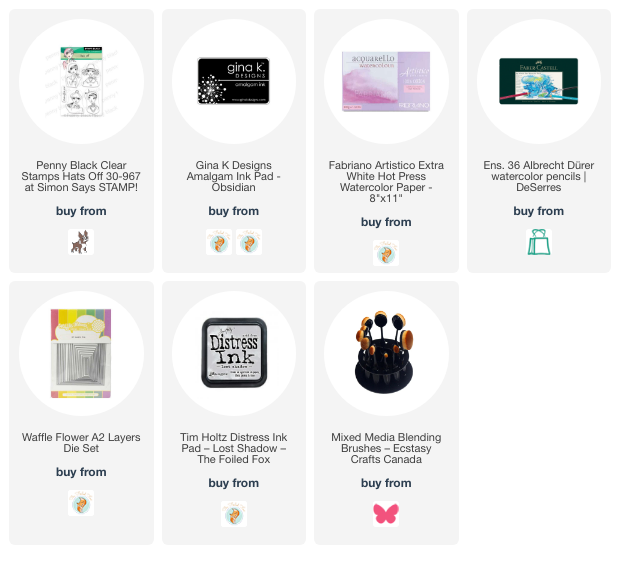
(Compensated affiliate links from Foiled Fox)
Darkroom Door Eyes
Posted: April 14, 2023 Filed under: Art Journal, Darkroom Door, eyes, Flower garden, French Script, gel press, Handmade book, made for you, spanish tiles, starry night, Stencils, you are everything | Tags: Art Journal, Darkroom Door stamps, Darkroom Door stencils, gel press, gel printing 4 Comments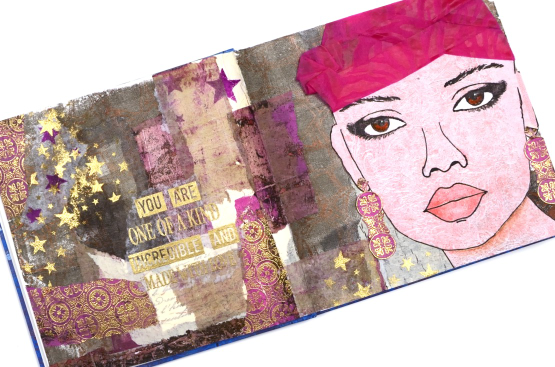
Are you surprised to see a face on one of my projects? This journal page spread was definitely outside my comfort zone but I am very happy I persevered and brought it to completion. The page began with the new ‘Eyes’ stamp set from Darkroom Door and a pile of gel prints. There are eight pairs of eyes in the set in a couple of different sizes. I chose to stamp the eyes on a pale gel print done with oxide inks and the DD background stamp ‘flower garden’. To help me draw the rest of the face around the eyes I found a magazine face with similar size eyes and that gave me the right scale and placement as I completed the head and features.
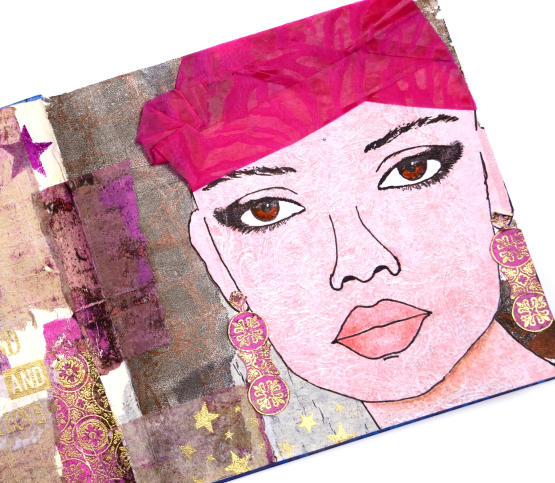
Although I like the idea of adding hair I decided to do that on a future project and used some textured wrapping from a bunch of flowers instead. The bright pink helped me choose other gel prints to complete the background collage. You might not see them all but DD background stamps and stencils are featured on most of the torn collage pieces.
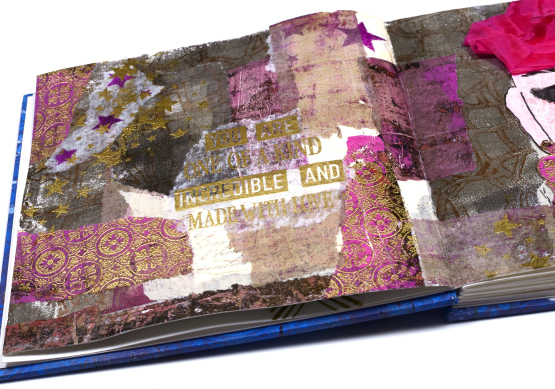
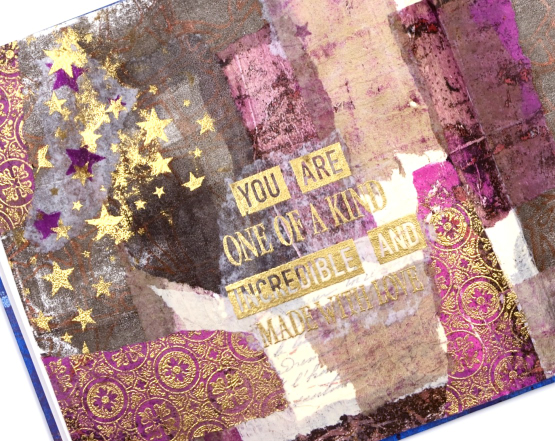
I embossed the Spanish tiles background stamp on a bright pink gel print, tore it up for collage and attached a strip to cardstock so I could cut earrings. I also used gold embossing when adding the words. I alternated phrases from the DD ‘you are everything’ set with the new DD ‘made for you’ set.

I worked in my new handmade journal which is 7″x7″. Once I had the facial features pencilled in I went over them with marker then added shading with coloured pencils. I also stenciled some stars over the collage and embossed in gold to give the whole spread more unity. The pink turban was a bit of a challenge which ended up looking a bit more like a swim cap than a turban but you get the general idea don’t you?
I will be using the eyes again both to practice drawing faces and as elements in future journal pages. I hope you are enjoying seeing the new stamps from Darkroom Door; they are always full of the artistic magic and clever ideas of Rachel Greig.
(Compensated affiliate links from Foiled Fox & Scrap n Stamp)
Time Art Journal page
Posted: March 6, 2023 Filed under: 6"x 6" journal, Art Journal, Darkroom Door, diamonds, gel press, ransom alphabet, starry night, Stencils | Tags: Art Journal, Darkroom Door stamps, Darkroom Door stencils, gel press, gel printing 4 Comments
This journal page is unlike many of my other pages but contains some of my favourite papers and techniques. What you can’t see is the design I started underneath about a year ago. It had the look of a watercolour sunset but everytime I flipped to that page I didn’t know what to do with it; eventually I covered it up completely.
This is the same as the 6″x6″ watercolour paper journal I use in my Art Journal Adventure workshops. The clock and the starry sky background are gel prints. I did them quite a while ago but because of their size I didn’t know how to use them. The clock was 7″ across before I cut it. It’s an image transfer from a Tiffany’s catalog which arrived at my house for no reason. I don’t have anything from Tiffany’s but I can tell you the images in that catalog are perfect for gel print image transfers! The starry sky was also a large print made with large stencils from Darkroom Door. I could have cut up the panel for cards but I wanted to keep it together if possible. I did end up tearing it into two pieces before gluing it to the page. The galaxy type strip from left to right covers the area where the two pieces meet.
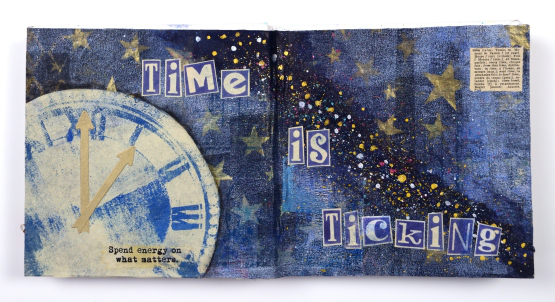
The theme of time is not meant to bully me into being busy, more to remind me that time is precious and why not use it wisely. I printed the letters for the phrase on the rice paper leftovers from the cut out clock using the Darkroom Door ransom alphabet set. That little definition in the corner is from a little palm sized dictionary bought second hand for collage.

The splatter on the black gesso strip is finetec pearlescent paints which tie in with the gold metallic printing on the star gel print. Considering the double page was uninspiring for so long, I’m quite happy with how it turned out.

(Compensated affiliate links from Foiled Fox, Scrap n Stamp)
Blossom Birthday
Posted: February 7, 2023 Filed under: Alcohol Ink, blossom stencil, Darkroom Door, grafix, Stencils | Tags: craft roulette, Darkroom Door stamps, Darkroom Door stencils, grafix, grafix craft plastic, Ranger Alcohol Ink 4 Comments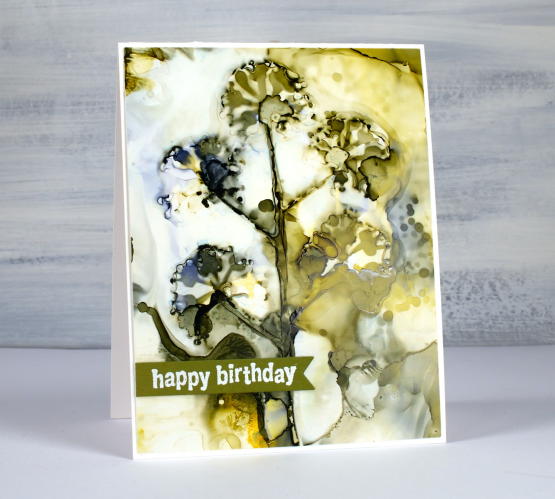
Yes, I have more alcohol in projects! Like gel printing, alcohol inks are quite addictive. When you work with them on plastic film (such as grafix craft plastic or yupo) you can keep changing the design with the addition of more ink or isopropyl alcohol. You can also remove ink with isopropyl. Depending on the amount of staining from whichever colours you choose you can even get the plastic white again to start fresh. I think that is why there is always on more thing I want to try when experimenting with alcohol inks.
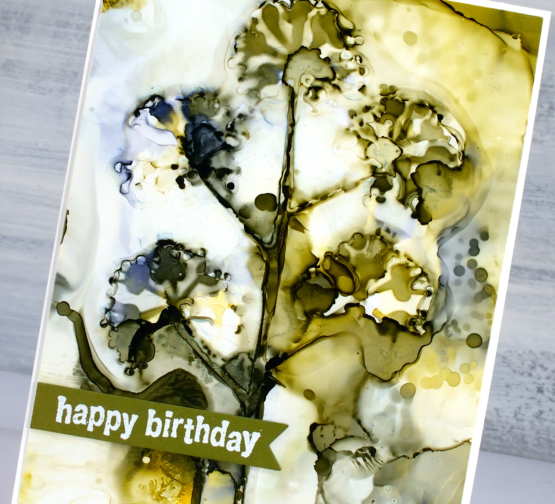
Last year I posted a video where I used a stencil to create a pattern on craft plastic with alcohol inks. I used a more open stencil that the one featured today but the process is similar. The Darkroom Door stencil ‘blossom’ has a lot of plastic surrounding the blossom cut out. When laid on the wet alcohol ink there is contact with most of the craft plastic panel and only a small area where the alcohol ink is drying in the air. This means you need way more patience as you let the ink dry under the stencil.
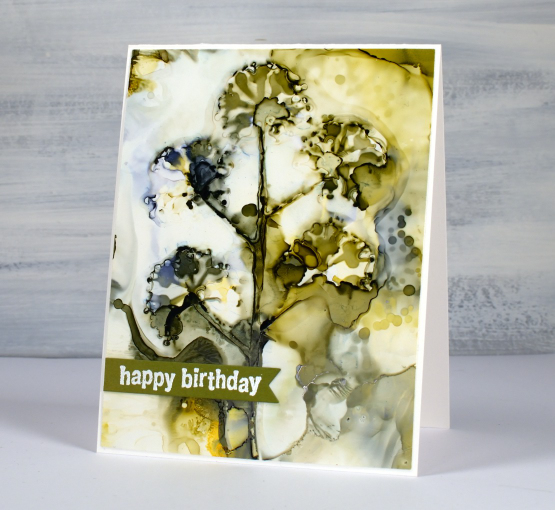
Not all my experiments with stencils work but I love the way this one ended up with distinct flowers and soft background. I finished the card with a sentiment from the DD ‘all occasions’ stamp set embossed in white on olive cardstock.
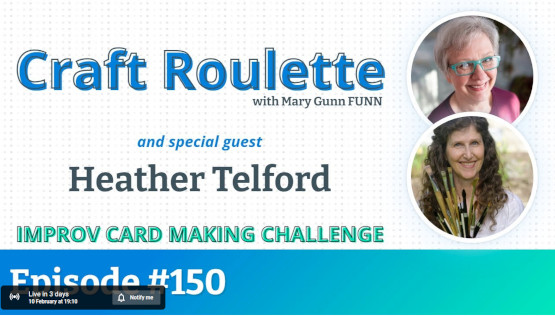
In other news I will be on Craft Roulette on Friday February 10 which is three days away! Craft Roulette is a live improv card making challenge on YouTube. I have no idea what kind of card I will be making, I only find out what the parameters are while I am on the show. Hope you can drop in a join the chat on Friday 7:10 pm EST
(Compensated affiliate links from Foiled Fox, Ecstasy Crafts & Scrap n Stamp)
Home is… journal page
Posted: June 17, 2022 Filed under: alphabet medley, Art Journal, Darkroom Door, gel press, polka dot stencil, remington lowercase alphabet | Tags: Art Journal, Darkroom Door stamps, Darkroom Door stencils, gel press, gel printing 5 Comments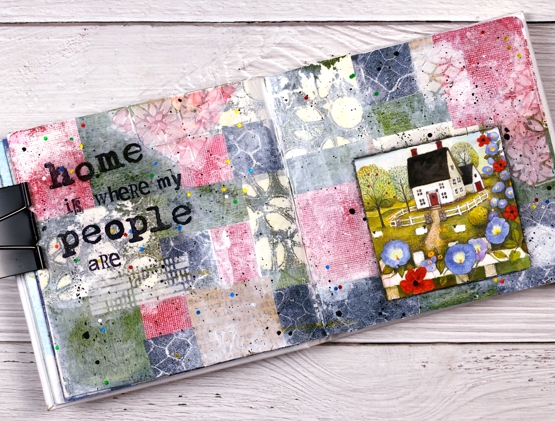
The shenanigans continue in my Art Journal Adventures workshops. Last month the theme was collage & texture and the range of pages was amazing. We all chose different papers, colours and focal images but followed a similar method to put them together.
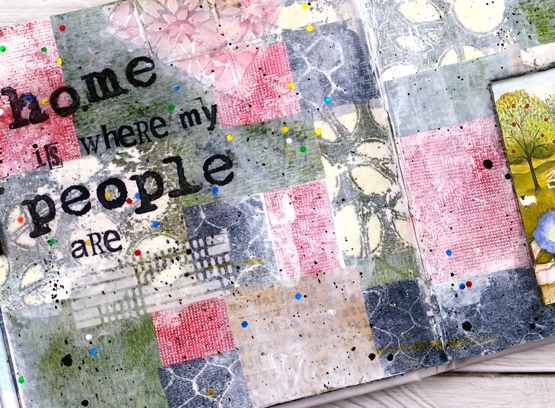
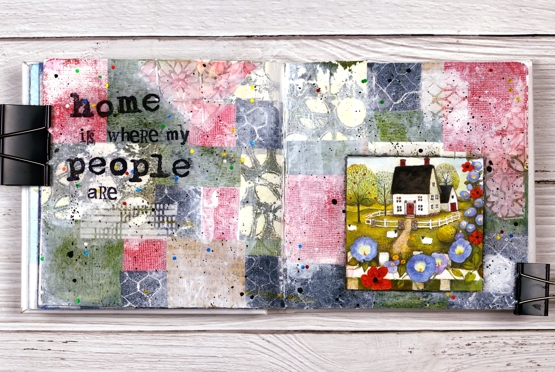
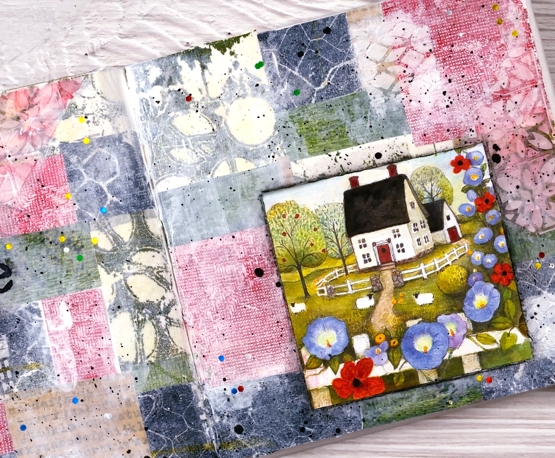
For this spread I relied heavily on my growing collection of gel prints. The little cottage picture is from a greeting card and I used it as a starting point when settling on colours. All the papers you can see are gel prints I made except for one kraft scrap down the bottom with text stamped on it. I added gesso as well as texture using modeling paste through the Ciao Bella patchwork stencil.
During each session of the class it was definitely a treat to walk around and be inspired by the ideas coming to life on all the pages. Some participants had their own stash of gel prints to draw from, others used some of mine. It was fun to see my prints pop up on other people’s pages. I loved it!
This week we are working on Tea and Coffee themed pages and next month it will be texture & movement. If you are close by and haven’t tried gel printing, I’m teaching another introductory class on July 9.
The sweet cottage with sheep at the gate looks nothing like my house! I do grow morning glory but that is about the only similarity. Home is definitely where my people are which means I have two homes very far apart. Although very much at home in Canada I claim Australia as home too, how could I not, some of my favourite people are there!
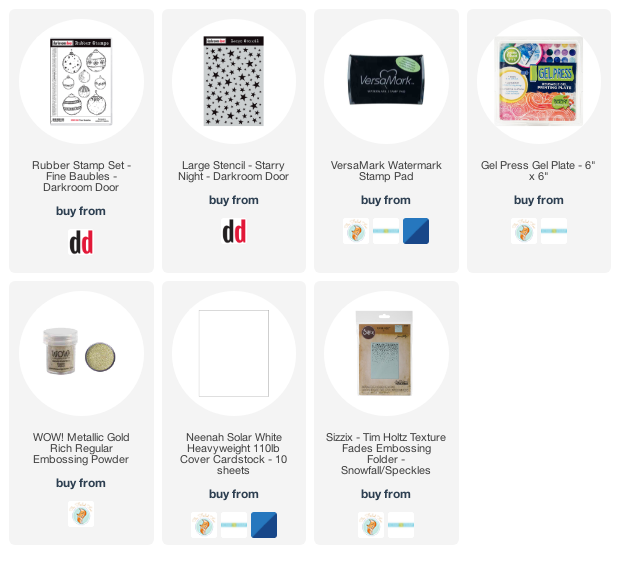
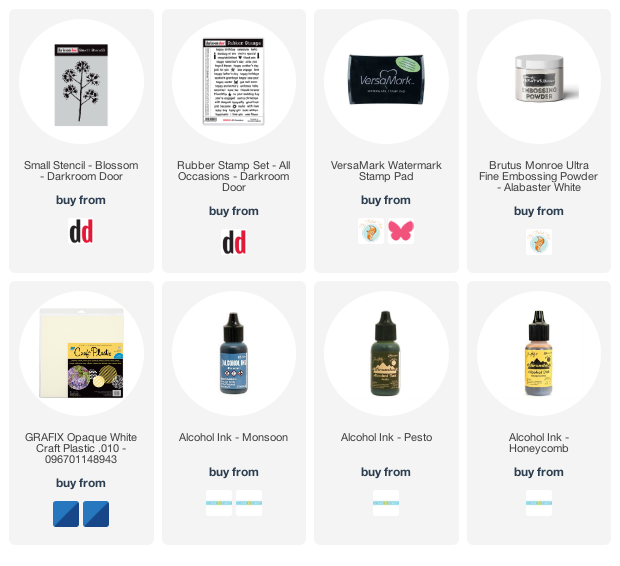
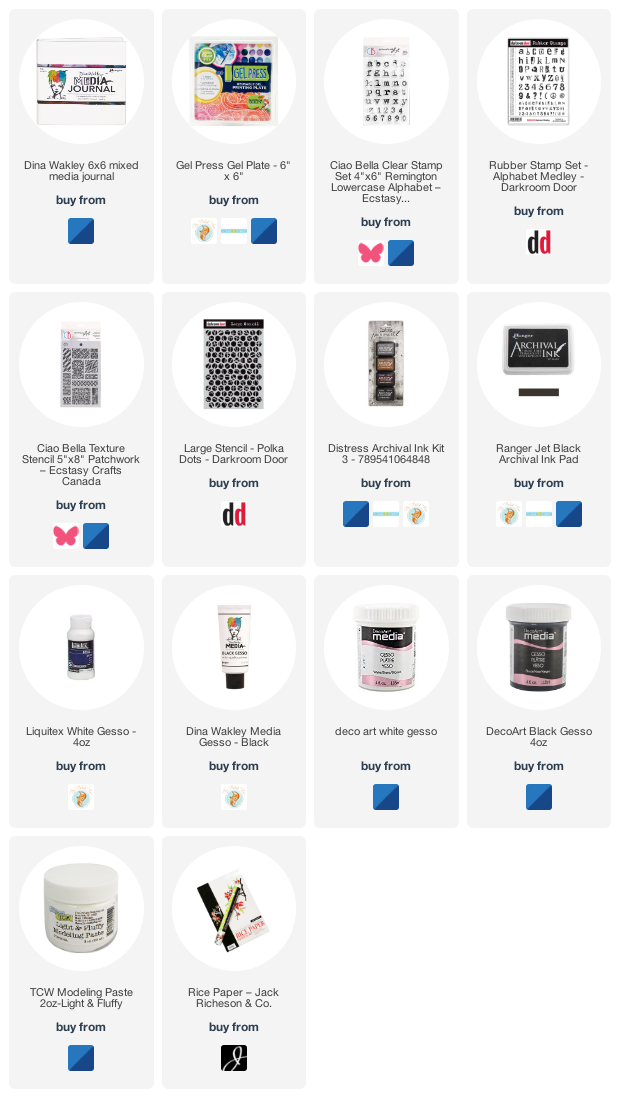
Supplies
(Compensated affiliate links used when possible)
Circle Flowers journal page
Posted: March 25, 2022 Filed under: abstract flowers, alphabet medley, Art Journal, checkered, Classes, Darkroom Door, gel press, Hand drawn, mesh, Stencils | Tags: Art Journal, Classes, Darkroom Door stamps, Darkroom Door stencils, gel press, gel printing, Mixed Media, Penny Black creative dies 8 Comments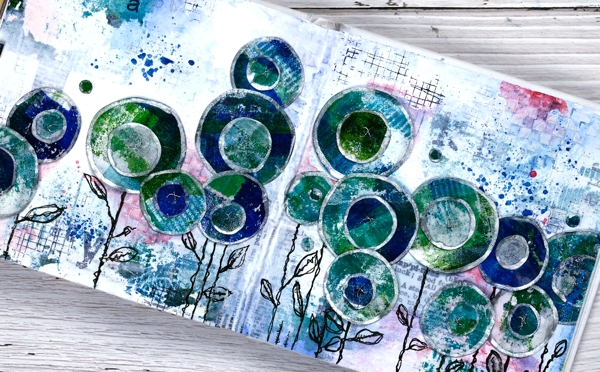
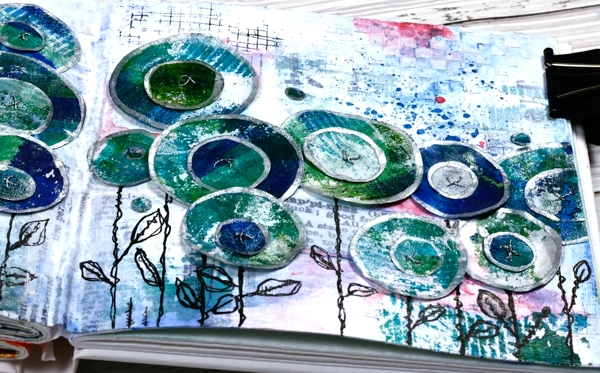
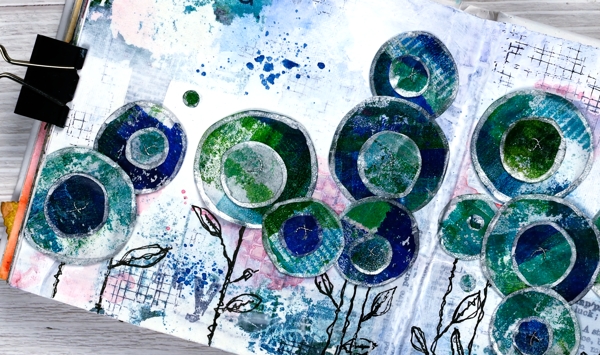
Last week I spent several happy hours gel printing. One of the prints I completed has ended all over this art journal spread. If you are a gel printer you know you can sometimes pull a couple of prints of the same design. The first one is full of colour and pattern and the second is often called a ghost print as it displays outlines and left over bits of paint.

For this journal page I used both the bold blue and green print and the ghost print. The ghost print can be seen on the top left and bottom right corners and is peeping out in a couple of other places. The first print which was very geometrical has been turned into circle flowers. It also had traces of a new stencil called ‘pods’. You will see more of it here on the blog because it is fabulous!
Also in the background you might see some black ink stamping (DD mesh and alphabet medley) and the texture of paste through the DD ‘checkered stencil. The text you see is a fabric tape with dictionary definitions of happiness; it is the first 49 & Market product I have bought and it is going to be handy!
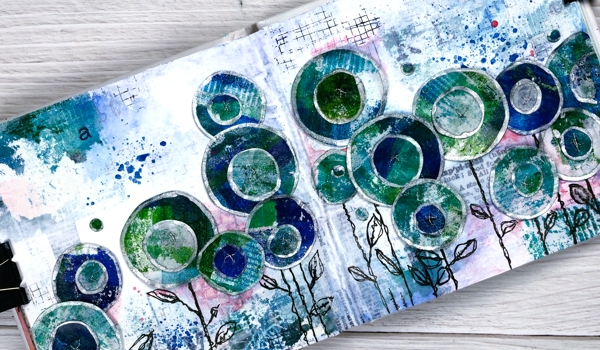
There is plenty of white gesso over the background to pull it together and mute some of the bold elements.
The flowers are all cut with Penny Black ‘abstract flowers’ dies which basically cut slightly wonky circles so I could have cut them myself but why bother when the machine will do it. The print was on rice paper so I could cut a few layers at once. After drawing an edge on each circle with a silver paint pen I stuck a small circle on a larger one, then sewed a cross in the centre with silver thread. There are stems in the set of dies but I doodled mine with a black marker. The blue splatters and pops of pink are from inktense pencils which are coming in handy for art journalling.
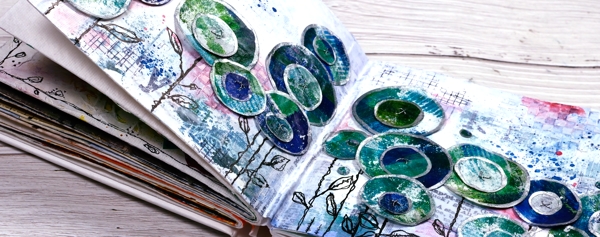
I know that was a lot of photos and chit chat but that is the way with some art journal pages especially the collage ones which involve different papers, paints, stencils, and mediums. I probably haven’t mentioned everything I used but if you are still here now I’m sure you’ve heard enough!
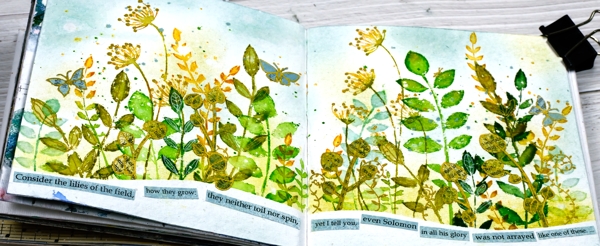
If you are in Ottawa and feel like doing a little art journalling of your own, there are still spaces left in my next Art Journal Adventure workshop where we will be creating a watercolour green and leafy spread similar to what you see below. All the details are on the Crop A While website.
Supplies
(Compensated affiliate links used when possible)
AI + Stencils Blue Edition
Posted: January 31, 2022 Filed under: Alcohol Ink, crackle, Darkroom Door, geometric stars, grafix, mesh, MFT stencils, My Favorite Things, Pink Fresh studio, Stencils, tall flowers, Uncategorized, you are everything | Tags: Darkroom Door stamps, Darkroom Door stencils, grafix, grafix craft plastic, My Favorite Things, pinata alcohol ink, Pink Fresh studio, Ranger Alcohol Ink 11 Comments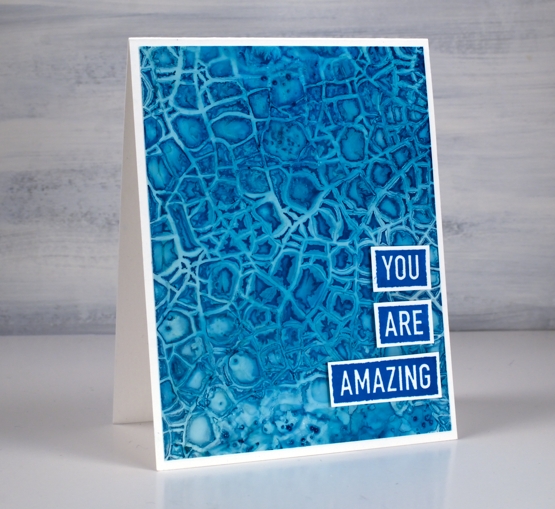
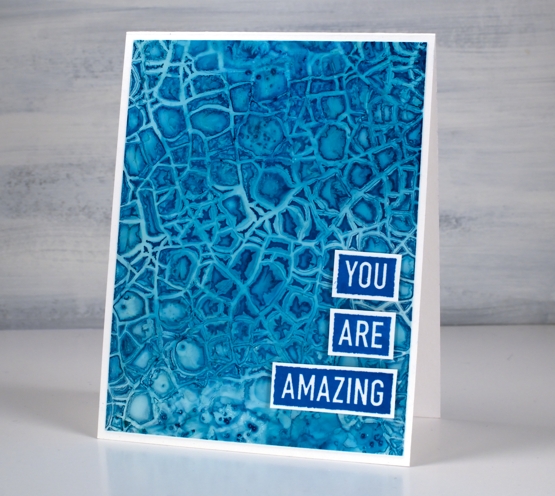
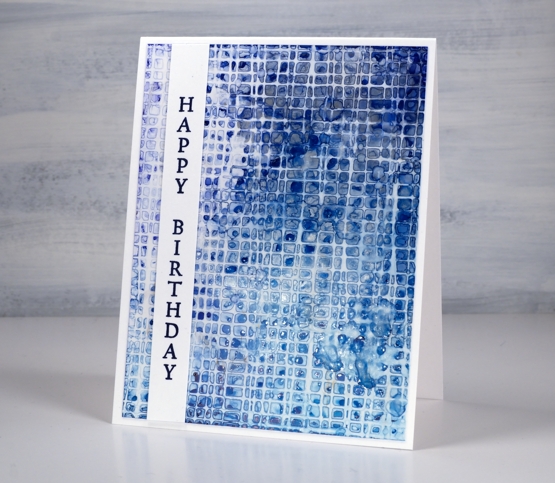
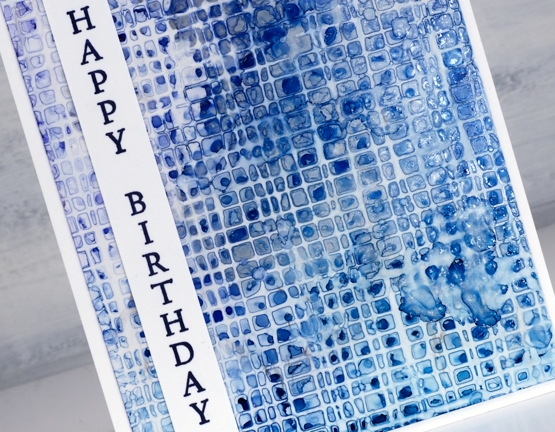
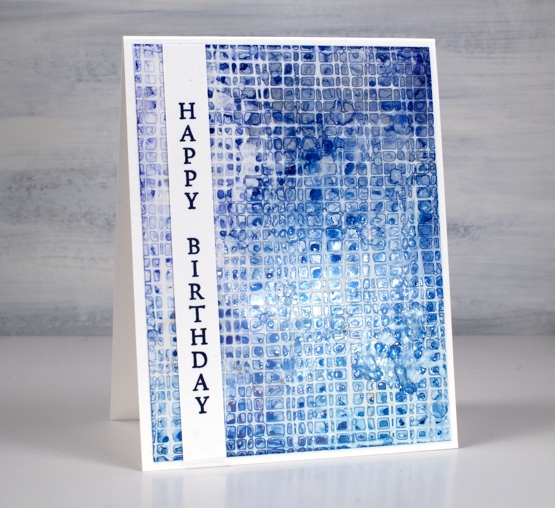
After success with one of my detailed stencils over an alcohol ink panel I tried a few more all with a mix of blue inks. The one above features the Darkroom Door crackle stencil over a mix of cloudy blue and stream inks.
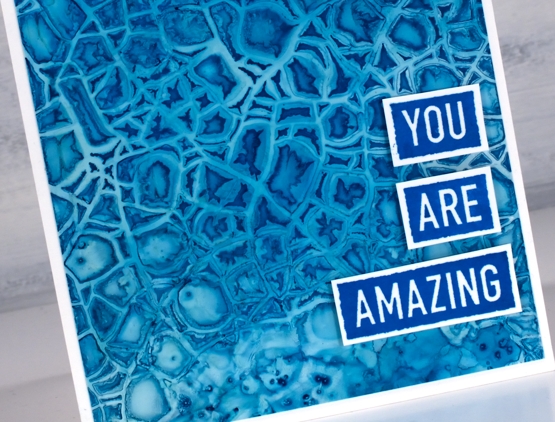
There is also a little bit of salt sprinkled on the panel where the stencil did not make consistent contact. This technique is definitely not for the impatient among us!
I am still working on Grafix white craft plastic and often starting over the top of a panel that already had ink on it. All the card bases are Neenah solar white.
The stencil above is MFT geometric stars and I positioned it over a panel of denim and stream inks with some leftover copper as well. The ‘print’ is not very consistent but I like the way a distinct line is right next to a blurry pattern.
I finished this one off with a die from the Pinkfresh Studio ‘sending’ die set.
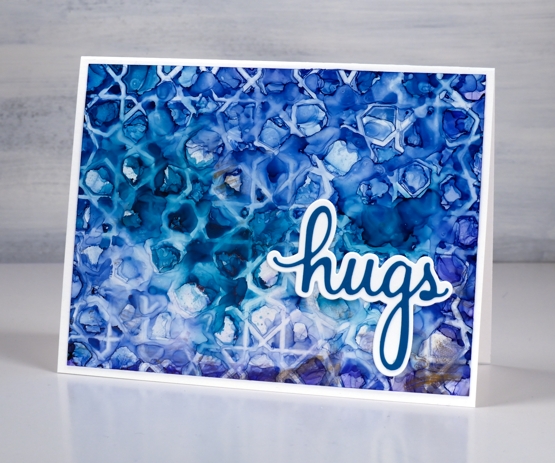
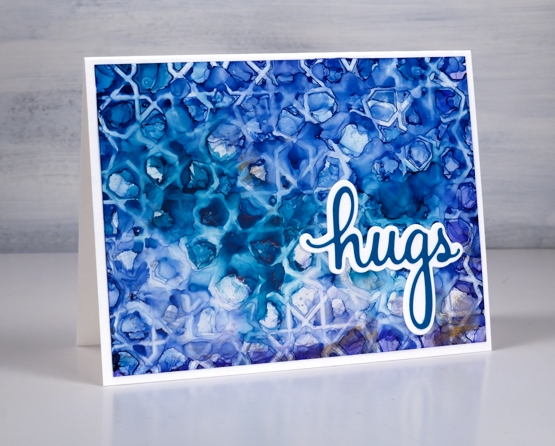
I worked with the DD mesh stencil a couple of times because it didn’t make consistent contact on my first attempts. I found if I taped it over the alcohol ink panel onto a piece of scrap cardboard I could bend the cardboard slightly to make sure stencil stayed pressed onto the wet alcohol inks. I just popped the piece in the right sized container to keep it bent while it dried.
This one is a mix of denim, cloudy blue, silver and a tiny bit of stream down in the right hand corner. I added a sentiment from the DD ‘tall flowers’ set.
As you can see my fascination with this technique continues. I did pick up a couple more detail stencils the other day for this very purpose. I will also give it a try with some watercolour paints and paper. I’m sure the result will be different as the watercolour paints soak in but I think there could be a pretty and subtle pattern. Stay tuned!
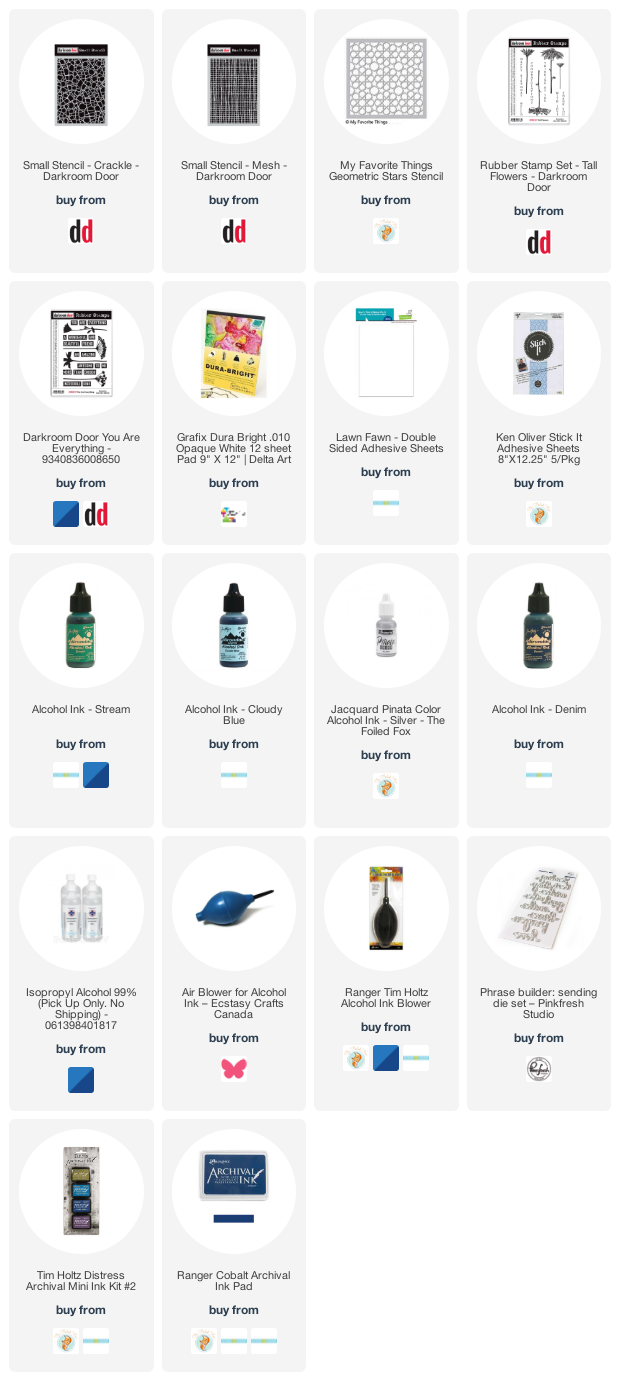
Supplies
(Compensated affiliate links used when possible)
Beauty of the Earth journal page
Posted: January 26, 2022 Filed under: Art Journal, Brutus Monroe, Darkroom Door, honeycomb, Nature Walk, number medley, Stencils, World Map, you are everything | Tags: Art Journal, Darkroom Door stamps, Darkroom Door stencils, Ranger archival inks, Ranger Distress inks, Ranger Distress stains 5 Comments
I have another double page spread in the 6″x 6″ journal today. Don’t tell the others but this one seems to be getting all the attention at present!
The pages in this journal are thick watercolour paper so I wanted to take advantage of that and use watercolour techniques. Most of the pages I have completed up until now have had a base layer of gesso or acrylic paint.
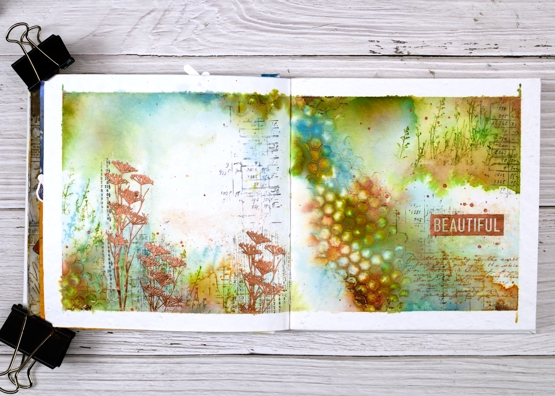
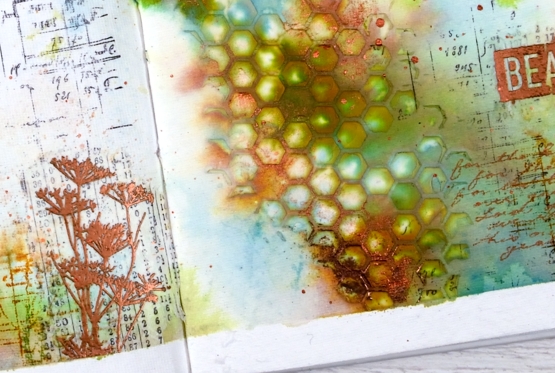
As you can see I taped the edges of the pages with tape before starting. I added some stamping in black here and there using a stamp from the Darkroom Door ‘number medley’ set. Next I used the DD ‘honeycomb’ stencil and modeling paste to add a texture strip from left to right down the centre of the spread. I added a small section bottom left also. Once the paste was dry I began painting colour around the honeycomb and across both pages. I spent a while doing this so as to see the blends and build up some depth of colour.
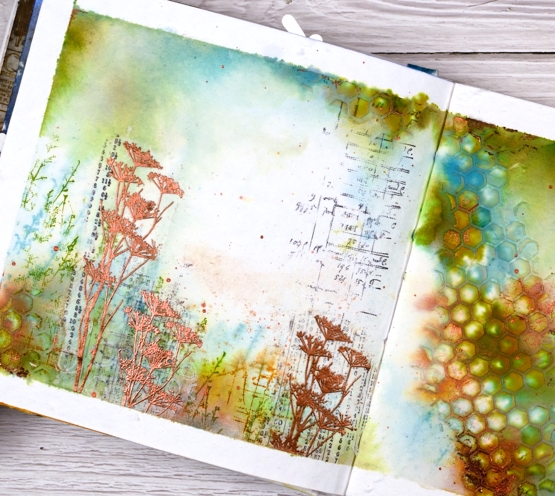
Other than some black stamping I used only three colours of distress ink, both spray stain and from the ink pads. I took care to keep some white space; sometimes I realise too late that I have colour all over the pages. I stamped some grasses in peeled paint archival ink so they would not dilute and broken china distress ink so they would dilute. I also stamped sections of the world map in rusty hinge. Although I loved the combo of peeled paint, rusty hinge and broken china I thought a bit of metallic shine would be nice so I added some wildflowers embossed in Brutus Monroe ‘penny’ powder.
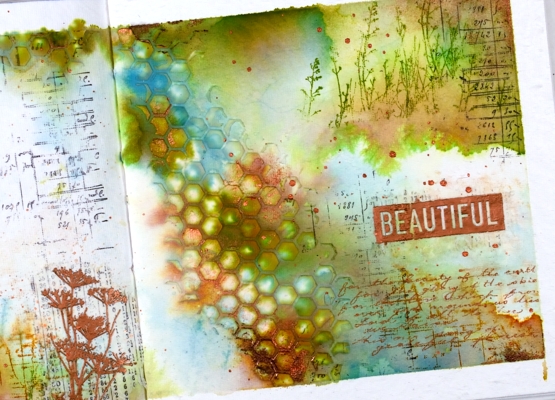
With a copper coloured gel pen I wrote the first verse of ‘For the Beauty of the Earth’ in the lower right hand corner then added the embossed word ‘beautiful’. And of course there is some copper splatter to finish it off. This is a style and look I have been hoping to create so you’ll probably see a few more like this one.
Supplies
(Compensated affiliate links used when possible
Fine Baubles
Posted: January 21, 2022 Filed under: Darkroom Door, fine baubles, gel press, large stars, Stencils | Tags: Darkroom Door stamps, Darkroom Door stencils, gel press 4 Comments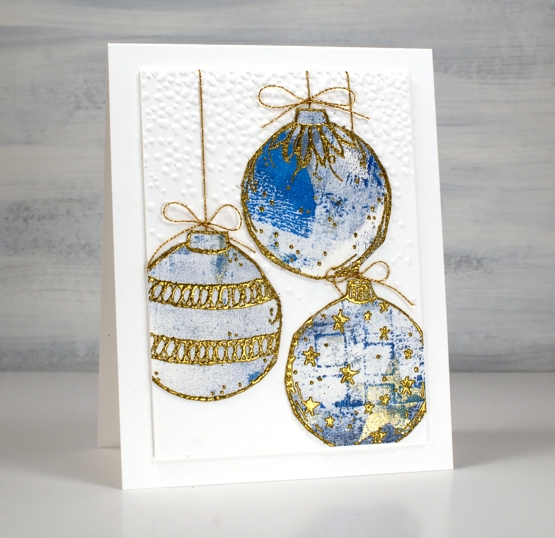
To make these cards I pulled out some gel printed paper and the Darkroom Door ‘fine baubles’ stamp set. I have a box of gel printed pieces longing to come out of the box and into the world.
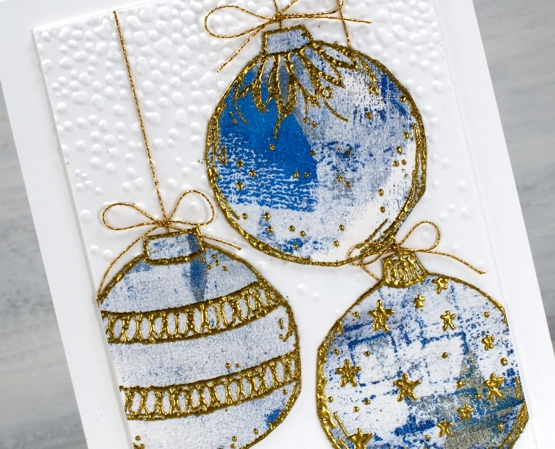
Last year I resolved to make a few Christmas cards every month of the year but that didn’t happen. This year I have resolved no such thing and look what happened: two done already! I embossed the large baubles on the gel print panel in a gold powder which is slightly chunky; it’s not my usual gold but there is a whole jar of it and I am committed to using up what I have where possible. It worked well for these baubles because I needed it to stand out against the patterns of the gel prints. I cut the baubles out which, although simple, still counts as fussy cutting in my book.
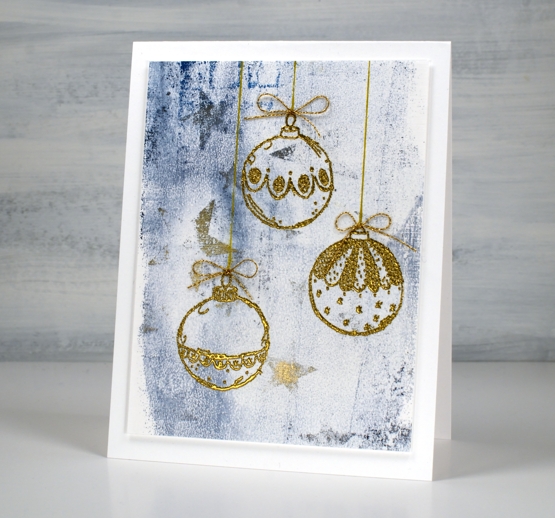
I embossed three of the smaller baubles on the other end of the gel print and did not cut them out because in doing so I would have lost the pretty stars on the print. It was hard to capture the gold of the stars in the photo but it is subtle and pretty in real life and is not blue as it appears below.
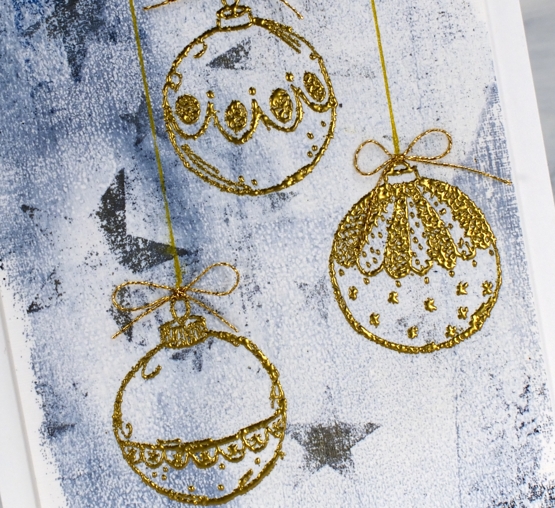
I attached gold cord behind the larger baubles as well as bows from cord too. The smaller baubles also got the bows but the cord is drawn with a gold gel pen.
No sentiments at this stage but that might change before I send them out in eleven months time!
Supplies
(Compensated affiliate links used when possible)