New YouTube channel – New Video
Posted: February 11, 2023 Filed under: Alcohol Ink, baby blue leaf embossing folder, Branch 9 die, cricut, Dies, grafix, Moda Scrap, my designs, ornate tile embossing folder, Paper Rose, Penny Black, Pink & Main, scripty, silhouette birds, so extra supporting sentiments, Stampin Up, thank you squares, Tim Holtz, Tutorial | Tags: cricut, grafix, grafix craft plastic, Penny Black creative dies, Penny Black stamps, Ranger Alcohol Ink, Stampin Up, Tim Holtz 6 Comments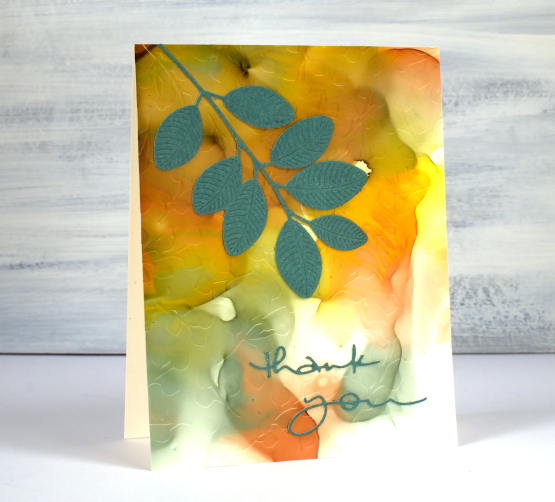
If you have been visiting this blog for a while you will know I had a youtube channel for many years. In 2022 after ten years of adding videos and gathering a community of 7000 subscribers my channel was deleted. In recent weeks I have started again with a new channel and some videos ‘from the archive’. My new channel is called Heather Telford Art and I would be very happy if you decided to like, subscribe and tell your friends! There is content on there that you may remember from the last few years and starting today there is new content also! The new ‘2 for 1 Alcohol Ink Panels’ is freshly filmed for my new channel and I hope it will be the first of many!
There are quite a few photos in this post because, well, this is a 2 for 1 technique and I created three panels which of course became six panels and one was cut in half so there are seven cards to show you in this blog post! Grab a cup of tea. I have added a linked supply list at the very bottom of this long post.
As well as a new youtube channel I am also a new Cricut owner. The stencil used on the card below was designed by me and cut on my Cricut. It is available as a cutting file from Echidna Studios etsy store.
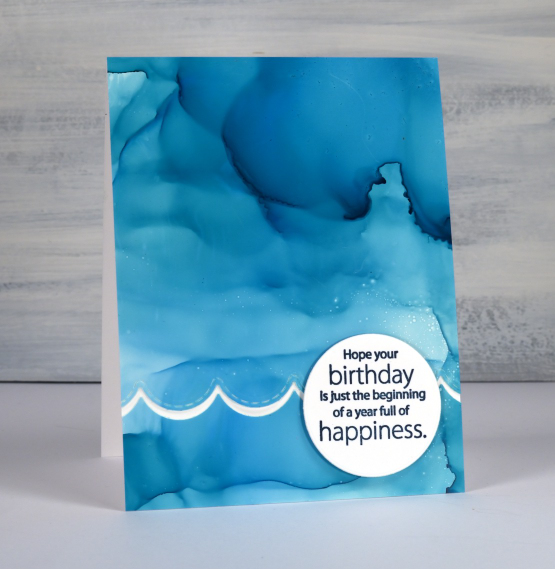
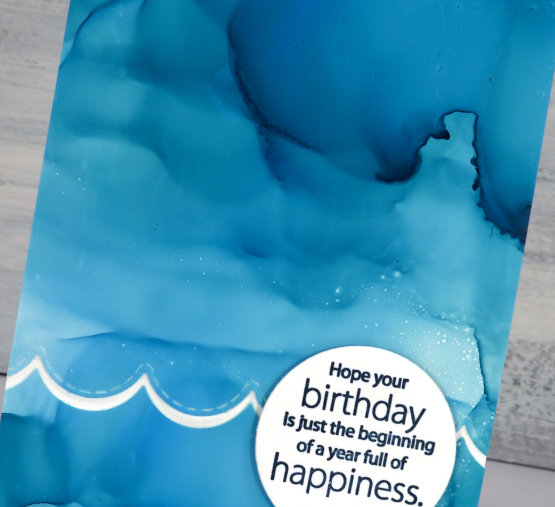
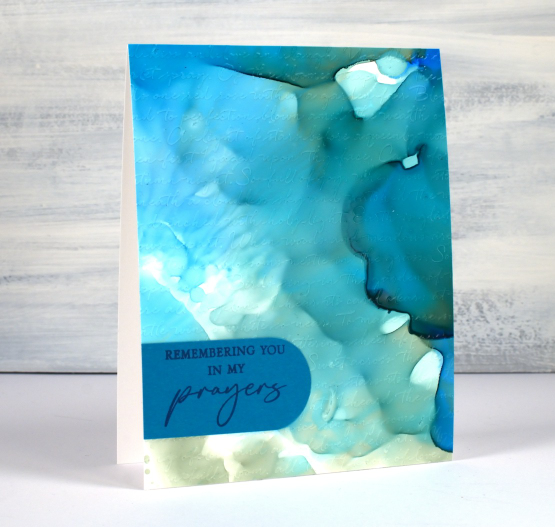
Most of the 2 for 1 smooshed panels I left as a full card fronts adding only a sentiment or some die-cutting. As the panel below reminded me of the ocean, the PB wavy scallop border seemed a nice touch.
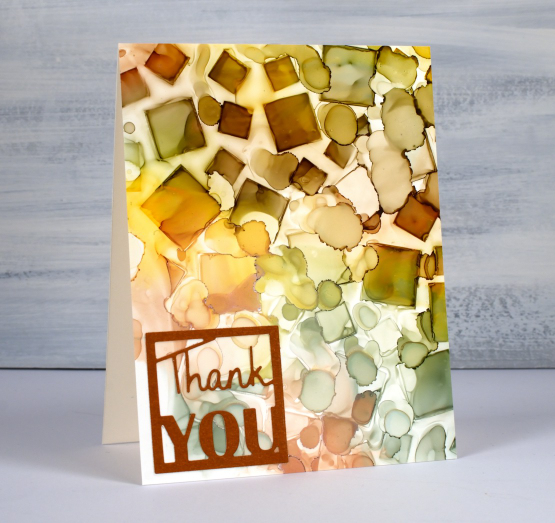
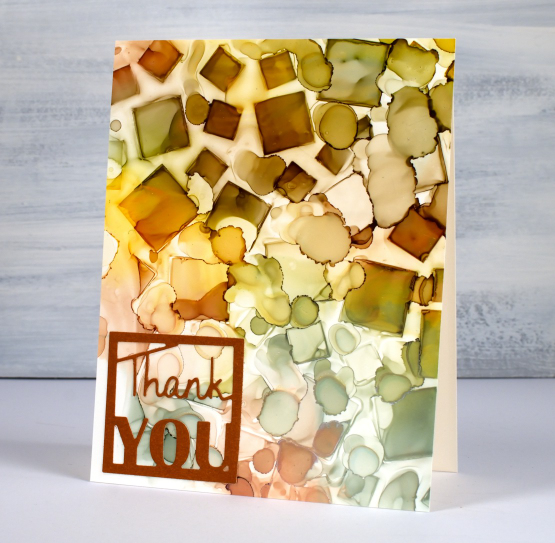
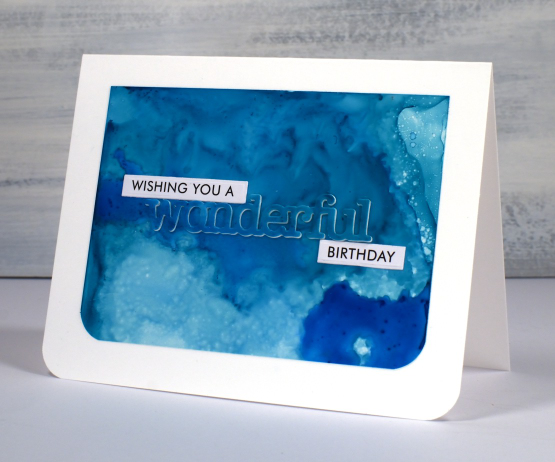
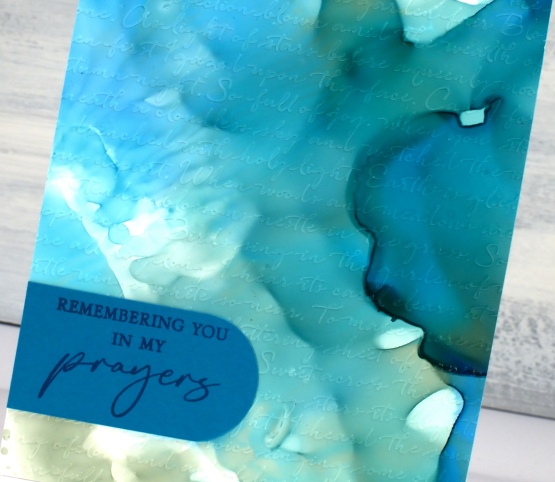
The panel below is a half panel from the first one I showed on the video. I love the patterns from the isopropyl alcohol ink spray even though they don’t stay distinct. Even when die-cutting the word from the panel I couldn’t leave it off so I popped it up. Not so funny story: I guess I haven’t popped up a die cut word in a while because I flicked those little shapes inside the letters into the garbage when I poked the word from the die. So yes, I had to hunt through my garbage to complete the card.
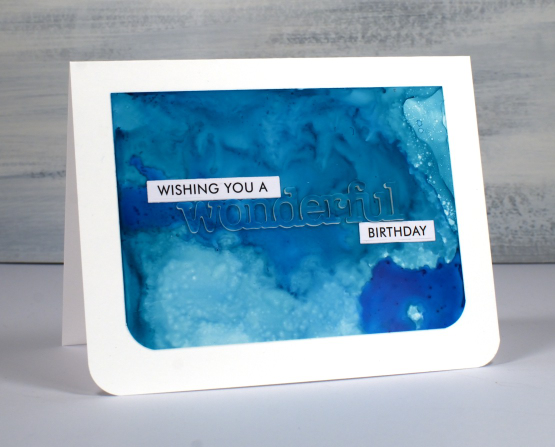
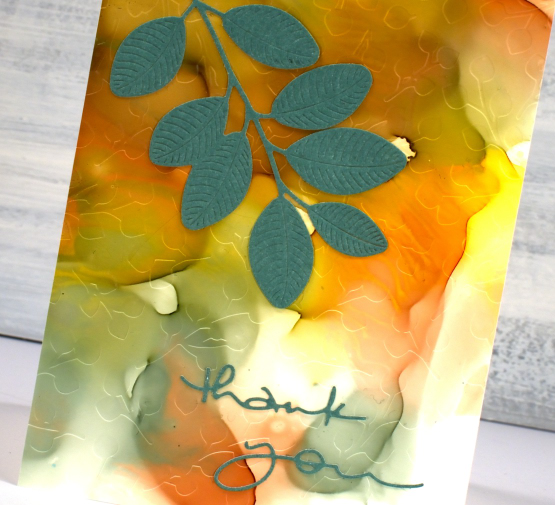
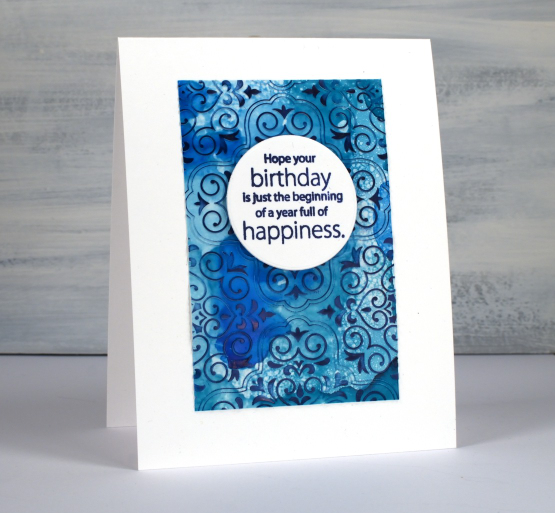
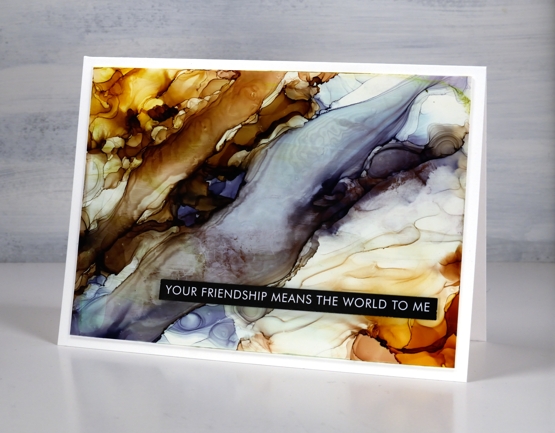
I don’t know why I hadn’t tried it before but seeing how well Grafix craft plastic responds when put in an embossing folder has been a revelation! I thought it might crack but it doesn’t so you can have the subtle impression of your embossing folder on a panel or the bold inked pattern as I’ve done on the card below. Sentiments in circles might be a little fad I go with for a while too; they look cute!
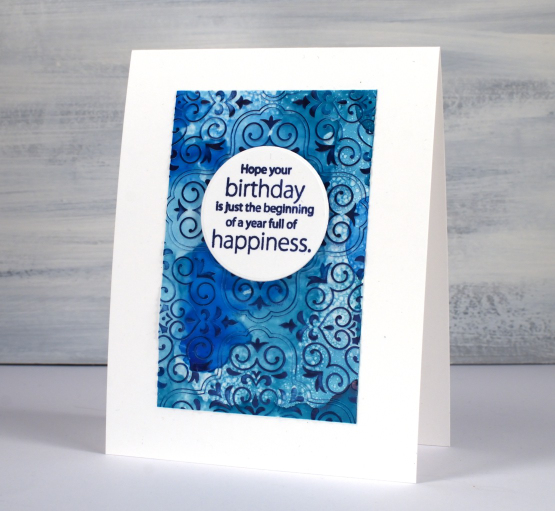
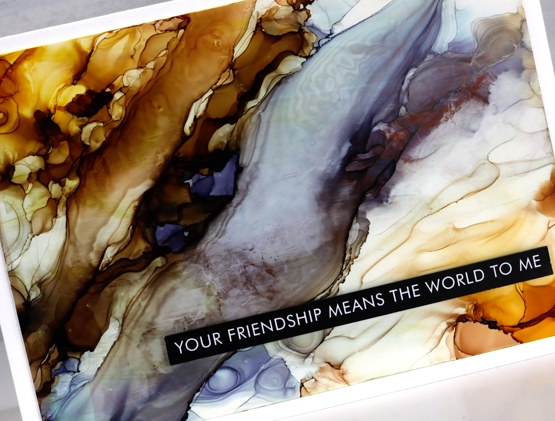
You can see the soft look of embossed script on the panel below, especially in the close up. This detailed embossing folder is from Stampin’ Up and is called ‘scripty’. I don’t think it is available anymore but you might something similar.
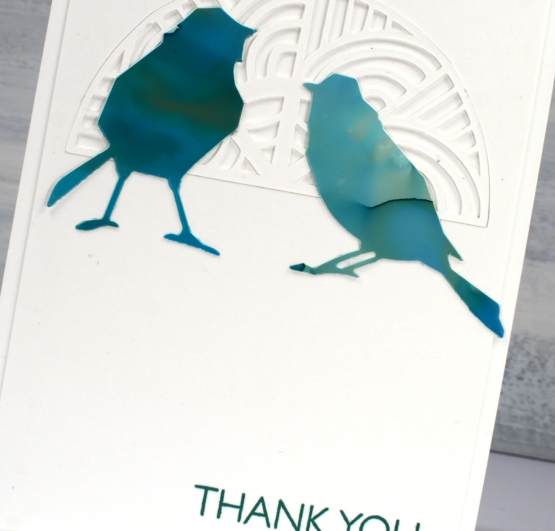
For this final card I cut six little birds from the panel and played with layouts for quite a while. I ended up just using two which means I have four birds in hand for another project. (pun definitely intended)
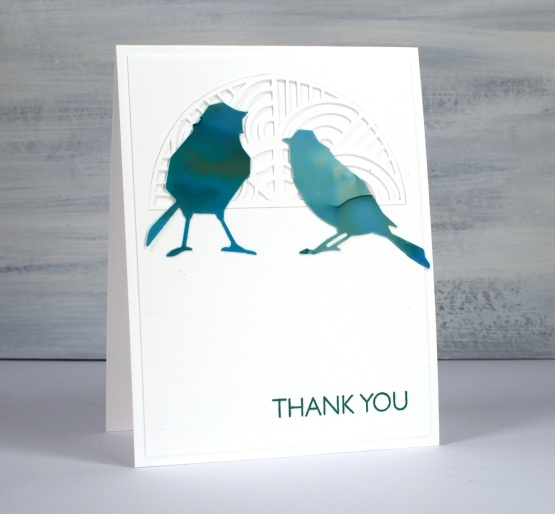
The intricate half circle cut out behind the birds is also one of my new cricut cutting files but more about that in another post. If you got this far, you’re a champion. Thank you for supporting me here on my blog and I would love to see you over on youtube as well.
(Compensated affiliate links from Foiled Fox, Scrap n Stamp)
AI Abstract and Landscape
Posted: January 28, 2022 Filed under: Alcohol Ink, grafix, Paper Rose, so extra supporting sentiments | Tags: grafix, grafix craft plastic, Paper Rose, pinata alcohol ink, Ranger Alcohol Ink 6 Comments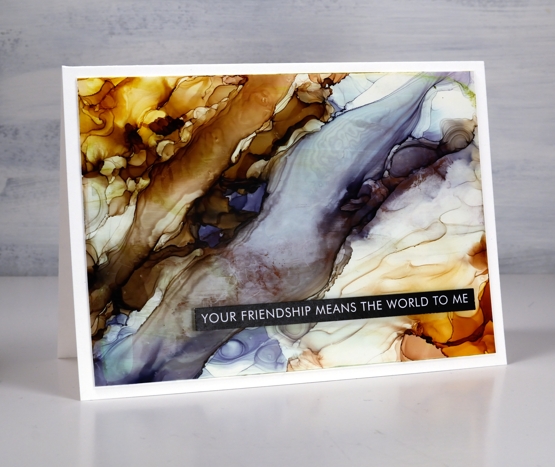
While trying the stencil and alcohol ink techniques earlier this week I also returned to techniques I’ve used before. The Grafix white craft plastic panel above was a grey & blue one which wasn’t very interesting. I added warm tones either side and using tilting and air blowing to create a pattern that looks a little like a rock cross section.
I used some clear gesso to seal this one but it did drag some colour and leave some texture lines so I wouldn’t recommend it as the best sealing solution. I could use a spray sealant but it is very, very cold outside so I’m not popping into the back yard to use aerosol cans right now!
I would tell you the ink colours I used if I knew. I picked up a panel with ink from a previous session then start putting more ink here and there and in no time I saw colours and patterns appear with no idea which ink went where!
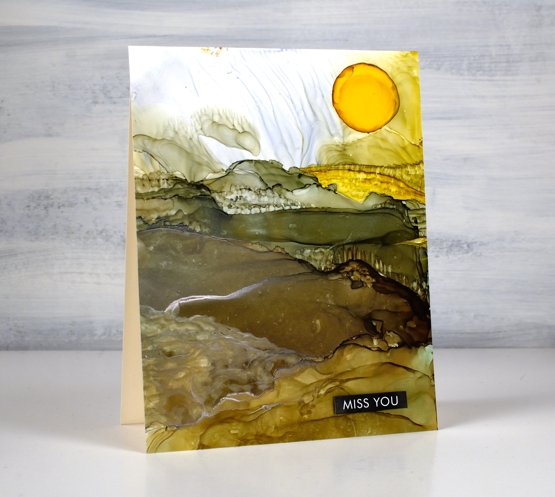
On this second panel I have a bit more of an idea of the landscape colours. I began with a previously inked panel and added pesto, ginger and sunshine yellow inks along with generous amounts of rubbing alcohol to move the inks.
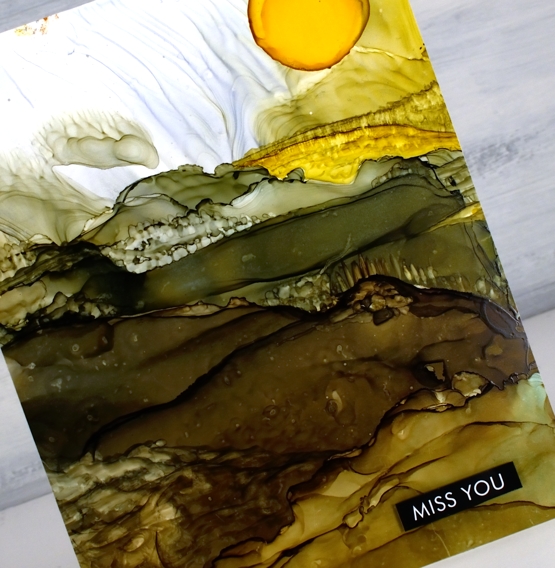
As I tipped the panel and used an air blower I was able to create stripes across the panel which looked a bit like hills. I feel like this is still a fluke for me; I wish I could give you exact instructions but it works sometimes and not others.
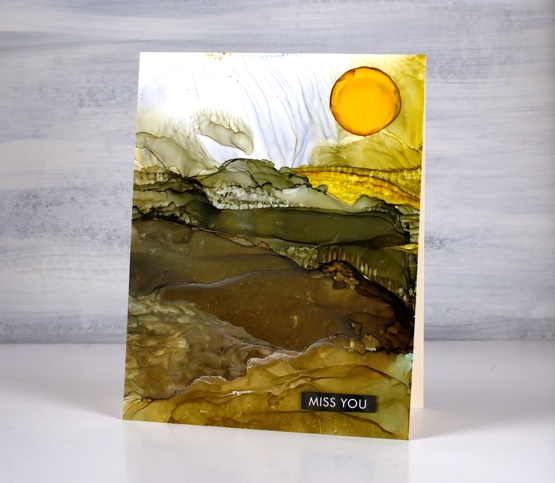
To add the look of trees and crops I used an alcohol ink paint brush and a very small amount of alcohol ink or isopropyl alcohol. I wanted to add texture to the ink that was already there rather than add more ink because when you add more ink it tends to displace the ink you already have on the panel. With this in mind I added a drop of sunshine yellow at the end to be the sun. It did not expand neatly in a circle so I used a paint brush which meant the sun was a bit larger than intended! I finished both cards with sentiments from the Paper Rose Studio ‘so extra supporting sentiments’ pack.
Alcohol ink art seems to be equal parts fabulous and frustrating but I will keep on persevering and see if I can come up with some processes I can recreate and share with you.
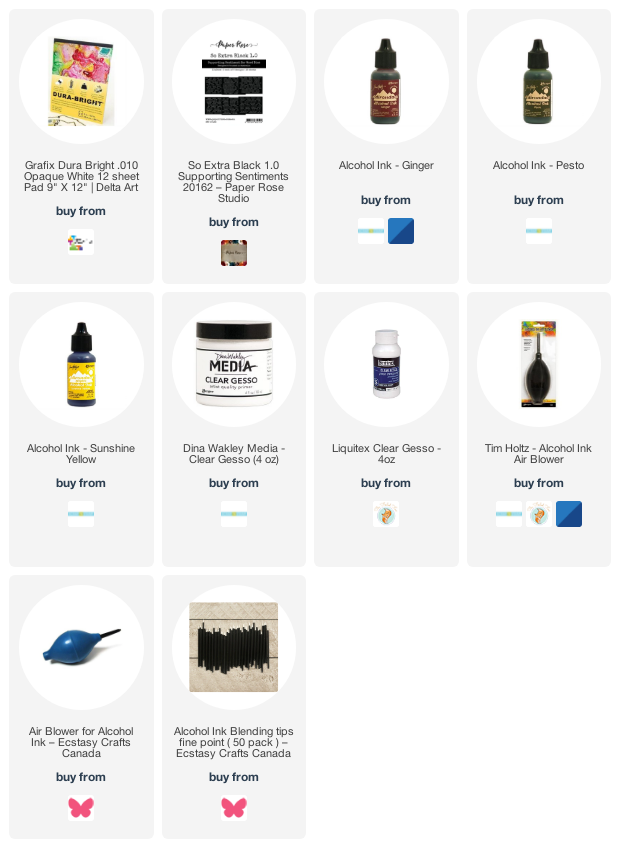
Supplies
(Compensated affiliate links used when possible)
Alcohol Ink + Stencil
Posted: January 24, 2022 Filed under: Alcohol Ink, Dies, little swirls, Paper Rose, Penny Black, so extra supporting sentiments | Tags: Paper Rose, Penny Black creative dies, Ranger Alcohol Ink 11 Comments
This card was inspired by the wonder and wizardry of my friend Ardyth who just happened to be the Featured Stamper on SplitcoastStampers yesterday. Ardyth has been doing quite a few alcohol ink techniques lately and I have been loving them while waiting for an opportunity to get my own inks out again. Take a look at Ardyth’s videos here and here for inspiration and instructions.
When I pulled out the inks and the substrates I found several panels from another session. The panels hadn’t inspired me enough to make them into cards when I first made them so I decided to work over the top of them. The panel for this card is Grafix white craft plastic and was originally covered in blue patterns, you can see a little remaining in the top right corner.
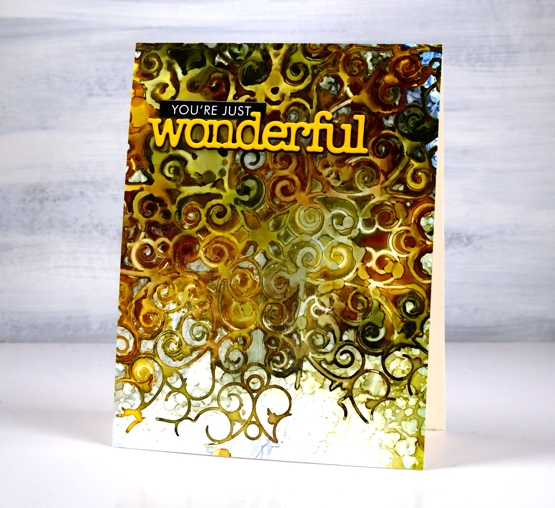
I lay the Paper Rose Studio ‘little swirls’ stencil on top of the panel and sprinkled ginger, pesto and sunshine alcohol inks over the stencil along with some rubbing alcohol to move the inks a little further. I was impatient so I pulled up one corner to check on the pattern before the inks dried. That is why the top left corner does not have distinct detail like the lower right. Once dry I removed the stencil and was left with this amazing pattern. Thank you for all the inspiration Ardyth!

Those sharper swirls at the bottom are my favourite part of the design but I love the whole effect. I will definitely be playing with this technique again. I finished off the card with a stacked PB die cut and a sentiment strip from the black Paper Rose Studio black ‘so extra’ set. I ended up sealing this panel with clear gesso. I haven’t done this before but some of my alcohol ink panels end up a bit sticky so I wanted to see if clear gesso worked as a sealant. I’ll will keep testing the process and let you know more next time I post about alcohol inks. Meanwhile head over and drool over all Ardyth’s clever cards!
Supplies
(Compensated affiliate links used when possible)
Gel Printing with stencils + video
Posted: July 12, 2021 Filed under: Butterflies, classic cars vol 1, Darkroom Door, fragments, gel press, gelli plate, Heather lowercase stamp set, little swirls, Nature Walk, Paper Rose, Pink Fresh studio, so extra supporting sentiments | Tags: Darkroom Door stamps, gel press, gel printing, Paper Rose, Pink Fresh studio 7 Comments
In recent gel printing sessions I have used some of my intricate stencils from Paper Rose Studio. This stencil, ‘little swirls‘ makes a particularly beautiful background. I’ve been printing on a 6″x6″ gel plate with a 6″x6″ stencil but I cut the print down to make a 4¼” x 5½” card.

I used stamps from Darkroom Door’s nature walk , butterflies and happy birthday sets. (all linked at the end of the post). The process for making this type of print is shown in the video below.
After any gel printing session I usually have quite a pile of prints, some become cards but I am hoping to use more in my art journal. I have to be a bit more adventurous in tearing and layering and turning them into more than just a patterned print.
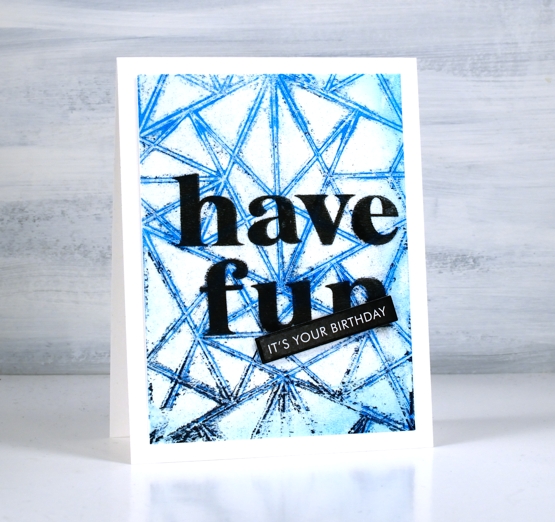
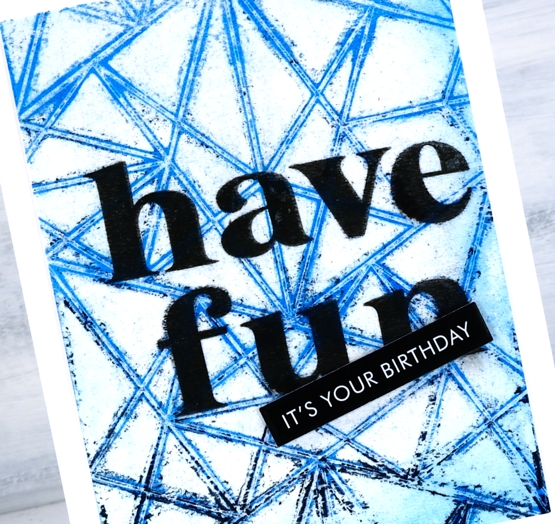
The making of the background above is included in the video. To turn it into a birthday card I stamped ‘have fun’ directly on the print then popped up a sentiment strip on top. The words are stamped in Gina K obsidian amalgam ink using the Pink Fresh Studio ‘Heather’ lowercase alphabet set.
The making of the background below is also part of the video and you can see the mustard paint beaded on the surface of the gel plate making an allover pattern when printed. I didn’t necessarily want the beading but was happy when it ended up uniform. Paints of different brands perform differently on the gel press so experimentation is necessary to work out how much paint and which brands will give you the results you want.
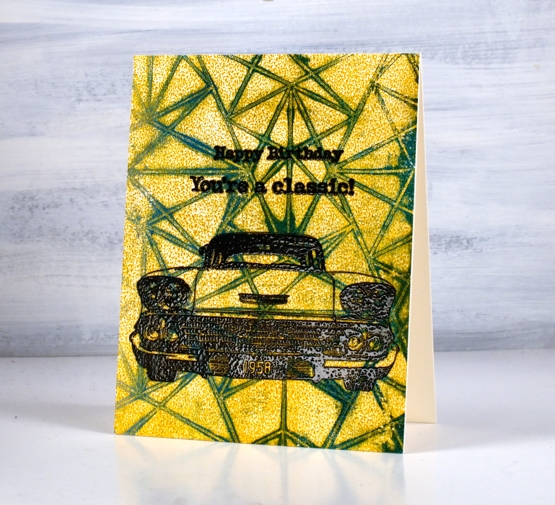
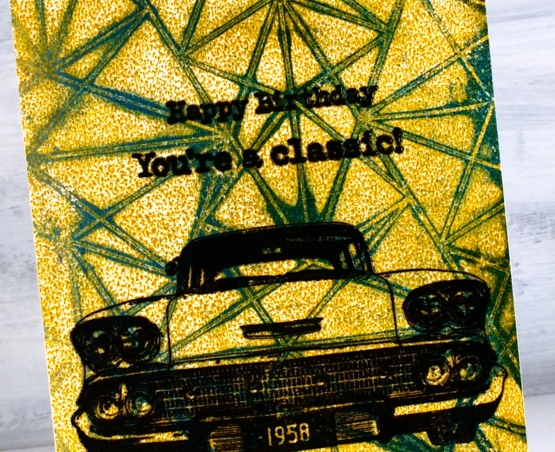
I turned this background into another birthday card by embossing a car from the Darkroom Door Classic Cars vol 1 set along with a sentiment from the same set plus one from the Happy Birthday set.
I also filmed some gel printing with a few textured surfaces from the recycling box; I’ll be sharing that video soon.
I’d love to hear how you use your gel prints; I’m always open to ideas.
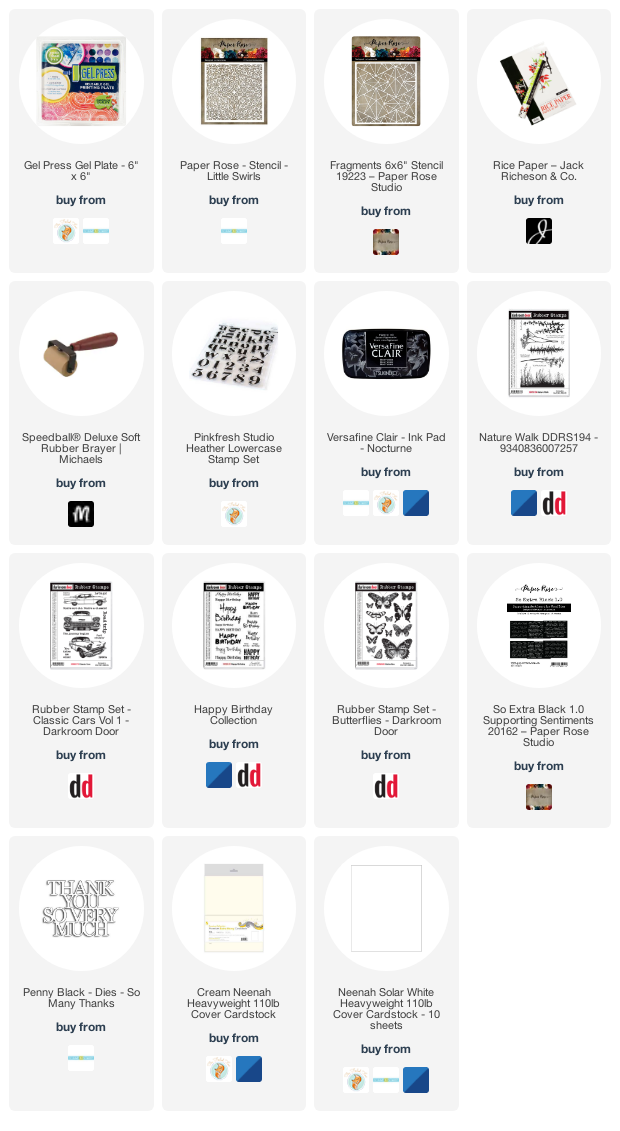
Supplies
(Compensated affiliate links used when possible)
3D Tulips
Posted: June 11, 2021 Filed under: Paper Rose, so extra supporting sentiments, tulips 3D | Tags: Catherine Pooler inks, delicata inks, Paper Rose 6 Comments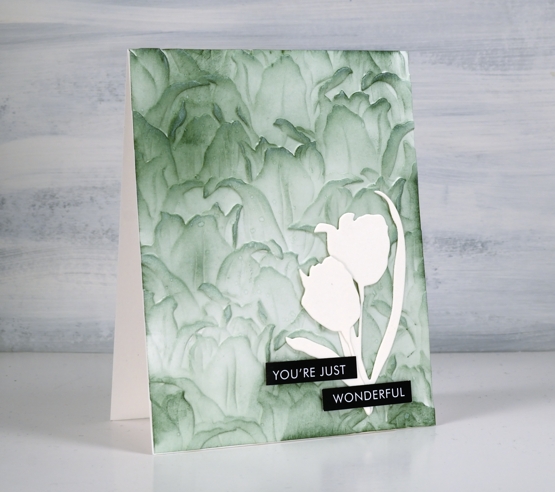
My embossing folder collection has grown a bit more this week. I ordered a couple from Paper Rose Studio and tried out the Tulips 3D folder today. After a few experiments with watercolour paper and neenah cardstock I used the same technique on both these cards with different inks.
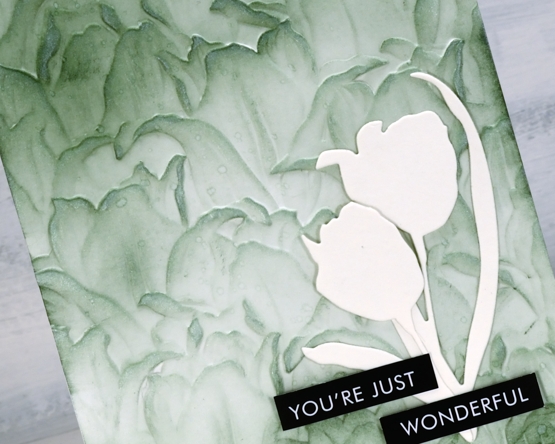
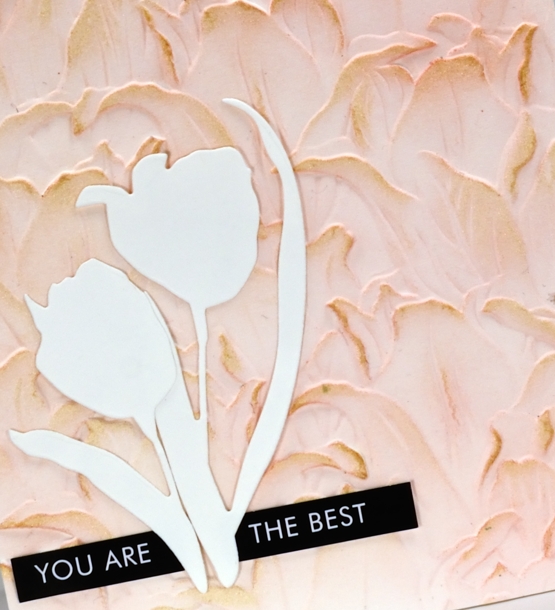
The green panel above was done with neenah solar white cardstock and the pink below is watercolour paper. As I didn’t end up adding more than a spritz of water the effect is the same on both panels. I embossed the cardstock then used blending brushes to add Catherine Pooler spruce ink to the card above and bellini to the card below. For added detail and shimmer I used delicata inks direct to the panel, shimmer white over the spruce and rose gold over the bellini.
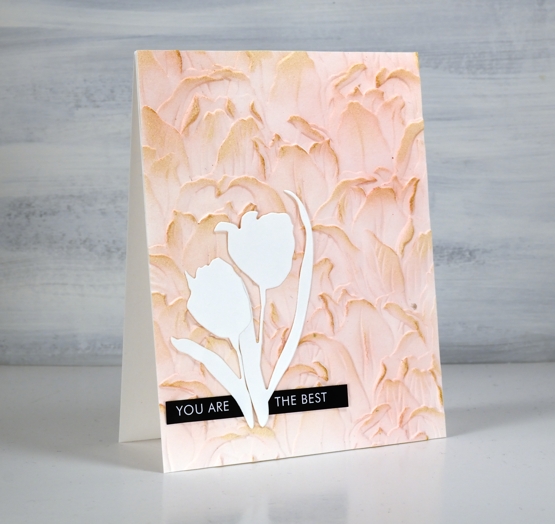
To complete the cards I added tulip diecuts from Penny Black (promise me II) and sentiment strips from Paper Rose Studio. I have seen printed sentiment strips from a few companies now and decided to try these. They are printed on slightly glossy cardstock and are designed to pair with die-cut words. There are several copies of each sheet of words or phrases so if I botch the cutting I can try again.
I know tulip season is over but I had to give this folder a try. I also know tulips don’t come in green but I think the spruce one is my favourite of the two.
I appreciated all the suggestions and comments about the alcohol ink panels. I am considering a few of the ideas and will do a video as requested as soon as possible. Thank you for taking the time to enter the discussion; I love hearing from you and gathering new ideas.
Supplies
(Compensated affiliate links used when possible)