Gel Printing with stencils + video
Posted: July 12, 2021 Filed under: Butterflies, classic cars vol 1, Darkroom Door, fragments, gel press, gelli plate, Heather lowercase stamp set, little swirls, Nature Walk, Paper Rose, Pink Fresh studio, so extra supporting sentiments | Tags: Darkroom Door stamps, gel press, gel printing, Paper Rose, Pink Fresh studio 7 Comments
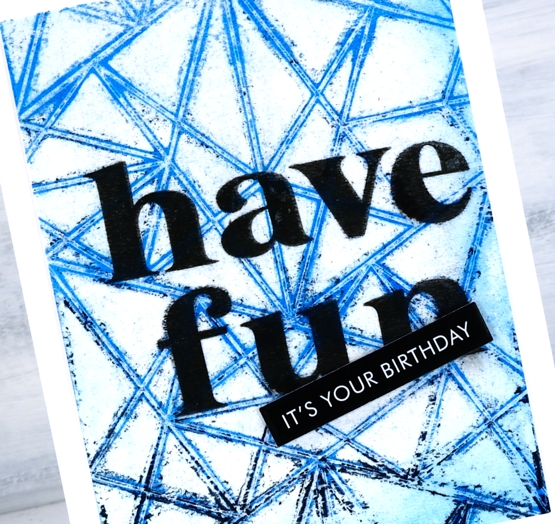
In recent gel printing sessions I have used some of my intricate stencils from Paper Rose Studio. This stencil, ‘little swirls‘ makes a particularly beautiful background. I’ve been printing on a 6″x6″ gel plate with a 6″x6″ stencil but I cut the print down to make a 4¼” x 5½” card.

I used stamps from Darkroom Door’s nature walk , butterflies and happy birthday sets. (all linked at the end of the post). The process for making this type of print is shown in the video below.
After any gel printing session I usually have quite a pile of prints, some become cards but I am hoping to use more in my art journal. I have to be a bit more adventurous in tearing and layering and turning them into more than just a patterned print.
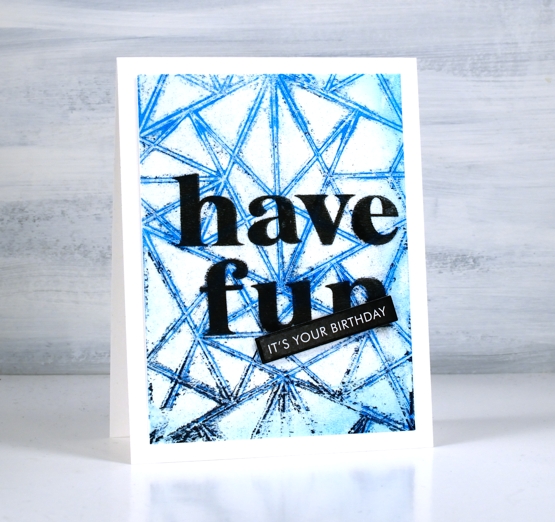
The making of the background above is included in the video. To turn it into a birthday card I stamped ‘have fun’ directly on the print then popped up a sentiment strip on top. The words are stamped in Gina K obsidian amalgam ink using the Pink Fresh Studio ‘Heather’ lowercase alphabet set.
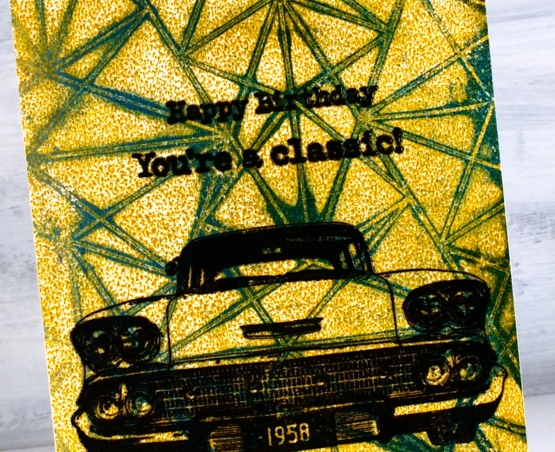
The making of the background below is also part of the video and you can see the mustard paint beaded on the surface of the gel plate making an allover pattern when printed. I didn’t necessarily want the beading but was happy when it ended up uniform. Paints of different brands perform differently on the gel press so experimentation is necessary to work out how much paint and which brands will give you the results you want.
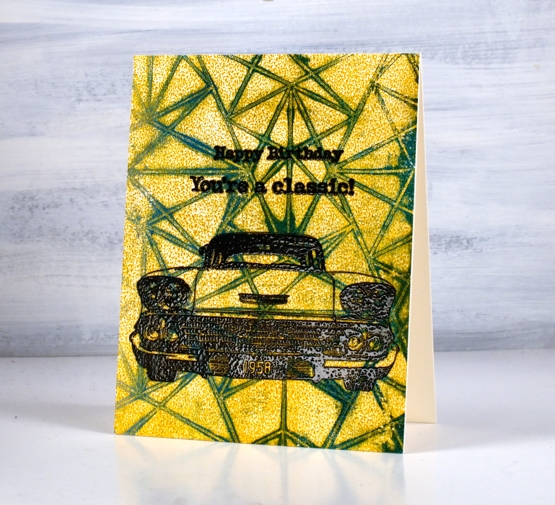
I turned this background into another birthday card by embossing a car from the Darkroom Door Classic Cars vol 1 set along with a sentiment from the same set plus one from the Happy Birthday set.
I also filmed some gel printing with a few textured surfaces from the recycling box; I’ll be sharing that video soon.
I’d love to hear how you use your gel prints; I’m always open to ideas.
Supplies
(Compensated affiliate links used when possible)
Floral Focus
Posted: June 28, 2021 Filed under: floral focus, Heather lowercase stamp set, Karin brushmarkers, Lea ornate uppercase stamp set, Pink Fresh studio | Tags: Karin brushmarkers, Pink Fresh studio 7 Comments
Hello! I am excited to be sharing this post here and on the Foiled Fox blog today. All this floral beauty is on one stamp from Pink Fresh Studio and it’s called ‘floral focus’. Since it arrived on my work table I’ve tried it with pencil colouring, emboss resist and this Karin brushmarker watercolour technique. I love how bright and summery it looks with these colours.
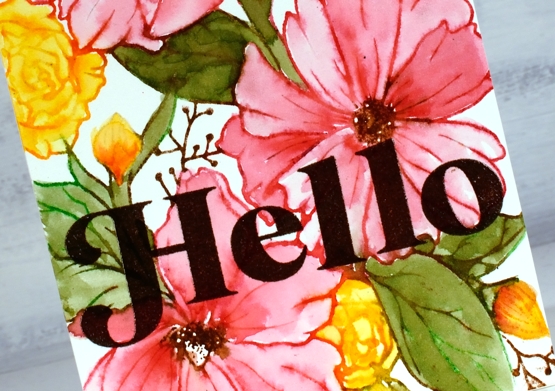
Floral Focus is a large rubber background stamp and rubber stamps are my favourite to work with. I know transparent stamps are great for placement but rubber stamps seem to hold onto their ink better. I will always have both in my collection but I get a little bit excited when I ink the rubber stamps. I used a stamp positioner for this panel and inked the large pink flowers first with magenta red and henna markers. If I get ink on adjacent areas I just wipe it off before stamping. Once stamped I blended the pink ink to fill the petals and restamped the centres in brown to make them a bit bolder. Next I inked the small flowers and buds with the gold brushmarker, then blended with water. For the leaves and stems I inked with both henna and grass markers to get a muted green rather than a bright green. Finallly I did the twiggy bits with the henna marker.
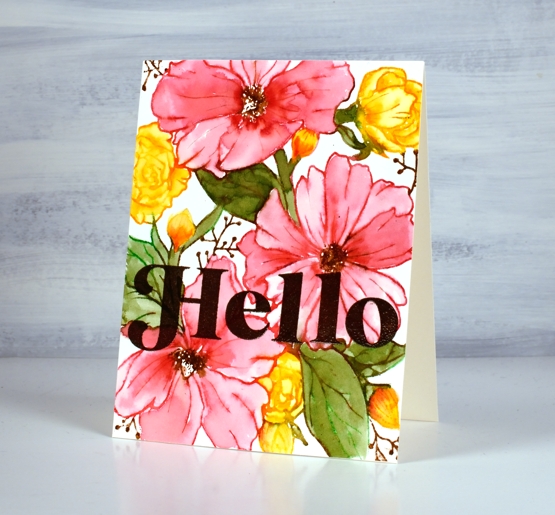
The large letters are from two Pink Fresh studio alphabet sets, the ‘H’ is from Lea’s Ornate uppercase set and the rest of the word from the Heather lowercase set. I stamped several times in versafine vintage sepia then embossed in clear powder for a glossy finish.
Thanks for dropping by today, make sure you visit the Foiled Fox blog for more information and inspiration!
Supplies
(Compensated affiliate links used when possible)