
Alcohol Ink Winter Skies
Posted: January 12, 2023 Filed under: Alcohol Ink, Dies, Penny Black, tall trees, Taylored Expressions | Tags: grafix, grafix craft plastic, Penny Black creative dies, Ranger Alcohol Ink, Taylored Expressions 11 Comments
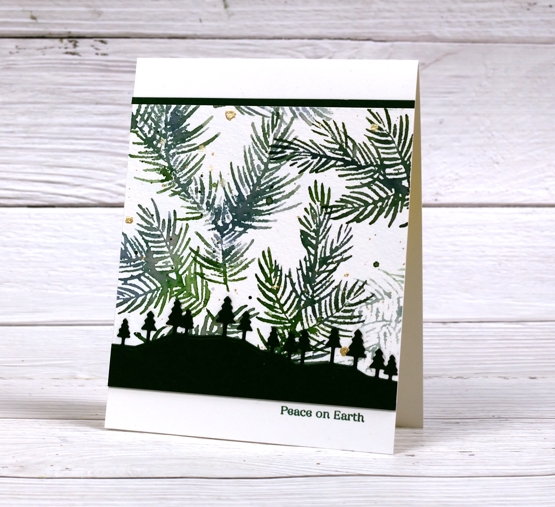
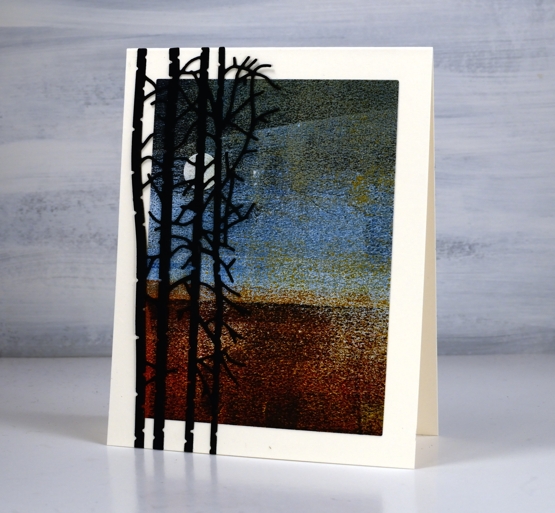
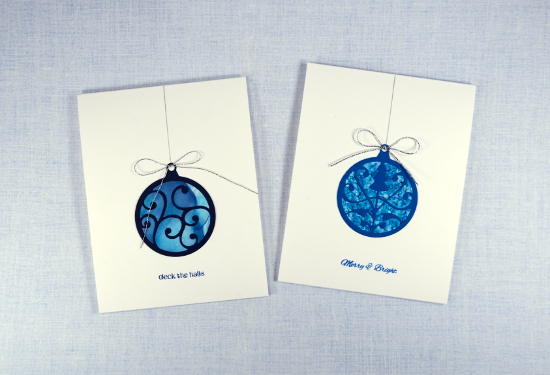
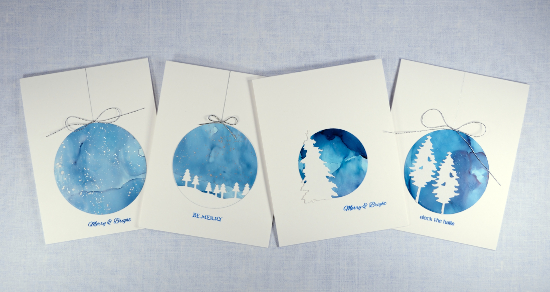
It is unusual for me to be making Christmas cards in January but the supplies are still handy and I will be happy to see the cards in October! I have a small stash of alcohol ink panels in my pile of possibility so the next few blog posts will feature those backgrounds paired with wintry scenery and Christmas greetings.
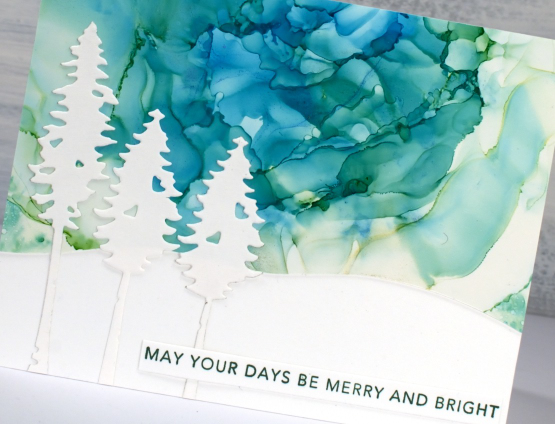
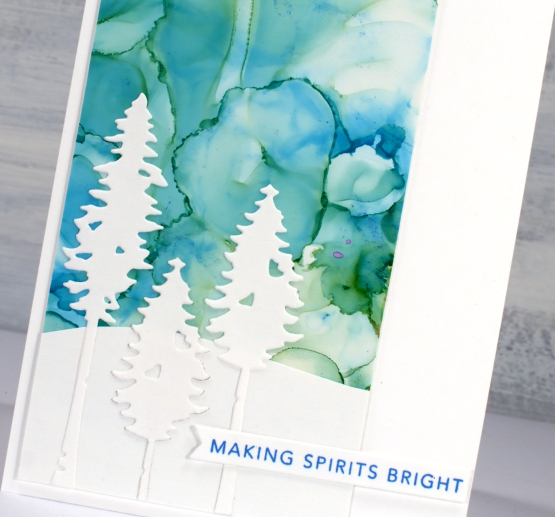
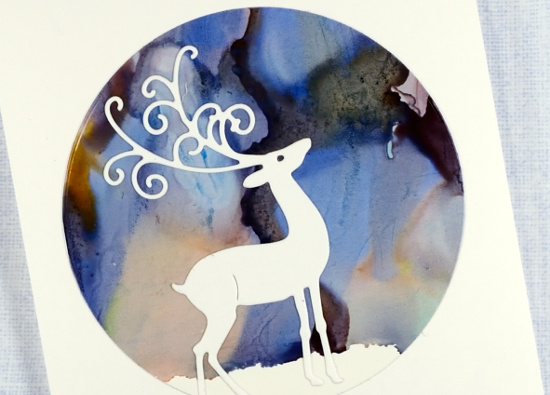
I’m sorry I can’t tell you exactly what techniques I used for these panels but it looks like I added blue and green inks to white craft plastic, added a generous amount of isopropyl alcohol then blew the liquids around the panel with a hand held air blower. I love the frilly ribbon look on the sky above.

I chose the wonderful ‘tall trees’ dies from Penny Black and hand cut some snowy hills from white cardstock. The sentiments are once again from Taylored Expression because they are so handy and neat!
(Compensated affiliate links from Foiled Fox & Scrap n Stamp)
Delicate Pines – 9 Ways!
Posted: November 29, 2021 Filed under: delicate pines, Dies, gift card pocket, joyful ornaments, jubilation, juniper, onramental branch, Penny Black, tall trees, Taylored Expressions, trees and hills | Tags: Catherine Pooler inks, Penny Black creative dies, Penny Black stamps, Taylored Expressions, Tsukineko Versafine inks 8 Comments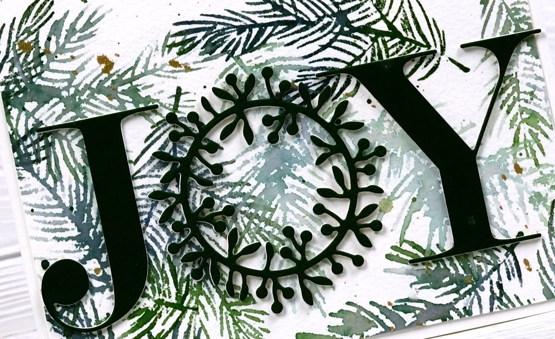
Welcome to a long post with quite a few photos!
When I last counted up the names on my Christmas card list and the number of cards I have completed the two numbers were not close to matching. I decided a quick way to grow the stack of cards would be to stamp a big panel then slice it up to make several cards.
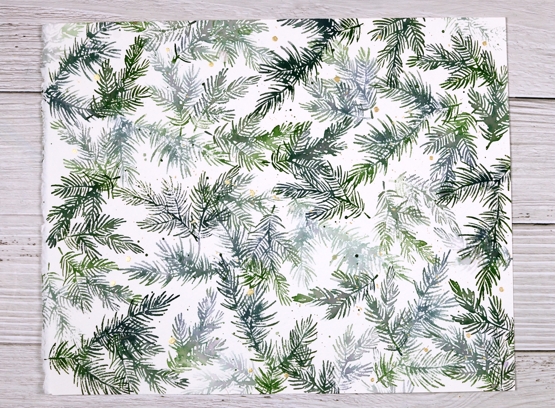
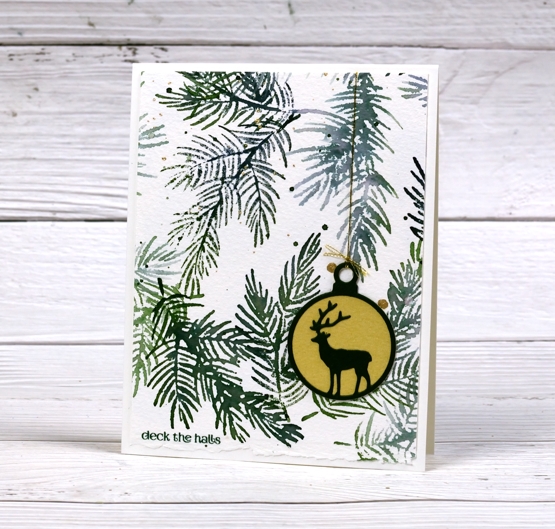
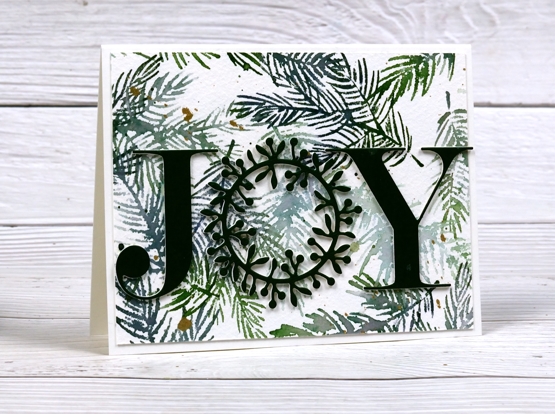
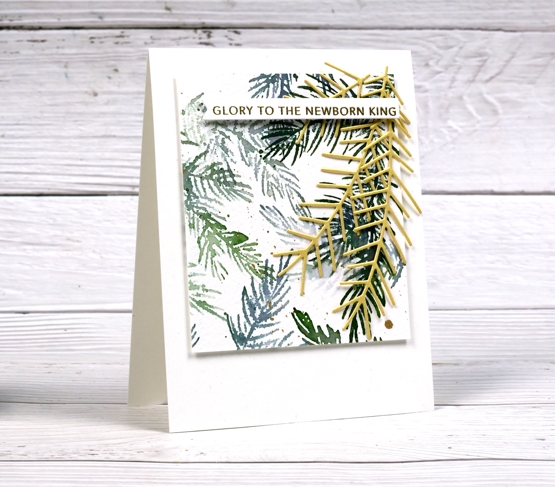
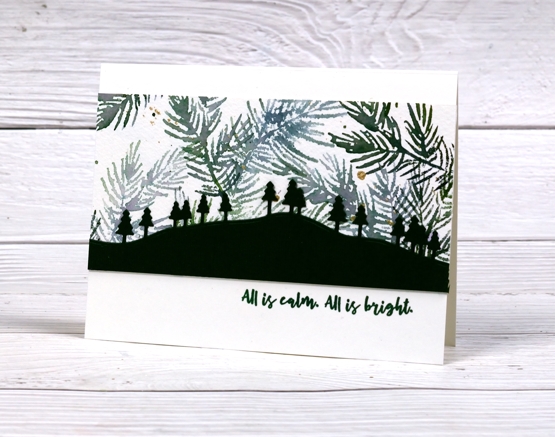
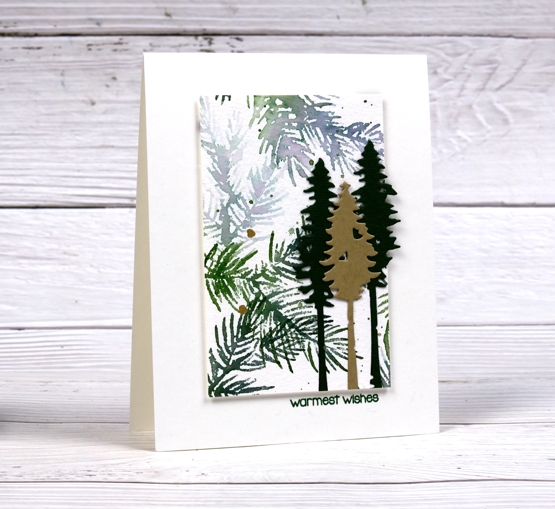
Turns out this idea was not all that quick. It took a while to make these cards because although they are from the same stamped panel, they are still all different. The photo above shows the original panel stamped with Penny Black’s new ‘delicate pines’ set of 3 stamps and two Catherine Pooler inks. After the stamping I added ink splatter then gold paint splatter.
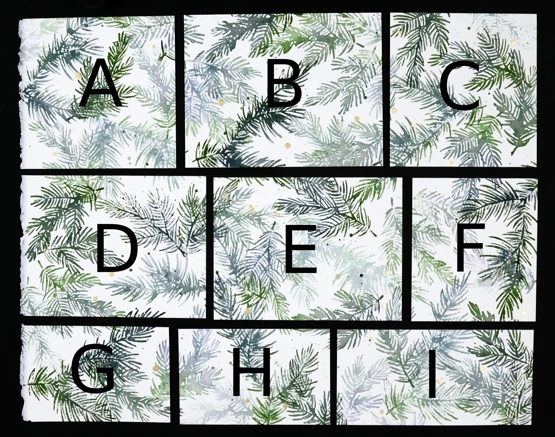
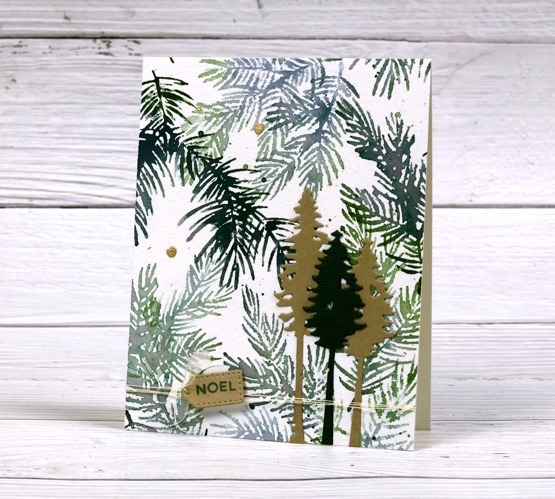
I kept the deckle edge on the 11″x14″ cold pressed watercolour panel and sliced up the panel lengthwise first. A,B & C are all 4¼” wide, D,E & F are all 4″ wide which left G,H & I all 2¾” wide. Below are all the finished cards. I used some pale gold, Bazzill avocado green and kraft cardstocks for the die cuts and framing. I used versafine clair rainforest ink to add sentiments and some linen twine here and there. All the cards are shown below with the size of the stamped panel portion included underneath (all the finished cards are 4¼”x 5½”)
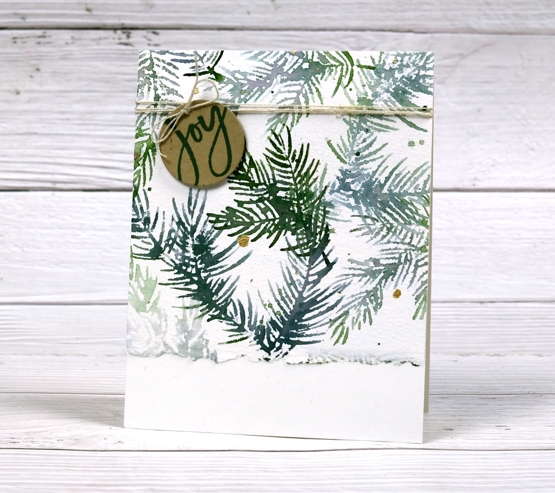
A. 4¼ x 4½
B. 4¼ x 5½
C. 4¼ x 4⅛
D. 4 x 5¼
E. 4 x 5¼
F. 4 x 3½
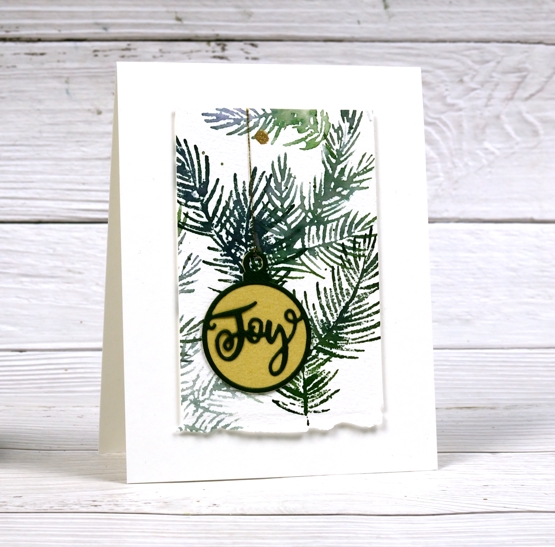
G. 2¾ x 4¼
H. 2¾ x 4¼
I. 2¾ x 5½
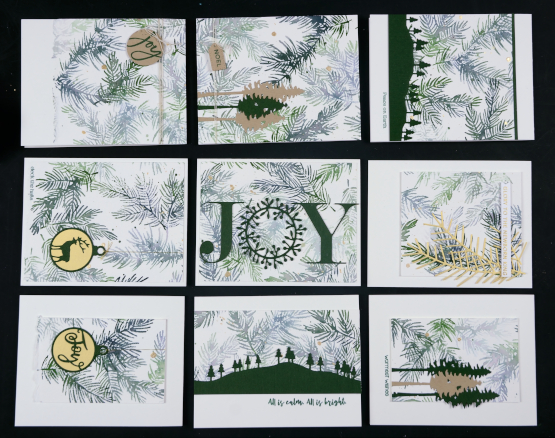
The finished cards above are in the places that correspond to the labelled photo up at the beginning of the post. I had them laid out on a cutting mat on the floor beside me as I put them all together so I didn’t get them mixed up. I wanted you to see how I used each size in a different way.
I hope you find some inspiration from these cards. Remember that three of my online classes are on sale until the end of November. Use the code HTNOV to get a 25% discount on the Floral Faves class, Winter Wonder class and the Colour Clues class.
The stores I have affiliate links with are also having sales right now (isn’t everyone?) I have put the links in the right hand side bar of the blog for easy access. Just click on the store name and start shopping!
Supplies
(Compensated affiliate links used when possible)
Landscapes from leftovers
Posted: July 21, 2021 Filed under: Dies, gel press, into the woods, Penny Black, tall trees | Tags: gel press, gel printing, Penny Black creative dies 7 Comments
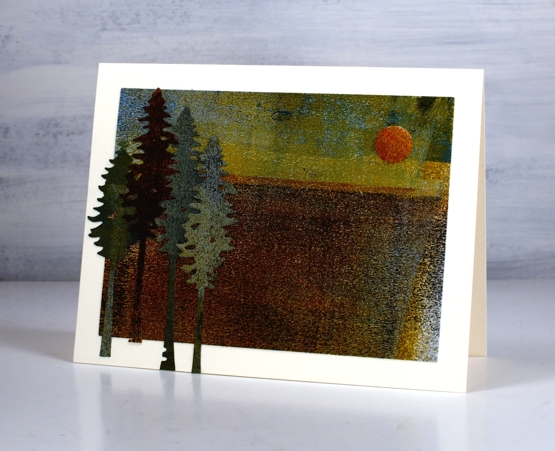
In my recent gel printing video I kept a piece of heavy weight paper off to the side for cleaning my brayer. I turned it around half way through the printing session so it ended up browns on one side and blue/grey/yellow on the other.

The colour and texture was too yummy to waste so I cut two rectangles which both spanned the centre or ‘horizon’ line of the large sheet. Because the panel above has a dark sky I punched a circle moon from another area and made it a night scene with the addition of black silhouette trees die-cut with the PB ‘into the woods’ die.
Not only is there plenty of visual texture in these panels the brayered paper is also very rough to touch. There is no trick to making these papers; I definitely don’t keep the clean up sheets every time but I find if I work with the same colours for a while and flip the sheet around when it has plenty of paint on it the combination of colour and texture can be beautiful.
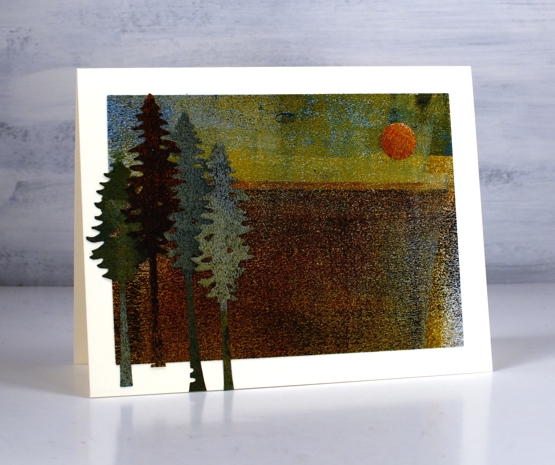
The second card is more of a late afternoon scene. The colour of the sun is similar to what we saw two days ago when the sky was hazy due to bushfires in northwestern Ontario.

The trees blend into the landscape somewhat as there is not a lot of contrast between the die cuts and the base. I used the PB ‘tall trees’ dies and cut them from the left over edges of the panel.
This is not the first time I’ve used scraps and scratch paper for cards and journal pages. This cityscape is made from gel printing masks and two of these cards are from a clean up sheet. Today I glued a large ‘clean up’ sheet into my art journal as a background for a future page. I don’t know what to do with it yet but I liked it too much to toss it away.
Supplies
(Compensated affiliate links used when possible)
Alcohol Ink Baubles – a tutorial
Posted: October 8, 2017 Filed under: Alcohol Ink, baubles, inspired, tall trees, trees and hills | Tags: Penny Black creative dies, Penny Black stamps, Ranger Alcohol Ink, Tsukineko Versafine inks 22 Comments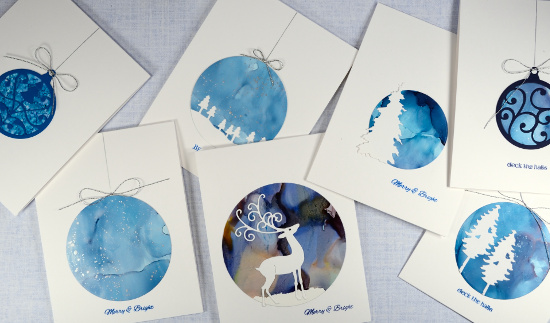
I am happy to finally have a video tutorial to share with you today. It’s been a while I know. This one I created for Splitcoaststampers “Falliday Fest”.
The card designs are very simple, the intricacy is in the patterns the alcohol ink makes.
I included several different methods of making alcohol ink patterns and also a few ideas for making the patterned panels into cards by die cutting circles to turn into baubles or snow globes. Method one involved blending alcohol inks on a non-stick craft sheet then swiping a piece of yupo paper through the ink to create a pattern. In method two I used a felt applicator with dots of alcohol ink on it to apply ink to the yupo paper. Method three was alcohol ink applied directly to the yupo paper. You can see all three methods in detail on my video tutorial below.
This post includes affiliate links to The Foiled Fox online store. At no extra cost to you I will receive a commission if you make a purchase after clicking a link to The Foiled Fox from this blog. The affiliate links are a new feature on my blog. I have been working with The Foiled Fox for quite a while now and I can recommend their store wholeheartedly. They have an extensive range of art and craft products and prompt and helpful service (also lovely packaging!)
Supplies:
Stamps: holiday snippets (Penny Black)
Dies: baubles, tall trees, nature’s creatures, inspired, trees and hills (all Penny Black), circle dies
Inks: stream, pool, stonewashed, shell pink, cloudy blue, denim, silver, snow cap, eggplant, lemonade alcohol inks (made by Ranger) majestic blue versafine ink & deep lagoon versafine ink
Paper: yupo paper, neenah solar white paper
Also: silver cord
Forest – Casology 231
Posted: January 11, 2017 Filed under: tall trees | Tags: Penny Black creative dies, Penny Black stamps 29 Comments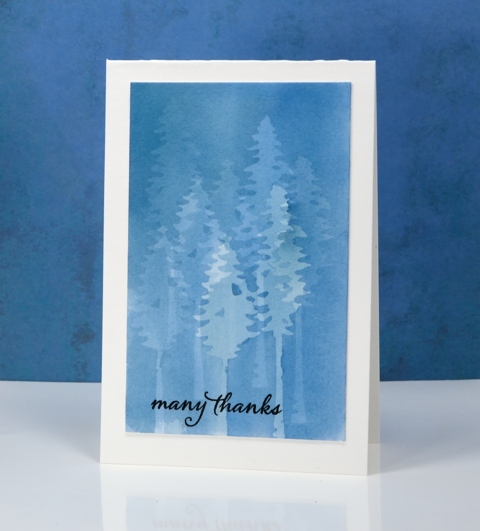
My subtle forest is an experiment in masking. I painted the panel a month back and it was sitting in the pile of possibilities. When I saw what the Casology challenge theme was this week I thought of this panel straight away. To paint this misty forest I use the PB ‘tall trees’ dies to cut masks from frisket film. Frisket film is a removable plastic film used for masking when painting and drawing. I positioned the two tree masks then painted a pale blue wash over the trees, let it dry then repositioned the masks. I repeated this process numerous times to create my forest. With each wash the panel became a darker shade of blue and the previously masked trees received some colour also. Having two different tree dies added a little bit of shape and height variety.
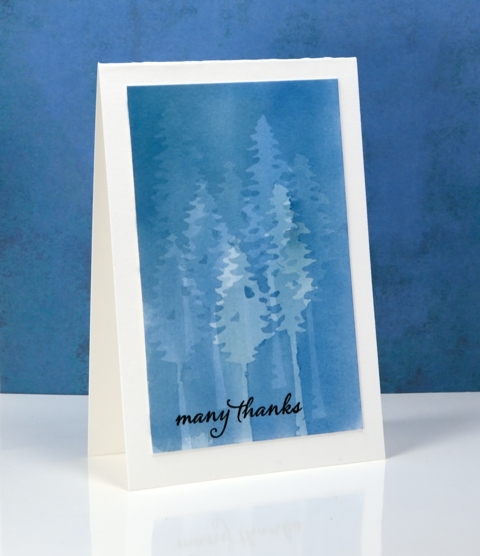
I’m sorry once again that I can’t remember which paint I used. I don’t think it matters too much; I would use any of my watercolour mediums and keep it fairly diluted so I could keep adding layers. I was careful to let it dry thoroughly between each addition of paint so there would be no blurry edges. I also pressed the frisket masks down very carefully so the paint wouldn’t creep under the edges. I finished the card simply by adding a black sentiment and a natural coloured card base.
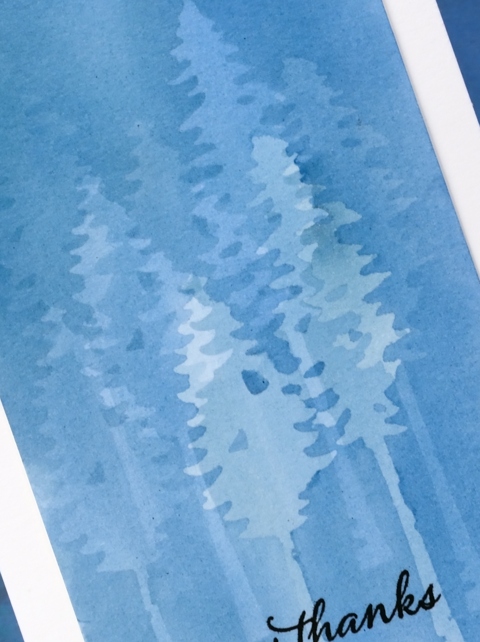
It’s an interesting technique which I haven’t finished playing with…
My blue forest works for the City Crafter challenge this week too.
Supplies
Stamps: Happy Snippets (PB)
Dies: Tall Trees (PB)
Ink: Versafine onyx black ink (Tsukineko)
Paper: hot pressed watercolour paper
Paint: watercolour paint of some kind??
Also: grafix frisket film extra tac


