Christmas Stars
Posted: February 22, 2021 Filed under: Cuttlebug, lighting the way, Papertrey Inks, Penny Black | Tags: Penny Black stamps 3 Comments
Last month I made a shaker card with five star cuts outs and sparkly sequins and beads inside to shake around. As the stars were cut out of a watercoloured panel I saved them for another project. My friend Stamping Matilda does this every weekend, her Sunday posts are called ‘Sunday Scraps’ and she features leftovers from that week in a new card or project. I don’t do that anywhere near as often but occasionally I have some scraps, like these stars, which inspire me to turn them into something new. I’m also committed to making a few Christmas cards every month so I don’t leave it all to the last few months of the year.

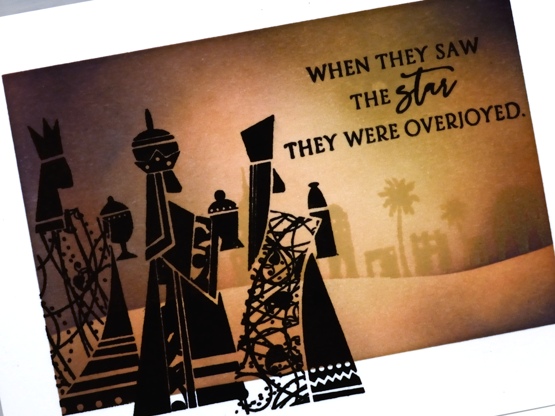
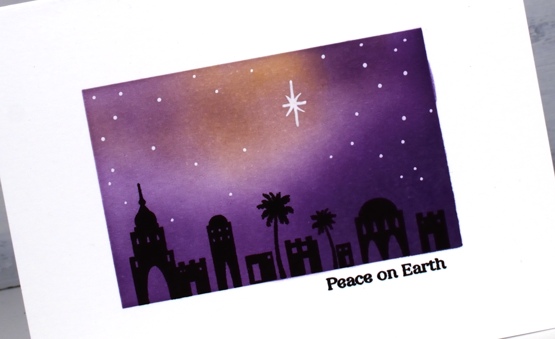
I used two of the cut out stars as backgrounds for some Christmas themed silhouette stamping, backed them with blue foam then mounted them on embossed backgrounds. On the card above I stamped the Bethlehem scene from the PB ‘lighting the way’ set along with a sentiment from PB ‘Christmas sentiments’. The embossed background was made with neenah solar white cardstock in the Tim Holtz ‘snowflakes – speckles’ embossing folder.

This smaller star was big enough to feature the dove from the PB ‘joy filled’ set and I added sentiment from the PB ‘holiday snippets’ set underneath in versafine clair purple delight ink. The embossed background was made with the ‘allegro’ embossing folder which has been sitting around since my cuttlebug days.

The star dies from We R Memory Keepers seem to be retired but I linked to some similar dies in the supply list below. The original shaker card these stars were cut from contained five stars but I deemed two too small to use. I did stamp the remaining star and it auditioned for a spot on a card but didn’t make the cut. You know it happens sometimes!
Supplies
(Compensated affiliate links used when possible)

Bethlehem scenes with Karin brushmarkers
Posted: December 17, 2020 Filed under: Ink to Paper, Karin brushmarkers, lighting the way, Penny Black, three kings, Uncategorized | Tags: Ink to Paper, Karin brushmarkers, Penny Black creative dies, Penny Black stamps 2 Comments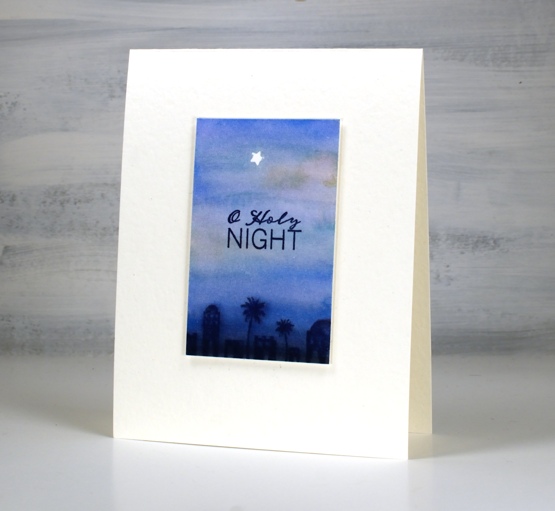
I’ve continued to experiment with the Karin brushmarkers from the Foiled Fox, this time using them for watercolour backgrounds. These three backgrounds feature combinations of rosewood 272, cyan 207, royal blue 045 and black 030.
I tried different methods of applying the marker to the hot pressed watercolour paper and found that to achieve smooth transitions from one colour to the next it was better to touch the markers to wet paper. It still worked applying the marker first then the water but I prefer the very soft blends made when the paper was already wet. I don’t think I will often use the markers for backgrounds as it probably uses up ink at a faster rate but little scenes like the one above did not require much application.

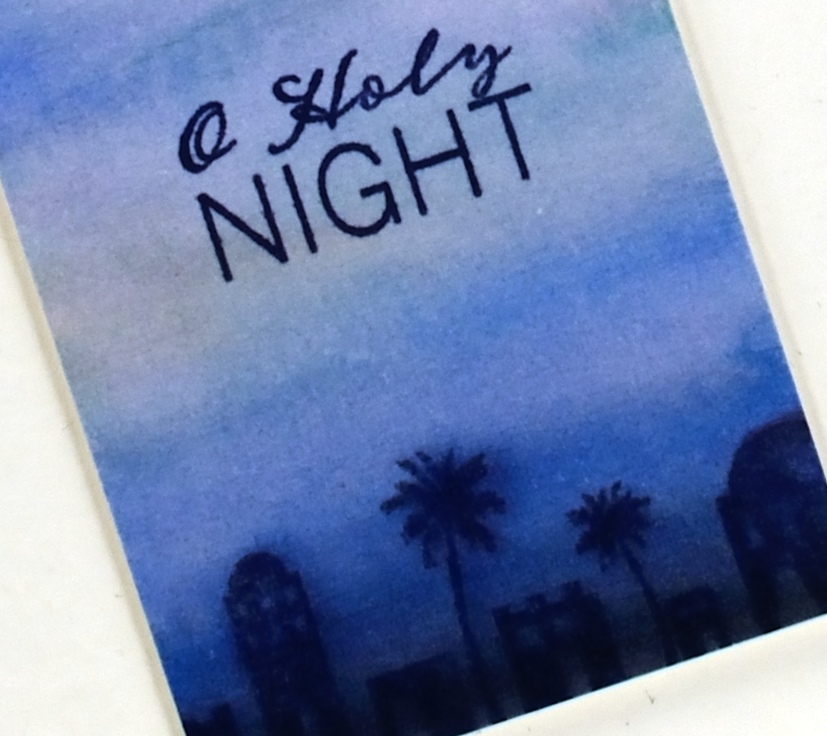
The tiny star was masked by die cutting a star (PB Xmas tree border set) from frog tape (painter’s tape for delicate surfaces) then positioning it firmly on the panel before painting. I stamped the manger above in versafine clair nocturne once the panel was totally dry.
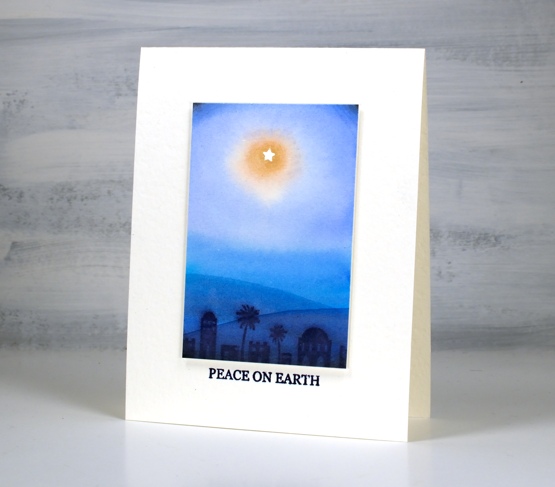
To get a soft image of the Bethlehem stamp I stamped it in chipped sapphire distress ink while the background was still slightly wet. On the panel above I took a wet paint brush and painted a hill shape across the lower part of the panel waited then painted another one even lower down. I didn’t need to add any ink the paint brush just dragged ink from the Bethlehem image. I popped up each panel with two pieces of cardstock, attached it to a white luxe card base then added sentiments from the Ink to Paper Be Merry Mini set.
The current Christmas card designs are looking minimal for two reasons, I still need quite a few cards and I like simple and elegant!
Supplies
(Compensated affiliate links used when possible)

Wise Men
Posted: December 8, 2020 Filed under: lighting the way, Penny Black, three kings | Tags: Penny Black stamps, Ranger Distress inks 5 Comments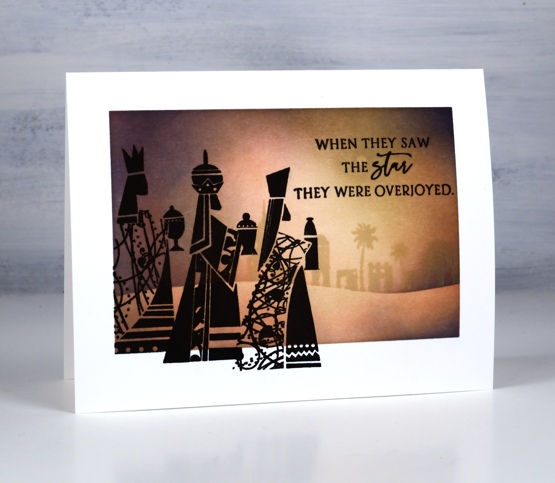
I have two more one-layer ink blended cards today created using exactly the same technique as yesterday’s cards. I masked the edges of the neenah solar white card front with painter’s tape then used blending brushes to build up colour to fill the inside space.
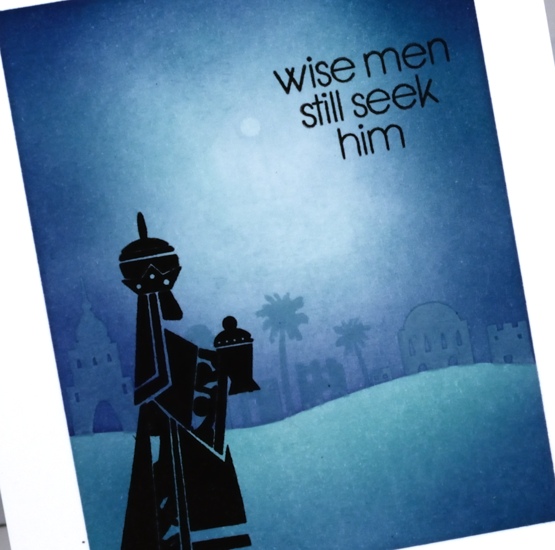
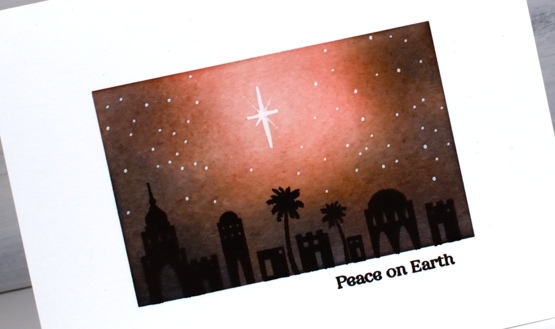
On both cards I placed a tiny circle post-it mask in the sky to be the star then blended the lightest colour over the whole panel. On the card above I started with antique linen distress ink; on the single wise man card below I started with speckled egg distress ink. Once the base colour was in place I positioned a hill shaped post-it note to mask the land area while I worked on the sky. On the card above I used worn lipstick then chipped sapphire. On the card below I blended pine needles followed by chipped sapphire.
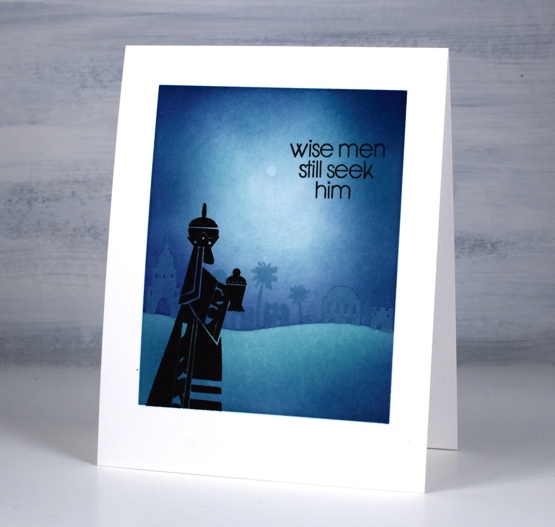
For both cards I completed the sky blending then removed the tiny circle mask and blended over the top of the white dot so it would still be the brightest spot but without the crisp edges that would make it look too much like the moon.
Before removing the mask over the land area I stamped the Bethlehem stamp from PB lighting the way set along the edge of the mask in the lightest ink (antique linen or speckled egg). With the sky complete I placed the other half of the curved mask over the sky and removed the lower mask so I could blend the darker colours along the base of the design.
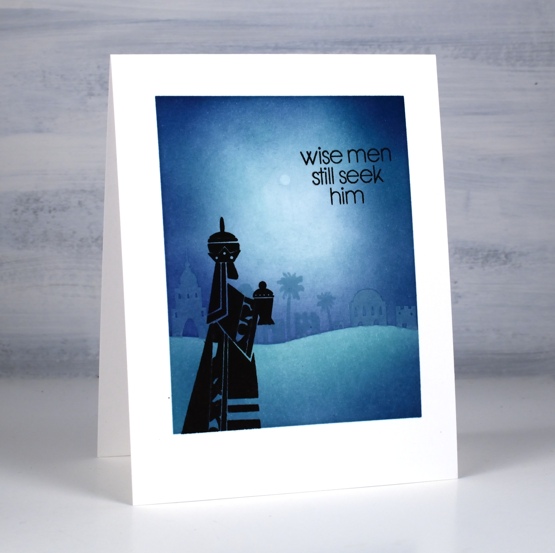
On the portrait oriented card I added one wise man from the PB three kings set in versafine clair nocturne ink while the tapes were still in place around the edges. On the card with three wise men I stamped one king with the tapes in place then removed the tapes to stamp two more kings overlapping the masked edge. I used sentiments from the PB set promise of hope.
I’ve mentioned my brother David’s videos a couple of times this year. He has created quite a few series since churches went online in March. Even though many churches are meeting in person again he is still creating short, thoughtful bible talks. You might be interested in his current series, God’s plan for Christmas. He is posting a new video everyday from Dec 1 -25 explaining the Christmas back story. There was nothing last minute about the birth of Jesus; it was planned from the beginning. As we prepare for a Christmas which will probably look a little different than usual you might enjoy taking a few minutes each day to think about the birth of Christ and what it means for us. You can find his God’s plan for Christmas series here
Supplies
(Compensated affiliate links used when possible)
 https://linkdeli.com/widget.js?id=f5e8378456858c916708
Lighting the way
Posted: December 7, 2020 Filed under: lighting the way, Penny Black, Uncategorized | Tags: One-Layer cards, Papertrey ink, Penny Black stamps 11 Comments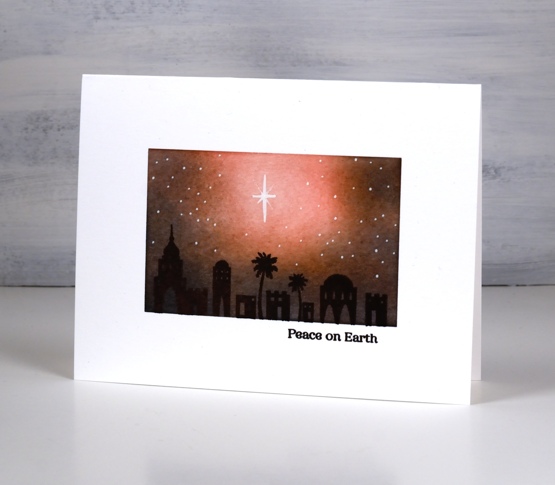
If you have been visiting my blog for a while you might remember I used to create a lot of cards using sponging techniques. I’ve been returning to those techniques lately but putting my blending brushes to work instead.
To create the one layer card above I masked off four sides of my neenah solar white card base then blended papertrey ‘berry sorbet’ ink over the panel. I switched to papertrey ‘Americana’ ink next but avoided blending the top middle area then finished the perimeter of the space with ‘enchanted evening’ ink which is a blue ink. Blending the dark blue over the brownish red made a dark brown, perfect for the night sky. I stamped the Bethlehem stamp from Penny Black’s lighting the way set in versafine clair nocturne ink.
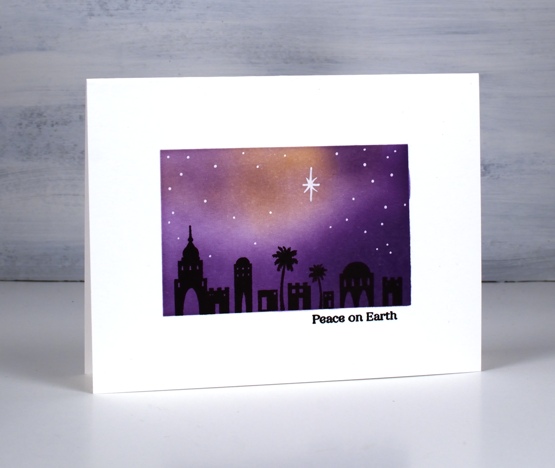
The second colour scheme is also a combo of papertrey ink cubes: lemon tart, lilac grace, plum pudding and royal velvet. I finished both cards with a sentiment from the PB holiday snippets set and stars drawn with a white gelly roll pen. I enjoyed doing these so much that I looked through my stamps and did more with a different silhouette stamp set. I’ll have them ready to show you soon. I don’t know that the blending brushes are any quicker than sponging but I find them easier to use and the results are very smooth.
Supplies
(Compensated affiliate links used when possible)

Simple and Elegant
Posted: December 21, 2018 Filed under: lighting the way, three kings | Tags: Alexandra Renke cardstock, Penny Black stamps, WOW embossing powders 8 Comments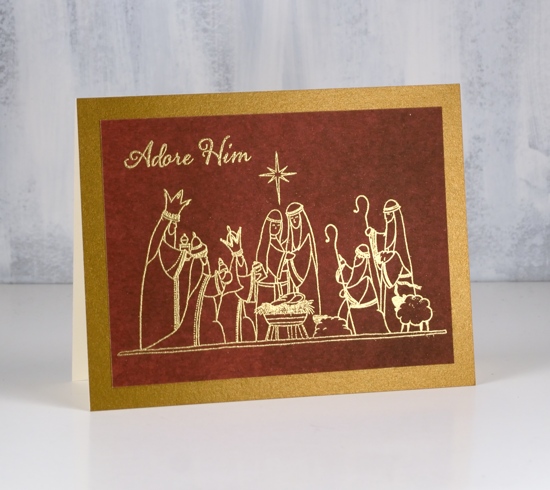
At this time of year any Christmas card making I’m doing has to be pretty simple and straightforward. But that doesn’t mean it can’t still be elegant or eye catching. I paired metallic embossing with richly coloured papers for these three nativity cards.
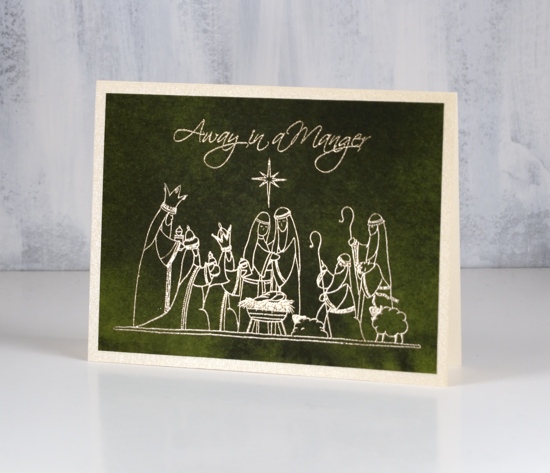
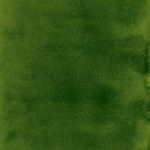
These papers from Alexandra Renke are solid colour but with the variation of a watercolour wash. They have enough interest to look like a sky but not fight with the detail of the picture stamps from Penny Black.

I always have a bit of a task matching a gold cardstock with gold embossing powder. On the top card the gold embossing powder on the dark red appeared to be an ‘old gold’ so I matted with a dark gold. On the last card I used a light gold card with the same embossing powder. The middle card features platinum embossing and a platinum mat around the deep green paper.
I hope you are further along than I with your Christmas card sending but as I say most years, December 25 is the first day of Christmas, there are twelve in total so I still have time to get my cards sent!
Supplies
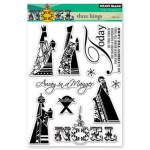
Stamps: lighting the way, peaceful season, three kings (PB)


Paper: Alexandra Renke dark green, red and scarlet papers


Cardstock: neenah natural white, platinum shimmer, gold shimmer, pale gold shimmer
![]()
Ink: versamark ink
Embossing powder: gold metallic rich, platinum