Filled with daydreams
Posted: March 10, 2021 Filed under: branch of love, daydream, dotlets, Penny Black, rain or shine | Tags: brutus monroe embossing powder, distress markers, Fabriano Watercolour Paper, Penny Black stamps, Penny Black stencils, Ranger Distress inks 11 Comments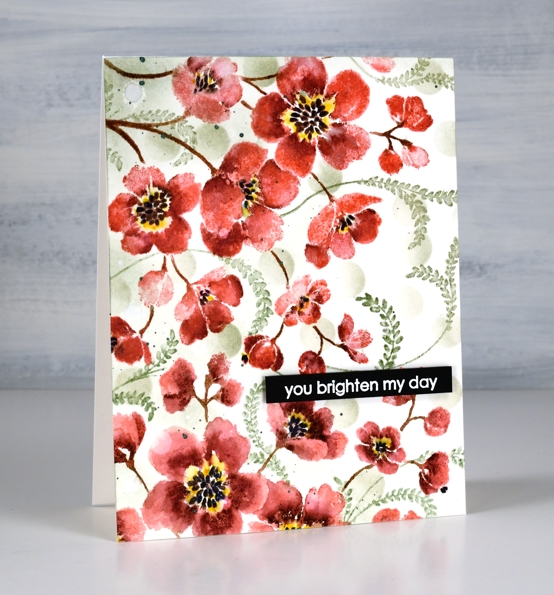
I’ve created with the Penny Black ‘daydream‘ stamp before but you might not recognise it as the same stamp used on today’s card. Last time I stamped the large rubber cling stamp once in blue. This time I’ve stamped it twice to almost fill the card front in pink and deep red. I’ve also added some filler foliage.

I kept the stamp in the stamp positiioner while I completed one print of the stamp then rearranged the panel and stamp to be able to stamp again in a slightly different direction to cover the lower third. I inked the stamp first with worn lipstick distress ink, added shading with an aged mahogany distress marker, stems with ground espresso and centres with black soot. I spritzed ever so lightly because I didn’t want to loose much definition but I did want the inks to blend a bit. After one impression I blended a few areas with a paintbrush and stamped more aged mahogany where needed to help define the petals. Once the ink and blending was dry I coloured around the black centres with a mustard seed marker.

To add filler around the red blooms I stamped the fronds from the PB ‘branches of love’ set in bundled sage ink then blended over them with a paintbrush and minimal water. I also used a blending brush to blend some bundled sage circles through the PB ‘dotlets’ stencil. I splattered some moss green pearlescent paint then popped up an embossed sentiment to finish the card.
Thanks for dropping by today; you do brighten my day!
Supplies
(Compensated affiliate links used when possible)
Daydream Watercoloured Flowers -Video
Posted: February 18, 2021 Filed under: daydream, Karin brushmarkers, Penny Black, Tutorial | Tags: Karin brushmarkers, Penny Black creative dies, Penny Black stamps, Tutorial 7 Comments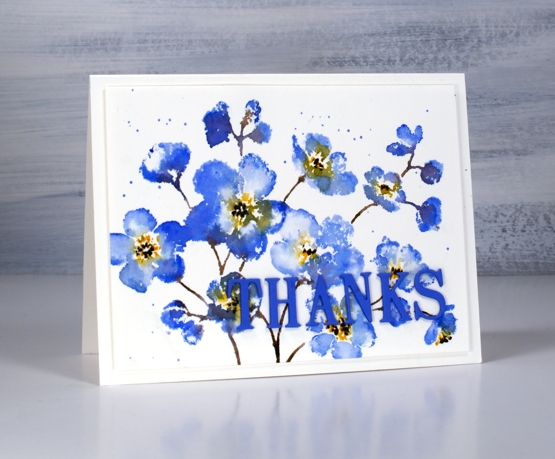
Penny Black has a new release called ‘Daydream’ and it’s filled with spring goodness. I guess many of us start daydreaming about spring in February. The stamp featured in my card today is called ‘daydream’ and I’ve paired it up with a new die, ‘thanks & hello’.
I’m enjoying working with the Karin brushmarkers both for watercolouring line images and for inking stamps. In today’s video I ink the stamp with four markers but my technique is slightly different to my usual method and involves some ‘water stamping’
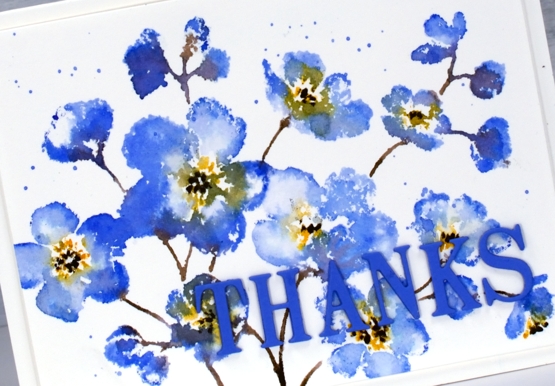
In the video below you can see why the juicy Karin markers are perfect for this technique. As I’ve mentioned in previous posts, a little ink goes a long way. I’m looking forward to trying this technique again on a different stamp with even less ink for a paler more subtle look.
I chose to keep the panel simple on a white background but you could add a pale wash before starting or do some second generation stamping for background flowers. Maybe I’ll try that next.

This blue which has a hint of purple is my favourite blue. It reminds me of cornflowers which featured in my bridal bouquet and was the colour of my bridesmaid’s skirts.
Supplies
(Compensated affiliate links used when possible)