Gel Print Floral Card Combos – Video
Posted: October 2, 2023 Filed under: gel press, Tutorial | Tags: gel press, gel printing, Tutorial, video 2 Comments
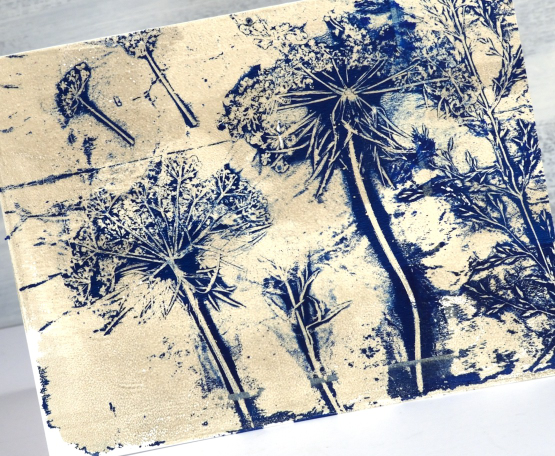
One of my favourite things to print on a gel plate is flowers. One of my favourite flowers to print is Queen Anne’s Lace. You might think, as I did, that Queen Anne’s Lace would be too fragile to print but it is surprisingly strong and the gel plate picks up all that delightful detail.
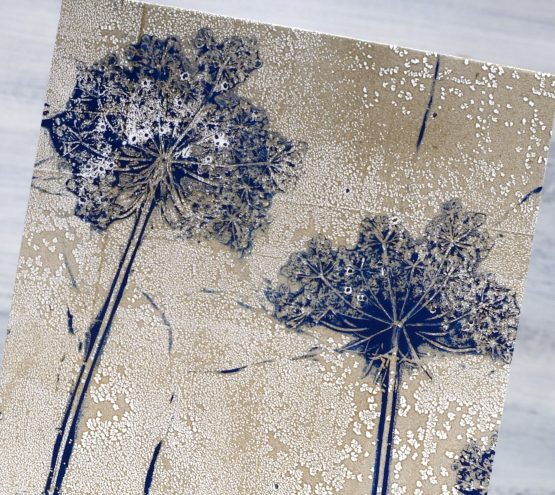
I don’t always print an envelope and card front in one go but it is a nice way to get a matching pair. I used a 9″x11″gel plate to easily fit both. I mention in the video that you can print the flowers over and over; the paint that clings to the flower head makes it sturdier rather than pulling it apart. The first few prints might leave some seeds on the gel plate and print but that just adds to the realism in my opinion.
Thank you to those of you who subscribed to my youtube channel last week. I am slowly building my community of subscribers again after losing my first channel. There are some of my early gel printing videos on the new channel marked with a ‘from the archives’ label and there is a gel printing playlist if you want to binge the lot.
If you don’t have a gel plate large enough to pick up a card front and envelope in one print you could always do two prints one after the other keeping your paint colours the same.
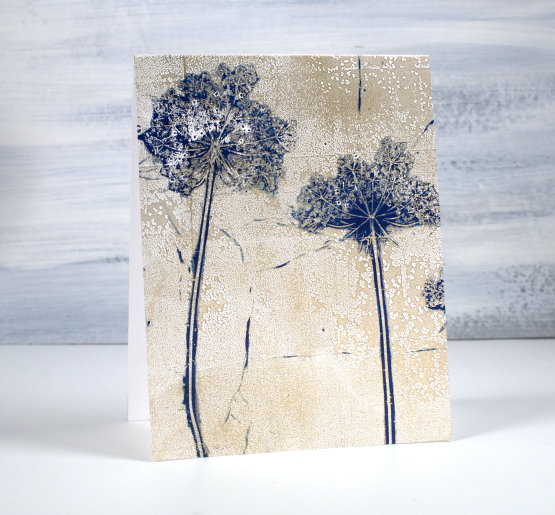
Below are a few more card and envelope combos I’ve printed using this same technique with a sticker to mask a space larger enough for the address.

You can see on this card featuring Queen Anne’s Lace and grasses that the print does not reach to the top of the card front. I guess I didn’t press down evenly when taking the print.
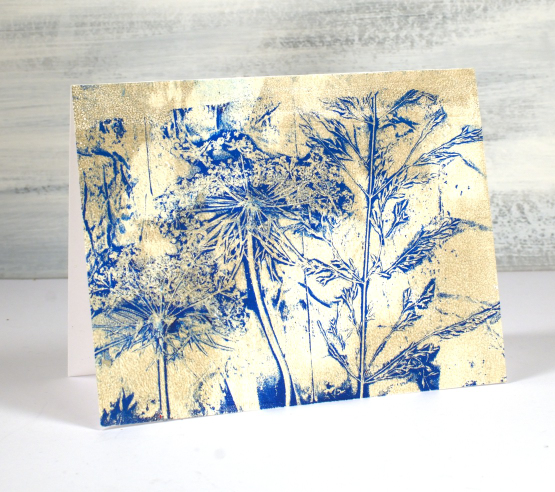
Of course you can make co-ordinating card and envelope prints using any pattern; it doesn’t have to be plants but when I have plants, not snow in the yard I like to choose plants. I’ve also used stencils.

I hope you give this technique a try; it makes an eye catching bit of mail to send. Make sure you use removable stickers to mask your address box; you can probably guess why I mention that!
If you are new to gel printing check out my online course Gel Print Journey to learn all the basics and try all sorts of patterns and combos.
Alcohol Inks + Stencil on the Gel Plate
Posted: September 18, 2023 Filed under: Alcohol Ink, Dies, gel press, Lavinia, Penny Black, Tutorial | Tags: Alcohol Ink, gel press, Lavinia, Tutorial, video 5 Comments
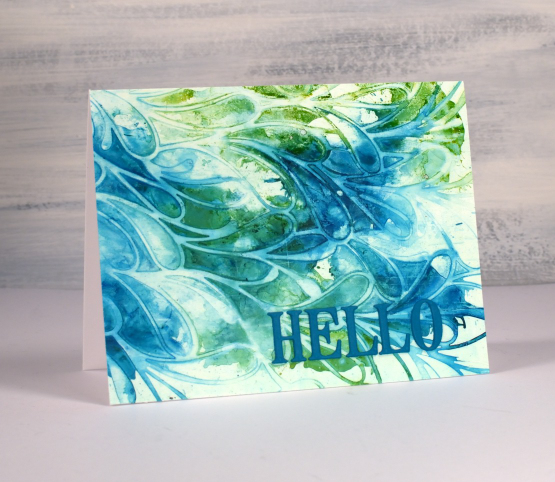
Recently I posted a card featuring a gel print made with alcohol inks and a stencil. You can check out that card here. There was quite a lot of interest in seeing a video of my process so that is what I have for you today. One of the bonuses of this technique is the way I can make more than one print from the same initial application of alcohol ink. I worked with T-Rex alcohol inks on a 5″x7″ gel plate.

As you will see in the video the first card (shown above) is made from the first print pulled from the gel plate.
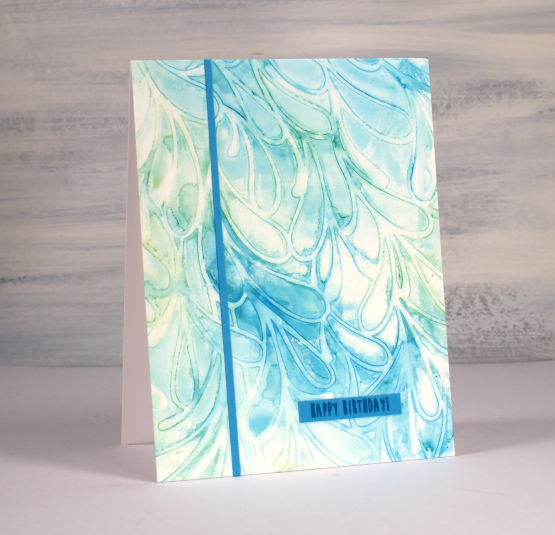
The second print pulled from the gel plate features the same inks but they are more muted because I diluted them to move them from the stencil to the plate. I quite like the softness of the second print.

If a print works for me and honestly, they don’t all work, I often don’t want to cover them up with extra decoration or die cuts. That’s why I kept these card designs very simple with just a die cut ‘hello’ added to the first card. The second print which I made into the card below features an even smaller birthday sentiment and one thin strip of the same cardstock.

One of the reasons I like to work with alcohol inks on the gel plate is the fact that I can pull the prints with a piece of paper, in the case of these prints I used printer paper. When I work with alcohol inks apart from the gel plate I generally use a thicker plastic surface such as yupo or craft plastic. The inks move beautifully on those surfaces but the plastics are bulkier and a bit more expensive so it is nice to have the gel plate + paper option. The featured prints from today’s video were done on a 5″ x 7″ gel plate which meant I could get a 5.5″ x 4.25″ card front as well as a left over strip to add to the envelope.
If you are new to gel printing in general and would like to know more about creating a range of patterned prints please consider my online class, Gel Print Journey, where I cover all the basics with acrylic paint and all sorts of patterned and textured items. If you purchase any of my online classes before the end of September use the code: ENDOFSUMMERSALE for a 20% discount.
Gel Print Journey
Posted: May 31, 2023 Filed under: Elizabeth Craft Designs, florals 13, gel press, online class, pretty plaid, Spellbinders | Tags: Classes, gel press, gel printing, online class, video 4 Comments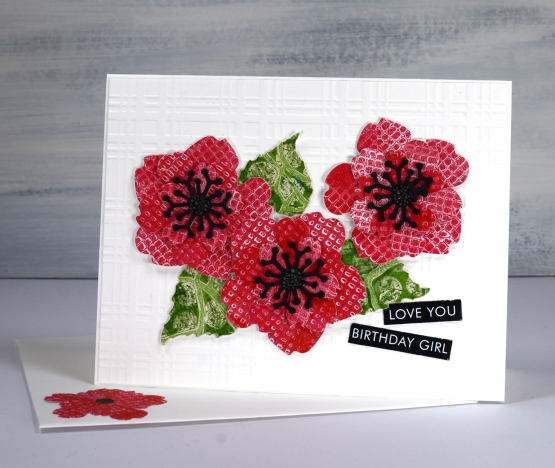
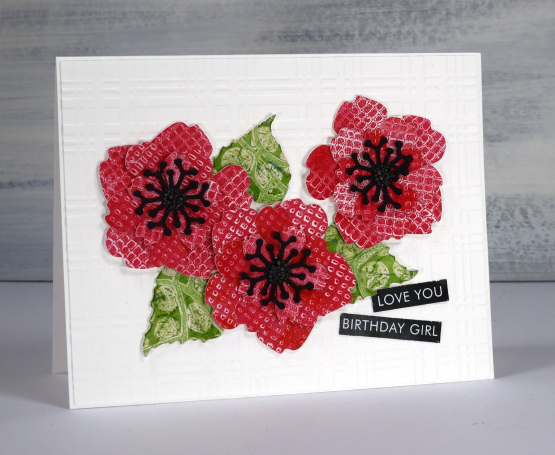
As I have mentioned a few times lately I have a new online class available. It’s called Gel Print Journey. I added the promo on Youtube today and thought I would share it here with you my blog readers as well. It is a class for both beginners and enthusiasts (and those who like me, tried it once and took a while to try it again). The card shown above is just one of the projects I made after a gel printing session. I grabbed the red print from the embossing folders lesson and the green print from one of the stencils lessons and die-cut all my elements to make a birthday card. Although there are project ideas at the end of the class the focus of the lessons is all gel printing. I just thought I would share one of the projects with you today because it is a bright happy card!
If you haven’t tried gel printing at all, GASP, this class will take you through the basics and provide you with oodles of textures and techniques to try. If you have tried gel printing I am sure you will enjoy putting your dies, stencils, embossing folders, recycling and plants to work to create one of a kind prints.
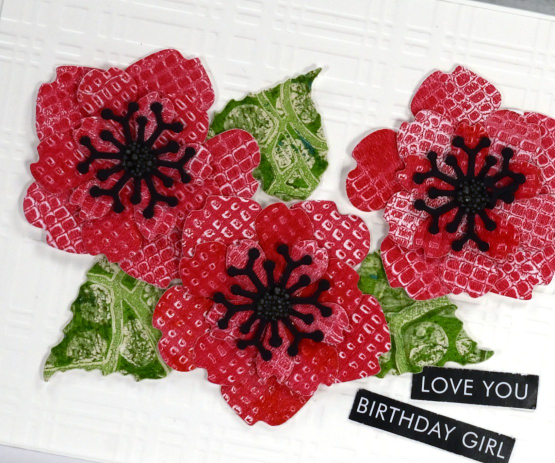
I added the red petals and green leaves to an embossed white background to keep them looking fresh and bright. There are little prills in the centres and a sentiment from Paper Rose studio.
As blog readers you have just one more day to use the TEAMBLOG10 discount code but if you read this after May has ended just pop over to youtube to see the code I shared over there. If you have any questions don’t hesitate to leave a comment below. I will continue to share gel printed cards and projects here on the blog and have some upcoming videos on youtube as well.
Have a great day!
(Compensated affiliate links from Foiled Fox & Scrap n Stamp)
AI Brussel Sprouts video
Posted: February 18, 2022 Filed under: Alcohol Ink, Concord & 9th, grafix, simple serif alphabet dies, Tutorial | Tags: Concord & 9th, grafix, grafix craft plastic, pinata alcohol ink, Ranger Alcohol Ink, Tutorial, video 9 Comments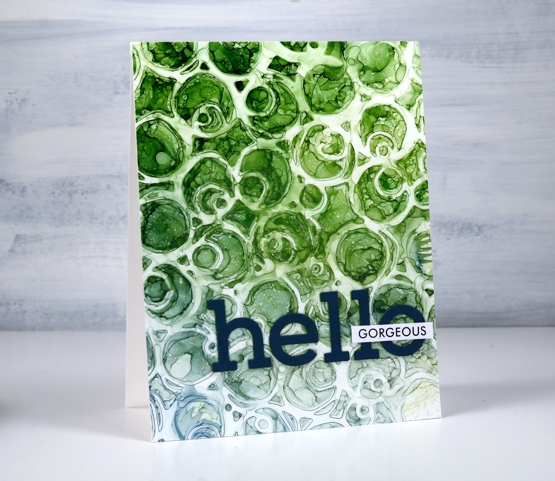
If you are a little baffled by the title of this post don’t worry no brussel sprouts were harmed or eaten or even incorporated into the making of this video! But would you agree that the little patterns formed inside the circles on the panel look a bit like brussel sprouts?
You will see in the video I didn’t set out to make a brussel sprout pattern; I actually changed track part way through the process. The video shows the technique I started with along with stencil technique I ended up doing. So it’s basically a 2 for 1 deal.
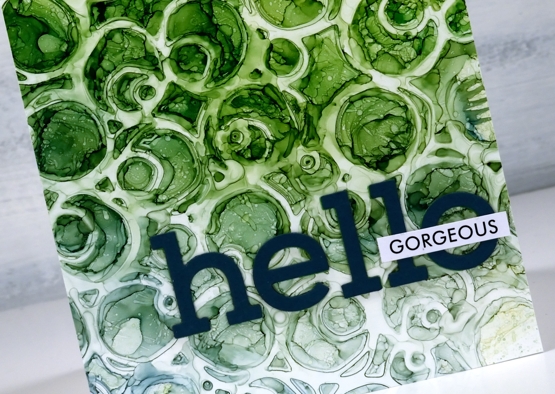
There are several ways to use a stencil with alcohol inks and this is just one. Make sure you check out Ardyth’s youtube channel for more ideas. I mentioned in the video that some alcohol inks tend to be a bit pushy and end up taking over a colour scheme. The lime green did so on this card but I’m glad there are some blues tones still visible at the base of the card.
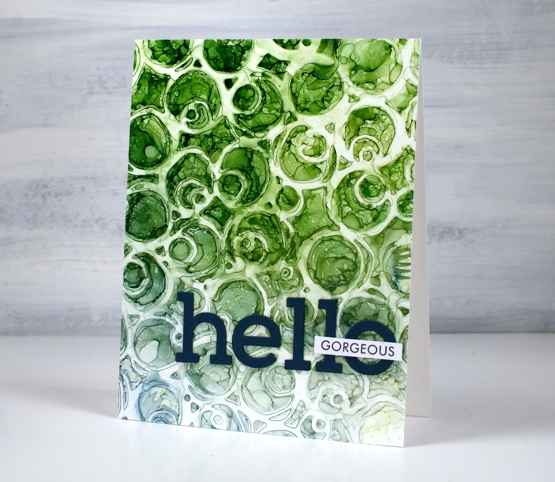
I finished the card with die-cut letters and a single word from Paper Rose Studio’s So Extra sentiment strips.
You can see other cards made using this technique here and here.
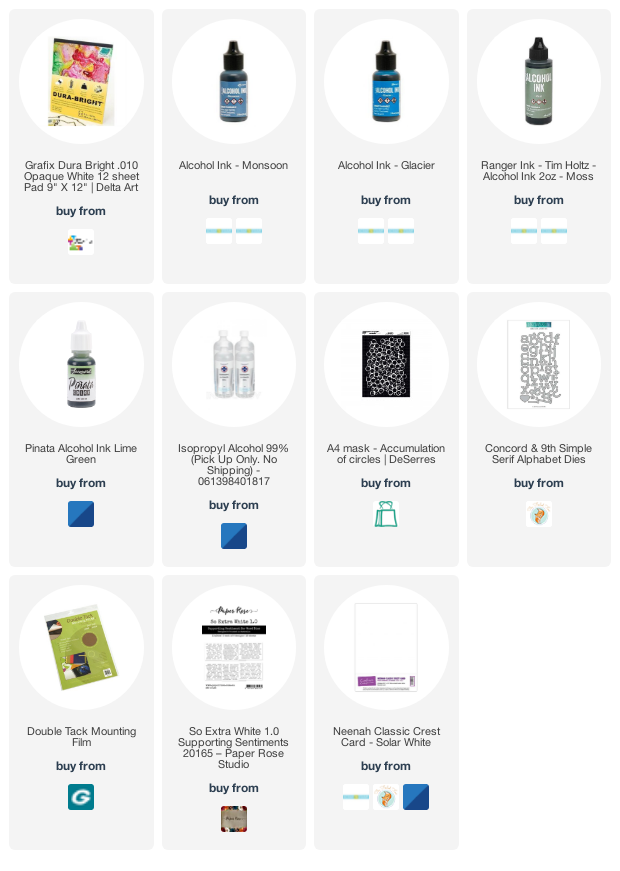
Supplies
(Compensated affiliate links used when possible)
Carmine – No Line Watercolour Video
Posted: November 16, 2021 Filed under: carmine, Penny Black, sennelier watercolours, Tutorial | Tags: distress markers, Fabriano Watercolour Paper, Papertrey ink, Penny Black stamps, sennelier watercolours, Tsukineko Versafine inks, Tutorial, video 9 Comments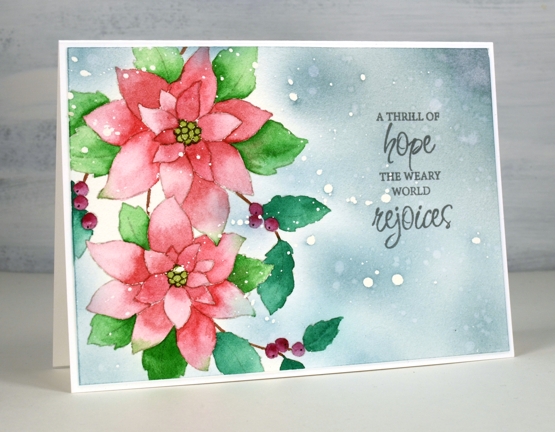
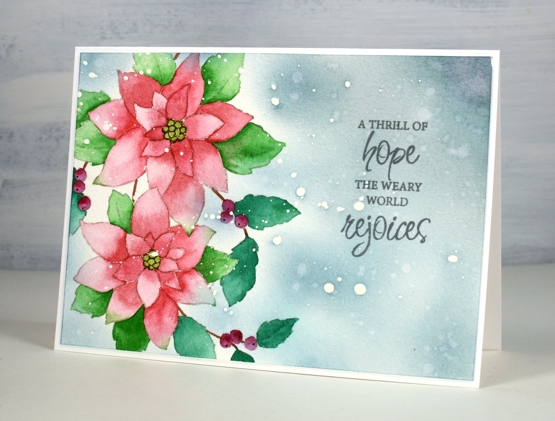
I hope you enjoy today’s no-line watercolour video. When I first saw this stamp I knew it would be perfect for the technique. There are a few little petals but most of the image is made up of open leaves and petals which are easy to see while painting. I used soft stone ink for the initial image on cold press watercolour paper and Sennelier watercolour paints for all the painting.
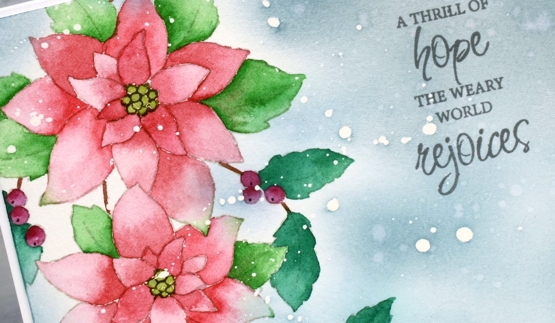
If you don’t always have a plan for the background you will see how I added one after all the painting was done. Take a look at the video below to see my process.
This is such a pretty stamp and might get inked up again soon to keep my stock of Christmas cards growing. I think it would look good embossed in white on a coloured background. Stay tuned!
Supplies
(Compensated affiliate links used when possible)
Beautify – Video
Posted: October 25, 2021 Filed under: beautify, Penny Black, Tutorial | Tags: Penny Black stamps, Ranger Distress inks, video 4 Comments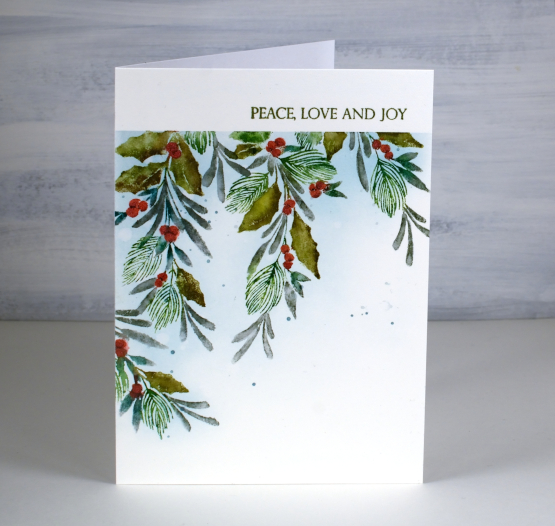
Today I have a second Christmas card featuring new rubber cling stamps from the Penny Black ‘Keeping Spirits Bright’ release. This one, ‘Beautify‘ is a garland shape but instead of stamping it across the card from side to side I have used it to create festive foliage hanging down. I love being able to use my stamps in multiple ways, sometimes the changes are through colour but other times I use part of a stamp or repeat impressions with a stamp.
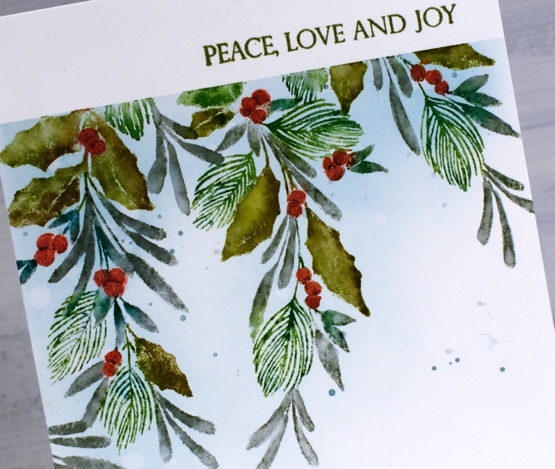
I filmed my process while creating this card so you can see the step-by-step in the video below. As the foliage is all quite small I used distress markers for the inking then blended some leaves after stamping. I upgraded the berries from distress ink to pearlescent paint to give them more prominence and a little shine.

I’m sure you will see this stamp again perhaps positioned in a more traditional garland orientation. Looking at this stamp makes me want to make my own fresh garlands but I’m not sure that’s going to happen. Have you made a fresh garland or wreath? Did it have a high fiddliness factor? I even borrowed a book from the library with the how-to.
Although I have not made any fresh wreaths yet I have been designing, stamping and painting wreaths for my new online card class. It is nearly ready to share so stay tuned for all the details.
Supplies
(Compensated affiliate links used when possible)
Fine Flowers watercolour video
Posted: August 3, 2021 Filed under: Darkroom Door, fine flowers vol 2, Tutorial | Tags: Darkroom Door stamps, distress markers, Ranger Distress inks, Tutorial, video 6 Comments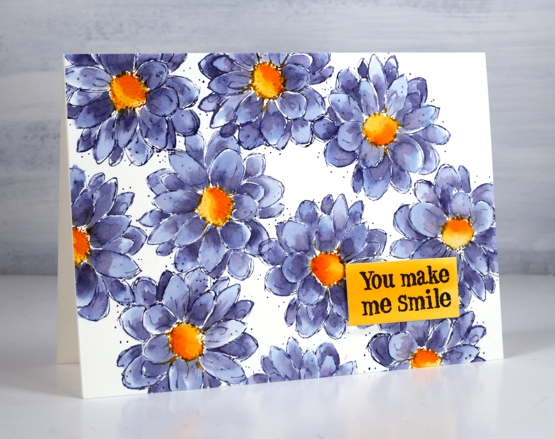
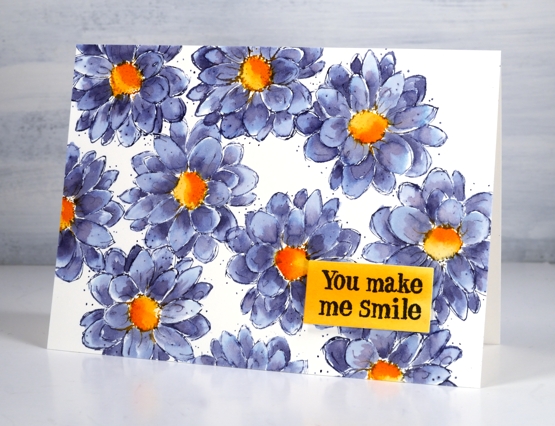
This pretty outline flower is from the Darkroom Door set ‘fine flowers vol 2’. There are six flowers in the set and I am working my way through trying out each stamp. I began inking and stamping this zinnia/dahlia style flower and was so happy with the colour combination I stopped stamping and set myself up to film. You can see the process in the video below.
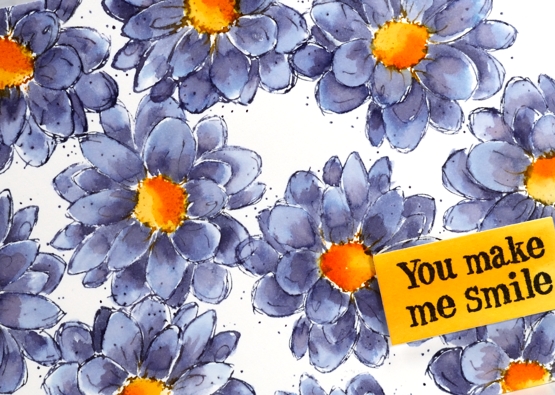
I’ve exclaimed about inks that colour separate before( and go into more detail in my online class Colour Clues ) but one of my favourites in this regard is chipped sapphire distress ink. You can see in the close up below grey blue, navy blue, pale blue and purply blue. Hardly any effort required!
All the stamps in the set have the same sketchy style and tiny dots so I did not add any further fanciness. It really was a minimal supplies card in the end even though I did not start with that plan in mind.
By the way Rachel Greig from Darkroom Door is running a challenge throughout August called #artfulaugust. If you check her instagram you can see a list of prompts. I am going to join in as often as possible as it is an open ended no pressure challenge. I have already missed one day but I am not going to dwell on that I will just dive in when I can. Kathy Racoosin is also running the Daily Marker colouring challenge during August, another low pressure, designed for fun and relaxation challenge. I hope to participate in that when I can too. Let me know if you are joining in.
Supplies
(Compensated affiliate links used when possible)
Vintage Style Bookshelf + Video
Posted: July 26, 2021 Filed under: bookshelf, classic motorcycles, Coliro paints, Darkroom Door, Finetec paints, Tutorial | Tags: Darkroom Door stamps, Finetec artist mica watercolour paint, Ranger Distress inks, Staedtler watercolour brush pens, video 13 Comments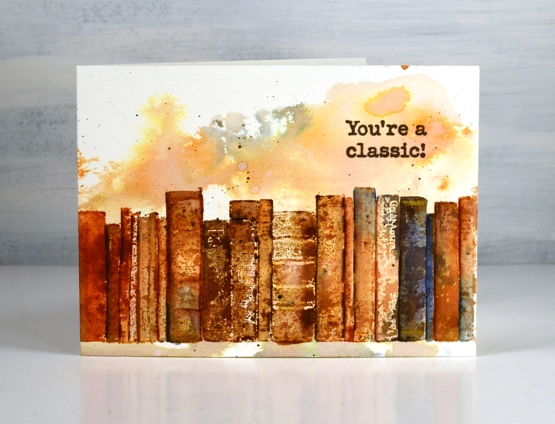
This isn’t my first time stamping books with Darkroom Door stamps. This time I filmed the process so you could see how I made them look all old and vintagey!
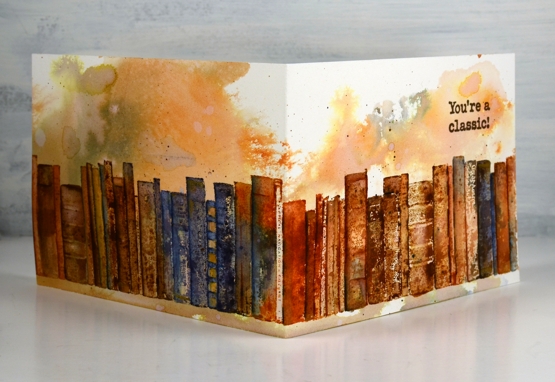
The fun thing about the Darkroom Door ‘bookshelf’ stamp is its length (just under 12″) so I decided to wrap it around my cards for maximum effect. I worked on two cards at the same time giving them slightly different paint jobs and background finishing touches. Watch the video to see my process.
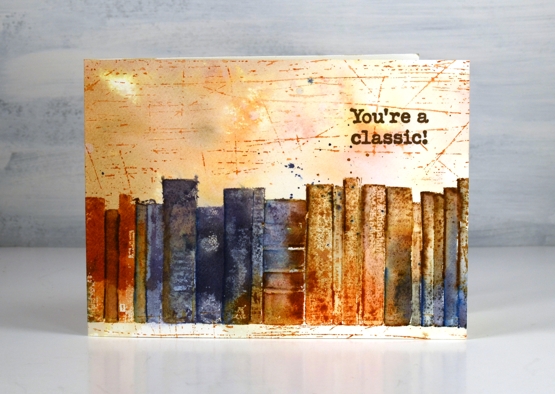
Because I inked the bookshelf stamp randomly the colours moved where they willed and left me with a mix of blues and browns. This second card has some extra scratches from the DD stamp of the same name.

The insides of the cards have random paint splotches here and there so I added paper inserts for a clean place to write a note. Now that I have made a wraparound card with this border stamp I might have to try it with the other DD one I own, ‘butterfly garden‘.
Thank you so much for your interest and discussion about the gel printing I shared last week. I really enjoyed the gel printing session which resulted in my last two videos and turning a few of the prints into cards and a journal page was very satisfying. Several of you mentioned wanting to get your gel plate out to try the techniques; I hope you do. I also hope you try this brown and blue vintage style on some of your own stamped projects. If you do be sure to let me know.
Supplies
(Compensated affiliate links used when possible)
Gel Printing with recycled cardboard
Posted: July 19, 2021 Filed under: carved leaves, Darkroom Door, gel press, layered Xmas wreath die set, Penny Black, sleigh, Tutorial | Tags: Darkroom Door stamps, gel press, gel printing, Penny Black creative dies, Penny Black stamps, video 8 Comments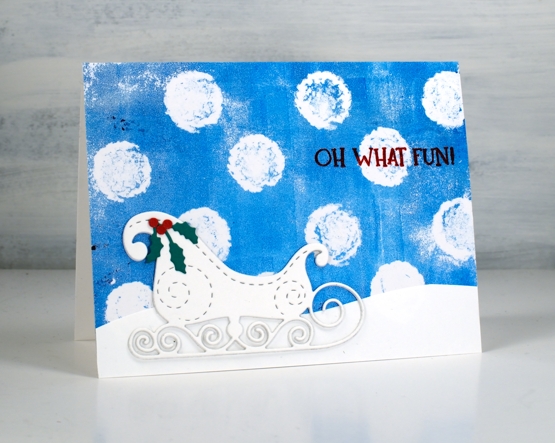
I posted a video last week featuring gel prints with stencils. In today’s technique video I use cardboard found at home. One piece was the packaging for eggs and the other a piece of corrugated cardboard.
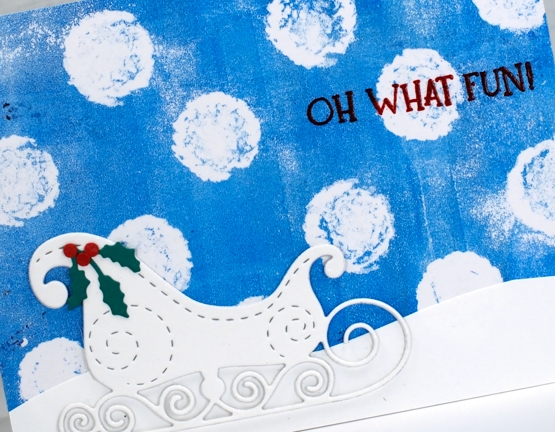
The huge snowballs falling in the card above were printed using the large circles on the egg carton. I could have done more on the gel plate with extra colour or texture but I kept it simple which works well behind the more intricate sleigh. You can see my process in the video below.
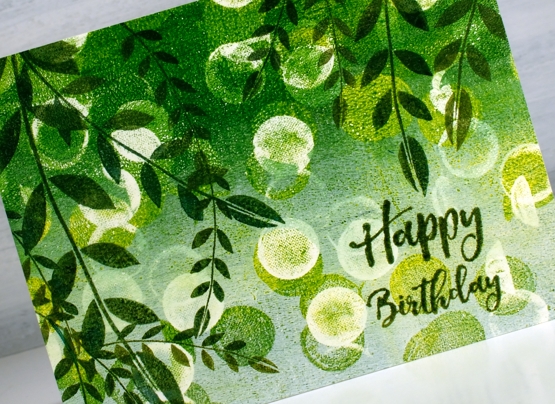
The card below also features a gel print background made with an egg carton but I pulled two prints on the one panel both with green and white paint and egg carton circles.
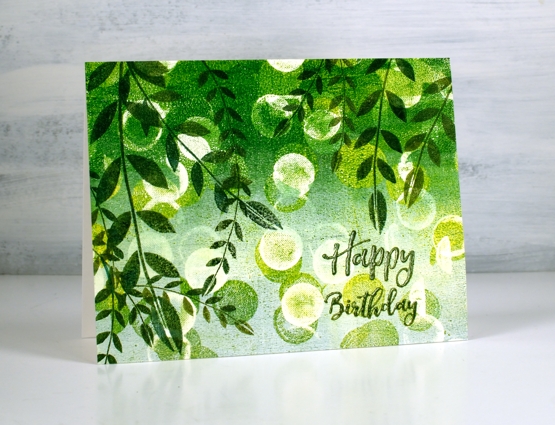
The card below also features a gel print background made with an egg carton but I pulled two prints on the one panel both with green and white paint and egg carton circles. I stamped leaves from the Darkroom Door stamp set, ‘carved leaves vol 1’ over the bokeh-like circle background. To get the right tones of green in the stamping I used both shady lane and rain forest versafine clair inks one over the top of the other. The sentiment is from the ‘happy birthday’ sentiment strip.
In the video I also made prints with a piece of corrugated cardboard pressing it down on the gel press once for a striped pattern and twice for a grid pattern. I’ve turned a couple of those prints into cards which will be on the blog tomorrow. I hope you try gel printing with some recycling you find at your place. See you soon.
Supplies
(Compensated affiliate links used when possible)
Moving Alcohol Inks with Air – Video
Posted: February 3, 2021 Filed under: Alcohol Ink, Brutus Monroe, CAS, Dies, grafix, light as a feather, nesting squares, Penny Black, polar bears, Tutorial, Waffle Flower | Tags: grafix, grafix craft plastic, Penny Black creative dies, Penny Black stamps, pinata alcohol ink, Ranger Alcohol Ink, Tutorial, video 16 Comments
I’ve had the alcohol inks out recently and spent some time trying to get soft wavy patterns on craft plastic. I have seen several artists who do this technique beautifully but I am very much still a beginner with it. I have a few cards to share today along with a video showing my process for two of the panels. I worked on white craft plastic from Grafix which is heavyweight and totally opaque. For most of the panels featured today I used only two alcohol inks plus plenty of 99% rubbing alcohol; each panel was created with a metallic and a non-metallic ink.
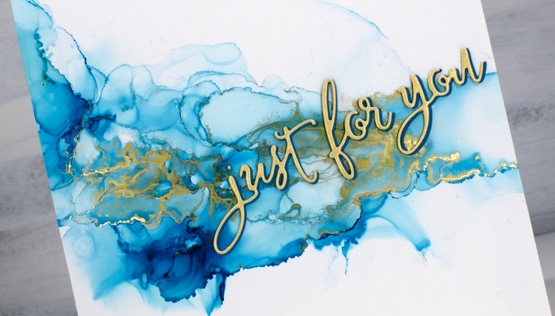
This first panel was made with turquoise AI and gilded alloy AI; I love the range of blues when diluted with rubbing alcohol. The ‘for you’ Penny Black die cut is two layers of turquoise cardstock topped with one layer of pale gold.
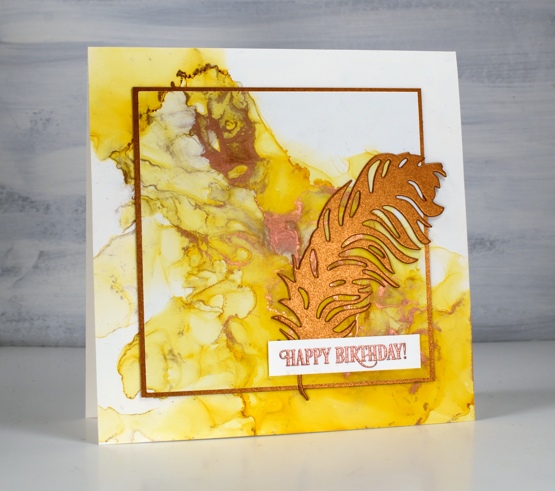
This warm toned card was made with honeycomb AI and mined alloy AI then die cut with a WaffleFlower square nesting die. I used the WaffleFlower additional square dies to cut a larger copper square then added the PB ‘light as a feather’ die cut and a PB birthday sentiment embossed in Brutus Monroe penny embossing powder.
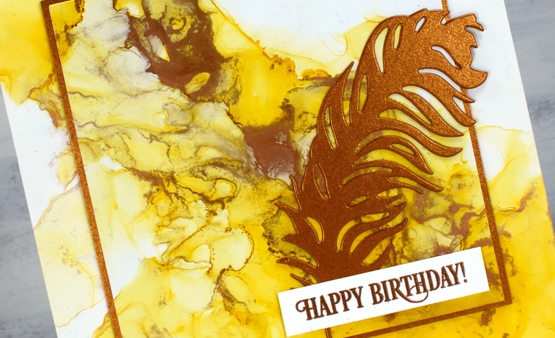
You can see the process for both cards above in the video below.
As I am working on alcohol ink panels I am evaluating my process and working out what I want to try next. I just bought a cheap lazy susan to work on the blown flowers and I’m pretty sure I don’t need to use as much coloured ink when I make the initial drops. You can be sure I will let you know what I discover.
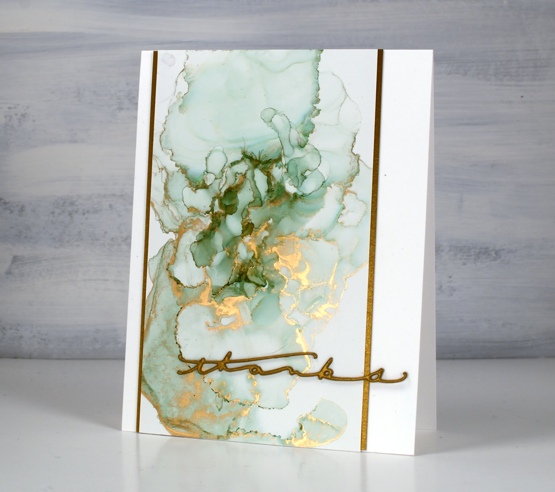
I have a couple more cards made off camera using the same technique shown in the video. The card above features juniper AI and statue alloy AI with the PB ‘many thanks’ die cut from antique gold cardstock and stacked twice.
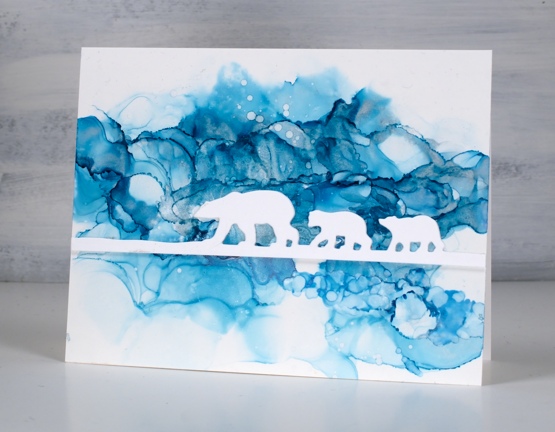
When this panel was finished it reminded me of photos of the artic and far north where the icebergs and glaciers are made up of beautiful shades of blue. It’s kind of a cross section perspective where we can see below and above the ice the bears are walking on. I did use two blue inks plus a silver for this one, ranger turquoise and stream with pinata silver. The bear die is ‘polar bears’ from Penny Black.
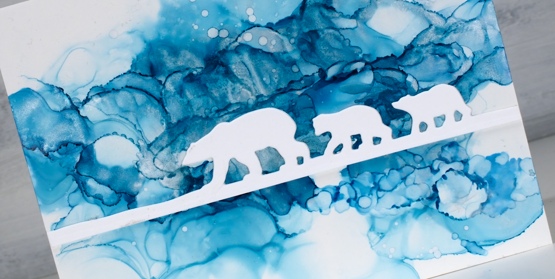
We’ve been watching Cecilia Blomdahl’s youtube channel about her life on Svalbard, an island off the north coast of Norway. She lives in the world’s northern most town. Polar bears are definitely around so you don’t wander outside the village without your weapon!
Supplies
(Compensated affiliate links used when possible)