
Big Alcohol Ink Trees
Posted: September 1, 2026 Filed under: Alcohol Ink, Concord & 9th, grafix, Kristina Werner Joyful and Merry dies, Kristina Werner Joyful and Merry stamp set, simple strips, Stampin Up, Taylored Expressions, Tim Holtz | Tags: Alcohol Ink, Concord & 9th, grafix craft plastic, Stampin Up, Taylored Expressions, Tim Holtz 2 Comments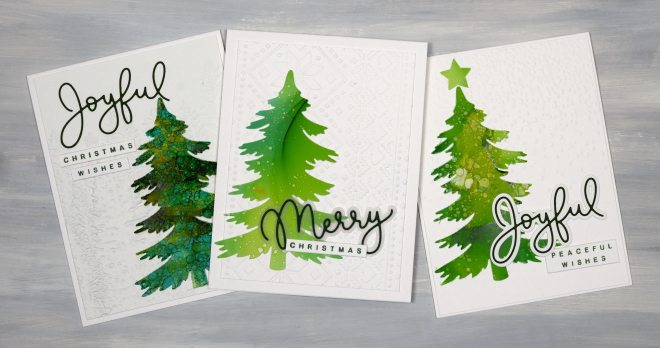
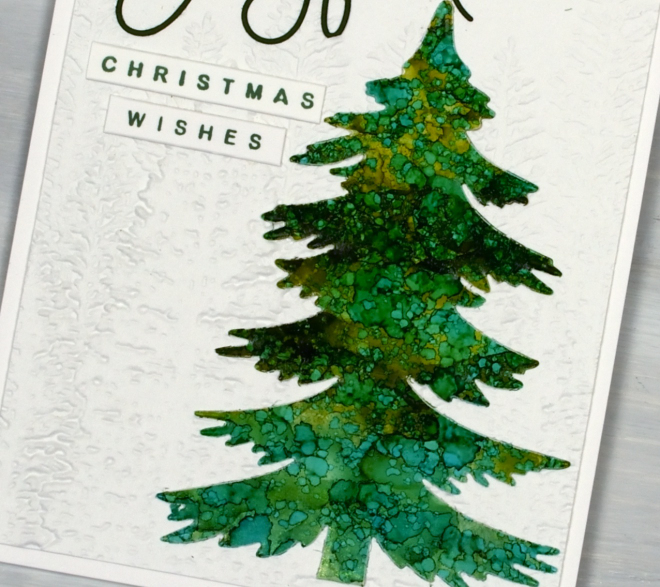
Time for another bunch of alcohol ink Christmas cards featuring one of the tree dies from the lovely Creative Expressions Festive Collection – Winter Pines set. The set has 6 different trees some tall, some short, some wide some skinny. The one featured here is a great size and shape so I used it over and over. The cards above feature Kristina Werner’s Joyful and Merry Stamps and Dies.
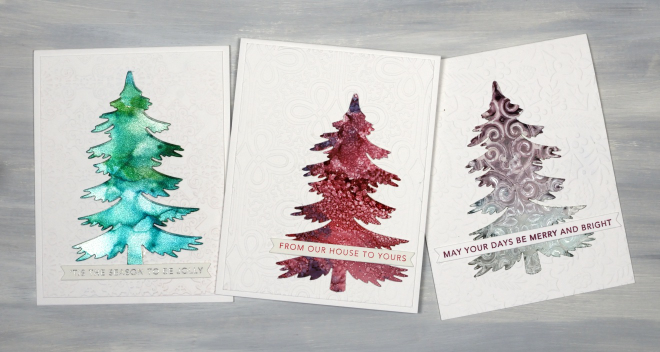
You can see the tree on the left was made with the Ranger alcohol ink silver sparkle cardstock. The tree on the right was made with a stencil on alcohol inks, hence the pattern. All the sentiments are from Taylored Expressions Simple Strips – Christmas stamp cut with the coordinating die.
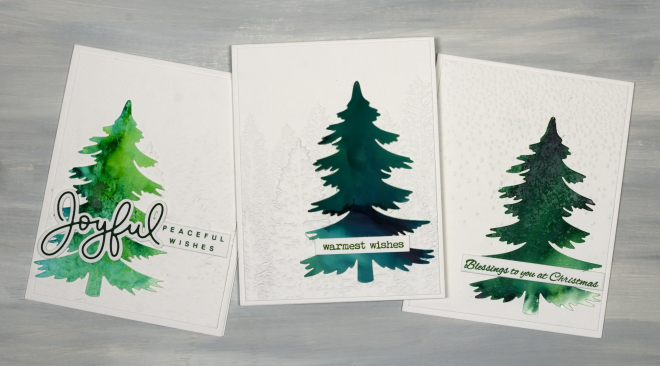
I used an embossed background behind every tree, often the retired evergreen folder from Stampin Up. I also used the snowflakes/speckles one from Tim Holtz.
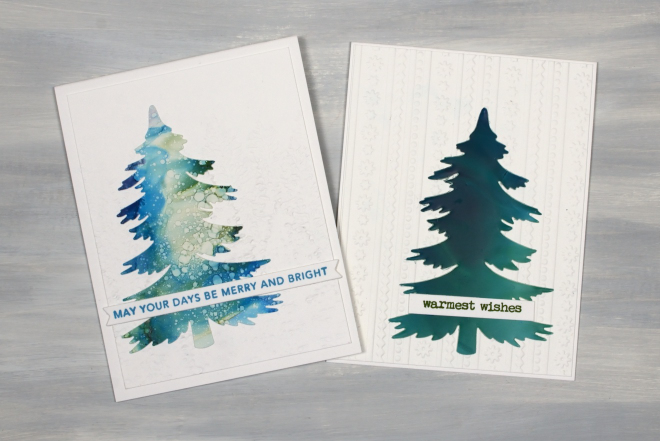
Of all the tree cards I made (and there were many) the one above on the left is my favourite. I like the mix of soft blues with a bit of dark blue and green and some splatter circles. I wish I remembered which alcohol inks I used but I don’t. It doesn’t matter too much. You can see I used dark blues and greens as well as light and some pinks, purples and silvers too.
Alcohol Ink Baubles
Posted: August 24, 2026 Filed under: Alcohol Ink, baubles, Christmas filigree, Concord & 9th, Echidna Studios, Kristina Werner Joyful and Merry dies, Kristina Werner Joyful and Merry stamp set, Penny Black, simple strips, Spellbinders, Taylored Expressions | Tags: Alcohol Ink, grafix craft plastic, Penny Black creative dies, Ranger Alcohol Ink, Spellbinders, Taylored Expressions, Yupo Paper 2 Comments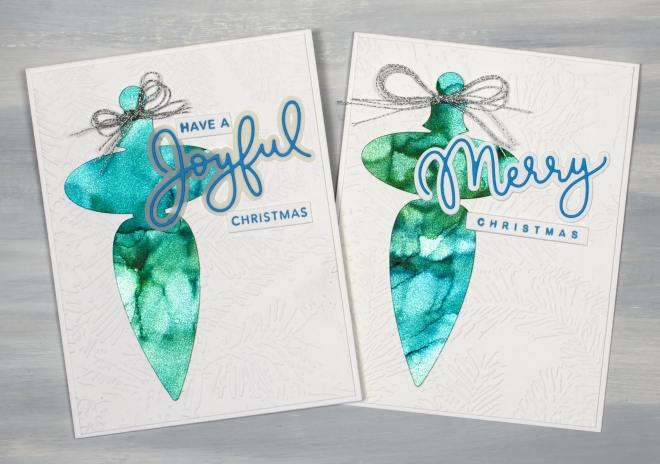
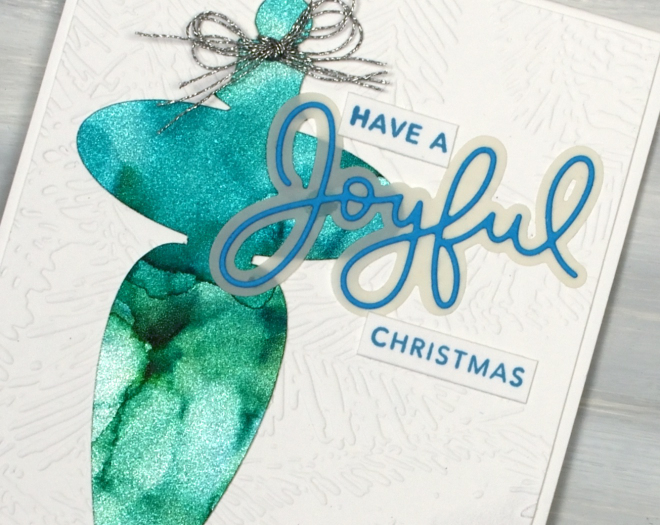
The alcohol ink cards continue but there is a new element featured in the shimmery baubles above. I created alcohol ink patterns on Ranger alcohol ink silver sparkle cardstock. Whatever colours you blend over the cardstock automatically shimmer and shine. On the cricut I cut the finials using the “Christmas Filigree Digital Stamp and Cutfiles” from Echidna Studios. Both decorations are on panels embossed with the Spellbinders “forevergreen” folder and feature Kristina Werner’s Joyful and Merry sentiment dies and stamps.
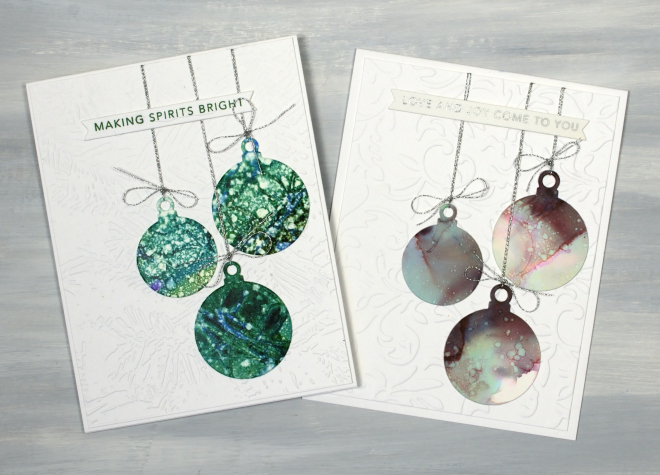
I also made simple round baubles using Penny Black dies and patterned panels. Basically any pretty alcohol ink panel is fair game for creating some baubles. As is my pattern they are also stuck on embossed panels, tied with silver cord and sentimented with Taylored Expressions “Simple Strips Christmas sentiments”.
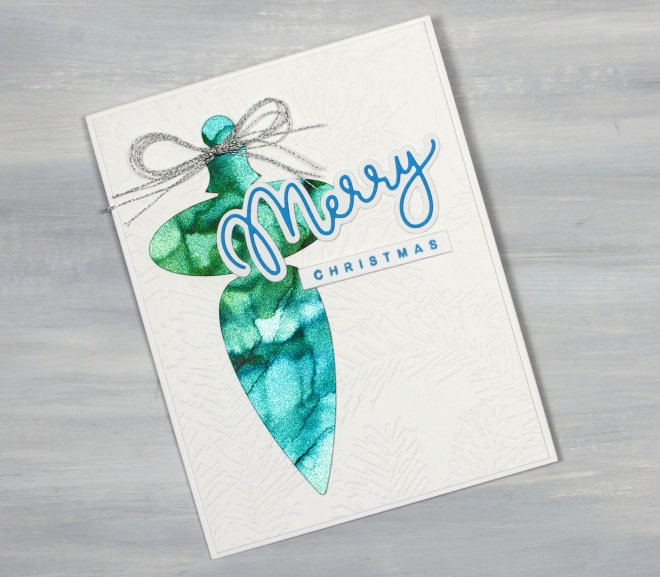
I don’t actually own any of this sparkly cardstock; a friend let me use some of hers, but I can highly recommend it if you want a very simple way to make your alcohol patterns look fabulous.
Alcohol Ink Trees
Posted: August 17, 2026 Filed under: Alcohol Ink, Creative Expressions, grafix, Kristina Werner Joyful and Merry dies, Kristina Werner Joyful and Merry stamp set, Spellbinders, winter pines | Tags: Alcohol Ink, Concord & 9th, Creative Expressions, grafix craft plastic, Spellbinders 3 Comments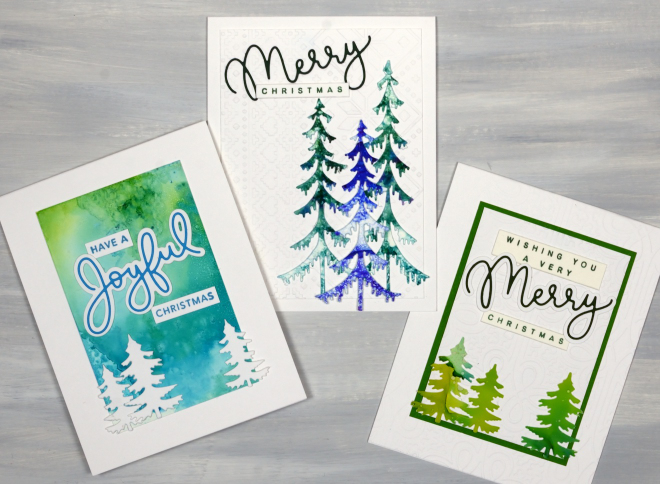
The alcohol ink cards continue, this time with a tree theme. If you didn’t see my first collection of alcohol ink cards please visit here. Once more I worked with only 2 or 3 alcohol inks to create patterned panels. I have been starting with 4.5″x 6″ yupo or craft plastic panels which I can turn into a large background panel, two smaller backgrounds or numerous trees.
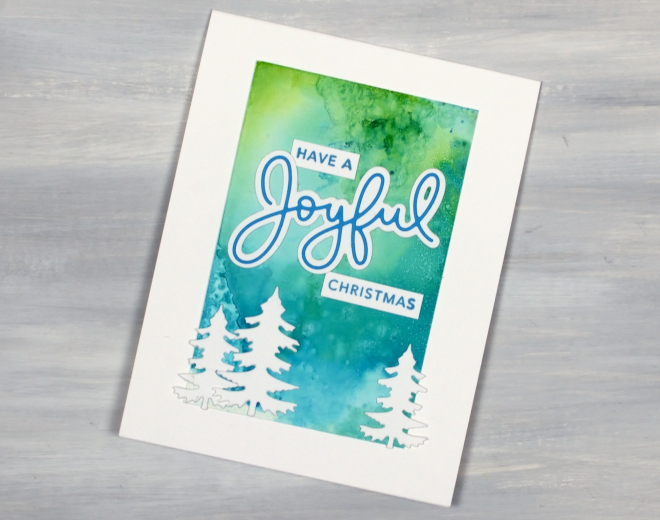
To add interest to alcohol ink panels I use several different techniques. I always add isopropyl alcohol to the panels to move and blend the inks and sometimes move the liquid around by tilting the panel or blowing the ink with an alcohol ink blower.
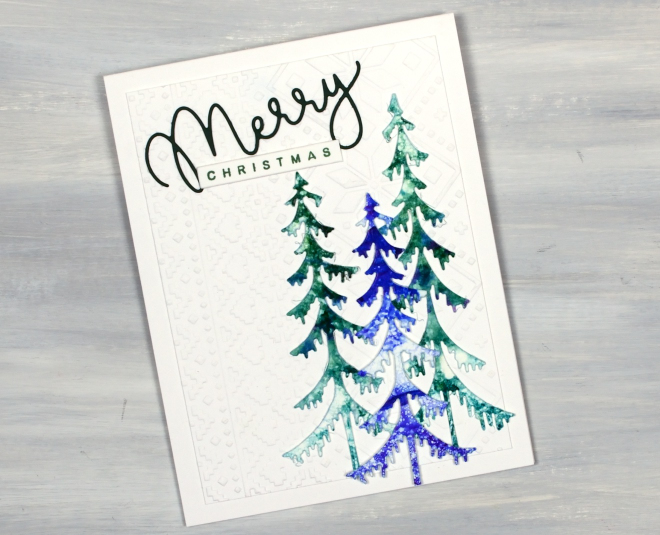
Another technique which gets quite intricate or softly blended results is to apply ink or isopropyl to a felt pad and ‘stamp’ it onto the yupo or craft plastic. Many of the cards I’ve been making feature an embossed panel behind the alcohol ink elements. I’ve used “a nordic themed”ski lodge” embossing folder from Spellbinders and an Anna Griffin ‘regal braid’ folder for today’s cards. The greeting stamps and dies are from Kristina Werner’s sets “Joyful and Merry stamp set” and “Joyful and Merry dies“. I don’t actually own them but you can be sure I made good use of them before my sister-in-law took them home to Australia. All the trees are cut using a fabulous Creative Expressions die set called Festive Collections – Winter Pines.
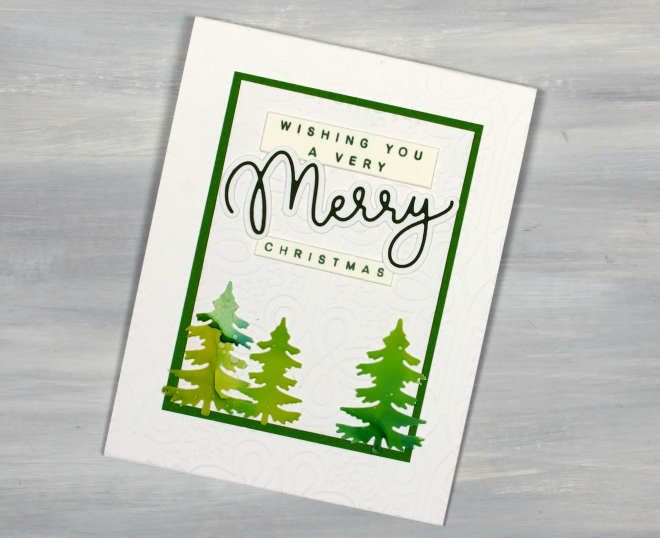
And, if you know me, you know there are more tree cards to come; this is just a smattering!
Totally Dotty
Posted: May 6, 2026 Filed under: AALL & Create, Classes, Concord & 9th, many mandalas, totally dotty stencil | Tags: AALL & Create, Classes, Concord & 9th, Fabriano Watercolour Paper, Stencils 4 Comments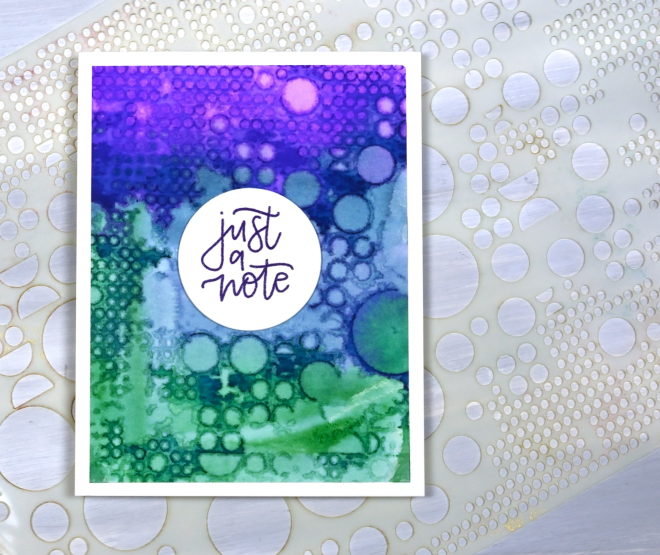
This stencil is appropriately called ‘totally dotty.’ It is a big stencil from AALL & Create and is cool for gel printing, alcohol inks and as it turns out, watercolour as well.
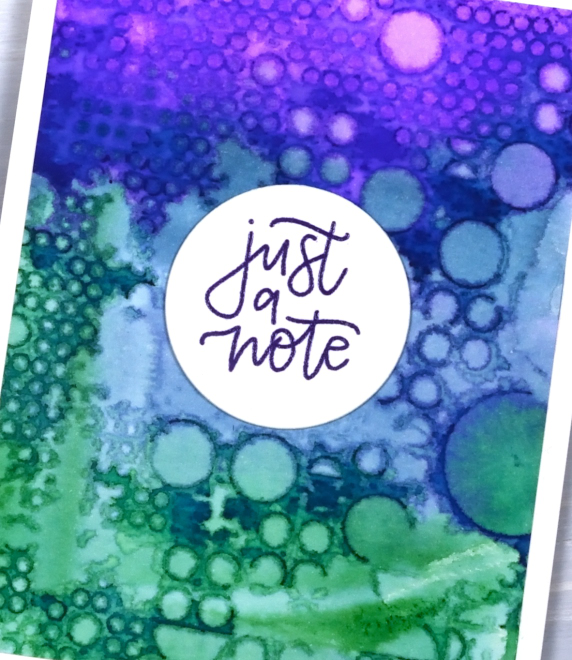
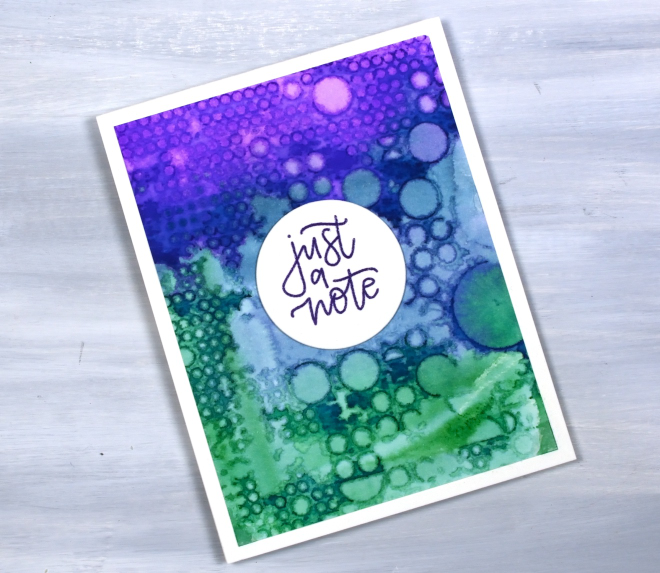
I have done quite a few stencil prints lately both in preparation for and during my recent workshops. I used different watercolour mediums including distress stains which provide quite saturated colour as you can see in the panel above. Pressing the painted panel on the stencil or vice versa can create very funky and distinct patterns as well as subtle dreamy ones. This panel ended up very distinct except for an area in middle. Not a problem as you can see; I stayed with the dotty theme and stamped my C&9 ‘many mandalas‘ sentiment on a circle for the centre.
This post includes an affiliate link from Scrap’n’Stamp . If you buy through this link I receive a small commission at no extra cost to you.
Calendar Cards
Posted: February 18, 2026 Filed under: border collection, Concord & 9th, cricut, Dies, online class, Patterned papers, Penny Black | Tags: Concord & 9th, cricut, Earth Greetings, online class, Penny Black creative dies 5 Comments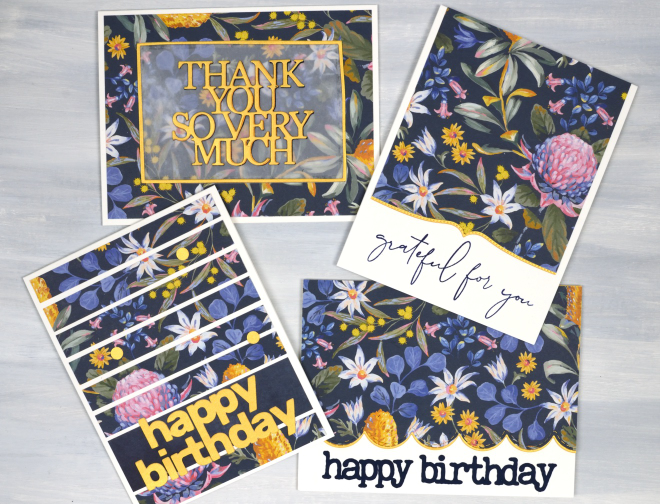
Here are some happy flowers to remind you of spring if you are still surrounded by snow like I am! Also to get you through winter there are details about a sale of my online classes at the bottom of this post.
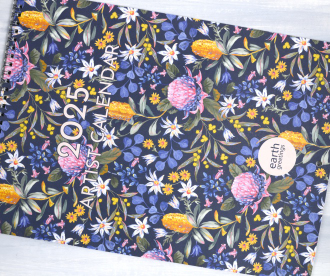
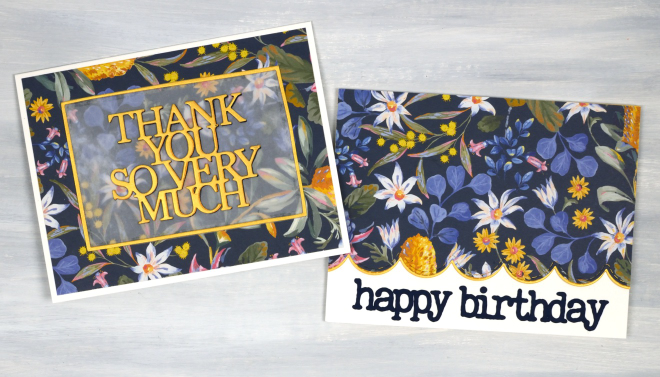
I received a beautiful Earth Greetings calendar last year from my brother and sister-in-law in Australia. I enjoyed the original artwork all year while also planning to turn the pages into cards once the year was over. I decided to start with the cover which features a beautiful floral design by Jayne Branchflower. The cover has the January artwork on the back so I used bits of each design, both painted by Jayne.
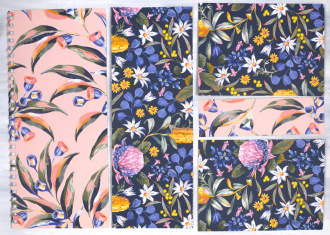
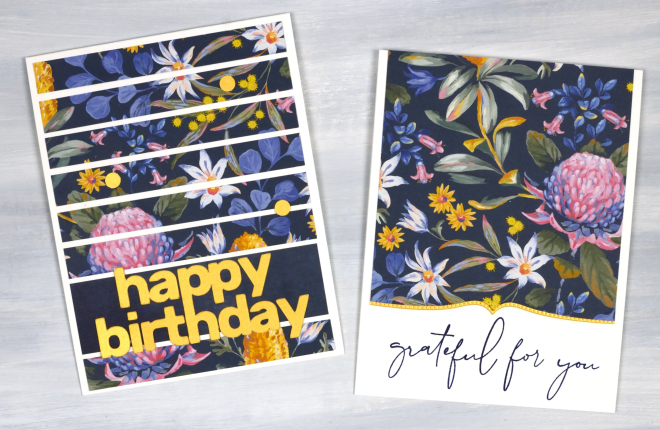
In this post I will feature the blue background panel covered in Australian native flowers such as waratah, bottlebrush and flannel flower. I created two portrait orientation cards shown below. The accents on all the cards are cut from gold cardstock to co-ordinate with the bottlebrush (callistemon) and wattle in the design. The greeting below left was cut on the cricut, below right features a Penny Black border die and a retired C&9 sentiment.
The two cards below I made in landscape orientation and used the PB Border Collection die to add a scalloped edge on the right along with a cricut cut sentiment. On the left I die-cut a PB sentiment, So Many Thanks, and lay it over duralar so it would be easier to see on the busy background. It is also stacked up on navy cardstock to give it a bit more prominence. I created the narrow gold border with WaffleFlower A2 rectangle dies. The cards in this post obviously do not have to be made with calendar pages; your own printed, drawn or painted papers would work, as would scrapbook papers or art papers. I am just having fun with calendar pages right now and hope I have inspired you to recycle and repurpose a few of yours!
All my online classes are on sale for 50% off. Just click over to https://heathertelford.podia.com/ to purchase.
This post includes affiliate links from Scrap’n’Stamp . If you buy through these links I receive a small commission at no extra cost to you.
Florals on Black
Posted: May 21, 2024 Filed under: Concord & 9th, fine line florals, meadow blossoms, online class, Penny Black, radiant | Tags: Concord & 9th, Finetec artist mica watercolour paint, online class, Penny Black stamps 6 Comments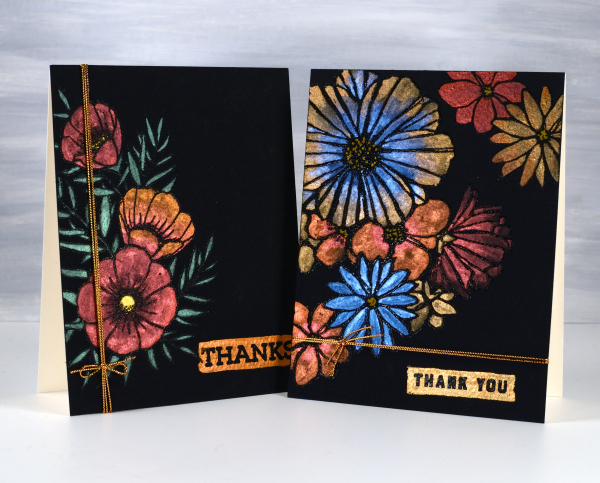
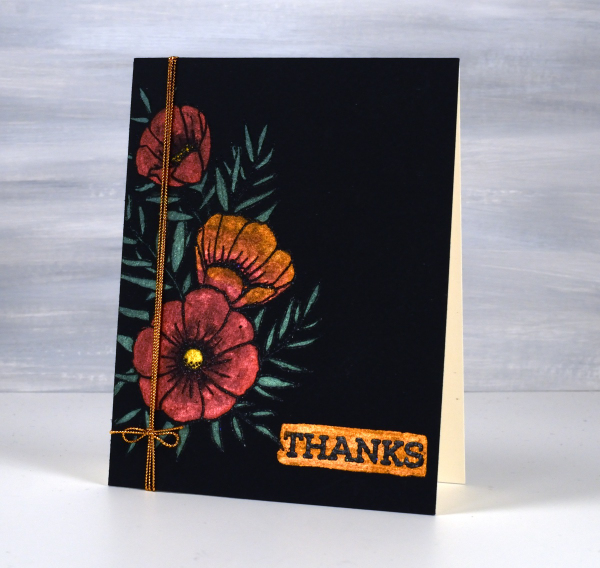
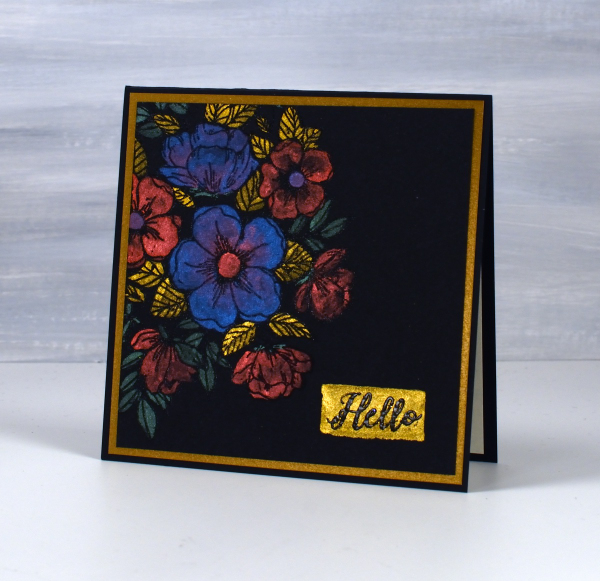
I haven’t used this eye catching technique in a while but I really should try it more often. These two cards were made as part of my Floral Faves online class, a lesson about using metallic watercolours on black watercolour paper. Maybe black watercolour paper has been around for a long time but when I first found it several years ago I was very keen to try it.
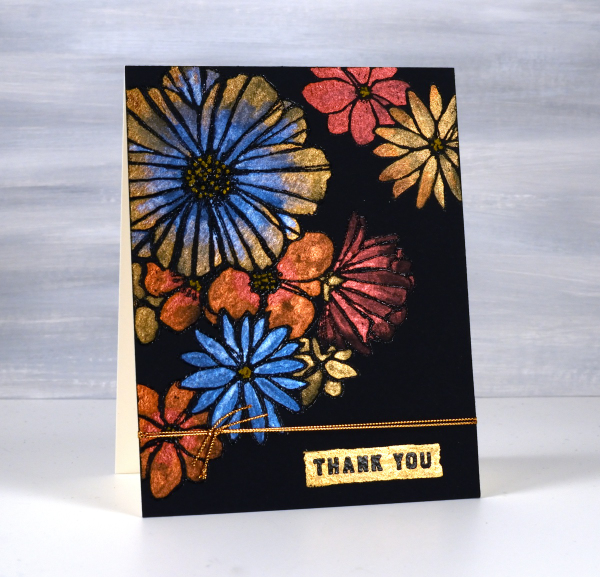
As you can imagine the paints need to be somewhat opaque to show up on black. I use Coliro and Finetec metallic watercolours (two names but all made by Finetec). I have also been given some Beam metallic watercolours which I will try out soon. I used Stonehenge Black watercolour paper for these cards and it worked well. It is very soft so I am careful if using tape on the edges as it lifts the surface off. I just work on a piece slightly larger than I need so I can trim it down to size after painting. I recently bought some of the Van Gogh brand so I will report back once I have tried it.
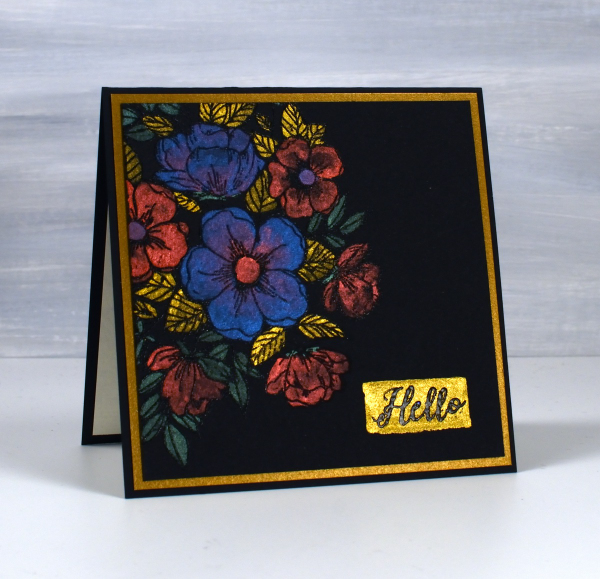
All these designs were made with embossed outlines making it easier to stay inside the lines. One feature of these cards that I quite like and need to remember to incorporate is the little painted strip where I embossed a sentiment over the top. It’s a trick that doesn’t have to be used only on a black background; I could paint a strip on any colour then emboss on top of it. For the cards featured today I used Penny Black ‘radiant’ set and Concord & 9th ‘fine line florals’ and ‘meadow blossoms’
If you have metallic watercolours let me know in the comments your favourite ways to use them.
The Washing Line
Posted: April 10, 2024 Filed under: City stacks, Concord & 9th, Echidna Studios, gel press, washing line | Tags: Concord & 9th, Echidna Studios, gel press, gel printing 2 Comments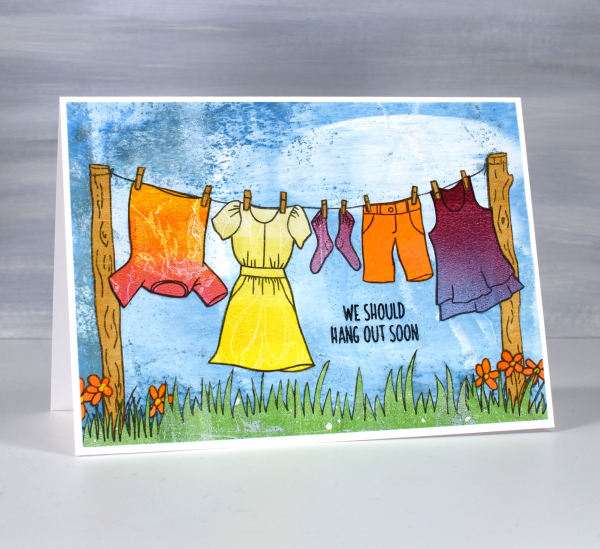
I’m not sure that this is strictly collage although it is all made from cut out papers glued together. I guess it is more like paper piecing, something I rarely do. But gel printing has me looking for all sorts of ways to use my printed papers. The ‘washing line‘ is a digital stamp from Echidna Studios and cutting out all the clothes took me way back to my paper doll days. I printed the washing line image on the seven different coloured gel prints then proceeded to pick colours for all the clothes.
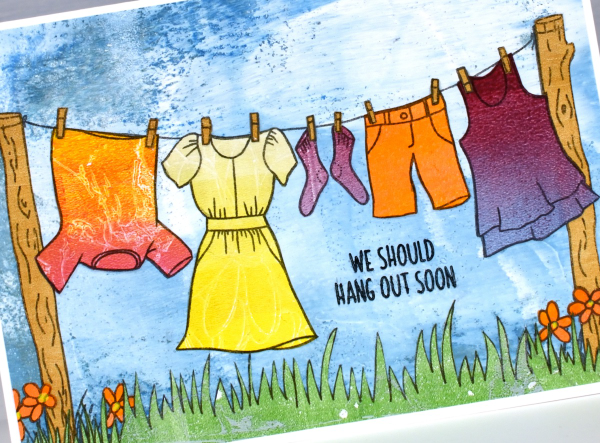
I looked through my gel prints; I have quite a few sorted into folders by colour. Most of the prints used for this panel were from my Gel Print Journey online class. The yellow dress was cut from a gradated print with a faint white daisy pattern on it. The pink and orange ‘tie dye’ was a print achieved my pressing cling wrap on the gel plate, the socks and top were from a blue & burgandy blended gel print. The blue background print was a patchy blue and white print where I hadn’t rolled off my brayer before rolling resulting in the big white blob of paint – just right for a cloudy blue sky. When it came to gluing everything onto the blue background I just adhered the cut-outs over the printed outline.
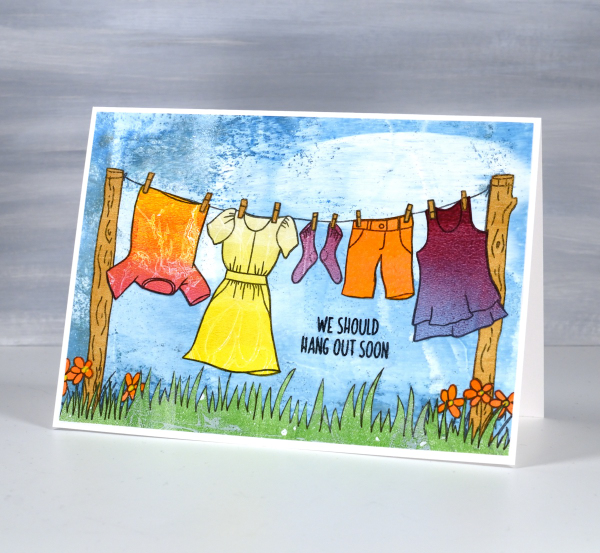
The digital image includes two patches of grass below the posts but I wanted more so I drew another strip of grass on a green gel print and filled the stretch under the washing line. I just happened to have the perfect sentiment from the Concord & 9 ‘City Stacks‘ stamp set. This post includes affiliate links from Foiled Fox. If you buy through these links I receive a small commission at no extra cost to you. If you buy from Echidna Studios my daughter and I get very excited!
AI Brussel Sprouts video
Posted: February 18, 2022 Filed under: Alcohol Ink, Concord & 9th, grafix, simple serif alphabet dies, Tutorial | Tags: Concord & 9th, grafix, grafix craft plastic, pinata alcohol ink, Ranger Alcohol Ink, Tutorial, video 9 Comments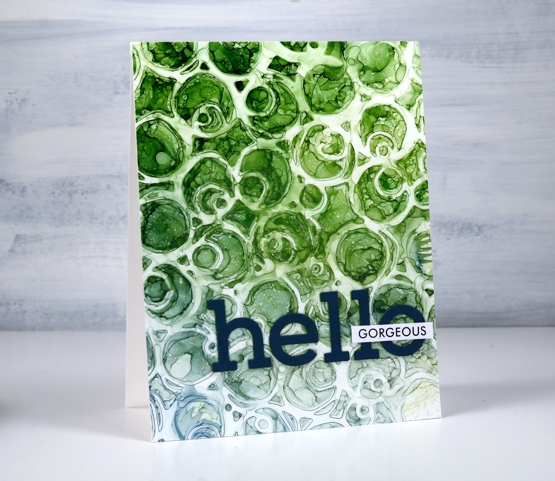
If you are a little baffled by the title of this post don’t worry no brussel sprouts were harmed or eaten or even incorporated into the making of this video! But would you agree that the little patterns formed inside the circles on the panel look a bit like brussel sprouts?
You will see in the video I didn’t set out to make a brussel sprout pattern; I actually changed track part way through the process. The video shows the technique I started with along with stencil technique I ended up doing. So it’s basically a 2 for 1 deal.
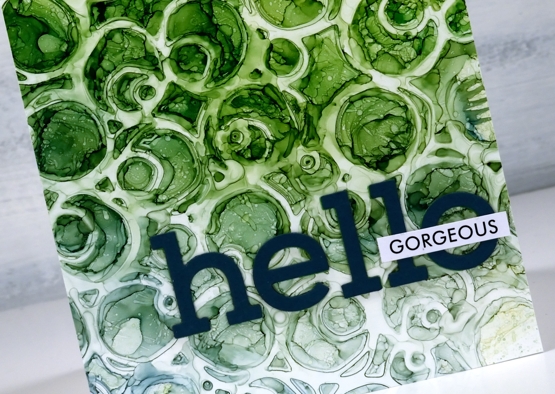
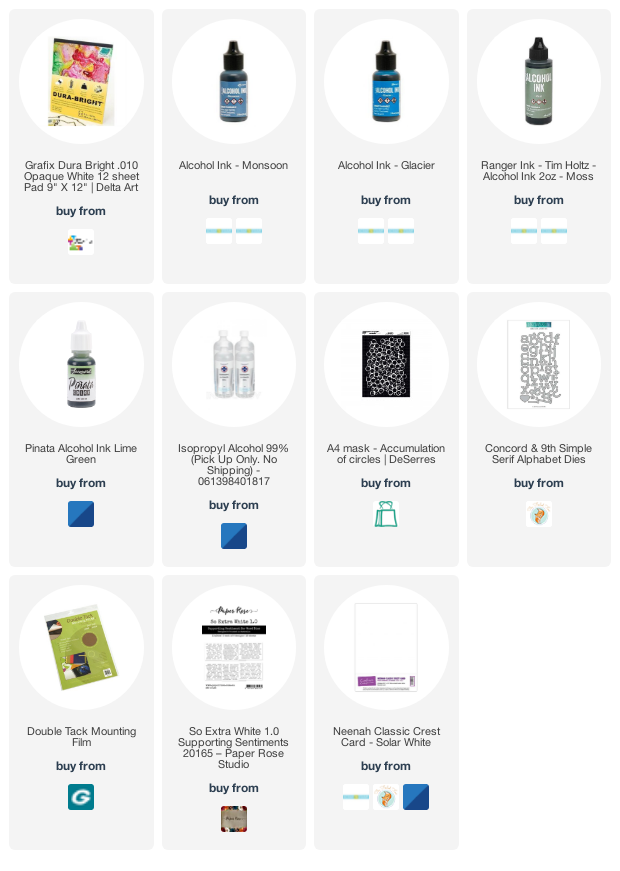
There are several ways to use a stencil with alcohol inks and this is just one. Make sure you check out Ardyth’s youtube channel for more ideas. I mentioned in the video that some alcohol inks tend to be a bit pushy and end up taking over a colour scheme. The lime green did so on this card but I’m glad there are some blues tones still visible at the base of the card.
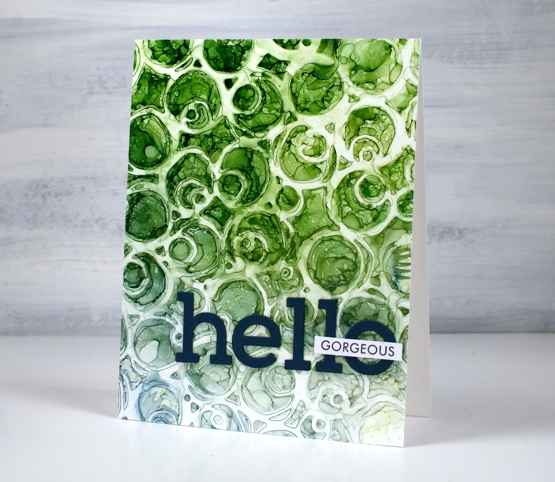
I finished the card with die-cut letters and a single word from Paper Rose Studio’s So Extra sentiment strips.
You can see other cards made using this technique here and here.
Supplies
(Compensated affiliate links used when possible)
Floral Birthday
Posted: October 29, 2021 Filed under: all the birthdays, companions, Concord & 9th, Penny Black | Tags: Fabriano Watercolour Paper, Penny Black stamps, Ranger Distress stains 10 Comments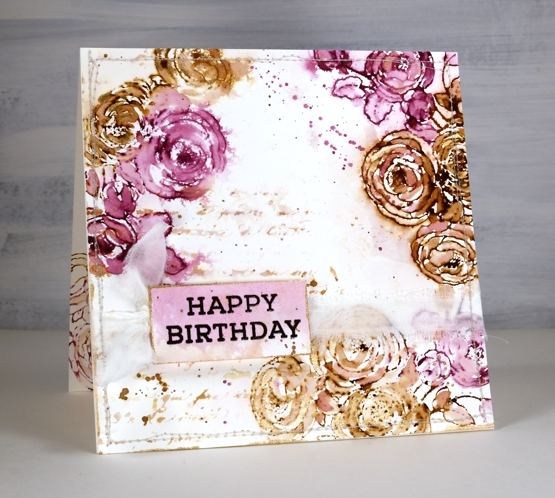
In my last post I shared a Christmas card featuring loose watercolour; the style of this card is even looser and was done with a few of the distress stain daubers I still have in my stash. Although I used techniques I’d devised years ago, this card was inspired by a card I saw on Pinterest recently. I followed the link and read through the whole post on the Tattered Nest Designs blog and combined some of her techniques with mine to create this very vintage floral birthday card.
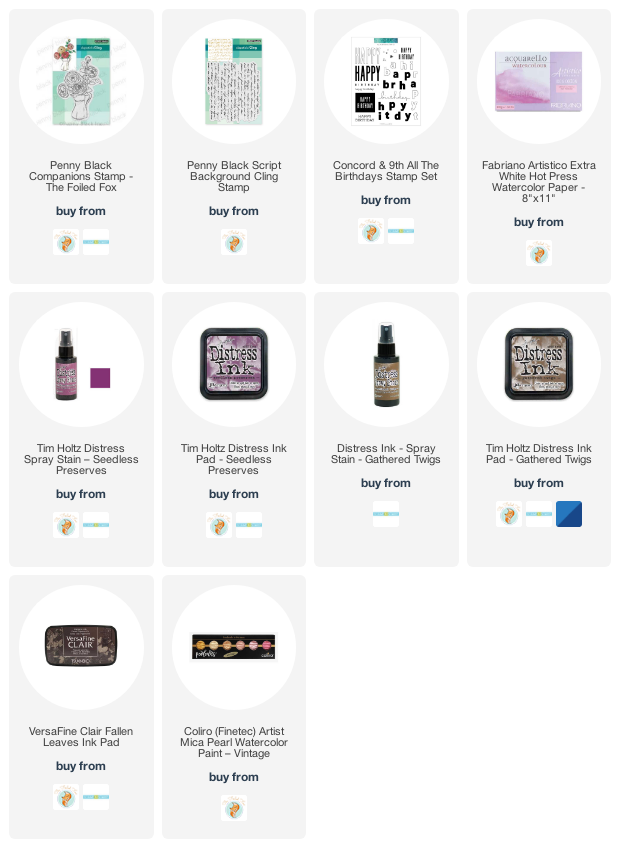
I worked on hot pressed watercolour paper with gathered twigs and seedless preserves distress stains. I still have those two colours in the daubers but you could use ink pads or spray stains on a glass mat or craft mat to get similar results. Check out the Tattered Nest post to read how she did it with spray stains. I inked the PB ‘companions’ stamp with both distress stains and stamped on the corners of my watercolour paper panel. I dried the stain with a heat tool then started blending loosely with water and a paintbrush. If the ink was too intense I would use more water or dab it with a paper towel, if too pale I would add more stain with the paintbrush.
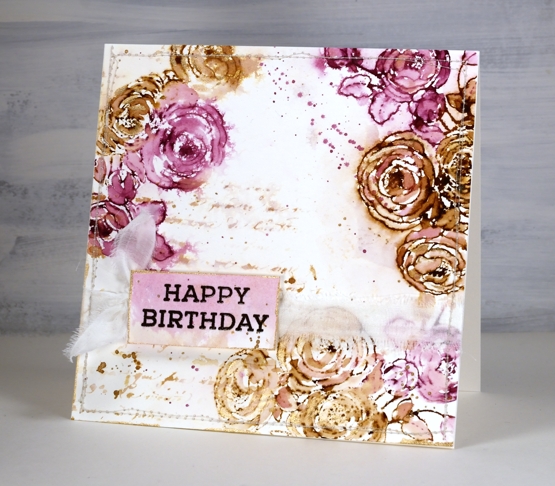
Once the flowers were loosely blended I inked the PB script background stamp with the same inks, spritzed it and stamped off on scrap paper. I spritzed it again with water before stamping a diluted print on the panel. You can see I also added splatter and created a sentiment on a small piece coloured with the same inks.
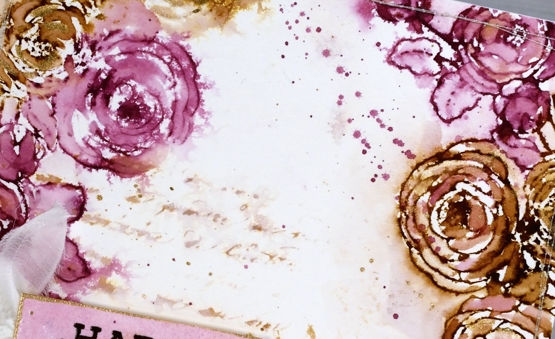
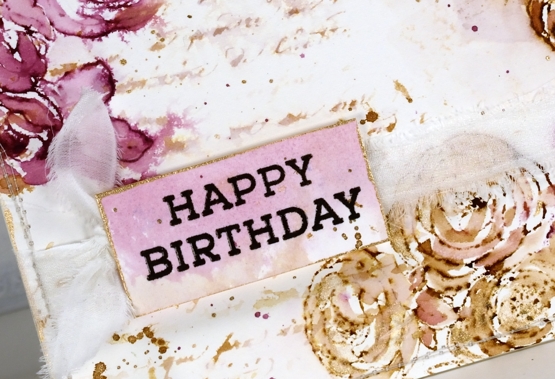
To finish the card I added splatter and some extra painting with rose gold pearlescent paint. You can see the gold border around the little tag in the close up above. Inspired by the Tattered Nest projects I sewed around the edge of the panel and then tore a strip of fabric to make a frayed ribbon sash.
Progress continues on my new online class; I’ve been gazing at the computer screen for days. I’m excited to share it with you very soon!
Supplies
(Compensated affiliate links used when possible)
Floral Faves – Online Class
Posted: May 20, 2021 Filed under: Classes, Concord & 9th, Darkroom Door, online class, Penny Black | Tags: Concord & 9th, Darkroom Door stamps, distress markers, Karin brushmarkers, online class, Penny Black stamps, Ranger Distress inks, sennelier watercolours 1 Comment
After months of work behind the scenes and a few weeks of hints here on the blog I am happy to open registration to my new online class FLORAL FAVES. As the name suggests this one is all about flowers; stamping them, painting them, arranging them (on paper) and turning them into card sized works of art.
Once again my videographer son Ben has filmed and edited while I have designed, uploaded and scripted the content which is now hosted on the Podia platform.
I hope you are inspired to join me in pairing your floral stamps to work with watercolour techniques. Every project is taught through video along with downloadable instructions, photos, tips and complete supply lists. We will work with different styles of stamps including background, outline, silhouette and brushstroke. We will pair all the favourite stamps with all the favourite mediums; dye inks, watercolour markers and watercolour paints .
As summer unfolds I’m sure you will be spending plenty of time outdoors, maybe in your garden, but when you need a quiet creative hour or two I hope you will join me in creating some bright and beautiful floral cards.
Registration is open now. Once registered you will have access to the introduction and supply pages. All the lesson content will be accessible on Wednesday May 26.












