Pansy Gaze
Posted: April 8, 2021 Filed under: pansy gaze, Penny Black | Tags: Fabriano Watercolour Paper, Penny Black stamps, Ranger Distress inks, Stampin Up 4 Comments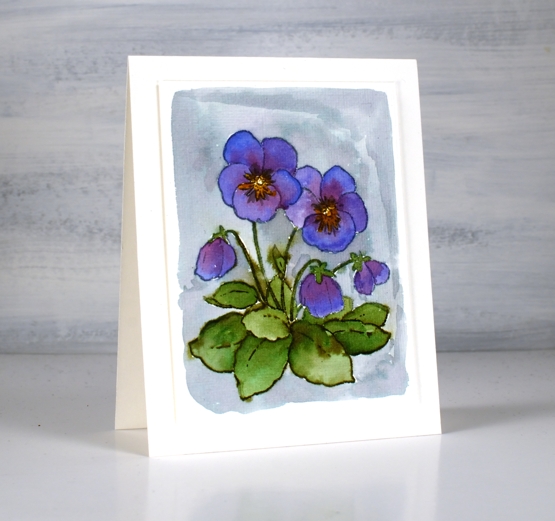
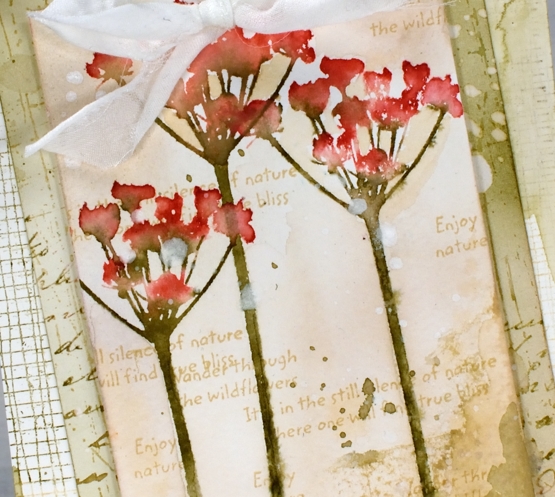
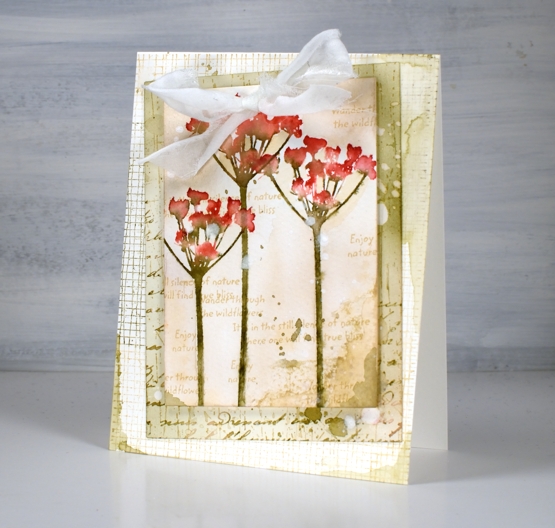
Today’s little card features a sweet stamp from Penny Black. I did the stamping and painting on a thin strip of cardstock thinking I might make a bookmark but as I filled in the background decided to just make a smaller than usual card. This one is 3¾” x 4¾” cut to frame the pansy panel evenly.
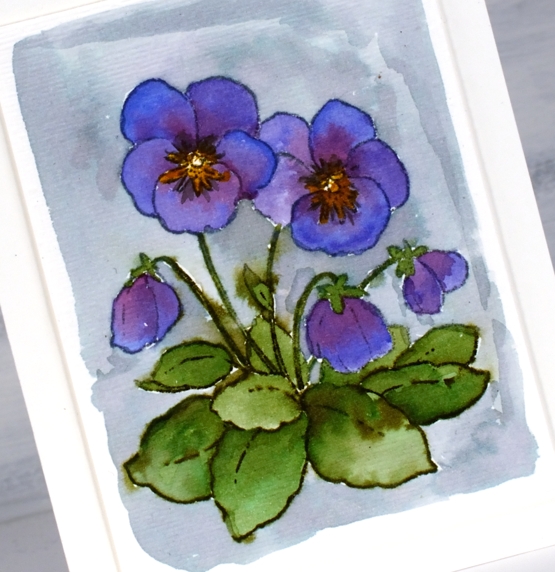
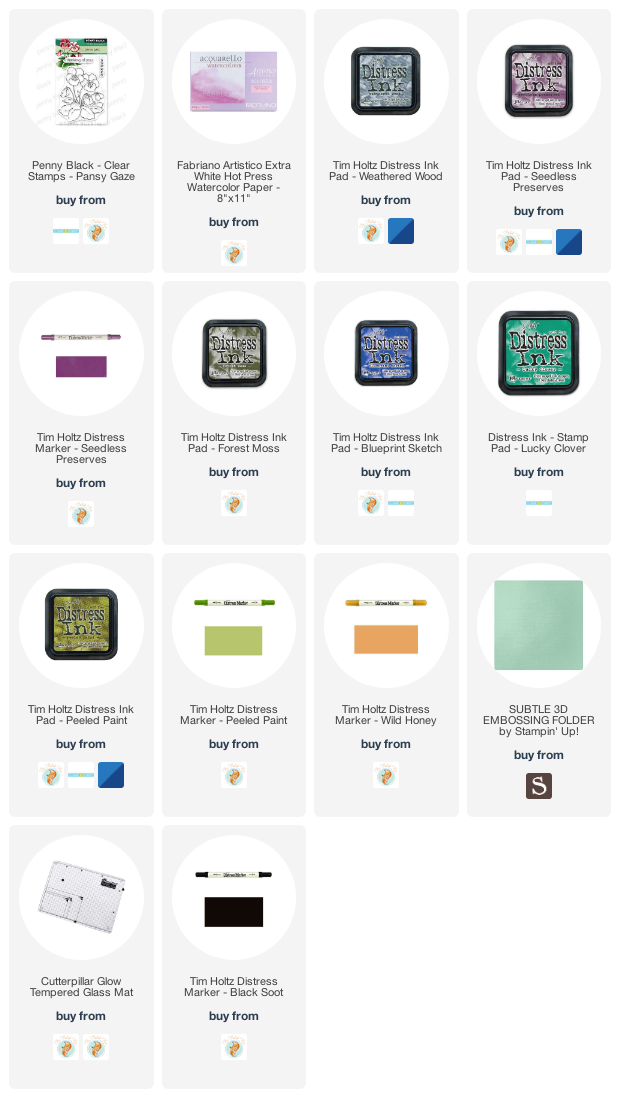
I stamped the pansy stamp in weathered wood distress ink then painted the petals with seedless preserves and blueprint sketch ink which was smooshed on my glass mat for convenient pick-up. I painted the leaves with a mix of forest moss, lucky clover and peeled paint. I added wild honey and black soot to the centres after painting all the petals and wish I’d achieved a bit more of a pop with the yellow but continued anyway.
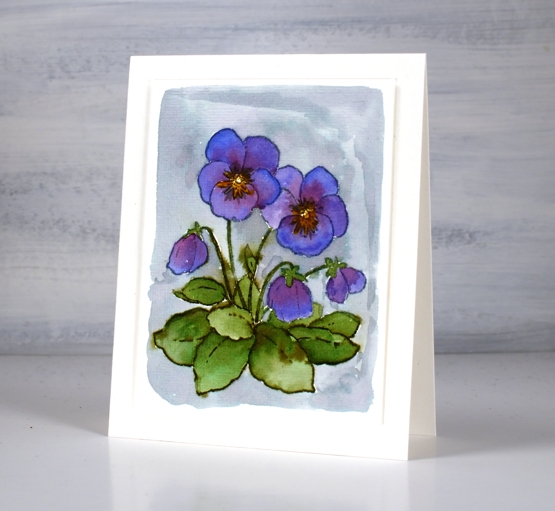
I smooshed the weathered wood ink pad on the glass mat several times to make plenty of the grey-blue ink available for painting a background and then proceeded to paint water first then ink as I went round the image. I was not after a seamless look (obviously!) but more of a rough sketchy look so there are some watermarks, hard edges and bleeds from the green ink. I ran the panel through the big kick with the ‘subtle’ embossing folder from SU for a canvas look; you can see it on the close up.
I saw the first flower in my garden today; it’s a little white star flower…happy sigh.
Supplies
(Compensated affiliate links used when possible)
Vintage layers
Posted: April 5, 2021 Filed under: Darkroom Door, French Script, global postmarks, mesh, Nature Walk, Papertrey Inks, scratches, you are everything | Tags: Darkroom Door stamps, Dr Ph Martin Hydrus watercolor paints, Fabriano Watercolour Paper, Papertrey ink 12 Comments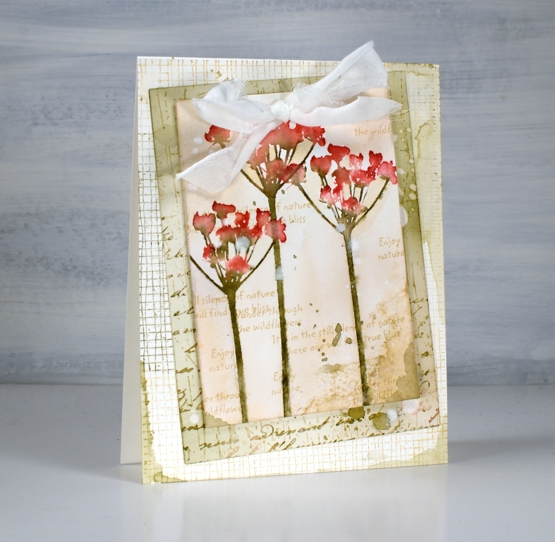
Today’s cards developed bit by bit over a week or so. I worked on flower panels one day, middle layers another day, let them sit a few days, searched for ribbon another day and finally a week later put them together still adding stamping, splattering and blending right up until I called them finished!
I featured the silhouette floral stamps from the new Darkroom Door ‘you are everything’ set. There are four floral stamps along with eighteen word stamps I mentioned in a previous post. The flowers above are stamped on cold press watercolour paper with papertrey inks. I used pale peony and pure poppy on the petals and olive twist on the stems. I spritzed lightly before stamping then blended further with a paintbrush on the paper. I used the same technique on the purple flowers in the second card but worked on hot pressed watercolour paper.
For the vintage and collage details on the card I above I used olive twist and fine linen inks to add painted areas, stamped text, splatter and blending with a brush.
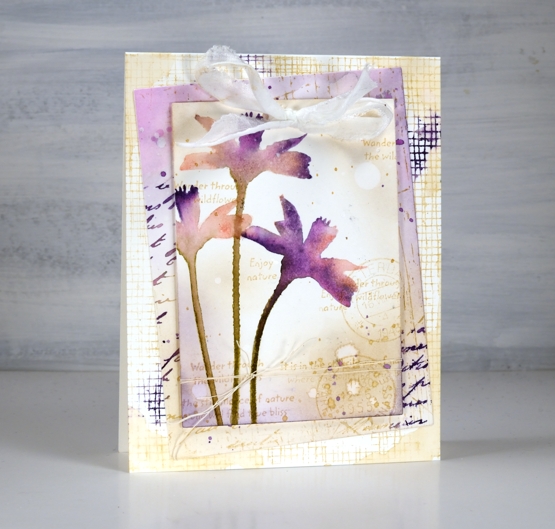
The flowers above are stamped in pale peony, royal velvet and olive twist and I stuck with fine linen and royal velvet as the inks on the layered areas also.
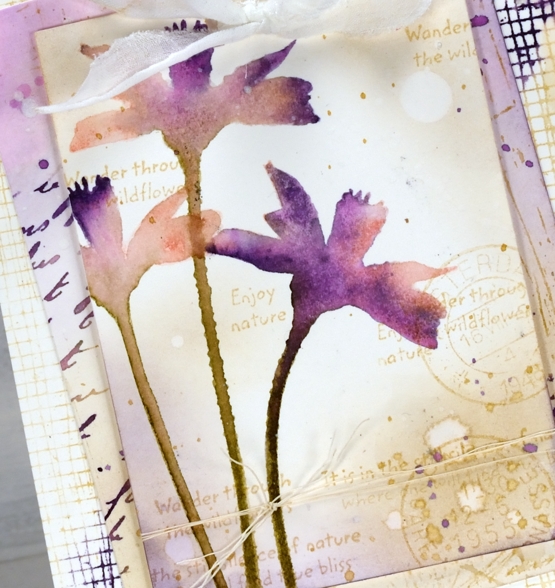
I’ve listed all the stamps I used to add texture and interest to the floral panel and the layers underneath. You can see some of my favourite ‘filler’ stamps including French script and global postmarks. I also splattered water and white paint for some watermarks and subtle blots!
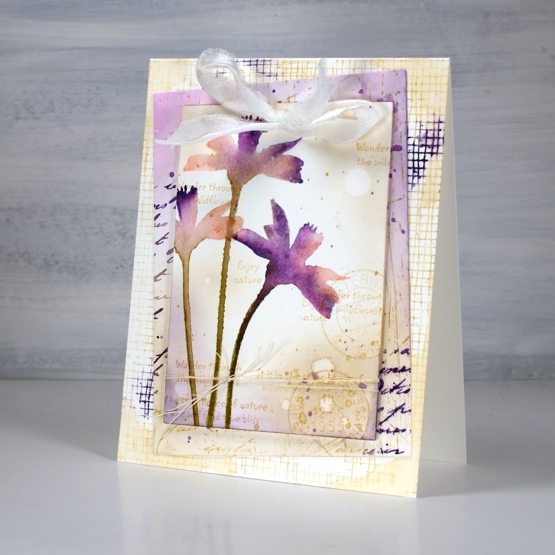
To finish both cards I punched a couple of holes in the top to thread some fabric through. I didn’t have a cream silk or sheer ribbon so I ripped some strips of what might be silk but I can’t remember. The ripped edge worked fine with my vintage layered look.
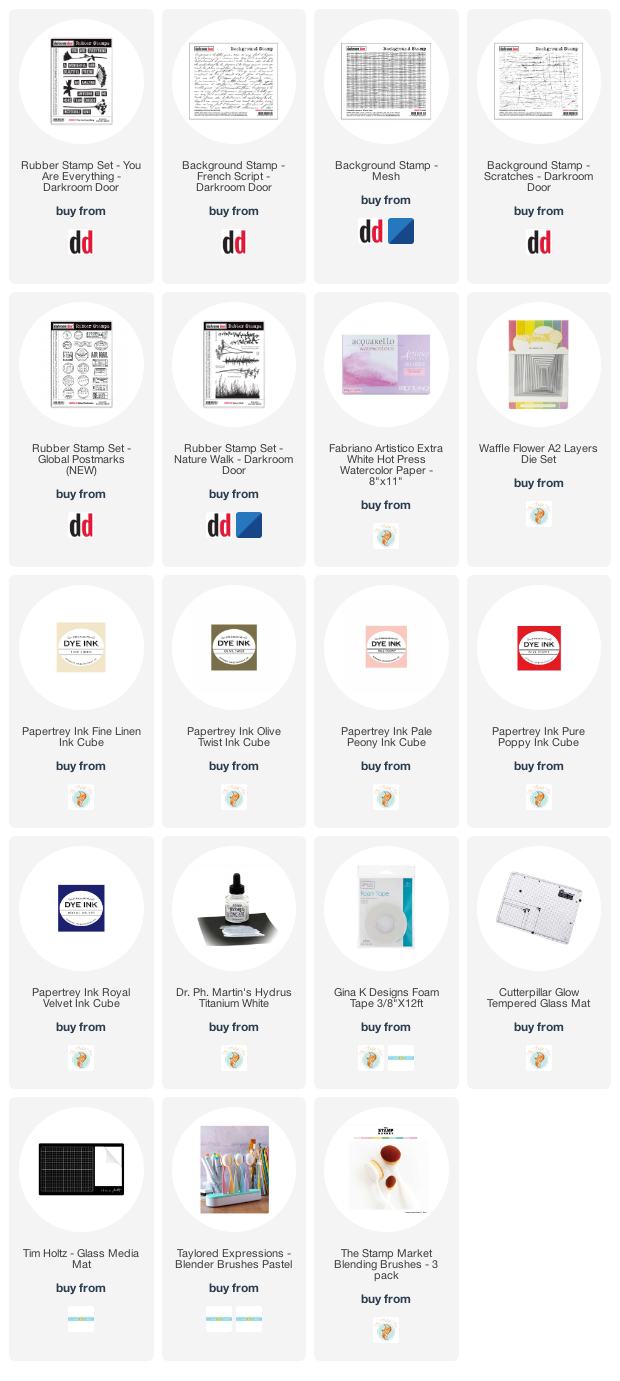
Supplies
(Compensated affiliate links used when possible)
Sweet Centrepiece
Posted: April 1, 2021 Filed under: Inktense pencils, sweet centerpiece | Tags: Inktense, Penny Black stamps, Ranger archival inks 9 Comments
I’m really enjoying pencil on kraft cardstock right now; the colours pop more than you might think on a brown base. This line image from Penny Black is called ‘sweet centerpiece’, cardstock is Bazzill kraft and the pencils are Derwent inktense.
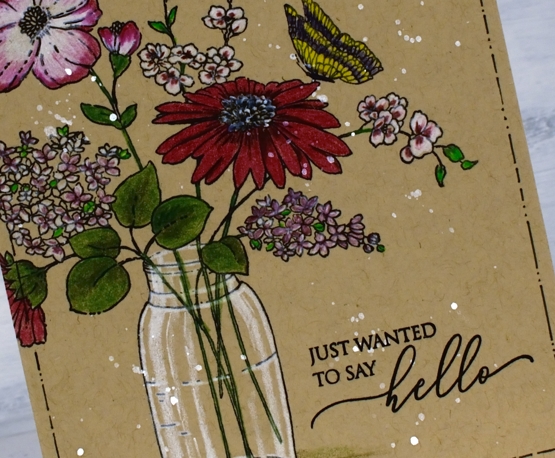
I stamped the image off to the side of the panel in archival jet black ink and coloured with a mix of purples and purply-pinks. Some flowers have a base of white with pinks and purples over the top, others have pink first with white blending over the top. The large daisy is a mix of deep red with shading of burgandy. I used three different greens, blending two at a time to get variety on the different plants.

I used a black micron pen to redraw a few lines that were muted by the coloured pencil and also drew a dots & dashes frame around the panel with the same fine tip pen (I used a rectangle frame die as a guide). I splattered some hydrus white paint over the panel before adding the sentiment from PB ‘magical friendship stamped archival jet black.
Wishing you joy and hope this Easter.
Supplies
(Compensated affiliate links used when possible)
Delighted with Daisies
Posted: March 30, 2021 Filed under: Christmas bush, daisy delight, Darkroom Door, Papertrey Inks | Tags: Darkroom Door stamps, Fabriano Watercolour Paper, Papertrey ink 5 Comments
This is the second card I’ve created with the new Darkroom Door background stamp ‘daisy delight‘. Once again I ended up using the whole stamp because it is just so happy and bright. At some stage I must try cutting a strip or some squares because I’m sure that would look pretty too.
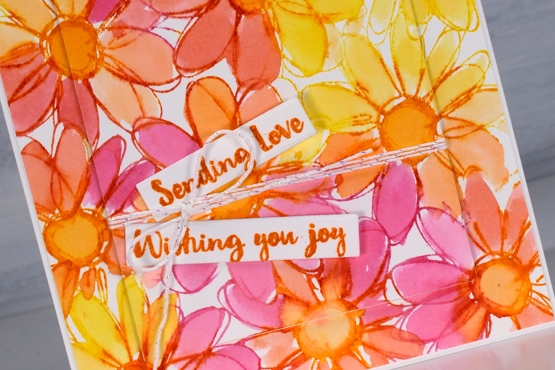
Using the stamp in a positioner with hot pressed watercolour paper I first inked the centres of the daisies with an orange ink cube. I wasn’t careful to ink only the circles; I just gave each daisy a twist of orange ink then stamped. I cleaned the stamp and inked sections with raspberry fizz ink then stamped and finally inked remaining sections with bright buttercup ink. I gave it a spritz of water to help the inks blend before stamping the last time.
To fill the petals I smooshed the same three inks on my glass mat then used a paintbrush and water to paint loosely inside the petals and centres. I also mixed new blends with the pink, orange and yellow inks.
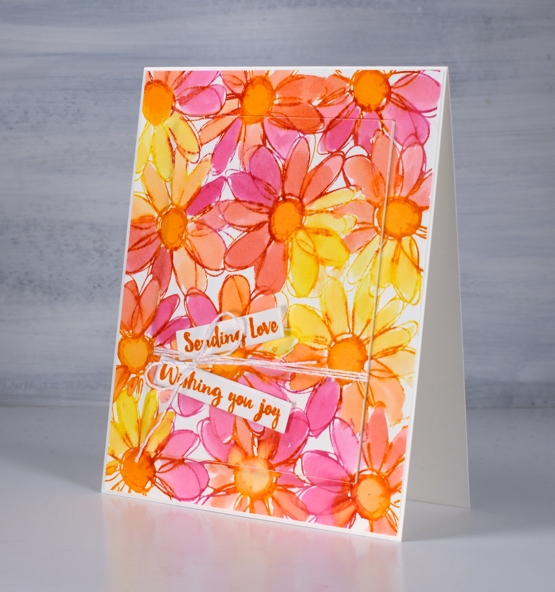
To put the card together I die cut a rectangle from the centre of the panel, popped in up on three layers of cardstock and wrapped some white and silver twine around it before attaching it to the card base. The sentiments are from the DD ‘Christmas bush’ set and they are perfect for many occasions; possibly a birthday this time.
Did you know Darkroom Door has a blog where they post oodles of inspiration for using their huge range of stamps and stencils? They also have a newsletter so you can receive emails full of inspiration.
Thanks for joining me today, see you again soon.
Supplies
(Compensated affiliate links used when possible)
Handwoven
Posted: March 29, 2021 Filed under: Christmas bush, Coliro paints, Darkroom Door, Finetec paints, handwoven, Papertrey Inks, you are everything | Tags: Coliro paints, Darkroom Door stamps, Fabriano Watercolour Paper, Papertrey ink, Stonehenge black watercolour paper 8 Comments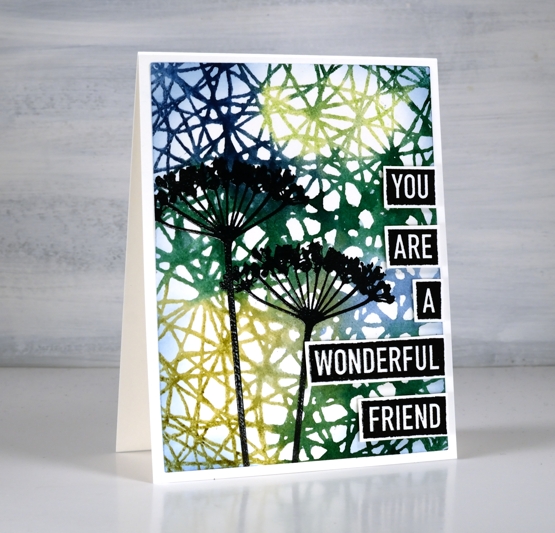
Today’s cards feature the new ‘handwoven’ background stamp from Darkroom Door it two quite different ways.
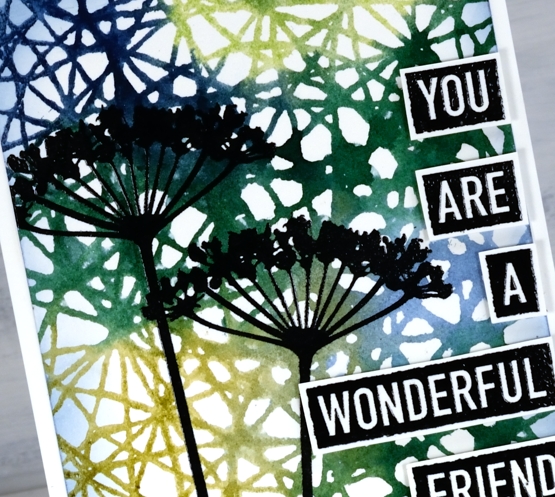
To create this first card I inked the handwoven stamp with blue and green papertrey ink cubes, spritzed the stamp then pressed it on hot pressed watercolour paper. The result was some green areas, some blue areas and some pretty blended areas where the inks overlap. The blue-green background created a pretty pattern as it was and I could have just added a sentiment and called it complete but I decided to take the risk of adding some flowers. I would understand if you wish I had left it flower free because it is a busy panel but I like the look of a patterned geometric roof or canopy over the flowers.
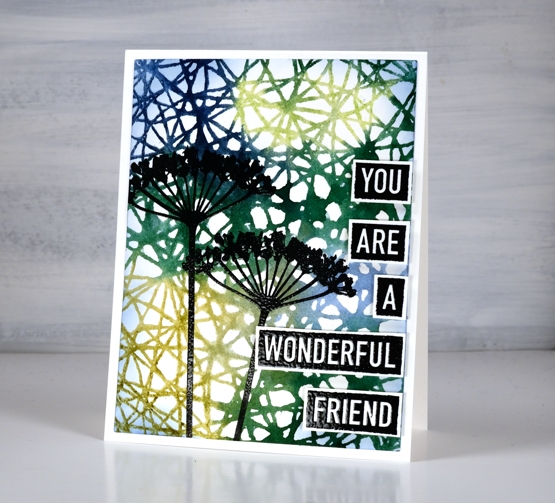
The flowers are from the new DD set ‘you are everything’ as are the words. The words in this set are great; there are eighteen negative space words that can be stamped and cut out to make countless sentiments. I embossed both the flowers and the words to give them more prominence over the busy background.
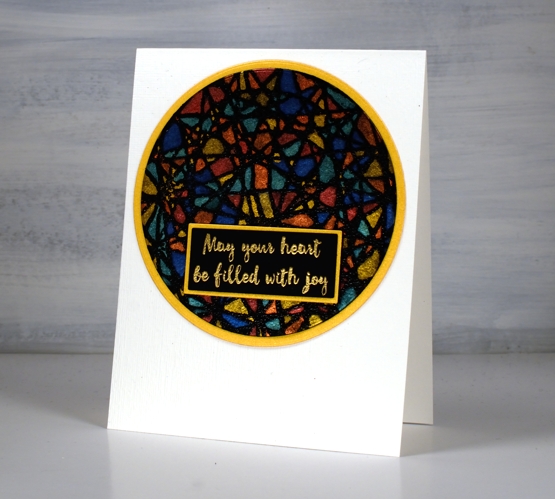
The second card I am planning to use as an Easter card. Filling the spaces of the handwoven pattern with pearlescent paint reminded me of a stain glass window so I looked through my sentiments and found this one in the DD ‘Christmas bush’ set and decided it works for many occasions, including Easter. I stamped the handwoven stamp on black watercolour paper in versamark then embossed in clear powder before painting all the little spaces with Coliro paints and a fine point brush. It did take a while and I didn’t do it in one sitting as the fiddliness factor was high!
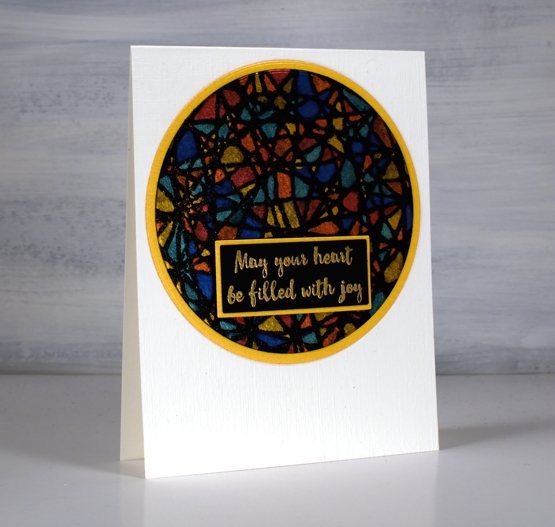
I matted both the patterned circle and the sentiment in gold shimmer cardstock and embossed the front of the card base using the ‘subtle’ embossing folder from SU.
Supplies
(Compensated affiliate links used when possible)
Lemon Lush – pencil on kraft
Posted: March 26, 2021 Filed under: A2 layers, Additional A2 layers, Coloured pencil, floral notes, lemon lush, Pink Fresh studio, Waffle Flower | Tags: brutus monroe embossing powder, Faber-Castell Polychromos Colour Pencil, Pink Fresh studio, Waffle Flower dies 5 Comments
I have a second card featuring the pretty ‘lemon lush’ stamp from Pinkfresh Studio. Last time I used peerless watercolours for a bold, bright look. Today’s white on kraft combo is softer and subtler.

I stamped the large 6″ x 6″ stamp on kraft cardstock in Brutus Monroe alabaster ink then embossed in alabaster powder. I used polychromos pencils to colour all the elements. The whole lemons needed a few shades of yellow and orange but the rest of the design was completed with pairs of inks, two greens, two pinks or two yellows with sometimes the addition of white to soften or brighten.
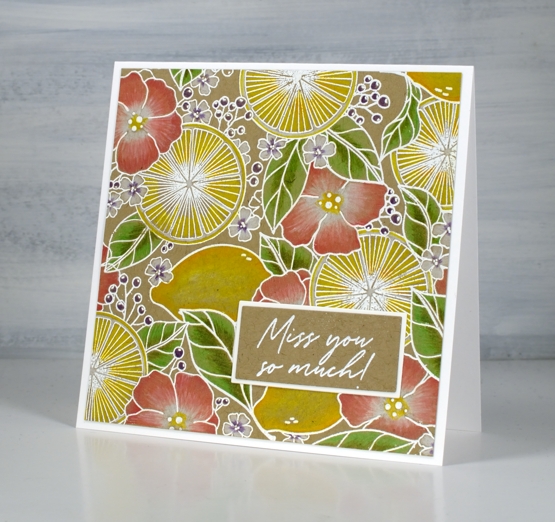
The sentiment is from the Pinkfresh set ‘floral notes’ embossed in white then cut and framed with the help of my ever-useful Waffle Flower A2 layer dies.
Wishing you a bright and happy day!
Supplies
(Compensated affiliate links used when possible)
Under the same sky
Posted: March 23, 2021 Filed under: Darkroom Door, long distance, vintage planes | Tags: Darkroom Door stamps, Dr Ph Martin Hydrus watercolor paints, Fabriano Watercolour Paper, Tsukineko Versafine inks 7 Comments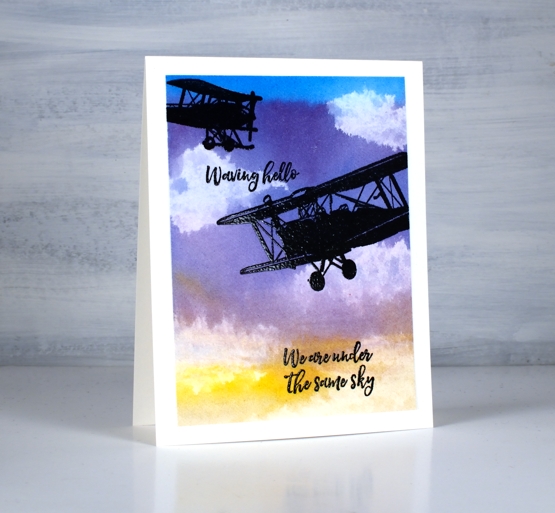
After pairing the cool new ‘long distance’ sentiments from Darkroom Door with a map stamp I took another look at the strip of sentiments (there are eleven) and picked out a couple that would work with planes and a sunset sky. I must admit my matchy-matchy side was pretty happy these two sentiments are in the same font and the three on my map card were also in the same font.

I taped a piece of hot pressed watercolour paper to my glass mat and painted six colours from top to bottom of the panel with plenty of water to dilute and mix the colours as I went. I used the Dr Ph Martin’s Hydrus watercolours for the sky and the colours are linked below. I put only a drop of each in wells of the palette then added three or four drops of water. Considering the paint brush was also dipped in water before picking up paint you can see these liquid watercolours are highly pigmented. I painted the whole panel twice starting with the phthalo blue each time and finishing with the gamboge. While the panel was still wet I scrunched up a tissue and dabbed paint off. You can see the tissue takes out a lot of colour bringing the dabbed area almost back to white.
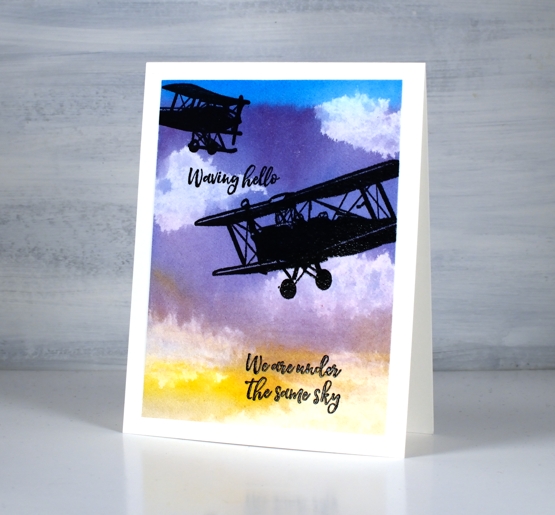
Once the panel was totally dry I trimmed it and stamped two planes from DD vintage planes and two sentiments in versafine clair nocturne before embossing over the black ink in clear powder.
I was thinking about a comment my dad left on the long distance + map card about the recipient being able to return the same message to the sender on receipt of the card and I wondered about a ‘send it on’ idea. It is a bit different to what my dad suggested but instead of writing in the card I will write on a piece of loose paper inside the card and suggest the recipient remove my note and add one of their own before sending the card on to another person. For fun the senders and recipients could note their names on the back of the card. Hmmmm, perhaps I should try it with the map card and maybe this one too.
Supplies
(Compensated affiliate links used when possible)
Daisy Delight
Posted: March 22, 2021 Filed under: Brusho, daisy delight, Darkroom Door, you are everything | Tags: Brusho, Darkroom Door stamps, Fabriano Watercolour Paper, Tsukineko Versafine inks 7 Comments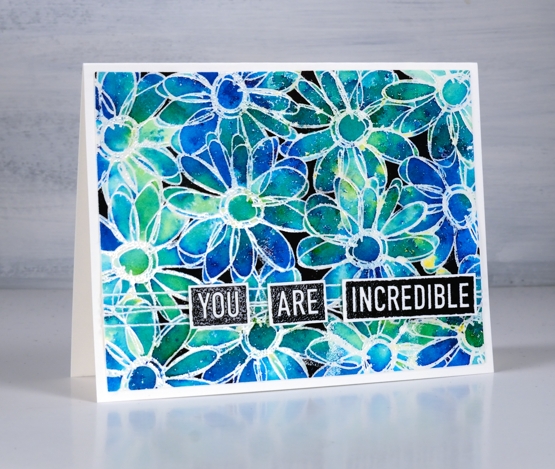
When I have a new line-art background stamp my first choice is usually to try emboss resist with brusho paint powders. This new background stamp from Darkroom Door is called ‘daisy delight’ and has plenty of loops and lines for trapping brusho.
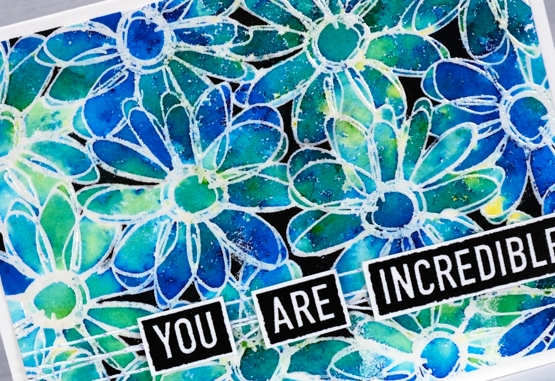
I embossed the stamp in clear powder on hot pressed watercolour paper. With scrap paper spread under the panel I sprinkled brusho powder over the panel, both turquoise and sea green. I spritzed water over the brusho and sat back to watch the magic happen. As the brusho diluted I saw pockets of colour appear which were exactly what I wanted. You can see different shades of blue and green as well as a few pops of yellow. There were a few blank or pale sections so I sprinkled more brusho, spritzed more water and then waited again to see what happened. Once the paint was really soaking in I took a small brush and started filling some of the petals where the colour hadn’t reached all the edges. In a few places I took bold colour from a petal and used it to fill a petal somewhere else.
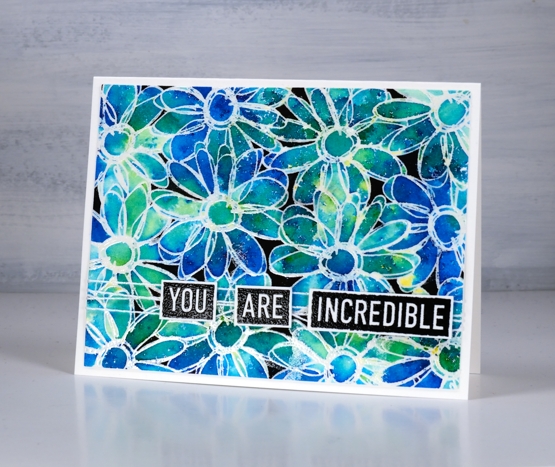
I dried the panel with a heat tool then trimmed it and did a test on a trimmed scrap to see if I would like black background in amongst the flowers. I went with it and coloured in the few areas that are not part of the flowers with a black Karin brushmarker. To finish the card I wrapped white/silver twine around it and popped up some embossed words from the new DD ‘you are everything’ set.
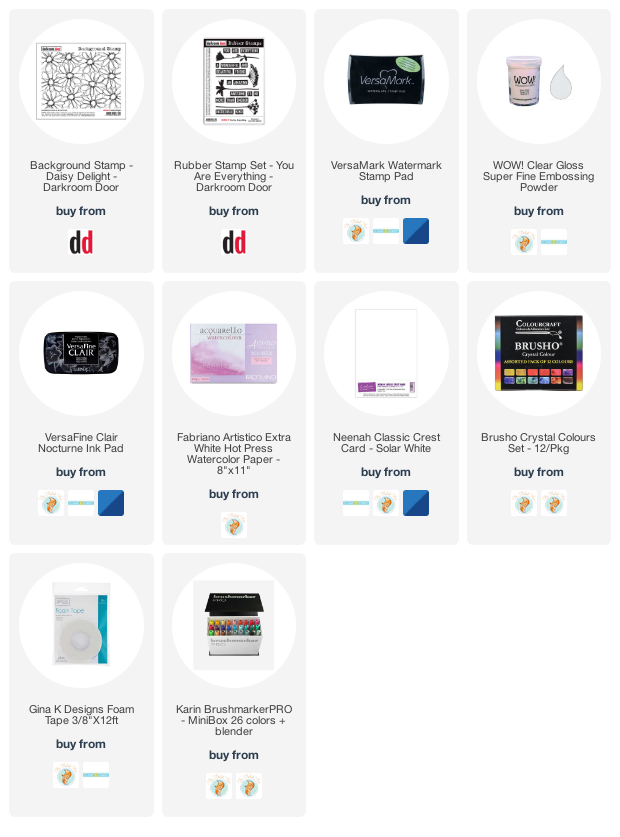
Supplies
(Compensated affiliate links used when possible)
2021 Bujo – March to do list
Posted: March 20, 2021 Filed under: Bullet Journal, Dingbat notebooks, Hand drawn, Hand lettered | Tags: Bullet Journal, Dingbats notebook, Staedtler watercolour brush pens, Tsukineko Memento inks 5 Comments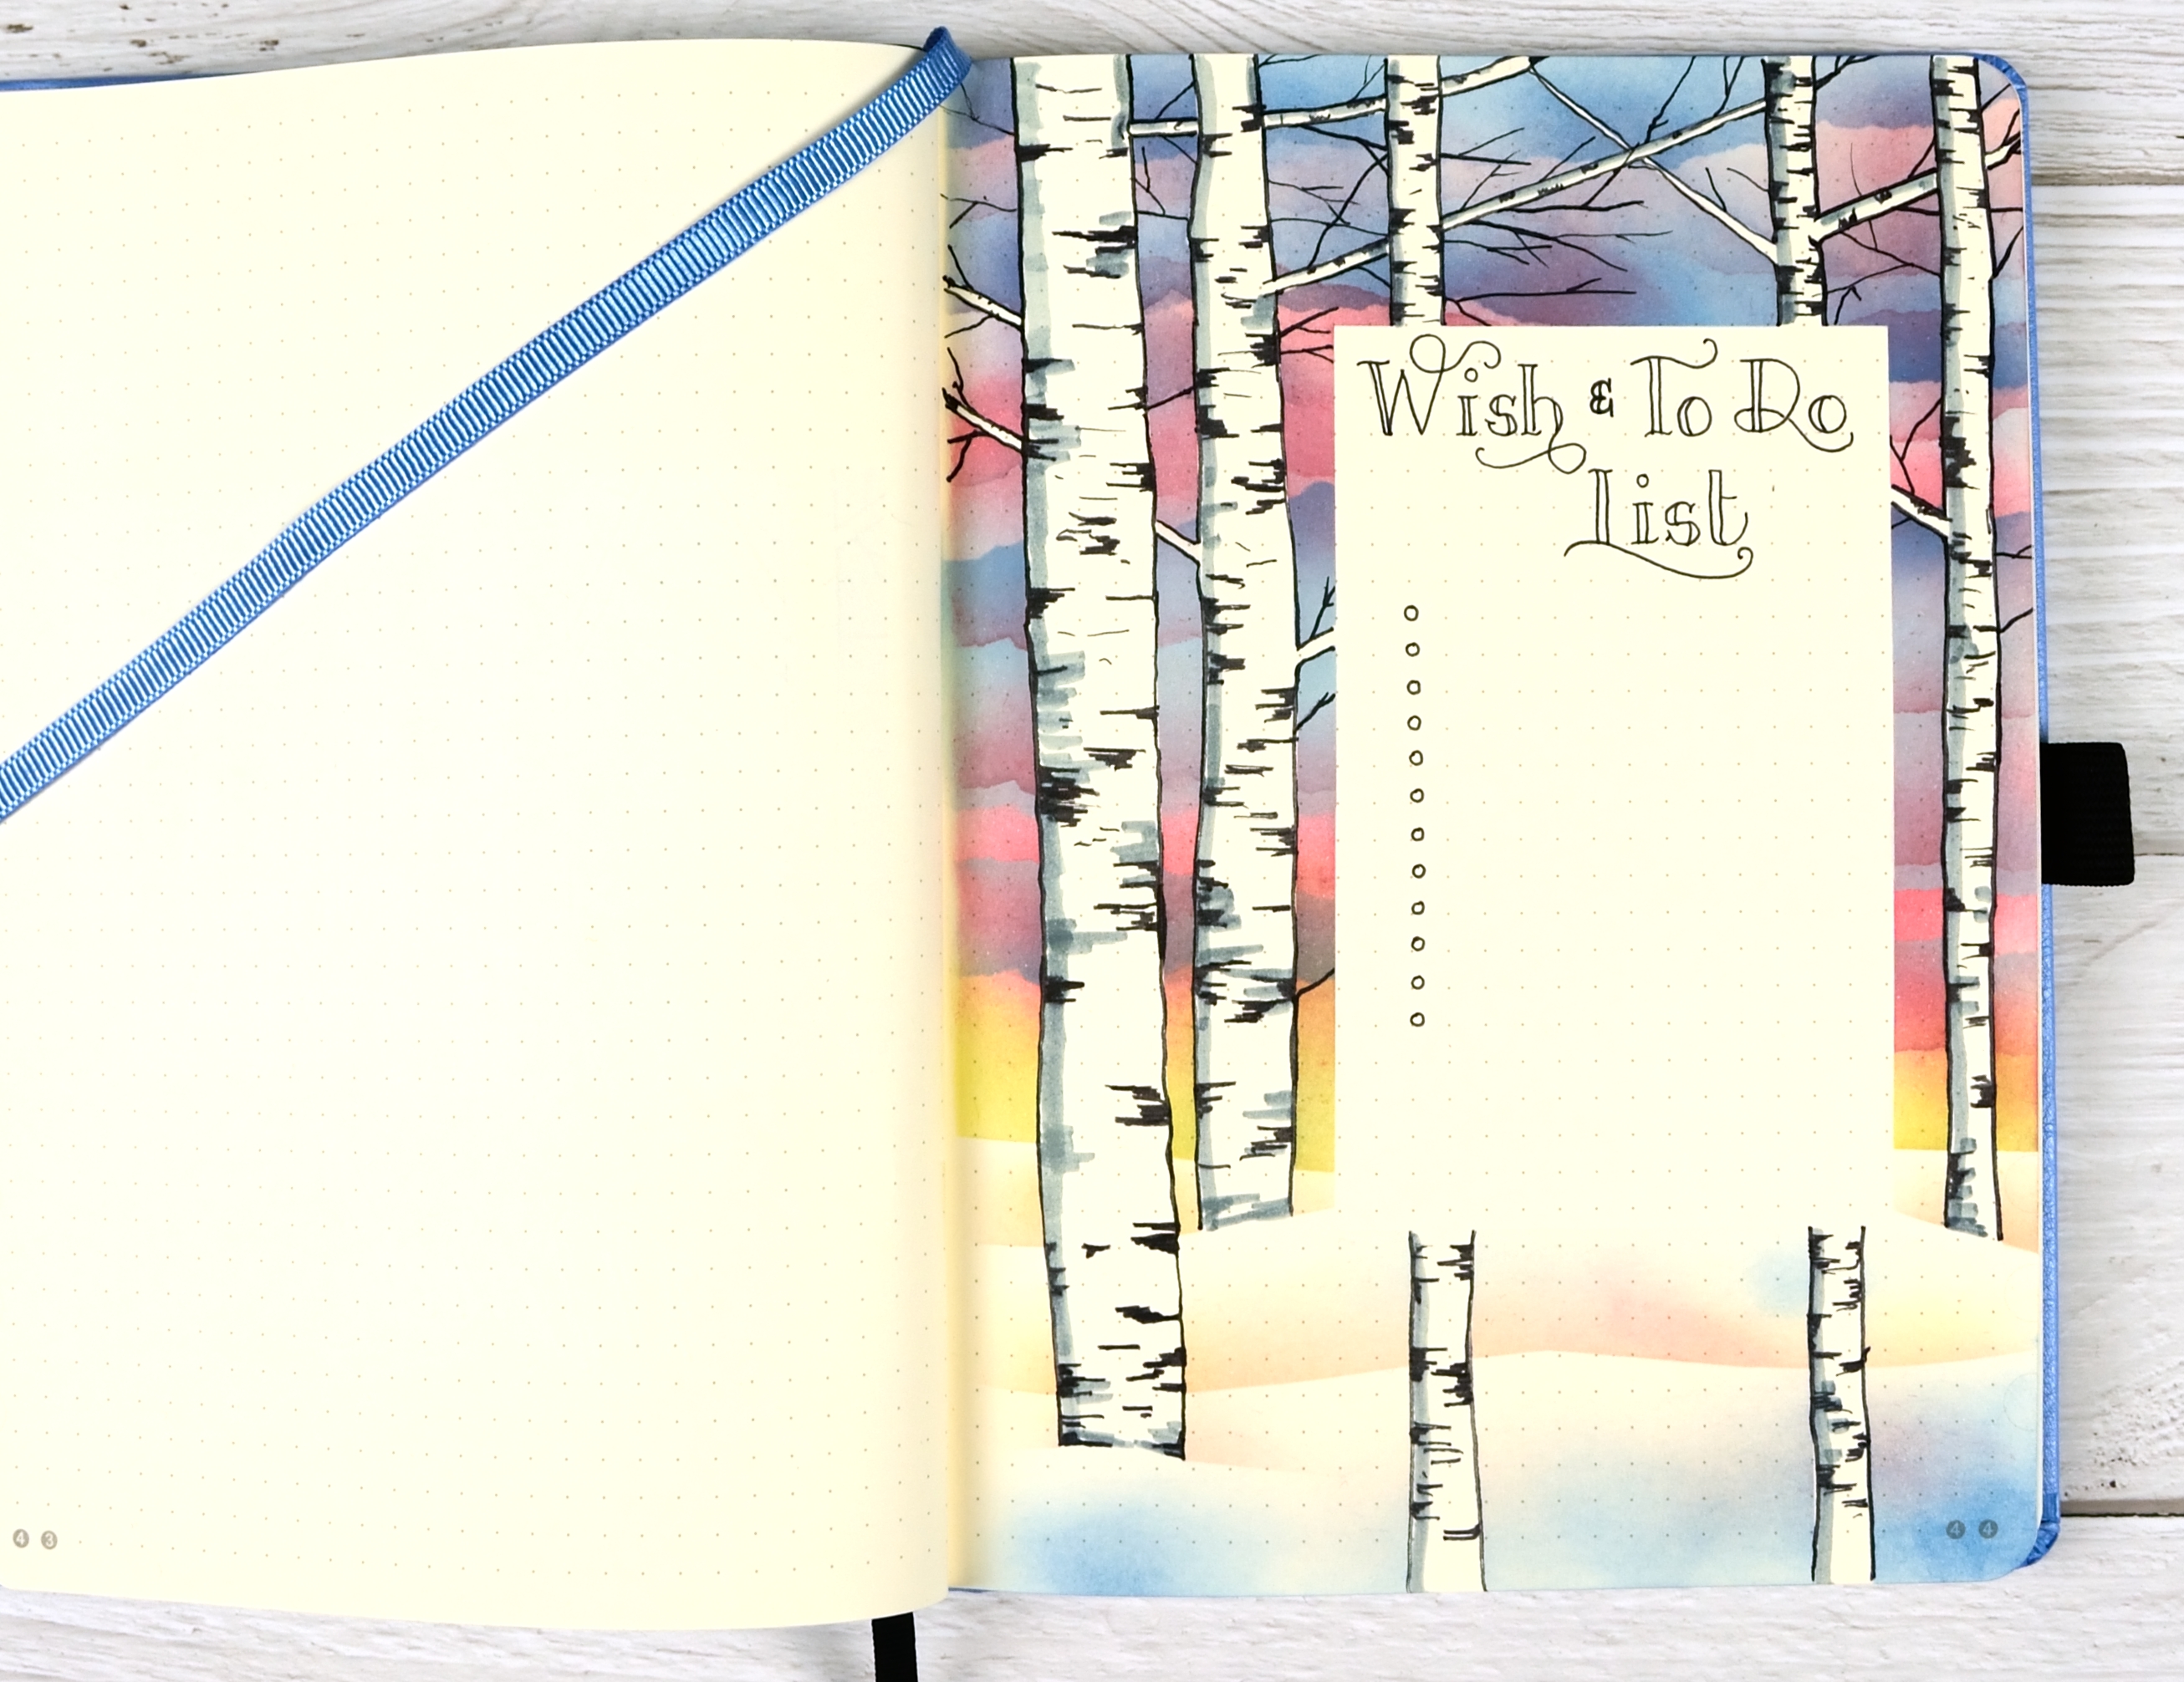
This is the last of my birch themed pages, photographed before I added all the to-dos and wishes. We are two thirds of the way through March and I’d like to say I have done two thirds of the things I added to this list but sadly that is not true!
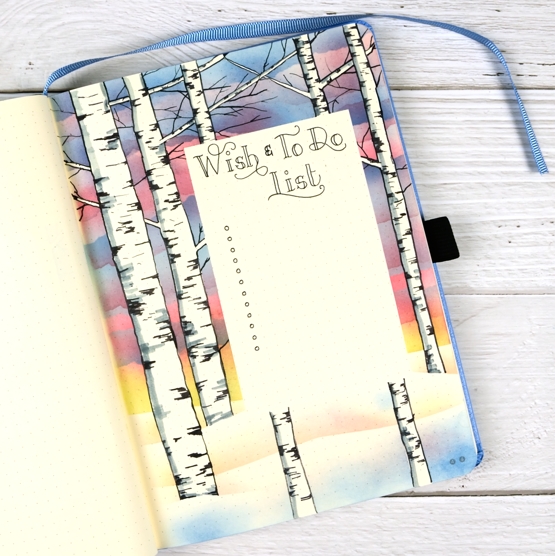
I used the same technique for this page that I described in previous birch + sunset posts here and here. One unexpected outcome of reusing the post-it tapes for four different pages was some pretty blue, pink and yellow tape to use on another page! Seeing I am primarily a card maker I plan to create a card using this technique and hopefully a video to show you the process.
Thanks for dropping by.
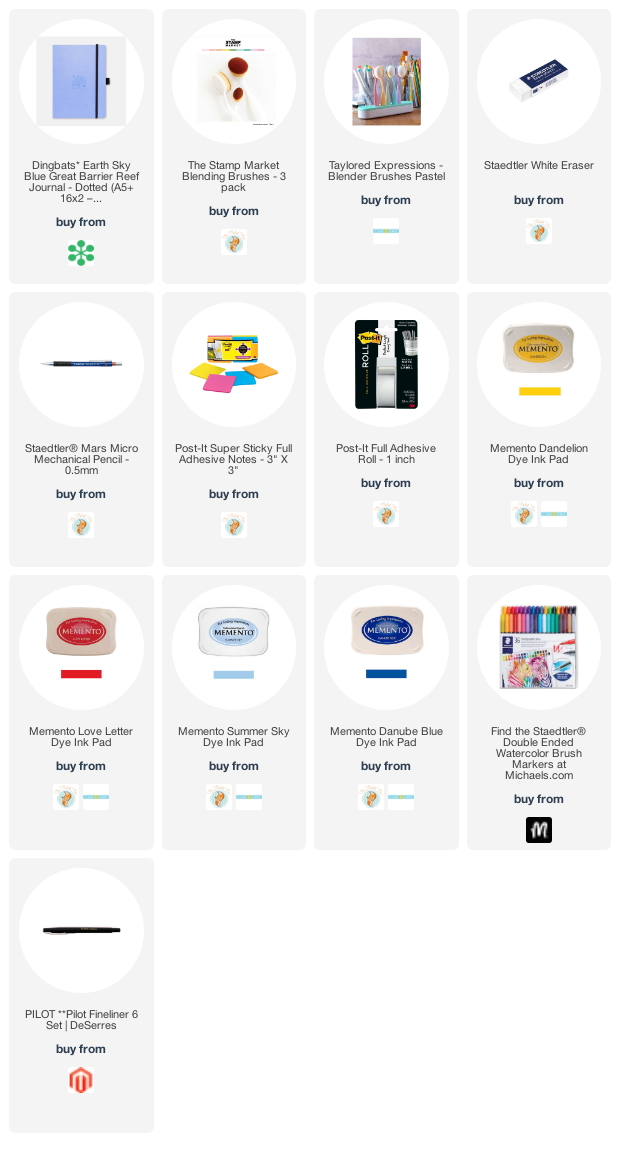
Supplies
(Compensated affiliate links used when possible)
Long Distance
Posted: March 19, 2021 Filed under: Darkroom Door, global postmarks, long distance, World Map | Tags: Darkroom Door stamps, Fabriano Watercolour Paper, Ranger Distress inks, Tsukineko Versafine inks 7 Comments
Many of us are separated from family and friends these days so when I saw this new set of sentiments from Darkroom Door I knew immediately that I could put them to good use. The set is called ‘long distance’ and is a long strip of sentiments one under the other, eleven in total. I have several sentiment strips from Darkroom Door and have not cut any of them into individual strips. Instead I tend to stamp the whole strip or a section of the strip and then snip off or die-cut the ones I want to use.
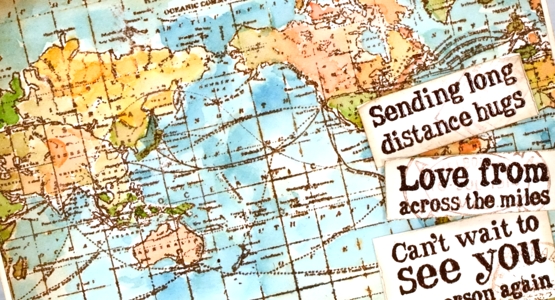
As many of you know I am originally from Australia and all my family still lives there while my husband, children and I live in Canada and have done for twenty years. When I designed this card featuring the DD ‘world map’ stamp I did so with my Australian family and friends in mind so I had to make sure both countries were still on display after I added the sentiments. I stamped the map on hot pressed watercolour paper in tea dye distress ink and acorn versafine clair, dried the inks then started painting colours over the map. I smooshed tea dye, carved pumpkin, abandoned coral, broken china and mowed lawn distress inks on my glass mat and painted loosely with no major concern for borders or accuracy. I searched ‘antique map’ for an inspiration photo to guide me.
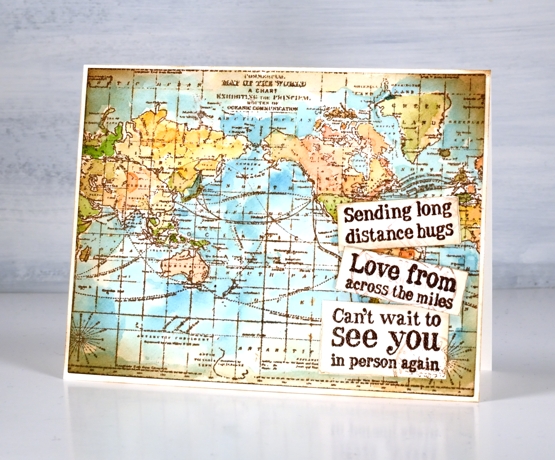
I cie-cut the map panel with a Waffle Flower A2 additional layer die then applied vintage photo ink around the edge of the map and the sentiments with a blending brush. It’s a subtle addition but I also stamped pale postmarks on the sentiments using the DD ‘global postmarks’ stamps. I will be showing you more of the new stamps from Darkroom Door over the next few weeks but there are already several blog posts on the Darkroom Door blog featuring the new beauties so make sure you pop over there to take a look.
Supplies
(Compensated affiliate links used when possible)