
2021 Bujo – March to do list
Posted: March 20, 2021 Filed under: Bullet Journal, Dingbat notebooks, Hand drawn, Hand lettered | Tags: Bullet Journal, Dingbats notebook, Staedtler watercolour brush pens, Tsukineko Memento inks 5 Comments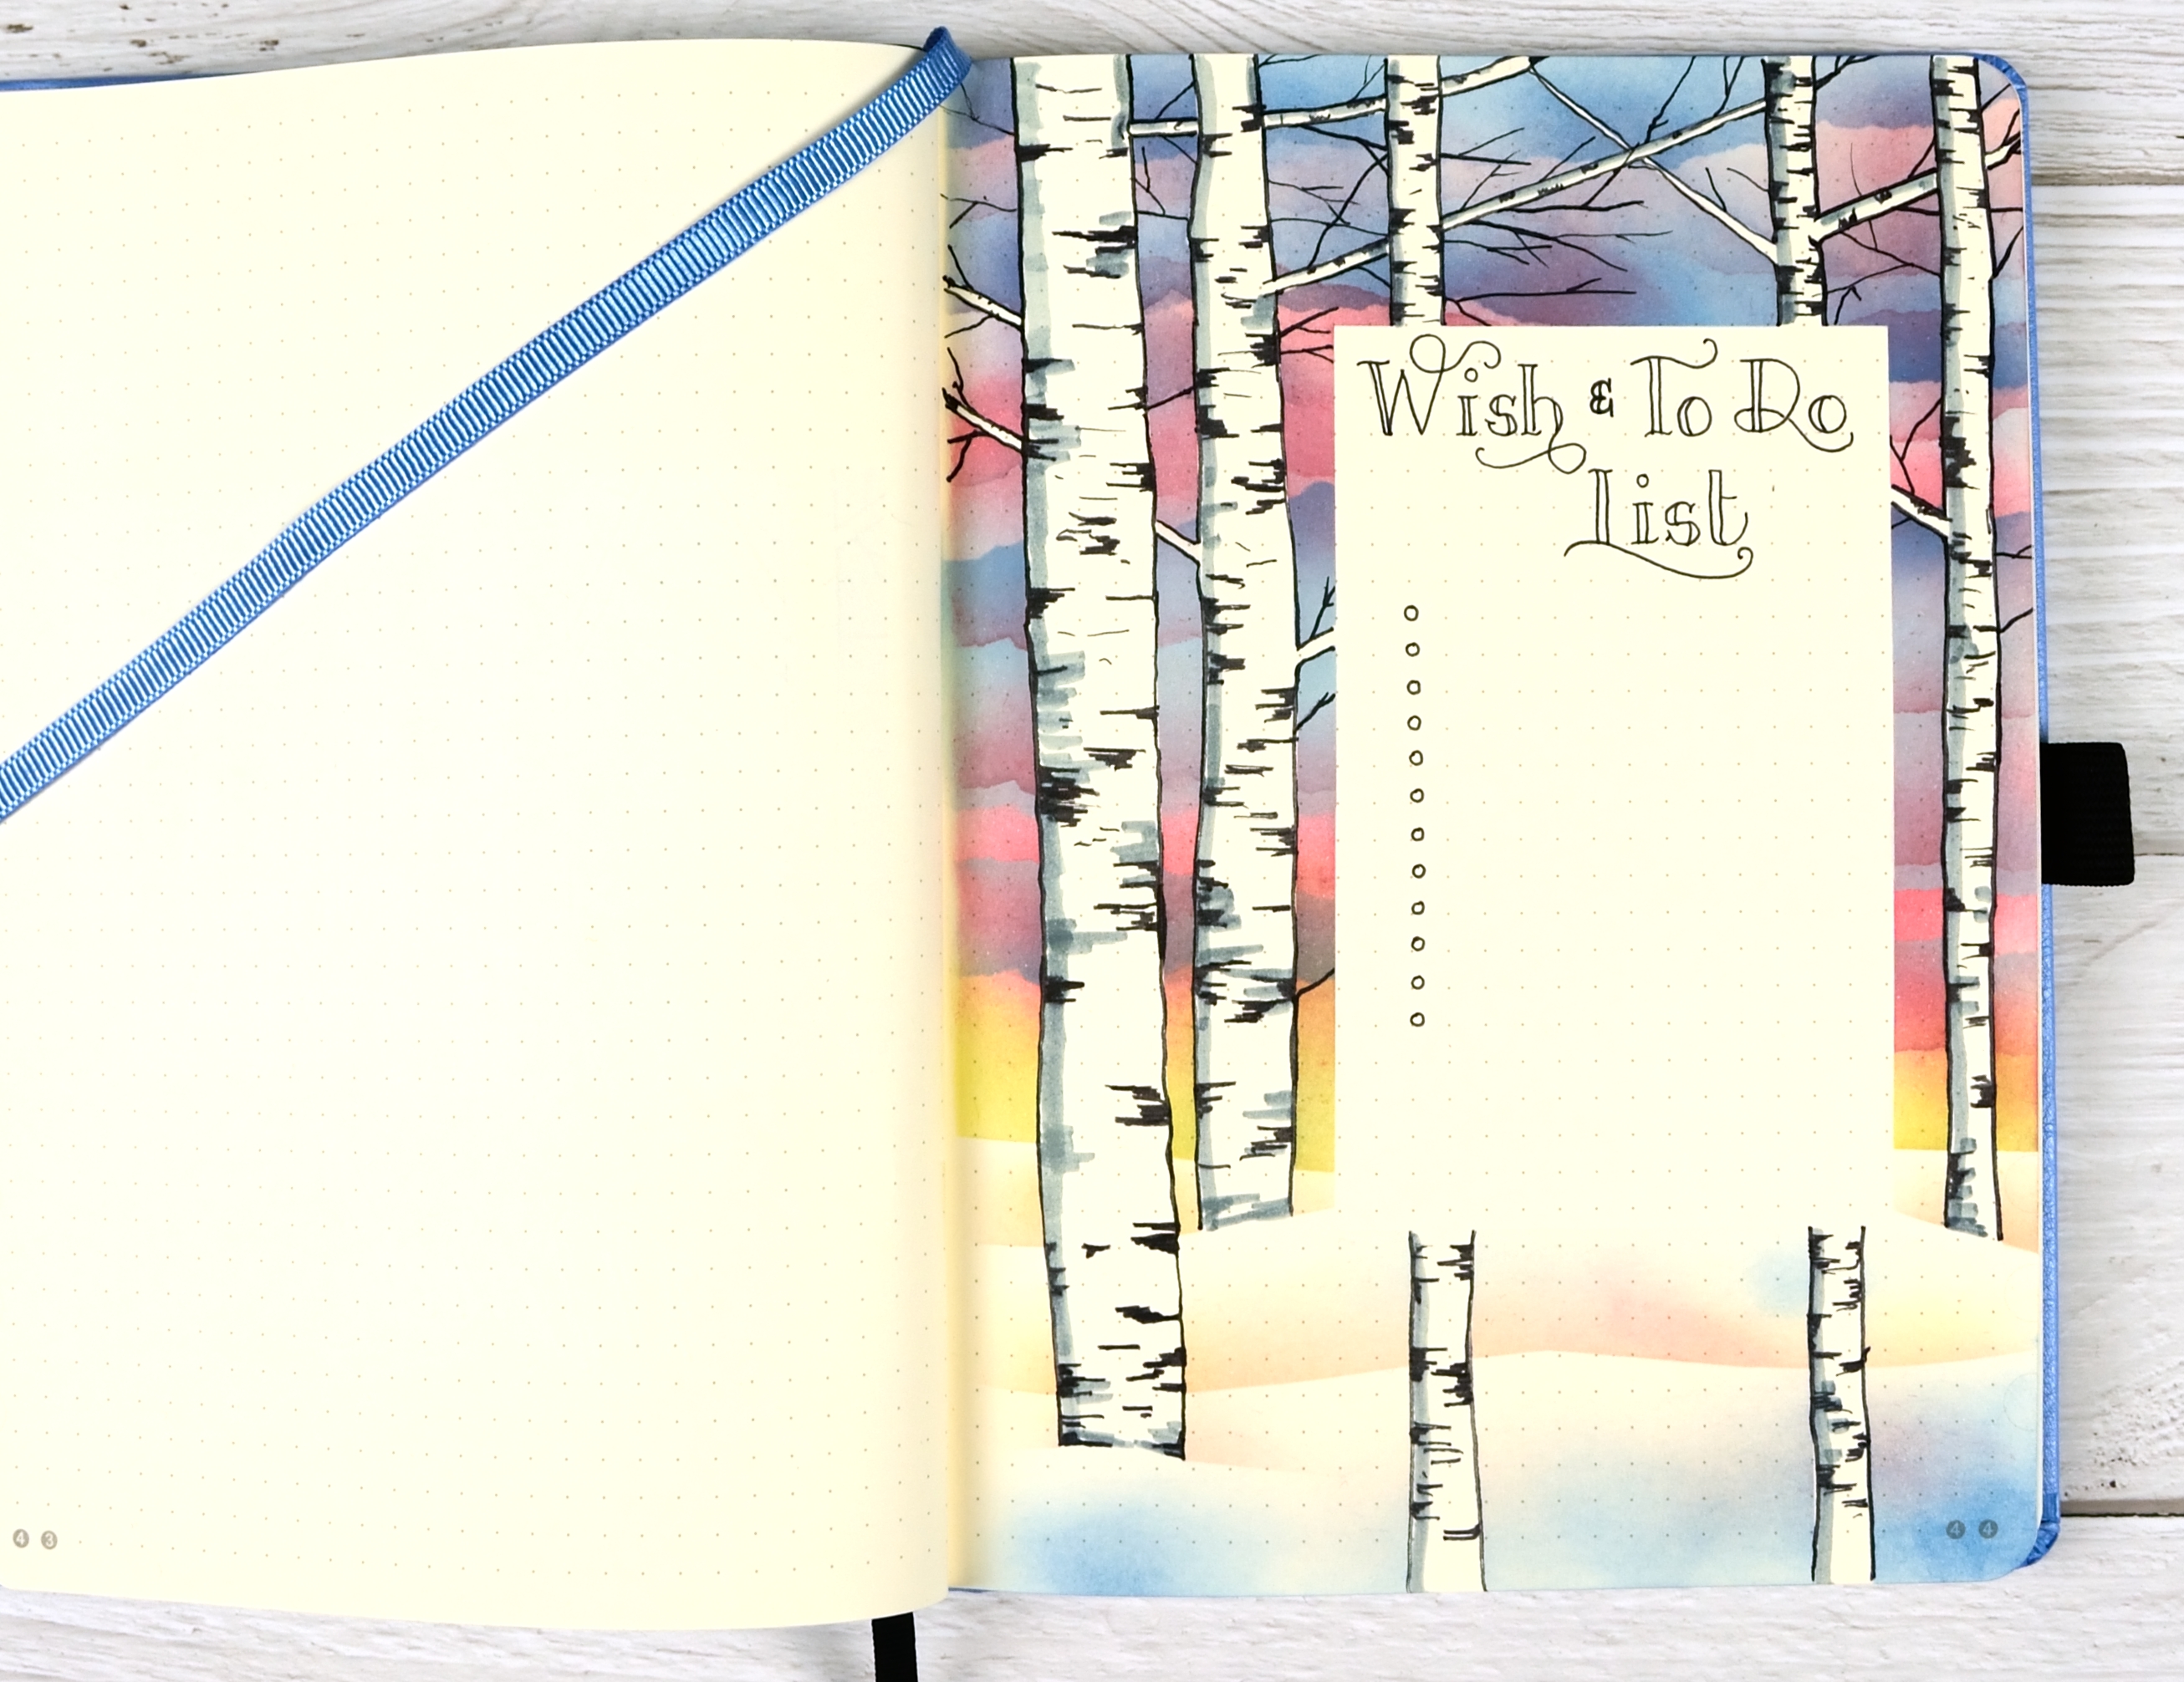
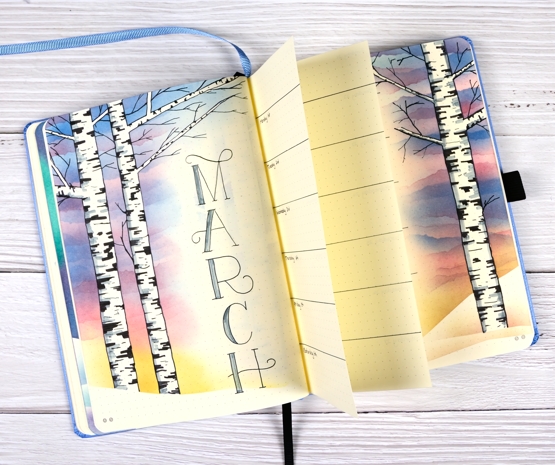
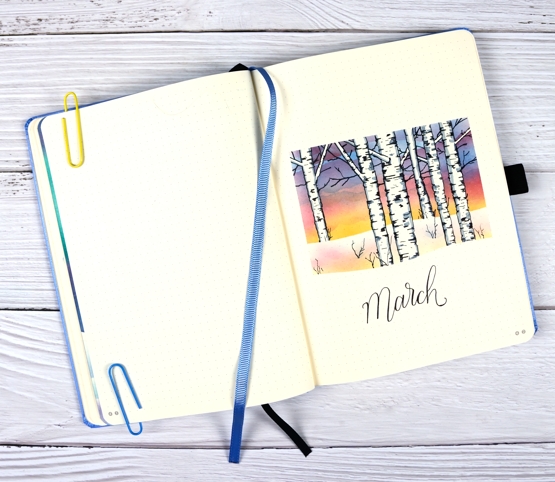
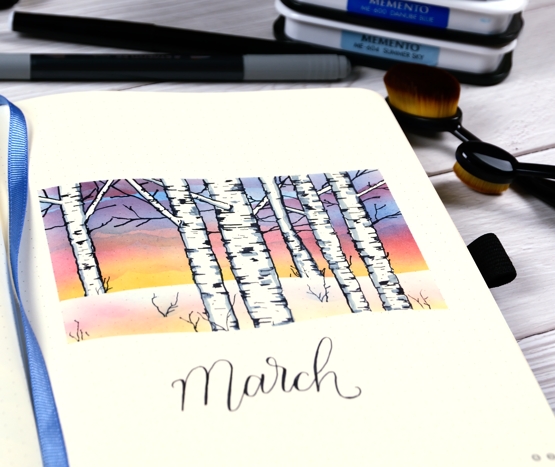
This is the last of my birch themed pages, photographed before I added all the to-dos and wishes. We are two thirds of the way through March and I’d like to say I have done two thirds of the things I added to this list but sadly that is not true!
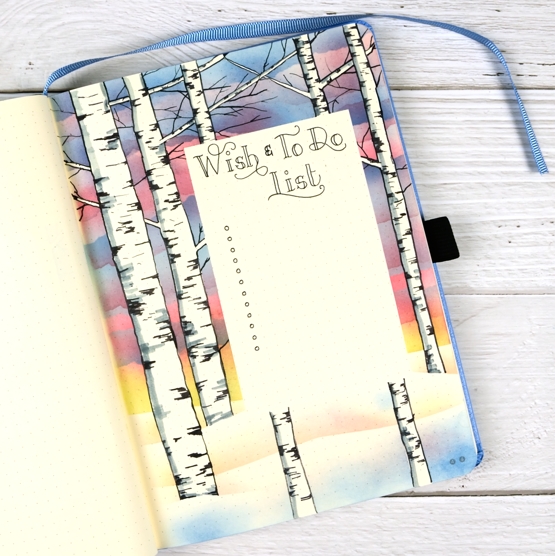
I used the same technique for this page that I described in previous birch + sunset posts here and here. One unexpected outcome of reusing the post-it tapes for four different pages was some pretty blue, pink and yellow tape to use on another page! Seeing I am primarily a card maker I plan to create a card using this technique and hopefully a video to show you the process.
Thanks for dropping by.
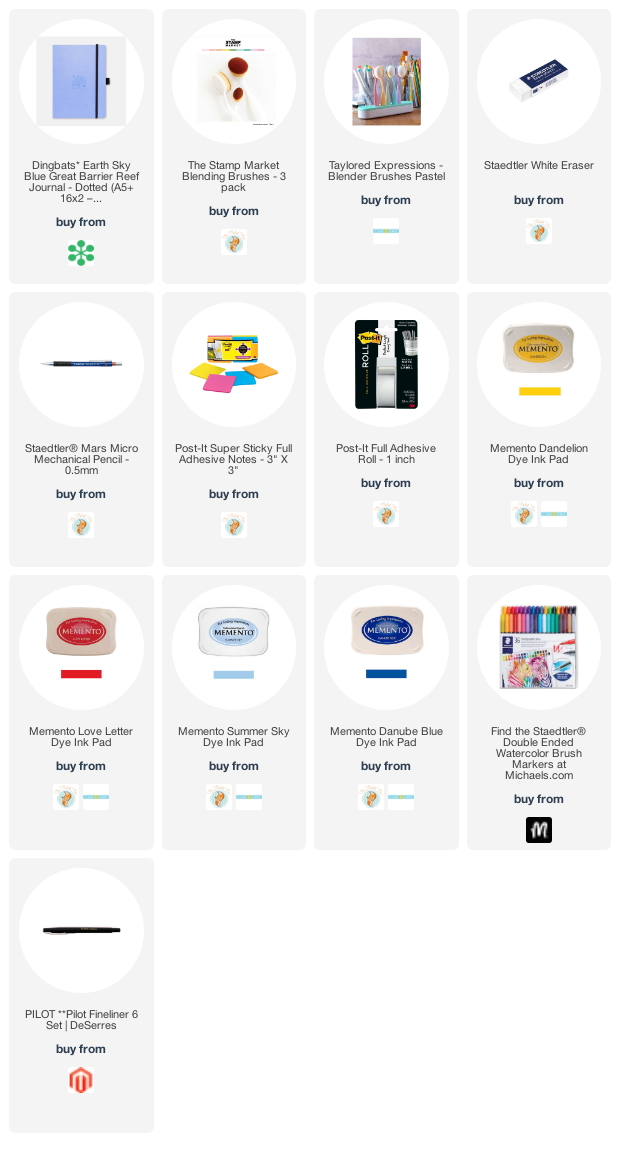
Supplies
(Compensated affiliate links used when possible)
Long Distance
Posted: March 19, 2021 Filed under: Darkroom Door, global postmarks, long distance, World Map | Tags: Darkroom Door stamps, Fabriano Watercolour Paper, Ranger Distress inks, Tsukineko Versafine inks 7 Comments
Many of us are separated from family and friends these days so when I saw this new set of sentiments from Darkroom Door I knew immediately that I could put them to good use. The set is called ‘long distance’ and is a long strip of sentiments one under the other, eleven in total. I have several sentiment strips from Darkroom Door and have not cut any of them into individual strips. Instead I tend to stamp the whole strip or a section of the strip and then snip off or die-cut the ones I want to use.
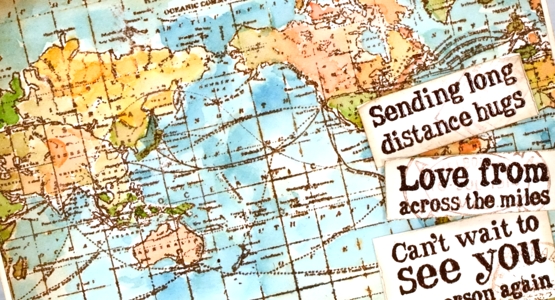
As many of you know I am originally from Australia and all my family still lives there while my husband, children and I live in Canada and have done for twenty years. When I designed this card featuring the DD ‘world map’ stamp I did so with my Australian family and friends in mind so I had to make sure both countries were still on display after I added the sentiments. I stamped the map on hot pressed watercolour paper in tea dye distress ink and acorn versafine clair, dried the inks then started painting colours over the map. I smooshed tea dye, carved pumpkin, abandoned coral, broken china and mowed lawn distress inks on my glass mat and painted loosely with no major concern for borders or accuracy. I searched ‘antique map’ for an inspiration photo to guide me.
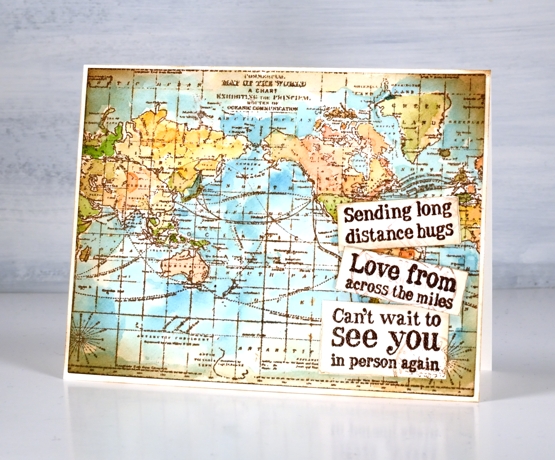
I cie-cut the map panel with a Waffle Flower A2 additional layer die then applied vintage photo ink around the edge of the map and the sentiments with a blending brush. It’s a subtle addition but I also stamped pale postmarks on the sentiments using the DD ‘global postmarks’ stamps. I will be showing you more of the new stamps from Darkroom Door over the next few weeks but there are already several blog posts on the Darkroom Door blog featuring the new beauties so make sure you pop over there to take a look.
Supplies
(Compensated affiliate links used when possible)
Arbors in green
Posted: March 18, 2021 Filed under: arbors, Penny Black | Tags: distress markers, Fabriano Watercolour Paper, Penny Black stamps, Ranger Distress inks, Ranger Distress stains, Tsukineko Versafine inks 9 Comments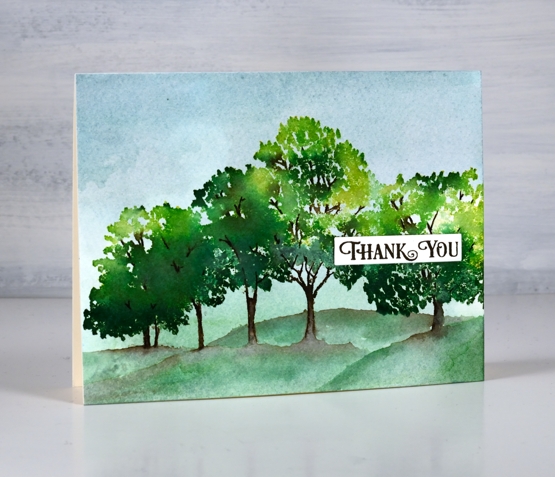
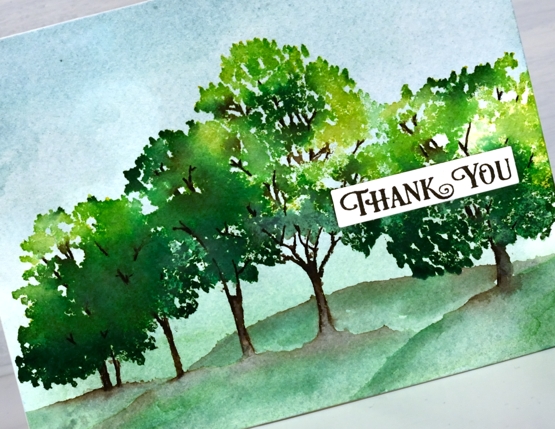
I can’t believe I am only just getting this beautiful tree stamp inked, especially considering my mantra, ‘you can never have too many tree stamps!’ This new stamp from Penny Black is called Arbors and I’m sure I will put it to use often. For its first inking I decided on keeping things traditional and green. We are just beginning to see grass appear here and there as the snow melts but no leaves yet.
Before I started stamping I put some speckled egg and rustic wilderness stain on my glass mat and diluted it with a few spritzes of water. I swiped a piece of cold pressed watercolour paper through the stains, dried it and then repeated the process to fill my background with blue and green.
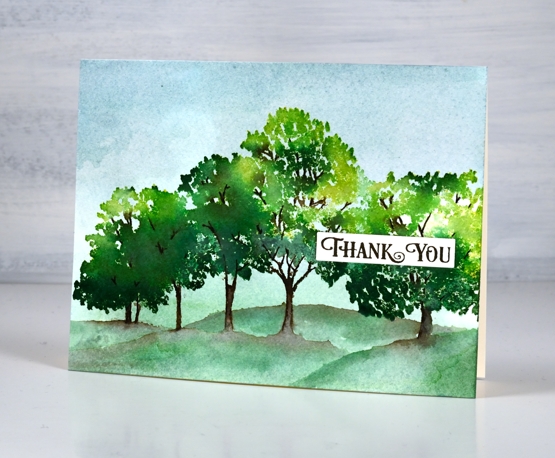
With the stamp and panel in a stamp positioner I inked the foliage of the trees with dabs of crushed olive, mowed lawn and rustic wilderness distress inks. I spritzed the stamp lightly before stamping to get the inks mingling with each other. It took several applications to build up the coverage. After applying quite a bit of green I inked the trunks and branches with a ground espresso distress marker leaving the base below the trunks uninked so I could paint some hills in and around the trunks. To do this I spread brown ink from the trunks left and right then added diluted rustic wilderness stain and painted hill shapes across the panel. I checked to see what I was short on in my stash and added a thank you from the banner sentiments set in acorn ink.
I can’t wait to ink this one up in autumn tones, but I guess a few trees in blossom might be timely first.
Supplies
(Compensated affiliate links used when possible)
Lemon Lush
Posted: March 15, 2021 Filed under: floral notes, Karin brushmarkers, lemon lush, Peerless watercolours, Pink Fresh studio | Tags: Brutus Monroe, brutus monroe embossing powder, Karin brushmarkers, Peerless Transparent Watercolors, Pink Fresh studio, Tsukineko Memento inks, Tsukineko Versafine inks 3 Comments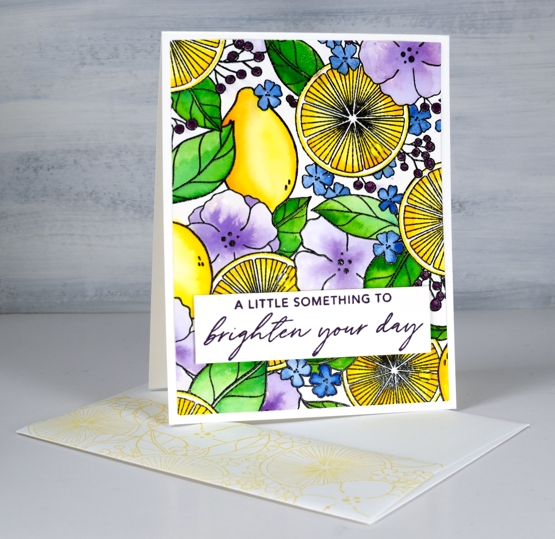
It’s a collaboration day with The Foiled Fox, so I am over on their blog and sharing here at home too. Make sure you pop over there to learn more about today’s card process and products.
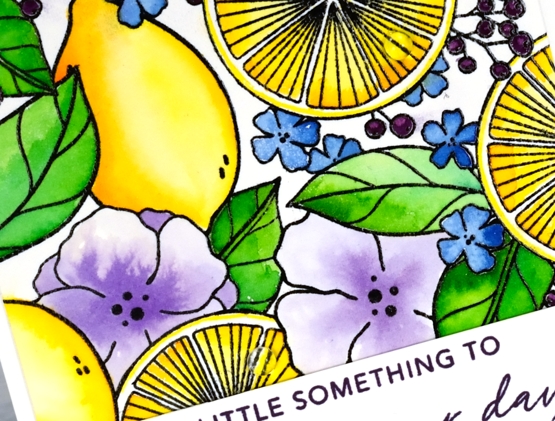
Isn’t this a bright happy image? I know it’s partly the colours I chose but I think it is also the mix of lemons, leaves and flowers. It’s a glimpse of summer and that is definitely welcome! The stamp is called ‘lemon lush’ and it is a large 6″x6″ from Pinkfresh Studio. I’ve used two thirds of it for this rectangle card but I’ll be showing you the whole square image on another card soon.
I stamped the rubber stamp on hot pressed watercolour paper in raven black ink and embossed in raven powder (both from Brutus Monroe). For the watercolouring I used Peerless watercolours. I watercolour with quite a few different products so sometimes the Peerless paints sit on the shelf feeling forgotten. Once I bring them out however, I remember just how beautifully they blend and what gorgeous colours are available. If you haven’t heard of Peerless watercolours paints they are an old, old company and the paint is in pieces of thick paper. I use a wet brush to pick up paint to use on my project.
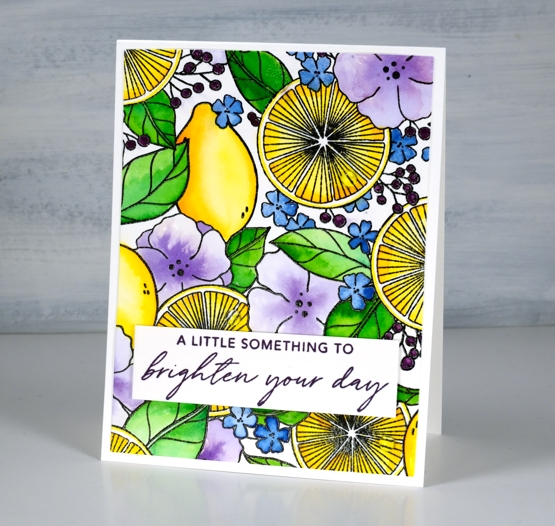
When painting the cut lemons I used a yellow and a light orange paint, for the whole lemons I used the same plus darker orange tones to get depth and shadow. I used two greens for the leaves, a blue for the tiny flowers and violet for the large flowers. To fill in the berries I switched to a purple Karin brushmarker. The sentiment is from Pinkfresh Studio’s ‘floral notes’ set stamped in monarch versafine clair. I stamped the flap of my envelope too with memento dandelion ink. If you take a close look at the second photo you will see some clear dots glued to the lemon halves, those droplets of juice might just be my favourite part of the card! Thanks for joining me today and thank you Foiled Fox for sending me this stunning stamp to create with.
Supplies
(Compensated affiliate links used when possible)
2021 Bujo – March daily record
Posted: March 13, 2021 Filed under: Bullet Journal, Hand drawn, Hand lettered | Tags: Bullet Journal, Dingbats notebook, Staedtler watercolour brush pens, Tsukineko Memento inks 4 Comments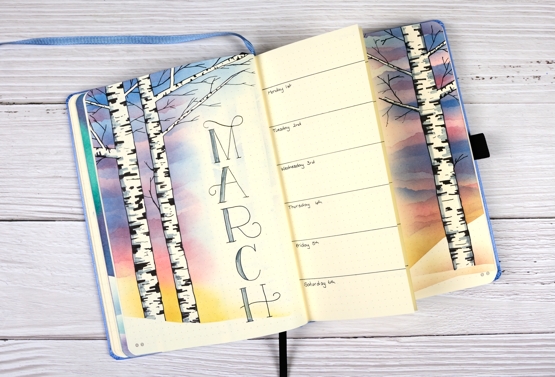
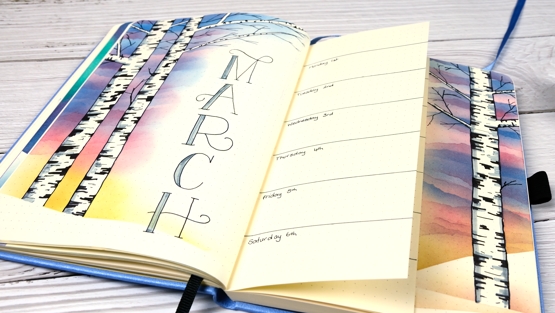
I’ve continued the birches + sunset theme on the month record spread. This is the page where I record day to day things, some in advance as reminders, but mostly afterwards so I can look back and see what I cooked last week or how long it is since I went for a run!
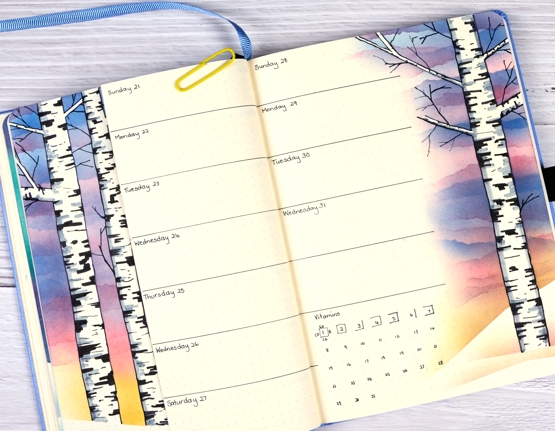
As I mentioned on my title page post last weekend we still have snow around here so this theme is currently appropriate. In the last week however we’ve had several warm days so I am thinking April’s theme might include flowers or leaves! For this spread I used the same method as for the title page where I masked trees and branches with post-it tape, masked a hill at the base then blended memento ink over the masking to create a sunset sky. After removing the post-it tape I outlined the edges of the the trees, added markings and branches in black then shading with a grey marker.
The layout is one week per trimmed page; you can see on the photo below that I cut off a portion of two pages so I would have ample room to write daily notes and still see the birches from each page.
I reduced the amount of habit tracking this month as I already have app on my phone to record water consumption and one for any exercise I do. Tracking things in two places isn’t really worth my time. I mentioned when I first wrote about this bullet journal that I want the practice of bullet journaling to help me stay on top of things rather than just be a pretty notebook. Do you keep track on paper or digitally or maybe a mix of the two like me?
Supplies
(Compensated affiliate links used when possible)
Fern Border
Posted: March 12, 2021 Filed under: Brusho, fern border, Penny Black | Tags: Brusho, Penny Black creative dies, Penny Black stamps, Tsukineko Versafine inks 6 Comments
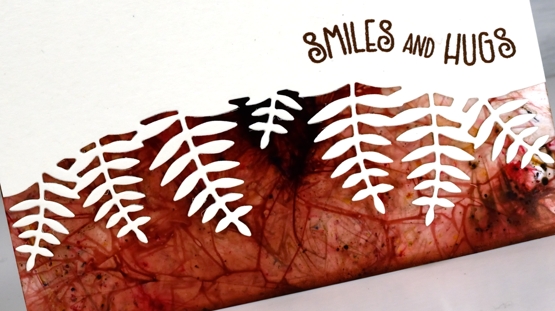
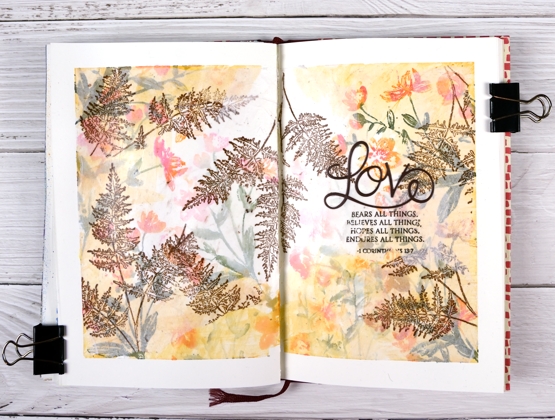
I was looking through my pile of possibilities recently and found some lovely brusho panels I made quite a while back at a class taught by my friend The Crafty Cigale. Instead of using brusho watercolour powders on watercolour paper we worked on photo paper. I remember the process being so much fun that I kept on making panel after panel.
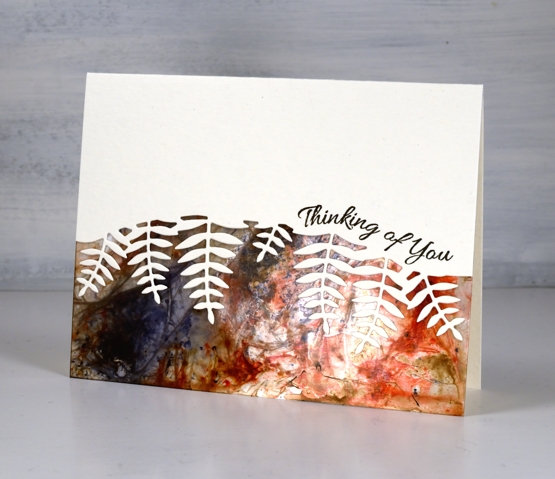
I’ve chosen two of the panels as borders for today’s cards. Initially I thought I would cut into the brusho panel using the Penny Black fern border die and I tried, but using the patterned print as a background showed it off better while still featuring the delicate shape of the fern fronds.
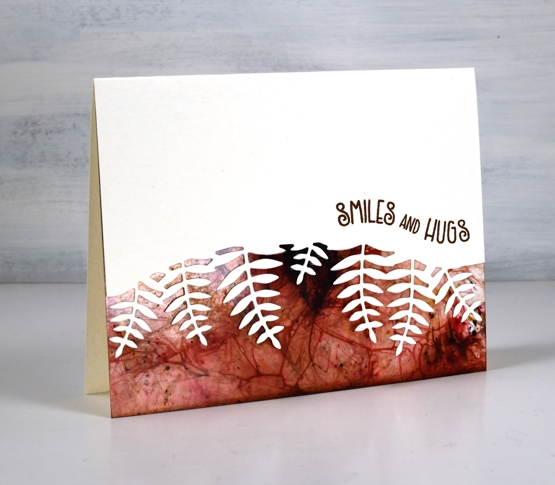
Before die-cutting the fern border I applied double sided adhesive to the back of the card front so once cut I could easily attach it to the patterned panel. The sentiments from the banner sentiments mimicked the curve of the border die so they were an obvious choice in two versafine brown inks
The card bases are Luxe White cardstock from Foiled Fox, which is a creamy colour with a soft pebbly texture. I’ll be back tomorrow with some more birch themed pages from my bullet journal. Thanks for dropping by.
Supplies
(Compensated affiliate links used when possible)
Filled with daydreams
Posted: March 10, 2021 Filed under: branch of love, daydream, dotlets, Penny Black, rain or shine | Tags: brutus monroe embossing powder, distress markers, Fabriano Watercolour Paper, Penny Black stamps, Penny Black stencils, Ranger Distress inks 11 Comments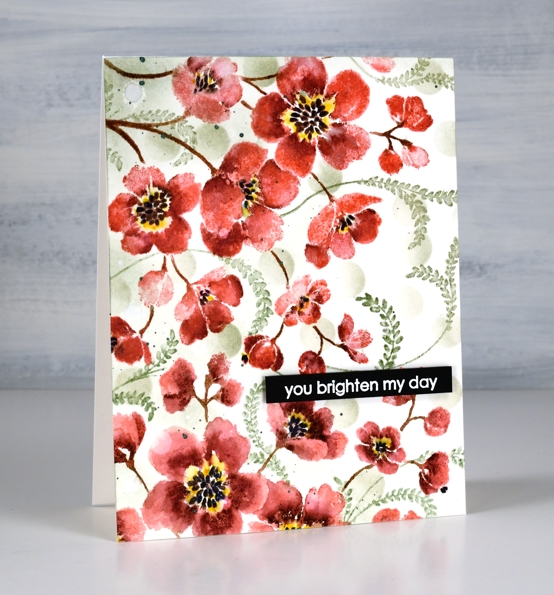
I’ve created with the Penny Black ‘daydream‘ stamp before but you might not recognise it as the same stamp used on today’s card. Last time I stamped the large rubber cling stamp once in blue. This time I’ve stamped it twice to almost fill the card front in pink and deep red. I’ve also added some filler foliage.

I kept the stamp in the stamp positiioner while I completed one print of the stamp then rearranged the panel and stamp to be able to stamp again in a slightly different direction to cover the lower third. I inked the stamp first with worn lipstick distress ink, added shading with an aged mahogany distress marker, stems with ground espresso and centres with black soot. I spritzed ever so lightly because I didn’t want to loose much definition but I did want the inks to blend a bit. After one impression I blended a few areas with a paintbrush and stamped more aged mahogany where needed to help define the petals. Once the ink and blending was dry I coloured around the black centres with a mustard seed marker.

To add filler around the red blooms I stamped the fronds from the PB ‘branches of love’ set in bundled sage ink then blended over them with a paintbrush and minimal water. I also used a blending brush to blend some bundled sage circles through the PB ‘dotlets’ stencil. I splattered some moss green pearlescent paint then popped up an embossed sentiment to finish the card.
Thanks for dropping by today; you do brighten my day!
Supplies
(Compensated affiliate links used when possible)
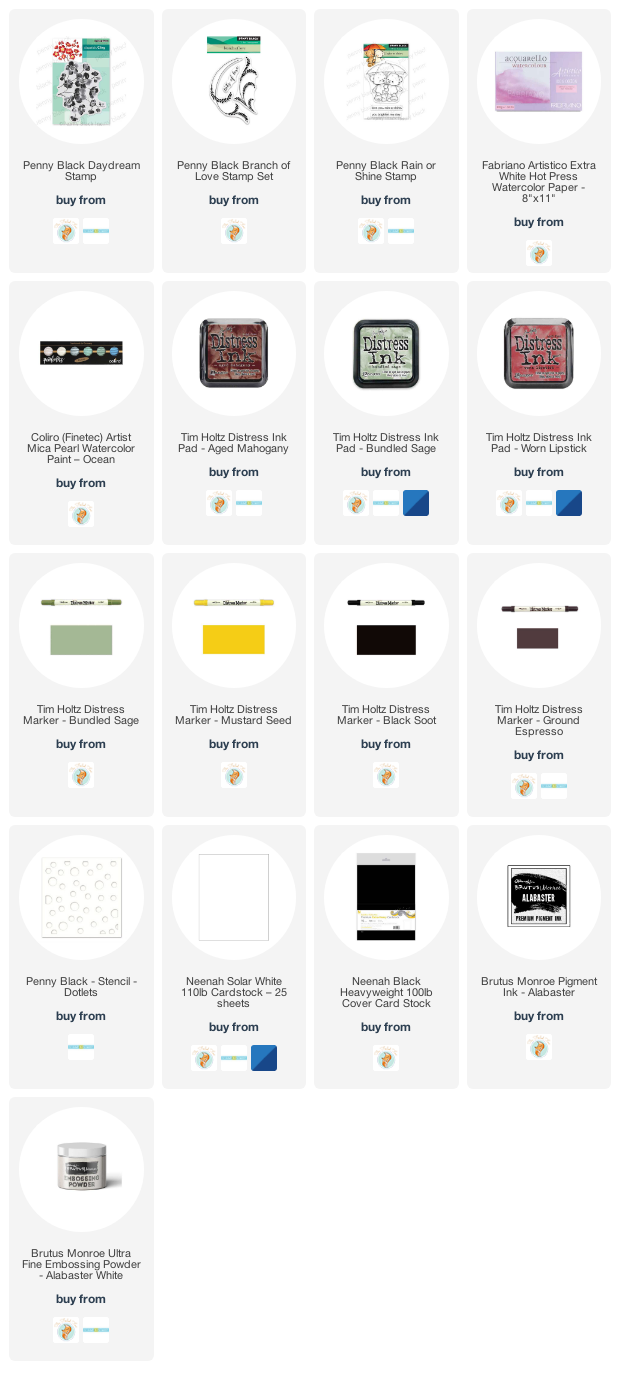
Vintage collage card
Posted: March 8, 2021 Filed under: Coliro paints, Darkroom Door, diamonds, Dies, Finetec paints, French Script, Gazette, gerberas, gift card pocket, global postmarks, Penny Black, shall we dance, Stencils | Tags: Coliro paints, Darkroom Door stamps, Darkroom Door stencils, Fabriano Watercolour Paper, Finetec artist mica watercolour paint, Penny Black creative dies, Penny Black stamps, Ranger Distress inks 4 Comments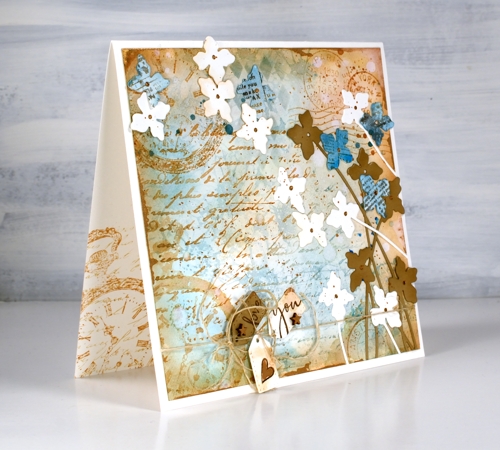
A friend commissioned me to make a ‘vintage’ themed card recently and I happily pulled out a bunch of Darkroom Door stamps to do so. You can see the pocket watch stamp managed to feature three times but the French script, global postmarks, and gerberas also contributed. I stamped, blended and painted with two brown tones of distress ink, two blues and a black. (all the supplies are listed below)
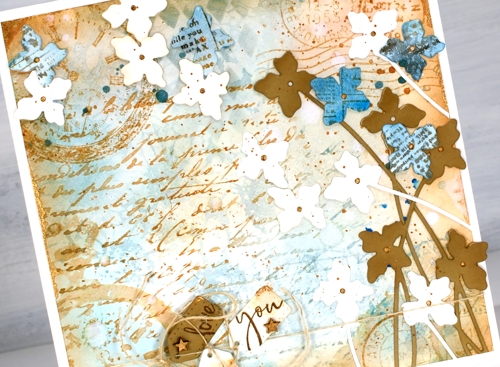
To begin I smooshed some speckled egg and antique linen distress inks on a glass mat, added water swiped the panel through the diluted ink. After that the gerbera background stamp became part of the base layer in speckled egg distress ink. I layered the other stamps over the top in tea dye and antique linen inks and blended some speckled egg ink through the DD diamonds stencil. Of course there is splatter, watermarks and extra blending to darken the edges. To add a dimensional feature I die cut several stems of flowers with the Penny Black ‘shall we dance’ die, some are from watercolour paper, some from tan cardstock and a few from paper painted with salty ocean ink and stamped with the DD gazette stamp.
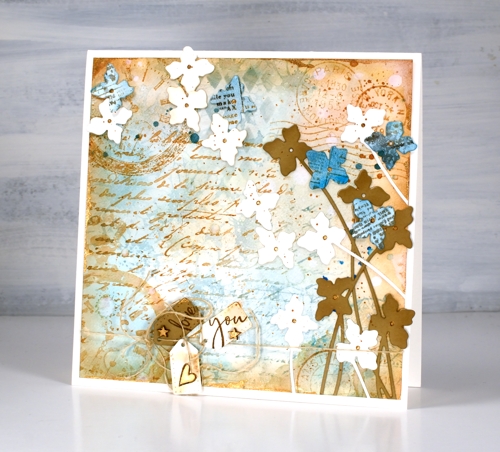
Almost finished, I added a strand of twine around the base and tied some tiny tags on with stamped PB sentiments on them and some little wooden stars I found. I was pretty happy with all this vintageness but decided to risk some gold paint. I splattered and added it to the tiny stars and heart, the flower centres. Where it worked best though was unevenly painted along the edges of the square panel. You probably can’t even see it clearly but it ended up being one of my favourite parts of the card.
By the way there are yummy new stamps on the Darkroom Door website. You will see them here soon, a few are winging their way here as you read this! Have a great day.
Supplies
(Compensated affiliate links used when possible)
2021 BuJo – March title page
Posted: March 6, 2021 Filed under: Bullet Journal, Dingbat notebooks, Hand drawn, Hand lettered | Tags: Bullet Journal, Dingbats notebook, Staedtler watercolour brush pens, Tsukineko Memento inks 16 Comments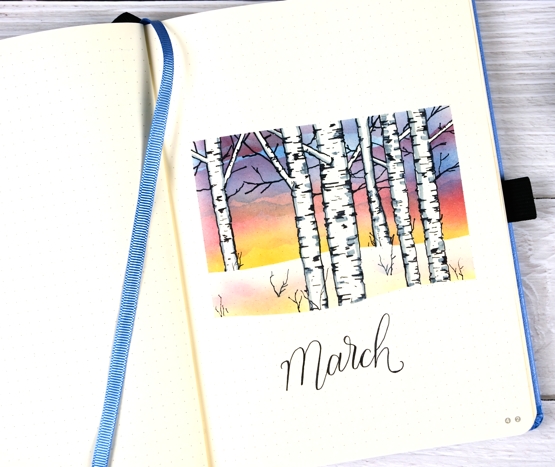
Although it’s been a few weeks since I posted any bullet journal pages here on the blog, the journal is turning out to be a handy record and planner for me. So far I have done more recording than planning as I am still working out how to use it for keeping track of ongoing projects. I have been recording all the evening meals we’ve been cooking and eating which is really helpful when I am trying to work out what to make next. All four of us take turns cooking which I love but it is sometimes a little tricky as we have a range of food sensitivities and allergies to take into account, some with serious health consequences.
As you can imagine I am also keeping track of books I’ve read and thinking about keeping track of podcasts too. Some podcasts are long time favourites while there are others I subscribe and unsubscribe from as my interest waxes and wanes.
But here is my March theme, a sunset behind birch trees in snow. I have been seeing themes on the interwebs featuring blossoms and flowers but that is not a March thing where I live. We still have plenty of snow and have been enjoying some amazing sunsets so I decided on one more wintery theme.
I masked the edges of a rectangle with post it notes top and sides then cut a curved edge along one for the bottom mask. I masked the trees by cutting strips of post-it tape in different thicknesses including some very thin scraps to lay on the page as branches. With the masks in place I used blending brushes to apply the inks shown below to fill the sky. To get some pattern in my sunset sky I tore some post-it edges and blended ink over the top of the first layer along the torn edges moving them around to get the look of clouds.
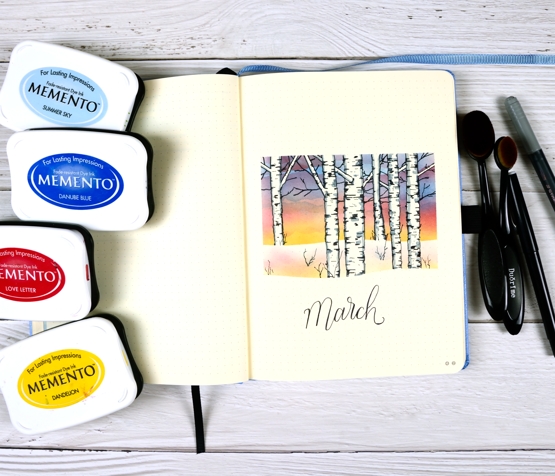
Once all the sky was done I removed the bottom mask and put a different one in place to blend a snow bank shadow. I then removed all the tree masks and drew edges and black marks with a black Pilot fineliner then some grey shadows with a staedtler brushpen.
I’ll be back next weekend with other birch sunset themed pages. I’m continuing to be a fan of the Dingbats notebook I’m using and was given another for my birthday which is just as lovely. They have just this week come out with a new, bigger style with thicker paper, so who knows I might have to let that one join the family one day too!
Supplies
(Compensated affiliate links used when possible)
Fern and floral art journal page
Posted: March 5, 2021 Filed under: Art Journal, fresh ferns, garden variety, Penny Black | Tags: Art Journal, Fabriano art journal, Penny Black creative dies, Penny Black stamps, Tsukineko Memento inks, Tsukineko Versafine inks 8 Comments
Recently when I was making a card with the new Penny Black stamps, ‘garden variety’ and ‘fresh fern’ I also began an art journal page. I really need to be braver with my art journal, I tend to reach for the same mediums that I use all the time in my cards. Today’s journal page was not particularly adventurous but I did pull out my box of pastes, gels and mixed mediums only to find several of them had dried up completely in their containers while others that used to be thick had turned to liquid. Those ones got tossed but a jar of distress collage medium came in handy along with some modelling paste. I think they might have both done the same job in the end.
I’m still working in my Fabriano art journals made up of drawing paper so I’m trying not to rely on my watercolour habits and techniques. I began as usual by taping the edges of the pages both to keep the book open and to create an attractive frame.

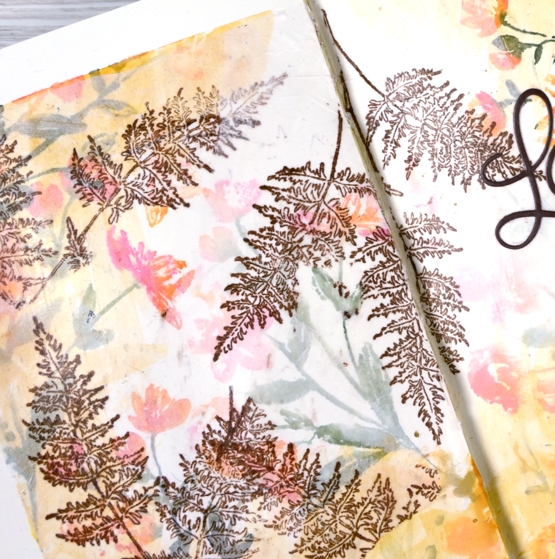
I inked the garden variety stamp with tangelo, northern pine and rosebud memento inks, spritzed it and stamped on the pages multiple times. I did first and second generation stamping to get both bold and pale prints. Then, feeling all brave and mixed media-ish I coloured some modelling paste with peanut brittle memento ink and applied it around the edges with a little plastic applicator (an old bank/library card would do). This step didn’t really yield the results I wanted but it was all in the spirit of experimentation so on I went.

I hadn’t used tissue paper in a while so I scrounged through our wrapping paper box and found some white, stamped the fresh fern in rich cocoa memento ink then tore it into sections before gluing it on the journal pages with collage medium. The tissue became almost transparent which gave the flowers behind a soft pearly look. I stamped the verse from 1 Corinthians on tissue too and glued it down in the same way replacing the first word, ‘love’ with a die cut.

I would love to know if you have an art journaller you admire. I am a big fan of Vicky Papaioannou and have watched many if not all her art journaling videos. I am interested to know what gels, pastes and mediums people use for what purposes. Which are best for resist effects, which are great for gluing, etc. Please share any recommendations you have.
Supplies
(Compensated affiliate links used when possible)


