Pods & Wings
Posted: April 14, 2022 Filed under: Dies, Flutters, gel press, Lavinia, Penny Black, pods stencil, soaring | Tags: gel press, gel printing, Lavinia, Mixed Media, Penny Black creative dies, Penny Black stamps 4 Comments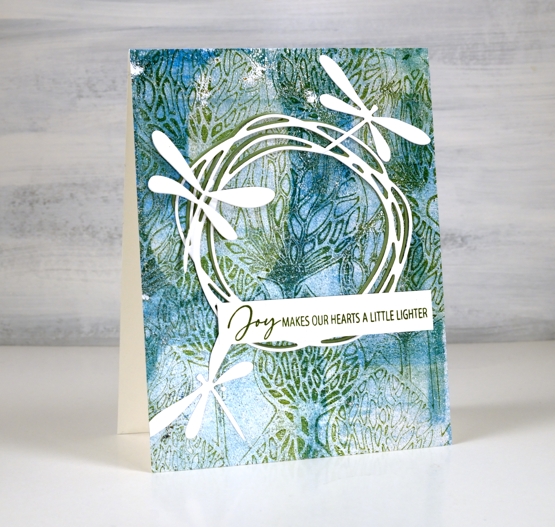
The background of today’s card is another gel print featuring a gorgeous Lavinia stencil called ‘pods’. You can’t see in the photos but in real life there is some shimmer on the print as I used silver paint along with blue, green and white.
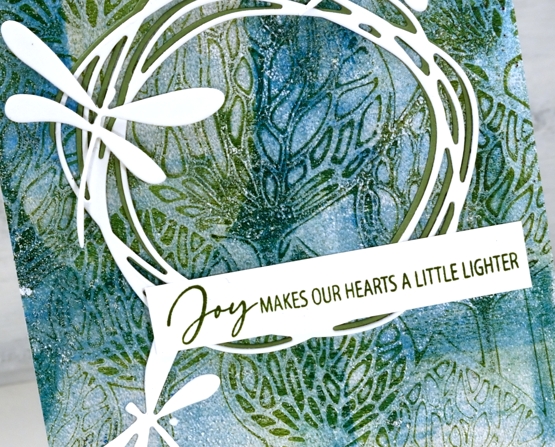
Over the print I added a green and a white wreath die cut from Penny Black. It is part of the new ‘soaring’ set which also includes four butterflies. The background called for dragonflies rather than butterflies so I die cut three from the ‘flutters’ set, an oldy but a goodie.
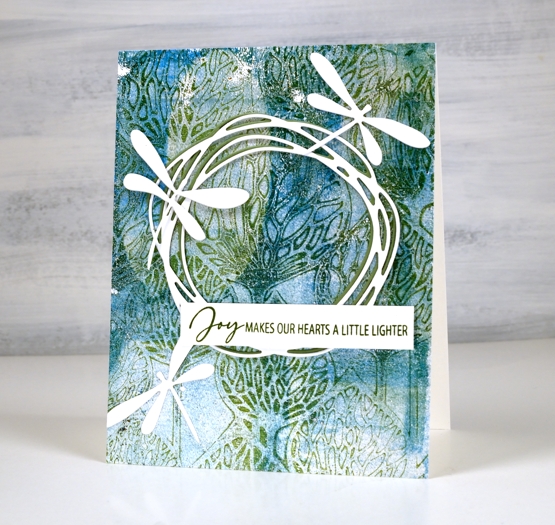
As I spent a chunk of time yesterday listening to Ann Voskamp’s book ‘One Thousand Gifts’, the joy sentiment seemed like a good match for the design.
I was watching a Julie Balzer book club discussion on youtube today as I worked and she mentioned how addictive gel printing is and how if you haven’t tried it you must (48 minute mark)! She called it the one tool that has changed her life! So I will again shamelessly plug my upcoming gel printing workshops and hope you will join me in this addiction!
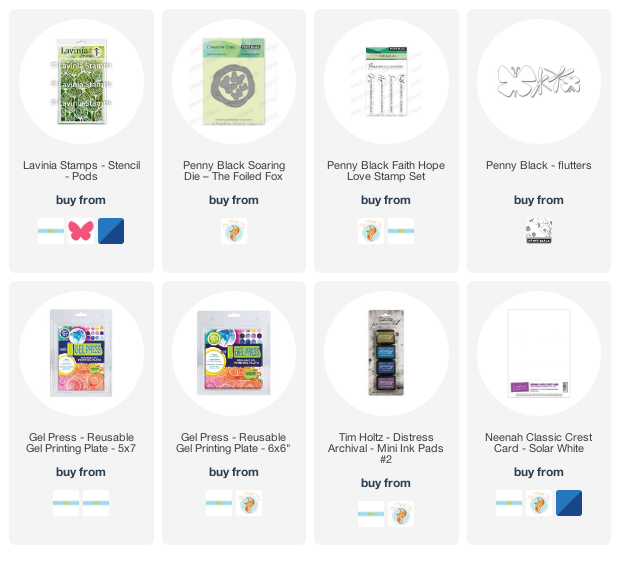
Supplies
(Compensated affiliate links used when possible)
Snow & Ice
Posted: April 13, 2022 Filed under: Darkroom Door, gel press, pine cones, snow flakes | Tags: Darkroom Door stamps, gel press, gel printing, Waffle Flower dies 4 Comments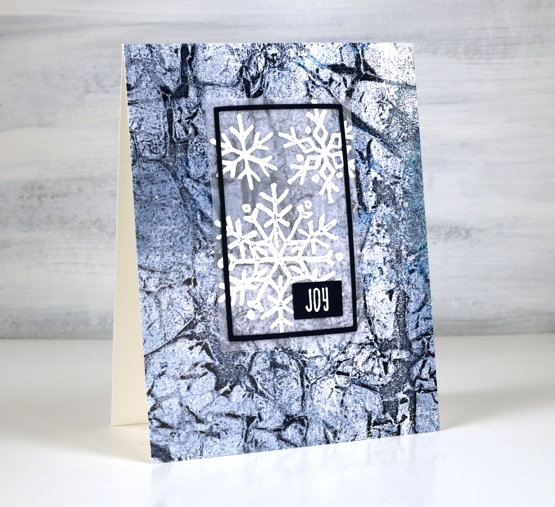
Although most of the ice is now gone, over the last few weeks I have seen it breaking up on the river near our home. The ice that once covered most of the bay cracks and ends up in layers as it breaks, moves and eventually disappears. When I lifted the print above from my gel plate I immediately thought of the cracking ice. It also reminded me of the colours in glaciers, not usually navy blue but I have seen blues and aquas.
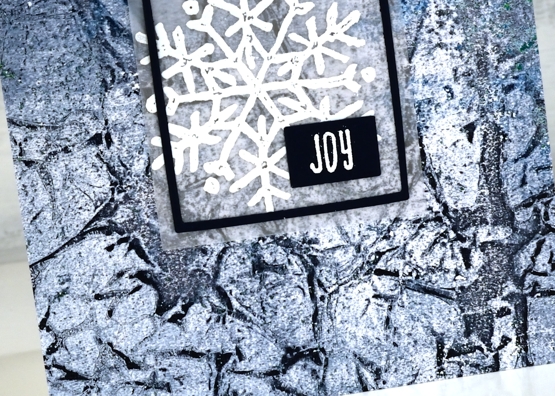
Around the time the ice was breaking and melting this snowflake stamp arrived from Darkroom Door so I stamped it on vellum to overlay the background. I really didn’t want to lose much of the background hence the vellum and then a very narrow navy frame and sentiment.
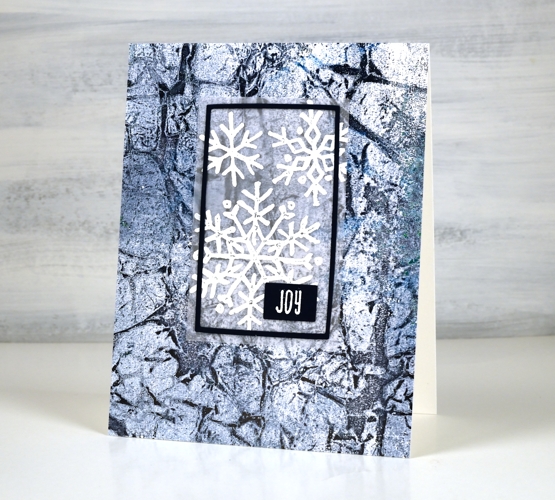
This gel print delighted me, both the colours and the pattern. That’s the fun of gel printing; you never know quite what you will get. I will be sharing a few more gel prints turned into cards and backgrounds over the next few days. In May I will be teaching a couple of gel printing workshops at Crop A While. I’d love to have you join me in making surprising and intriguing prints.
Supplies
(Compensated affiliate links used when possible)
Circle Flowers journal page
Posted: March 25, 2022 Filed under: abstract flowers, alphabet medley, Art Journal, checkered, Classes, Darkroom Door, gel press, Hand drawn, mesh, Stencils | Tags: Art Journal, Classes, Darkroom Door stamps, Darkroom Door stencils, gel press, gel printing, Mixed Media, Penny Black creative dies 8 Comments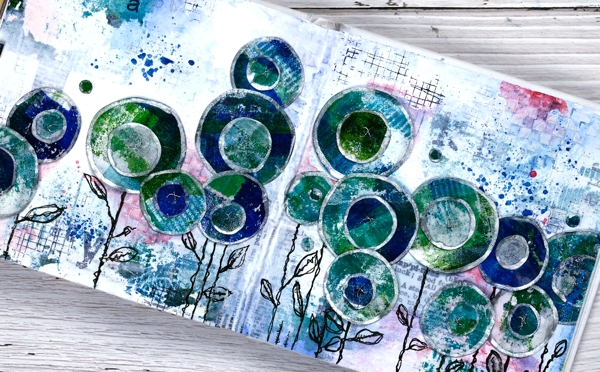
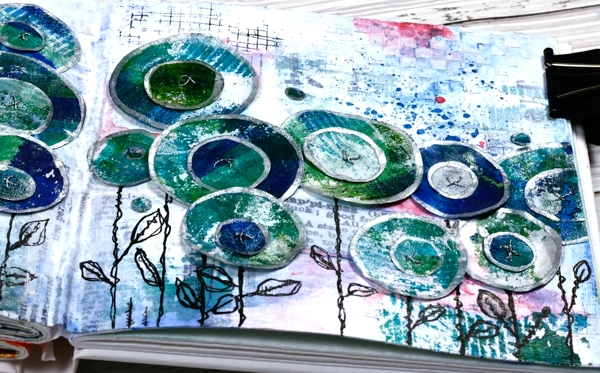
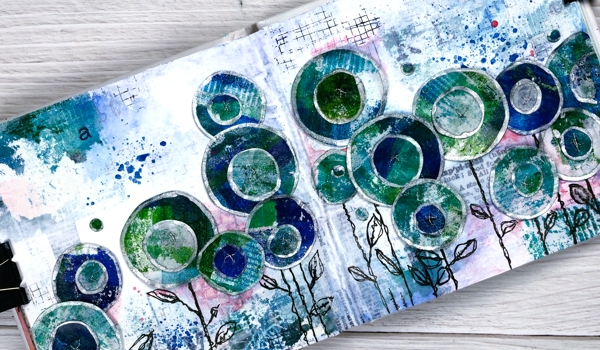
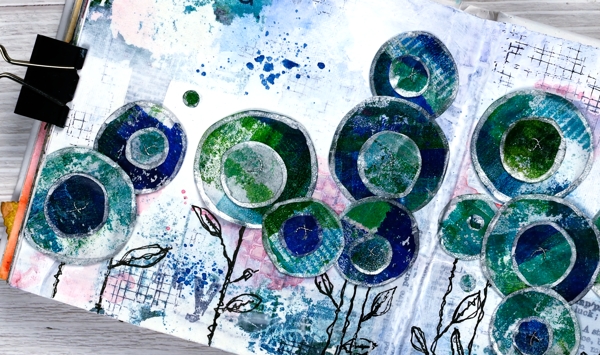
Last week I spent several happy hours gel printing. One of the prints I completed has ended all over this art journal spread. If you are a gel printer you know you can sometimes pull a couple of prints of the same design. The first one is full of colour and pattern and the second is often called a ghost print as it displays outlines and left over bits of paint.

For this journal page I used both the bold blue and green print and the ghost print. The ghost print can be seen on the top left and bottom right corners and is peeping out in a couple of other places. The first print which was very geometrical has been turned into circle flowers. It also had traces of a new stencil called ‘pods’. You will see more of it here on the blog because it is fabulous!
Also in the background you might see some black ink stamping (DD mesh and alphabet medley) and the texture of paste through the DD ‘checkered stencil. The text you see is a fabric tape with dictionary definitions of happiness; it is the first 49 & Market product I have bought and it is going to be handy!
There is plenty of white gesso over the background to pull it together and mute some of the bold elements.
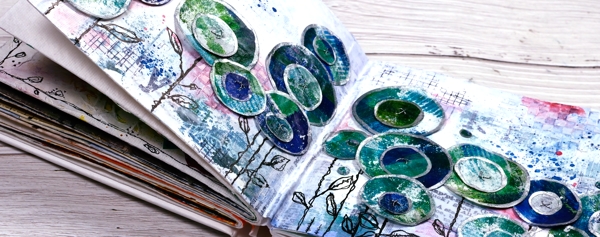
The flowers are all cut with Penny Black ‘abstract flowers’ dies which basically cut slightly wonky circles so I could have cut them myself but why bother when the machine will do it. The print was on rice paper so I could cut a few layers at once. After drawing an edge on each circle with a silver paint pen I stuck a small circle on a larger one, then sewed a cross in the centre with silver thread. There are stems in the set of dies but I doodled mine with a black marker. The blue splatters and pops of pink are from inktense pencils which are coming in handy for art journalling.
I know that was a lot of photos and chit chat but that is the way with some art journal pages especially the collage ones which involve different papers, paints, stencils, and mediums. I probably haven’t mentioned everything I used but if you are still here now I’m sure you’ve heard enough!
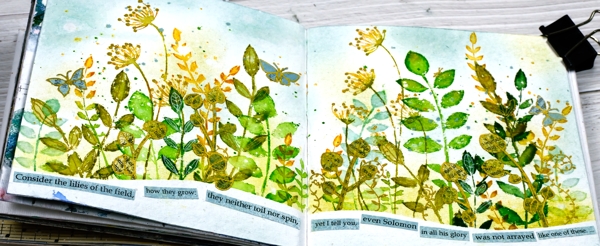
If you are in Ottawa and feel like doing a little art journalling of your own, there are still spaces left in my next Art Journal Adventure workshop where we will be creating a watercolour green and leafy spread similar to what you see below. All the details are on the Crop A While website.
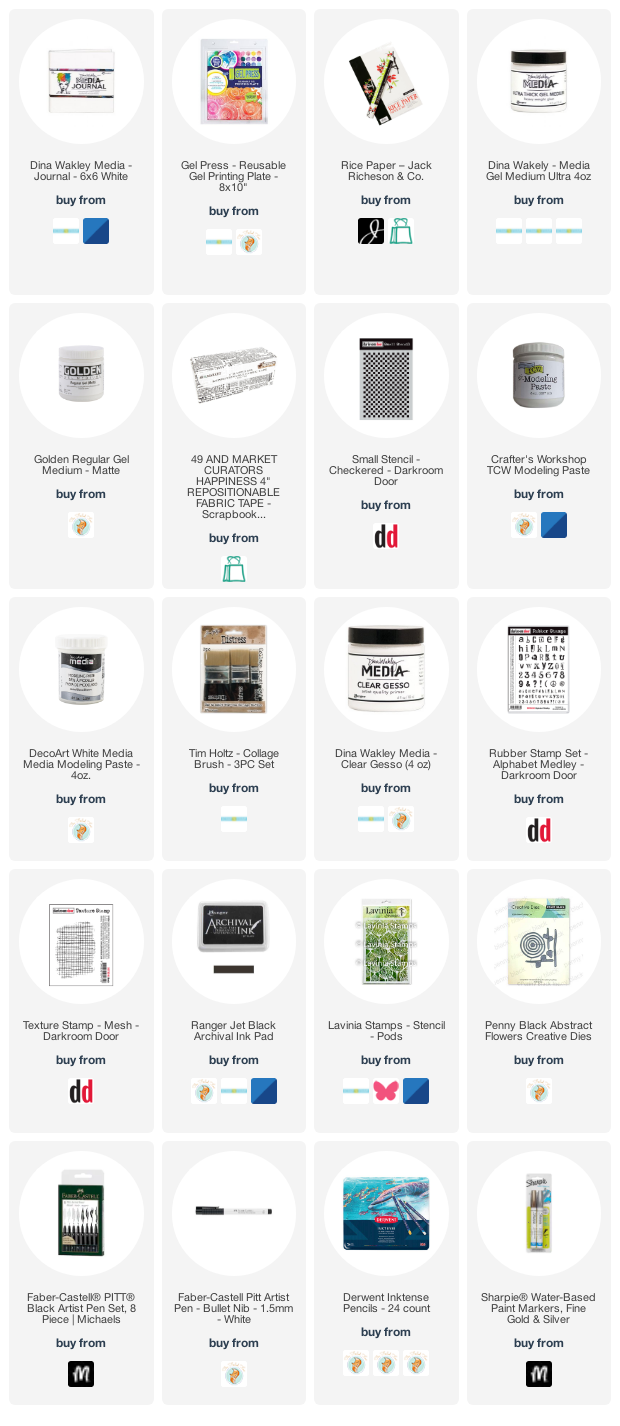
Supplies
(Compensated affiliate links used when possible)
Blue flowers on red gel print
Posted: March 2, 2022 Filed under: gel press, harmonious, Penny Black, Tim Holtz, wild flowers #1 | Tags: gel press, gel printing, Penny Black stamps, Tim Holtz, To 3 Comments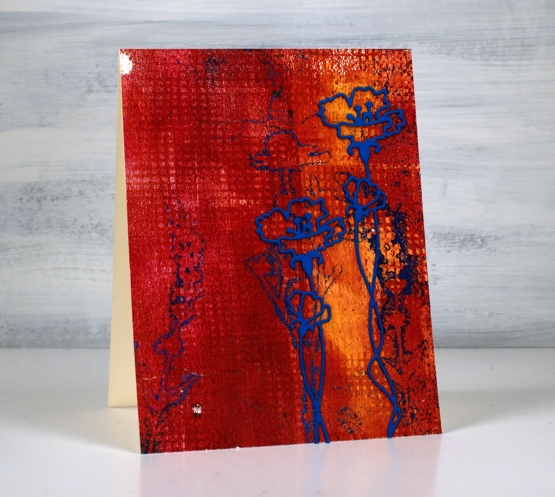
Here is another of my gel prints from last week. When I sit down to write my process for you I get a little confused as to the order I did things. With gel printing you need to do the top layer of the final print first on the plate then layer the background over the top. I don’t list the paints I use for my prints because I end up with many paints over my work surface during a printing session of several different brands. If you are wondering about paints for gel printing, use any acrylics you have and see what you like best.
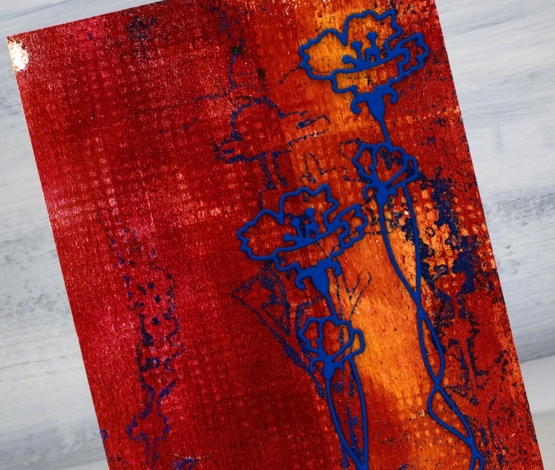
I imagine I brayered blue paint on the plate first, then pressed the fiddly flower die cuts into the paint, took a print to remove all but the outlines of blue then brayered the orange and red over that. I added texture to the red layer and took the final print, I think. The grid print you see was made by pressing a textured piece of cardstock into the paint on the gel plate. I guess I need to video my process for myself as well as to share with you!
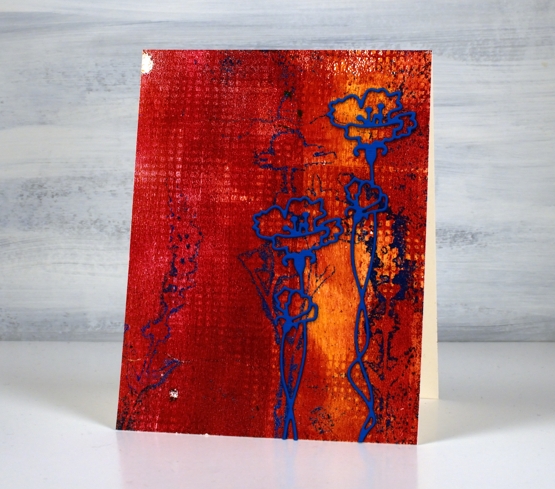
The blue prints were not as distinct as I had hoped; I’ll keep working on that. I do like the shadow flowers though and when I found an outline flower die from Penny Black I stacked two blue layers and added it over the shadows. I like its grunginess, bold colours, shadow flowers and grid texture. And those two odd white dots were made as old paint peeled off the plate. Gel printing is full of delightful surprises.
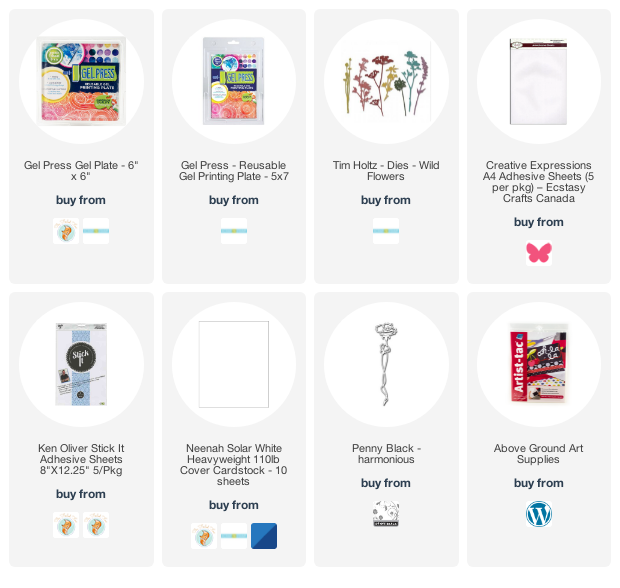
Supplies
(Compensated affiliate links used when possible)
Gel printing & a new crafty crush
Posted: February 28, 2022 Filed under: Ciao Bella, Darkroom Door, gel press, patchwork, Penny Black, tall flowers | Tags: Ciao Bella, Darkroom Door stamps, gel press, gel printing, Penny Black creative dies 5 Comments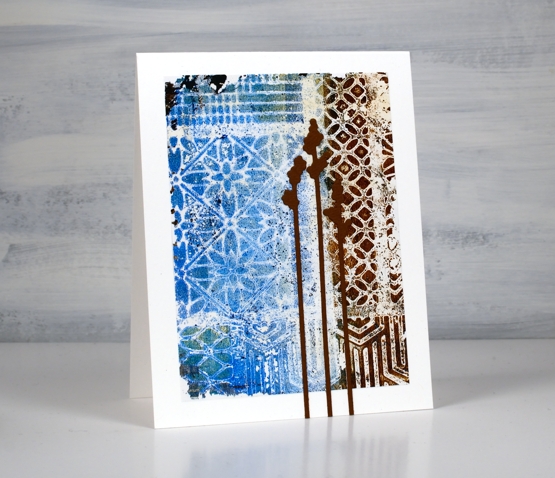
I had a couple of opportunities to gel print last week and it was, as always, most enjoyable. The prints did not all work out but I have a couple that made me very happy.
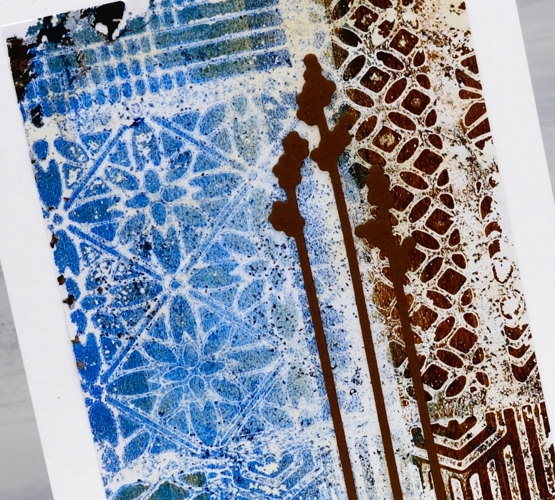
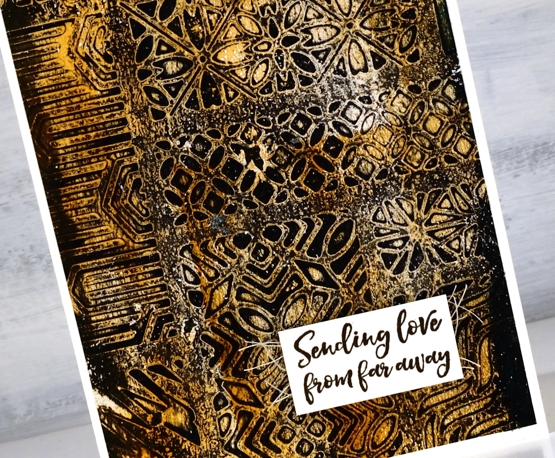
Now would be the time to tell you I have a new crafty crush! Not a crafter, a craft company. I have fallen for the beautiful stamps, stencils and papers from Ciao Bella. The stencil I used to create today’s prints is called ‘patchwork’. I bought it because it features eleven different patterns that will be good for adding texture to art journal pages. I had no idea how beautiful it would look when I printed it as a whole! (Both Crop A While and Ecstasy Crafts carry Ciao Bella products; if you shop from Ecstasy make sure you use my link to get there and the discount code heathertecs10 for a 10% discount at checkout.)
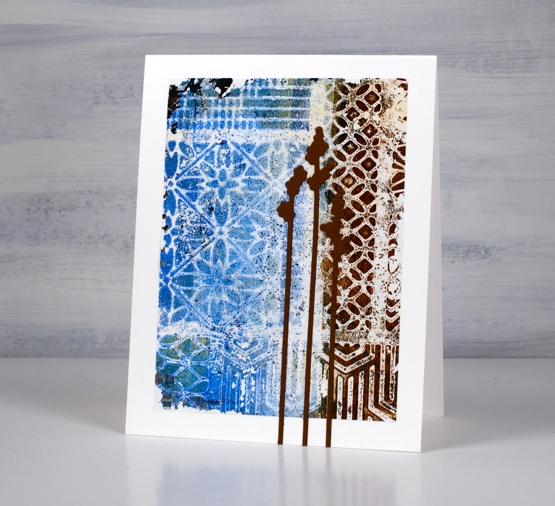
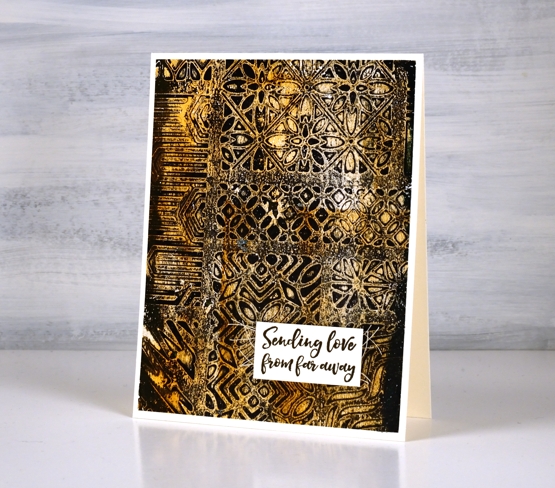
I brayered some blues and browns on my gel plate then placed the stencil over the top followed by a piece of paper so I could remove some of the paint. When the first layer was dry I brayered a layer of white over the top and pulled the print. This is only a small section of the stencil but it was the best part of the print. I used adhesive sheets to attach it to the card base then added three Penny Black ‘tall flowers’ die cuts.
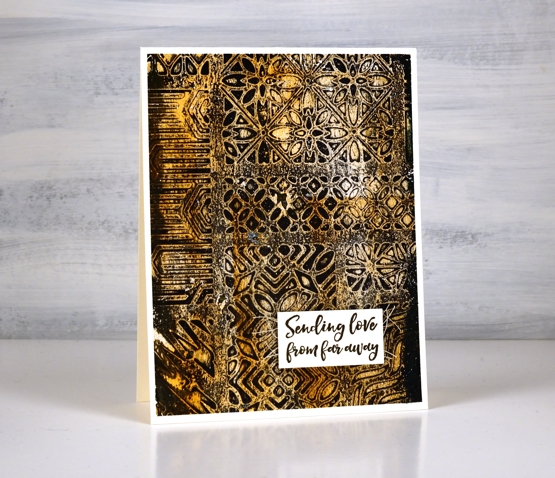
I used browns and black for the base of this print then light browns and white for the second layer before pulling the print. (yes I will do a video sometime soon)
The sentiment is from the Darkroom Door ‘long distance’ sentiment stamp.
I have no immediate use for many of the prints but they will go in my collage collection for now because they might come in handy for art journalling.
I taught the first Art Journal Adventure workshop on Saturday and enjoyed it so much. The workshop was held at Crop A While; there are spaces in the Friday workshop this week, March 4, and the Saturday March 12 workshop.
Supplies
(Compensated affiliate links used when possible)
Crumple & Colour journal page
Posted: February 14, 2022 Filed under: Art Journal, gel press, Hand drawn | Tags: Art Journal, Dr Ph Martin Hydrus watercolor paints, gel printing 6 Comments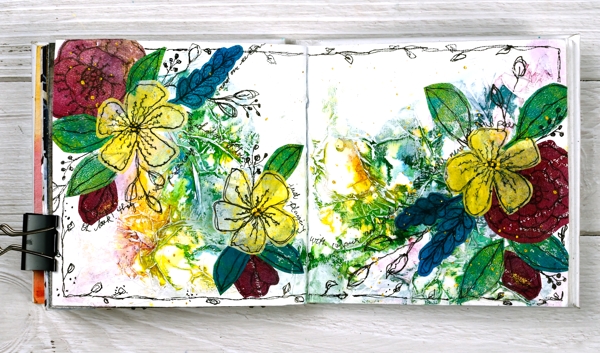
While creating art journal pages lately I’ve noticed that they often look a bit rubbishy until the end or just before the end! It’s a good thing to keep in mind throughout the process, especially as the process sometimes stretches over a few days.
I started this page while I was at Crop A While and a friend looked over at me and said, “Heather is having fun playing with toilet paper!” For the record I was having fun with tissue paper not toilet paper! Working in the 6″x 6″ Dina Wakley journal I glued crumpled tissue paper over the whole spread with gel medium, scrunching it as I went to make folds and texture over the pages. (it didn’t look at all special at this point)
Later I used my Dr Ph Martin’s hydrus watercolours to drop blue, yellow and red ink over the pages. I worked one ink at a time tilting and diluting the ink so it would spread over and around the crumpled paper. (still underwhelming)
I let the watercolours dry and left the page for several days. The colours were bright and there were some nice blends and patterns but too bright for me so I painted over the spread with white gesso. My aim was not to totally cover the watercolours but to soften their impact and highlight the texture of the paper. I used my fingers to move the paint and a baby wipe to remove it where it was too thick. (looking better but still messy)
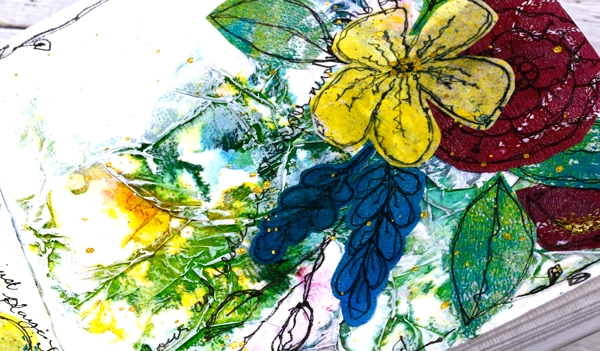
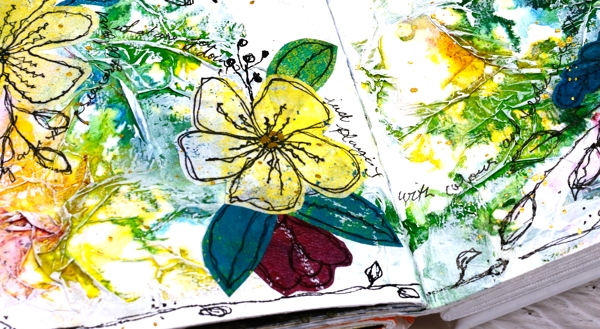
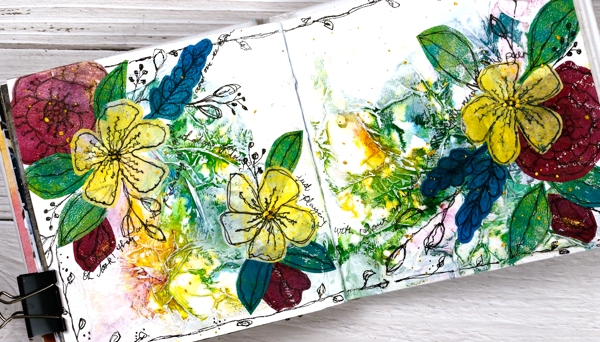
Settling on a focal point for an art journal page is sometimes hard; I don’t always begin with one in mind. You won’t be too surprised to see I chose flowers. I have a box of gel printed panels, some on rice paper and some on light card or computer paper. I found several prints on rice paper that matched the colours on the page and doodled flowers and leaves on them with a permanent black marker. I cut them out and started arranging them on the pages. (it was beginning to show promise)
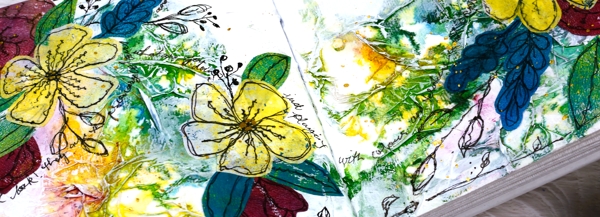
After quite a few rearrangements I glued down the flowers and leaves making sure I didn’t cover up all the yummy colour and texture but also didn’t cover up the important white space. (it was finally looking ok) With the elements in place I continued to doodle more foliage on the pages including a border around the whole spread. I scribbled some thoughts around the flowers then splattered gold paint over the finished pages.
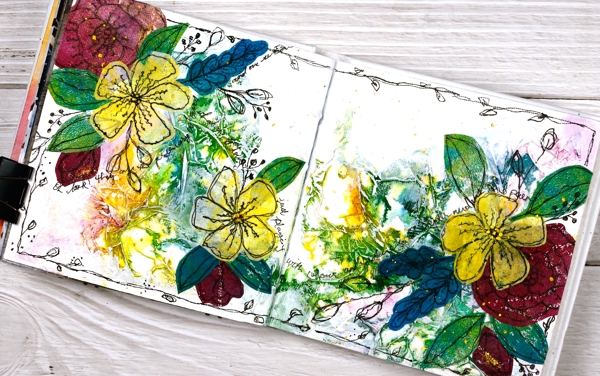
I am very happy with the final result but had no idea it would end up like this. At one point during the process I thought, “hmmm, I don’t think I’ll do this technique again…”
But I will.
Supplies
(Compensated affiliate links used when possible)
Trees over Gel Print
Posted: February 2, 2022 Filed under: Darkroom Door, gel press, majestic mountains | Tags: Darkroom Door stamps, gel press, gel printing 7 Comments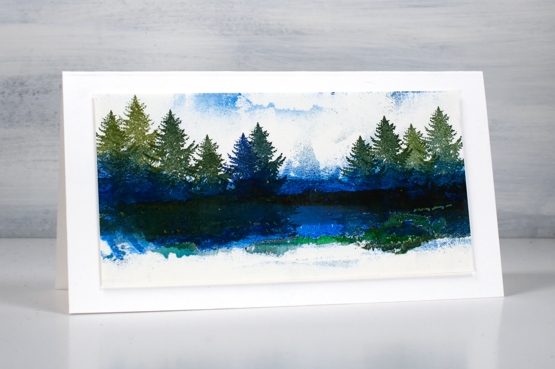
Sometimes a background scrap can make a whole card. If you have done gel printing you probably know how beautiful the leftover edges can be. As you make print after print, excess paint layers up on the edges of the gel plate. I like to ‘collect’ those edges at the end of a gel printing session by brayering white paint over the top then lifting the whole section onto a last print.
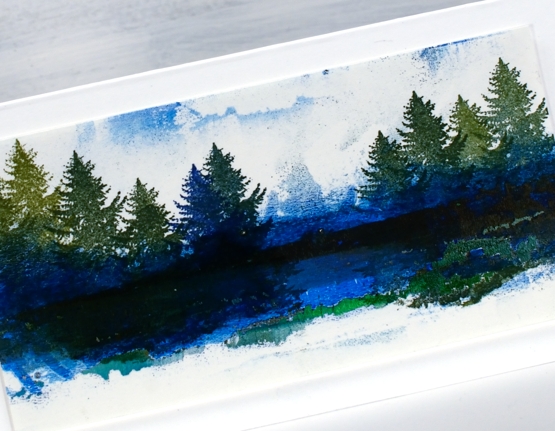
The horizontal lines of blue and green you see here are from cleaning up edges. I thought they looked like the edge of a lake or river so I stamped trees over the top. Even the blue and white paint in the background looks a little like clouds and mountains.
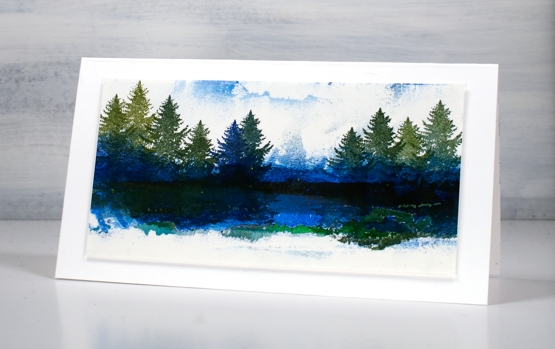
I used tree stamps from Darkroom Door’s ‘Majestic Mountains’ set and Catherine Pooler inks to add to what was already a landscape. I had my gel plate out again yesterday after quite a break and once again saved some textural edges .
Supplies
(Compensated affiliate links used when possible)
Fine Baubles
Posted: January 21, 2022 Filed under: Darkroom Door, fine baubles, gel press, large stars, Stencils | Tags: Darkroom Door stamps, Darkroom Door stencils, gel press 4 Comments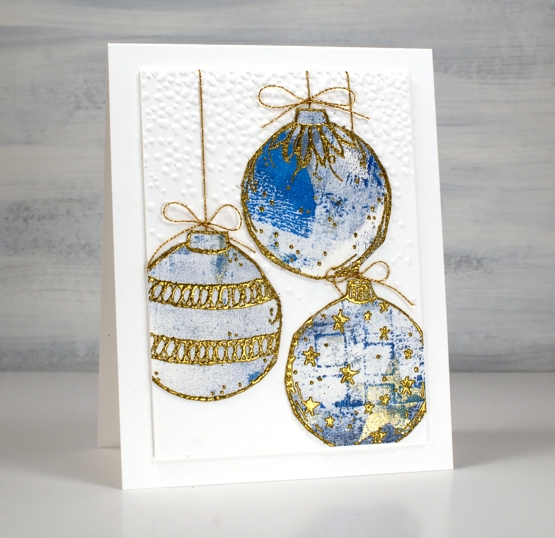
To make these cards I pulled out some gel printed paper and the Darkroom Door ‘fine baubles’ stamp set. I have a box of gel printed pieces longing to come out of the box and into the world.
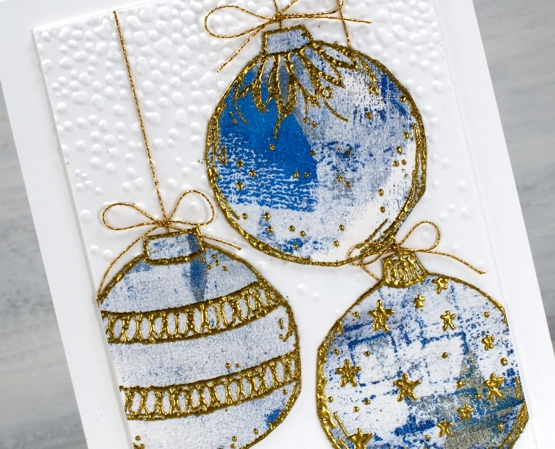
Last year I resolved to make a few Christmas cards every month of the year but that didn’t happen. This year I have resolved no such thing and look what happened: two done already! I embossed the large baubles on the gel print panel in a gold powder which is slightly chunky; it’s not my usual gold but there is a whole jar of it and I am committed to using up what I have where possible. It worked well for these baubles because I needed it to stand out against the patterns of the gel prints. I cut the baubles out which, although simple, still counts as fussy cutting in my book.
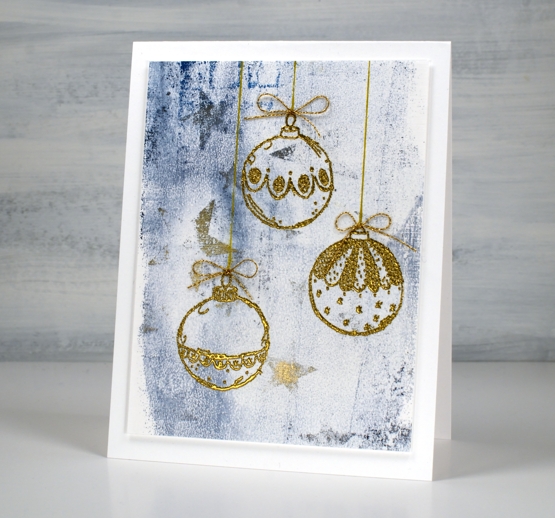
I embossed three of the smaller baubles on the other end of the gel print and did not cut them out because in doing so I would have lost the pretty stars on the print. It was hard to capture the gold of the stars in the photo but it is subtle and pretty in real life and is not blue as it appears below.
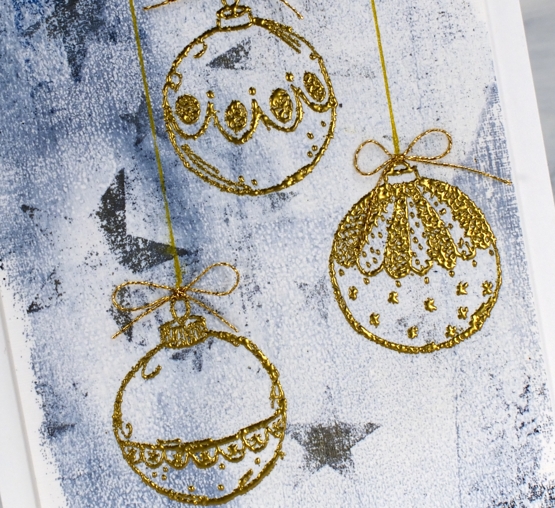
I attached gold cord behind the larger baubles as well as bows from cord too. The smaller baubles also got the bows but the cord is drawn with a gold gel pen.
No sentiments at this stage but that might change before I send them out in eleven months time!
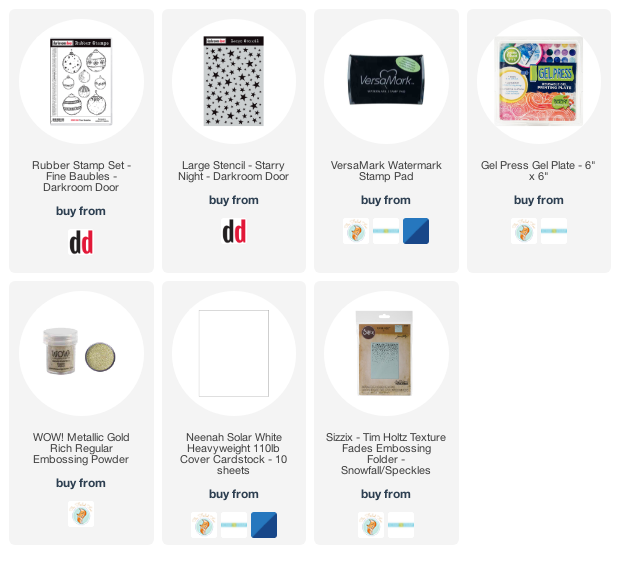
Supplies
(Compensated affiliate links used when possible)
Butterfly art journal page
Posted: September 15, 2021 Filed under: Art Journal, Butterflies, Darkroom Door, diamonds, French Script, gel press, Mixed Media, starry night, Stencils, Wildflowers Vol 1 | Tags: Art Journal, Darkroom Door stamps, Darkroom Door stencils, gel press, gel printing, Mixed Media 4 Comments
My art journal is a place where I experiment with new techniques and mediums. It’s also a place for taking ideas further after making a card or creating a gel print. For this butterfly themed page I experimented with layering. I don’t find layering easy so it is a good technique to be playing with in my journal. You can’t see all the layers clearly on this page but there are layers of rice paper under gesso as well as on top of it.

Another technique which I am just beginning to play with is sewing on cards and mixed media pieces. Rachel Greig from Darkroom Door is a master at it and provided loads of inspiration during her recent Artful August challenge. I have tried sewing on paper with my precious Pfaff sewing machine but it didn’t like it so a few weeks ago I bought a second hand machine especially for sewing heavy and unusual materials. The machine is an old one but it is very sturdy and hums along beautifully.

I began by tearing up a large gel print done on rice paper. It featured diamonds on one side and stars on the other, both patterns made with large Darkroom Door stencils. The colour scheme was blues, reds and gold. I glued the torn pieces around the edges with gel medium then painted over them with diluted gesso. After the gesso dried I stamped a few butterflies then added more gesso over the top.
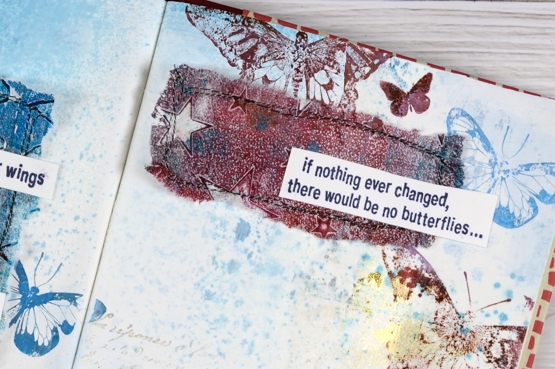
I spritzed over the pages with a faded jeans and broken china distress sprays, only enough to add a bit of speckle here and there, not so much as to cover the colour and pattern underneath. I stamped more butterflies from the DD butterflies set in colours similar to those in my gel print patches.
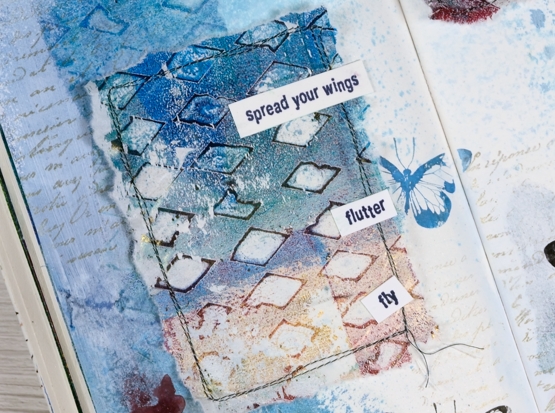
Once the stamping was done I sewed borders around two pieces of gel printed rice paper then glued them on the pages. I stamped, cut out and glued down sentiments from the DD wildflowers vol 1 stamp set.
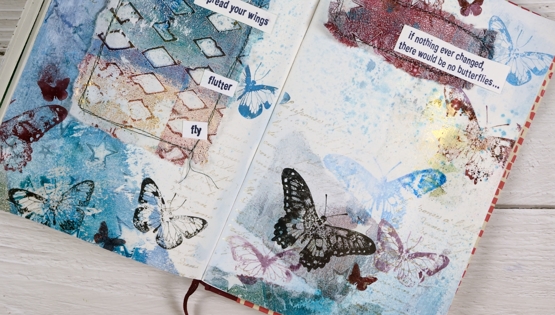
Oh, and I stamped the DD French script stamp a couple of times on each page in gold to co-ordinate with the gold on the gel prints. Not a ton of layering or sewing but I am learning how to paint over background layers just enough to make them fade but not so much that they disappear. I realise looking at these photos that the gel print on the left looks like a pocket… it’s not but that’s an idea for another page.
Supplies
(Compensated affiliate links used when possible)
Artful August Home Journal page
Posted: August 25, 2021 Filed under: Art Journal, basket weave, Darkroom Door, fragments, gel press, honeycomb, Paper Rose, Stencils | Tags: Art Journal, Darkroom Door stencils, gel press, gel printing, Paper Rose, Ranger Distress inks 2 Comments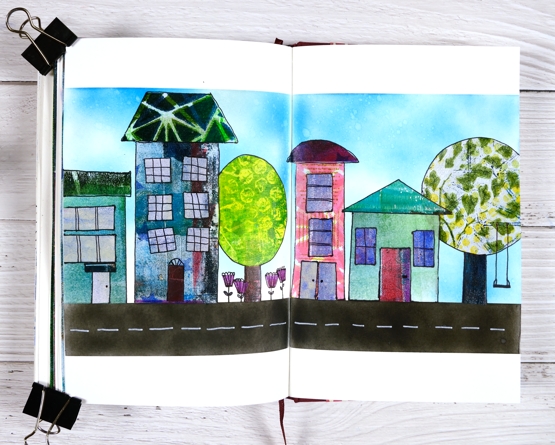
The fun and inspiration continues in Rachel Greig’s Artful August challenge. I am so impressed and inspired by what I have seen. Rachel’s own art has been beautiful and unique every single day. As I mentioned in my last post I have not participated every day but I have definitely enjoyed the times I have followed the prompts. Today’s prompt is ‘Home’ and I decided to make an art journal page of a street.
Make sure you read to the end of this post to find out the winner of Summer Giveaway I hosted with the Foiled Fox.
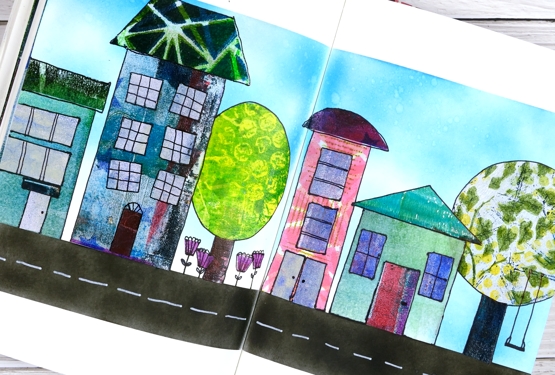
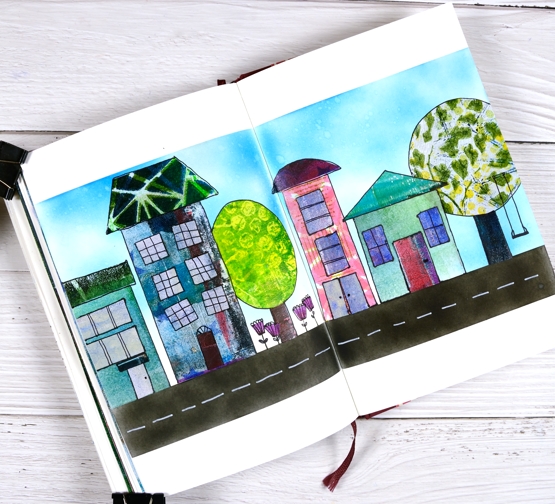
None of these quirky houses look anything like my home but I have had thirteen different homes over the years so I wasn’t going for realism, instead I wanted to create more of a neighbourhood feel. Once again I cut up gel prints to make the houses, trees and flowers. I particularly like the gel print trees. The one on the left was printed with bubble wrap and the one on the right features texture from three different stencils which ended up giving me leaves and a branch to hang a swing on.
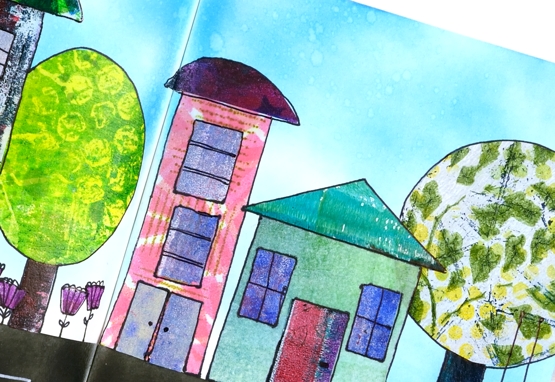
I began by masking the top and bottom edges then used blending brushes to fill the sky with blue distress inks and the road with black soot ink. I cut all the shapes by hand not worrying about perspective or scale and glued them on with multi matte medium. Once the glue dried I drew around all the edges and added detail with with a black ultrafine sharpie. I added markings to the road with a white sharpie paint pen.
Thank you to everyone who entered the Summer Giveaway by telling us your favourite summer activity. I enjoyed reading about beach walks, mountain hikes, picnics, porches and time spent with friends. I hope you are all still enjoying those pastimes. Summer is not over yet! Congratulations to Stephanie Clapper, check your email for your gift certificate to the wonderful Foiled Fox online store.
Supplies
(Compensated affiliate links used when possible)