Blooming Bunch
Posted: March 4, 2020 Filed under: blooming bunch, Penny Black | Tags: Fabriano Watercolour Paper, no-line watercolour, Penny Black stamps, Ranger Distress inks 5 Comments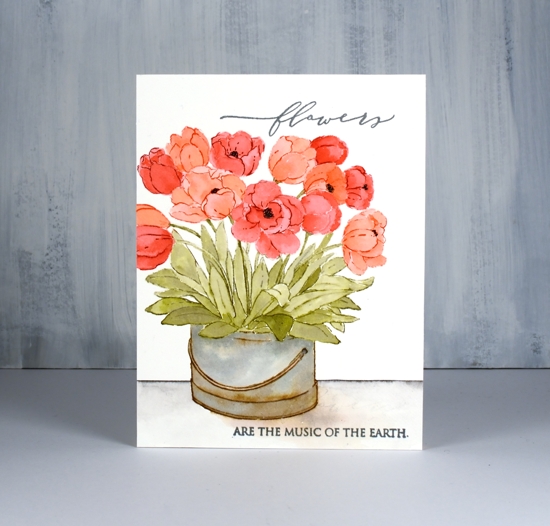
It’s time for a new release from Penny Black! This one’s called Secret Garden and it is full of gorgeous floral stamps and dies (and other cuteness). I will be sharing projects here on the blog in the coming weeks.
This lovely bucket of tulips turned out to be the perfect stamp for distress ink no-line watercolour. I inked the flowers one at a time in either festive berries or abandoned coral then blended ink from stamping along with a little extra from smooshing on my glass mat. I kept the panel (hot pressed watercolour paper) in the stamp positioner as I was painting my way through the flowers. I blended the stamped ink within each flower and added more ink towards the base of the petals. I tried to work on flowers that were not adjacent to each other so the inks didn’t run into each other. When all the flowers were done I inked some of the outlines again with a marker and re-stamped to add a bit of definition here and there.
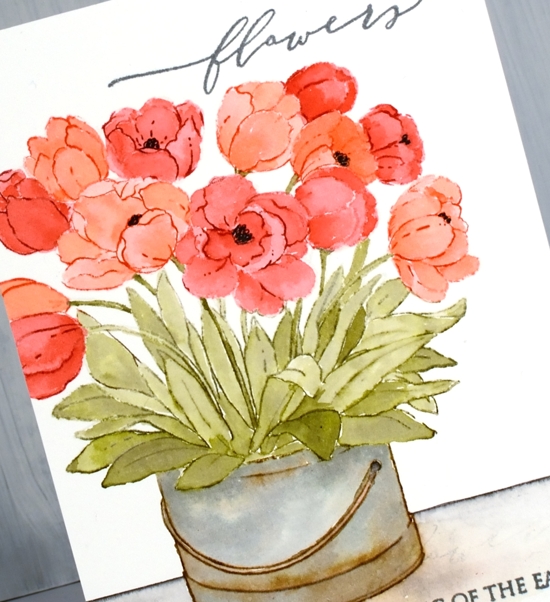
I used forest moss distress ink for the stems and leaves. Forest moss is quite a dark ink so I diluted it for some of the leaves and was able to get depth and shadows.
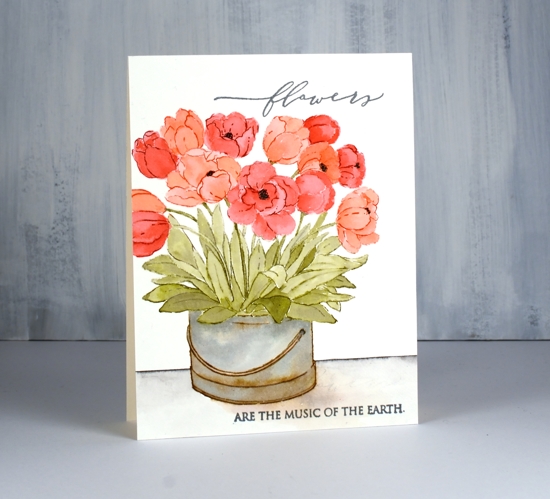
Painting the bucket was my favourite part of the process; it isn’t fiddly and the mix of vintage photo and stormy sky ink made it look old. To ground the image I ruled a line with a black soot marker then blended the ink downward and painted a shadow at the base of the bucket with some stormy sky ink and a tiny bit of abandoned coral ink. I finished the card with a sentiment from the new ‘blooming sentiments’ set. It is one sentiment but I did some masking in order to stamp the large word at the top and the rest of the text at the bottom of my card front in versafine clair versafine clair misty morning.
See you again soon with more from the PB ‘Secret Garden’.
Supplies
Beloved View – 2 ways
Posted: March 2, 2020 Filed under: beloved view, Penny Black, Stamped Landscapes | Tags: Fabriano Watercolour Paper, Penny Black stamps, Ranger Distress inks, Ranger Distress stains 8 Comments
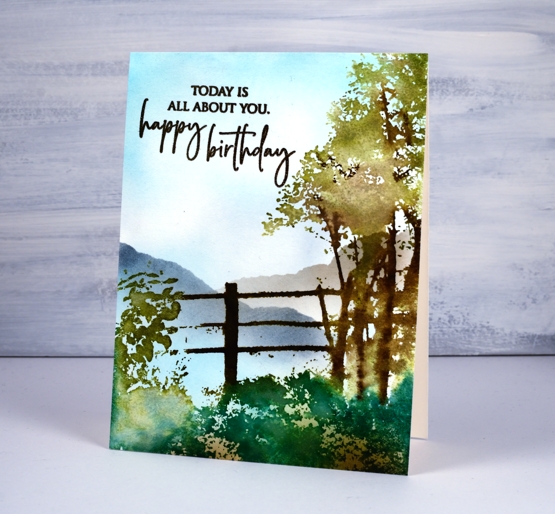
I haven’t done scenic stamping for a while so ‘beloved view’ from Penny Black called out to me. I decided to stamp it two ways, that way you can see the versatility and I will have two more birthday cards. To begin I smooshed some mermaid lagoon and weathered wood distress inks on a glass mat, diluted the ink with water then swiped the watercolour paper through the inks to create the look of a cloudy sky. I dried the panel then put it in a stamp positioner so I could build up the scene a colour at a time. First I inked the fence in gathered twigs and ground espresso distress inks then, after stamping, blended the browns with a brush and water. Next I inked the foliage of the tree in peeled paint and forest moss inks, spritzed and stamped. I let that dry a little then used a brown marker to ink some of the branches before stamping again. For the foreground foliage I used a mix of pine needles distress ink along with peeled paint. I did a bit more blending with a paint brush then dried the whole panel.
I switched to blending brushes to add the rest of the detail including brown ink along the lower edge and mermaid lagoon around the edge of the sky. I added two hills by blending over the edge of a torn post it note first in weathered wood ink then on the right with hickory smoke ink.

The sentiment is from PB ‘special sentiments’ and is stamped in versafine vintage sepia ink. Now I’m sure this never happens to you but as I was stamping the sentiment a second time I got it slightly off set. Several unappealing fixes popped into my head but I decided to keep stamping the sentiment so with extra ink the two ‘prints’ would join together. This would not have been totally successful if I had left them only stamped but once I embossed with clear powder the text no longer appeared to be a double image! Phew, crisis averted.
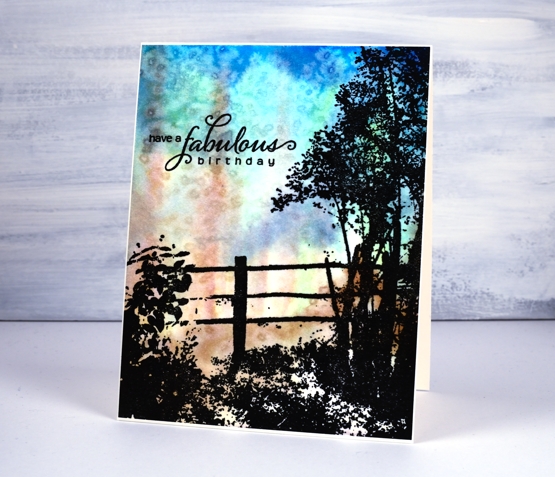
On my second card I created an abstract background first then, once dry, I stamped ‘beloved view’ over the top in versafine clair nocturne ink to create a silhouette,
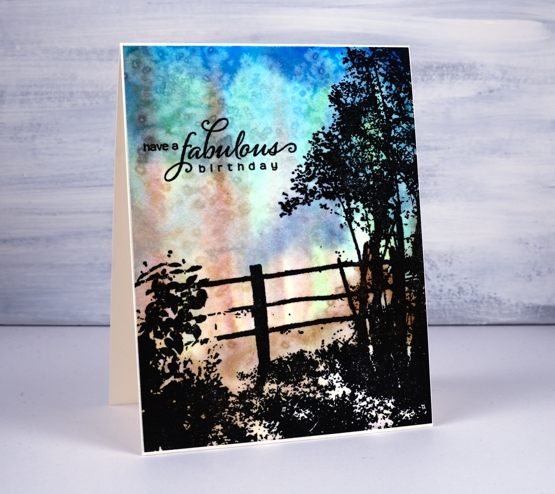
The ‘impressionistic’ background was painted with distress stains, salty ocean, chipped sapphire, vintage photo and peeled paint. I spritzed water and painted them without trying to create a scene other than keeping the brown stain in vertical strips a bit like trees. Once I had the background covered I sprinkled salt over the wet panel to add some texture.
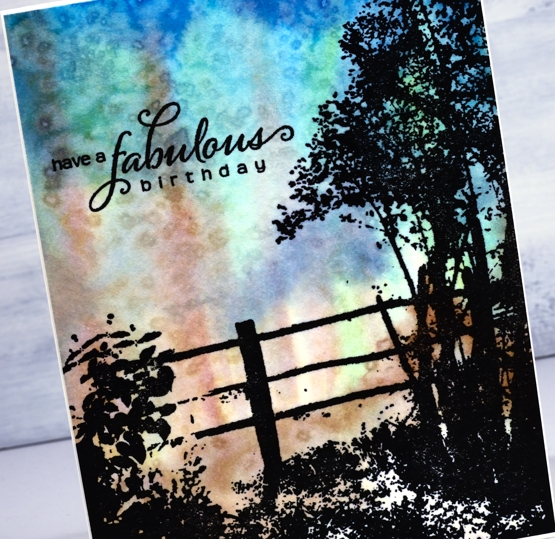
Once the salt dried I rubbed it off and did the silhouette stamping. The paper is hot pressed watercolour so it has a little texture; to get a solid image of the foreground scene I had to stamp several times in black and the stamp positioner made that possible. The sentiment from PB ‘heartfelt’ is also stamped in nocturne ink. I trimmed the panel so the card base would create a very narrow frame all around.
My stash is always a little short on masculine cards so these two are sure to come in handy. And by the way, my cards are now for sale in two Ottawa locations, A Curated Nest on Wellington Street and Crop A While on St Joseph Boulevard. Thanks for dropping by today
Supplies
Poppy birthdays
Posted: February 25, 2020 Filed under: little lowercase letters, My Favorite Things, phrase builder you, Pink Fresh studio, poppy background, YAY for you | Tags: Fabriano Watercolour Paper, grafix, My Favorite Things, Pink Fresh studio, Ranger Distress inks, WOW embossing powders 5 Comments
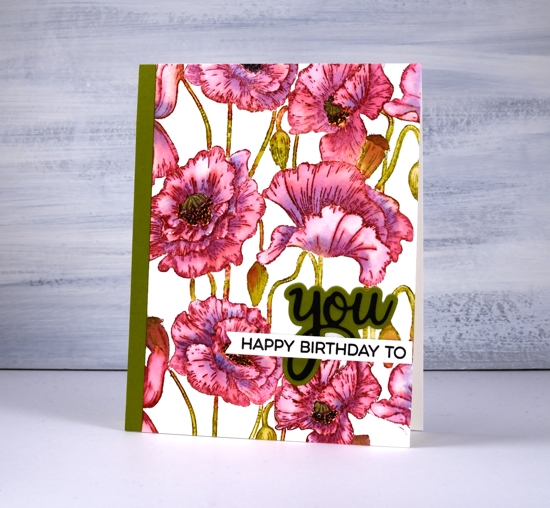
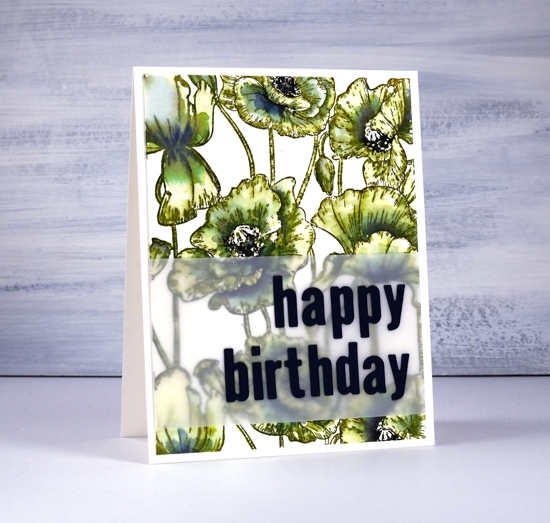
When I pulled out the MFT ‘poppies background’ stamp my intention was to do some loose watercolour with splashes and dabs here and there. As you can see I didn’t manage that; I stayed inside the lines. It was not a fiddly job though, painting this panel. I was surprised at how quickly I was able to get it done. I put the stamp in the stamp positioner along with a piece of cold pressed watercolour paper. Using the papertrey ink cubes I was able to ink the flowers in ‘scarlet jewel’ and the buds, stems and pods in ‘ripe avocado’. If the inks ended up on the wrong section I either wiped it off or let it be because a little green in the flowers or red in the stems doesn’t matter.
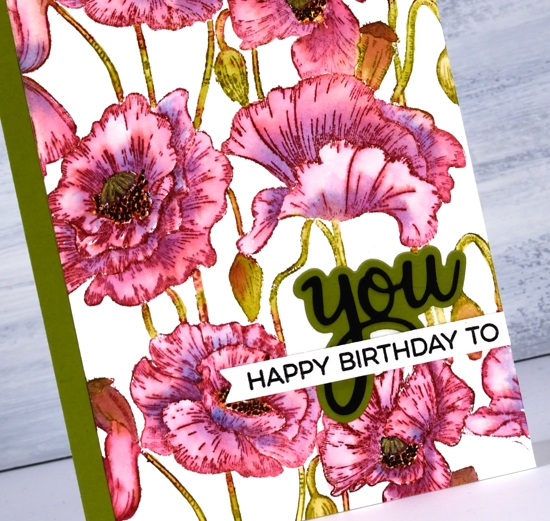
I blended one petal at a time which sounds time consuming but they are large petals so it wasn’t bad. As I finished blending the ink into one petal I picked up a little bit of ‘blueberry sky’ ink and dropped it into the wet petal at the inner edge. When I came to the poppy centres I got mixed up and did the centres black and the surrounding dots in yellow so to fix it I went over the yellow with little black dots then went over the black center with a gold gel pen to turn it yellowish! Adding a sentiment took me an age, not because it was too fiddly but because I couldn’t decide how to arrange it and my embossing game was definitely off. I ended up with ‘you’ from Pink Fresh ‘phrase builder: you’ set overlaid with a sentiment from MFT ‘YAY for you’ set.
The second panel definitely involved more slap dash watercolouring but I still managed to stay inside the lines. I stamped the whole image in distress peeled paint which blends very easily with water. As I wanted some depth of colour in the centres of the flowers I smooshed faded jeans and chipped sapphire distress inks on my glass mat and picked up ink to paint shadows on the petals. I inked up the centres of the poppies with a chipped sapphire marker then chose a dark blue (not black) cardstock to die-cut the letters for the sentiment.
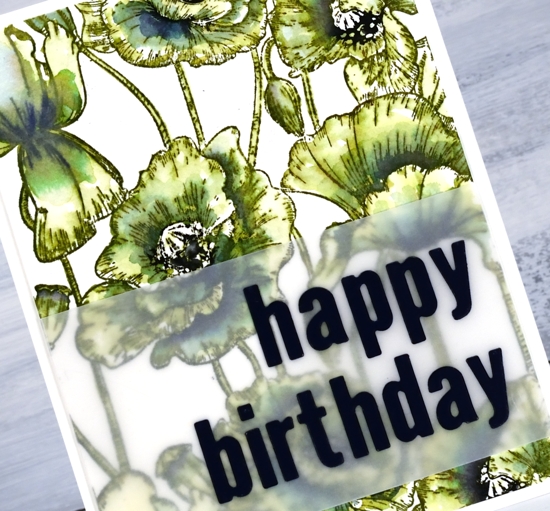
The die-cut letters got a little lost when placed straight on the busy background panel so I attached them to a piece of vellum first. To line them up I perfectly magnets held the vellum in place on my Wendy Vecchi magnetic board and, because it was vellum I was able to see a whole grid of lines to get them straight vertically and horizontally. I was pretty happy with this arrangement and might just have to do all my sentiments on vellum to experience the same satisfaction! I put ‘stick it’ adhesive on the back of the dark blue cardstock before I cut the letters so I would not have to deal with glue or tiny bits of tape for each letter. That would not have given me any satisfaction at all!
Even though green poppies are a bit of an oddity I think that one ended up being my favourite.
In other news make sure you pop over to the Penny Black blog to enter their giveaway; you have until March 1. I will be sharing plenty of new PB product in the weeks to come.
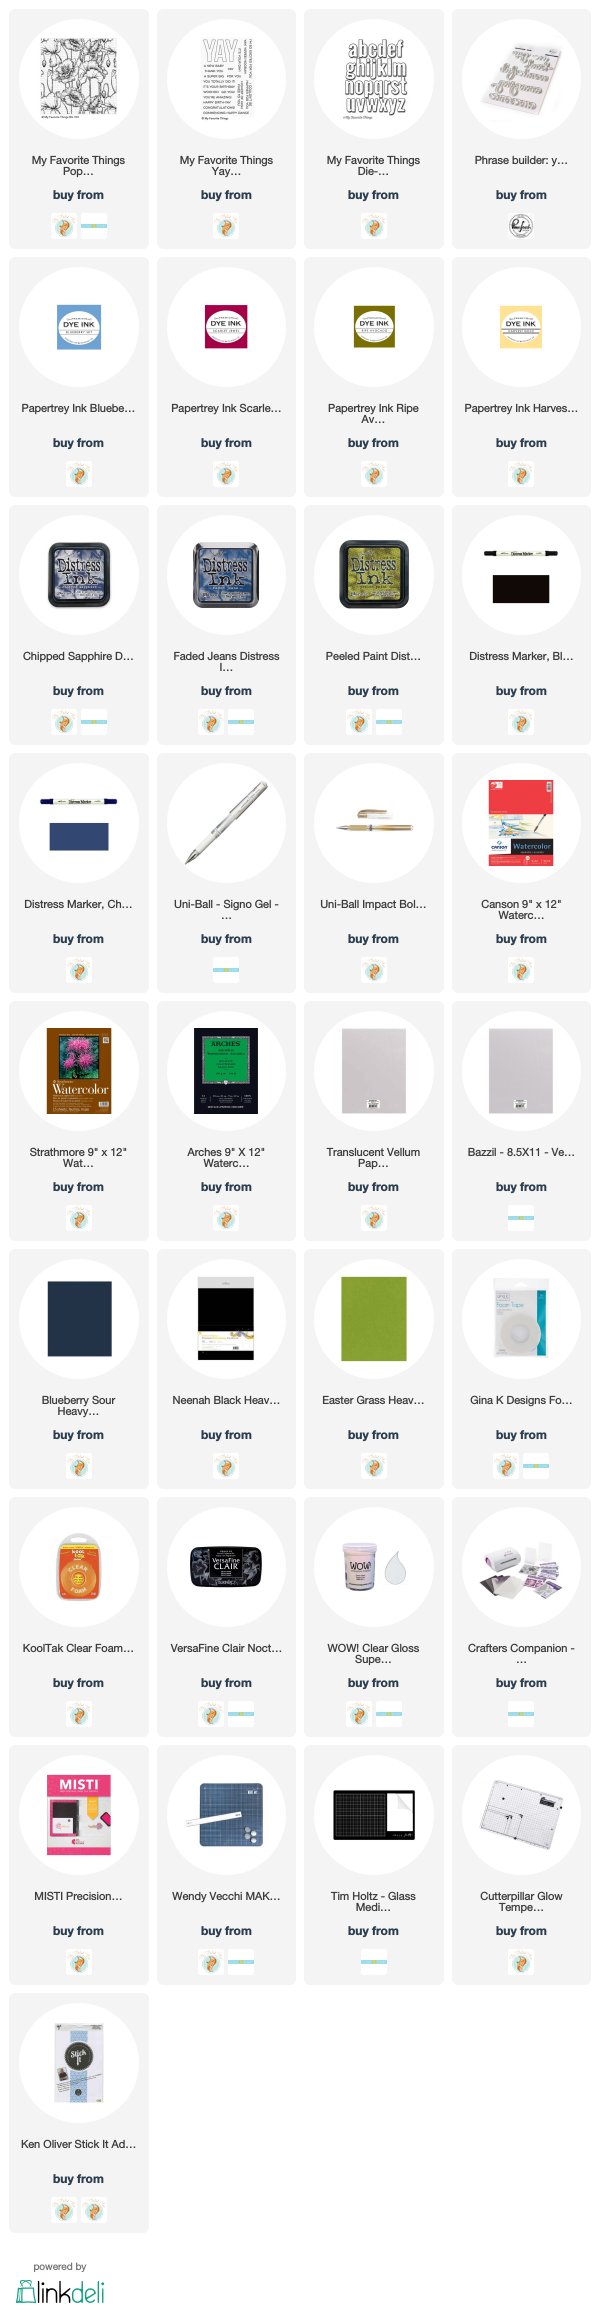
Supplies
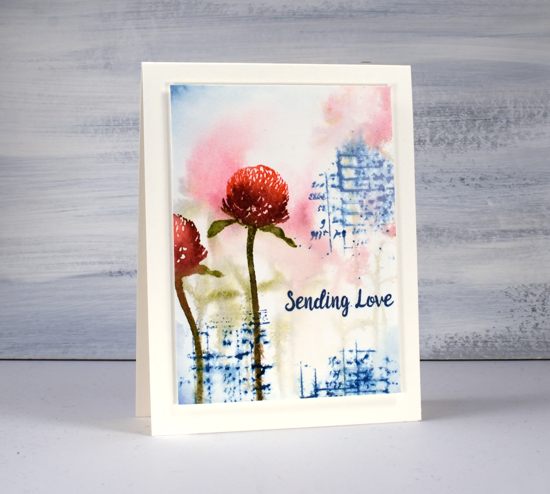
Sending Love
Posted: February 10, 2020 Filed under: Darkroom Door, number medley, warm wishes | Tags: Darkroom Door stamps, Fabriano Watercolour Paper, Ranger Distress inks, Ranger Distress stains 11 Comments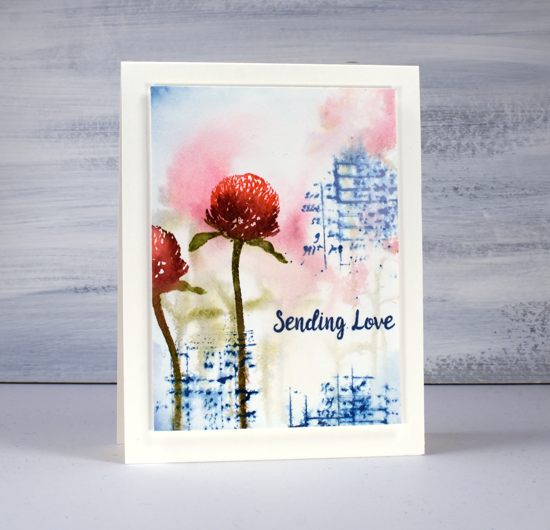
I posted a clean and simple two tone card last week featuring a new Darkroom Door set, ‘warm wishes’. The detail of the stamp was very apparent in my earlier card but this time I am showing it off with a watercolour look. The set includes five flowers ( I think they are clover) of different shapes and sizes. I have used a rounder flower on this card and stamped it several times to create a blurry background then twice with detail in the foreground.
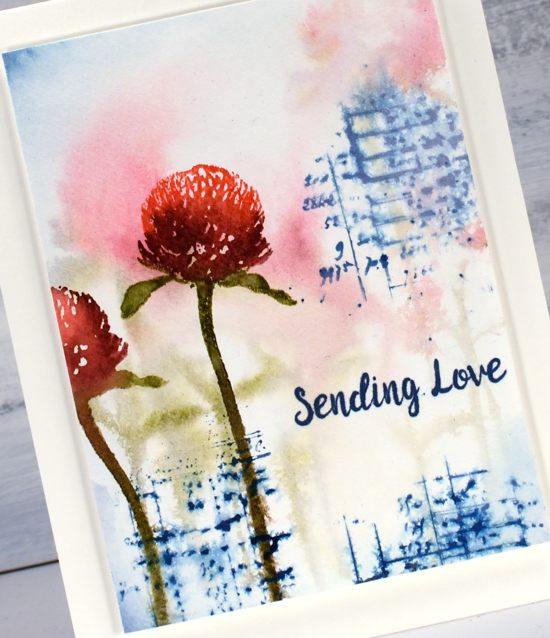
I began by taping some hot pressed watercolour paper to my glass mat then spritzing it unevenly with water. When it was fairly wet I inked the flower stamp in worn lipstick, aged mahogany and peeled paint distress inks then stamped it repeatedly over the wet panel. I re-inked the stem to stamp several times in the bottom left hand corner. To frame the design I painted some stormy sky distress stain around the edges. After the panel dried I transferred it to a stamp positioner so I could add a couple more flowers. I used the same three distress markers to ink the flower and stem then added darker green with a forest moss marker.
For some added interest I used a number stamp from another new Darkroom Door set, ‘number medley’. I know I am going to enjoy using this set to add texture and detail to a whole lot of projects. You probably wouldn’t have guessed the stamp is made up of numbers because I stamped with distress stain and did some spritzing to make the ink move a little.
To complete the card I added a sentiment from ‘warm wishes’ in faded jeans archival ink then popped up the whole panel with some white foam. I feel like transforming this design into an art journal page; what do you think?
For more inspiration with this new set head over to the Darkroom Door blog.
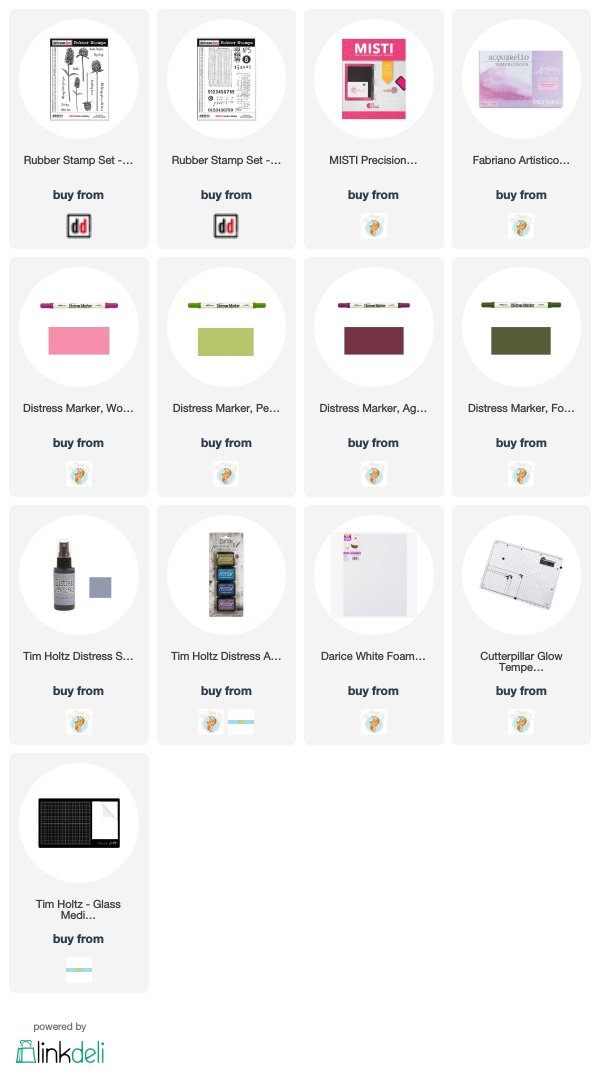
Supplies
Wintertide
Posted: January 17, 2020 Filed under: Penny Black, wintertide | Tags: Fabriano Watercolour Paper, Penny Black stamps, Ranger Distress inks 11 Comments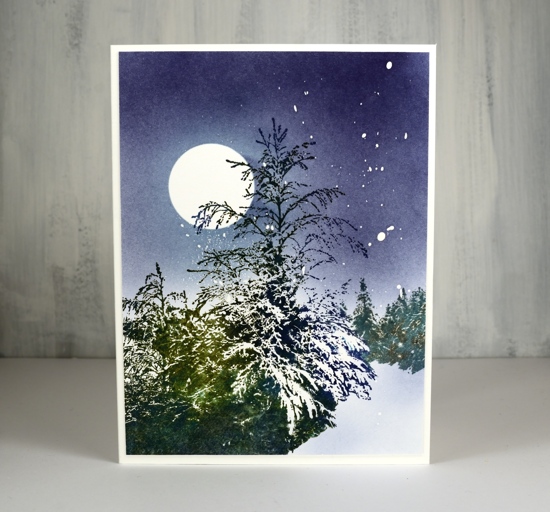
As you can imagine, I was thrilled when I saw this stamp. Yes it is one stamp with all these beautiful trees in a snowy clearing! It’s called wintertide and it definitely portrays what I am seeing outside these days.
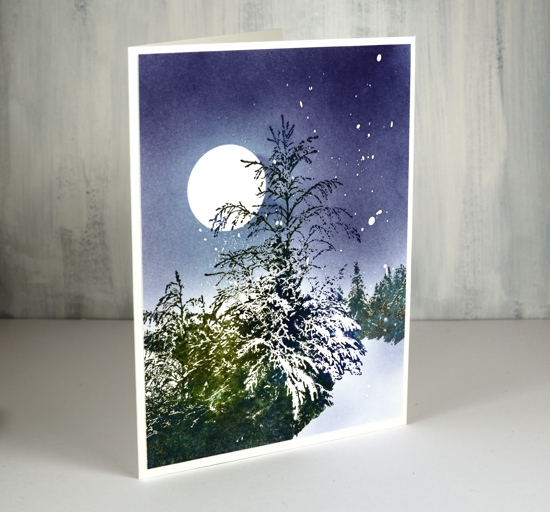
I worked on hot press watercolour paper because I did plan to add a little water as I worked but the stamp is very detailed so I didn’t want added water to blur the detail and lose all the snowy white areas. There are some white splatters in the sky made by splots of masking fluid splattered on the panel before I started stamping.
I kept the stamp in a stamp positioner so I could stamp one colour at a time starting with pine needles distress ink. I added other distress greens and blues bit by bit to give definition to the trees on the right and the bushy area in the foreground. I spritzed the stamp lightly with water after inking the area left of the big tree so the greens blended with each other. Once I had built up enough colour variation I dried the panel and added a frisket film circle mask before colouring the sky. I used blending brushes to apply tumbled glass and chipped sapphire distress inks to the sky and the snowy path.
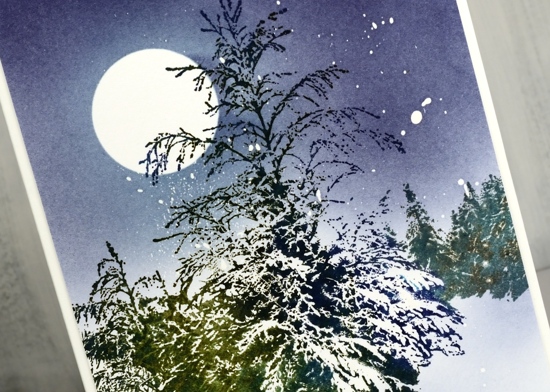
This stamp is very detailed but that does not have to mean it is difficult to use. By stamping the whole image first in a light colour you are able to see where to change colours when adding ink with markers or ink pads. When I don’t use markers I add ink to a large area with an ink pad(often a cube) then wipe it off the areas I don’t want stamped. Jill Foster has a fabulous video tutorial for this stamp so check that out if you want some ideas.
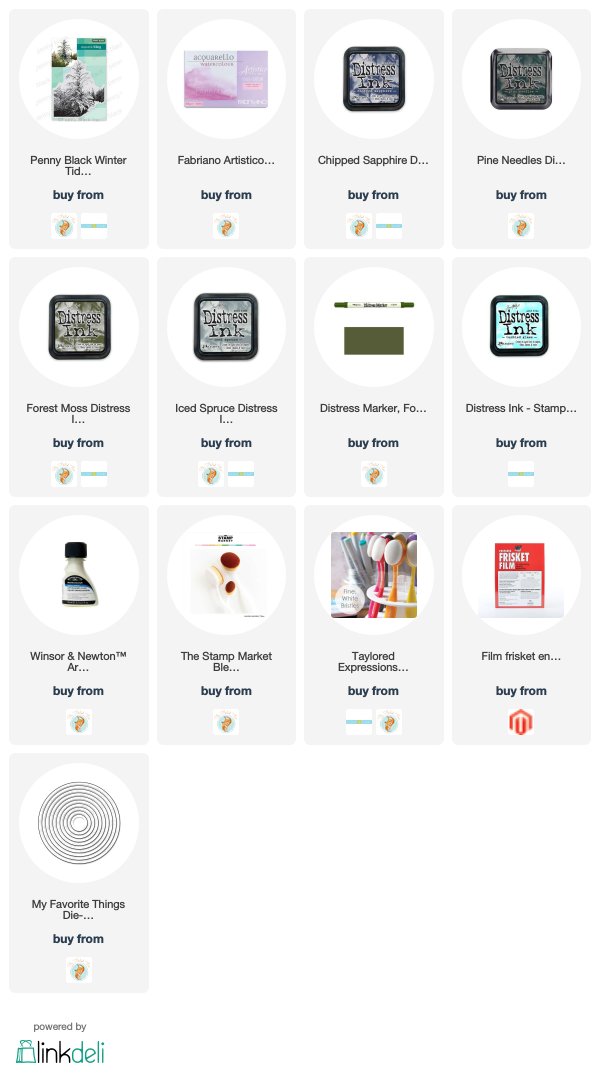
Supplies
Three colours – Bouquet Ballet
Posted: January 13, 2020 Filed under: bouquet ballet, Brusho, fluttering friends, My Favorite Things, Penny Black, square frames | Tags: Brusho, Fabriano Watercolour Paper, My Favorite Things, Penny Black creative dies, Penny Black stamps 12 Comments
Above is the second of my three colour cards painted with only ost blue, sandstone and lemon brusho. The first card displayed some of the texture and blending which is easily achieved with brusho, in this card it is easier to see the three basic colours plus a couple of the colours I mixed myself. As with the first card I mixed the brusho powders with water in a palette but for this card didn’t sprinkle any brusho directly on the watercolour panel.
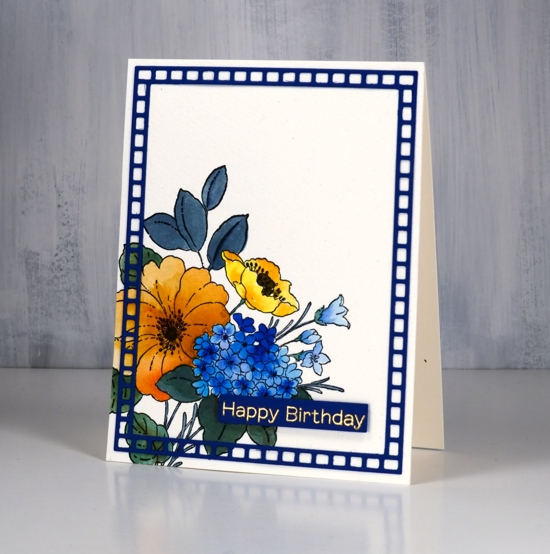
The PB bouquet ballet stamp is stamped in black ink on cold pressed watercolour paper; I used a stamp positioner as cold pressed watercolour paper has texture which prevents me from getting a perfect impression first go. The small poppy is painted in lemon brusho, the large flower with sandstone and the multi-headed flower in ost blue. On each one I dropped in more colour for extra depth. The small trumpet shaped flowers to the right are also painted in ost blue but a diluted coat. The stems and leaves are painted in a mix of blue and lemon. The centre of the flowers I painted in brown which was a mix of blue and sandstone brusho. I did use a black marker to colour the little flower centre thingies, but we are not going to count black as a fourth colour!
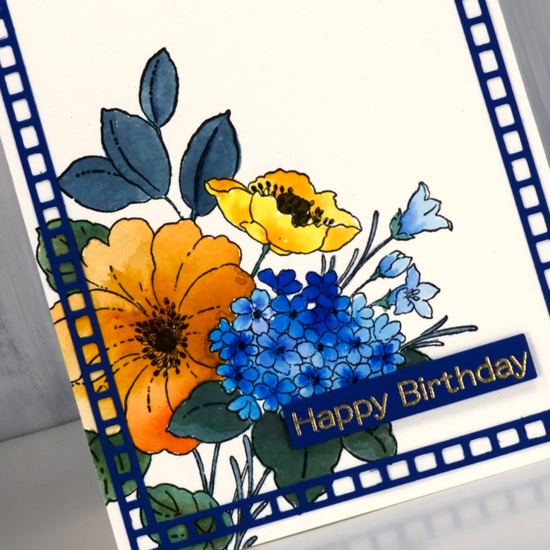
Happily I found a blue cardstock in my stash to create a sentiment strip and a frame. I embossed the sentiment from MFT fluttering friends in gold powder and popped it up over the panel. The frame is cut using PB square frames and glued on using on point glue because of the tiny tip on the glue bottle. I have one more card to show you in this miniseries and I think it might be my favourite. Check back soon.
Supplies

Pinecones & joy
Posted: December 19, 2019 Filed under: Darkroom Door, Ink to Paper, jumbo joy, Penny Black, pine cones, season of joy stamps | Tags: Darkroom Door stamps, Fabriano Watercolour Paper, Ink to Paper, Kuretake Gansai Tambi watercolour paints, Penny Black creative dies, WOW embossing powders 11 Comments
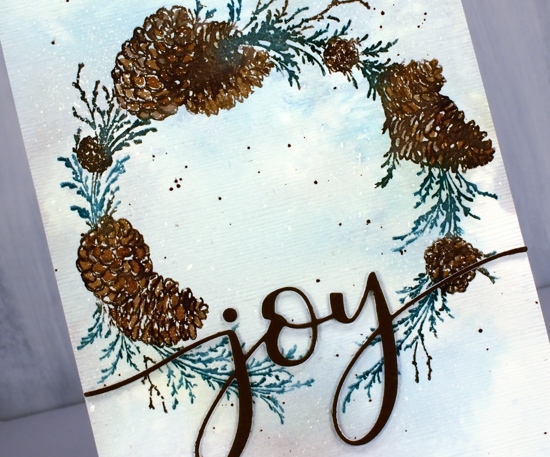
The pine needles and pine cone stamps I used for this card are from Darkroom Door and I love how realistic they are. The stamps are quite large and there are several sizes and shapes of cones which makes for lovely feature images and fillers as well. I used one pine cone stamp but two of the pine needle stamps and worked on hot pressed watercolour paper which had been splattered with masking fluid. If you look at the close up below you can see large white dots as well as tiny ones; they’re all made by the masking fluid.
I stamped the pine cone three times using a stamp positioner and four different brown distress inks. A spritz of water started the browns blending and I did a little blending with a paint brush as well.

I stamped the green pine needles with forest moss and evergreen bough distress inks and the fine needles in the background with iced spruce. I added some green splatter then some gold splatter using one of the gansai tambi starry colours. I used the ‘jumbo joy’ die from Penny Black to cut out the word joy from the stamped panel and cut three layers from shimmer gold cardstock as well so I could stack them up just a little offset so the gold peeps out on the side.

I stamped the rest of the Christmas carol lyric using a stamp from Ink to Paper’s ‘season of joy’ set and some gold embossing powder. The overall pattern may be a little messy but it reminds me of what I see if I look up into the branches of the very messy pine tree in my front yard, which is currently covered with snow but not gold splatter!
I have been blessed to receive some beautiful handmade Christmas cards in the mail this week and I am enjoying them on my window ledge. I hate to say it but as yet I have not sent a single one! As I’ve said before there are twelve days of Christmas so I haven’t run out of time yet!
Supplies
Pink poinsettia poem
Posted: December 17, 2019 Filed under: poinsettia poem, xmas poinsettia cut out | Tags: brutus monroe embossing powder, Fabriano Watercolour Paper, Papertrey ink, Penny Black creative dies, Penny Black stamps 4 Comments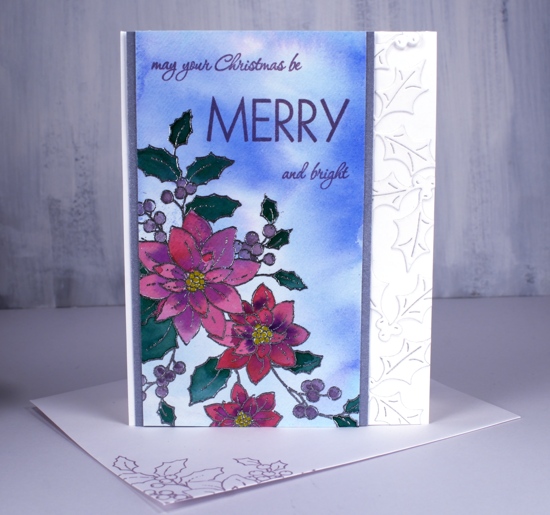
I have a less traditional colour scheme for you today featuring pink and purple on this pretty poinsettia stamp from Penny Black. I wasn’t set on being non-traditional when I started but it headed that way as I progressed. I started by smooshing tumbled glass and blueprint sketch distress stains on my glass mat, adding water then swiping a piece of hot pressed watercolour paper through it to create a soft background. Once it dried I used my stamp positioner to stamp and emboss the ‘poinsettia poem’ stamp in silver embossing powder.
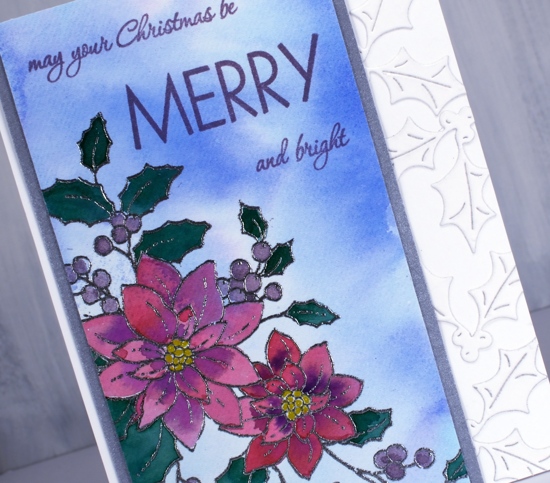
I smooshed papertrey ink cubes onto my glass mat to use as watercolours and painted the flowers in scarlet jewel and royal velvet, the leaves in pine feather and the berries in winter wisteria. I used a gold gel pen to colour the centres. The card is not quite so bold as the photo suggests but even so I wanted some light and bright features alongside the painted panel so I framed it in silver and added some die cut holly to the white card base.
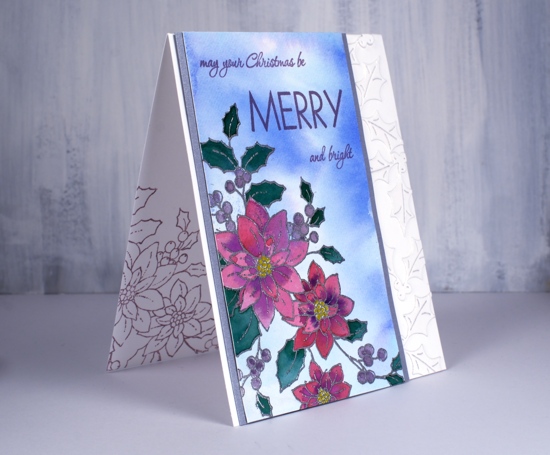
In keeping with my resolve I stamped inside the card and on the envelope with winter wisteria ink and add the sentiment in the same.
Supplies
Wreath & wreath
Posted: December 4, 2019 Filed under: conifer wreath, homespun, Penny Black | Tags: Fabriano Watercolour Paper, Finetec artist mica watercolour paint, Penny Black creative dies, Penny Black stamps, Ranger Distress inks, Ranger Distress stains 4 Comments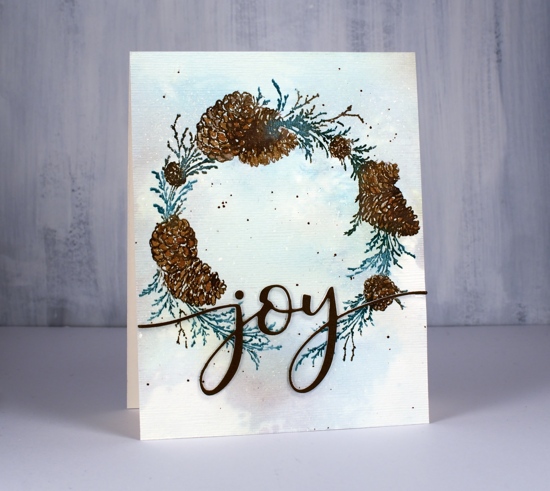
I have two more wreaths to share today; I don’t think I’ve ever made so many wreath cards. This year I did them in a class and I’ve done them here at home more than a few times with little stamps and big stamps. The fact that Penny Black came out with such beautiful wreaths this year kept the inspiration going.
The stamp above is called ‘conifer wreath’ and the stamp below ‘homespun’. I used the same technique for both. Working on hot pressed watercolour paper (psst Foiled Fox has Fabriano in stock now!!) I splattered masking fluid over the paper before I started stamping or painting so I would have dots of snow appear at the end. Once the masking fluid was dry I used my glass mat and spread some pine needles, evergreen bough and gathered twigs distress stain over the mat. I diluted it with water then swiped both panels through the stain to pick up pale green and brown blurry colour.
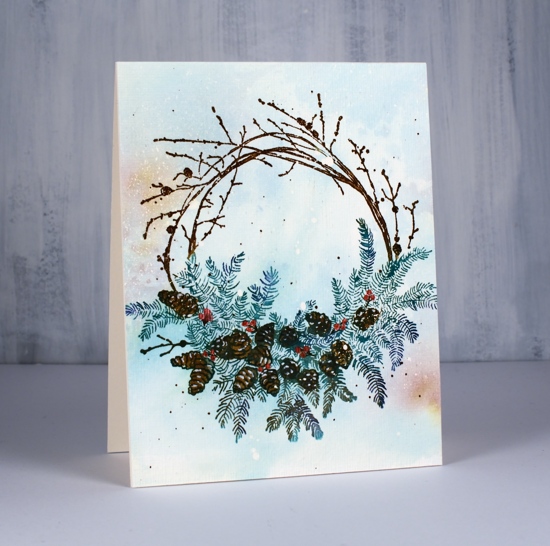
Once the background ink dried I used the stamp positioner to stamp the wreaths colour by colour using pine needles and forest moss distress inks for the foliage, gathered twigs and black soot for the twigs and pine cones and chipped sapphire for some added depth. I drew a few berries on the wreath below with a festive berries marker then painted over them with red from the finetec pearlescent paint set.
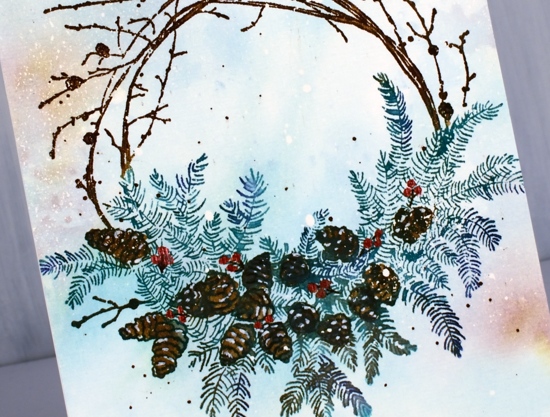
To add a little snow to the pine cones I used a white gel pen then splattered some green and brown ink around the wreaths. Once all the ink was dry I removed the masking fluid then added some texture to the panel with the clever SU embossing folder ‘subtle’.
To add a sentiment to the conifer wreath I die-cut a few ‘joy’ words with the PB die, ‘merry & joy’, stacked them and added them over the bottom of the wreath. Now what I really need to get done is a wreath to hang over my fireplace!
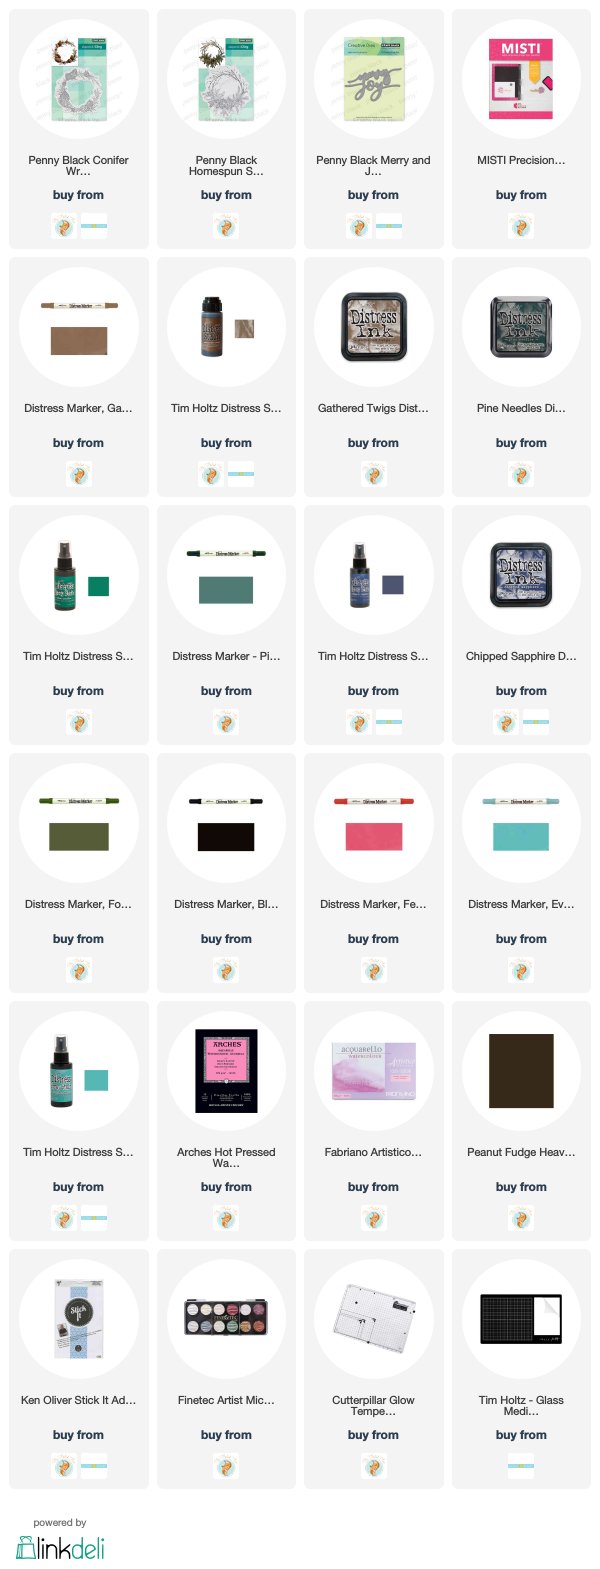
Supplies
Filigree thank you
Posted: September 18, 2019 Filed under: Filigree Foliage | Tags: Fabriano Watercolour Paper, Penny Black creative dies, Penny Black stamps, Ranger Distress inks 11 Comments
This leaf is from a PB stamp set called ‘filligree foliage. I haven’t used it for a few years but it is perfect for creating some autumn leaves. As the name suggests each leaf has a filigree pattern on it but you can’t see it on this card because I am using the stamp for its shape not its pattern. To see cards I’ve made in the past with this set click over here, here and here
I worked on hot pressed watercolour paper and moved the stamp around each time I stamped it. I used abandoned coral and frayed burlap distress inks, an odd combo, but one which seemed to work and even gave me a some purply blue in a few places. After stamping the leaf I immediately blended the ink with a paintbrush and water until I had filled the entire shape diluting all the stamped ink as I did so.
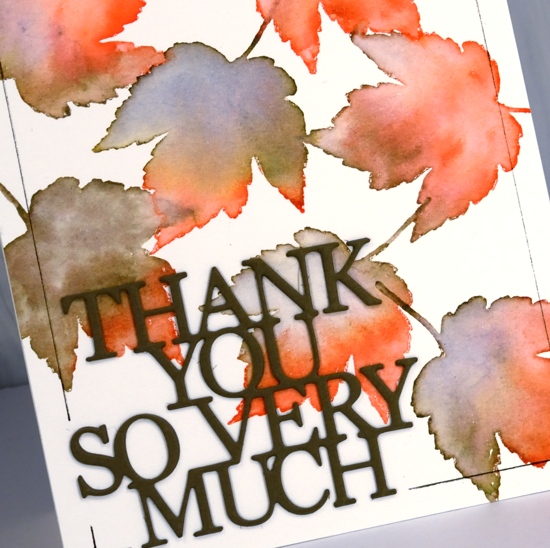
I added a double stacked sentiment die cut from olive green cardstock then ruled a thin brown frame around the edge with the help of the ‘staytion’ magnetic board and ruler. I know the ‘staytion’ was designed with stenciling in mind but it makes lining up die cut words and letters easy as well as ruling lines.
Can you believe I have another card for the current CAS watercolour challenge?