
Speckled Leaf Trails
Posted: May 30, 2024 Filed under: Alcohol Ink, gel press, Lavinia, leaf trails stencil, Taylored Expressions | Tags: Alcohol Ink, gel press, gel printing, Lavinia, Taylored Expressions 2 Comments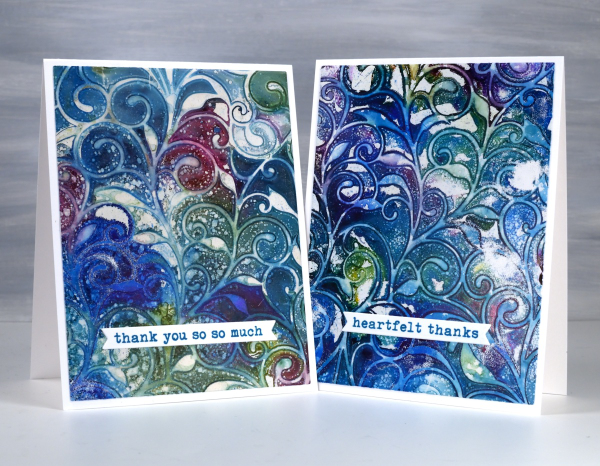
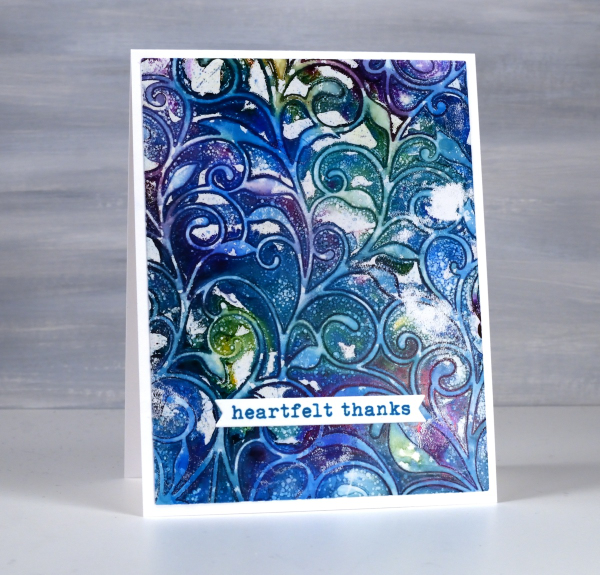
If this design looks familiar it’s because I posted a couple of similar cards a few weeks back. They featured the same pretty Lavinia stencil, ‘leaf trails’.
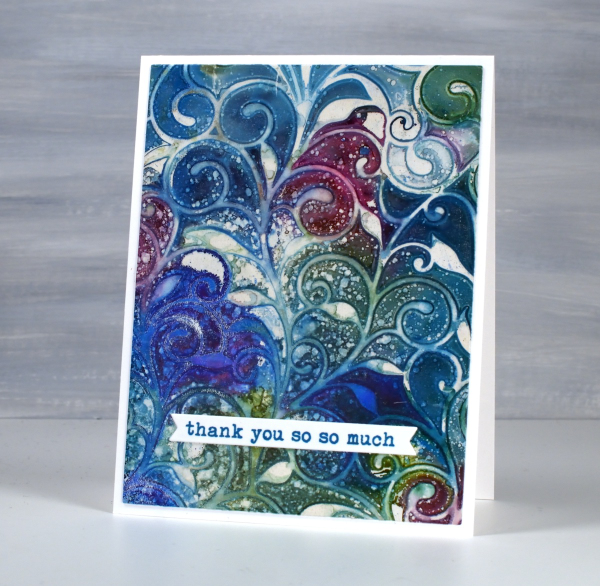
The difference between the cards is partly the colours but more significantly today’s cards feature splatter! You know how I feel about splatter. I always say if a project doesn’t seem quite finished, add some splatter.
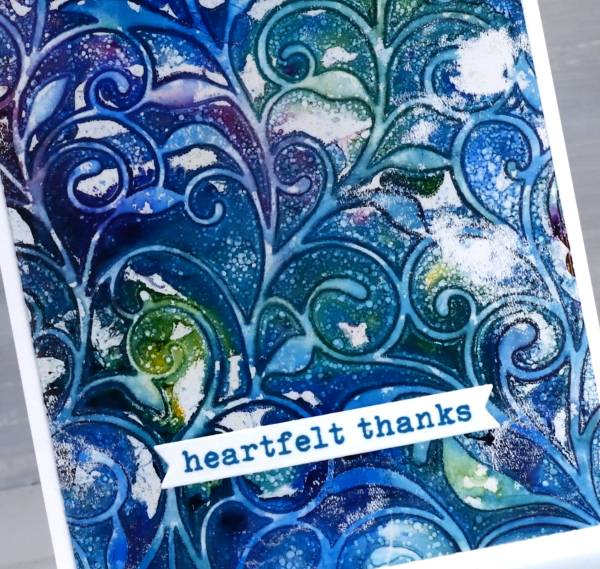
The panels on these cards were made with alcohol inks on a gel plate. I dropped three or four alcohol inks on the plate along with some isopropyl alcohol to help the inks move and blend. I dropped the leaf trails stencil on top and let the inks dry. Once the ink on the plate was dry I splatted some isopropyl alcohol over the design, waited a minute and lifted the stencil. I used white acrylic paint to pull the print on heavy cardboard then added Taylored Expressions sentiments to complete the cards. This post includes an affiliate link from Foiled Fox. If you buy through these links I receive a small commission at no extra cost to you. And remember, if in doubt, add some splatter!
Blue & Green Leaf Trails
Posted: May 7, 2024 Filed under: Alcohol Ink, gel press, Lavinia, leaf trails stencil, Taylored Expressions | Tags: Alcohol Ink, gel press, gel printing, Lavinia, Taylored Expressions 5 Comments
There are many ways to use stencils on the gel plate, one being with alcohol inks rather than acrylic paint. When I use alcohol inks I do pull the print with acrylic paint but most of the colour you see is from the initial layer of alcohol inks.
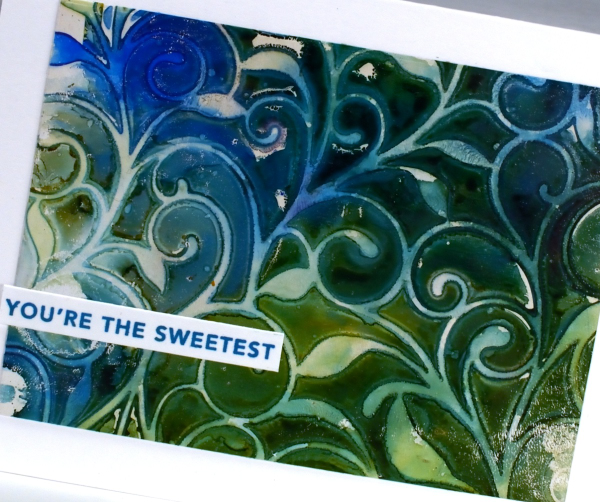
You can lay the stencil down then add alcohol inks or do it the other way round, dropping the stencil onto the wet alcohol ink. Some gel-printers add a layer of hand sanitiser first but that isn’t what I did to make these prints. I’m not 100% sure but I believe I lay the stencil down on top of a layer of alcohol ink for these prints. I use some isopropyl alcohol to help the inks move further and facilitate some blends between colours. I also use an air blower to push the ink around and speed up the drying process.
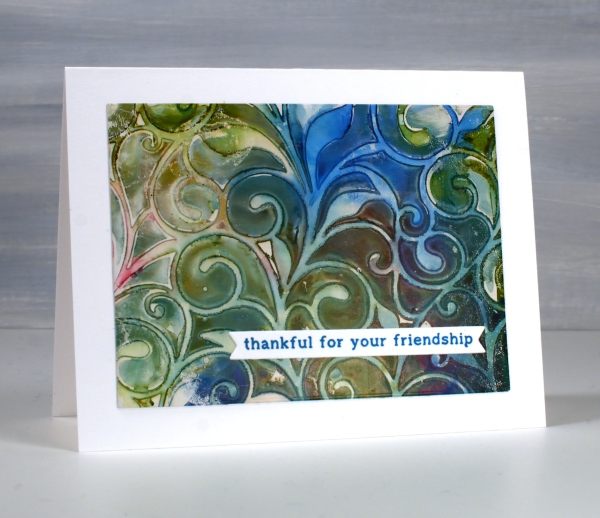
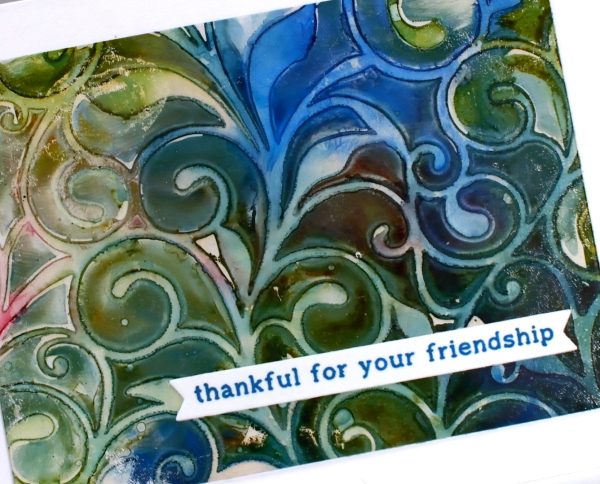
The pretty twirly patterns are from the Lavinia ‘leaf trails’ stencil. Lavinia has lovely organic stencils which often feature in my gel prints. I can’t remember the exact alcohol inks I used but the technique works with all sorts of colour combos so pick your faves. No surprise to see blue in my mix. I have mentioned before that I often gel print on printer paper but these panels I pulled with thick cardstock so when it came to making cards I just cut some rectangles from the print and added them to white card bases along with sentiments from Taylored Expressions.
Alcohol Ink & Foil – Video
Posted: April 17, 2024 Filed under: Alcohol Ink, grafix, Penny Black, Tutorial | Tags: Alcohol Ink, grafix, grafix craft plastic, Penny Black stamps, Ranger Alcohol Ink, video 4 Comments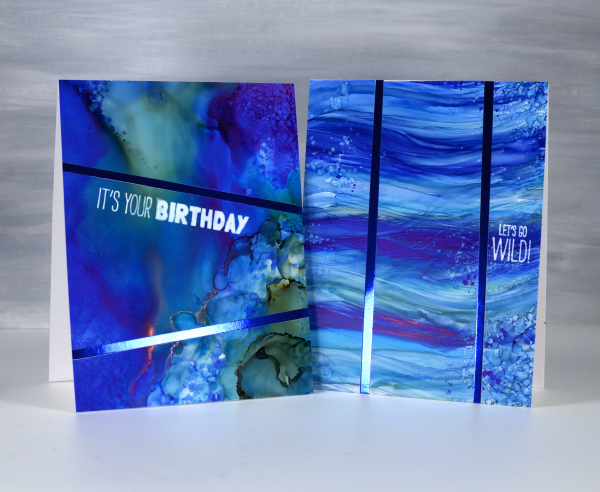
Recently I spent a happy few days creating with alcohol inks after quite a break. They did not disappoint! I am looking forward to more experimenting and maybe some Christmas card designs.
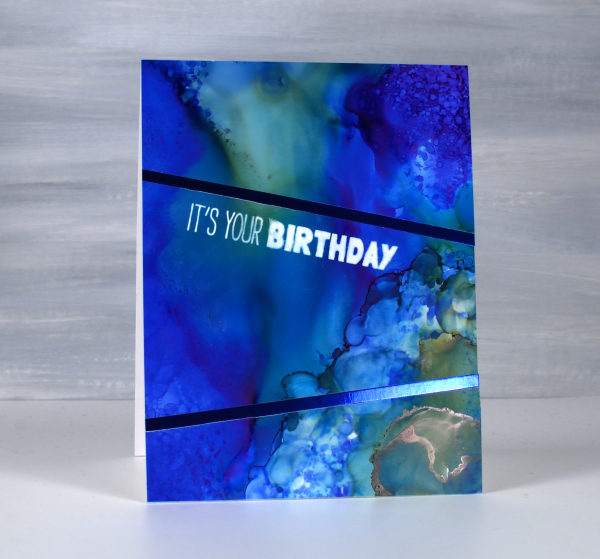
I created some cards using Grafix white craft plastic (also called bright white dura-lar), Grafix metallic foil board and Grafix double tack adhesive. These are all products I’ve used before and definitely recommend. You can see my process in the video below.

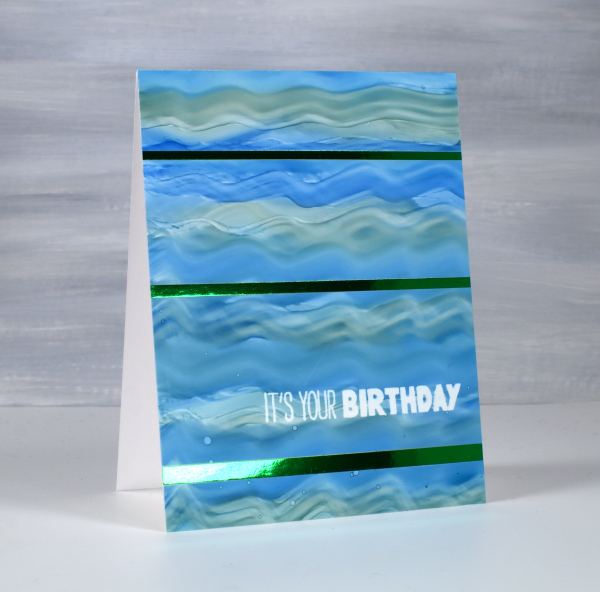
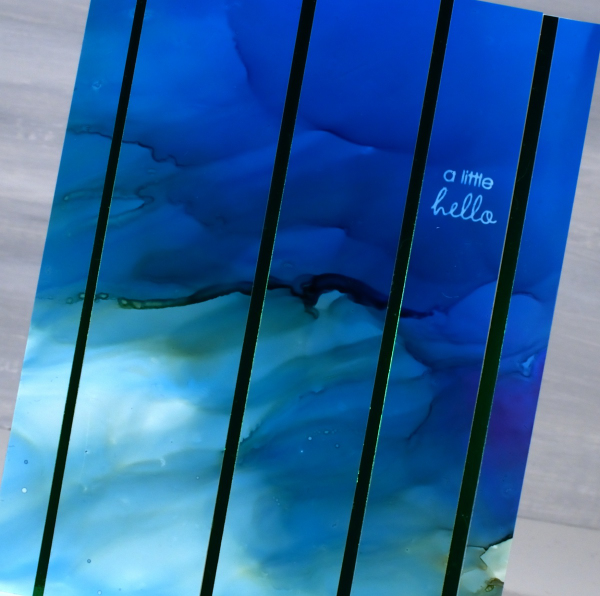
In the cards above and below you can see the wavy ocean effects I achieved easily by applying alcohol inks with a felt applicator. I love watching the inks continue to move after I lift the applicator.
The panels below were all made by moving the alcohol inks and isopropyl alcohol around. I tilt the panel and use an air blower to move the the ink. Where there was too much of one colour or too much intensity of colour I diluted with isopropyl alcohol or just dabbed ink off the panel with a paper towel
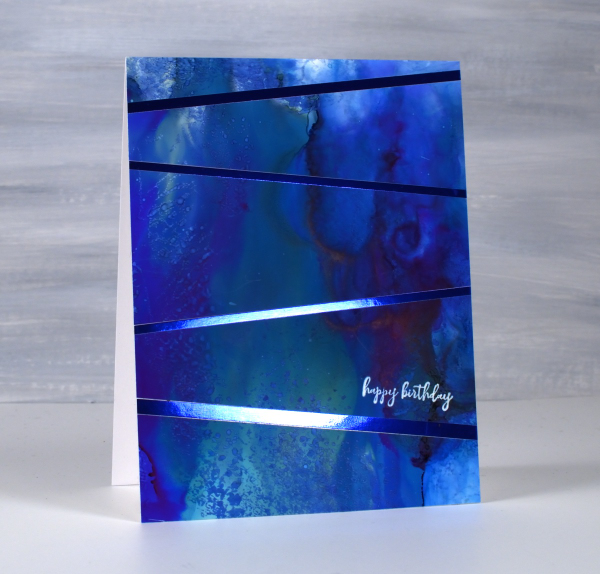
I used some of the green and the blue metallic foil board from Grafix to add to my designs. To see another project using the foil board click here.
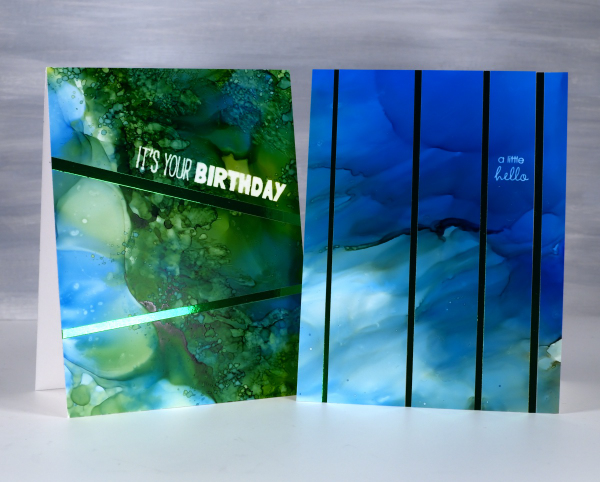
To add the sentiments I used an alcohol lift inkpad from Ranger. Its been a while since I’ve used alcohol lift ink and I was thrilled with how well it lifted the ink from the grafix white craft plastic. With a few repeat impressions and removal of diluted ink I was able to remove the bold green and blue inks to reveal sharp white words.
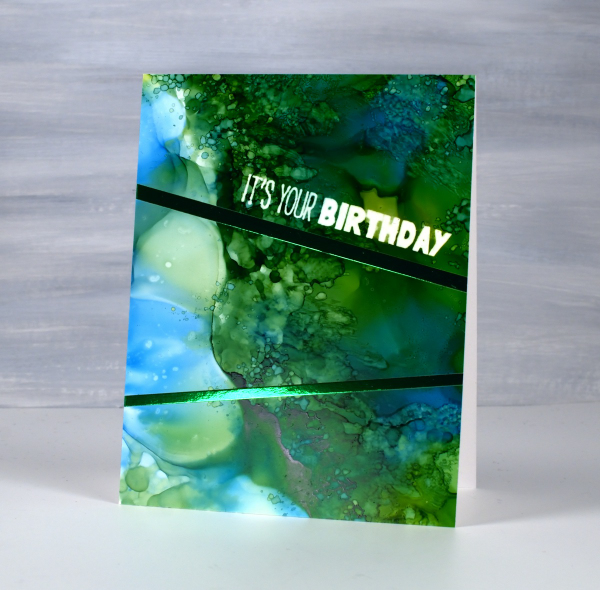
The sentiments are from the Penny Black ‘how sweet!’ set and ‘Let’s Go Wild’ set. Both are rubber cling sets which seem to hold the lift ink well and apply it evenly. This post includes affiliate links from Foiled Fox and Scrap’n’Stamp . If you buy through these links I receive a small commission at no extra cost to you.
Roses Stencilled
Posted: January 29, 2024 Filed under: Alcohol Ink, Echidna Studios, gel press, Roses digital stamp set | Tags: Alcohol Ink, Darkroom Door stamps, Echidna Studios, gel press, gel printing, Taylored Expressions 2 Comments
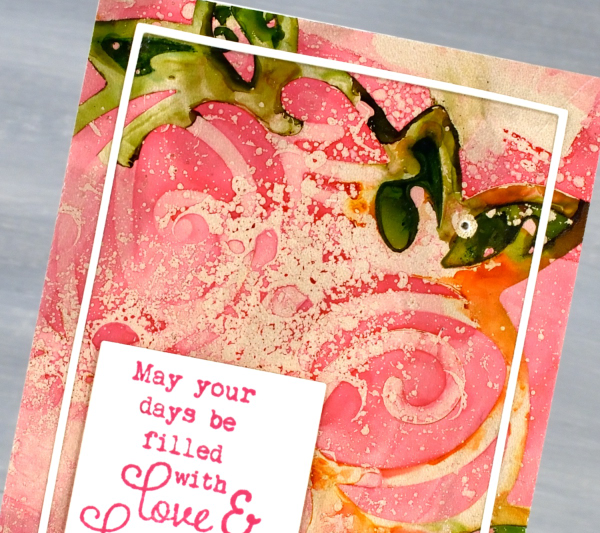
Last week I featured the Roses digital stamp set from Echidna Studios by cutting the rose trio from cardstock with my cricut. I have also cut dura-lar stencils with the same digital files. I cut them in different sizes for gel printing, blending or working with alcohol inks. To create both the pink and the orange panel I used alcohol inks on a gel plate and either dropped the rose trio stencil on top of the alcohol inks or lay the stencil down on the gel plate then added the inks. Both techniques work but by adding the alcohol ink after the stencil you have a bit more control of your ink placement. But you know alcohol inks; they kind of have a mind of their own.
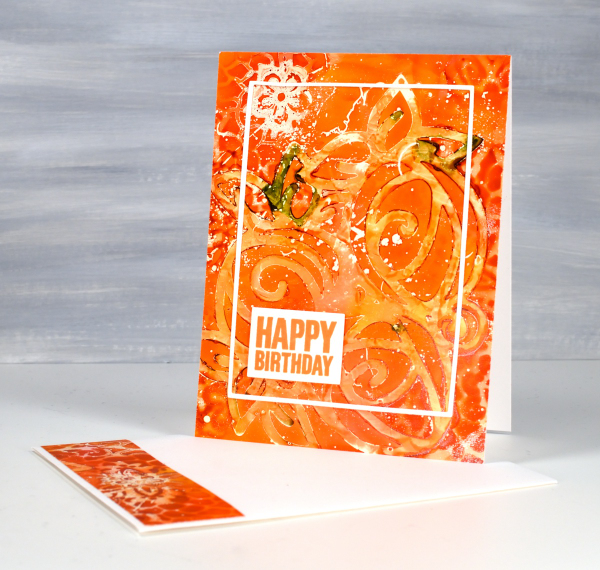
On the card above you can see two patterns. The roses stencil was laid down on the inked gel plate first so you can see the whole design. The Finnabair/Prima ‘floral net’ stencil was laid over the top so there are snatches of that pattern around the edges where it made contact with the alcohol inks. If you are interested in using alcohol inks on the gel plate, check out my video here.
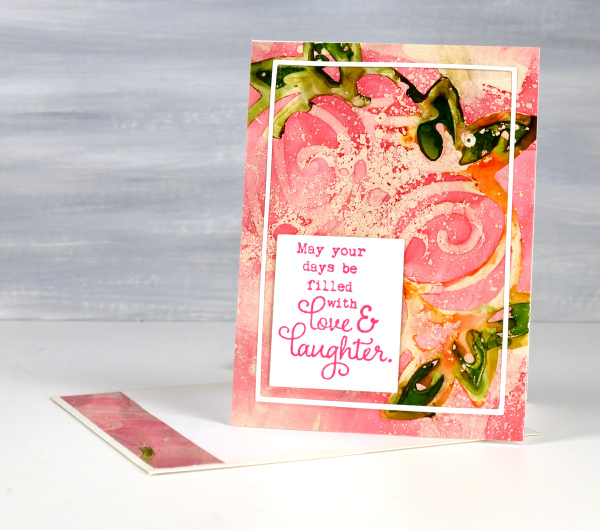
You can see from the photo at the top of the post that the pink one is a smaller card; it’s 5″ x3¾. This print doesn’t include a second stencil pattern but does have some isopropyl alcohol splatter adding interest. The sentiment is from Taylored Expressions ‘In & Out Birthday’ set.
The sentiment below is from the Darkroom Door ‘Happy Birthday‘ set.
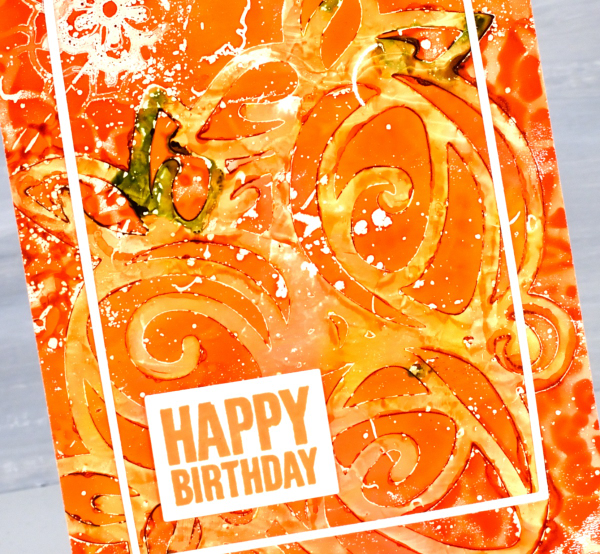
I used Waffle Flower A2 layers and Additional A2 layers die sets to cut the narrow border frames. These two sets have been so useful for cutting out panels and sentiments and adding very neat and correctly sized mats.

I’ll be back tomorrow to show you my project from Craft Roulette. Thank you to those of you who tuned in on youtube. It was lovely to have you there. Today’s post features affiliate links to The Foiled Fox. If you buy through these links I receive a small commission at no extra cost to you.
Tree Canopy
Posted: November 7, 2023 Filed under: Alcohol Ink, gel press, The Crafters Workshop, tree canopy | Tags: Alcohol Ink, gel press, gel printing, The Crafter's Workshop 8 Comments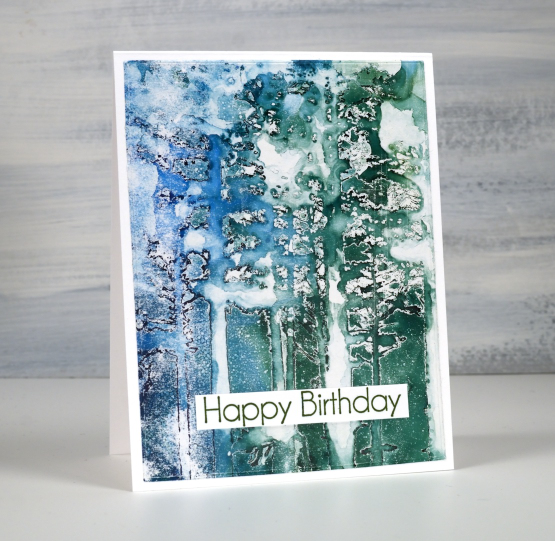
Some might say this print didn’t work and I admit, that was my first thought when I looked at it. On later inspection I decided I really liked its imperfection and incomplete nature. The technique is alcohol ink through a stencil on a gel plate. Once the alcohol ink dries I pull the print with acrylic paint. (I have several videos on my youtube channel showing the technique)

When applying alcohol ink through a stencil onto a gel plate I have had the most success when using stencils full of fine lines not large solid spaces. The tree canopy stencil from The Crafter’s Workshop has some very fine lines but quite a lot of solid tree trunks also. The alcohol ink pools under the expanse of stencil plastic and takes quite a while to dry. If you move the stencil before the ink dries it starts moving again. I don’t believe I waited long enough for the ink to dry so I have some distinctly tree-ish bits in my print and some very abstract blobby bits. Despite the indistinct image I love the atmosphere of the print which I pulled with white acrylic paint. The stencil is 6″x6″ and so is the gel plate I used so I chose the best part of the print to make my 4.25″x5.5″ card. The sentiment is from Taylored Expressions ‘In & Out birthday’ set.
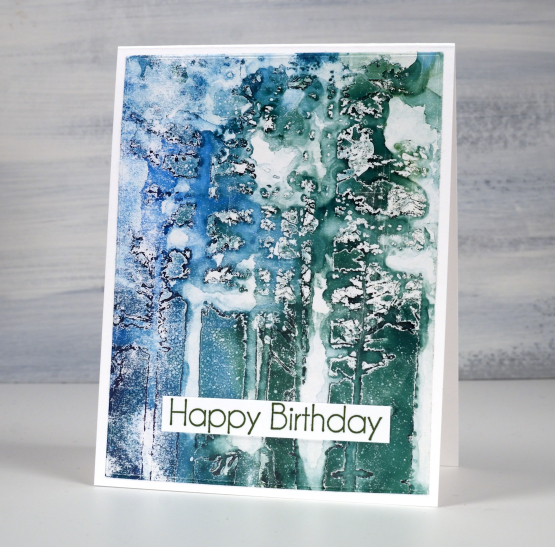
So let me know, is this too abstract for you or do you see a bit of whimsical forest atmosphere in there?
Today’s post features affiliate links to the following companies. If you buy through these links I receive a small commission at no extra cost to you. The Foiled Fox & Scrap’n’Stamp
Printed Baubles – short video
Posted: October 24, 2023 Filed under: Alcohol Ink, Echidna Studios, entwined, gel press | Tags: Alcohol Ink, Echidna Studios, gel press, Penny Black stamps, Stampin Up, Taylored Expressions 6 Comments
Last month I posted a sped up video on instagram showing how I printed alcohol ink patterns through the entwined stencil onto my 5″x7″ gel plate. I planned to add it to youtube as a vertical ‘short’ because not all my blog readers and youtube followers are on instagram. Sadly I discovered a ‘short’ on youtube must be 60 seconds or shorter. My sped up video was #shortnotshort at 77seconds. I decided to post it on horizontally on youtube anyway so I could share it here along with the cards I made from the panel.
The print you will see in the video above shows how I created the alcohol ink pattern through a stencil then pulled the print on printer paper with acrylic paint. I know there is no narration along with this very short sped up video but I go through the process in more detail with less speed in a couple of other recent videos here and here.

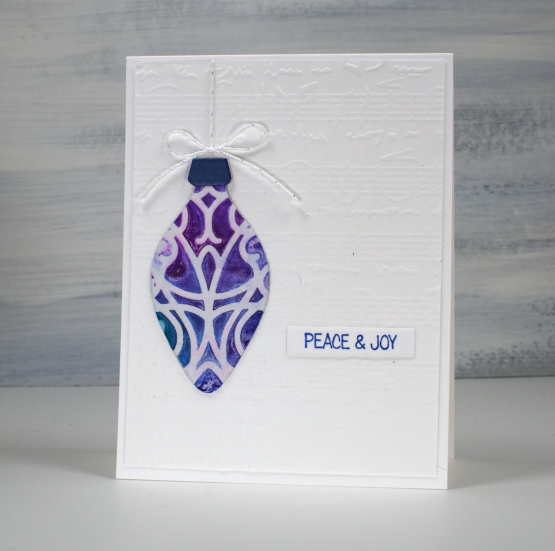
To make the print sturdy enough to die cut I used double sided adhesive to attach the print to thick cardstock. I used dies from a stampin up set ‘holiday ornaments’ which is possibly retired. I borrowed the set because I thought the finial style suited the symmetry of the print.
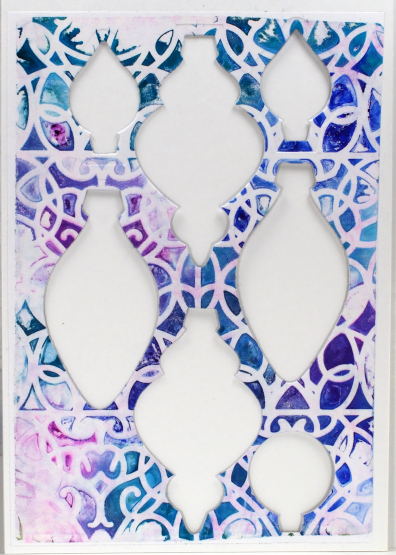
As I often do with a patterned busy element I embossed white panels to be the background. I used Taylored Expressions sheet music embossing folder, an Spellbinders in the pines folder and the one below that I don’t know the name of. The little sentiments from my well used Penny Black set, ‘holiday snippets’.

The card bases and embossed panels are Neenah solar white 110lb cardstock. That is four more cards added to my Christmas card pile which is definitely not a big enough pile just yet. At class today a few people said they had finished all their Christmas cards, but others were yet to start so I feel happy somewhere in the middle!
Today’s post features affiliate links to the following companies. If you buy through these links I receive a small commission at no extra cost to you. The Foiled Fox & Scrap’n’Stamp
Artsy Alcohol Ink on the Gel Plate
Posted: September 26, 2023 Filed under: Alcohol Ink, artsy stems, Darkroom Door, gel press, Tim Holtz | Tags: Alcohol Ink, Darkroom Door stamps, gel press, gel printing, Ranger Alcohol Ink 4 Comments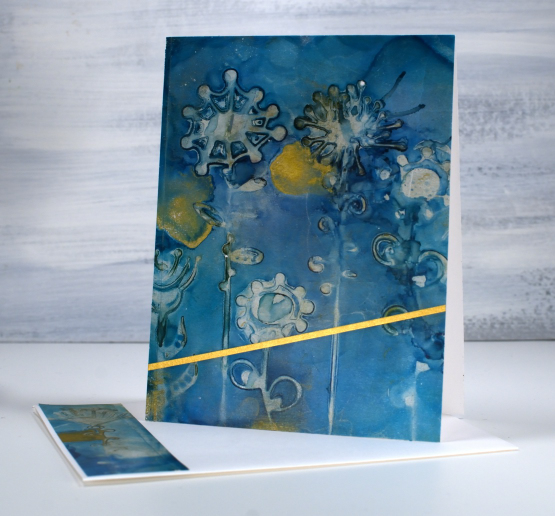
I have a couple of cards made from alcohol prints on the gel plate which is the technique feature in my last two youtube videos. I love the colours in this one and the funky patterns made using die-cut artsy stems, which are Tim Holtz dies.

The technique used in the recent youtube videos involves stencils not die-cuts but the effect is the same when the die-cuts are cut from stencil film or similar thin non-porous material. I use films from Grafix, either matte duralar or craft plastic.
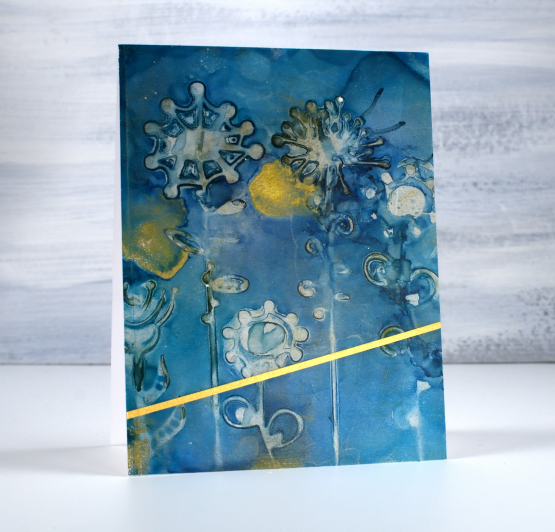
I can’t remember the exact inks I used for the panel above but my guess is a deep blue such as glacier as well as some gold mixative or alloy ink. I pulled the print with the transparent gold paint used in this video so the panel has a subtle shimmer to it in real life. I loved the pattern so much I decided to add the narrow strip of gold but no sentiment.
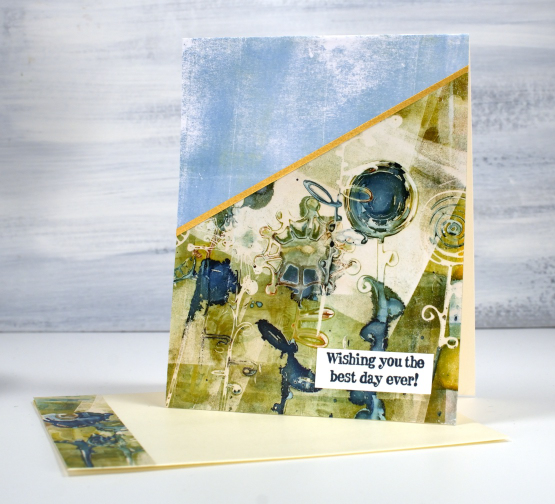
The second card was also made using alcohol inks on the gel plate but is a more grungy print due to the mix of green and cream paint used to pull the print and the mix of yellow, green and blue alcohol inks used to make the pattern on the gel plate.
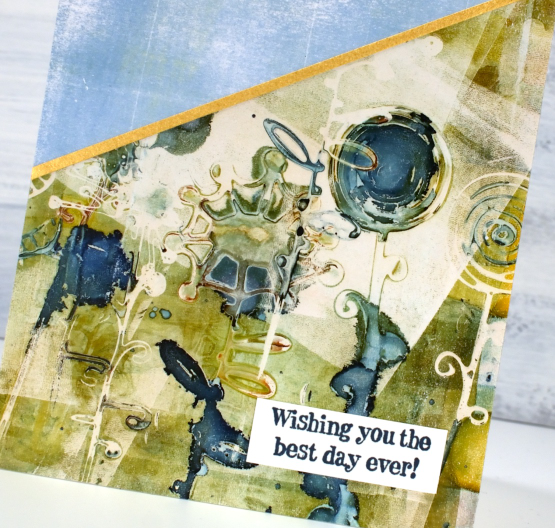
Rather than use the whole panel I added a simple blue gel printed piece to the top of the card front and once again a gold strip of cardstock. The sentiment is from the Darkroom Door happy birthday set.

I hope you enjoy these two examples of what can be made from alcohol ink gel prints. Let me know if you try the technique.
This post features affiliate links to the Scrap’n’Stamp. If you buy through these links I receive a small commission at no extra cost to you.
More Alcohol Inks on the Gel Plate
Posted: September 25, 2023 Filed under: Alcohol Ink, Dies, Flutters, gel press, Lavinia, Penny Black, pods stencil, Taylored Expressions | Tags: Alcohol Ink, gel press, gel printing, Lavinia, Penny Black creative dies, Taylored Expressions 1 Comment
Using alcohol inks and stencils on the gel plate is a bit of an addiction for me right now so I filmed another one to show you. A friend let me know that if you receive my blog posts by email the video doesn’t show up in the email. To see the video just click on the title of the blog post and it will take you to my blog. If you would like to subscribe to my youtube channel too that would be delightful.
I started this print with the Lavinia pods stencil already covered in ink and then added more ink and isopropyl alcohol when it was on the gel plate. Take a look at the video below to see the process.
I would love to hear if you try this technique. As I mentioned last week I like pulling the prints with paper or cardstock because they are surfaces that I wouldn’t normally use with alcohol inks.
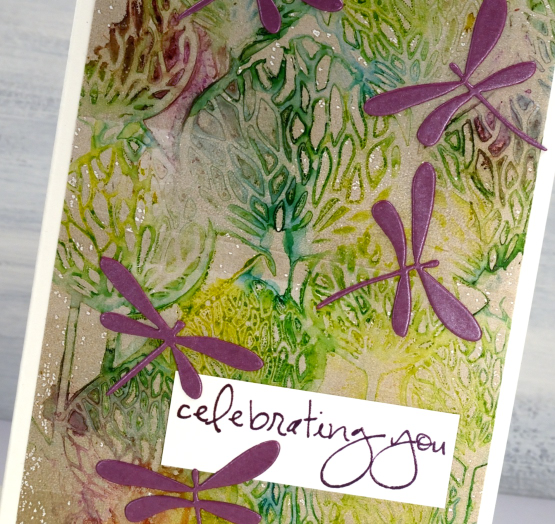
The finished card does include most of the print; it is a larger size than my usual A2 cards. I decided to add the Penny Black dragonflies in the wine colour which matches the alcohol ink I added very sparingly. In retrospect you will probably agree I could have added more. The sentiment is from Taylored Expressions ‘In and Out Birthday’ stamped in Chianti versafine clair ink.

My blog features affiliate links to the following companies. If you buy through these links I receive a small commission at no extra cost to you.
Ecstasy Crafts (Ecstasy Crafts offers a discount code heathertecs10 you can use for a 10% discount at checkout)
Alcohol Inks + Stencil on the Gel Plate
Posted: September 18, 2023 Filed under: Alcohol Ink, Dies, gel press, Lavinia, Penny Black, Tutorial | Tags: Alcohol Ink, gel press, Lavinia, Tutorial, video 5 Comments
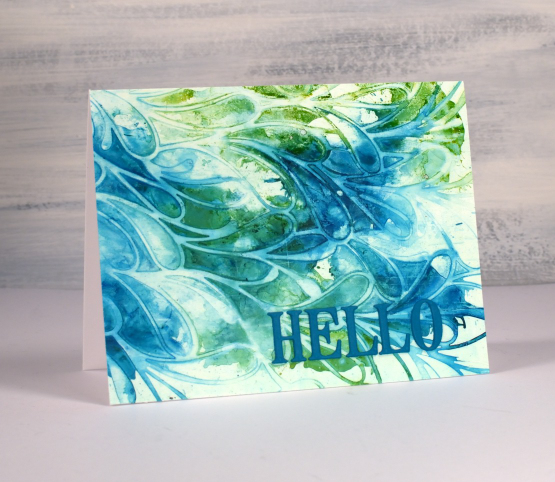
Recently I posted a card featuring a gel print made with alcohol inks and a stencil. You can check out that card here. There was quite a lot of interest in seeing a video of my process so that is what I have for you today. One of the bonuses of this technique is the way I can make more than one print from the same initial application of alcohol ink. I worked with T-Rex alcohol inks on a 5″x7″ gel plate.

As you will see in the video the first card (shown above) is made from the first print pulled from the gel plate.
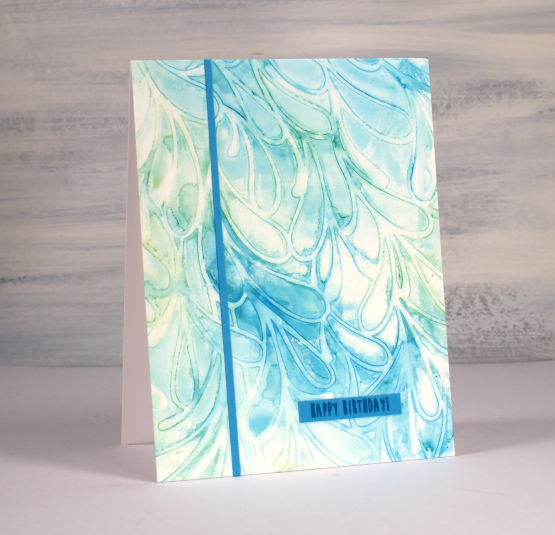
The second print pulled from the gel plate features the same inks but they are more muted because I diluted them to move them from the stencil to the plate. I quite like the softness of the second print.
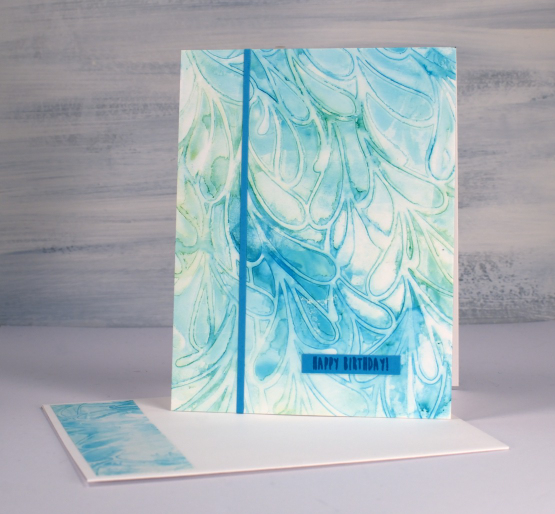
If a print works for me and honestly, they don’t all work, I often don’t want to cover them up with extra decoration or die cuts. That’s why I kept these card designs very simple with just a die cut ‘hello’ added to the first card. The second print which I made into the card below features an even smaller birthday sentiment and one thin strip of the same cardstock.

One of the reasons I like to work with alcohol inks on the gel plate is the fact that I can pull the prints with a piece of paper, in the case of these prints I used printer paper. When I work with alcohol inks apart from the gel plate I generally use a thicker plastic surface such as yupo or craft plastic. The inks move beautifully on those surfaces but the plastics are bulkier and a bit more expensive so it is nice to have the gel plate + paper option. The featured prints from today’s video were done on a 5″ x 7″ gel plate which meant I could get a 5.5″ x 4.25″ card front as well as a left over strip to add to the envelope.
If you are new to gel printing in general and would like to know more about creating a range of patterned prints please consider my online class, Gel Print Journey, where I cover all the basics with acrylic paint and all sorts of patterned and textured items. If you purchase any of my online classes before the end of September use the code: ENDOFSUMMERSALE for a 20% discount.
Botanical Dream
Posted: August 30, 2023 Filed under: Alcohol Ink, botanical dream stencil, gel press, gelli plate, Taylored Expressions, The Crafter's Workshop, The Crafters Workshop | Tags: gel press, gel printing, Ranger Alcohol Ink, Taylored Expressions, The Crafter's Workshop 7 Comments
I think you’ve noticed my love of gel printing. Let me assure you it hasn’t diminished at all. Today’s card features an alcohol ink and stencil print completed on the gel plate then lifted with a layer of acrylic paint.

I’m not sure which alcohol inks I used but I am pretty sure there was a cloudy blue and a brown involved. I’ve learned to like blue and brown combos over recent years which has surprised me a bit. Often we use alcohol inks only on plastic surfaces such as yupo or craft plastic. What I like about using alcohol inks on the gel plate is the way I can lift the print with any paper at all. I plan to make a video showing this technique so stay tuned.

The lovely stencil featured here is called botanical dream from The Crafters Workshop. All the little spaces trap alcohol really well making it a great choice for this technique. I let the stencil sit on the alcohol ink pattern for a while so it dries then lift the print with acrylic paint. I finished the card with a cute greeting from the Taylored Expressions set ‘In & Out Birthday. The set is full of pretty fonts.
My blog features affiliate links to the following companies. If you buy through these links I receive a small commission at no extra cost to you.
Ecstasy Crafts (Ecstasy Crafts offers a discount code heathertecs10 you can use for a 10% discount at checkout)












