Mushrooms & Pods
Posted: May 23, 2023 Filed under: Classes, Darkroom Door, fairy toadstool, gel press, Lavinia, mini meadow mushroom, online class, pods stencil, woodland fern | Tags: Darkroom Door stamps, gel press, gel printing, Lavinia, online class 6 Comments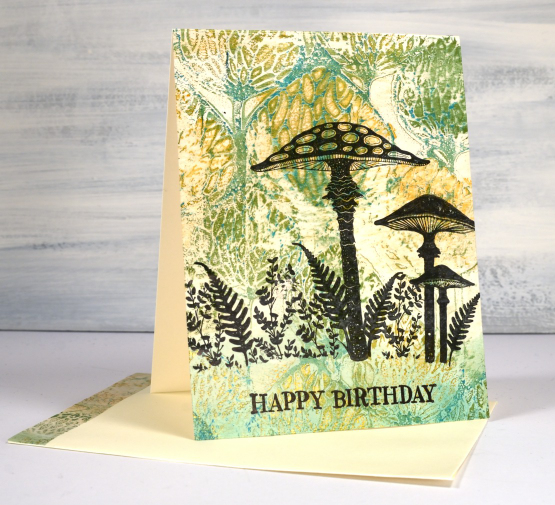
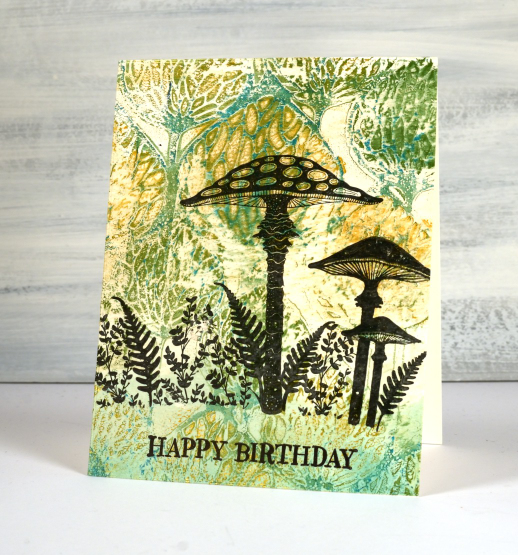
I often combine my gel prints with stamping and on this card there is a bit of brand matchy-matchy which really works for a whimsical look. The print is a ghost print made while filming my new class Gel Print Journey. There is a surprising amount of paint and pattern on this ghost print; sometimes they are a lot more ghostly!
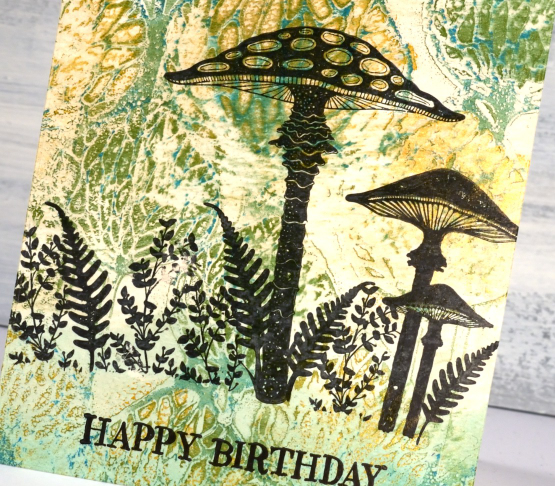
The gel print was made with the Lavinia stencil ‘pods’. Last week when stamping with a friend I was able to pair the background with some Lavinia stamps. I don’t own any…yet but I did enjoy the fun of arranging little scenes with their pretty silhouettes.
If you are not familiar with the world of ghost prints or stencil prints or even gel printing, check out my new online course. The TEAMBLOG10 discount is available until the end of May so now is a great time to join me.
(Compensated affiliate links from Foiled Fox, Ecstasy Crafts* & Scrap n Stamp)
*if you visit the Lavinia products at Ecstasy Crafts make sure you use the heathertecs10 discount code at check out
Gel Printing with the Strands stencil
Posted: May 18, 2023 Filed under: Classes, Dies, Echidna Studios, Flutters, gel press, online class, Penny Black, rustic birdhouse, strands | Tags: Echidna Studios, gel press, gel printing, Penny Black creative dies, Penny Black stamps 4 Comments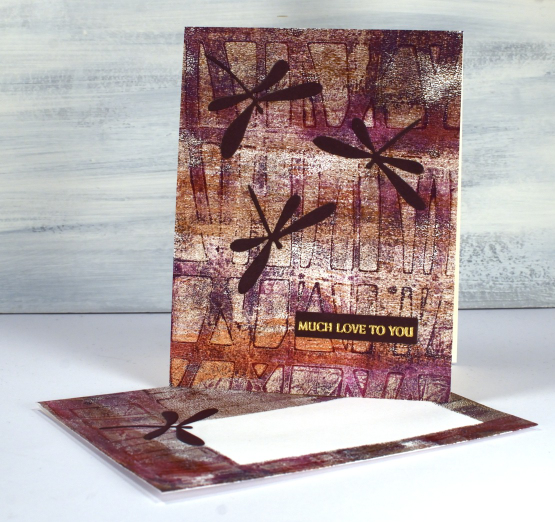
A stencil gel print for you today. I created this distressed print on a large gel plate so I could pick up a card front and an envelope print at the same time. If you don’t have a large plate you could just use the same paint colours and stencil on a second print. Just in case you didn’t catch my news yesterday, my new online course Gel Print Journey is now available! (And there is a discount for blog readers TEAMBLOG10)
The stencil is called ‘strands’ and it is a digital design I created and have made available in the Echidna Studios etsy store. The bold print shown on the card above was made with copper, burgandy and purple paint so I chose a dark burgandy cardstock to cut dragonfly elements and a sentiment strip. Printing directly on the envelope is a easy way to co-ordinate with your card and I placed a sticker on the white envelope before printing to preserve white space for the address. I think I might make a video of this process because it’s quick and effective, a combination I like.

The pattern on the second card is very muted because it is a ghost print, the leftovers on the plate after I pulled the one above. I cover this technique in my new online class using a range of different stencils and colour combinations.
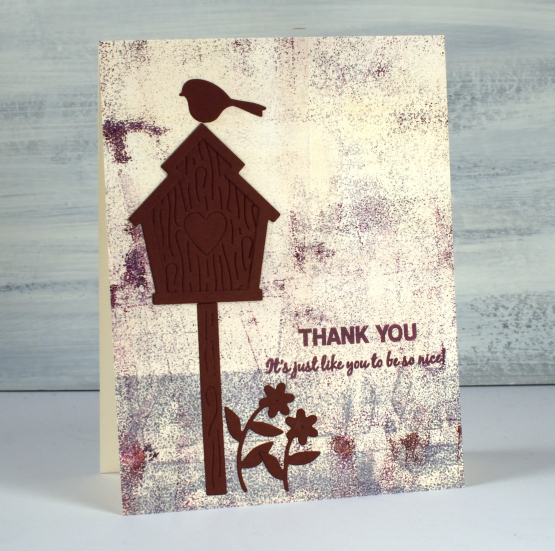
Even though ghost prints are often patchy I like using them for collage or backgrounds as I have here. The line between cream and grey ended up looking like a path or lawn and I just like the unique grungy texture.
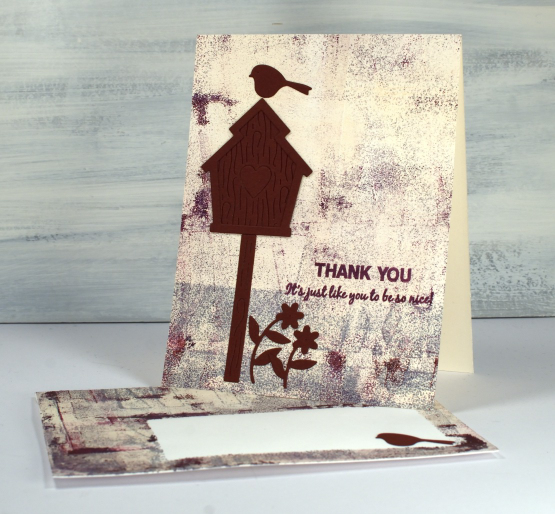
The dies and stamps I used to finish the cards are all Penny Black, those dragonflies on the first card are some of the first dies I ever got and they’re still a favourite.
(Compensated affiliate links from Foiled Fox & ScrapNStamp)
Gel Plate Plant Prints
Posted: May 16, 2023 Filed under: Classes, gel press, online class | Tags: Classes, gel press, gel printing, online class 6 Comments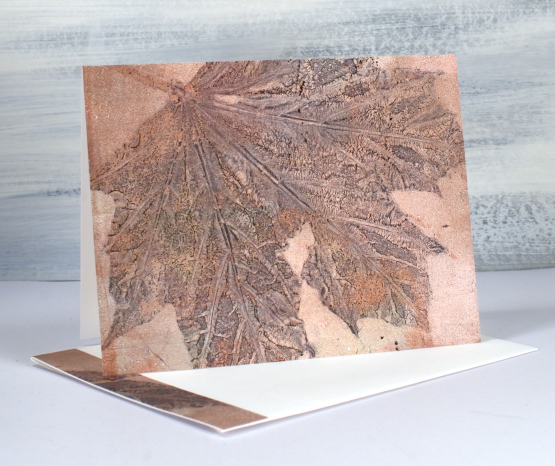
I have a few more plant gel prints to share with you. I put these ones together as a gift a while ago but saved this post to co-ordinate with the launch of my new online class Gel Print Journey. This class has been in the works for a while so I am excited to finally share it with you. It is an introductory class covering printing with acrylic paints and includes loads of techniques, hours of video instruction and a few inspiration galleries at the end so you can see what I do with some of the prints. (there is a discount code at the end of this post)
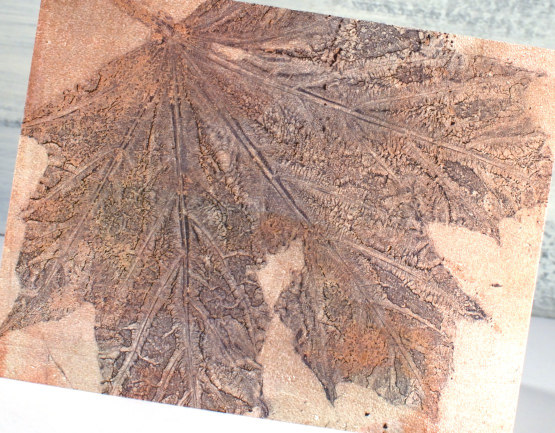
In the new class three of the lessons cover leaf, grass and feather prints teaching the techniques used to make the cards in today’s post. For the card above I used one large leaf but often I use a mix of leaves, grasses and when available, flowers.
Because I made all these prints with a 6″x6″ gel plate I was able to cover the card front and save a strip to add to the edge of the envelope. I used double sided adhesive to add these prints to my card fronts but a tape runner or gluestick would also do the job.
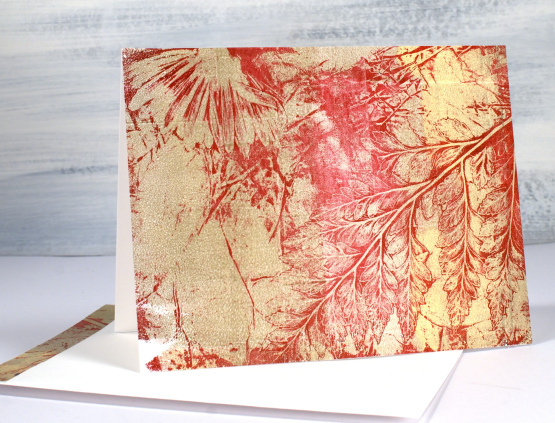
As you can see in the print above ferns print very well. I rolled red paint on my plate, pressed a fern frond and a flower into the paint, removed paint all around the elements with tissue paper then pulled the remaining print with gold paint. So much fun! Now that I have plants growing again in my garden I will be creating a new pile of nature prints.
I promised to let you know when my class launched and because my blog readers are such an encouragement to me feel free to use the discount code TEAMBLOG10 for a 10% discount when you register.
(Compensated affiliate links from Foiled Fox & Scrap n Stamp)
Sun Kissed
Posted: May 15, 2023 Filed under: Penny Black, sun kissed | Tags: Fabriano Watercolour Paper, Penny Black stamps, Ranger Distress inks 5 Comments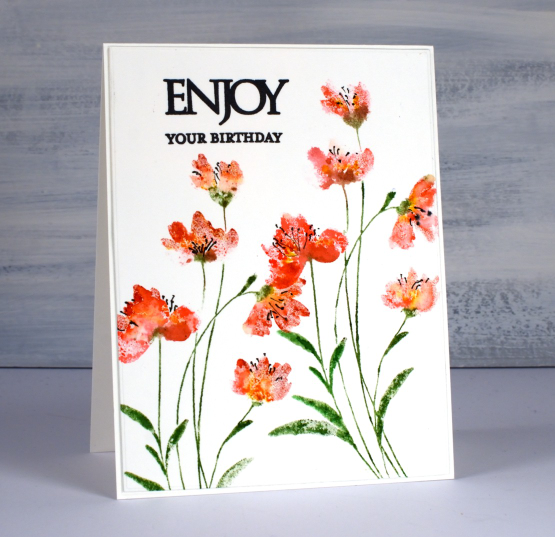
These breezy flowers are from the new Penny Black release. The stamp is called ‘sun kissed‘ and I have stamped it twice on this card. I used both distress markers and ink pads to ink the stamp; I know the markers are being discontinued but while I have them I will keep using them.
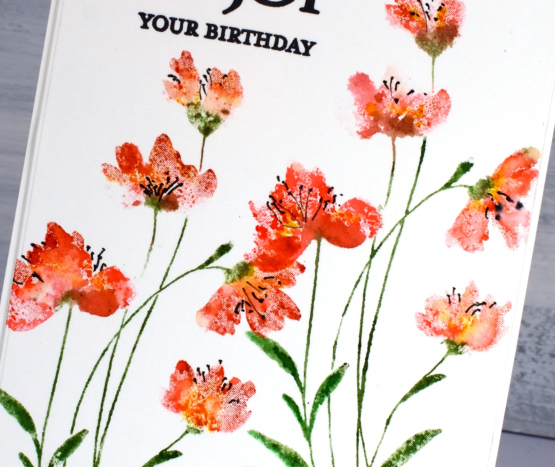
I inked the flowers with barn door and worn lipstick, spritzed the stamp lightly then stamped on hot pressed watercolour. Often I follow this step by blending the ink on the petals with a damp paintbrush. I decided not to do that this time as I liked the soft ‘impressionistic’ look of the uneven coverage. I inked and stamped the stems with mowed lawn then added some fossilized amber to some of the flowers.
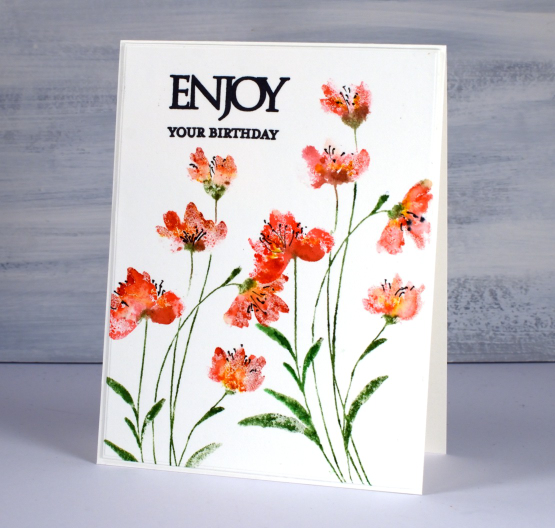
I added fine lines and dots to each flower head with a fine black marker then added a sentiment from the PB ‘Enjoy builder set’. The builder sets include one or two large solid stamps then a range of phrases or words to stamp adjacent to the large word. Once again I decided not to add any background blending or shading. I like the simple clean look of the stem and flowers on white and it gives me a chance to get to know the stamp before combining it with other stamps or techniques.
(Compensated affiliate links from Foiled Fox & Scrap n Stamp)

Hollyhock Heaven Indeed!
Posted: May 11, 2023 Filed under: hollyhock heaven, how sweet, Penny Black | Tags: Fabriano Watercolour Paper, Penny Black stamps, Ranger Distress inks 9 Comments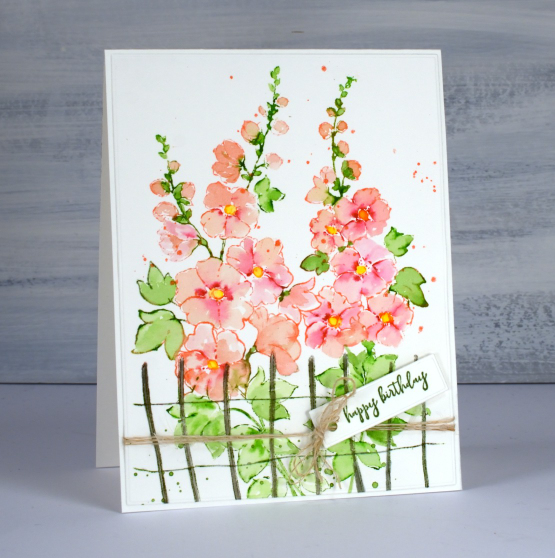
This is the stamp I didn’t know I’d been waiting for until I saw it in the new Penny Black release! Hollyhocks are such beautiful flowers. I don’t have any in my garden so obviously I need some on my cards!
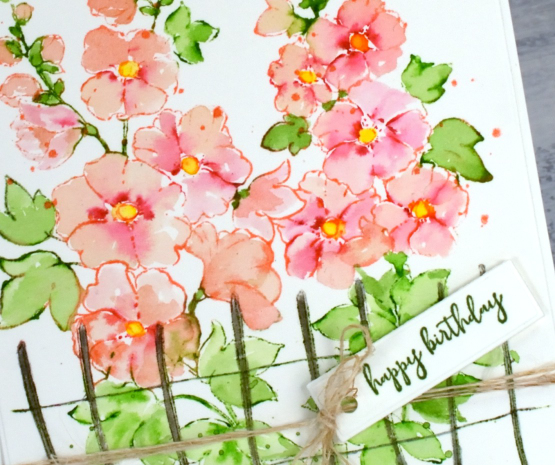
As usual I worked in the stamp positioner with hot pressed watercolour paper. I first inked the centres of the open flowers with a dark red zig clean color brush marker, spritzed with water and stamped. Next I inked the stems and leaves at the top of the image with a green zig marker and stamped. I used saltwater taffy distress ink to ink all the flowers wiping ink off where I could see there were leaves. This is a bit of a tricky step but a bit of green in the wrong place can usually be diluted and dabbed off with paper towel. I blended all the petals with a paintbrush pulling the dark red ink into the paler pink. When stamping the lower leaves with mowed lawn distress ink the fence ended up green so I went over that with some hickory smoke ink and a paintbrush. When I was sure the flower petals were dry I added yellow to the centres just like my reference photo. To finish I splattered some green and taffy ink, added a little greeting from the PB ‘how sweet!’ set and tied some twine to fit in with the little fence.
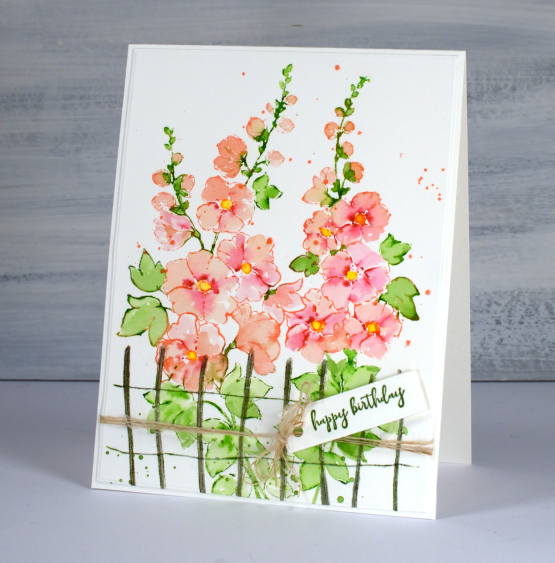
Isn’t this stamp a stunner? I can’t wait to try other colours and pair it with other florals.
Now back to my gel printing class; it’s not going to publish itself!
(Compensated affiliate links from Foiled Fox & Scrap n Stamp)
Close-up Blooms
Posted: May 10, 2023 Filed under: bud & bloom, Echidna Studios | Tags: Echidna Studios, Fabriano Watercolour Paper, Kuretake Zig clean color real brush markers, Penny Black stamps 6 Comments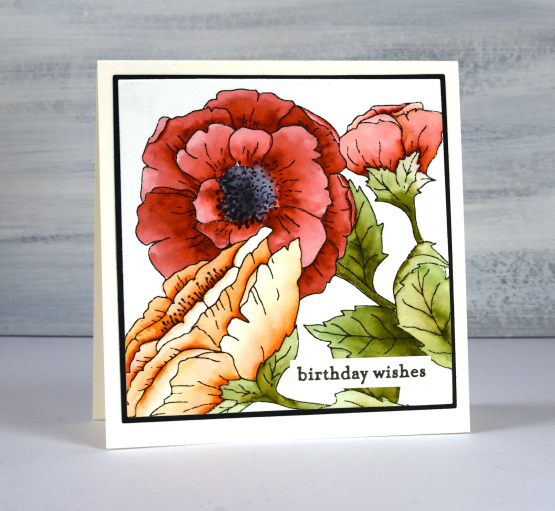
You’ve seen this digital stamp once before on my blog but it is much bigger this time. I printed it on hot pressed watercolour paper at a size that would fill the square card front. The set is called ‘bud & bloom‘ and this is just one of the three images in the set.
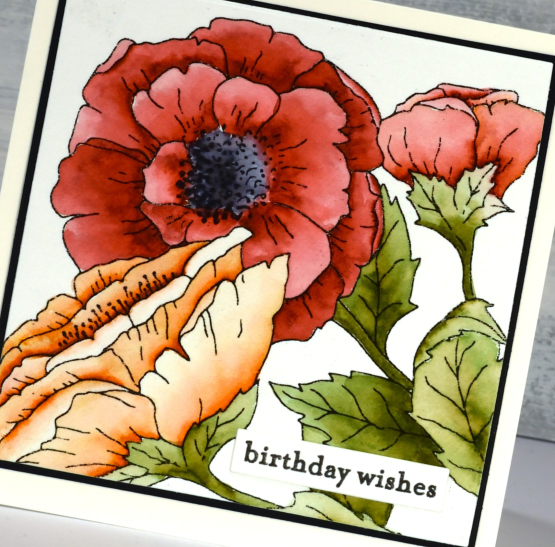
A bigger image fills the card front beautifully and is easier to colour. I enjoyed colouring this one while relaxing on the couch. I used zig clean color real brush pens which are highly pigmented. I was able to add intense colour to one side of the petals then blend it out with a waterbrush. It is easy to add a bit more ink if needed or add a different colour just by touching the tip of the brush pen to a wet area on the petal. The zig pens are easy to control and mine are lasting very well.
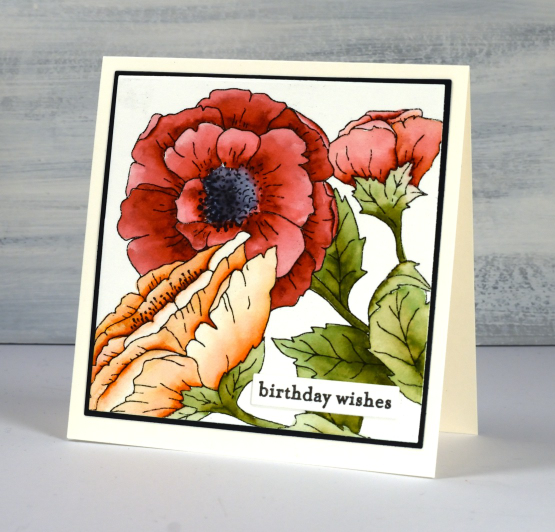
This time I kept the background clean and added a little Penny Black sentiment. If you haven’t visited the Echidna Studios etsy store lately pop over and see what’s new. There are a bunch of new stencil designs ready for cutting from a plastic film for stenciling or from cardstock to add to a card front.
(Compensated affiliate links from Foiled Fox & Scrap n Stamp)
Printed & Stamped
Posted: May 8, 2023 Filed under: Darkroom Door, French Script, Gazette, gel press, pocket watch, tickets, Wildflowers Vol 1 | Tags: Darkroom Door stamps, gel press, gel printing 13 Comments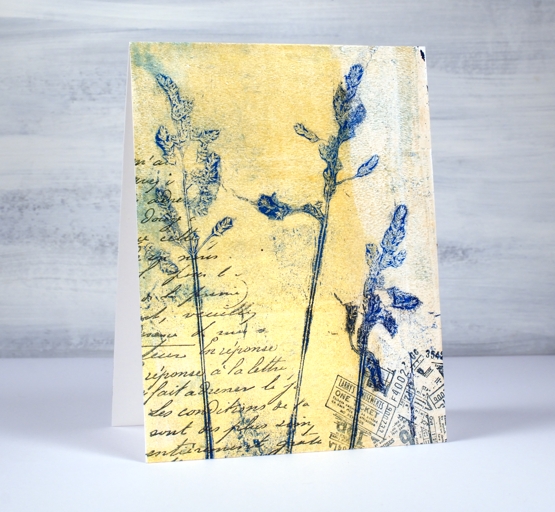
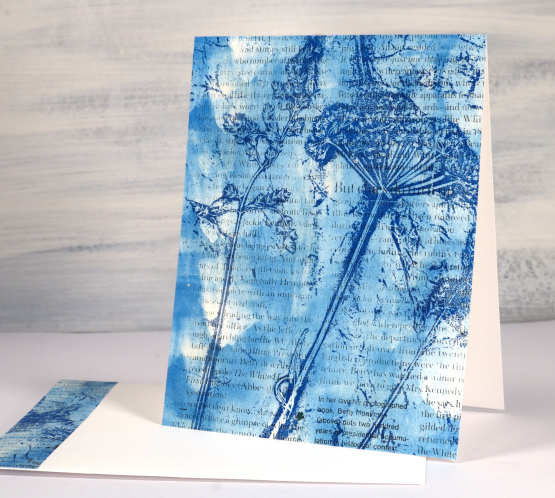
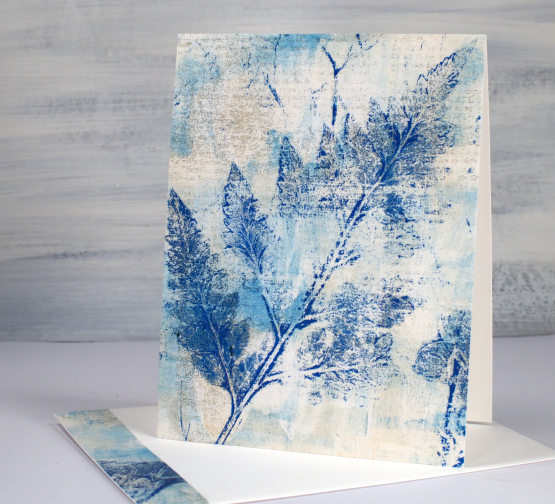
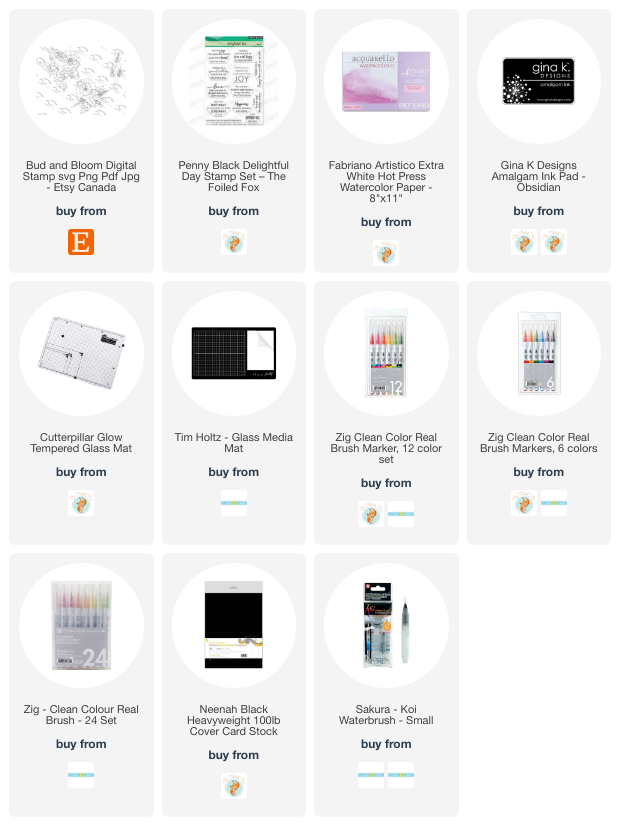
Now the grass has turned green I am looking forward to gel printing with fresh plants again. I have used some dried ones over the winter and also some I purchased but nothing beats pulling a few grasses, leaves or flowers from the yard to print immediately. On the card above and below I pressed grasses into blue paint on a gel plate, removed the surrounding paint with paper then picked up the whole print with white and yellow.
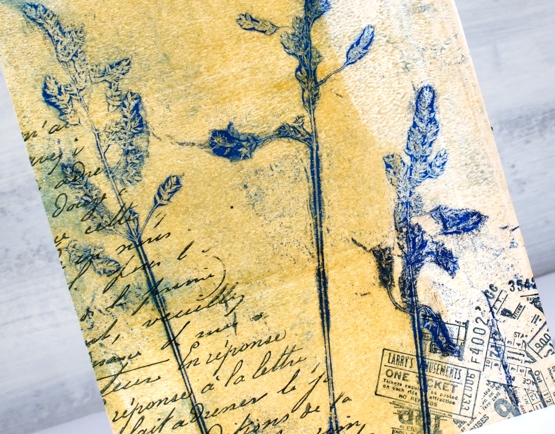
To turn the printed panel into a card I added stamping with Darkroom Door stamps in a collage style with a dark blue ink and attached the paper print to the card base with double sided adhesive sheets.

I used the same process to create another collage card adding stamping over a feather gel print. The Darkroom Door fine detail stamps once again add to the grungy printed background.

I left the cards blank to be used for any occasion. As you can see in both cards, the gel print isn’t the main feature, nor is the stamping; it’s the combination of grungy background and stamped elements that make these work for me. Depending on the size of the gel printed sheet it is usually possible to add a co-ordinating strip of the print to the envelope as well.
There are lessons on gel printing with grasses and feathers in my soon to be released online Gel Printing Journey class; I can’t wait to invite you in!
(Compensated affiliate links from Foiled Fox, Scrap n Stamp & Ecstasy Crafts)
Gel Print Mandala Thank You Card
Posted: May 3, 2023 Filed under: beaded mandala, Deco Frame, Dies, gel press, Penny Black, The Crafters Workshop | Tags: gel press, gel printing, Penny Black creative dies, The Crafter's Workshop 3 Comments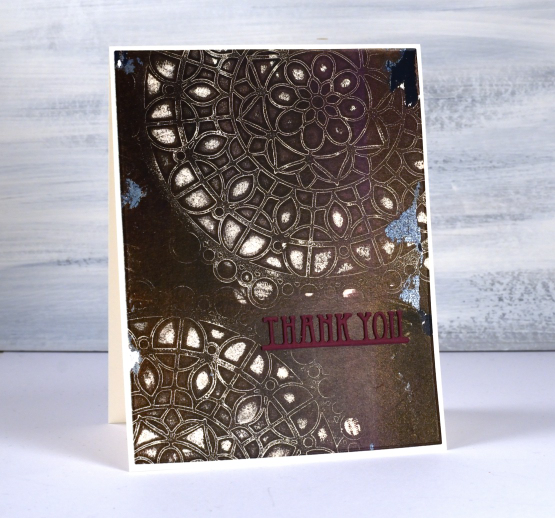
Gel printing continues to entice and delight me. This brown and burgandy print was done with a mandala mask from The Crafter’s Workshop; it’s called ‘beaded mandala’.
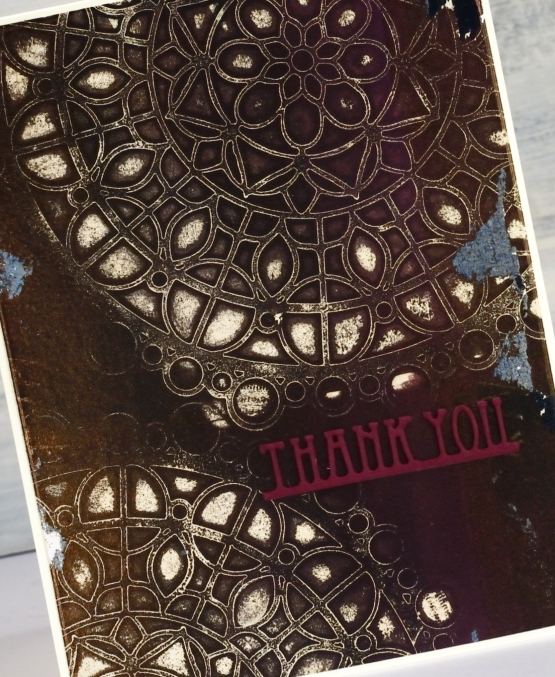
This print is a good example of the bonuses you pick up when you don’t start with a perfectly clean gel plate. If you look closely you can see some tiny remnants of text from an image transfer as well as the more obvious grey leftovers. I chose burgandy for the stacked PB diecut ‘thank you’ because there are some patches that look more burgandy than brown.

This technique with stencils is one of my favourites and is included in my upcoming online class Gel Print Journey. I am excited to be talking about it again despite the months that have passed since I began. I am back on it and excited to release it soon!
(Compensated affiliate links from Foiled Fox & Scrap n Stamp)
Lattice Blooms
Posted: May 1, 2023 Filed under: Brusho, Echidna Studios, lattice blooms, Paper Rose, Taylored Expressions | Tags: Brusho, distress oxide inks, Echidna Studios, Paper Rose, Taylored Expressions 3 Comments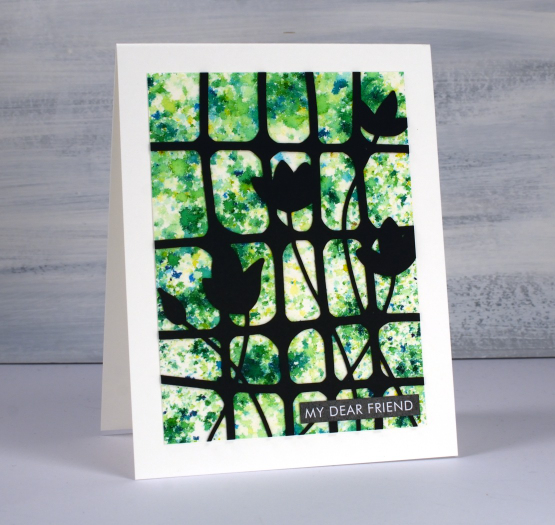
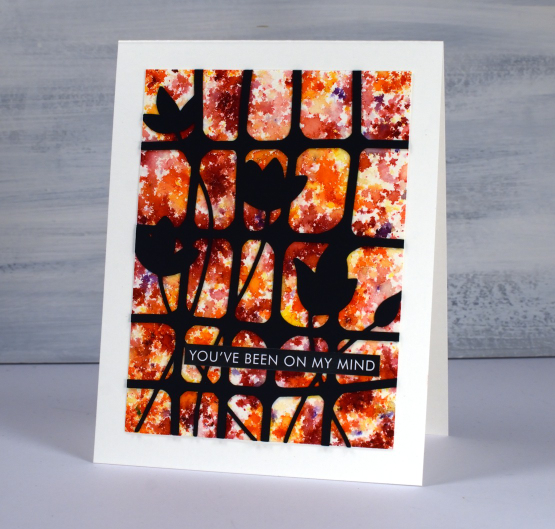
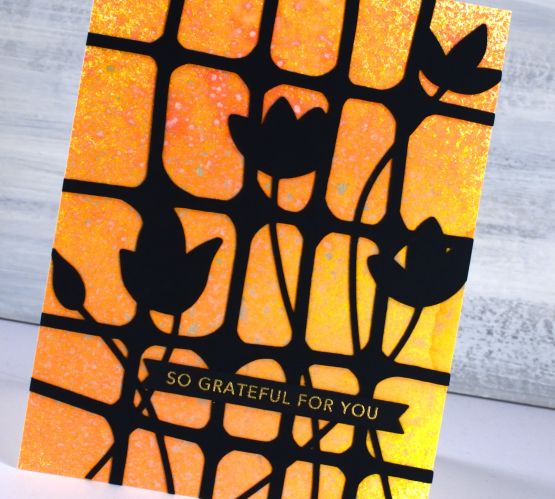
If you have used them you will have recognised at once that this is a brusho background and so is the next card with yellow, orange and red. To create a background like this with brusho you have to be patient and watch the brusho powder slowly react with spritzed water from above. If you don’t spritz enough water the powder stays dry; if you spritz too much water the diluted powders all run together giving you a blended background but not a confetti one like you see here. I worked on a panel of hot pressed watercolour paper and sprinkled brusho sparingly over it before spritzing with water.
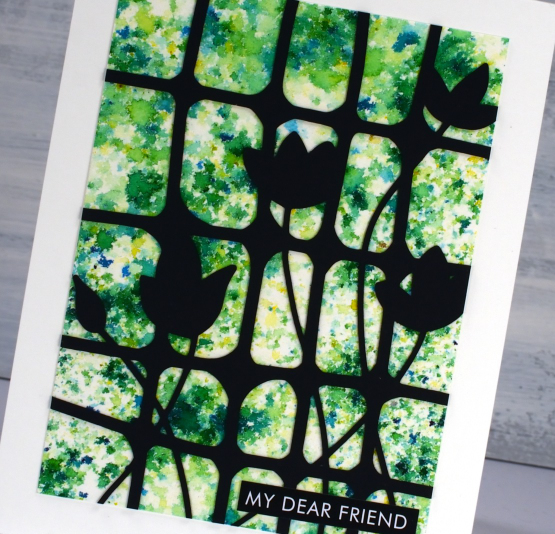
The lattice with blooms cut from black cardstock is another image I designed to be cut or printed. So far I have just used it on the cards featured today but I will also be using it as a stencil on my gel plate. The digital file can be found in the Echidna Studios etsy store.
To complete both brusho cards I used sentiments cut from the Paper Rose Studio ‘so extra’ supporting sentiments panels. There are loads of words and phrases to choose from.
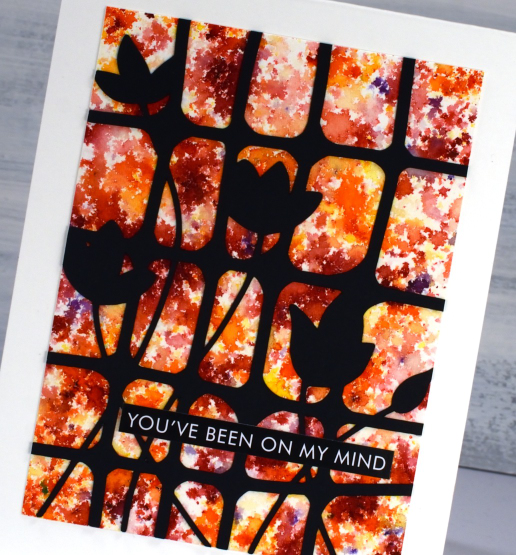
The card below also has a watercolour background but this one was done with oxide sprays. I have only recently dipped my toe in the oxide spray pool (just picture that literally for a minute!) With many oxide inks and many many distress sprays I didn’t think I needed the oxide sprays as well. To be clear I only have seven but with those seven I can get some very pretty backgrounds. Because the oxide formula reacts with water it also reacts with other sprays when you layer them. The pigments make them less transparent so the effect is quite speckly as you can see in the close up.
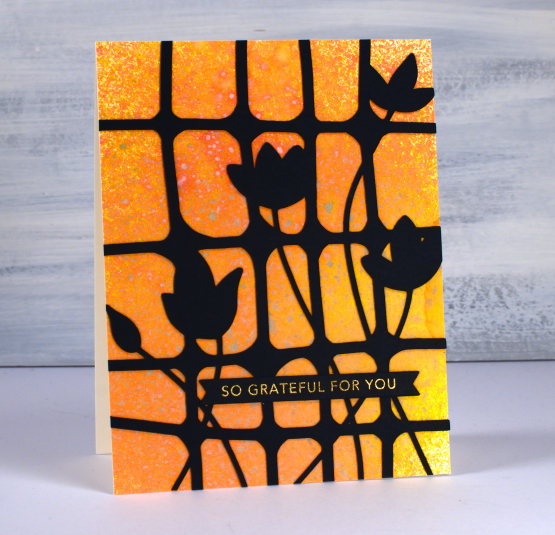
I cut the lattice blooms bigger for this card so it stretches from edge to edge. The card is finished with a Taylored Expressions sentiment strip embossed with gold. Those sentiment strips are still one of the cleverest ideas I’ve seen in stamp and die design.
(Compensated affiliate links from Foiled Fox, Ecstasy Crafts & Scrap n Stamp)
The World is a Garden
Posted: April 28, 2023 Filed under: Art Journal, daisy delight, Darkroom Door, eyes, Handmade book, sketched alphabet | Tags: Art Journal, Darkroom Door stamps, Fabriano Watercolour Paper, Ranger Distress inks 4 Comments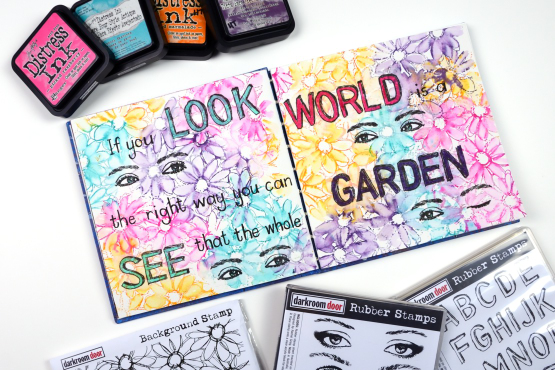
Do you recognise this set? It is the Darkroom Door ‘Eyes’ set I featured on a journal page a couple of weeks back. For this journal page I used a smaller pair of eyes and also one eye from the closed eye stamp so I could create a ‘wink’!
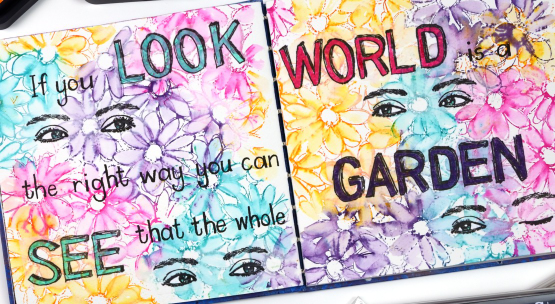
The background is stamped loosely with four bright distress inks and the DD ‘daisy delight’. When I say stamped loosely I was not looking for complete images so I inked sections of the stamp with a couple of inks then stamped on the journal page. I did the same again with a different pair of inks until I had filled both pages. Because distress inks react so well with water and my pages are cold pressed watercolour paper it was easy to blend the petals with a wet paintbrush. Where the inks overlapped I got some nice blends; there were a few muddy blends but overall look is of a garden bed of daisies which is what I wanted.
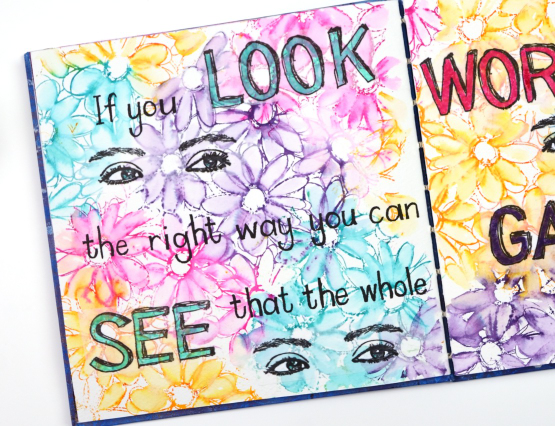
No surprise that I did not have the whole design planned out from the beginning so I had to work out the best way to add the eyes without disturbing the very dilutable flowers I had already watercoloured. I ended up stamping them on tissue paper and gluing them down with a gluestick so as to not add more liquid to the background. I also stamped the large letters for the quote on tissue paper using the DD ‘sketched alphabet’ stamp set. Having the eyes and the words stamped on tissue made it easy to play with the arrangement until I was happy with it. The smaller words making up the quote I wrote by hand with a black marker.

The quote is from ‘The Secret Garden’ by Frances Hodgson Burnett, a book I enjoyed reading as a child and a parent.
Just a quick question for you, did you try reading the quote straight across the two pages or did you see it went down the left then up to the right? Just wondering because I didn’t even think of both options when I was laying it out.
(Compensated affiliate links from Foiled Fox & Scrap n Stamp)