Foiled and Embossed ornaments – video
Posted: November 27, 2023 Filed under: grafix | Tags: grafix, Penny Black creative dies 5 Comments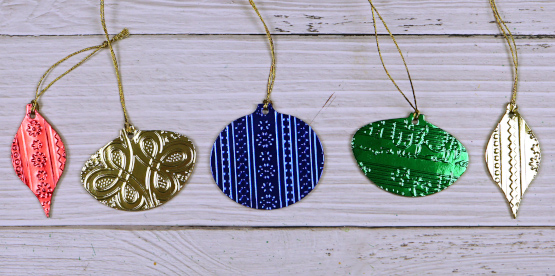
Recently I made a video for Grafix which involved some experimenting with their Metallic Foil board. I created some sweet little foiled and embossed ornaments and a card. I was very impressed with the way the foil board embossed. You can see the whole process in the video below.
The double tack mounting film worked very well also adhering the foil board to the chipboard. It made for some simple but very shiny, eye-catching ornaments. If you don’t have dies that cut chipboard you could always die-cut several baubles from cardstock and stack them to make a firm base for the foiled layers.

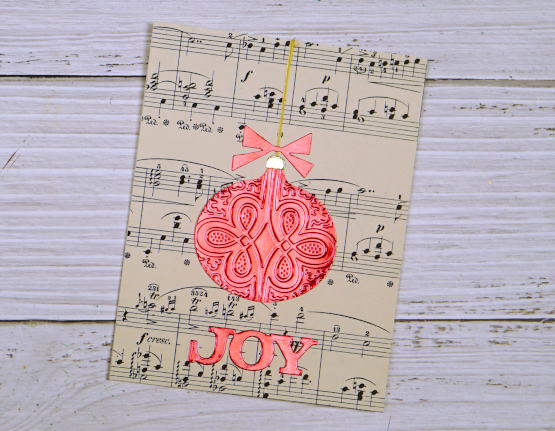
I added a single layer embossed bauble to a card front too and the shine of the foil board looks lovely on the very neutral vintage music paper. The ornaments and bow were all cut using the Sizzix ‘retro ornaments’ Bigz die and the word ‘joy’ was cut with the Penny Black ‘joyful winter’ die.
Christmas Filigree
Posted: November 23, 2023 Filed under: Christmas filigree, Dies, Echidna Studios, joy of giving, Penny Black, Taylored Expressions | Tags: digital stamps, Echidna Studios, Penny Black creative dies, Penny Black stamps, Taylored Expressions 2 Comments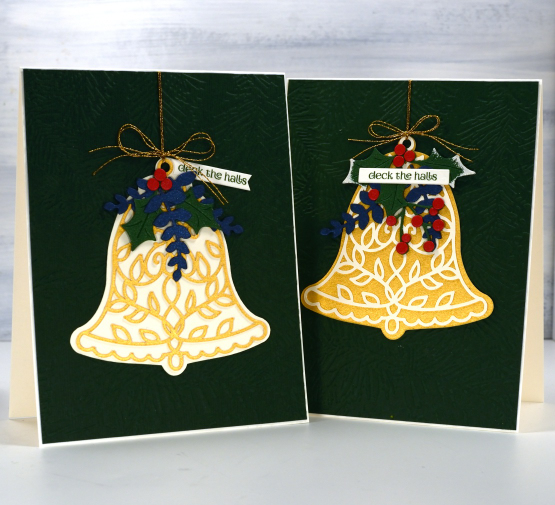
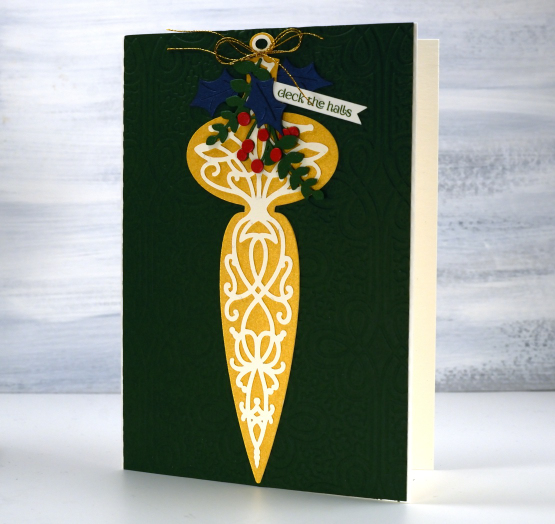
I am pretty excited about these new images. I think filigree patterns are very pretty and once I got the gist of it had a lovely time designing a bell, a star and a finial ornament. I thought it made sense to have a solid background to show off the filigree and, tada, the Christmas filigree digital stamp and cut file set came to be! This set is now in the Echidna Studios store along with three more new sets and some updated Christmas sets from last year. It’s beginning to look more like Christmas every day.
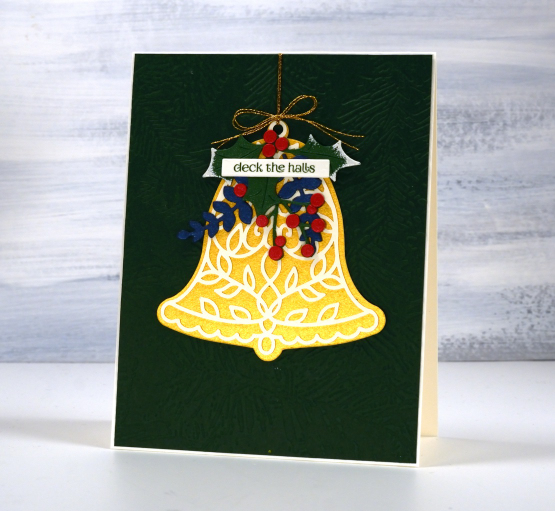
I think the bell is my favourite of the three images and will come in handy making wedding cards as well as Christmas. I wanted to show off the designs on dark backgrounds but when in comes to photographing shimmery gold, embossing on dark green or navy and the high contrast of cream cardstock as well, I can’t always nail it.
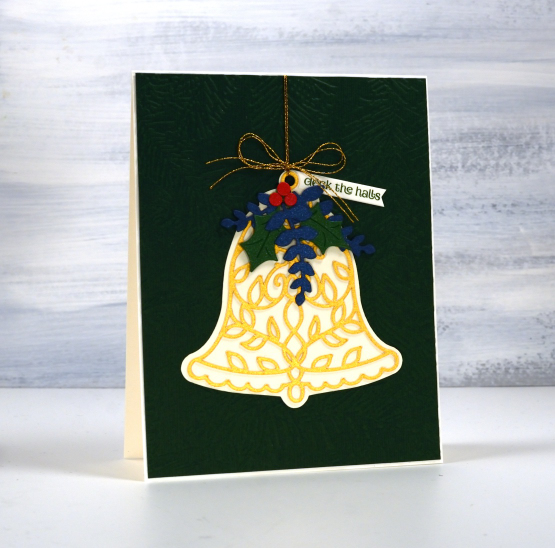
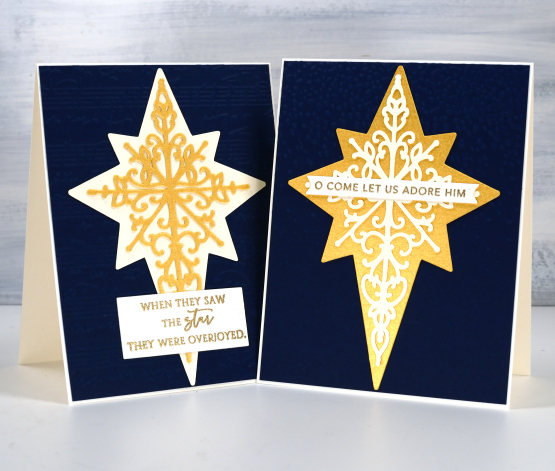
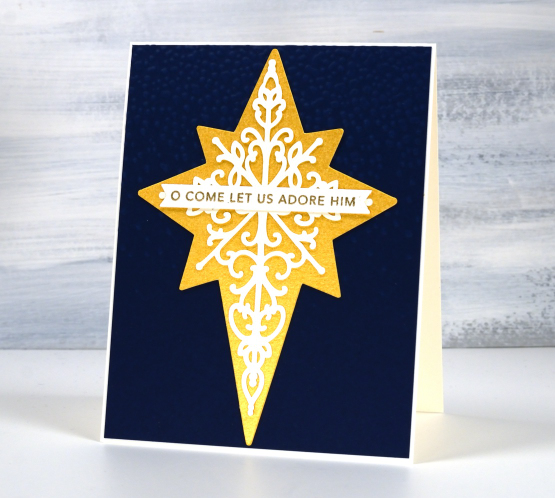
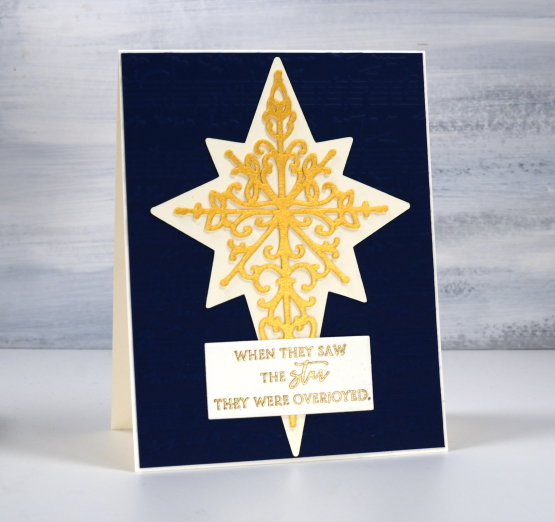
So let me tell you the bells are sitting on dark green panels embossed with Spellbinders ‘forever green’ folder. The green panel on the left below is also embossed with that folder but the one on the right is embossed with the Anna Griffin ‘regal braid’ folder. The star cards at the end of this very long post are on navy blue backgrounds and it is again a little tricky to see one base is embossed with the ‘speckles/snowfall‘ folder and the other with the Taylored Expressions ‘sheet music‘ folder.
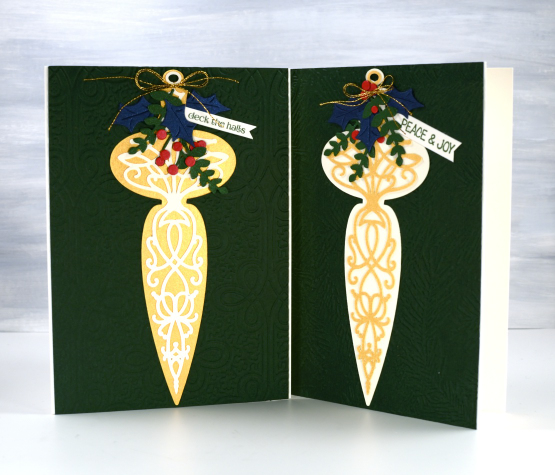
I decorated the finials and bells with a mix of die cut foliage from Penny Black including the ‘joy of giving‘ set.
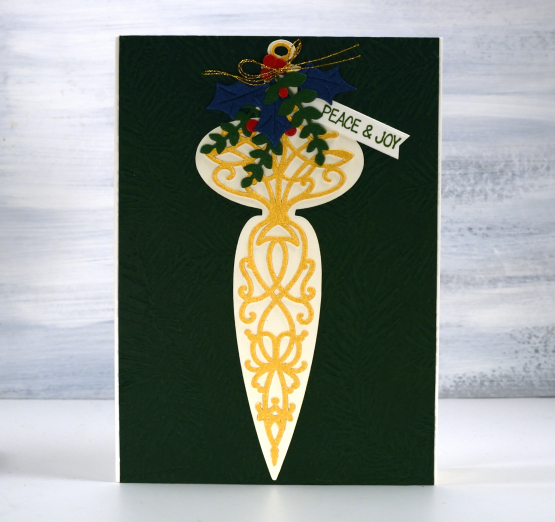
As the finial is such a long thin shape I made the card a little larger than usual, around 6″x4.5″.
I created the star cards without foliage but found suitable sentiment from PB and Taylored Expressions.
I think all three designs would make lovely tree ornaments either stacked to give them extra stability or cut from thick acrylic or thin board on a laser cutter. I don’t have a laser cutter but it is possible to book time on one at the library; if get some cut I will definitely show them here on the blog.
Thanks for scrolling all the way through this long post; I really appreciate you visiting the blog. Have a great day!
Today’s post features affiliate links to Scrap’n’Stamp. If you buy through these links I receive a small commission at no extra cost to you.
Stripes and strips
Posted: November 14, 2023 Filed under: Christmas background, Dies, Hand drawn, Hand lettered, My Favorite Things, Penny Black, starry night | Tags: collage, My Favorite Things, Penny Black creative dies 8 Comments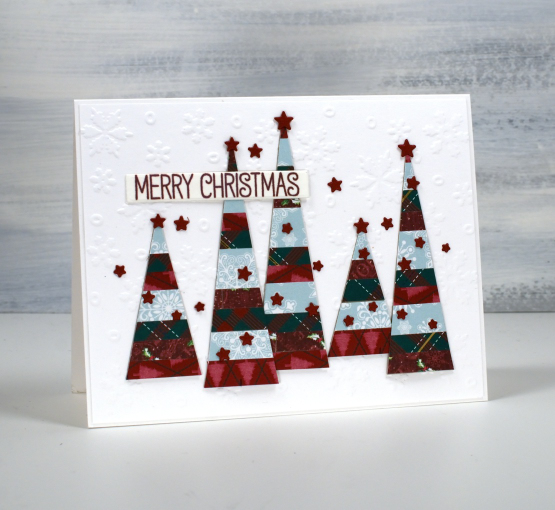
If you have scraps of patterned or solid coloured paper today’s post is for you. I made a panel of striped cardstock by cutting thin strips of patterned paper and gluing them to a piece of light cardstock. From my homemade ‘striped cardstock’ I cut a hand drawn tree, a hand drawn bird and some simple triangle trees. You could use dies for all the elements I was just playing with ideas and decided to sketch and cut myself.
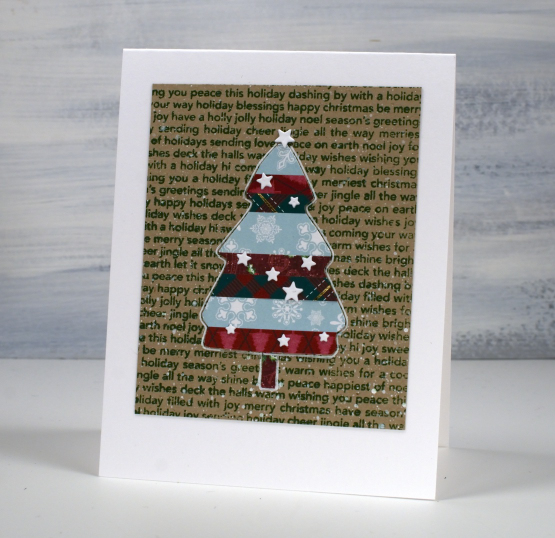
I used an embossed snowflake background for the card at the top of the page, a stamped kraft background for the tree above and then plain kraft for the bird. The little stars that decorate each card I did not hand cut of course! They are cut with the PB ‘starry night die’ and applied with the help of one of those sticky ended tools. Little embellishments have a high fiddliness factor which I don’t appreciate but these tiny stars were necessary!

I added outlines to both the bird and the tree with white or black gel pen along with some dots and a handwritten sentiment.
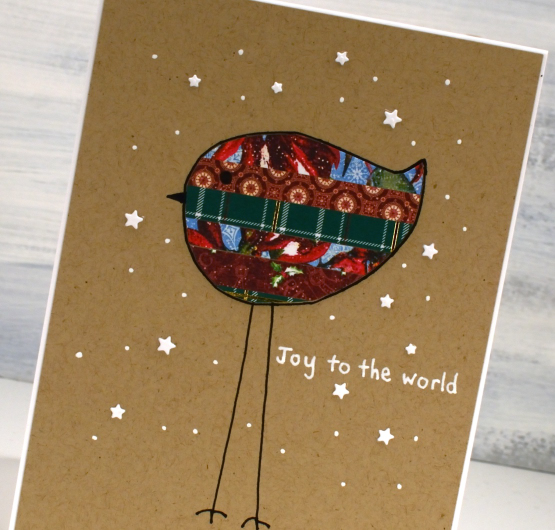
Cutting my own shapes was fun and put some of the many paper scraps to good use!
Surf’s Up
Posted: October 17, 2023 Filed under: Echidna Studios, Surf's Up | Tags: digital stamps, Echidna Studios, Penny Black creative dies 2 Comments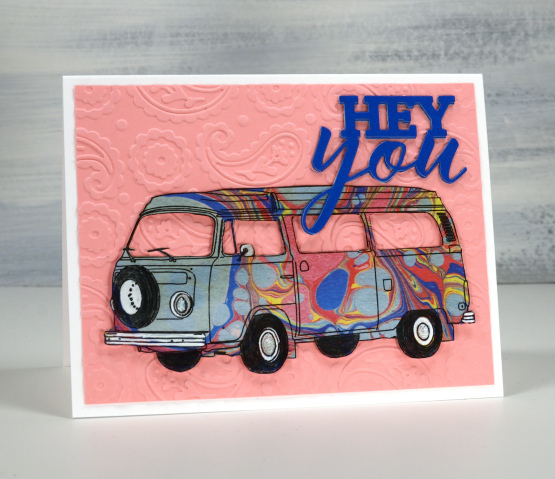
What do you think of today’s funky van from Echidna Studios? A few months back I watercoloured the vintage VW beetle and it’s still one of my favourite digital images from the store. The new Surf’s Up image is equally cool and made me reach for some marbled paper that would make it all the more fun! The digital stamp set includes three surfboard images that can be positioned with the van or used on their own.
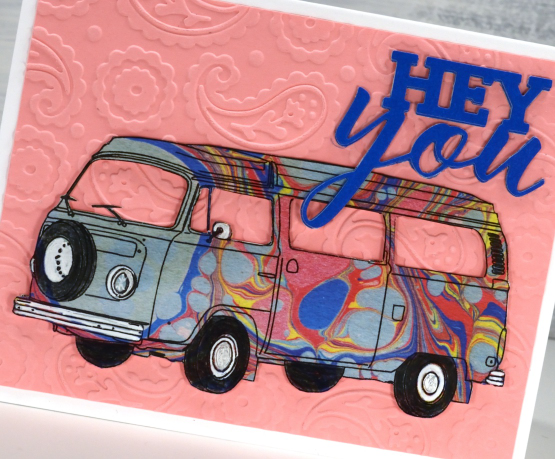
The paper I had was a 6″x6″ square which I was able to manually feed through my printer. I imagine some of you are wondering if I fussy cut this because I have been vocal in my dislike of fussy cutting in the past. Surprisingly I did cut it out and also an extra roof and van body from cardstock to tuck behind to lift and strengthen the cut out. I coloured directly on the marble paper with a black pencil, and white and silver gel pens.
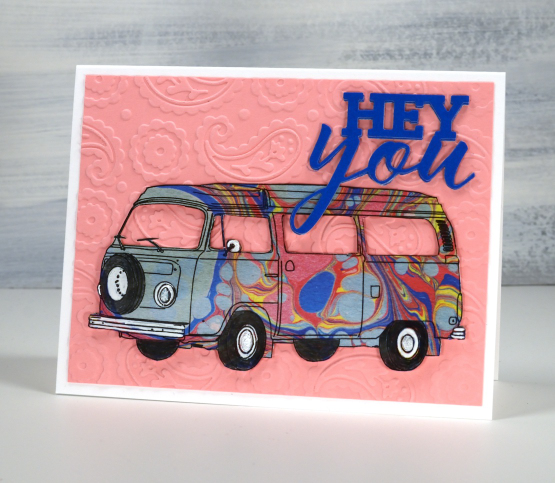
Naturally a marbled van wanted a paisley backdrop so I embossed some pink cardstock with a cuttlebug folder I recently picked up at a garage sale. The bold die cut sentiment is from Penny Black. Hope you have a groovy day!
More Alcohol Inks on the Gel Plate
Posted: September 25, 2023 Filed under: Alcohol Ink, Dies, Flutters, gel press, Lavinia, Penny Black, pods stencil, Taylored Expressions | Tags: Alcohol Ink, gel press, gel printing, Lavinia, Penny Black creative dies, Taylored Expressions 1 Comment
Using alcohol inks and stencils on the gel plate is a bit of an addiction for me right now so I filmed another one to show you. A friend let me know that if you receive my blog posts by email the video doesn’t show up in the email. To see the video just click on the title of the blog post and it will take you to my blog. If you would like to subscribe to my youtube channel too that would be delightful.
I started this print with the Lavinia pods stencil already covered in ink and then added more ink and isopropyl alcohol when it was on the gel plate. Take a look at the video below to see the process.
I would love to hear if you try this technique. As I mentioned last week I like pulling the prints with paper or cardstock because they are surfaces that I wouldn’t normally use with alcohol inks.
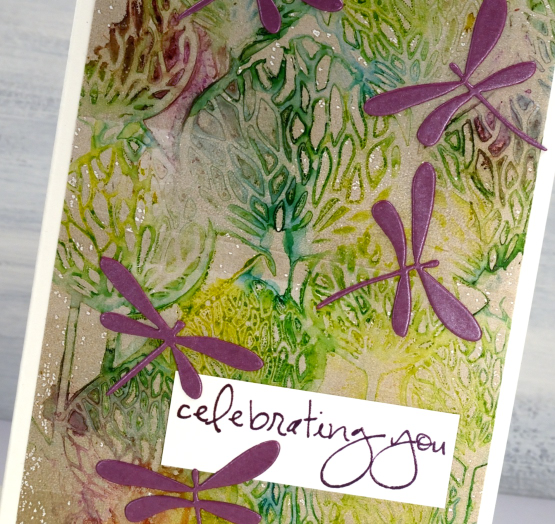
The finished card does include most of the print; it is a larger size than my usual A2 cards. I decided to add the Penny Black dragonflies in the wine colour which matches the alcohol ink I added very sparingly. In retrospect you will probably agree I could have added more. The sentiment is from Taylored Expressions ‘In and Out Birthday’ stamped in Chianti versafine clair ink.

My blog features affiliate links to the following companies. If you buy through these links I receive a small commission at no extra cost to you.
Ecstasy Crafts (Ecstasy Crafts offers a discount code heathertecs10 you can use for a 10% discount at checkout)
Wishing you comfort
Posted: August 3, 2023 Filed under: Branch 9 die, gel press, Moda Scrap, Penny Black, whisper | Tags: gel press, gel printing, Penny Black creative dies, Penny Black stamps 3 Comments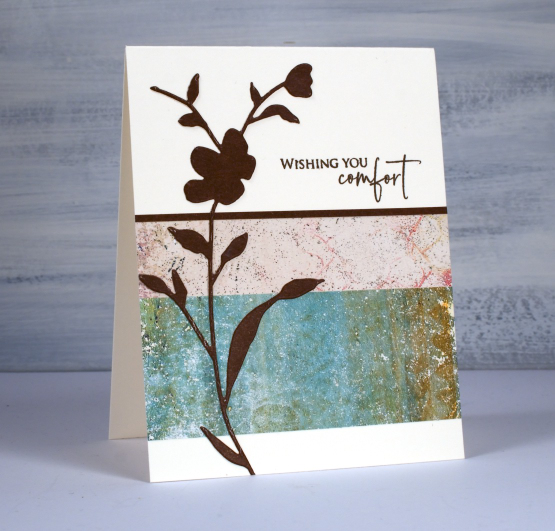
I’m always looking for ways to use my gel prints because I have many and want to make more! I found this two panel idea on Victoria Wilding’s instagram. I chose not to stamp on my prints but instead added the Penny Black ‘whisper’ die-cut over the top, a strip of cardstock along the edge and a sentiment from the PB set ‘strength‘.
If you don’t have gel prints you could use any kind of patterned paper but I would encourage you to check out my online course ‘Gel Print Journey‘ if you are interested in learning or trying new techniques.
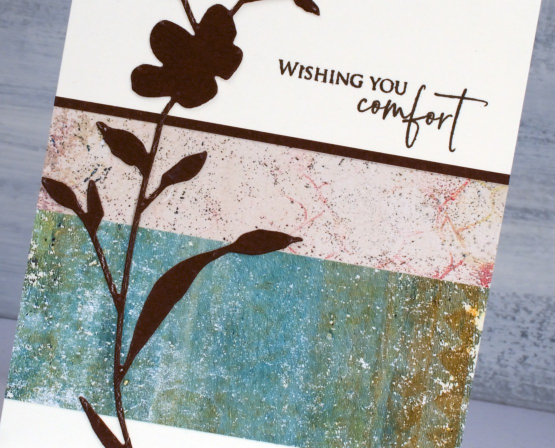
I thought the muted tones of the gel prints lent themselves to a sympathy card as did the dark brown cardstock rather than bold black.
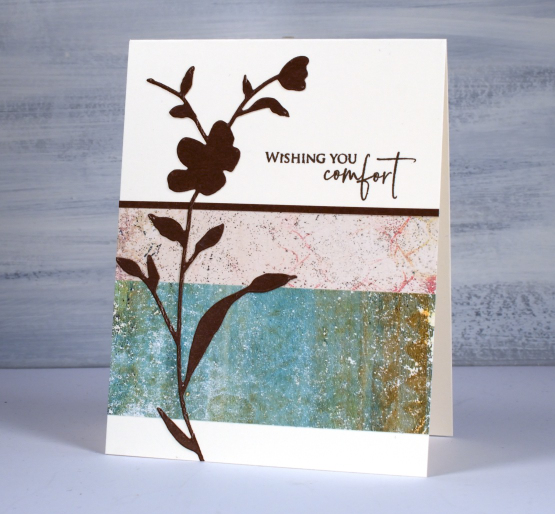
These gel prints are not very bulky as I printed on paper not cardstock. I added double sided adhesive to the back then attached the strips to the card base and trimmed off any overhanging paper.
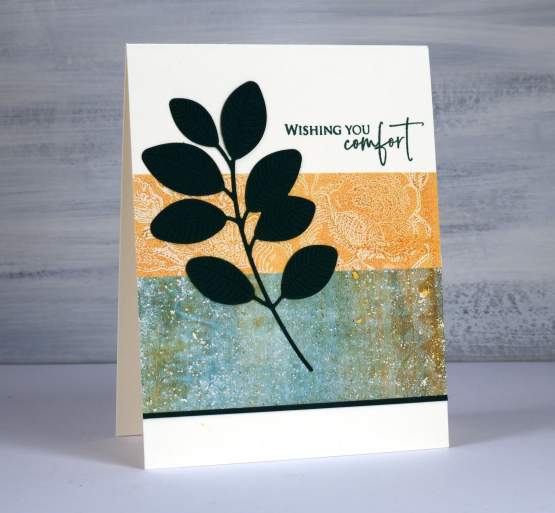
You might recognise the same greeny brown print on this second card but this time paired with a print featuring the PB background stamp, ‘bed of roses’.
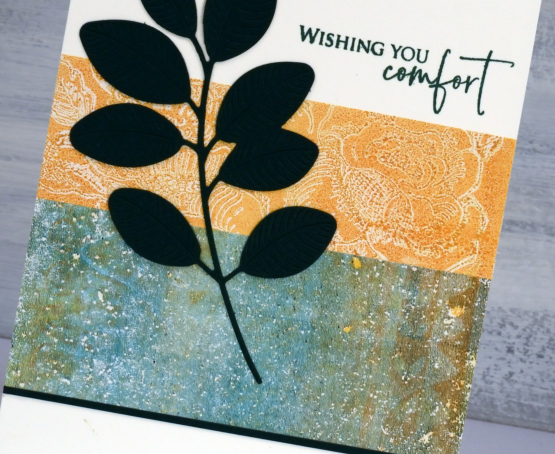
I cut both the Moda Scrap ‘branch 9‘ die and the edge strip from dark green cardstock and used a similar coloured ink for the sentiment. I know the cardstock looks black in the photo but it is truly dark green in real life.
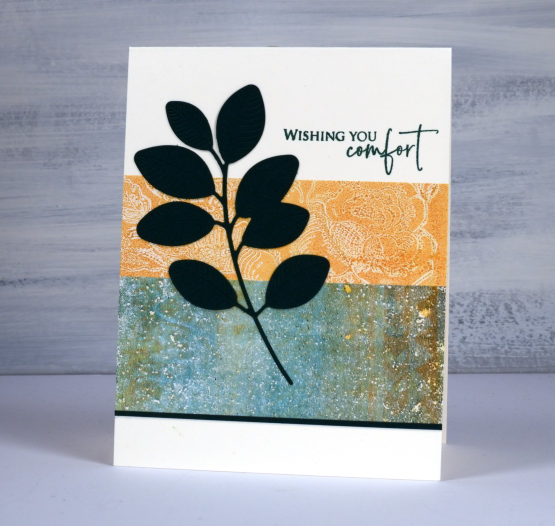
I liked the clean but pretty effect of two gel printed strips together and was able to make several cards using bits of 6″x6″ prints. I kept all the left over scraps too; you will see them in an upcoming journal page.
Gel Printing with the Strands stencil
Posted: May 18, 2023 Filed under: Classes, Dies, Echidna Studios, Flutters, gel press, online class, Penny Black, rustic birdhouse, strands | Tags: Echidna Studios, gel press, gel printing, Penny Black creative dies, Penny Black stamps 4 Comments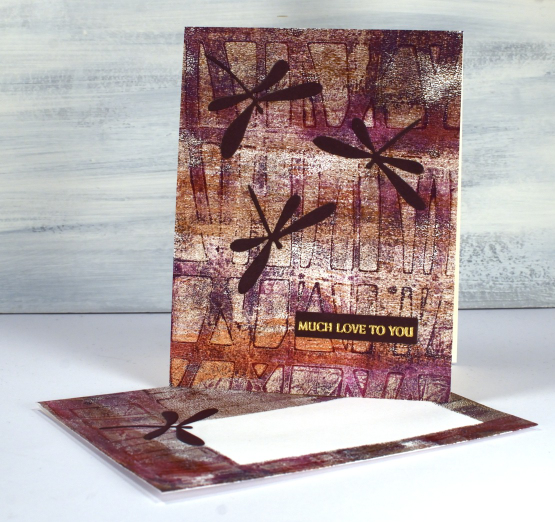
A stencil gel print for you today. I created this distressed print on a large gel plate so I could pick up a card front and an envelope print at the same time. If you don’t have a large plate you could just use the same paint colours and stencil on a second print. Just in case you didn’t catch my news yesterday, my new online course Gel Print Journey is now available! (And there is a discount for blog readers TEAMBLOG10)
The stencil is called ‘strands’ and it is a digital design I created and have made available in the Echidna Studios etsy store. The bold print shown on the card above was made with copper, burgandy and purple paint so I chose a dark burgandy cardstock to cut dragonfly elements and a sentiment strip. Printing directly on the envelope is a easy way to co-ordinate with your card and I placed a sticker on the white envelope before printing to preserve white space for the address. I think I might make a video of this process because it’s quick and effective, a combination I like.

The pattern on the second card is very muted because it is a ghost print, the leftovers on the plate after I pulled the one above. I cover this technique in my new online class using a range of different stencils and colour combinations.
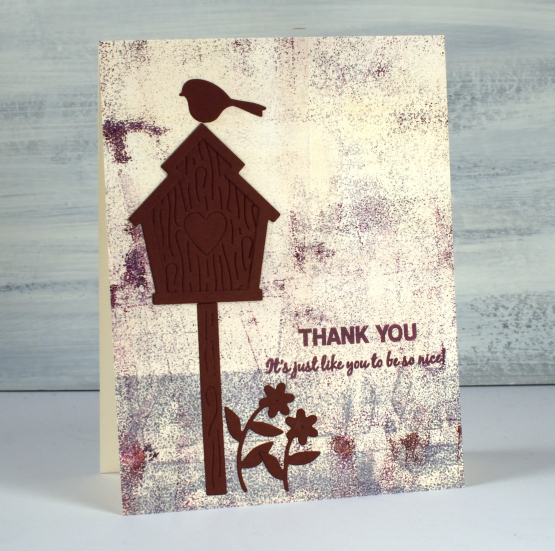
Even though ghost prints are often patchy I like using them for collage or backgrounds as I have here. The line between cream and grey ended up looking like a path or lawn and I just like the unique grungy texture.
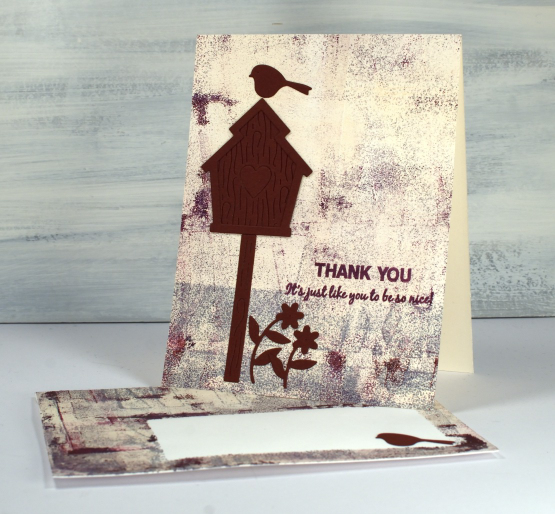
The dies and stamps I used to finish the cards are all Penny Black, those dragonflies on the first card are some of the first dies I ever got and they’re still a favourite.
(Compensated affiliate links from Foiled Fox & ScrapNStamp)
Gel Print Mandala Thank You Card
Posted: May 3, 2023 Filed under: beaded mandala, Deco Frame, Dies, gel press, Penny Black, The Crafters Workshop | Tags: gel press, gel printing, Penny Black creative dies, The Crafter's Workshop 3 Comments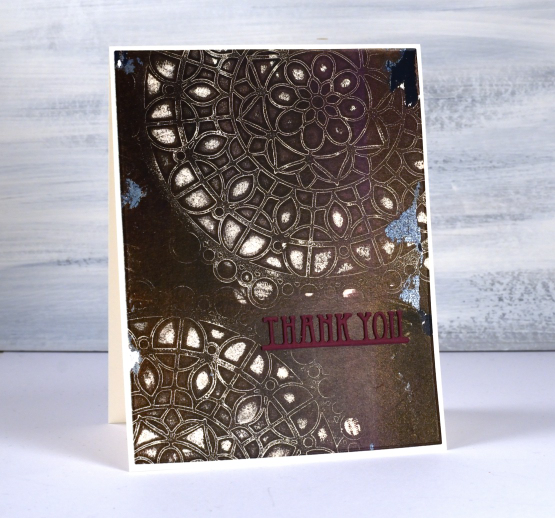
Gel printing continues to entice and delight me. This brown and burgandy print was done with a mandala mask from The Crafter’s Workshop; it’s called ‘beaded mandala’.
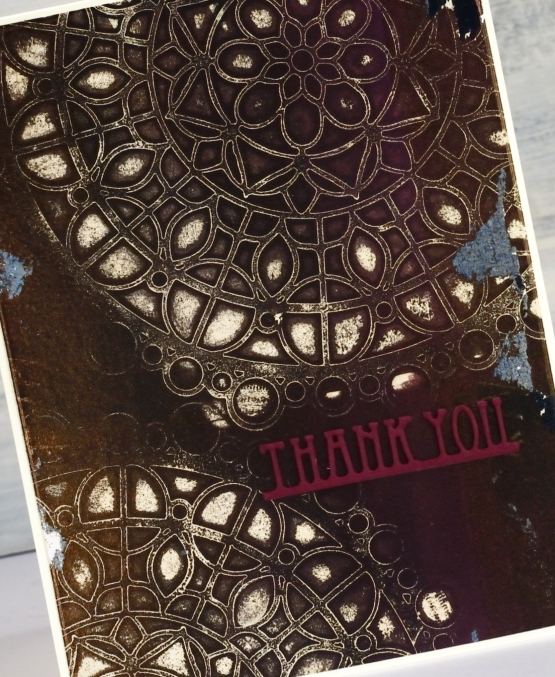
This print is a good example of the bonuses you pick up when you don’t start with a perfectly clean gel plate. If you look closely you can see some tiny remnants of text from an image transfer as well as the more obvious grey leftovers. I chose burgandy for the stacked PB diecut ‘thank you’ because there are some patches that look more burgandy than brown.
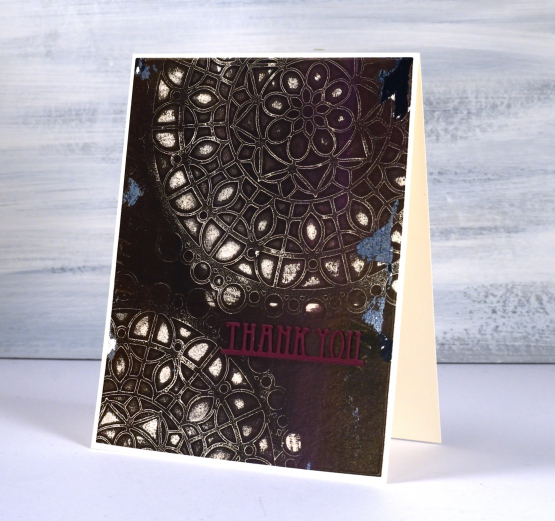
This technique with stencils is one of my favourites and is included in my upcoming online class Gel Print Journey. I am excited to be talking about it again despite the months that have passed since I began. I am back on it and excited to release it soon!
(Compensated affiliate links from Foiled Fox & Scrap n Stamp)
Turning
Posted: April 27, 2023 Filed under: Alcohol Ink, delicate daisies, Echidna Studios, grafix, Paper Rose, Penny Black, skewed squares, turning | Tags: Echidna Studios, Penny Black creative dies, Penny Black stamps, Ranger Alcohol Ink, Ranger Distress inks 2 Comments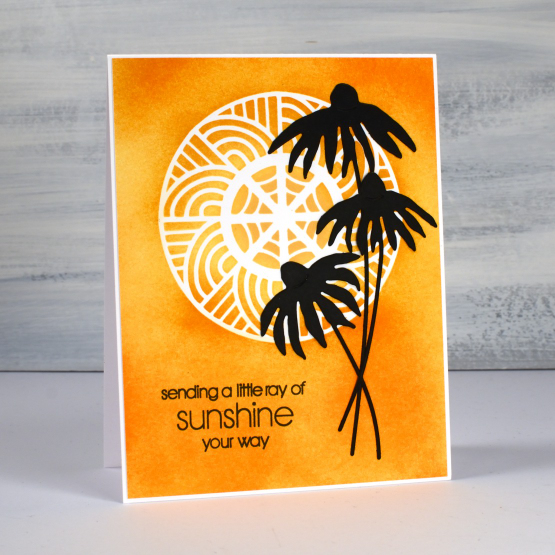
As you know I have recently been featuring some designs from my daughter’s etsy store Echidna Studios. They are available as digital stamps/cutting files. What I haven’t mentioned is that some of the designs in her store are designed by me! She has just added a batch of digital images that I designed as stencils but they can also be printed. The circle masked on the card above and the half circle on the second card are from a digital set called ‘turning‘. The beauty of digital designs is that they can be cut or printed in any size. I cut both stencils from Grafix matte duralar using my cricut.
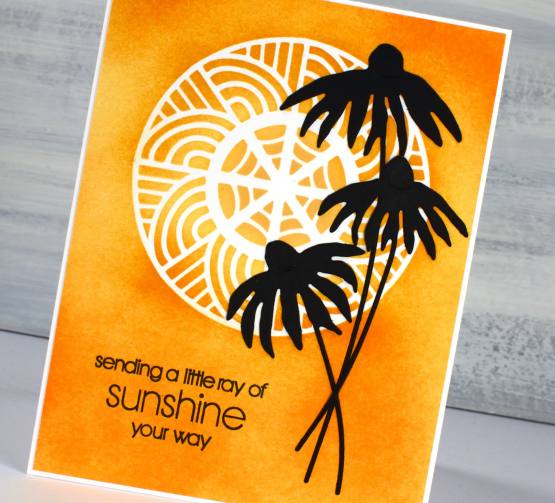
I blended three distress inks through the stencil onto neenah solar white cardstock then added the PB delicate daisies die-cuts and a PB sentiment.
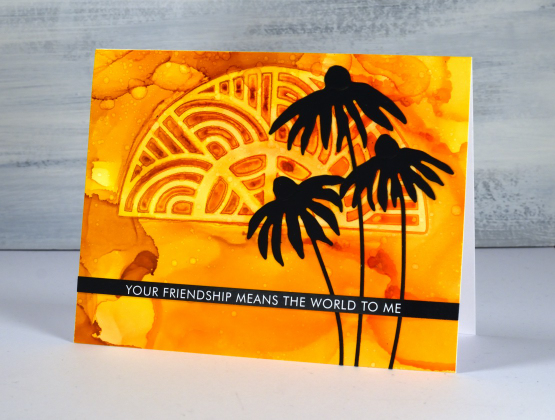
To create the half turn stenciled card I worked on Grafix white craft plastic with three alcohol inks. I dropped isopropyl alcohol and alcohol inks on the panel then dropped the stencil into position. I tried to be patient so the inks would dry and give me a complete impression of the stencil. I did help it along with an air blower and managed not to lift it too early! I splattered a little isopropyl over the top for extra interest.
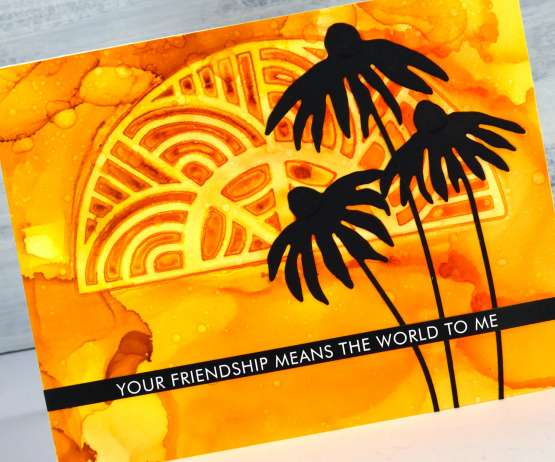
Once again I finished the card with black elements: the PB daisies and a sentiment strip from Paper Rose Studio. I hope you visit Echidna Studios store and check out the designs there. I will be featuring more in the weeks ahead. See if you can guess which of the stamp sets I designed, they are different from my daughter’s very realistic style. If you are on IG we would love you to follow Echidna Studios there too. And if you do happen to be on Instagram check out Gina Ferrari and see if you recognise anyone among her portraits.
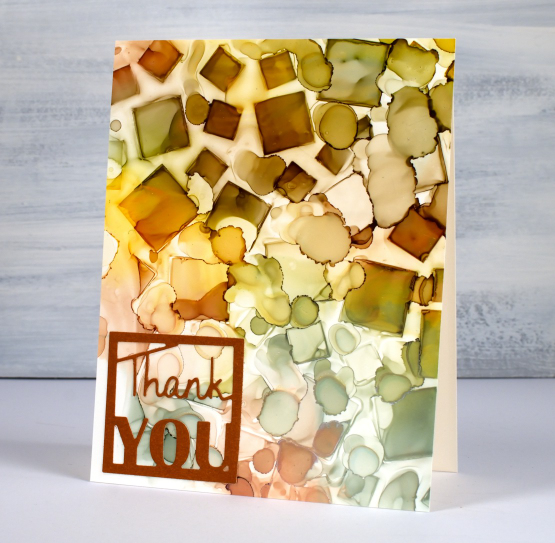
By the way, a while back I showed a sneak peak of a squares stencil I had designed and cut. You can see I used it on the card below and in the video here. The stencil is called skewed squares and it is now available as a digital file in the Echidna Studios store.
Thanks for dropping by today. I hope the sun is shining where you are; it is peeping through the clouds here.
(Compensated affiliate links from Foiled Fox, Ecstasy Crafts & Scrap n Stamp)
Tea, Coffee, Art Journalling?
Posted: February 28, 2023 Filed under: 6"x 6" journal, Art Journal, Background Stamps, coffee time, Cup of tea, Darkroom Door, Dies, Gazette, Penny Black, Script, Time, What's in your cup, World Map | Tags: Art Journal, Darkroom Door stamps, Penny Black creative dies, Penny Black stamps, Ranger Distress inks 2 Comments
Today I am posting a few pages from last year’s Art Journal Adventure workshops. I taught seven different ‘episodes’ last year and one month the theme was coffee and tea. I did a few pages before the sessions and then created a different page during each class. I don’t like replicating the same spread in my art journal so each one had a different colour scheme and style.

Even though I am more of a herbal tea drinker than a coffee drinker I ended up creating three coffee themed pages and two tea themed. You can see the first coffee themed page here. As you can see from the three spreads featured here I use a variety of techniques, papers and elements in my pages. The common technique on these pages is a watercolour background and the common element is the chipboard cups. Both the coffee themed pages feature photos from an old coffee themed diary. In both cases I took my colour scheme from the photo and added browns.
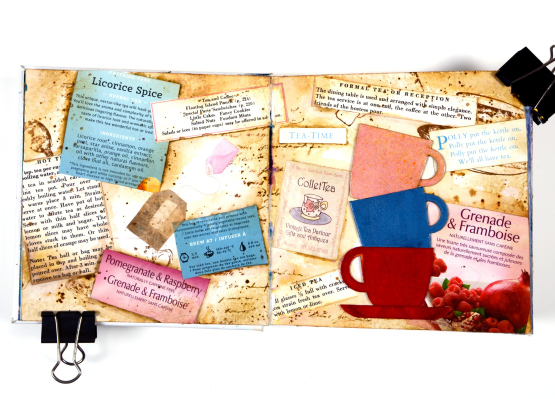
This tea themed page could also be called ‘these are a few of my favourite teas!’ I used packaging from boxes and sachets, embossed the teacups to match and add snippets from old books and magazines.
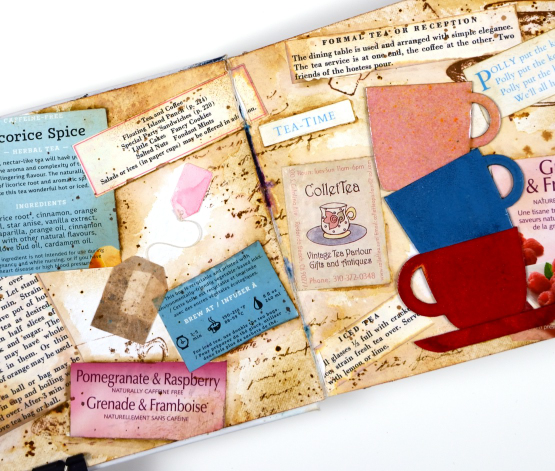
These pages show how I gather elements and papers from here, there and everywhere when creating a page. I used inks, embossing powders and glazes, stamps and stencils for these pages but I also used an old diary, packaging, pages from a vintage recipe book, and old teabags!
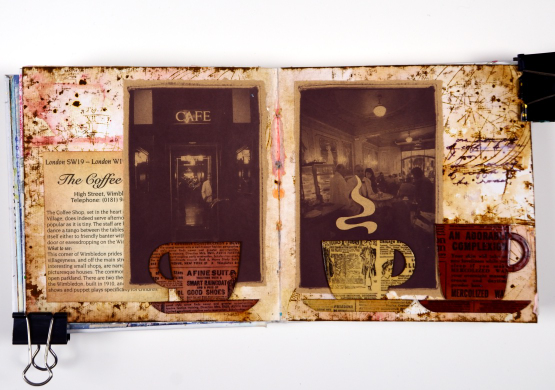
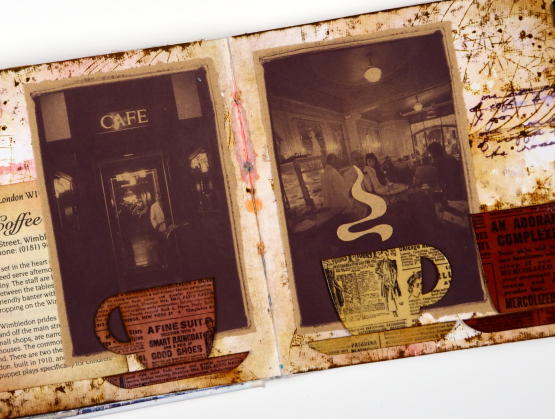
I almost didn’t finish this last spread but once I had stamped then glazed the cute chipboard cups I knew I had to finish. Now I want a mug with vintage newsprint on it!
Art Journal Adventure for 2023 kicks off this week. There is still space in the Friday class and the Monday class. We will be creating with semi- transparent papers.
(Compensated affiliate links from Foiled Fox, Scrap n Stamp)