All about you
Posted: June 17, 2020 Filed under: Penny Black, springtime sigh | Tags: Fabriano Watercolour Paper, Penny Black stamps, Ranger Distress inks, sennelier watercolours 9 Comments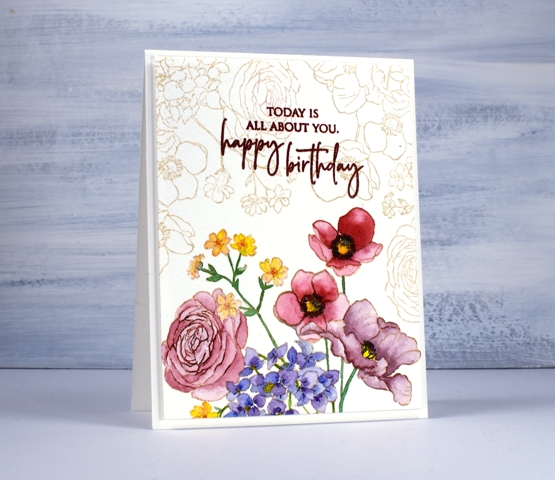
More than once I have created cards that inspire me to make art journal pages. This time it was the other way around; I created an art journal page that inspired this card. Perhaps I should be showing you the journal page first but it contains as yet unreleased stamps so I have to keep it under wraps for a little while longer. (just in case you hadn’t seen them yet, Jill has been sharing some sneak peeks of new PB products over on the PB blog). The panel is stamped on cold pressed watercolour paper. I kept it in the stamp positioner so I could add some detail once all the paint was completed.
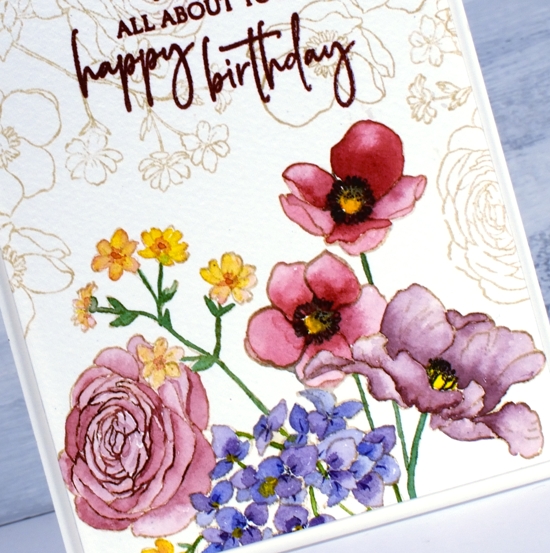
I stamped PB ‘Springtime Sigh’ in antique linen distress ink then painted the flowers with Sennelier watercolour paints. To keep the panel cohesive I used the same red and blue paints to create a variety of reds and burgandies for the four large flowers. The blue showed up in the purple flowers and the green stems. Once all the painting was finished I partially stamped the rose with ‘aged mahogany’ distress ink and added little details to the other flowers with a chipped sapphire distress marker and a black soot marker.
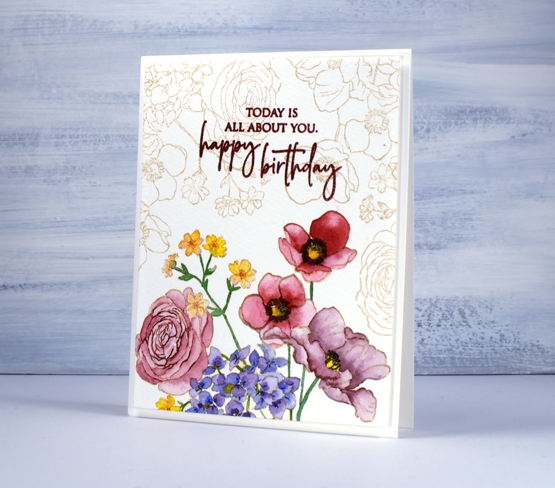
The combination of antique linen outline and faded burgandy petals gave the painted flowers a vintage look so I filled the rest of the panel with the same image stamped in antique linen, then chose crimson red versafine to stamp the sentiment from PB ‘special sentiments’.
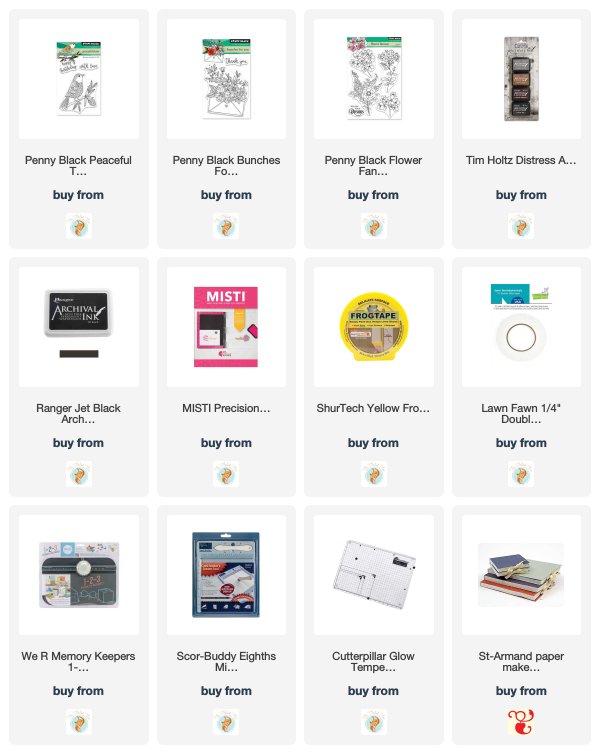
Supplies
Hand painted veggie card
Posted: June 10, 2020 Filed under: Altenew, Hand painted, Leaf Canopy | Tags: Altenew, Fabriano Watercolour Paper, Hand painted, sennelier watercolours 8 Comments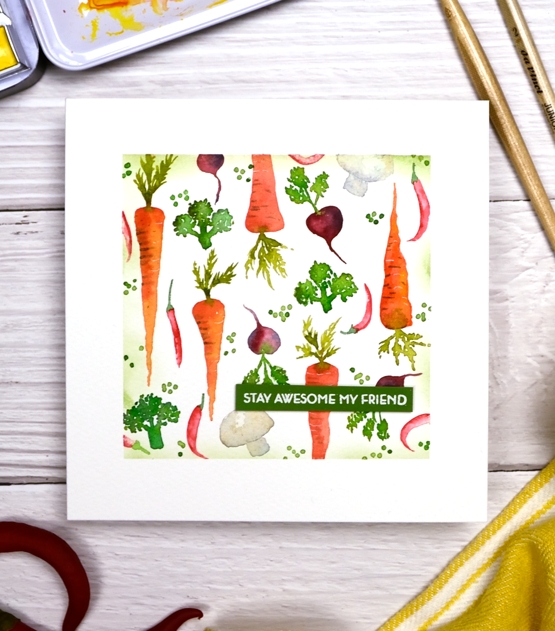
I’ve been painting again but took a break from florals. I pictured this veggie panel in my head before I sat down to paint it and realised part way through I should have been working bigger. I did the carrots first and as they were the biggest vegetable I regretted making them so small. All the rest of the veggies had to be pretty tiny to make it work.
I used Fabriano cold pressed watercolour paper and Sennelier watercolour paints. The card is one layer so I folded the piece of watercolour paper then masked the edges before I started painting. I had watched some youtube tutorials to glean hints including Jenna Rainey’s ‘farmer’s market‘ and Laurie Tsou’s ‘drawing fruits and vegetables‘.
When I had filled the panel with carrots, broccoli, beets, chiles and mushrooms it still looked unfinished so I had to include the peas. I am not a fan of peas but as you can see they are the perfect filler, for a painting mind you, not a meal. When I was a child I was required to eat the number of peas that matched my age at the time and yes my family still brings that up and amuses themselves by asking if the required number of peas are on my plate! After I’d added the peas, with a stylus not a paintbrush, I still needed more definition on the masked edges so I blended some bamboo branch memento ink lightly over the tape. The sentiment is from Altenew’s ‘leaf canopy’ set.
Stay awesome my friends and eat your veggies. Or paint them if that’s more your style. Or better yet, grow them, paint them then eat them!
Supplies
Masked hand painted circle
Posted: June 1, 2020 Filed under: Hand drawn, Hand lettered, sennelier watercolours | Tags: Fabriano Watercolour Paper, Hand lettering, Hand painted, sennelier watercolours 10 Comments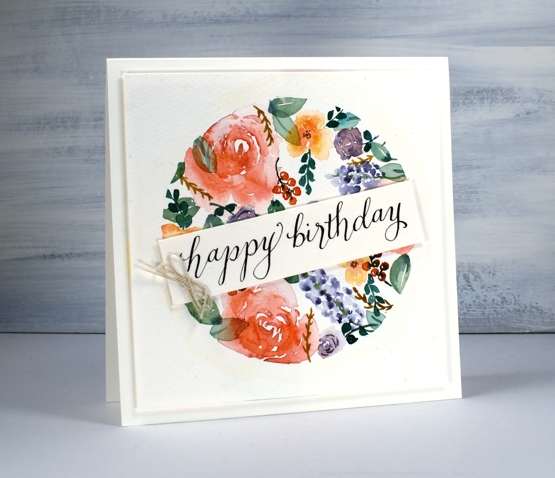
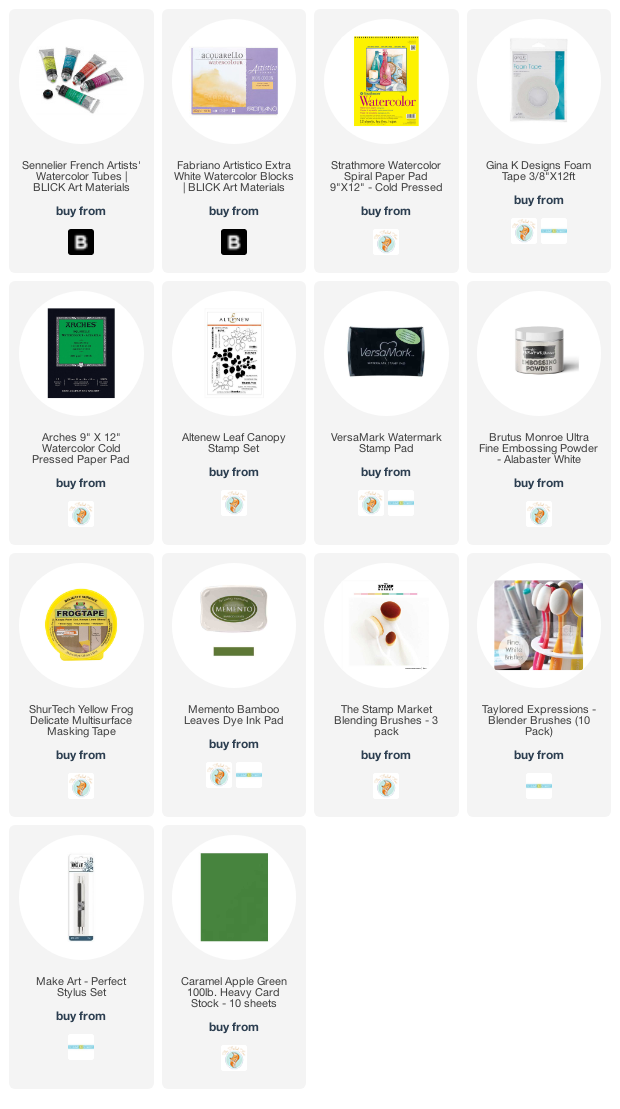
A few weeks ago I posted a floral wreath I’d painted and asked your opinion on adding a sentiment. In the end I didn’t risk stamping or writing one because I didn’t want to spoil the finished wreath with an inky mistake. So….can you guess why I have a large sentiment strip stuck across this floral circle I painted?
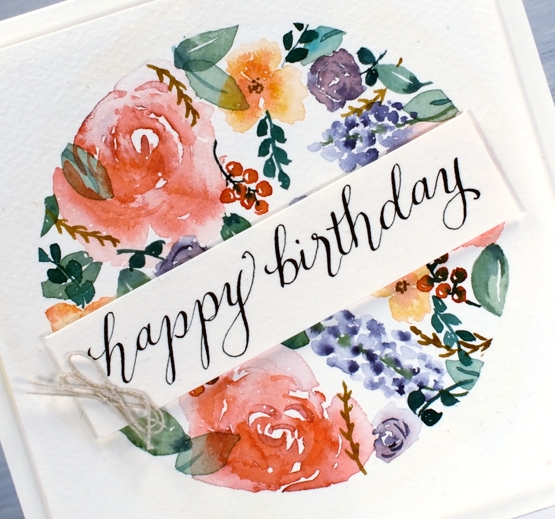
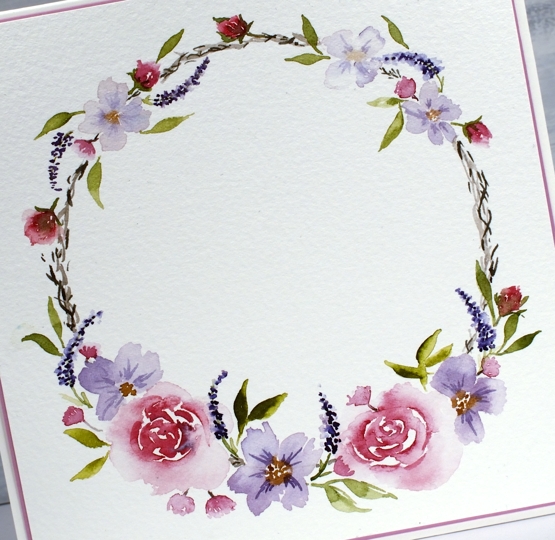
To create the floral circle I drew a circle in pencil on cold pressed watercolour paper then painted liquid frisket (masking fluid) to a width of about half an inch around the outside of the circle. I used my Sennelier watercolours to paint three large roses first then moved onto other flowers, leaves and berries until the circle was fairly full. With a random design like this one whether it is painted or stamped it makes sense to start with the largest images to make sure you can fit them in then finish off will little leaves, dots or tiny flowers to fill any spaces at the end.
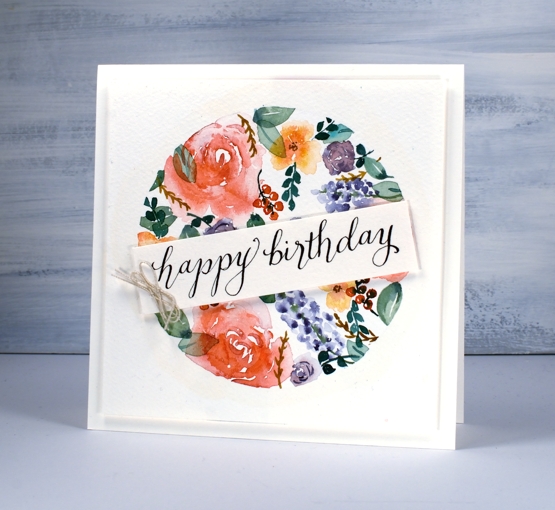
Once the painted circle was complete I practiced a ‘happy birthday’ greeting on scraps of watercolour paper with my nib pen and some black ink until I was happy with the size and style. I had only written 2½ letters before a large blob of black ink landed on the panel where the letter ‘p’ should have been! As you probably guessed that is the reason I have a large birthday banner obscuring some of my pretty flowers.
Supplies
https://linkdeli.com/widget.js?id=f5e8378456858c916708
Oh Baby
Posted: May 27, 2020 Filed under: balloons!, City Stacks dies, Concord & 9th, Papertrey Inks, Penny Black, sennelier watercolours, simple serif alphabet dies | Tags: Concord & 9th, Papertrey ink, Penny Black creative dies, sennelier watercolours 8 Comments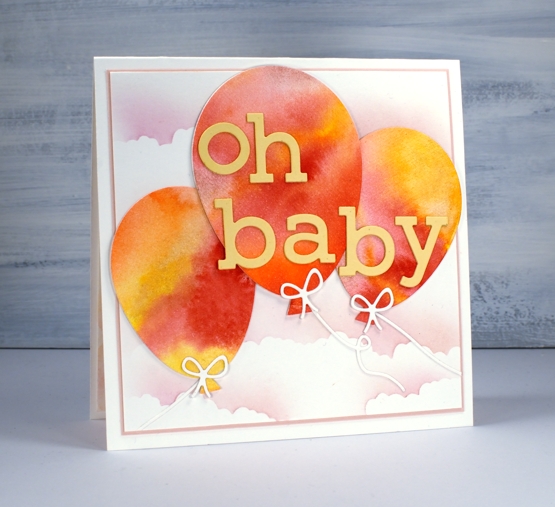
I’m not sure if I have ever posted a baby card on my blog; if I have it was so long ago I can’t remember! This one is a commission for a friend; she asked me months ago and I totally forgot. When she texted the other day to see if it was ready I admitted it was not but I would make sure it was by the next day! I was happy to have thought up a concept all those months ago and my idea came together without hiccoughs.
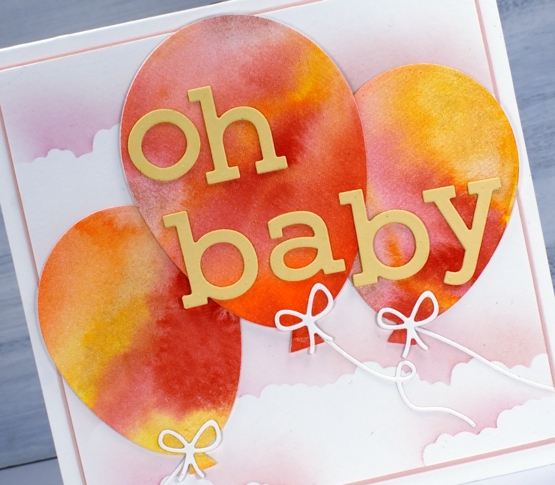
I painted pink, yellow and orange paint on watercolour paper, added water then let it blend and bleed together. Once it was dry I used the Penny Black ‘Balloons!’ die set to cut three balloons then cut the strings and bows from unpainted watercolour paper. I added stick-it adhesive to the back of some peach coloured cardstock then cut two sets of letters to stack for the words using the C&9 ‘simple serif alphabet’ dies.
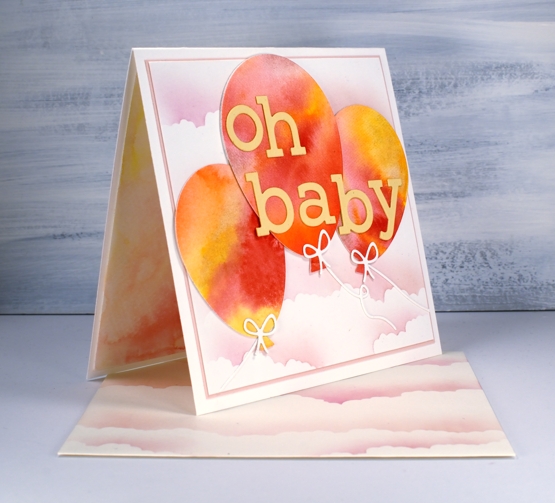
To create the cloudy sky I cut post-it masks using the cloud die from C&9 ‘city stacks’ die set then blended over the edges on a background panel and an envelope using Papertrey ink cubes in ‘sweet blush’ and ‘lovely lady’. I cut a very narrow mat of pale rose cardstock to frame the panel and attached everything to a cream card base.
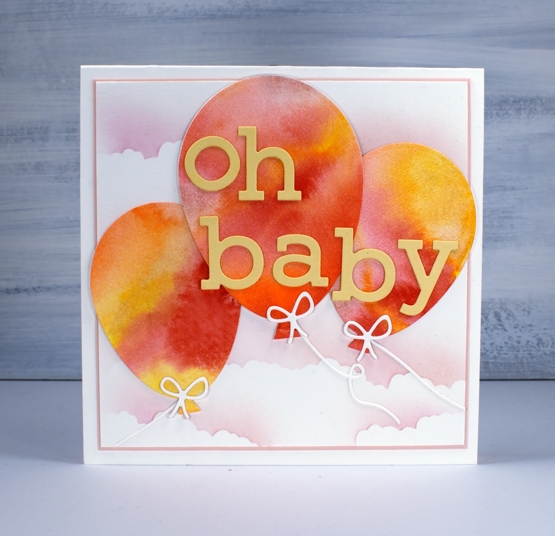
I wondered about cutting more balloons to put inside but instead painted some of the same pink, yellow and orange paint on my glass mat, spritzed it generously to dilute it then placed an extra panel of watercolour paper on top to pick up a pale wishy-washy print.
Seeing that I rarely make baby cards this might become my design of choice when I do need one; I’ll just change the colour scheme to keep things interesting.
Supplies
Hand painted floral square
Posted: May 25, 2020 Filed under: Hand painted, Penny Black | Tags: Hand painted, Penny Black stamps, sennelier watercolours 13 Comments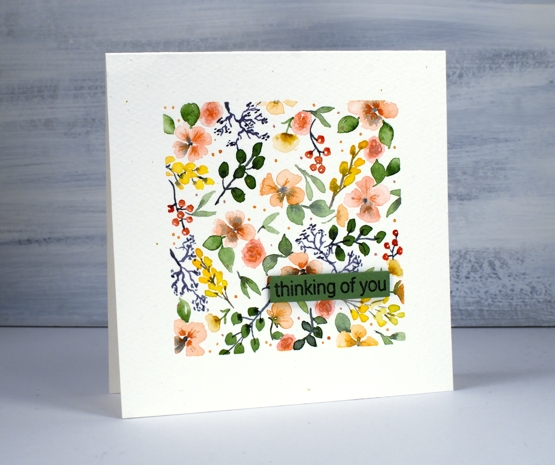
I’ve been doing a bit more watercolour painting. When I started this one I didn’t intend to make all the elements so teeny tiny; it took a while to fill the square. I started by taping a square frame on a folded piece of cold pressed watercolour paper to make a one layer card.

I used my Sennelier watercolour paints and as you can imagine a fairly small round watercolour brush to fill the square with flowers and foliage. I kept the colour palette limited and added a few shimmer highlights at the end with some coliro pearlescent paint.
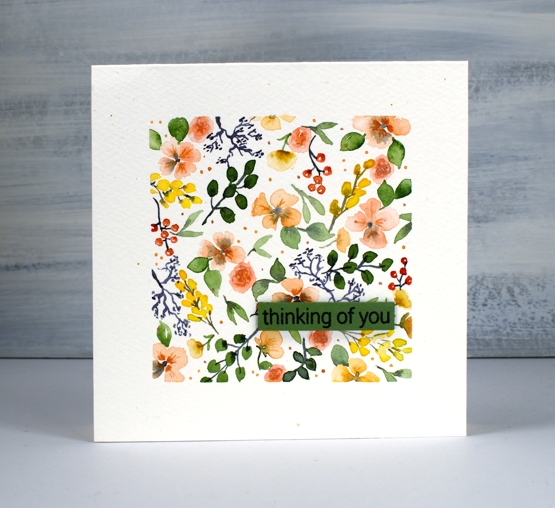
Peeling the tape off the paper to reveal a clean straight edge was very satisfying then I finished it off with a PB sentiment stamped on a co-ordinating green cardstock.
Supplies

https://linkdeli.com/widget.js?id=f5e8378456858c916708
Hand painted floral wreath
Posted: May 11, 2020 Filed under: Hand painted | Tags: Fabriano Watercolour Paper, sennelier watercolours 31 Comments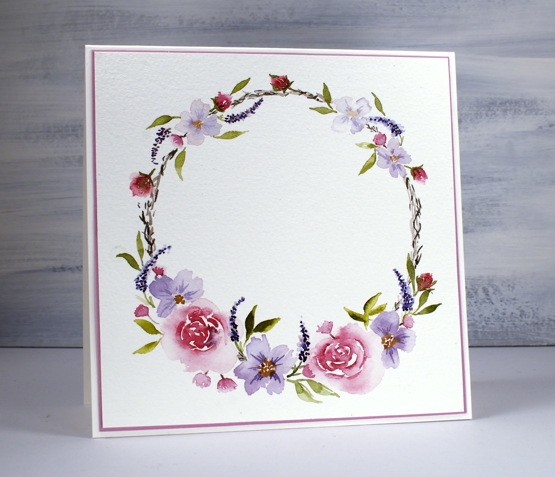
It is a constant resolve of mine to do more painting. I love painting with stamped images but I want to improve my painting without stamps too. I spent some free time recently painting this little wreath for a friend’s birthday. I worked on Fabriano cold pressed watercolour paper (100% cotton 140lb) and used Sennelier watercolour paints. As usual I kept my palette of colours limited concentrating on the same red, blue, purple, grey and mustard paints to get different hues and tones. I began by tracing a circle with a light brown watercolour pencil knowing that I would cover most of it up and it would dilute and disappear as I painted over it.
I started by painting the large flowers then moved on to the smaller ones and leaves. I kept adding little leaves or buds thinking the circle was unbalanced but eventually had to tell myself to stop. The decision about whether to stamp, hand letter or die cut some words is still unresolved. What to do you think?
Banner Blooms
Posted: February 13, 2020 Filed under: banner blooms, boxes, Darkroom Door, Penny Black, sennelier watercolours, Stencils | Tags: Darkroom Door stencils, Penny Black stamps, sennelier watercolours, Tsukineko Versafine inks 3 Comments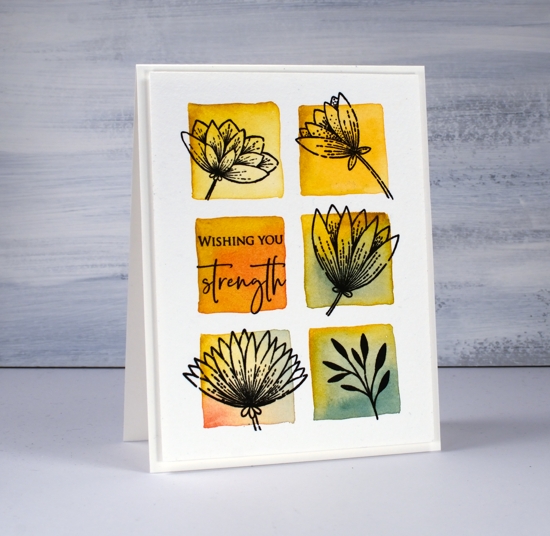
Recently I blended through a stencil to create square grid backgrounds for some floral silhouette stamping. Today’s card uses a similar technique but I wanted the squares to be less neat, a little imperfect but still recognisable as squares. I guess I could have freestyled them entirely but I wanted them to be evenly spaced and I didn’t trust myself to do that without the stencil as a guide. To achieve this look I once again taped a grid stencil (DD boxes 6 up) to a piece of cold pressed watercolour paper but instead of blending the squares then painting over them I just painted squares inside the stencil squares. I didn’t paint right up to the edges of the stencil because then liquid would have seeped underneath and made a mess. I used the stencil as my placement guide and painted a square inside each space.
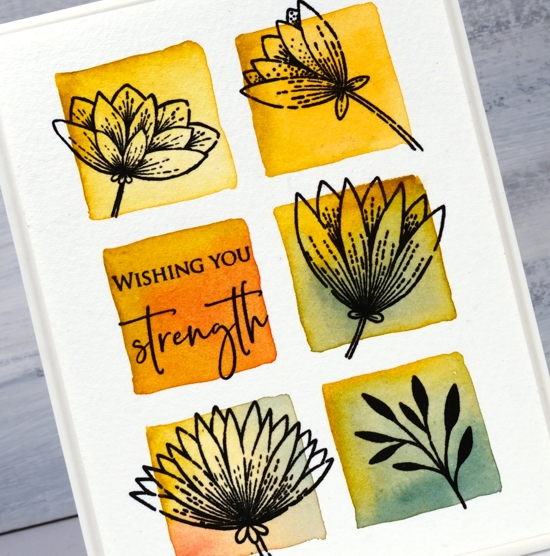
I used Sennelier watercolour paints but you could use any watercolour paints or inks. I started each square with a stroke or two of mustard yellow then added some blue, red or orange and blended it with the mustard. After it dried I flattened it in my minc then transferred it to the stamp positioner to stamp five different images from the PB banner blooms set in versafine clair nocturne ink. Simple but quite effective. I chose a sentiment from the PB ‘strength’ set for the last square.
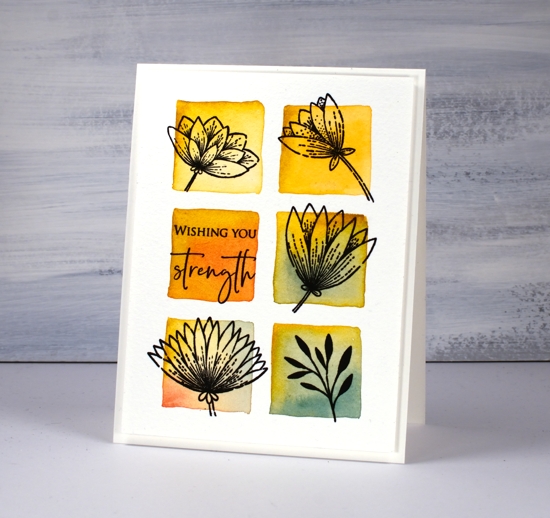
I really like the simple ‘shadow frame’ created by popping up the panel on a piece of foam; that’s why you keep seeing it!
Supplies

Poppy background watercoloured
Posted: August 29, 2019 Filed under: Ink to Paper, My Favorite Things, poppy background | Tags: Faber-Castell Polychromos Colour Pencil, Ink to Paper, My Favorite Things, Ranger Distress inks, sennelier watercolours 10 Comments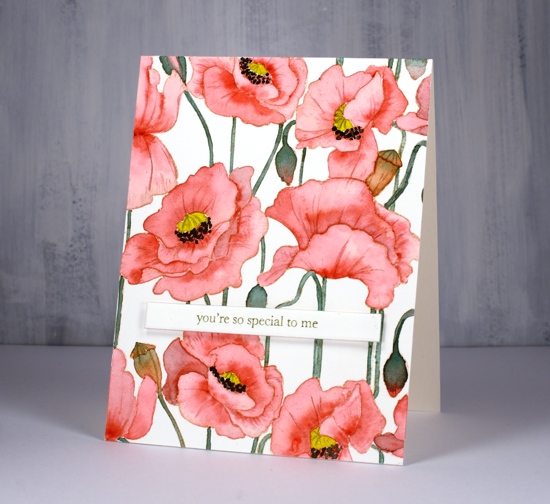
I did not plan to post this stamp two days in a row but it was there on the desk within reach and you have to admit it is perfect for no line watercolour because the outlines are so clear. So, instead of working on my to do list I painted on this card.
I stamped on hot pressed watercolour paper with antique linen distress ink for a pale but easily seen outline image. I decided to use my sennelier watercolours because they are lovely to work with. I used a red, a yellow, and a green. To make brown I mixed the red and green, then to make the black I added more red and green. The green I used for the stems and buds was not straight from the pan I mixed in a little red first to make it more olive toned. Once again I was happy with the results from sticking to a limited palette. You can definitely try the same approach with whatever watercolours you have on hand. If your green is a little bright, as mine was, add in a bit of red.
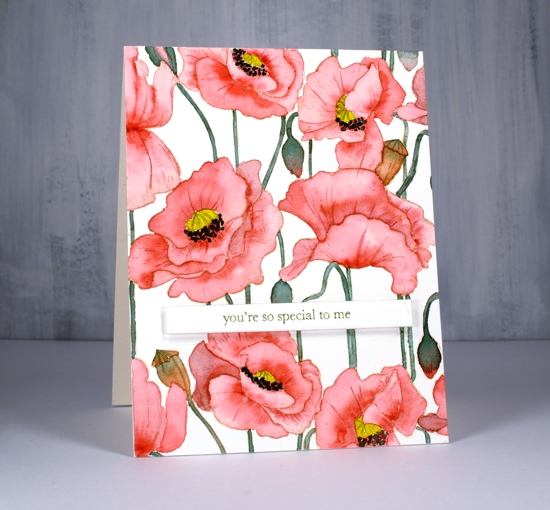
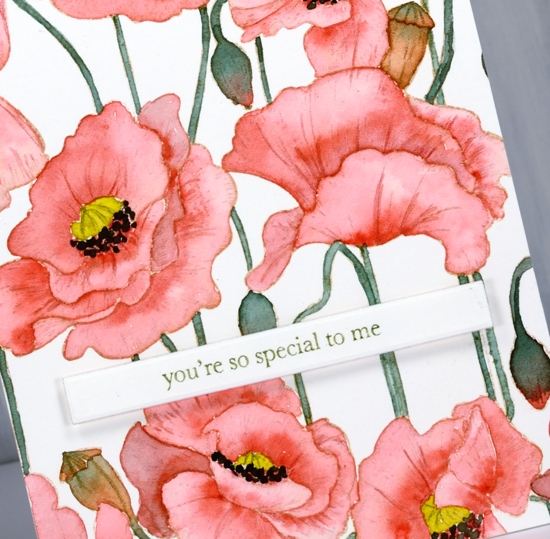
I painted the petals one at a time with diluted red and while each was wet I added more red where I wanted depth or shadow. I paid attention this time to whether I was painting buds or pods. I painted the buds with green blended into red and painted the pods in browns. I added a little of the mixed green to my yellow before painting the poppy centres and used my red+green=almost-black to paint the little black dots around the poppy centres.
After all the painting was done I added a bit more shading and veins on petals with polychromos coloured pencils.
I decided to use another of the lovely little sentiments from my new Ink to Paper ‘tagged’ sentiments set. To achieve a matching olive green on the sentiment I stamped with versafine clair shady lane ink but I stamped on a scrap first so I could get a pale ‘second generation’ print.
I hope you see how versatile this stamp is; it worked beautifully with the loose distress stain watercolour and the more precise no-line watercolour. I have an idea for a third look too.
Supplies
Watercolour on coloured paper
Posted: May 10, 2019 Filed under: bunches for you, flower fantasy, peaceful time, Penny Black, Watercolour | Tags: canal paper, Penny Black stamps, sennelier watercolours 10 Comments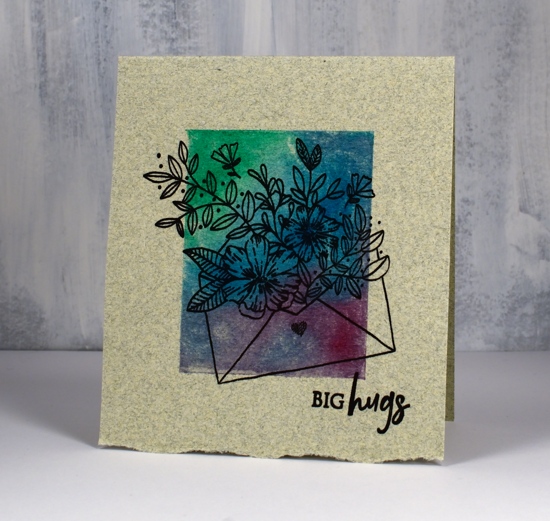
I came across some interesting paper at Art Noise when I was in Kingston on the weekend. It is called canal paper and is made by Paperterie St. Armand in Montreal. The pad of paper I bought has six different colours, all made from cotton rag; the fibres are left from clothing company offcuts. There is no bleaching or dyeing, the colour of the papers is from the colour of the cotton fabrics.
The paper is not the only new thing I tried out on these cards. I also have some delicious new Sennelier watercolours. I was interested to see how they looked on the coloured paper and also how the paper held up to a watercolour wash.
These cards are one layer making use of the natural deckled edge on one edge of the paper pad. I scored the paper then taped it to my glass mat, lining up the frog tape with the grid on my mat to create a masked panel in the centre of the card front. I used three colours of paint on each card and matching envelopes. I was impressed that no paint seeped under the edge of the tape so I had crisp edges to my watercolour panels.
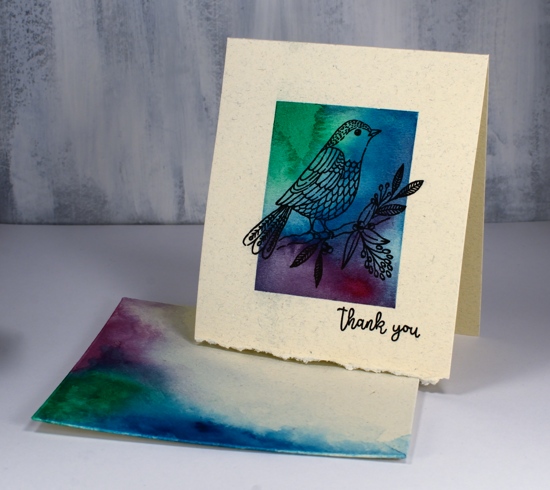
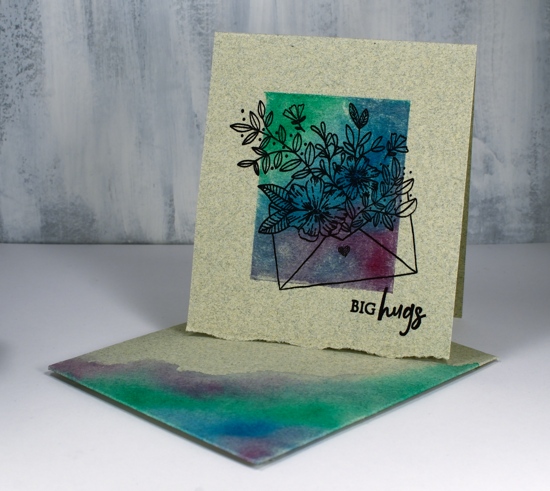
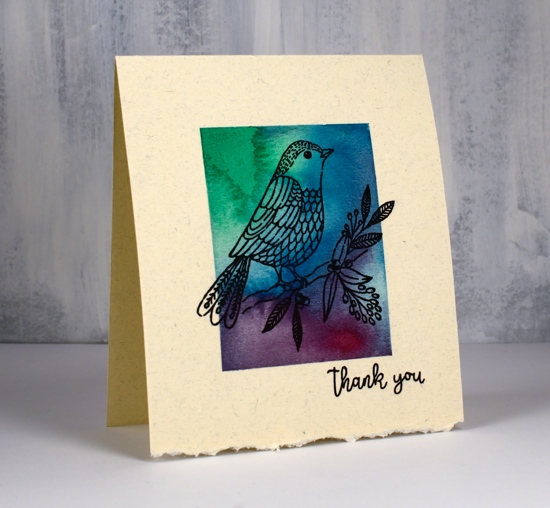
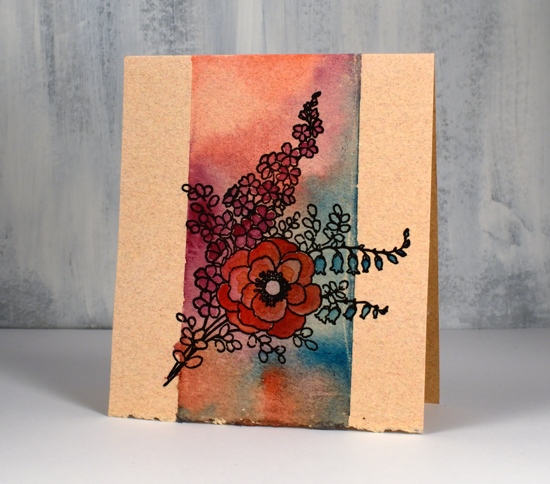
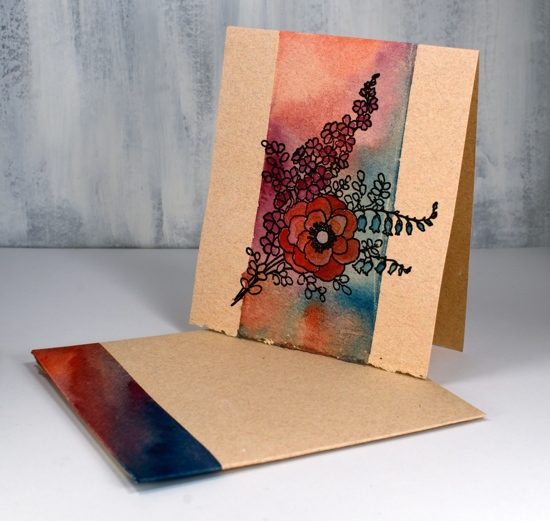
I stamped the new line art stamps from Penny Black with Ranger archival inks and was very happy with the crisp prints on the paper, I thought there might be a bit of bleed as the paper has quite a soft surface but the stamping was crisp and there was no bleed through with the watercolour washes. For the two cards above I simply stamped the image over the watercoloured section. On the card below I did the same then added some extra painting to the flowers using the same paint colours. The colour of the paper makes the paint colours more muted than they would be on white or cream but I liked the more rustic simple style on these cards. You could definitely use this technique with the traditional white watercolour paper and achieve much brighter results.
My cards measure 5″x 4¼” so I decided to make custom envelopes from the same paper. I used the We R Memory Keepers 1-2-3 punch board to make an envelope to fit and before I taped it together I masked a section of the front so I could watercolour in the same colours used for the cards.
Supplies