
Blue Birthday
Posted: March 26, 2024 Filed under: banner blooms, banner blooms cut out dies, Dies, exquisite envelope, online class, Penny Black | Tags: online class, Penny Black creative dies, Penny Black stamps, Ranger Distress inks 6 Comments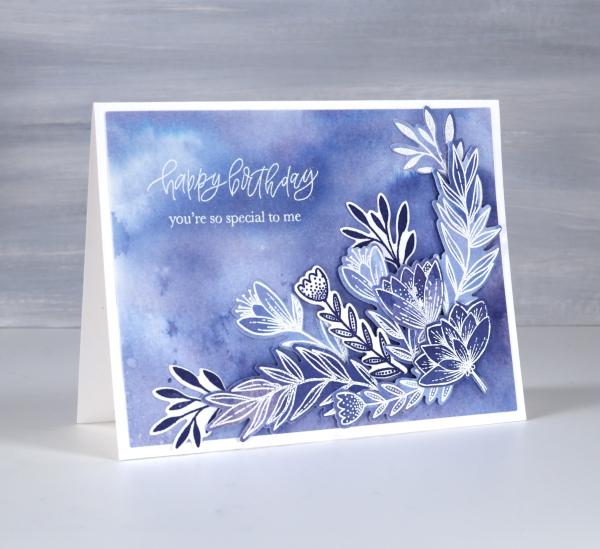
Blue is my favourite colour and the different hues seen on this card are examples of why it appeals to me so much. I tend to prefer the blues that are a little bit purply but I like the teal blues as well.
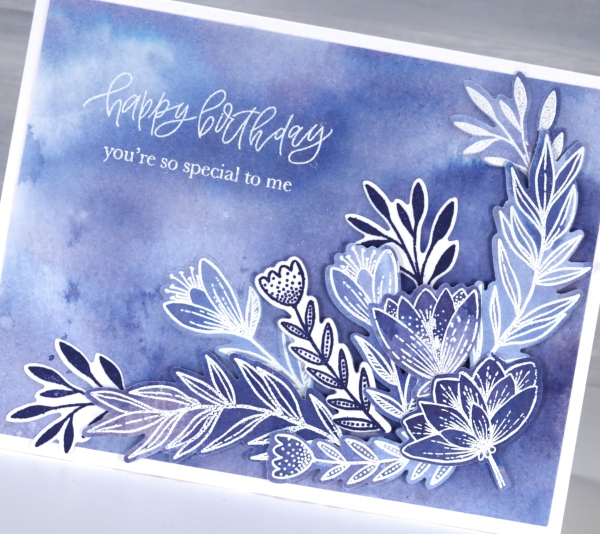
All the blues on the card are made from one ink, chipped sapphire distress ink. If you watercolour with your dye inks you have probably noticed that some inks separate into different hues when diluted. I thought I would share this card today because it features in one of the lessons in my Colour Clues online course. Colour Clues is a card making course which covers colour blending, contrast, separation and mixing. I created a 40% discount for all my online courses back on February 29, mentioned it in a blog post then forgot about it! That’s why I’ve been featuring it more this week. The discount code LEAPYEAR40 is active until the end of March 28 which is now two days away.

I chose the Penny Black sets Banner Blooms and Exquisite Envelope for this card because there were plenty of enclosed petals and leaves to trap colour. Banner Blooms just happens to have a co-ordinating die set which sped up the layering of blooms and leaves. This post includes affiliate links from Foiled Fox . If you buy through these links I receive a small commission at no extra cost to you.
Do you have a favourite colour. Does it turn up often in your crafting or perhaps in your wardrobe? I definitely wear a lot of blue!
Gel Printed Pods
Posted: March 25, 2024 Filed under: artsy stems, framed fern, gel press, Lavinia, online class, Penny Black, Tim Holtz | Tags: gel press, gel printing, Lavinia, online class, Penny Black creative dies, Tim Holtz 3 Comments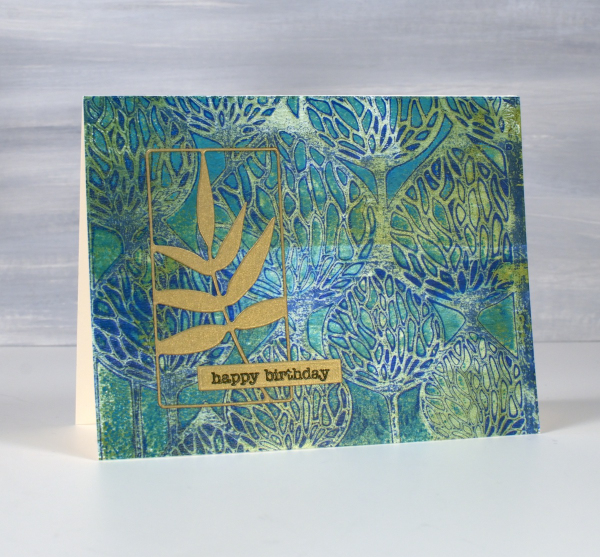
It’s been a while since I gel printed but that there is no lack of gel prints to show you. I currently have boxes of prints and and a stash of cards made from prints.

These two cards were made from the same stencil print, one of the examples from my Gel Print Journey online class (which is on sale along with all my online classes until March 29; just use the code LEAPYEAR40 at checkout)
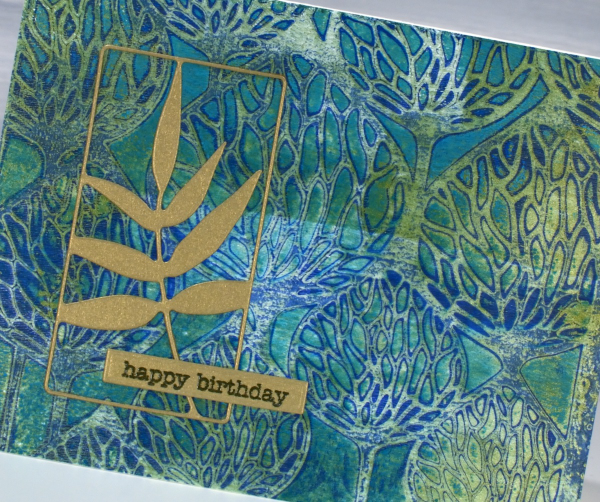
If you are a fan of Lavinia stencils like I am you probably recognise the ‘Pods’ stencil used for this print. I printed on a 6″x 6″ gel plate giving me a print big enough for two cards. It’s hard to see in the photo but some of the paint was metallic so the print has some shimmer and shine on it.

I looked through my botanical dies and gold cardstock in order to fine co-ordinating elements for the cards. On the card above I used the ‘framed fern’ die from Penny Black and on the card below the die featured is from Tim Holtz artsy stems die set.

I hear my gel plate calling to me so hopefully I will soon dedicate a few days to happy printing. If you are looking for a beginner gel printing class or a refresher please check out Gel Print Journey. This post includes affiliate links from Ecstasy Crafts, Foiled Fox and Scrap’n’Stamp . If you buy through these links I receive a small commission at no extra cost to you.
Fuchsia Favourites
Posted: March 22, 2024 Filed under: captivating, Dies, gift card pocket, online class, Penny Black | Tags: online class, Penny Black creative dies, Penny Black stamps 9 Comments
As I wait for spring I thought I would post a couple of cards I made a few years ago when filming my Floral Faves online course. I used the beautiful ‘Captivating‘ stamp from Penny Black to teach a no-line watercolour technique. All my online courses are discounted by 40% for a one more week.
Edited to add: use the code LEAPYEAR40 if the discount doesn’t appear automatically.
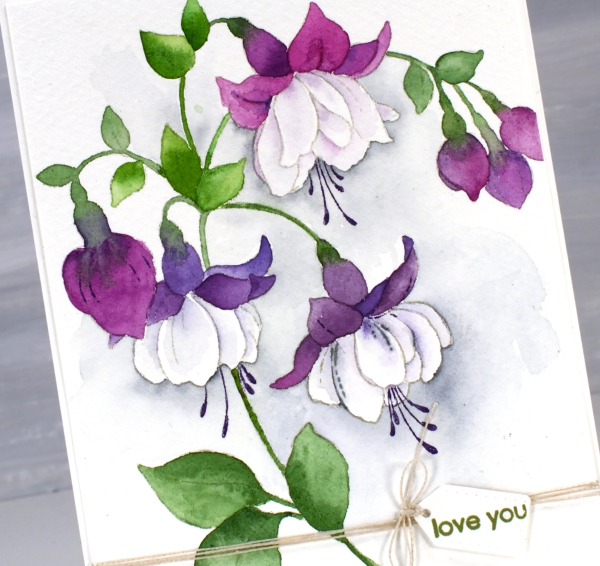
I used watercolour paints to colour the two cards featured today but I have also used waterbased inks smooshed onto a glass mat as they also work well for the technique. I added the tiny little tag from the PB ‘gift card pocket die set‘. It’s a set that I never use to make gift card pockets but often reach for one of the tag or label dies included.

I had fuchsias looking pretty in the planters at my front door last year. They were the opposite colouring of the ones above with pale pinky purple petals hanging down and creamy white petals at the top.

It might be time to pull out this stamp again and try it with the new pastel pencils. For more inspiration with this stamp click here and here. Today’s post features affiliate links to The Foiled Fox.
Happy Birthday, Happy Camper
Posted: January 31, 2024 Filed under: ...is coming, campers, Penny Black, trio of trees | Tags: Penny Black creative dies 3 Comments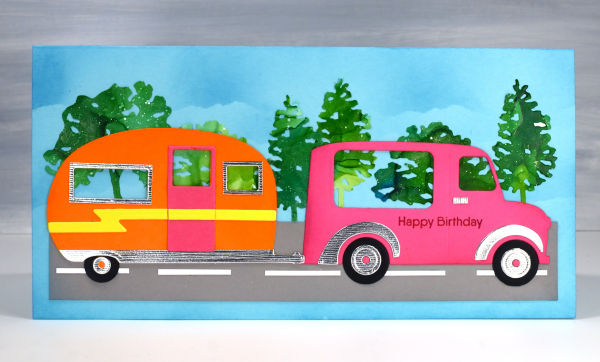
Today’s card has already travelled to a girl who just turned 8! It’s not my usual style but it was definitely fun choosing the colours and cardstock to put this one together. The die sets are both from Penny Black and although they weren’t released at the same time, they are the same scale which made this cute little scene possible. One set is called ‘Campers‘ and the other ‘…is coming‘
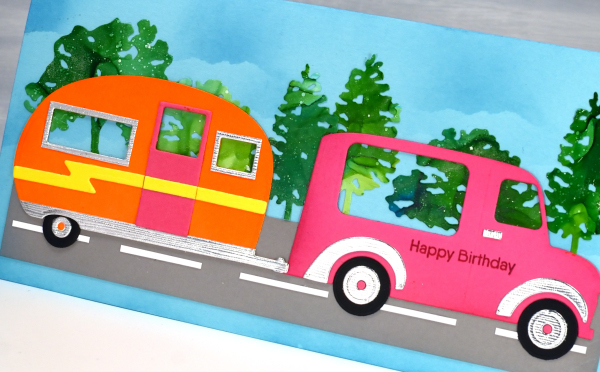
The blue card base and the pink, yellow and orange cardstock was all from my stash so I couldn’t say what the colours are but the cool lined silver is from Tonic Studios. The trees are also a PB set called ‘Trio of trees‘ and I cut them from an alcohol ink gel print.
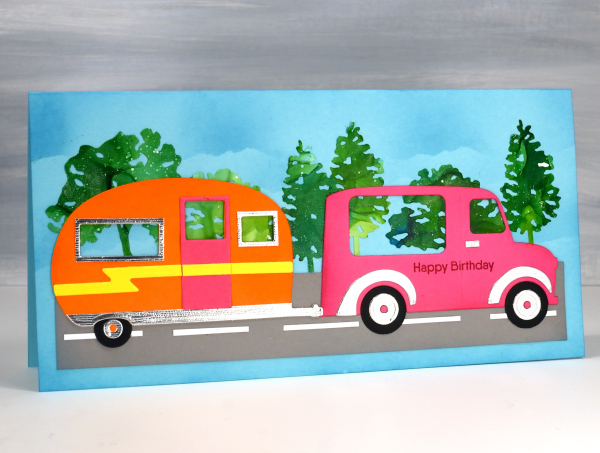
I tore a post-it note edge to mask some clouds as I blended broken china ink over the base. I’ve used the little truck/van a couple of times before; you can see those cards here and here. Today’s post features affiliate links to the following companies. If you buy through these links I receive a small commission at no extra cost to you. The Foiled Fox & Scrap’n’Stamp.
Collage Skates
Posted: December 13, 2023 Filed under: Dies, gel press, let's skate, Penny Black | Tags: gel press, gel printing, Penny Black creative dies, Taylored Expressions 1 Comment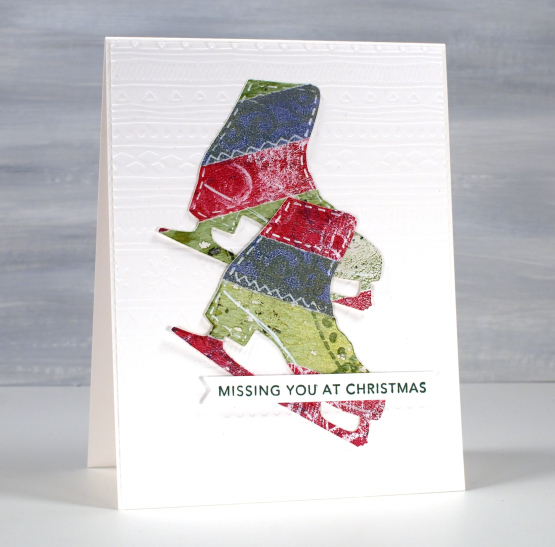
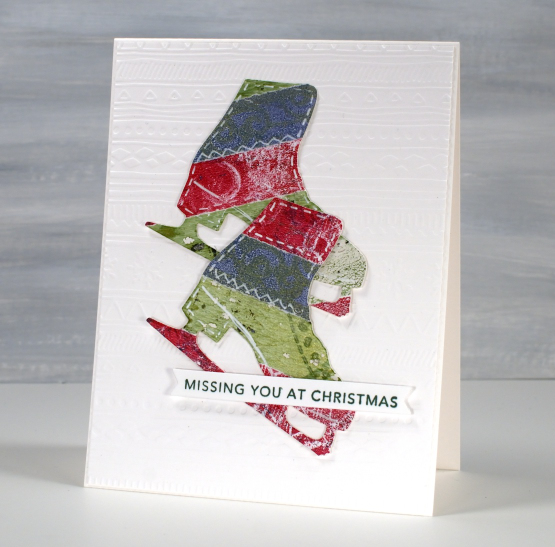
This was one of last year’s Christmas cards made during my collage Christmas card class. All the strips of colour are from gel prints. If you look closely you can see some grungy texture and pattern. None of the prints were amazing by themselves but when combined I quite liked the mix and pattern.
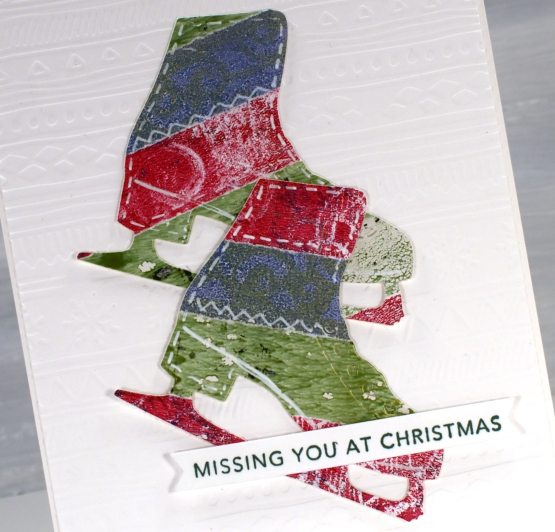
I used the Penny Black die set ‘let’s skate’ to cut two skates from the collage panel then popped them up on an embossed panel and added a Taylored Expressions sentiment from her ‘simple strips’ Christmas stamp.
I made many collage cards last year because I have so many gel prints to collage and many dies that worked for cutting. There were trees, bells, stars, poinsettia, stockings, baubles and more trees! I hope this is another idea you’ll try with your gel prints or any patterned papers or tapes. Washi tapes work well because the adhesive is already there!
Trees from strips and scraps
Posted: November 29, 2023 Filed under: Darkroom Door, Dies, Music Background, Penny Black, sheet music, starry night | Tags: Darkroom Door stamps, Penny Black creative dies, Penny Black stamps 5 Comments
I have a few more cards made from leftovers today; I love leftovers, especially the ones in the fridge but the paper ones are nice too! The card above is my favourite of the mix and it is so simple, just strips and stars. I stamped one of those strips with a music background stamp but the rest are just patterned or gold shimmer cardstock.
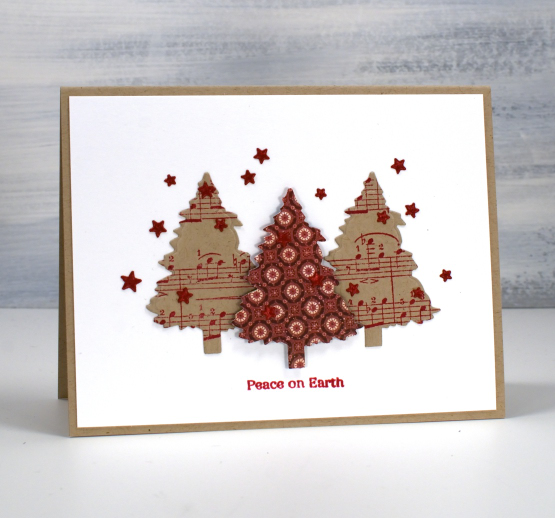
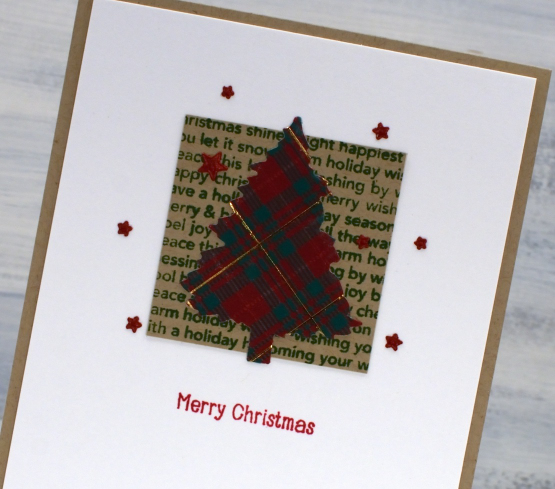
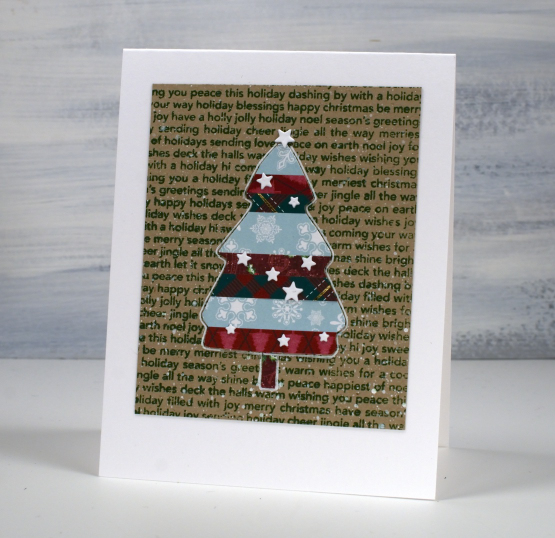
I made use of one tree die for the rest of today’s cards, it’s from Penny Black’s ‘evergreen tree‘ die set. The trees above are cut from stamped and patterned paper. The tree below I cut from a piece of kraft that I had coloured my own plaid pattern on with coloured pencils and a gel pen. It was fun but not necessary if you want to be quick. The pretty music stamp featured below is from Darkroom Door and the larger one above from Penny Black.

The final card shows another tree cut with the same die but from printed plaid paper attached to a panel stamped with an old holiday word stamp. The little stars I cut with the PB ‘starry night die’ and used small sentiments from the PB holiday snippets set. It is an old set now but I use it all the time on Christmas cards.
Today’s post features affiliate links to The Foiled Fox. If you buy through these links I receive a small commission at no extra cost to you.
Foiled and Embossed ornaments – video
Posted: November 27, 2023 Filed under: grafix | Tags: grafix, Penny Black creative dies 5 Comments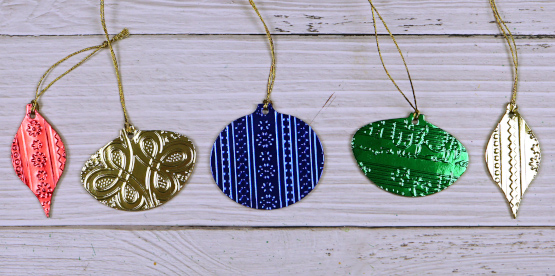
Recently I made a video for Grafix which involved some experimenting with their Metallic Foil board. I created some sweet little foiled and embossed ornaments and a card. I was very impressed with the way the foil board embossed. You can see the whole process in the video below.
The double tack mounting film worked very well also adhering the foil board to the chipboard. It made for some simple but very shiny, eye-catching ornaments. If you don’t have dies that cut chipboard you could always die-cut several baubles from cardstock and stack them to make a firm base for the foiled layers.

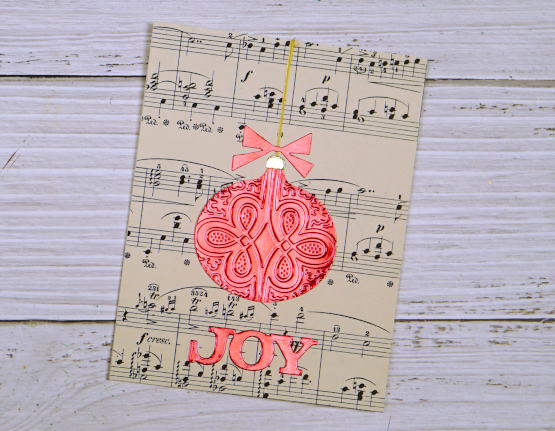
I added a single layer embossed bauble to a card front too and the shine of the foil board looks lovely on the very neutral vintage music paper. The ornaments and bow were all cut using the Sizzix ‘retro ornaments’ Bigz die and the word ‘joy’ was cut with the Penny Black ‘joyful winter’ die.
Christmas Filigree
Posted: November 23, 2023 Filed under: Christmas filigree, Dies, Echidna Studios, joy of giving, Penny Black, Taylored Expressions | Tags: digital stamps, Echidna Studios, Penny Black creative dies, Penny Black stamps, Taylored Expressions 2 Comments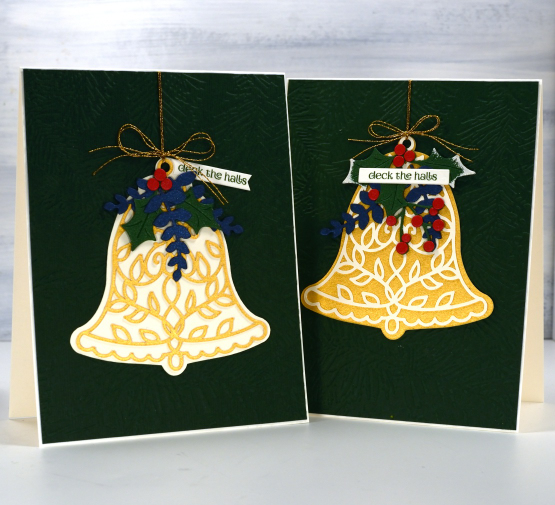
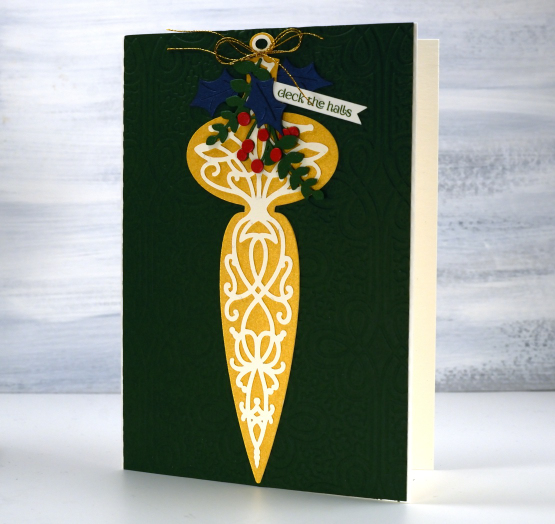
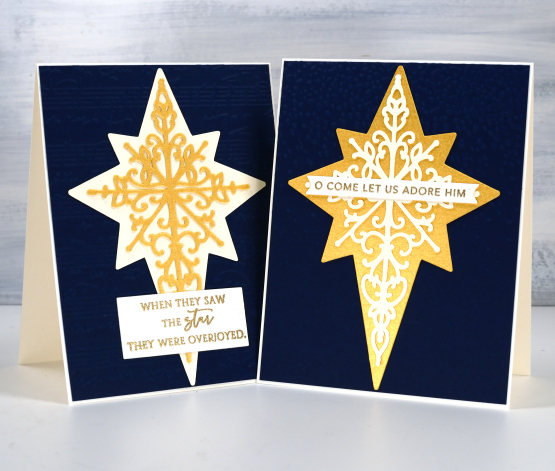
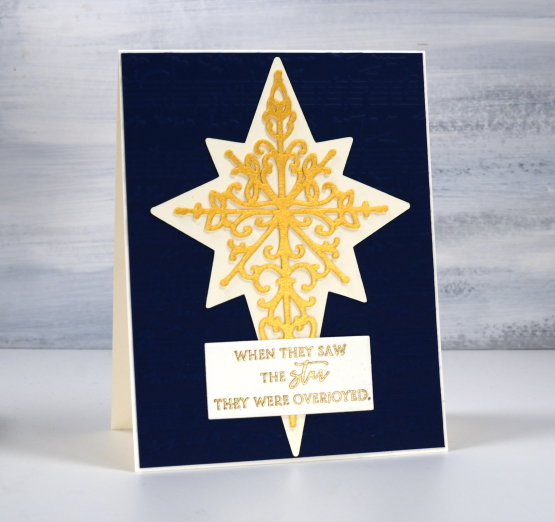
I am pretty excited about these new images. I think filigree patterns are very pretty and once I got the gist of it had a lovely time designing a bell, a star and a finial ornament. I thought it made sense to have a solid background to show off the filigree and, tada, the Christmas filigree digital stamp and cut file set came to be! This set is now in the Echidna Studios store along with three more new sets and some updated Christmas sets from last year. It’s beginning to look more like Christmas every day.

I think the bell is my favourite of the three images and will come in handy making wedding cards as well as Christmas. I wanted to show off the designs on dark backgrounds but when in comes to photographing shimmery gold, embossing on dark green or navy and the high contrast of cream cardstock as well, I can’t always nail it.
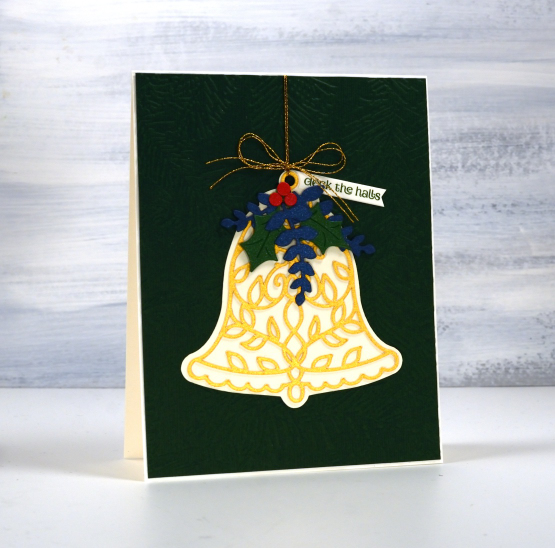
So let me tell you the bells are sitting on dark green panels embossed with Spellbinders ‘forever green’ folder. The green panel on the left below is also embossed with that folder but the one on the right is embossed with the Anna Griffin ‘regal braid’ folder. The star cards at the end of this very long post are on navy blue backgrounds and it is again a little tricky to see one base is embossed with the ‘speckles/snowfall‘ folder and the other with the Taylored Expressions ‘sheet music‘ folder.
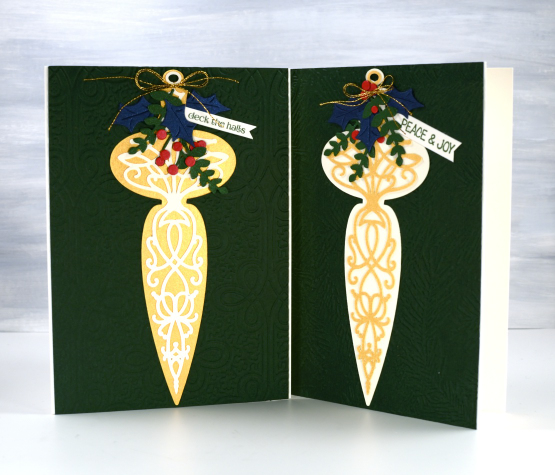
I decorated the finials and bells with a mix of die cut foliage from Penny Black including the ‘joy of giving‘ set.
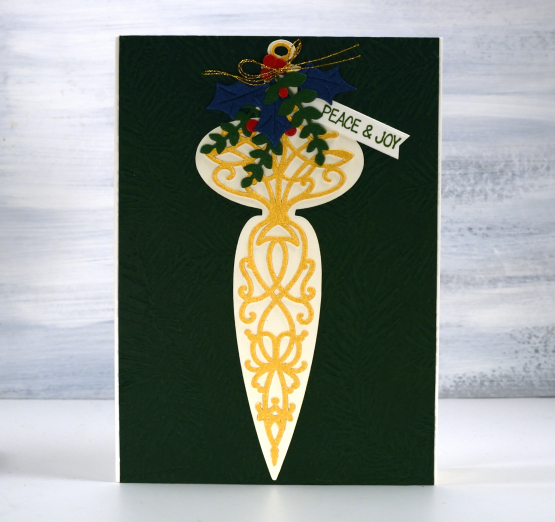
As the finial is such a long thin shape I made the card a little larger than usual, around 6″x4.5″.
I created the star cards without foliage but found suitable sentiment from PB and Taylored Expressions.
I think all three designs would make lovely tree ornaments either stacked to give them extra stability or cut from thick acrylic or thin board on a laser cutter. I don’t have a laser cutter but it is possible to book time on one at the library; if get some cut I will definitely show them here on the blog.

Thanks for scrolling all the way through this long post; I really appreciate you visiting the blog. Have a great day!
Today’s post features affiliate links to Scrap’n’Stamp. If you buy through these links I receive a small commission at no extra cost to you.
Stripes and strips
Posted: November 14, 2023 Filed under: Christmas background, Dies, Hand drawn, Hand lettered, My Favorite Things, Penny Black, starry night | Tags: collage, My Favorite Things, Penny Black creative dies 8 Comments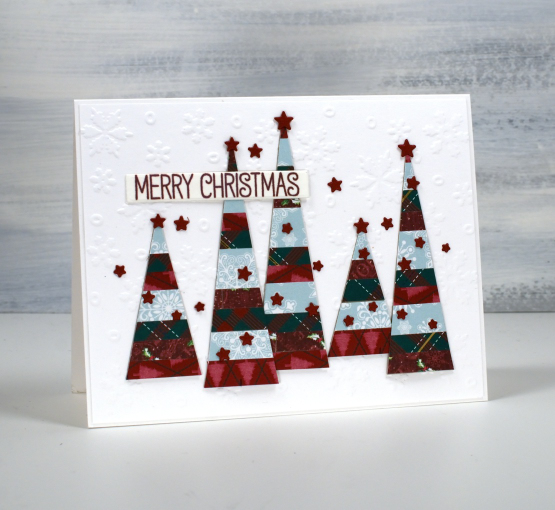
If you have scraps of patterned or solid coloured paper today’s post is for you. I made a panel of striped cardstock by cutting thin strips of patterned paper and gluing them to a piece of light cardstock. From my homemade ‘striped cardstock’ I cut a hand drawn tree, a hand drawn bird and some simple triangle trees. You could use dies for all the elements I was just playing with ideas and decided to sketch and cut myself.
I used an embossed snowflake background for the card at the top of the page, a stamped kraft background for the tree above and then plain kraft for the bird. The little stars that decorate each card I did not hand cut of course! They are cut with the PB ‘starry night die’ and applied with the help of one of those sticky ended tools. Little embellishments have a high fiddliness factor which I don’t appreciate but these tiny stars were necessary!

I added outlines to both the bird and the tree with white or black gel pen along with some dots and a handwritten sentiment.

Cutting my own shapes was fun and put some of the many paper scraps to good use!
Surf’s Up
Posted: October 17, 2023 Filed under: Echidna Studios, Surf's Up | Tags: digital stamps, Echidna Studios, Penny Black creative dies 2 Comments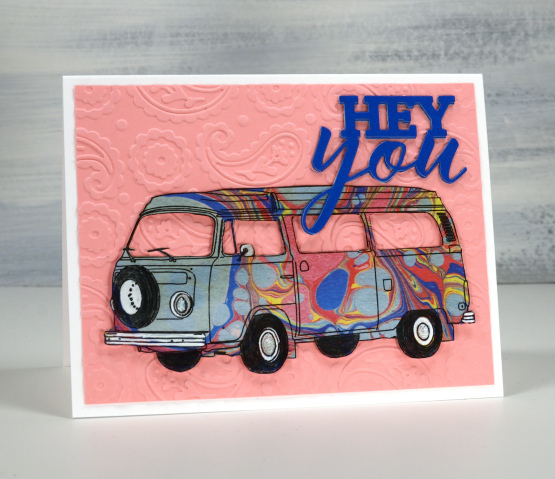
What do you think of today’s funky van from Echidna Studios? A few months back I watercoloured the vintage VW beetle and it’s still one of my favourite digital images from the store. The new Surf’s Up image is equally cool and made me reach for some marbled paper that would make it all the more fun! The digital stamp set includes three surfboard images that can be positioned with the van or used on their own.
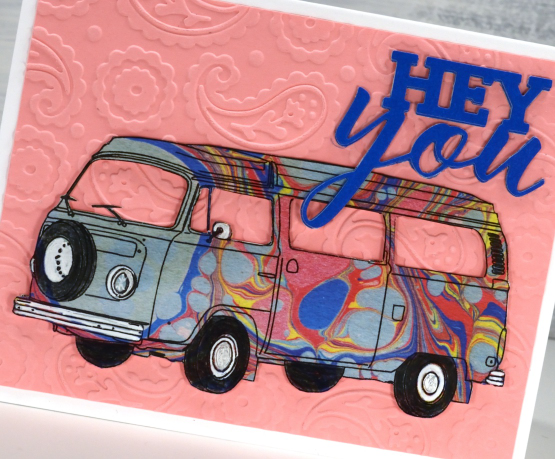
The paper I had was a 6″x6″ square which I was able to manually feed through my printer. I imagine some of you are wondering if I fussy cut this because I have been vocal in my dislike of fussy cutting in the past. Surprisingly I did cut it out and also an extra roof and van body from cardstock to tuck behind to lift and strengthen the cut out. I coloured directly on the marble paper with a black pencil, and white and silver gel pens.
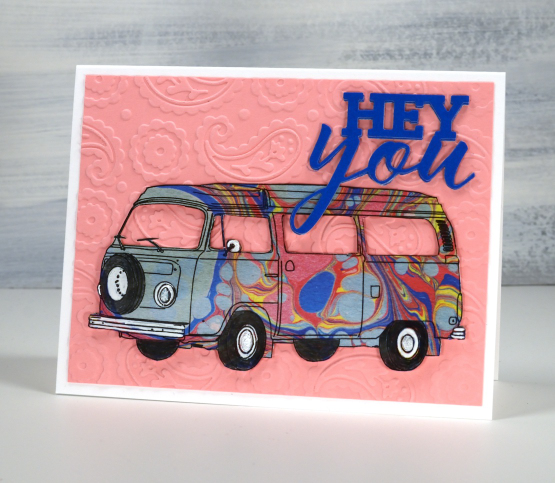
Naturally a marbled van wanted a paisley backdrop so I embossed some pink cardstock with a cuttlebug folder I recently picked up at a garage sale. The bold die cut sentiment is from Penny Black. Hope you have a groovy day!


