Botanical Dream
Posted: August 30, 2023 Filed under: Alcohol Ink, botanical dream stencil, gel press, gelli plate, Taylored Expressions, The Crafter's Workshop, The Crafters Workshop | Tags: gel press, gel printing, Ranger Alcohol Ink, Taylored Expressions, The Crafter's Workshop 7 Comments
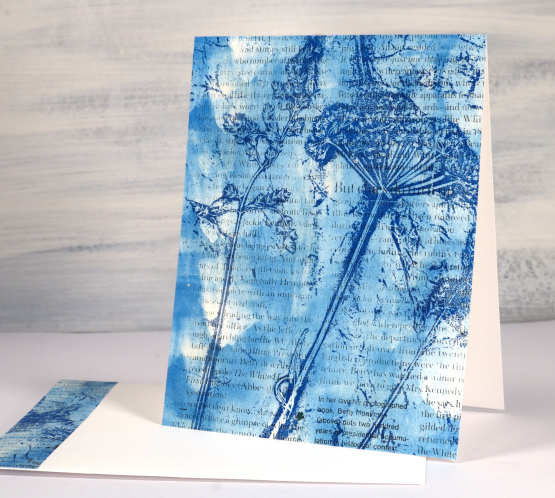
I think you’ve noticed my love of gel printing. Let me assure you it hasn’t diminished at all. Today’s card features an alcohol ink and stencil print completed on the gel plate then lifted with a layer of acrylic paint.

I’m not sure which alcohol inks I used but I am pretty sure there was a cloudy blue and a brown involved. I’ve learned to like blue and brown combos over recent years which has surprised me a bit. Often we use alcohol inks only on plastic surfaces such as yupo or craft plastic. What I like about using alcohol inks on the gel plate is the way I can lift the print with any paper at all. I plan to make a video showing this technique so stay tuned.

The lovely stencil featured here is called botanical dream from The Crafters Workshop. All the little spaces trap alcohol really well making it a great choice for this technique. I let the stencil sit on the alcohol ink pattern for a while so it dries then lift the print with acrylic paint. I finished the card with a cute greeting from the Taylored Expressions set ‘In & Out Birthday. The set is full of pretty fonts.
My blog features affiliate links to the following companies. If you buy through these links I receive a small commission at no extra cost to you.
Ecstasy Crafts (Ecstasy Crafts offers a discount code heathertecs10 you can use for a 10% discount at checkout)
Vintage Butterfly Journal page
Posted: August 8, 2023 Filed under: 49 and Market, 6"x 6" journal, Art Journal, Curators Adverts, gel press | Tags: Art Journal, gel press, gel printing 4 Comments
I recently completed this spread in my Ranger 6″x6″ kraft journal. The background or base of my page is covered in collage so by the time the page was finished very little of the kraft colour showed through.
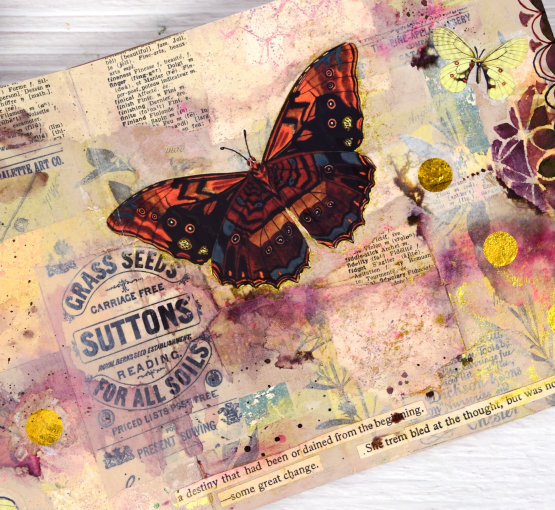
When I started this page I didn’t have a plan but I did have patterned papers on my table. I had some pink, yellow and apricot coloured gel print scraps, some yellow-green tissue paper printed with botanical images and as always, some vintage book pages. Some of the gel printed scraps were left over from the cards I featured in a post last week. I glued down the gel print scraps in no particular arrangement then began gluing the green tissue over the top. I have some fancy washi tape called ‘Curators Adverts‘ which is 4″ wide and covered in black-on-cream ads. I tore some pieces of that and added them over the paper collage.

The collaged page sat on my desk for several weeks before I resumed by adding acrylic paint in pale neutral tones including sand and old ivory. The paint began to tie the page together but it was still lacking a focal point. I flipped through the DK Bees, Birds and Butterflies Sticker Anthology and chose a few pale yellow butterflies which I added to the bottom left and top right corner.

You know I love splatter on my cards and journal pages so I added some droplets of dark brown ink, then spritzed it to dilute and move it around the page. The brown ink diluted to burgandy and pink tones which made me go back to the sticker anthology in search of a bolder butterfly. Once I had added it to the page I worked with walnut stain distress ink and Parker writing ink to add scallop patterns by hand and through the beaded mandala stencil.
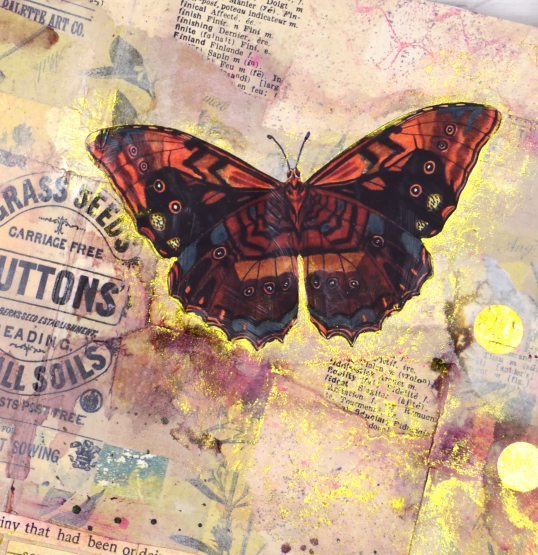
Final touches included some gold polka dot tissue paper, some sentences cut from book pages and sparkly gold watercolour paint. I really like the warm pinky brown tones of this page with some subtle yellow and green appearing sparingly. The vintage ad for grass seed is also a nice feature, centered but not the main attraction.
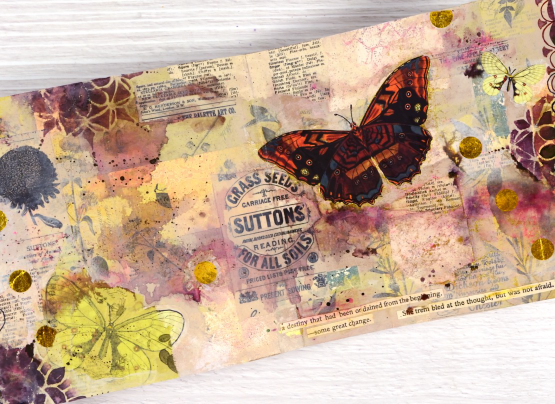
Collage is a favourite technique for me when beginning journal pages, how do you like to get started on a fresh new spread?
Wishing you comfort
Posted: August 3, 2023 Filed under: Branch 9 die, gel press, Moda Scrap, Penny Black, whisper | Tags: gel press, gel printing, Penny Black creative dies, Penny Black stamps 3 Comments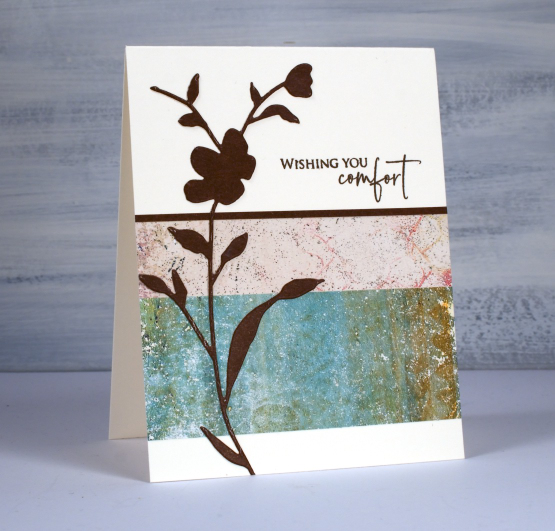
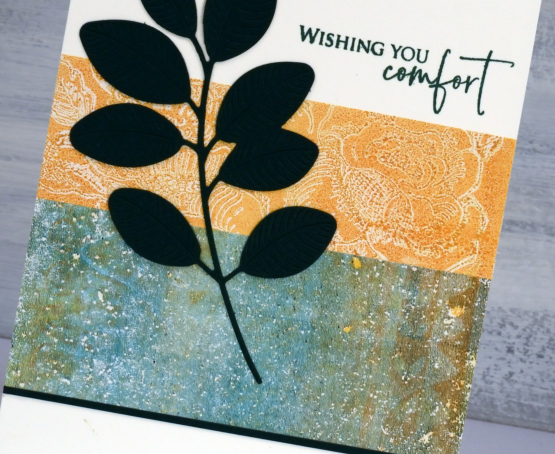
I’m always looking for ways to use my gel prints because I have many and want to make more! I found this two panel idea on Victoria Wilding’s instagram. I chose not to stamp on my prints but instead added the Penny Black ‘whisper’ die-cut over the top, a strip of cardstock along the edge and a sentiment from the PB set ‘strength‘.
If you don’t have gel prints you could use any kind of patterned paper but I would encourage you to check out my online course ‘Gel Print Journey‘ if you are interested in learning or trying new techniques.
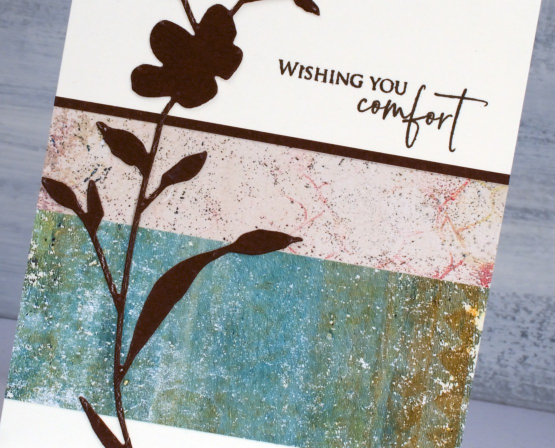
I thought the muted tones of the gel prints lent themselves to a sympathy card as did the dark brown cardstock rather than bold black.
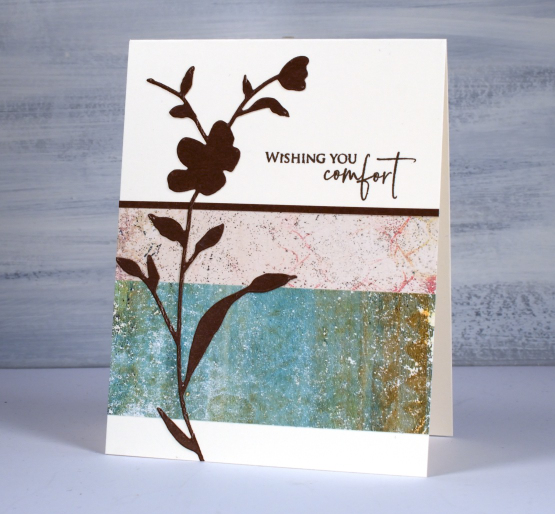
These gel prints are not very bulky as I printed on paper not cardstock. I added double sided adhesive to the back then attached the strips to the card base and trimmed off any overhanging paper.
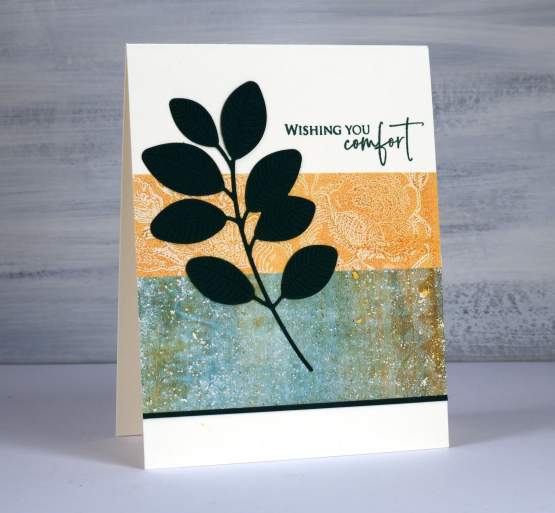
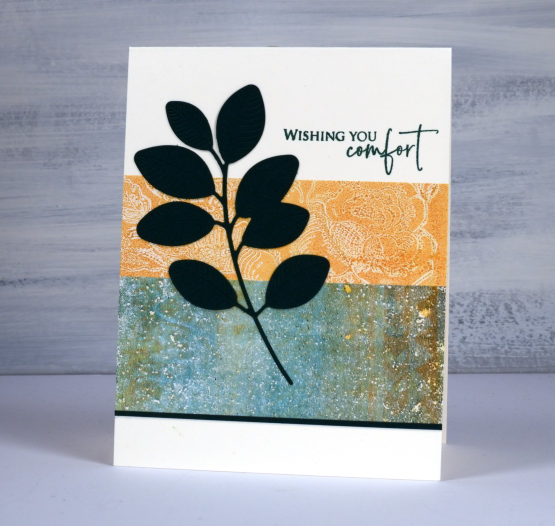
You might recognise the same greeny brown print on this second card but this time paired with a print featuring the PB background stamp, ‘bed of roses’.
I cut both the Moda Scrap ‘branch 9‘ die and the edge strip from dark green cardstock and used a similar coloured ink for the sentiment. I know the cardstock looks black in the photo but it is truly dark green in real life.
I liked the clean but pretty effect of two gel printed strips together and was able to make several cards using bits of 6″x6″ prints. I kept all the left over scraps too; you will see them in an upcoming journal page.
Alcohol Ink Gel Print
Posted: June 19, 2023 Filed under: Alcohol Ink, artsy stems, gel press, little lowercase letters, My Favorite Things, Tim Holtz | Tags: gel press, gel printing, My Favorite Things, Ranger Alcohol Ink, Tim Holtz 3 Comments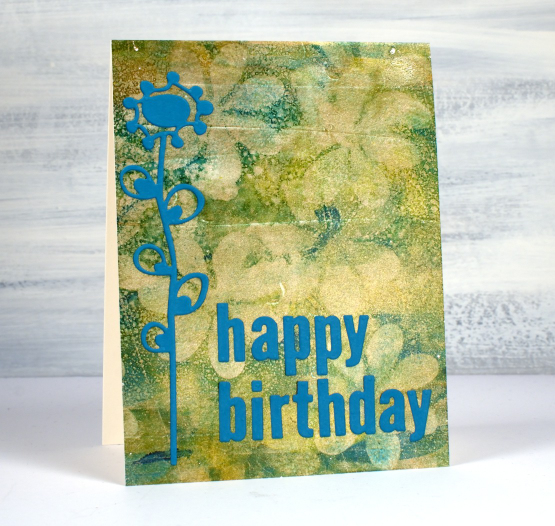
Last Monday I posted a faux batik look created on the gel plate. Today’s card is not faux alcohol ink; I did create a design on the gel plate with alcohol inks then picked it up with acrylic paint. Alcohol inks dry quite quickly so they are fun to fiddle with on a gel plate.

I can’t remember exactly which inks I used but I imagine there was a blue and yellow alcohol ink involved and perhaps ‘stream’ which is a deep teal colour. I sprinkled them on the gel plate, added some isopropyl alcohol to get the colours moving and then used a homemade stamp to add the flower shapes. In my online gel printing course I have a whole lesson about making and using homemade stamps with acrylic paints. Using them with alcohol inks is also an option as shown on this card. The speckled look over the panel is from adding a spritz of isopropyl alcohol to the plate before letting it dry.

I pulled the print with gold acrylic paint which has given the whole panel a goldish tint and in real life a bit of shine and shimmer. To finish the card I added a die-cut flower and letters in a co-ordinating colour. The letters were cut with MFT ‘little lowercase letters’ which might not be available anymore but I have linked to a similar set.
(Compensated affiliate links from Foiled Fox & Scrap n Stamp)
Batik on the Gel Press
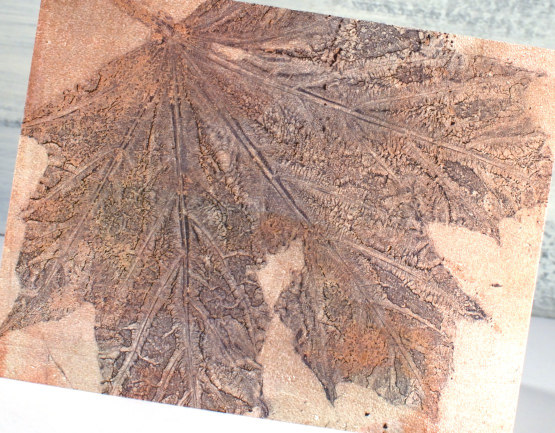
Posted: June 12, 2023 Filed under: gel press, leaves and lines, Tutorial | Tags: Echidna Studios, gel press, gel printing 4 CommentsJust because my new online class is published doesn’t mean the gel plates have been put away. I am always thinking up new ideas to try on the gel plate and the problem is finding the time to experiment. I sat down last week and filmed myself while gel printing with some stencils. This large batik-like panel is one of the prints I made.
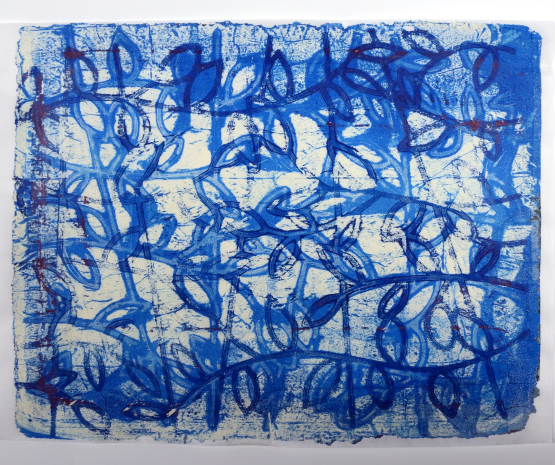
The stencil is one I designed myself called ‘leaves and lines‘. I cut it out of grafix matte durar-lar on the cricut. The beauty of a digital cutting file and cutter is the same design can be cut in different sizes. For the print above I used a 9″ x 11″ gel plate and the stencil was slightly smaller than the plate. Some of you might remember that I have a new youtube channel as I lost my old one. It has a mix of older (from the archives) videos and new ones (freshly filmed). It has been a bit quiet lately but thanks to all who have visited. Please spread the word so I can build the community back up.
The crackly effect that makes the design look a bit batik-y is from the tissue I used to lift paint around the stencil. I don’t yet have a plan for this large print but I am thinking it would make a nice book cover.
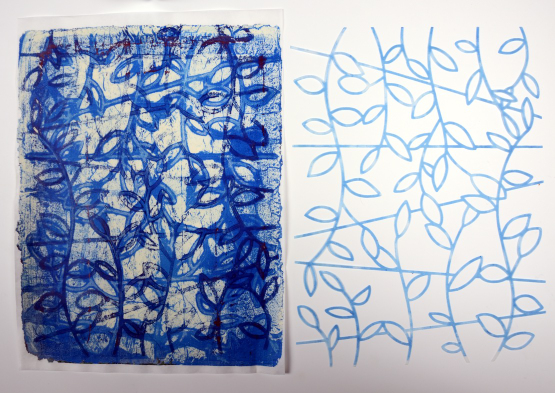
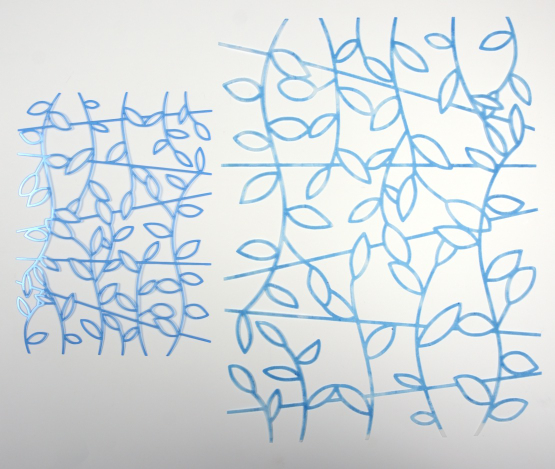
The digital cutting file is available in Echidna Studios etsy store and is printable as well if you wanted to print it instead of cut it. I have cut it twice but only used the larger of the two stencils so far. You can see them in the photo below. The smaller one is shinier as it is pristine and cut from Grafix stencil film (slightly heavier than matte dura-lar) The one of the right was used in the video and is blue from paint stain. If you are interested in more gel printing techniques with stencils or just more gel printing techniques I’d love you to check out ‘Gel Print Journey‘ my new self paced online course.
I haven’t done any real batik lately but I did quite a bit in high school and of course had a long batik wrap around skirt! Anyone else remember that look? Not surprisingly mine was white and blue just like today’s gel print.
Gel Print Journey
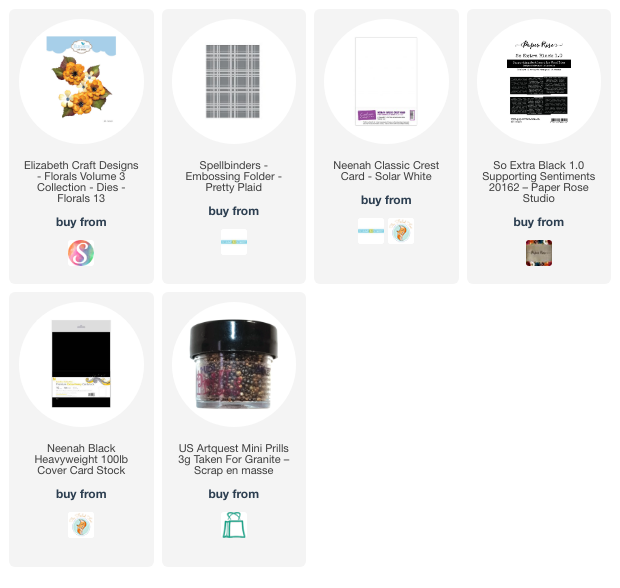
Posted: May 31, 2023 Filed under: Elizabeth Craft Designs, florals 13, gel press, online class, pretty plaid, Spellbinders | Tags: Classes, gel press, gel printing, online class, video 4 Comments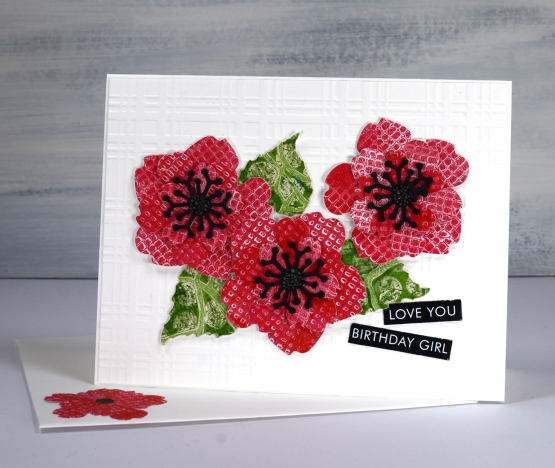
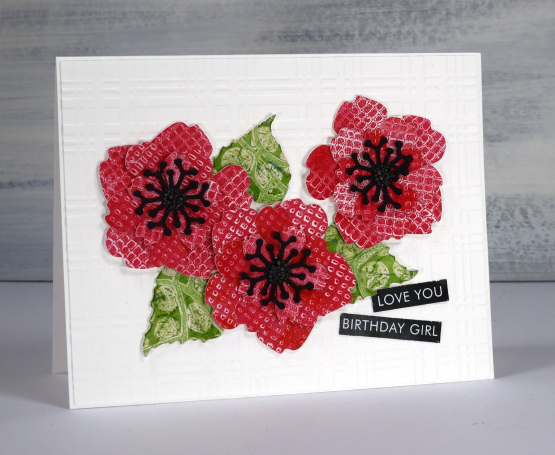
As I have mentioned a few times lately I have a new online class available. It’s called Gel Print Journey. I added the promo on Youtube today and thought I would share it here with you my blog readers as well. It is a class for both beginners and enthusiasts (and those who like me, tried it once and took a while to try it again). The card shown above is just one of the projects I made after a gel printing session. I grabbed the red print from the embossing folders lesson and the green print from one of the stencils lessons and die-cut all my elements to make a birthday card. Although there are project ideas at the end of the class the focus of the lessons is all gel printing. I just thought I would share one of the projects with you today because it is a bright happy card!
If you haven’t tried gel printing at all, GASP, this class will take you through the basics and provide you with oodles of textures and techniques to try. If you have tried gel printing I am sure you will enjoy putting your dies, stencils, embossing folders, recycling and plants to work to create one of a kind prints.
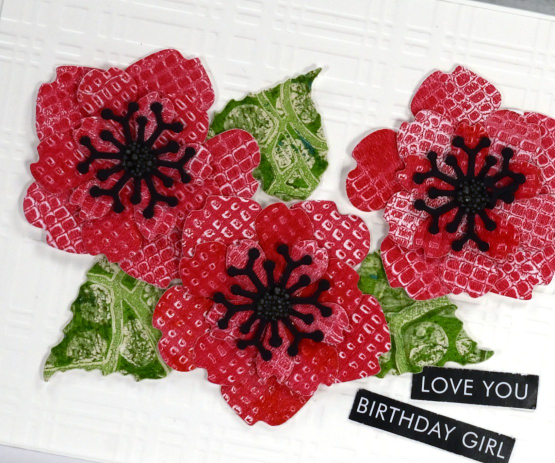
I added the red petals and green leaves to an embossed white background to keep them looking fresh and bright. There are little prills in the centres and a sentiment from Paper Rose studio.
As blog readers you have just one more day to use the TEAMBLOG10 discount code but if you read this after May has ended just pop over to youtube to see the code I shared over there. If you have any questions don’t hesitate to leave a comment below. I will continue to share gel printed cards and projects here on the blog and have some upcoming videos on youtube as well.
Have a great day!
(Compensated affiliate links from Foiled Fox & Scrap n Stamp)
Clean Up Fairies
Posted: May 26, 2023 Filed under: berry leaves, fairy buds, Lavinia, silhouette thistle, star group miniature, three dancing fairies | Tags: gel printing, Lavinia 4 Comments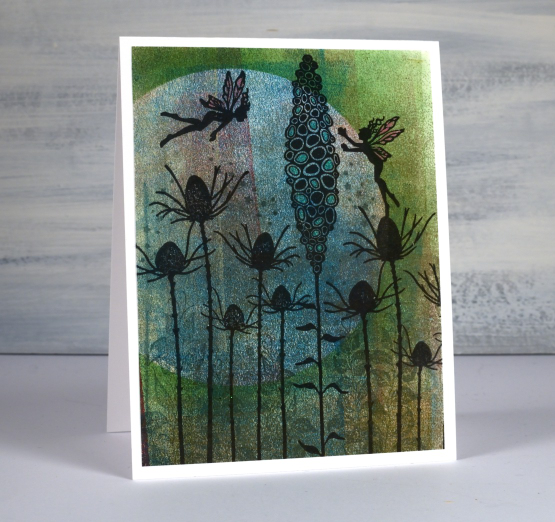
No, sadly I don’t have any clean up fairies; that would be a win! This little moonlit scene is stamped with Lavinia stamps on one of my gel printing ‘clean up sheets’ and I couldn’t resist the name. As I gel print I clean the brayer on clean up sheets off to the right of my plate. I use thickish drawing paper and when the sheet is well covered but still looking pretty I move it and start on a new sheet. So, yes, I have many clean up sheets to turn into cards or other projects.

I am still learning my way with Lavinia stamps; there is an art to the layering and arrangement. One of the fairies looks like she is doing a little cleaning of the fairy bud but the other looks like she is diving off the high tower. I know there is a plethora of Lavinia inspiration videos out there so maybe I should watch a few.
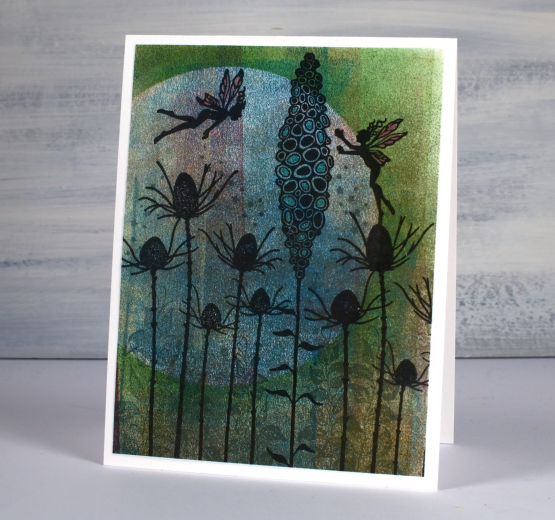
I stamped all the bold images in black and used blue and green inks to stamp some sprinkly stars and shadowy leaves in the background. The clean up sheet was mainly blue, pink and green so I cut a circle mask and blended more green around it to suggest a moon. I used sparkly gel pens to colour in some of the fairy buds and the fairy wings.
(Compensated affiliate links from Foiled Fox, Ecstasy Crafts* & Scrap n Stamp)
*if you visit the Lavinia products at Ecstasy Crafts make sure you use the heathertecs10 discount code at check out
Mushrooms & Pods
Posted: May 23, 2023 Filed under: Classes, Darkroom Door, fairy toadstool, gel press, Lavinia, mini meadow mushroom, online class, pods stencil, woodland fern | Tags: Darkroom Door stamps, gel press, gel printing, Lavinia, online class 6 Comments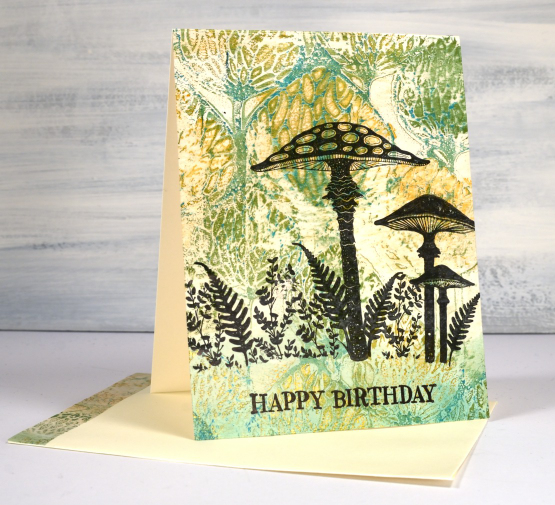
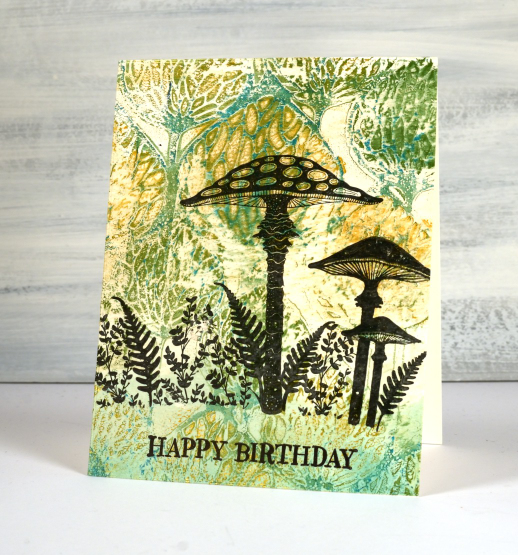
I often combine my gel prints with stamping and on this card there is a bit of brand matchy-matchy which really works for a whimsical look. The print is a ghost print made while filming my new class Gel Print Journey. There is a surprising amount of paint and pattern on this ghost print; sometimes they are a lot more ghostly!
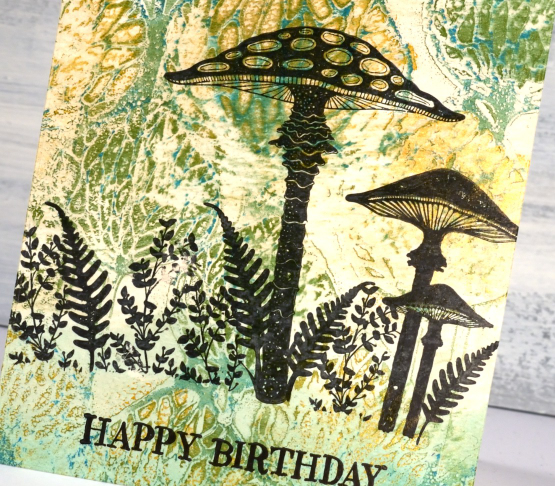
The gel print was made with the Lavinia stencil ‘pods’. Last week when stamping with a friend I was able to pair the background with some Lavinia stamps. I don’t own any…yet but I did enjoy the fun of arranging little scenes with their pretty silhouettes.
If you are not familiar with the world of ghost prints or stencil prints or even gel printing, check out my new online course. The TEAMBLOG10 discount is available until the end of May so now is a great time to join me.
(Compensated affiliate links from Foiled Fox, Ecstasy Crafts* & Scrap n Stamp)
*if you visit the Lavinia products at Ecstasy Crafts make sure you use the heathertecs10 discount code at check out
Gel Printing with the Strands stencil
Posted: May 18, 2023 Filed under: Classes, Dies, Echidna Studios, Flutters, gel press, online class, Penny Black, rustic birdhouse, strands | Tags: Echidna Studios, gel press, gel printing, Penny Black creative dies, Penny Black stamps 4 Comments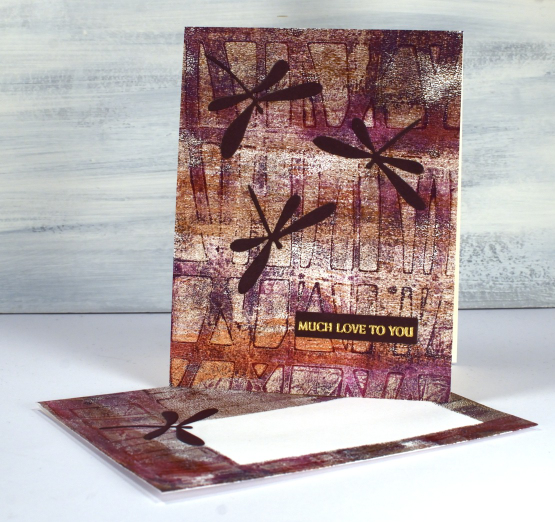
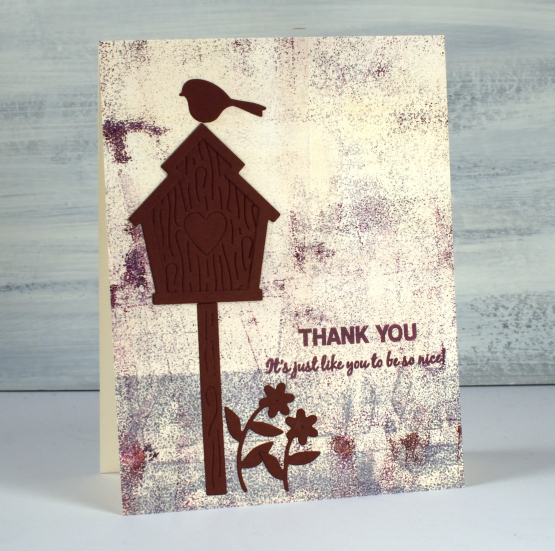
A stencil gel print for you today. I created this distressed print on a large gel plate so I could pick up a card front and an envelope print at the same time. If you don’t have a large plate you could just use the same paint colours and stencil on a second print. Just in case you didn’t catch my news yesterday, my new online course Gel Print Journey is now available! (And there is a discount for blog readers TEAMBLOG10)
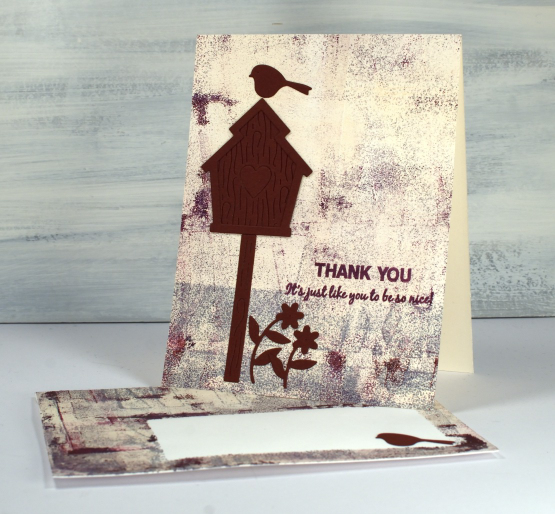
The stencil is called ‘strands’ and it is a digital design I created and have made available in the Echidna Studios etsy store. The bold print shown on the card above was made with copper, burgandy and purple paint so I chose a dark burgandy cardstock to cut dragonfly elements and a sentiment strip. Printing directly on the envelope is a easy way to co-ordinate with your card and I placed a sticker on the white envelope before printing to preserve white space for the address. I think I might make a video of this process because it’s quick and effective, a combination I like.

The pattern on the second card is very muted because it is a ghost print, the leftovers on the plate after I pulled the one above. I cover this technique in my new online class using a range of different stencils and colour combinations.
Even though ghost prints are often patchy I like using them for collage or backgrounds as I have here. The line between cream and grey ended up looking like a path or lawn and I just like the unique grungy texture.
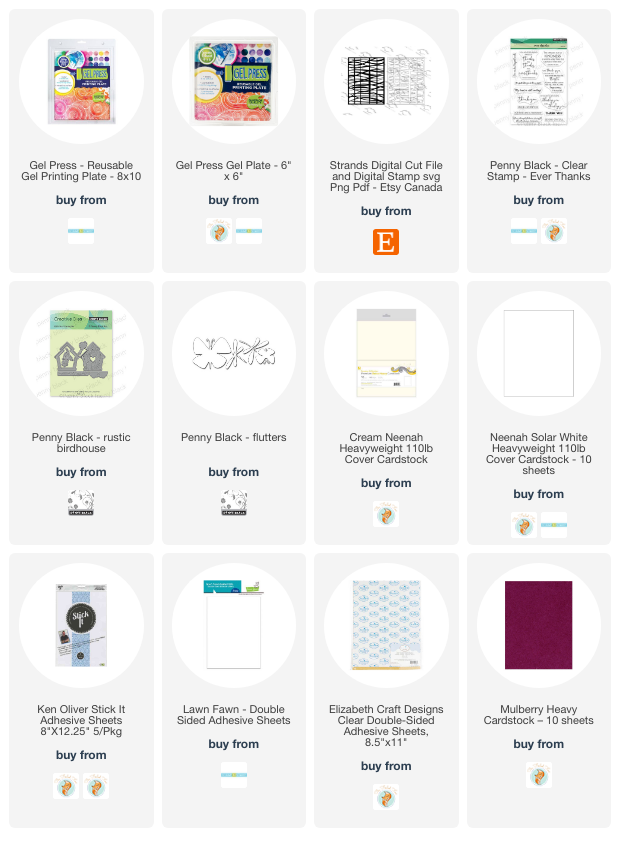
The dies and stamps I used to finish the cards are all Penny Black, those dragonflies on the first card are some of the first dies I ever got and they’re still a favourite.
(Compensated affiliate links from Foiled Fox & ScrapNStamp)
Gel Plate Plant Prints
Posted: May 16, 2023 Filed under: Classes, gel press, online class | Tags: Classes, gel press, gel printing, online class 6 Comments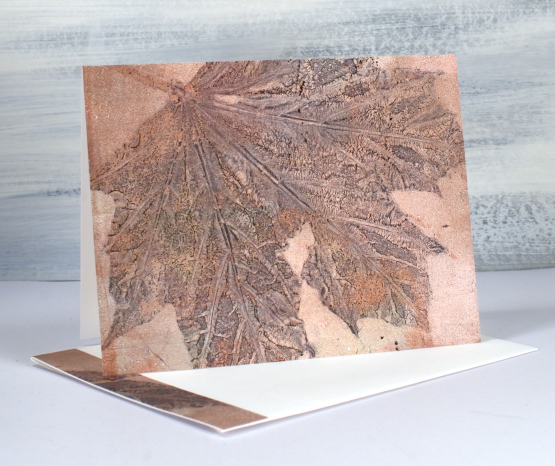
I have a few more plant gel prints to share with you. I put these ones together as a gift a while ago but saved this post to co-ordinate with the launch of my new online class Gel Print Journey. This class has been in the works for a while so I am excited to finally share it with you. It is an introductory class covering printing with acrylic paints and includes loads of techniques, hours of video instruction and a few inspiration galleries at the end so you can see what I do with some of the prints. (there is a discount code at the end of this post)
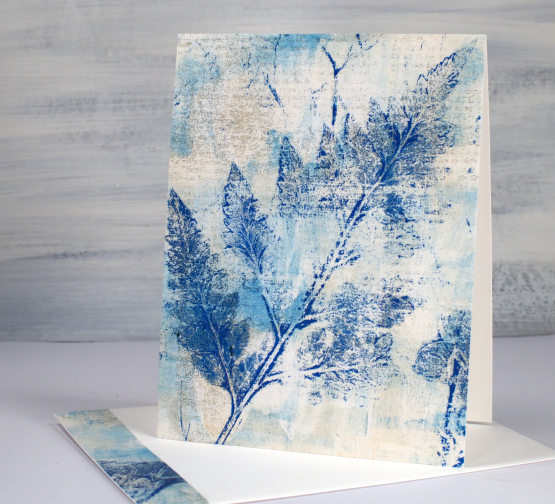
In the new class three of the lessons cover leaf, grass and feather prints teaching the techniques used to make the cards in today’s post. For the card above I used one large leaf but often I use a mix of leaves, grasses and when available, flowers.
Because I made all these prints with a 6″x6″ gel plate I was able to cover the card front and save a strip to add to the edge of the envelope. I used double sided adhesive to add these prints to my card fronts but a tape runner or gluestick would also do the job.
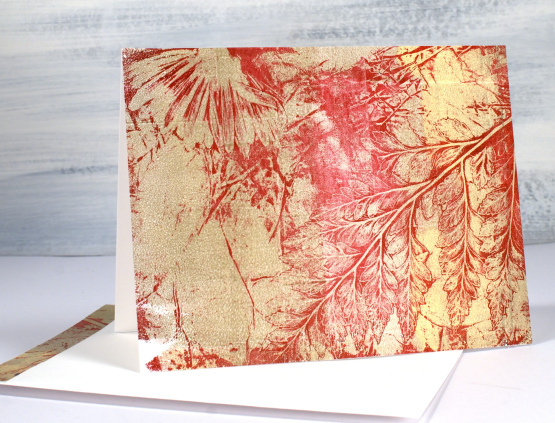
As you can see in the print above ferns print very well. I rolled red paint on my plate, pressed a fern frond and a flower into the paint, removed paint all around the elements with tissue paper then pulled the remaining print with gold paint. So much fun! Now that I have plants growing again in my garden I will be creating a new pile of nature prints.
I promised to let you know when my class launched and because my blog readers are such an encouragement to me feel free to use the discount code TEAMBLOG10 for a 10% discount when you register.
(Compensated affiliate links from Foiled Fox & Scrap n Stamp)