Calendar Cards
Posted: February 18, 2026 Filed under: border collection, Concord & 9th, cricut, Dies, online class, Patterned papers, Penny Black | Tags: Concord & 9th, cricut, Earth Greetings, online class, Penny Black creative dies 5 Comments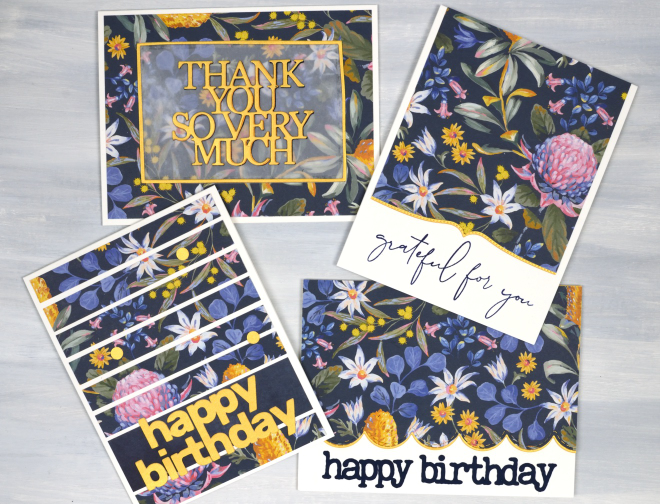
Here are some happy flowers to remind you of spring if you are still surrounded by snow like I am! Also to get you through winter there are details about a sale of my online classes at the bottom of this post.
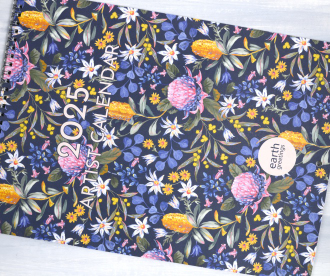
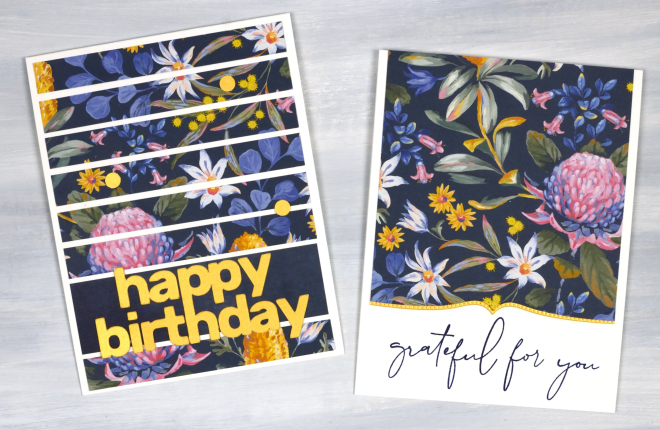
I received a beautiful Earth Greetings calendar last year from my brother and sister-in-law in Australia. I enjoyed the original artwork all year while also planning to turn the pages into cards once the year was over. I decided to start with the cover which features a beautiful floral design by Jayne Branchflower. The cover has the January artwork on the back so I used bits of each design, both painted by Jayne.
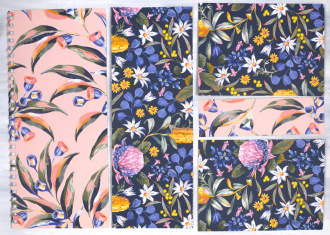
In this post I will feature the blue background panel covered in Australian native flowers such as waratah, bottlebrush and flannel flower. I created two portrait orientation cards shown below. The accents on all the cards are cut from gold cardstock to co-ordinate with the bottlebrush (callistemon) and wattle in the design. The greeting below left was cut on the cricut, below right features a Penny Black border die and a retired C&9 sentiment.
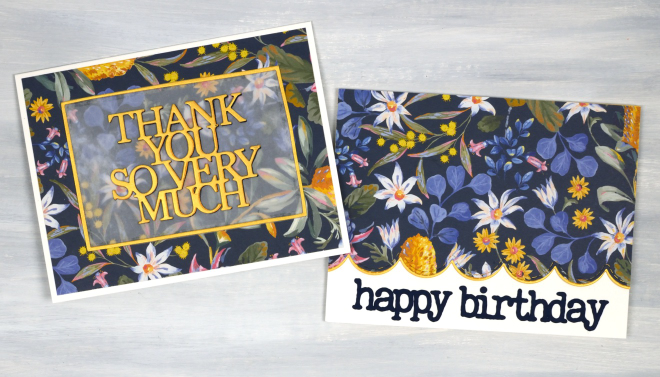
The two cards below I made in landscape orientation and used the PB Border Collection die to add a scalloped edge on the right along with a cricut cut sentiment. On the left I die-cut a PB sentiment, So Many Thanks, and lay it over duralar so it would be easier to see on the busy background. It is also stacked up on navy cardstock to give it a bit more prominence. I created the narrow gold border with WaffleFlower A2 rectangle dies. The cards in this post obviously do not have to be made with calendar pages; your own printed, drawn or painted papers would work, as would scrapbook papers or art papers. I am just having fun with calendar pages right now and hope I have inspired you to recycle and repurpose a few of yours!
All my online classes are on sale for 50% off. Just click over to https://heathertelford.podia.com/ to purchase.
This post includes affiliate links from Scrap’n’Stamp . If you buy through these links I receive a small commission at no extra cost to you.
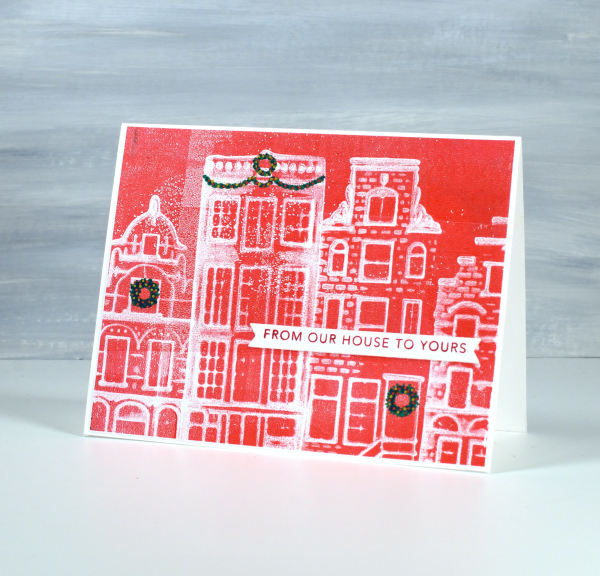
From my House to Yours
Posted: January 29, 2025 Filed under: gel press, online class, Taylored Expressions | Tags: gel press, gel printing, online class, Taylored Expressions 3 Comments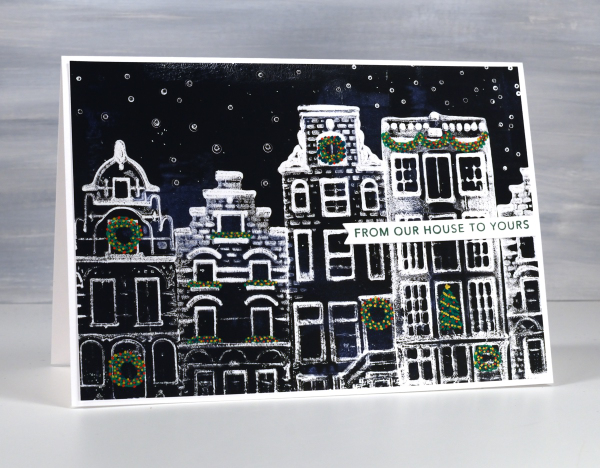
I know it is a month since Christmas but I’ve been waiting to share these last few designs with you. Because of the Canadian postal strike this black & white card arrived in Australia just last week!

You might find these designs a bit familiar if you happen to own any of the china houses that KLM airlines once gave away on flights or if you have collected similar houses when travelling in the Netherlands. I got together with a friend to do some gel printing and we printed four of her little houses on the gel plate to create Dutch themed Christmas cards.
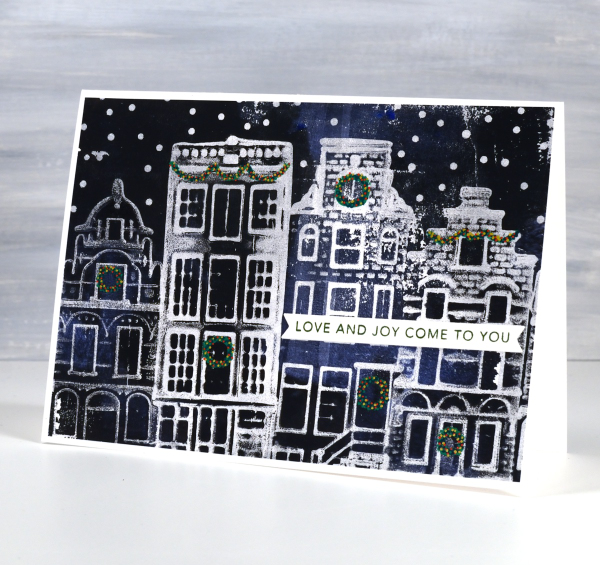
It took some trial and error to work out the best technique but it turned out that pressing the houses firmly into the paint covered gel plate worked well, as more texture appeared in the final print. If you are looking for an introductory gel printing class I have an online one called Gel Print Journey. Although it doesn’t include little Dutch houses it is full of ideas for what to print and how to get different effects. In honour of these cute cards I just created a discount code for Gel Print Journey which will give you 40% off until the end of February. Just use the code GELPRINT2025 at check out for the discounted price.
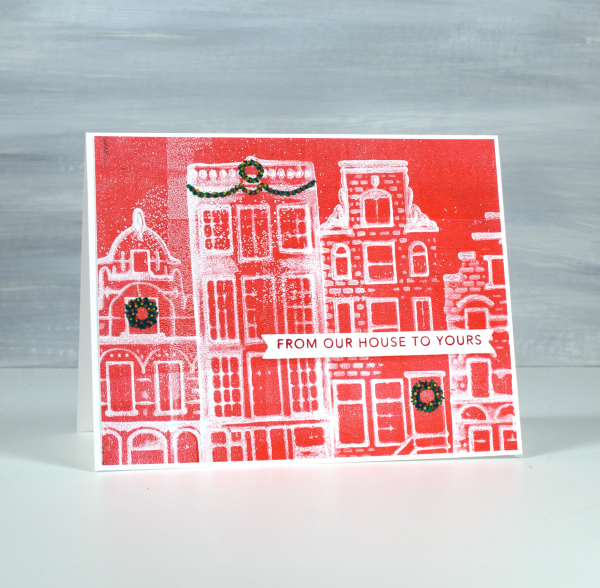
I drew the little wreaths and swags on afterwards with posca paint pens then added sentiments from Taylored Expressions Simple Strips Christmas stamp. I am always looking out for new things to print. Leave me a comment if you’ve had some great gel printing discoveries.
What I like about Gel Printing
Posted: October 31, 2024 Filed under: Branch 9 die, gel press, Moda Scrap, online class | Tags: gel press, gel printing, online class, Penny Black creative dies 3 Comments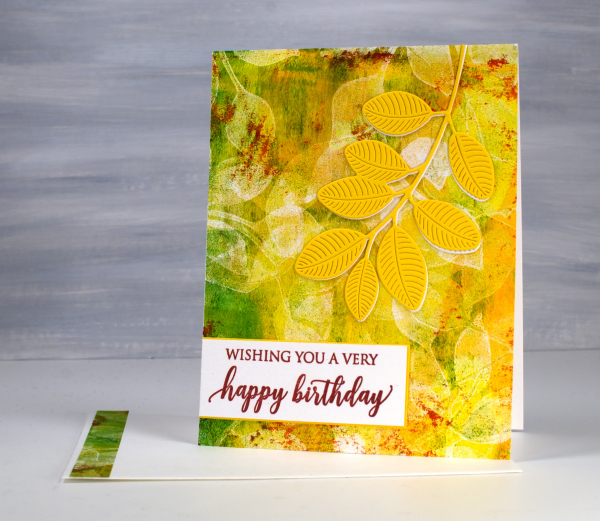
I think you already know I like gel printing: I’ve made that very clear! This card includes many of the reasons I enjoy it. There is a lot of layering, colour and imperfections in the print on this card and that often happens when gel printing. I didn’t strategically add grazes of red paint to the gel plate; they were left there from a previous print. They add so much that I chose to match the sentiment to those ‘leftovers’.
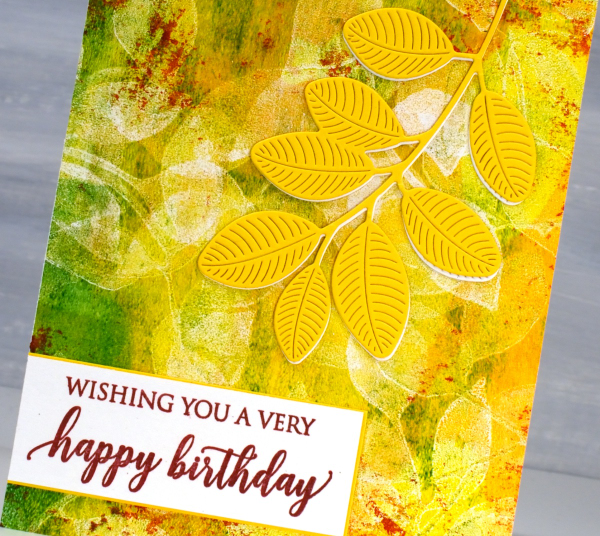
The leaves on the top of the panel are definitely die cut but the leaves on the print were added using my homemade stamp. I have quite a few homemade gel printing stamps; I don’t worry about cleaning the paint out of the stamp and I use scraps of cardstock and fun foam to make them very cheaply.
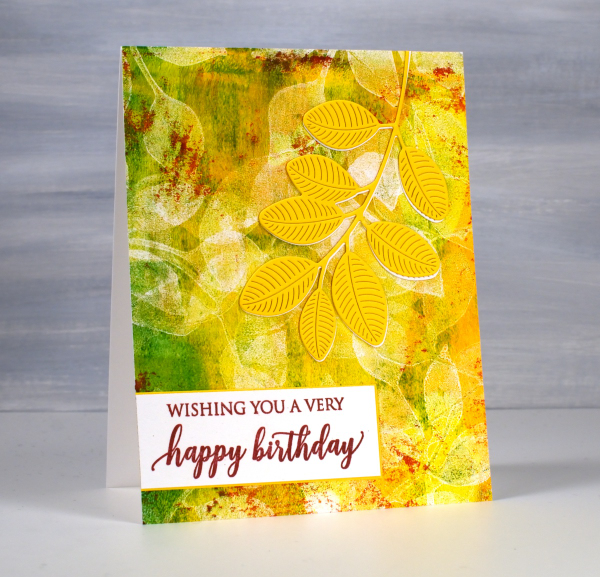
Gel printing is full of surprises; some of my favourite prints are not ones I carefully planned, they are ghost prints or partial prints, what some would call ‘fails’. There is often beauty in the texture, leftover paint and pale patterns of these prints. This card was made from a print demonstrated in my online class ‘Gel Print Journey‘ an introductory gel printing class. I created a 40% off discount coupon for the class if you are interested. Just use the coupon code SURPRISE at checkout anytime before the end of November. This post includes affiliate links from Foiled Fox. If you buy through these links I receive a small commission at no extra cost to you.
Florals on Black
Posted: May 21, 2024 Filed under: Concord & 9th, fine line florals, meadow blossoms, online class, Penny Black, radiant | Tags: Concord & 9th, Finetec artist mica watercolour paint, online class, Penny Black stamps 6 Comments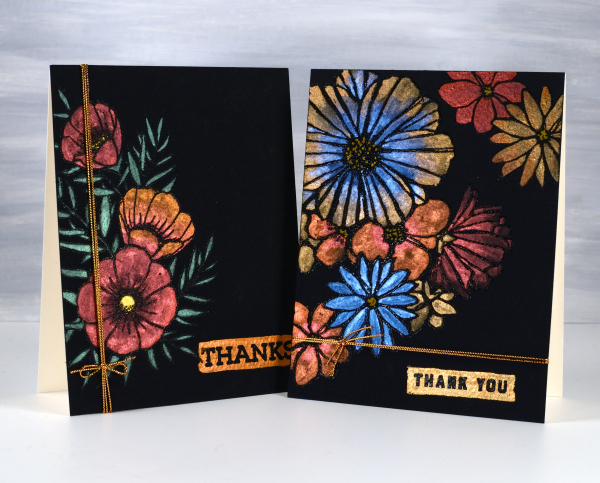
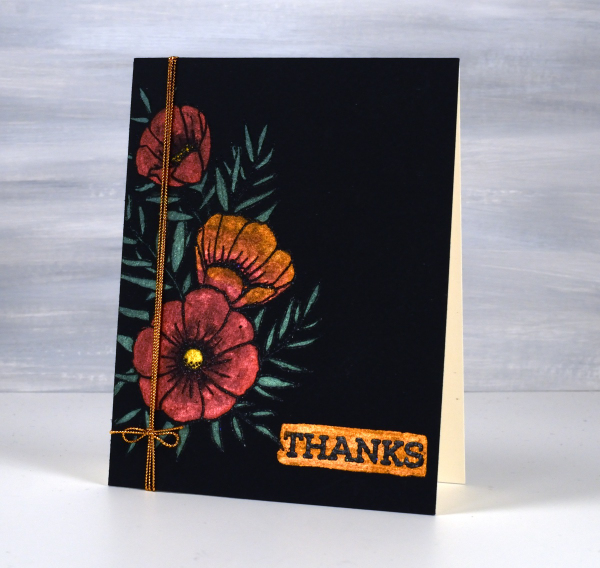
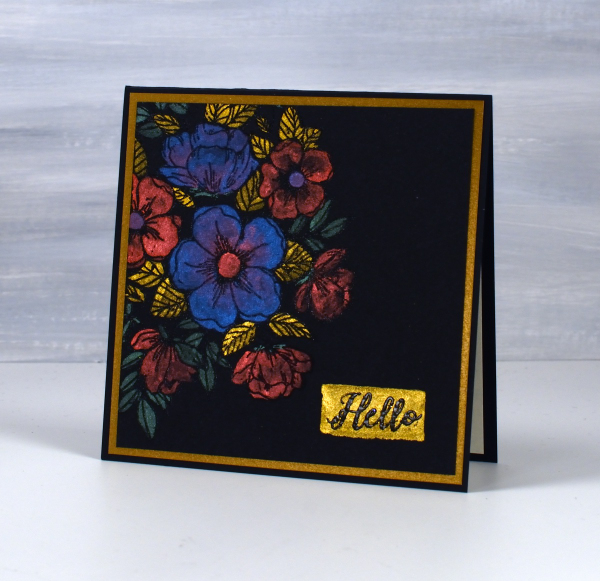
I haven’t used this eye catching technique in a while but I really should try it more often. These two cards were made as part of my Floral Faves online class, a lesson about using metallic watercolours on black watercolour paper. Maybe black watercolour paper has been around for a long time but when I first found it several years ago I was very keen to try it.

As you can imagine the paints need to be somewhat opaque to show up on black. I use Coliro and Finetec metallic watercolours (two names but all made by Finetec). I have also been given some Beam metallic watercolours which I will try out soon. I used Stonehenge Black watercolour paper for these cards and it worked well. It is very soft so I am careful if using tape on the edges as it lifts the surface off. I just work on a piece slightly larger than I need so I can trim it down to size after painting. I recently bought some of the Van Gogh brand so I will report back once I have tried it.
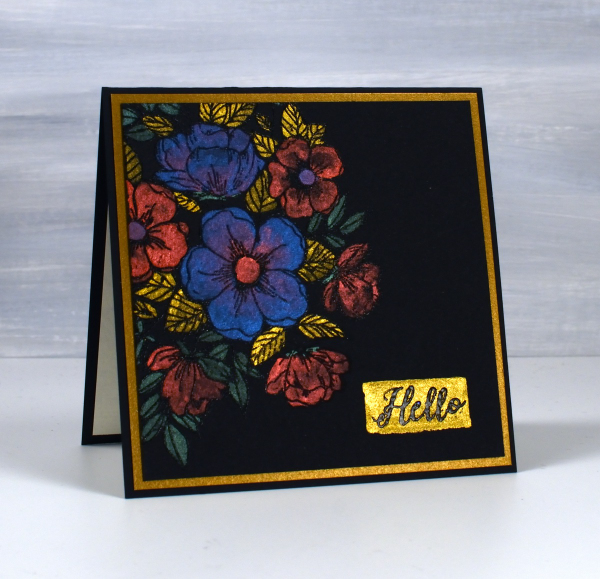
All these designs were made with embossed outlines making it easier to stay inside the lines. One feature of these cards that I quite like and need to remember to incorporate is the little painted strip where I embossed a sentiment over the top. It’s a trick that doesn’t have to be used only on a black background; I could paint a strip on any colour then emboss on top of it. For the cards featured today I used Penny Black ‘radiant’ set and Concord & 9th ‘fine line florals’ and ‘meadow blossoms’
If you have metallic watercolours let me know in the comments your favourite ways to use them.
Wildflower Spring
Posted: May 8, 2024 Filed under: Darkroom Door, Nature Walk, online class, Taylored Expressions, Wildflowers Vol 1, Wildflowers Vol 2 | Tags: Darkroom Door stamps, online class 6 Comments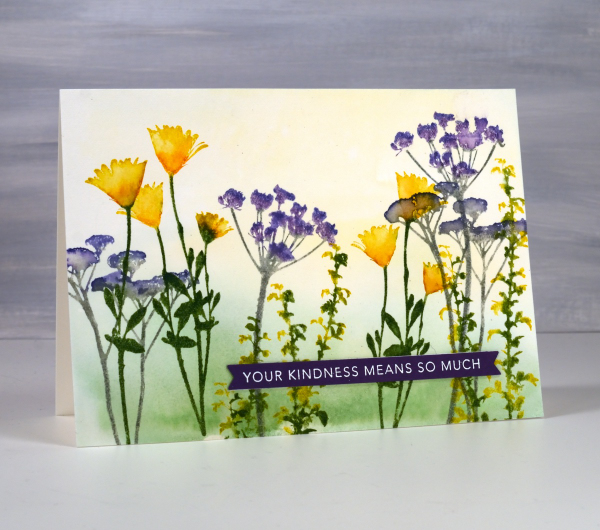
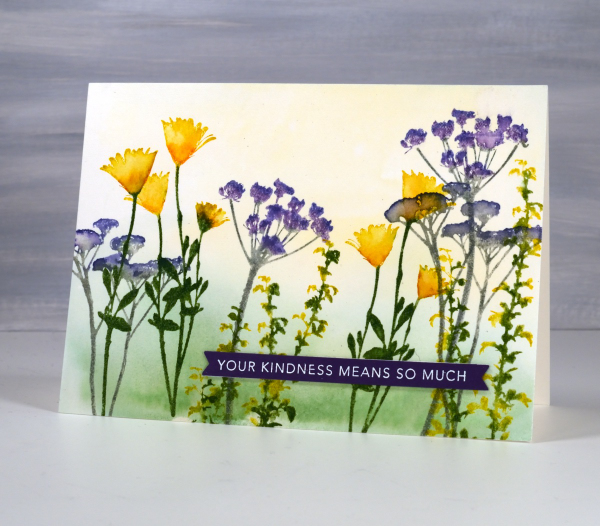
These spring flowers are all silhouette stamps from Darkroom Door, some from the Nature Walk set and a few from Wildflowers vol 1 & 2. Even though the stamps are solid with no detail it is possible to use ink pads and markers to give them more depth.

This card is a sample from my Floral Faves online class. In the class I feature no-line watercolour with outline stamps, techniques with brushstroke stamps and ways to use silhouette stamps as featured on this card. I often use my silhouette stamps with a black or dark ink over a sunset sky but I do like to give them colour sometimes with a pale watercolour wash in the background.
I hope you are seeing spring colour in your garden or perhaps fall colour if you are in the southern hemisphere.
Blue Birthday
Posted: March 26, 2024 Filed under: banner blooms, banner blooms cut out dies, Dies, exquisite envelope, online class, Penny Black | Tags: online class, Penny Black creative dies, Penny Black stamps, Ranger Distress inks 6 Comments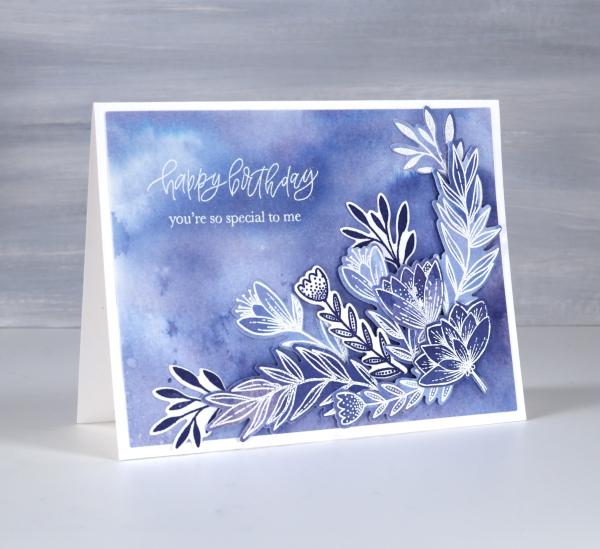
Blue is my favourite colour and the different hues seen on this card are examples of why it appeals to me so much. I tend to prefer the blues that are a little bit purply but I like the teal blues as well.
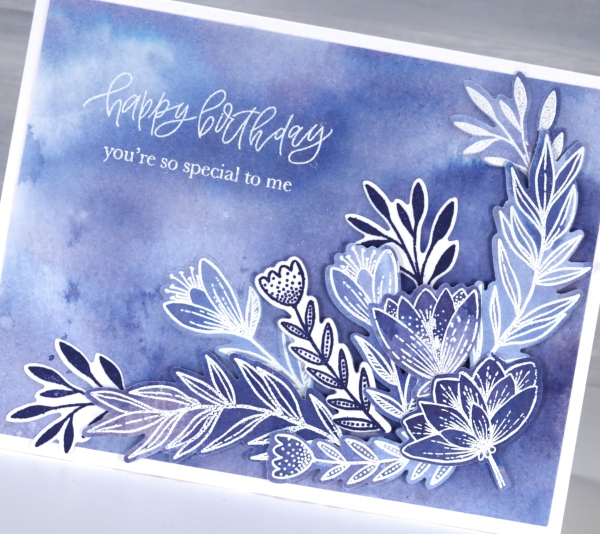
All the blues on the card are made from one ink, chipped sapphire distress ink. If you watercolour with your dye inks you have probably noticed that some inks separate into different hues when diluted. I thought I would share this card today because it features in one of the lessons in my Colour Clues online course. Colour Clues is a card making course which covers colour blending, contrast, separation and mixing. I created a 40% discount for all my online courses back on February 29, mentioned it in a blog post then forgot about it! That’s why I’ve been featuring it more this week. The discount code LEAPYEAR40 is active until the end of March 28 which is now two days away.

I chose the Penny Black sets Banner Blooms and Exquisite Envelope for this card because there were plenty of enclosed petals and leaves to trap colour. Banner Blooms just happens to have a co-ordinating die set which sped up the layering of blooms and leaves. This post includes affiliate links from Foiled Fox . If you buy through these links I receive a small commission at no extra cost to you.
Do you have a favourite colour. Does it turn up often in your crafting or perhaps in your wardrobe? I definitely wear a lot of blue!
Gel Printed Pods
Posted: March 25, 2024 Filed under: artsy stems, framed fern, gel press, Lavinia, online class, Penny Black, Tim Holtz | Tags: gel press, gel printing, Lavinia, online class, Penny Black creative dies, Tim Holtz 3 Comments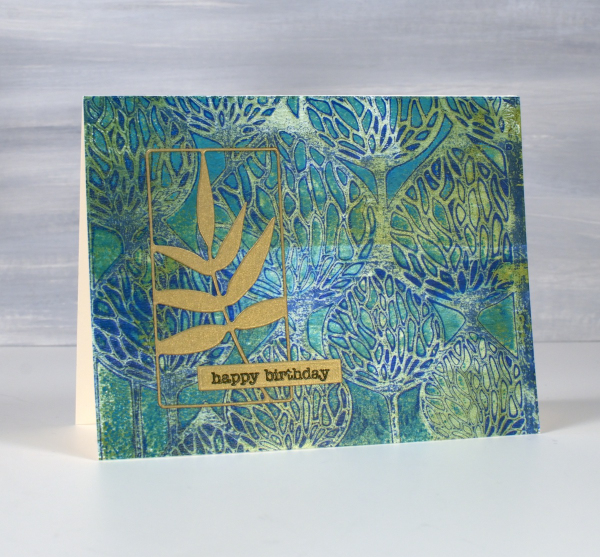
It’s been a while since I gel printed but that there is no lack of gel prints to show you. I currently have boxes of prints and and a stash of cards made from prints.

These two cards were made from the same stencil print, one of the examples from my Gel Print Journey online class (which is on sale along with all my online classes until March 29; just use the code LEAPYEAR40 at checkout)
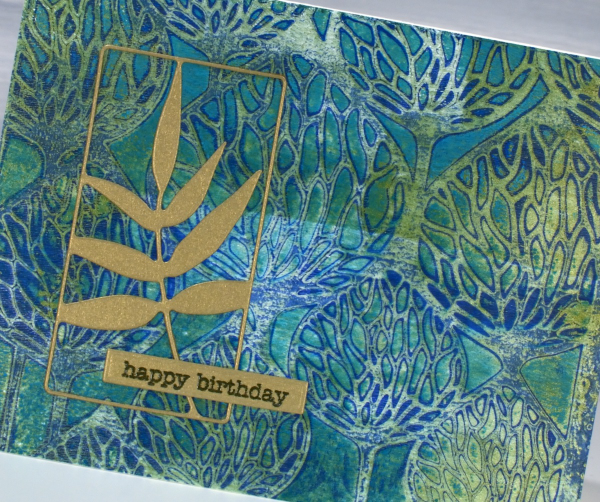
If you are a fan of Lavinia stencils like I am you probably recognise the ‘Pods’ stencil used for this print. I printed on a 6″x 6″ gel plate giving me a print big enough for two cards. It’s hard to see in the photo but some of the paint was metallic so the print has some shimmer and shine on it.

I looked through my botanical dies and gold cardstock in order to fine co-ordinating elements for the cards. On the card above I used the ‘framed fern’ die from Penny Black and on the card below the die featured is from Tim Holtz artsy stems die set.

I hear my gel plate calling to me so hopefully I will soon dedicate a few days to happy printing. If you are looking for a beginner gel printing class or a refresher please check out Gel Print Journey. This post includes affiliate links from Ecstasy Crafts, Foiled Fox and Scrap’n’Stamp . If you buy through these links I receive a small commission at no extra cost to you.
Fuchsia Favourites
Posted: March 22, 2024 Filed under: captivating, Dies, gift card pocket, online class, Penny Black | Tags: online class, Penny Black creative dies, Penny Black stamps 9 Comments
As I wait for spring I thought I would post a couple of cards I made a few years ago when filming my Floral Faves online course. I used the beautiful ‘Captivating‘ stamp from Penny Black to teach a no-line watercolour technique. All my online courses are discounted by 40% for a one more week.
Edited to add: use the code LEAPYEAR40 if the discount doesn’t appear automatically.
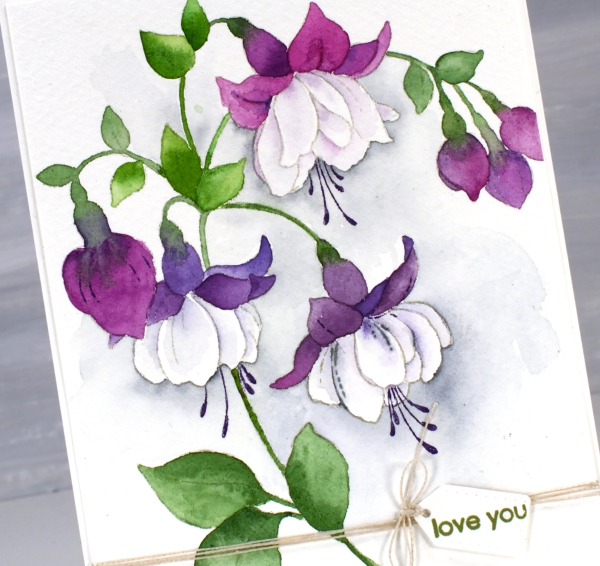
I used watercolour paints to colour the two cards featured today but I have also used waterbased inks smooshed onto a glass mat as they also work well for the technique. I added the tiny little tag from the PB ‘gift card pocket die set‘. It’s a set that I never use to make gift card pockets but often reach for one of the tag or label dies included.

I had fuchsias looking pretty in the planters at my front door last year. They were the opposite colouring of the ones above with pale pinky purple petals hanging down and creamy white petals at the top.

It might be time to pull out this stamp again and try it with the new pastel pencils. For more inspiration with this stamp click here and here. Today’s post features affiliate links to The Foiled Fox.
Postage Stamp Tulips
Posted: February 7, 2024 Filed under: Darkroom Door, Elizabeth Craft Designs, global postmarks, online class, Penny Black, postage stamps, splendiferous | Tags: Darkroom Door stamps, Elizabeth Craft Designs, Fabriano Watercolour Paper, online class, Penny Black stamps 11 Comments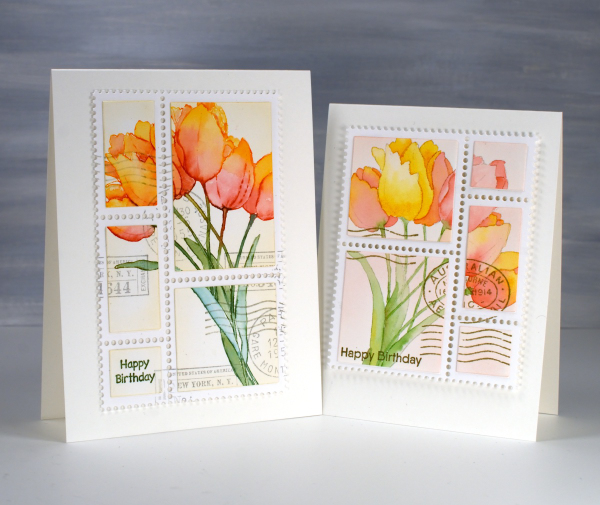
I’ve been inspired so many times by my talented friend Stamping Matilda, aka Godelieve Tijskens including her delightful faux postage stamps. I’ve wanted to make some for a while so I treated myself to a fancy die from Elizabeth Craft Designs. There are many ways to make faux postage stamps including with a clever tracing wheel usually use for sewing.

Once I had my die on hand I had to decide what to make my stamps from. I decided not to stamp something especially for the faux stamps. Instead I started using patterned papers and stamped panels that were sitting around looking pretty but not serving any other purpose. The two tulip panels featured on today’s cards were made for my online class Floral Faves. There is a lesson in the class where I show a range of methods for no-line watercolour. In designing and filming the class I created quite a few no-line watercolour panels that were never turned into cards…until now. I stamped the tulips using the Penny Black stamp, ‘Splendiferous‘.

The ‘postage stamps‘ die cuts a large panel of perforated stamps all joined together. There are also small dies in the set that cut rectangles to attach inside the perforated sections. Once I had my tulip sections attached I used Darkroom Door set, ‘global postmarks‘ to add postmarks. I popped up my faux postage stamps on one A4 card and one slightly smaller card. Of course I proceeded to search my pile of possibility for more panels to turn into faux stamps! Today’s post features an affiliate link to Scrap’n’Stamp. If you buy through this link I receive a small commission at no extra cost to you.
Gel Print Journey
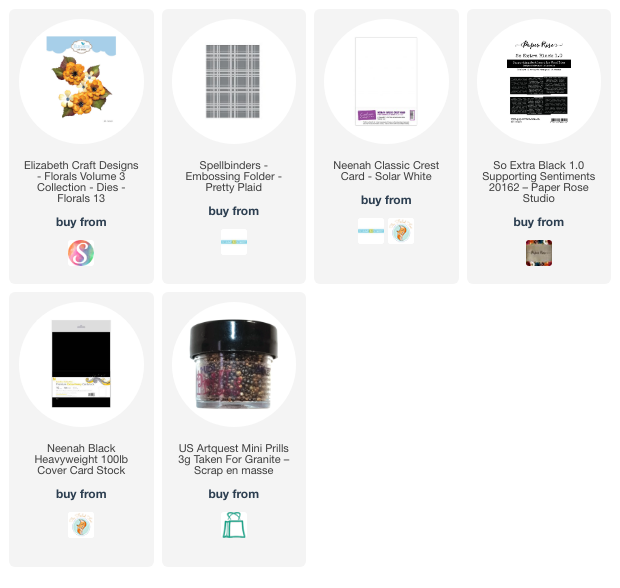
Posted: May 31, 2023 Filed under: Elizabeth Craft Designs, florals 13, gel press, online class, pretty plaid, Spellbinders | Tags: Classes, gel press, gel printing, online class, video 4 Comments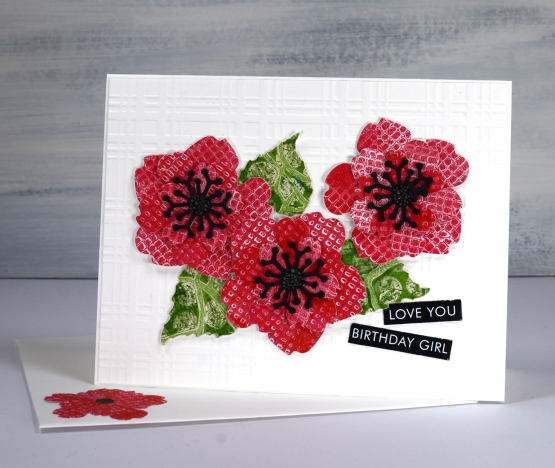
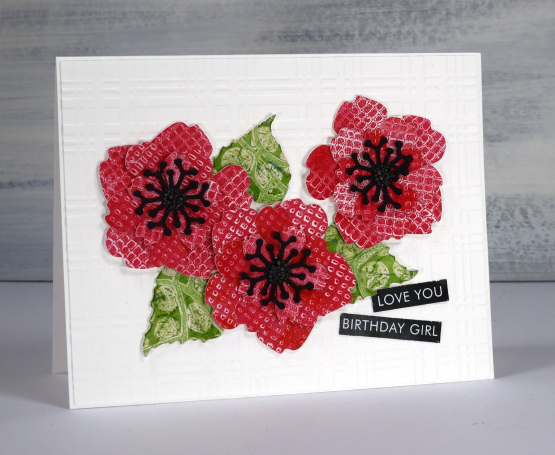
As I have mentioned a few times lately I have a new online class available. It’s called Gel Print Journey. I added the promo on Youtube today and thought I would share it here with you my blog readers as well. It is a class for both beginners and enthusiasts (and those who like me, tried it once and took a while to try it again). The card shown above is just one of the projects I made after a gel printing session. I grabbed the red print from the embossing folders lesson and the green print from one of the stencils lessons and die-cut all my elements to make a birthday card. Although there are project ideas at the end of the class the focus of the lessons is all gel printing. I just thought I would share one of the projects with you today because it is a bright happy card!
If you haven’t tried gel printing at all, GASP, this class will take you through the basics and provide you with oodles of textures and techniques to try. If you have tried gel printing I am sure you will enjoy putting your dies, stencils, embossing folders, recycling and plants to work to create one of a kind prints.
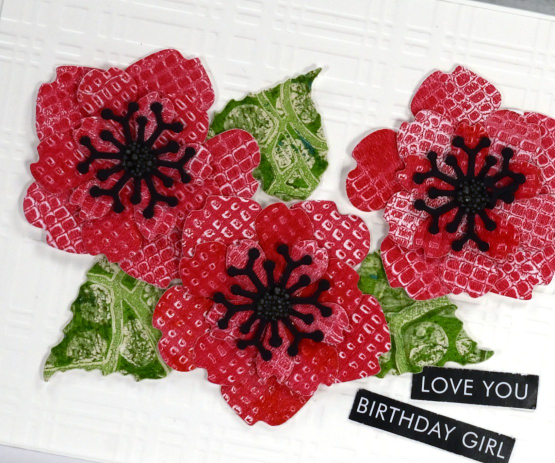
I added the red petals and green leaves to an embossed white background to keep them looking fresh and bright. There are little prills in the centres and a sentiment from Paper Rose studio.
As blog readers you have just one more day to use the TEAMBLOG10 discount code but if you read this after May has ended just pop over to youtube to see the code I shared over there. If you have any questions don’t hesitate to leave a comment below. I will continue to share gel printed cards and projects here on the blog and have some upcoming videos on youtube as well.
Have a great day!
(Compensated affiliate links from Foiled Fox & Scrap n Stamp)