
Shimmery Foliage
Posted: October 14, 2025 Filed under: Airy, Dies, Finetec paints, Leaflets, Leaves, Penny Black, Taylored Expressions | Tags: Fabriano Watercolour Paper, Finetec artist mica watercolour paint, Penny Black creative dies, Taylored Expressions 2 Comments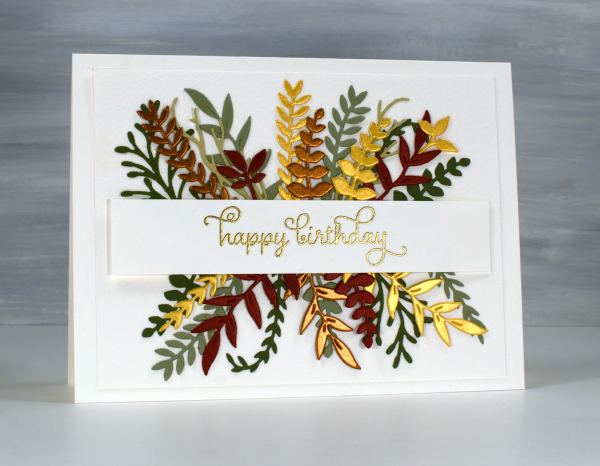
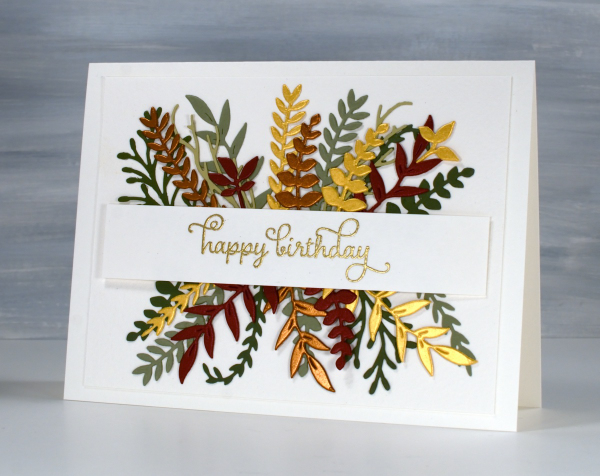
Recently a friend and I got together and worked on wreath style wedding cards. Mine is featured further down in this post. After my friend left I used some of the die-cut foliage leftovers to make her a birthday card. You can see a few matte green leafy branches plus more cut from gold, bronze and reddish shimmer cardstock. I arranged it all either side of a stamped and embossed banner. This sort of a card takes a while to arrange in a balanced way so once I had it looking good I took a photo so I would be able to glue it all down again in the same way.

All the die-cutting was done with Penny Black foliage dies from a variety of sets. The curly twirly birthday sentiment is from the Taylored Expressions set, ‘In & Out Birthday’ embossed in gold powder
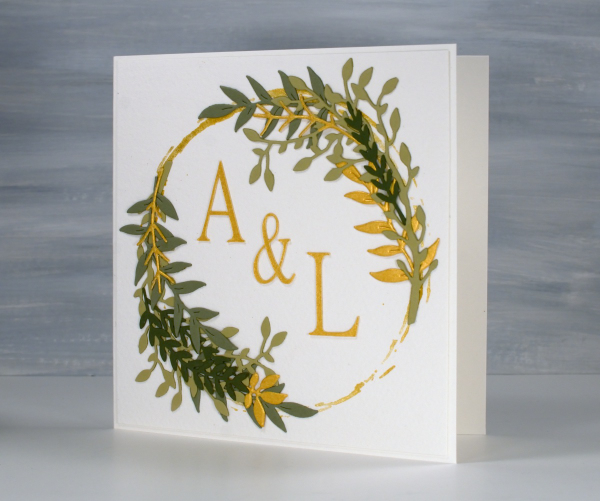
To make the wreath card I began by stamping a rough circle using gold watercolour paint on a jar lid. It was the lid of the lentil jar so yes, I had to wash it carefully before it was returned to the jar.
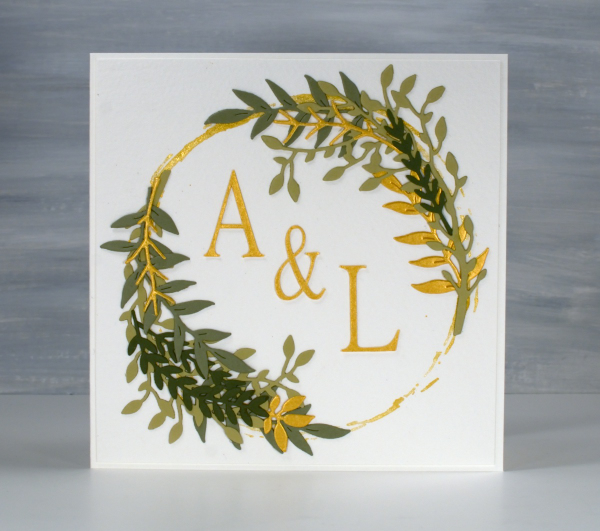
I arranged die-cut foliage around the gold circle not with perfect symmetry but I aimed for balance.
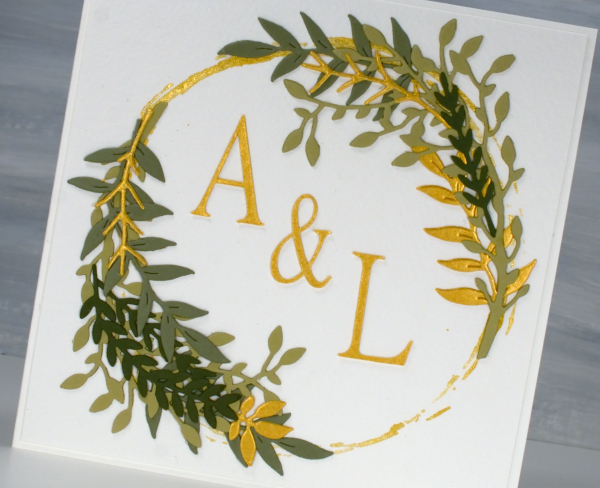
I cut the A, & and L on the cricut using the Linux Libertine Display G font. Both cards were made on cold pressed watercolour paper which has a nice creamy colour and soft texture.
Greenery Collage Cards
Posted: April 3, 2024 Filed under: Collage cards, Darkroom Door, Dies, Finetec paints, gift card pocket, global postmarks, Leaves, measuring tape, Mixed Media, paris postcard, Penny Black, Tim Holtz, wild flowers #1 | Tags: collage, Darkroom Door stamps, Finetec artist mica watercolour paint, Mixed Media, Penny Black creative dies, Penny Black stamps, Tim Holtz 6 Comments
Continuing with the collage theme I have three cards featuring greenery from a paper napkin. I know people have been creating with paper napkins for years but I am new to the game. I have a small collection of pretty paper napkins to use on cards, book covers and journal pages. The green ones featured here are large dinner napkins found at Winners, probably in that tempting ‘just before the checkout’ area!

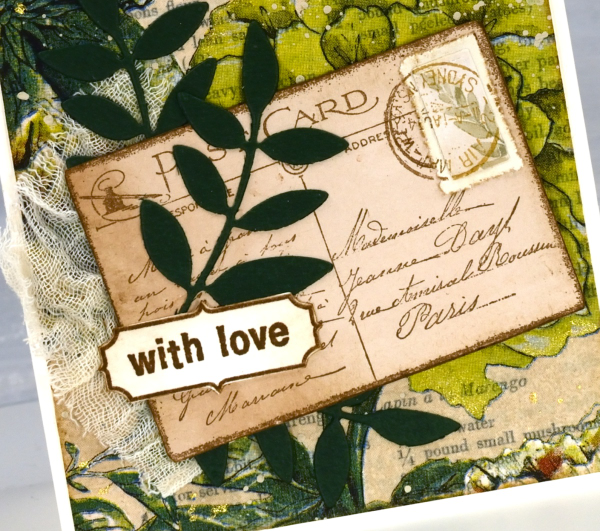
I glued the printed layer of the napkin over book pages to make my main panels and aged the edges with green and brown inks. I created a couple of little vintage postcards with the Paris postcard stamp, a background with the Measuring Tape stamp, sentiments and postmarks all from Darkroom Door.
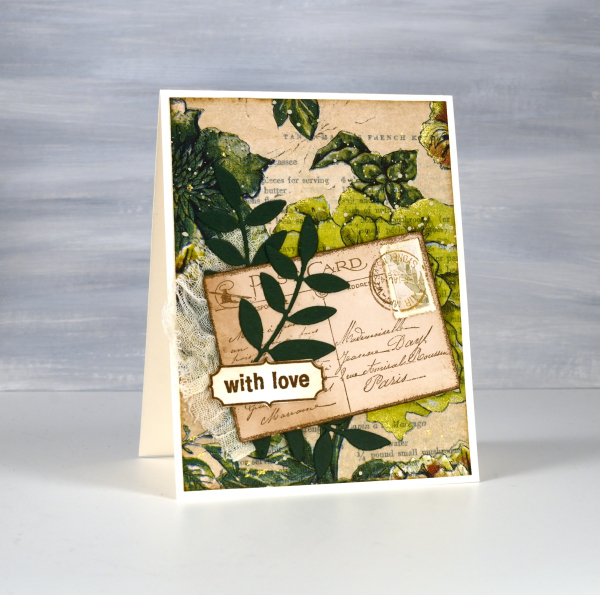
Once again I used some cute dies from Penny Black to cut tickets, file divider, tag and leaves adding blending around the edges for the vintage look.
The scrap of cheesecloth, the lace and the grosgrain ribbon were all found around here, maybe the ribbon is actually vintage; it looks a bit discoloured from age which meant it co-ordinated well.

The lovely Queen Anne’s lace die is from the Tim Holtz ‘wildflowers #1 set.
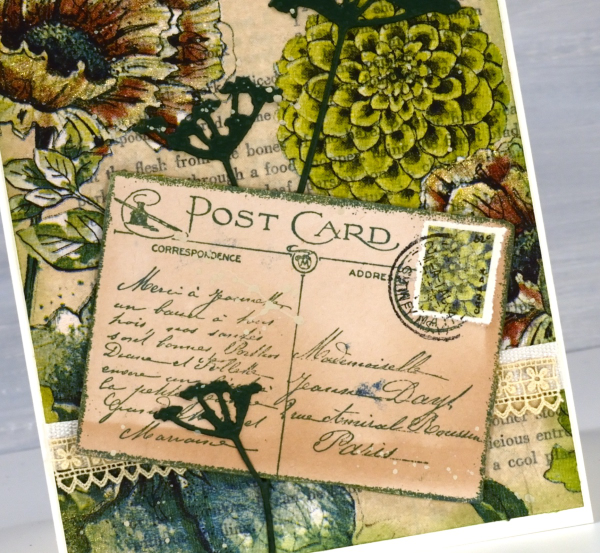
I did make my own little postage stamps for the postcards because I’m still in love with faux postage. These ones had to be quite small so I didn’t use a die I just punched tiny holes with a needle to perforate the edges. You can see a bit of splatter here and there with ivory paint and there are touches of gold watercolour paint on the petals of a few flowers too!

This post includes affiliate links from Foiled Fox and Scrap’n’Stamp . If you buy through these links I receive a small commission at no extra cost to you.
Rosa
Posted: February 5, 2021 Filed under: Leaves, Penny Black, rosa | Tags: distress markers, Penny Black creative dies, Penny Black stamps, Ranger Distress inks 8 Comments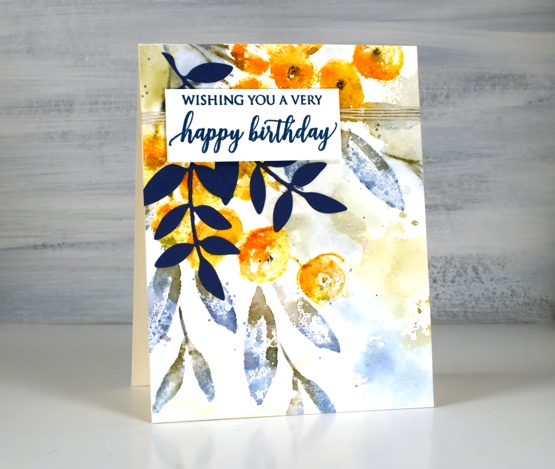
This is ‘Rosa’ a new floral stamp from Penny Black. When I have a new brushstroke stamp I usually reach for the distress inks for the first test drive. That’s what I used for both cards in today’s post and I love the watercolour effects I was able to get.
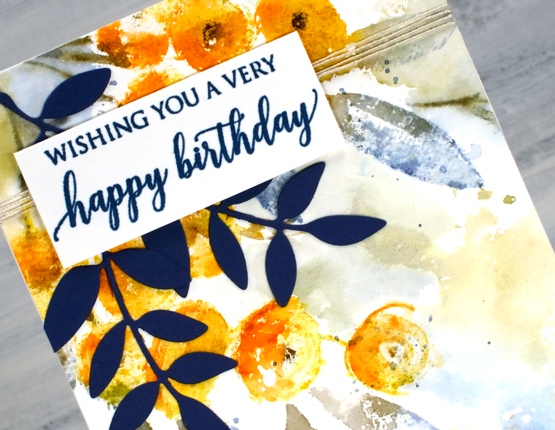
The ‘rosa’ stamp is made up of round flowers and long leaves in an impressionistic style. For this orange and blue card I kept the stamp in the positioner while I worked on the hot pressed watercolour panel stamping the flowers first in fossilized amber and spiced marmalade, the leaves in faded jeans and forest moss and the flower centres in ground espresso.
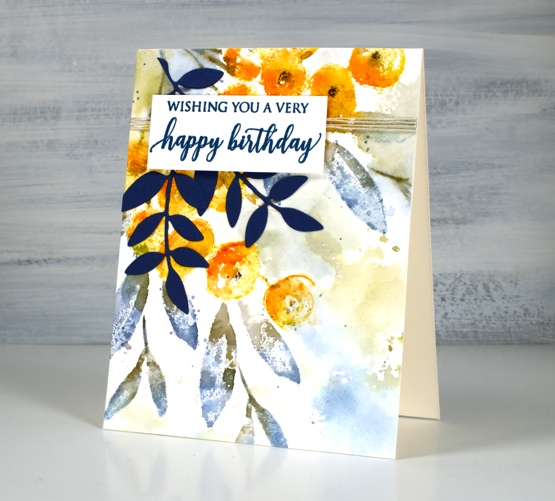
Because I was experimenting with the new stamp I didn’t plan or paint a background for the panel. Once the flowers were finished I decided I wanted some colour around them. Rather than paint some pale washy colour I smooshed the faded jeans and forest moss mini distress cubes on a piece of acetate, spritzed it generously then pressed it onto the panel here and there to transfer ink around the flowers. I finished the card with some twine, blue leaf die cuts and a sentiment also stamped in blue. If you’re wondering why I chose to have blue leaves it’s not just because I love blue. Blue and orange are complementary colours, opposites on the colour wheel so when they are placed next to each other they provide a contrast that makes the other colour pop!

The second card features generational stamping stamping and plenty of spritzing to make the paler background flowers bleed into the surrounding area.
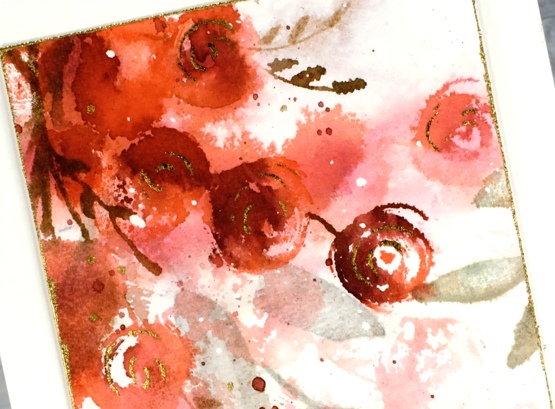
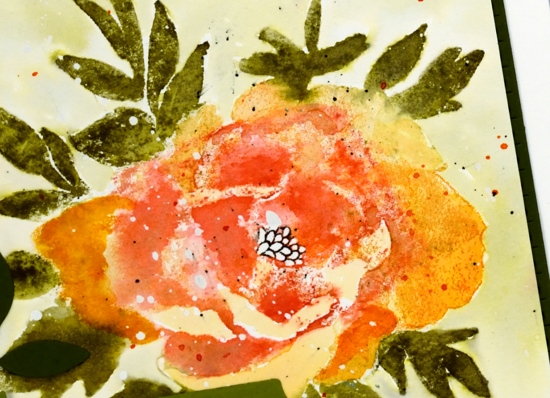
The flowers are stamped in abandoned coral and aged mahogany, the leaves are forest moss and the stems ground espresso. Because I added plenty of water when stamping this panel most of the definition in the flowers was lost so I drew some swirls on the flowers with a glue pen, let it dry to a tacky state then pressed gold foil on top. I added more gold details with an embossed sentiment, a gold cord and gold embossed edges round the panel.
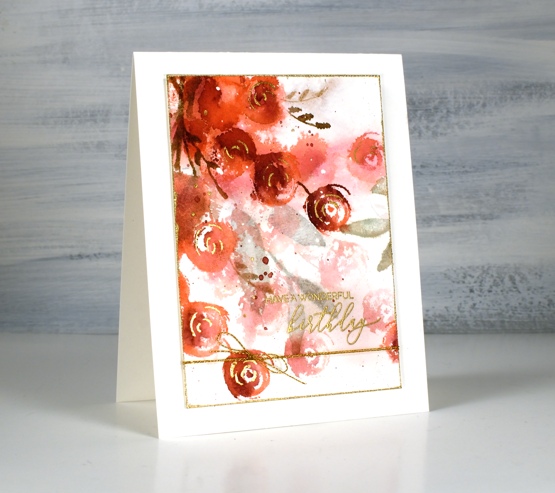
Rosa is such a pretty stamp, I’m looking forward to playing with it again. I think it might make a pretty art journal page.
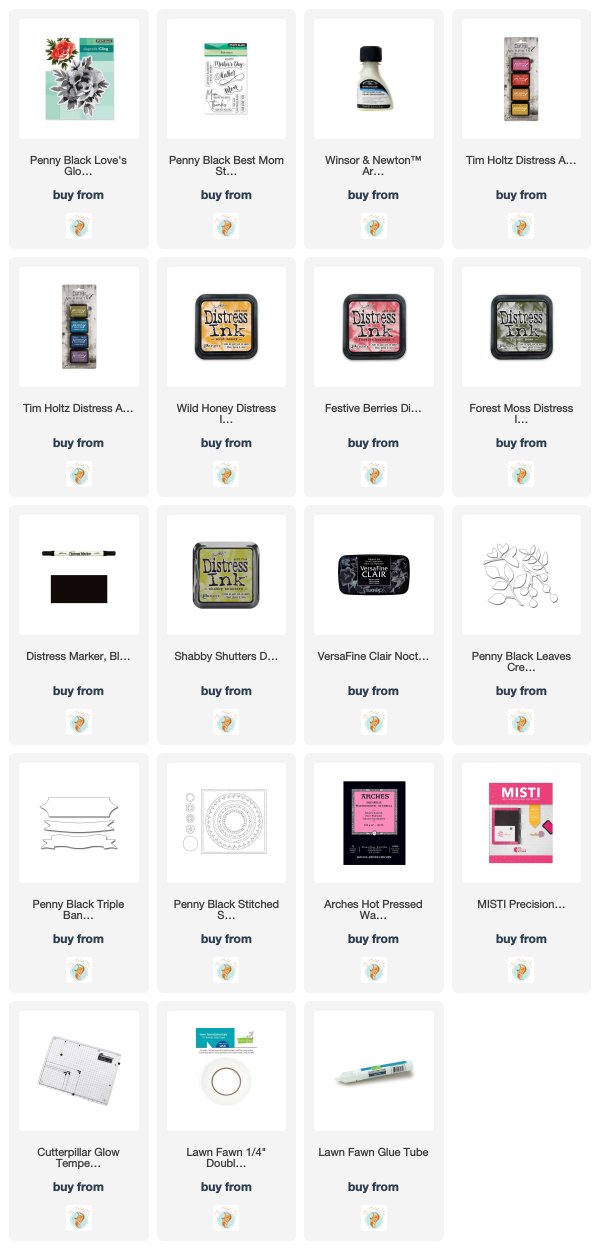
Supplies
(Compensated affiliate links used when possible)
Love’s glow
Posted: May 20, 2019 Filed under: Leaves, love's glow, stitched square & circles, Triple Banner | Tags: Penny Black creative dies, Penny Black stamps, Ranger archival inks, Ranger Distress inks 7 Comments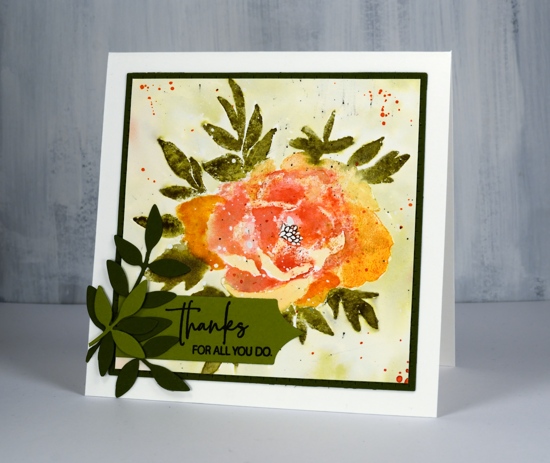
Here’s another new beauty from Penny Black. This one is a large rubber cling stamp called ‘love’s glow’. I’ve stamped it with a mix of archival and distress inks then added some die-cut extras on the corner. I think I might have gone a little over board with the splatter at the end but not enough to make me give up on the floral. There is a lot of shaded detail in this stamp so it is very helpful to stamp it in a medium to dark colour first on a scrap of paper so you can have the image off to the side while adding colour to your project. Before I started stamping I splattered some masking fluid on the hot pressed watercolour panel so the finished design would have some white dots here and there. You could use white paint at the end to get a similar effect. I used my MISTI so I could work on the oranges and reds separate from the green.
I stamped the flower first in archival spiced marmalade ink, it is one of the colours Ranger has recently brought out in mini archival packs. I learnt this trick from Jill Foster, just one of many tricks I have learnt from her! By stamping the flower first in archival I have an image on my paper that I can watercolour over but it will not be diluted and lost as I add water. Because I was using similar colours in distress inks the initial archival ink does not stand out as different. When I inked the stamp initially with archival ink I wiped any of the spiced marmalade that ended up on the leaves. To achieve the blended red and orange tones in the petals I inked and stamped the flower again in wild honey and festive berries distress inks. I then used a damp brush to blend the colours in the petals using my reference photo to help me when necessary.

I followed the same process for the leaves stamping them first in archival peeled paint, then again in forest moss distress ink which I blended with water and a paint brush. I added definition to the centre with a black marker. Once the panel was dry I painted shabby shutters ink around the flower after first pressing my shabby shutters inkpad onto my glass mat and adding some water. I splattered with festive berries, forest moss and black soot ink. I trimmed the panel down to a square then die cut a square mat of olive green cardstock with the stitched square die.
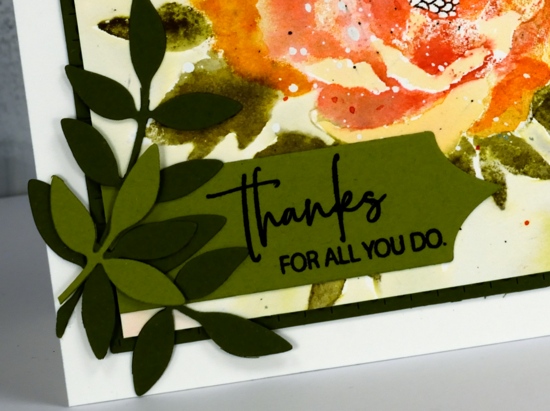
To finish off the card I added some green die cut leaves; I think these leaves might be from the first die sets I ever received from Penny Black. I’ve used them over and over. I cut a sentiment banner with one of the ‘triple banners’ set and trimmed one end so it could align with the mat. The sentiment is from the Best Mom set but I did some partial stamping to get only half the words on my banner.
I hope you are having a great Monday. I just want to remind you there is a sale happening at Foiled Fox all the long weekend and a ‘Color Trio challenge’ continuing until May 30.
Supplies
OLW 162 Leaves
Posted: October 16, 2013 Filed under: CAS, Hot Rod, Leaves, OLW 12 Comments
As I write this post our backyard is beginning to fill up with leaves. The strange thing is that by the time this post goes live I will be far away from our autumn leaf filled yard in another season and country all together!
Wherever you are and whether you can see golden, red or green leaves the challenge this week is to feature them on your one layer card. I used one of the leaf dies from the Penny Black creative die set Leaves to cut a couple of masks from post it notes. I then sponged over the masks in warm fall colours and added a thankful sentiment.
Supplies:
Stamps: Hot Rod (PB)
Inks: Memento Dandelion, Potter’s Clay, Cantaloupe, Morocco (Tsukineko)
Dies: Leaves

Mini Journal boards – Autumn & Winter
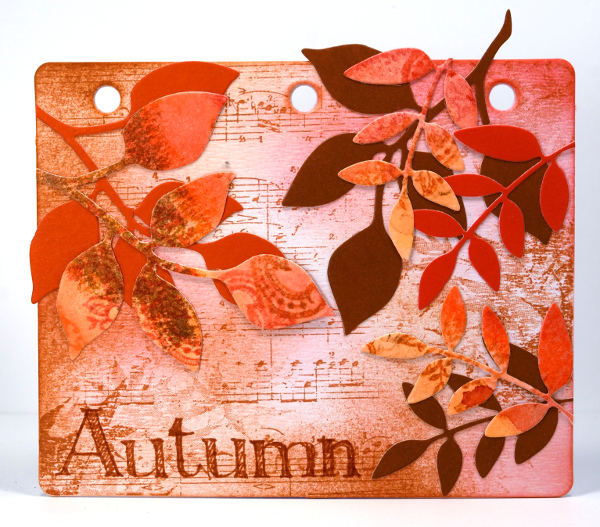
Posted: August 22, 2013 Filed under: Background Stamps, Floral Applique, Japanese Maple, Leaves, Mixed Media, Tagged 10 CommentsOn Tuesday I posted the spring and summer mini journal boards I made as part of the Penny Black collaboration with Design Memory Craft Faber Castell.

Today I have the autumn and winter boards along with a description of my creative process. Once again I relied heavily on the new creative dies from Penny Black and the gelatos from Faber Castell. I began my autumn board by creating a collage background in red and rust. I used the music background stamp, the Japanese maple stamp and some sponging. The next layers are all die cut using the Leaves dies. Some are cut from Penny Black mix & match fall festival papers; the patterned leaves are cut from a watercolour panel I created using red cherry, tangerine and chocolate gelatos and a stamp from the Floral Applique set.
Supplies:
Stamps: Music Background, Japanese Maple, Floral Applique (PB)
Creative Dies: Leaves (PB)
Gelatos: red cherry, tangerine, chocolate (Faber Castell)
Mini Mixed Media Journal (Faber Castell)
Inks: Potter’s Clay, Rhubarb Stalk (Tsukineko)
Last but not least, the winter board. To create the co-ordinated board and tags I cut a hill mask from two post-it notes at once so the masks were identical. I positioned one mask on the board then layered the tags on another post-it note to hold them together while positioning the second mask across the tags. Before applying any ink I flicked masking fluid onto both the board and the tags then let it dry. To create the night sky I used a combination of gelato and ink blended over the masking fluid. When the sky was complete I repositioned the hill mask on both the board and the tags to create a couple of snow banks by sponging. The berries were die cut from white cardstock then coloured with red and brown inks and the snow was added with a coconut gelato. To finish I removed the masking fluid, popped up the tags and arranged the berries across the top.

Supplies:
Creative Dies: Leaves (PB)
Gelatos: boysenberry, coconut (Faber Castell)
Mini Mixed Media Journal (Faber Castell)
Inks: Memento love letter, rich cocoa, Paris Dusk(Tsukineko)
Blue shining through
Posted: July 23, 2013 Filed under: Hillflowers, Leaves, Maidenhairs, Stamped Landscapes, Winter Berries | Tags: Faber Castell gelatos, Penny Black stamps, Tsukineko Memento inks 27 Comments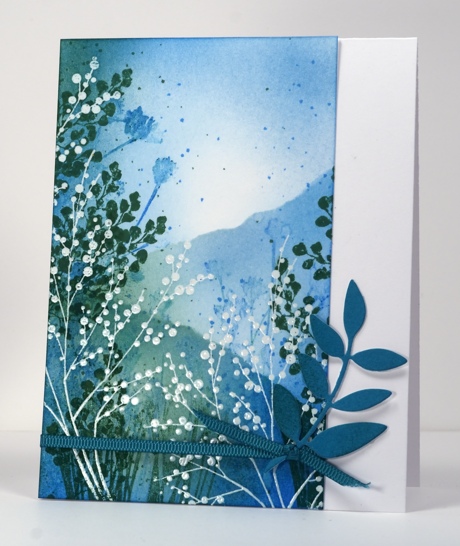
“Time for a scenic card,” I thought as I browsed through my art inspiration board for ideas. The delicate white branches and stems in this piece of art were my starting point. I embossed winter berries in clear and then coloured the hill flowers stamp with the spearmint and the blueberry gelatos, spritzed it and stamped it over the embossing. Next came the Maidenhairs leaves in green and sponging in blues and green. I t was only after I had sponged the perimeters that I decided to create some hills using a torn post-it note mask. Finally I flicked blue and green ink around and a few drops of water here and there. The drops remind me of the tiny insects which sometimes swarm and are not always detected until one is in my eye or down my throat! I thought about adding a sentiment but opted for some die cut leaves instead.
Enjoy your day;, I’ll be back tomorrow with my take on Beating the Heat
Supplies:
Stamps: Maidenhairs,Winter berries, Hill flowers PB)
Inks: Memento Bahama Blue, Summer Sky, Cottage Ivy & Versamark (Tsukineko)
Dies: Leaves
Also: Clear embossing powder, teal ribbon from Lorraine’s stash, Faber Castell gelatos
Dies Days 4: One die four ways
Posted: July 11, 2013 Filed under: Background Stamps, CAS, Dies, Leaves, Penny Black 12 Comments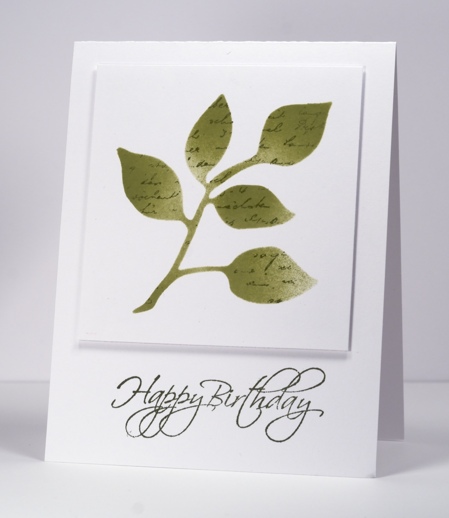
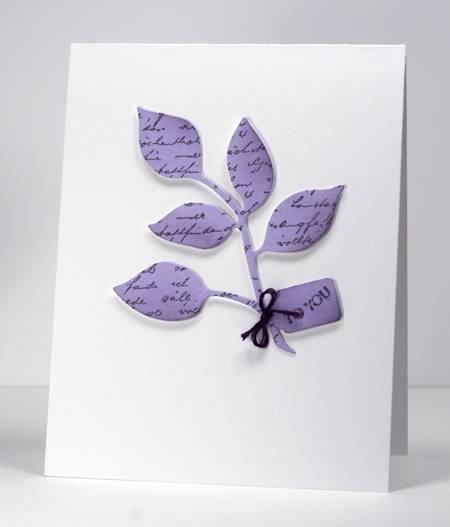
I am having a great time with the new dies from Penny Black and one of the reasons is that I can make masks from them. I am using them with cardstock but you know me, I love to mask and sponge and every single die can create two different masks: the positive and the negative. For my post today I used the same die from the Leaves set and stuck with the same layout and design elements but varied the colours. I think the top one is my favourite, the one where I sponged through a mask cut from a post it note and stamped with the letter background stamp. (I think my new stamping motto just might be, “when in doubt, use the letter background stamp”)
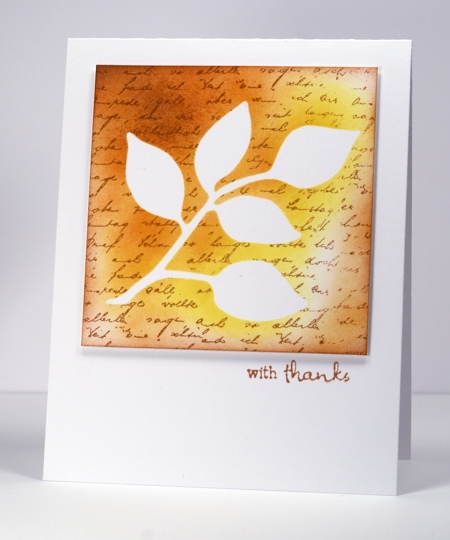
For the one above I stuck the die cut post-it leaves down and sponged and stamped over them.

Dies Days 1: Daisy Collage
Dies Days 2: Dots and Blossoms
Dies Days 3: Flutters
Supplies:
Stamps: Letter Background, Flourish Birthday, Wishes, Sentimental (PB)
Inks: Memento Pistachio, Olive Grove, Dandelion, Potter’s Clay, Rich Cocoa, Elderberry (Tsukineko)
Dies: Leaves
Cardstock: Mix & Match Periwinkle
Dies Days 2: Dots and Blossoms
Posted: July 9, 2013 Filed under: Bashful, CAS, Dies, Dots, Leaves 8 Comments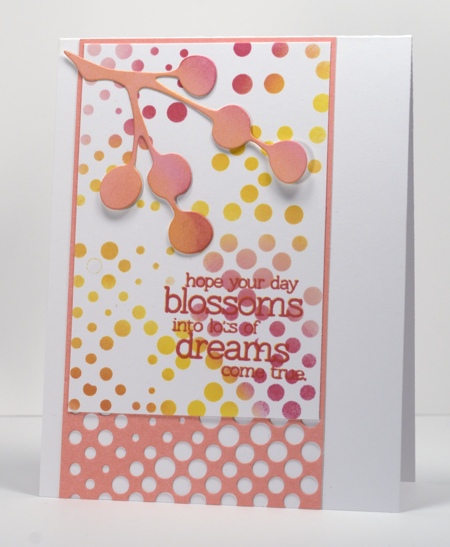
More dies on show today. One of the dies I imagine I will use on all sorts of cards is the ‘dots’ die. I used it two ways on this card, first cutting a dotty mask out of a post-it note and then creating a background from a coloured piece of cardstock. I sponged through the post-it mask in four colours and then used some of the same colours to define the edges of the berry branch die cut and background panel.
Have a great day
Supplies:
Stamps: Friendship (PB)
Inks: Memento Angel Pink, Rosebud, Dandelion, Cantaloupe (Tsukineko)
Dies: Dots, Leaves
Cardstock: Coral Reef


