
Elephant congrats
Posted: January 30, 2017 Filed under: African Trees, CAS, Tribal | Tags: CAS, Darkroom Door stamps, Ranger Distress inks 8 Comments

With fond memories of the One Layer Simplicity challenge I decided to make a one layer card for the current Case This Sketch challenge.

I masked my card base and stamped the ‘tribal’ stamp from Darkroom Door in distress inks. I stamped one colour after another just inking part of the pattern each time. With the mask still in place I sponged over the stamping in the colours listed below. Next I repositioned my first mask and added a second mask to reveal a thin strip of cardbase above the pattern then sponged with fired brick distress ink. To complete the design I stamped an elephant and a sentiment in fired brick ink.
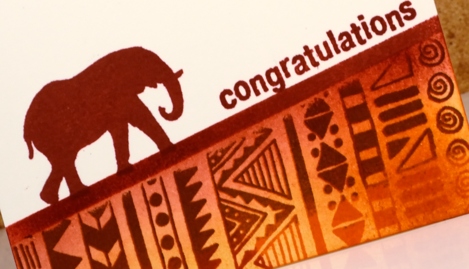
Some goals are reached with much elephant-like plodding rather than the speed of a gazelle!
Supplies:
Stamps: All Occasions, Tribal, African Trees (Darkroom Door)
Inks: Distress wild honey, spiced marmalade, fired brick, vintage photo inks (Ranger)
Cardstock: neenah natural white cardstock
Stencilled breeze
Posted: January 27, 2017 Filed under: Brusho, CAS, Fresh Breeze | Tags: Brusho, CAS, Penny Black creative dies, Penny Black stamps 7 Comments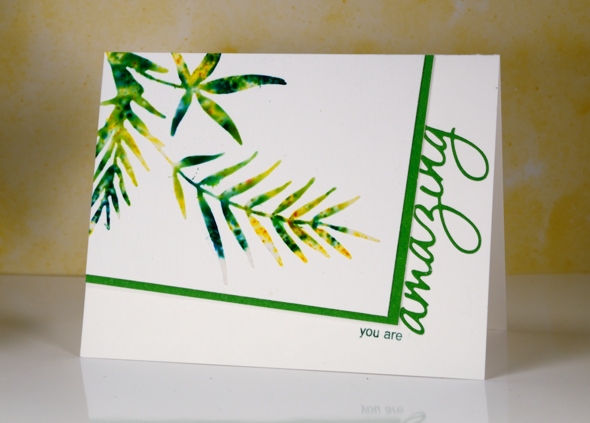
Earlier this week I posted a card made out of a leftover, the negative print from a stencil used for watercolouring. Today’s card is a positive print made through a stencil (not using the same stencil as the earlier card). I created the stencil for this card myself by die-cutting the shape from a piece of stencil plastic. You could use an old plastic folder as long as it is not too thick for your die cutting machine to handle. The die I used is ‘fresh breeze‘ from Penny Black. I taped my home made stencil to a piece of cold pressed watercolour paper and spread moulding paste over it, keeping the layer fairly thin with a palette knife. Next I sprinkled yellow and green brusho powder over the stencil then spritzed with water to activate the brusho. Too much water and it seeps under the stencil, not enough and the brusho doesn’t activate. Once the brusho appeared a little blurry I removed the stencil and let the panel dry for quite some time.
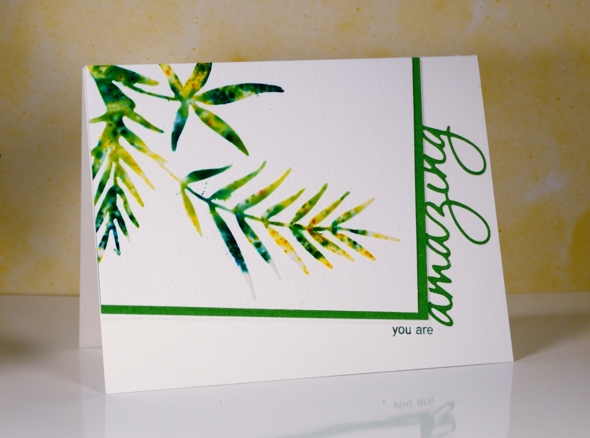
I chose the angled rectangle layout and messed it up by attaching the panel upside down on my card base. I had to cut it out of the cardbase and attach it to a new one so it is a tad bulky under the stencilled panel! I matted in green and trimmed off the top of the die cut word so it would appear to be attached to the mat. I inked just two words on a sentiment stamp so I could turn it into a phrase.
I’m going to add this one over at the Sweet Stampin’ Dies and Punches challenge. Thanks for dropping by.
Supplies:
Stamps: Heartfelt (PB)
Die: Fresh Breeze , OMG (PB)
Inks: Cottage ivy memento (Tsukineko)
Paint: Brusho (Colourcraft)
Paper: Canson 100% cotton cold pressed watercolour paper, green cardstock
Also: moulding paste
Butterfly Heart
Posted: January 16, 2017 Filed under: butterfly heart pop out, CAS | Tags: Peerless Transparent Watercolors, Penny Black creative dies 7 Comments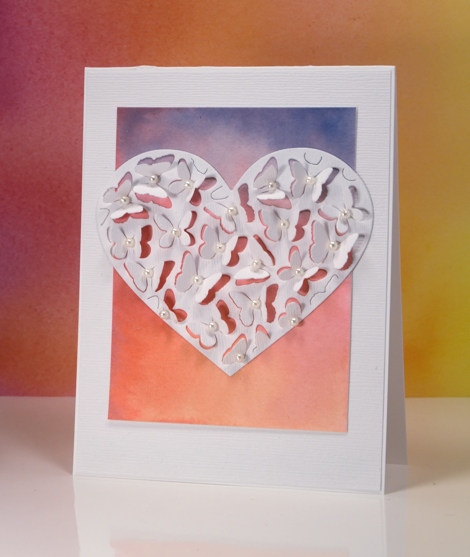
If you have visited the Penny Black blog lately you will know about the new Follow Your Heart release, if not I will be sharing some of new dies and stamps over there and here on my blog this week. Because the butterfly heart pop out die only partially cuts the butterflies you can fold up the wings to reveal whatever is underneath. I tossed up whether to cut the heart out of the watercolour panel or white but decided to have the watercolour panel peeping through the wings and framing the heart. I painted the gradated panel with yellow, pink then blue blending each colour into the one beside it. I attached the coloured panel to a linen textured white panel and cut the heart out of the same textured white cardstock.
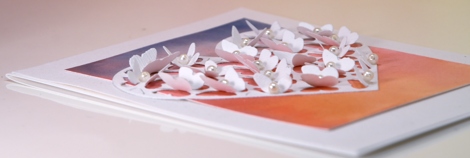
I bent all the butterfly wings up before gluing the heart onto the watercolour panel so I wouldn’t accidentally glue any wings flat. Once the heart was firmly attached I glued a seed pearl in the centre of each butterfly and attached the whole panel to a white card base. If I were to mail this one I would probably need a box-type envelope so I think it might end up being a hand delivered card.
Supplies:
Die: Butterfly Heart Pop Out (PB)
Paints: Peerless watercolors
Cardstock: hot pressed watercolour paper, neenah solar white, textured white
Also: white seed pearls
You warm my heart
Posted: December 22, 2016 Filed under: CAS, crystal trio, What's in your cup | Tags: Brusho, Penny Black creative dies, Penny Black stamps 4 Comments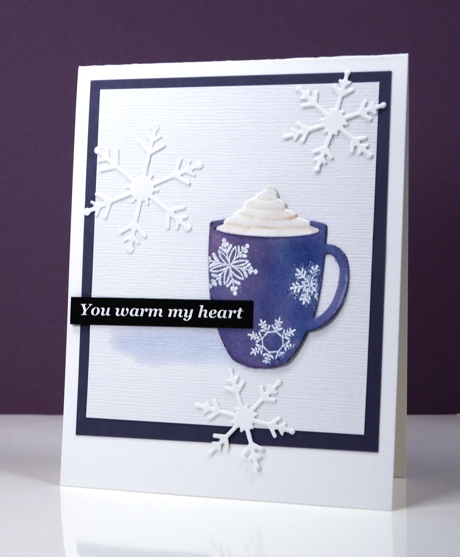
This message is definitely for you my blog readers; you really do warm my heart with all the kind encouragement you leave in the comments. I have been working on a Valentine themed class for January 2017 and the cute little die-cut cup is one of the stars of the new class. I settled on classic red & white for the Valentine class but not before painting quite a few cups in other colours. This little blue cup with its snowflakes is just right for a day which started with snowfall and ended with a blue sky.
I die cut the cup out of watercolour paper then painted it with blue brusho watercolour paint. To give the cup some shape I painted some purple over the blue on the left hand side. Once it was dry I embossed the snowflakes over the top and added the whipped cream die cut piece. I attached the cup to a textured white panel and painted a pale shadow beside the cup then added snowflakes, a sentiment and a purple mat to frame it.
I’ve been making gingerbread today following my usual pattern of burning the first tray and half the second before settling on a shorter cooking time.
Supplies
Stamps: season’s gifts (PB) note: I printed the sentiment on my computer; it’s not a stamp
Dies: crystal trio, what’s in your cup (PB)
Inks: versamark (Tsukineko)
Paper: hot pressed watercolour papers (Fabriano),white linen textured cardstock, purple cardstock, black cardstock
Also: brusho watercolour crystals (Colourcraft), white embossing powder
Holly Stencilling
Posted: October 27, 2016 Filed under: CAS, Holly medley | Tags: Brusho, Penny Black creative dies, Penny Black stencils 4 Comments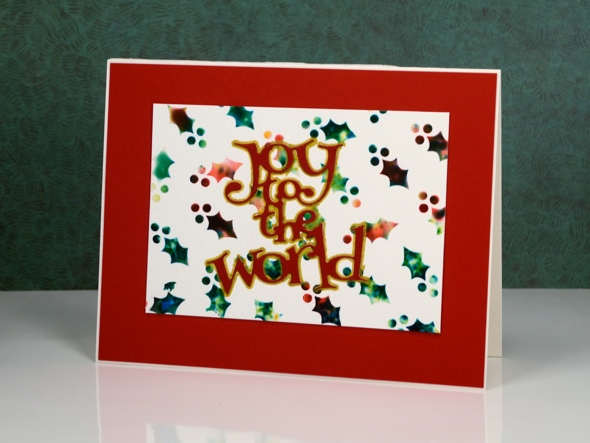
I have a couple more stencilled and watercoloured cards to share today. I used the same technique to create these panels as I did to make the ‘stained glass‘ panel shared earlier in the week.
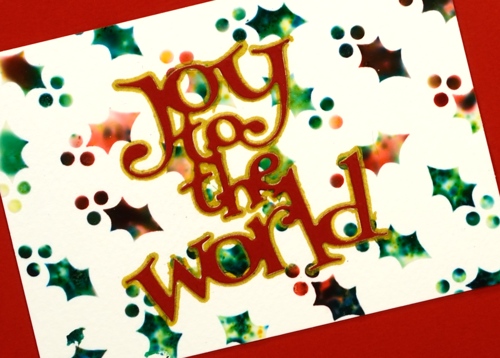
I began with the stencil taped to a piece of watercolour paper then spread molding paste over the stencil to fill all the little holly leaves and berries. While the paste was still wet I sprinkled brusho powder over the stencil then spritzed lightly with water. The water activates the brusho which spreads, blends and soaks into the paste. I removed the stencil and let the paste dry for quite a while before handling it. On the panel below I used a pearl paste instead of white to achieve a shimmery appearance. Water and colour did seep under the stencil in a couple of places but I trimmed the panel to utilise the best portion.
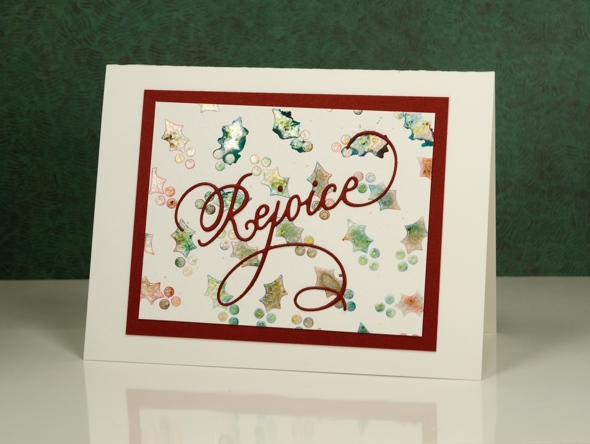
I finished the cards with die-cut sentiments and mats. To make the ‘Joy to the world’ sentiment pop I traced around it with a gold gel pen. You can see in the photo below the shimmer from the pearl paste. When I sprinkled the brusho over and spritzed, it really did not look good; it was more of a dirty mustard colour. Once it dried, though it looked pearly with shades of yellow, green and gold peeping through.

I apologize if I did not answer your questions about the last post; I’ve been travelling around a bit this week and visiting family in Canberra and Newcastle. When the choice was computer time or duplo with my delightful three year old great nephew, well really, there was no choice!
Supplies
Dies: Joy to the World, Rejoice(PB)
Stencil: Holly Medley (PB)
Paints: Red and green Brusho (Colourcraft)
Paper: Fabriano watercolour paper, red cardstock
Also: molding paste, texture luxe pearl paste, gold gel pen
More Glimpses
Posted: August 18, 2016 Filed under: CAS, Nature's Silhouettes, Stamped Landscapes, Woodland Beauty | Tags: Dr Ph Martin Hydrus watercolor paints, Penny Black stamps, Tsukineko Versafine inks 13 Comments
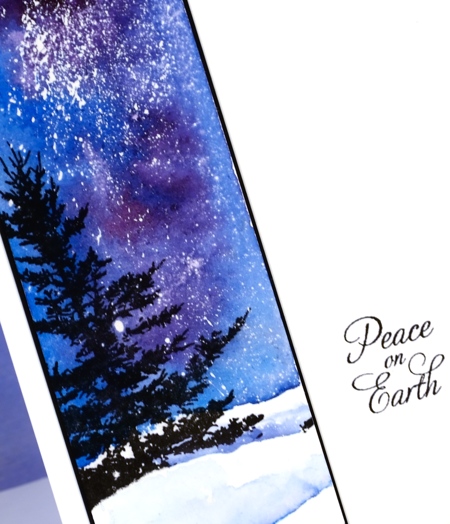
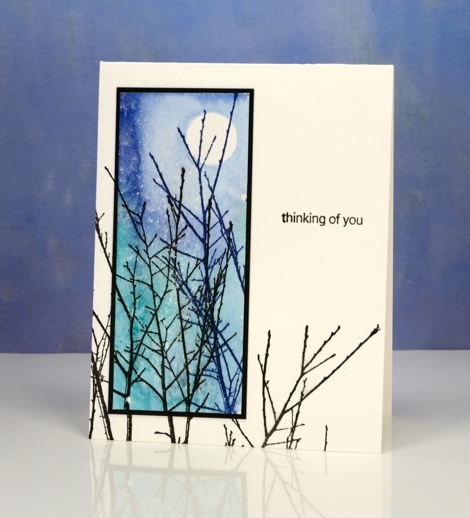
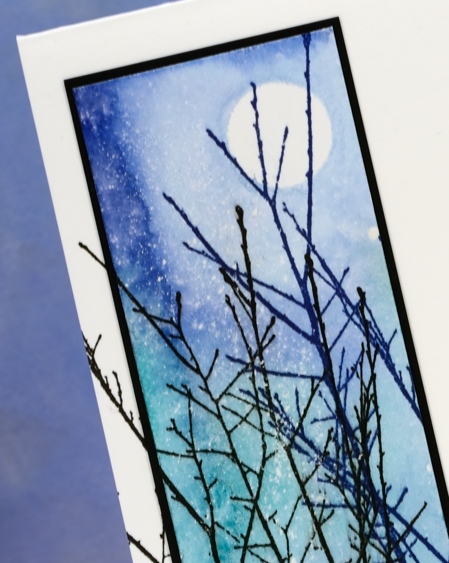
I have two more cards made from my experiments with new stamps on watercolour strips. Both today’s strips and yesterday’s were splattered with masking fluid before I started. For the deer card I also added a circle of masking tape before painting the sky in blue, purple, pink and yellow watercolour paint. I painted the horizon edge in blue and tilted the strip up so the paint flowed toward the moon, one colour blending into another

Once the sky dried I removed the masking fluid and tape then stamped the branches from ‘woodland beauty’ and the deer from ‘ nature’s silhouettes’ in black before painting some shadows in front of the deer’s legs.

I used a similar process for the single tree scene, painting the sky first while leaving some unpainted paper at the bottom to be the snowbanks. Once the sky dried I removed the masking fluid and positioned a post-it mask below the horizon and stamped the single tree from the ‘woodland beauty’ set over the mask. Once I removed the mask I painted shadows on the snow in the foreground and behind the tree.
The four little panels in today’s and yesterday’s posts are a taste of the new stamps and the types of scenes I expect to be creating over the next few months. I really enjoyed working small; have you tried it?
Supplies:
Stamps: Nature’s Silhouettes, Woodland Beauty, Joy Filled (PB)
Paints: Dr Ph Martin Hydrus watercolour paints
Inks: Versafine Onyx black ink (Tsukineko)
Cardstock: Fabriano 100% cotton hot pressed watercolour paper, Neenah epic black cardstock
Also: masking fluid, masking tape
Glimpses
Posted: August 17, 2016 Filed under: CAS, Into the sky, Nature's Silhouettes, Prancers | Tags: Brusho, Penny Black stamps, Ranger Distress stains, Tsukineko Versafine inks 24 Comments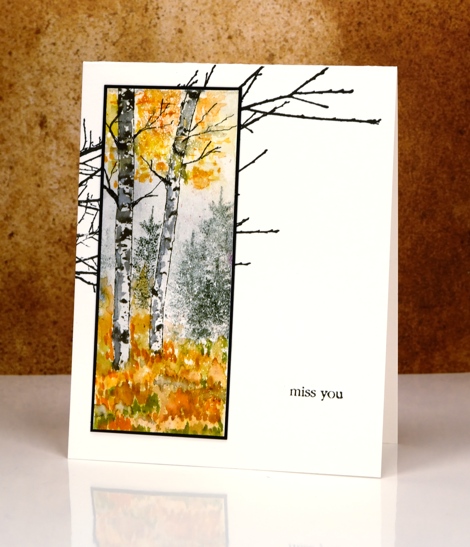
You have probably already caught up with the fact that Penny Black has two new collections of stamps and dies. When I first receive new stamps my head fills with ideas and designs to try and this time was no exception. I had a little pile of bookmark sized watercolour paper strips on my table so I decided to try some of my ideas on mini projects rather than full sized panels. That way I was able to play with a few stamps and several ideas in a short space of time. The strips I worked on have become the cards I’m sharing today and tomorrow. I have also had a chance to develop some of the designs into full sized panels. On the strip above I used an old favourite, the little tree stamp from the ‘Prancers’ set as background for the new birch trunk stamps.
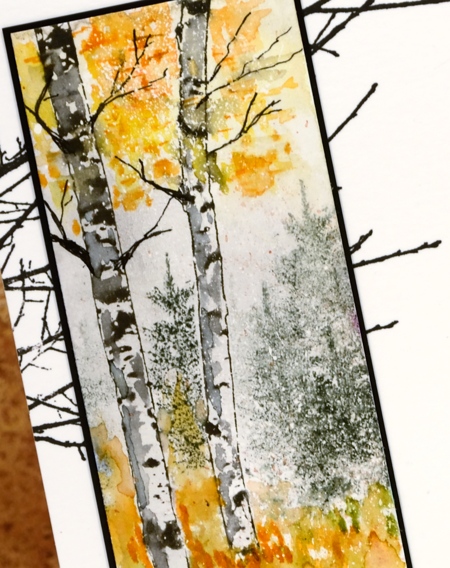
I stamped the two trunks from the new ‘Nature’s silhouettes’ transparent set on watercolour paper already covered in spots of masking fluid. I masked the trunks with post-its while I stamped the fir tree in the background then painted colour at the top and bottom of the panel with a combination of brusho and distress markers. I added some shadow and twigs to the trunks to make them look more tree like.
On my second mini panel I masked a moon with masking tape then used distress stains to paint a blue and green sky over the splatters of masking fluid. I turned this into a little scene by adding the ‘Into the Sky’ stamp in blue and black ink. I love this delicate stamp of branches and decided to stamp it on both the bases for today’s cards. It mimics the twiggy branches on the birch trees above and continues some of the upward reaching branches in the panel below.
Supplies:
Stamps: Nature’s Silhouettes, Prancers, Into the sky, Snippets (PB)
Paints: Brusho powders (Colourcraft)
Inks: Versafine Majestic Blue & Onyx black ink (Tsukineko) Black Soot, Rusty hinge, Spiced marmalade, Peeled paint distress markers, Evergreen Bough & Blueprint sketch distress stains (Ranger)
Cardstock: Fabriano 100% cotton hot pressed watercolour paper, Neenah epic black cardstock
Also: masking fluid, masking tape
Watercolour Dance
Posted: August 3, 2016 Filed under: Brusho, CAS, shall we dance, Watercolour | Tags: Brusho, Penny Black creative dies, Penny Black stamps 21 Comments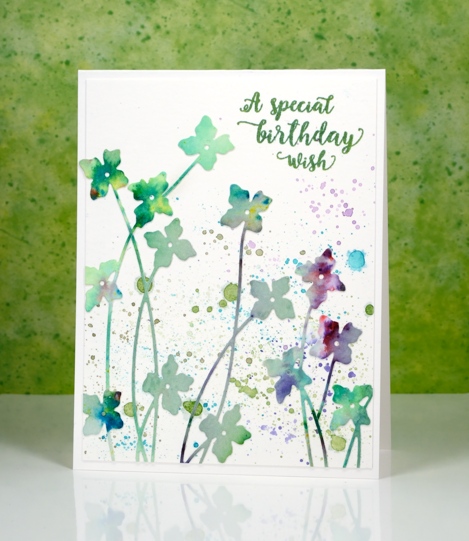
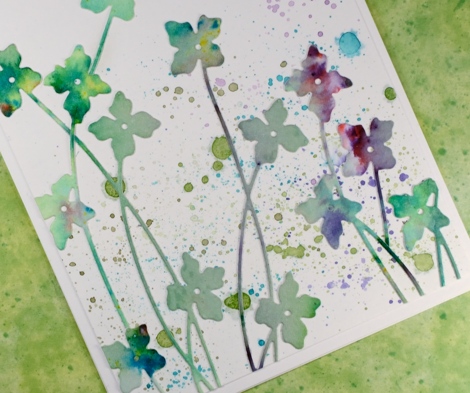
It’s really quite hot here at present and this card some how makes me feel a little cooler. It’s either the watery splatter or the cool blues and greens. I used up another abstract watercolour panel to make this card; there is quite a pile of painted or stamped panels sitting on my desk waiting to be turned into something. As you can probably guess this panel was mainly green but had a bit of purply pink on it. I am pretty sure it was done with brusho because there are little bits of other colours mixed in which is one of the nice features of brusho paint – the colours are not purely one pigment.
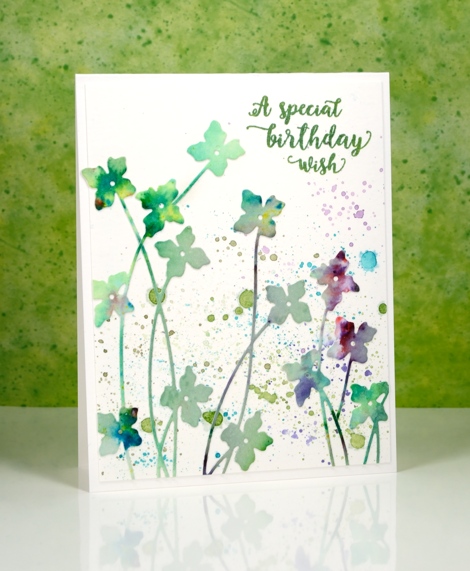
I used the new ‘shall we dance’ die from Penny Black to cut as many flowers as I could. I didn’t need them all to be complete die cuts as I wanted some tall and some short. Before I cut them I put ‘stick it’ adhesive on the back of the whole panel to make things easier later. Once I had all the flowers I could squeeze out of the panel I played around with positioning until I was happy. I did it all on a plain white panel assuming that I would keep the background blank and let the colours in the flowers pop. It would have been ok that way but I decided to use my watercolour pencils to try a little splatter in similar colours to the flowers. It may not be strictly white space any longer but it is pretty.
I am going to let this card play along with not one, but two challenges.
The CASology cue card is

and the CAS Mix Up challenge is

I read the fine print and discovered that if you didn’t have sprays then splatter is just fine so we’re in!
Supplies:
Stamps: Words of Kindness (PB)
Die: Shall we dance
Paints: Brusho powders (Colourcraft)
Inks: Cottage Ivy Memento ink (Tsukineko)
Cardstock: Fabriano 100% cotton hot pressed watercolour paper
Also: stick it adhesive sheet
OLS29 Christmas in July
Posted: July 1, 2016 Filed under: CAS, One-Layer Simplicity challenge, Spread Cheer | Tags: Faber-Castell Albrecht Durer Watercolour pencils, Penny Black stamps, Speedball elegant writer, Tsukineko Memento inks, Tsukineko Versafine inks 18 Comments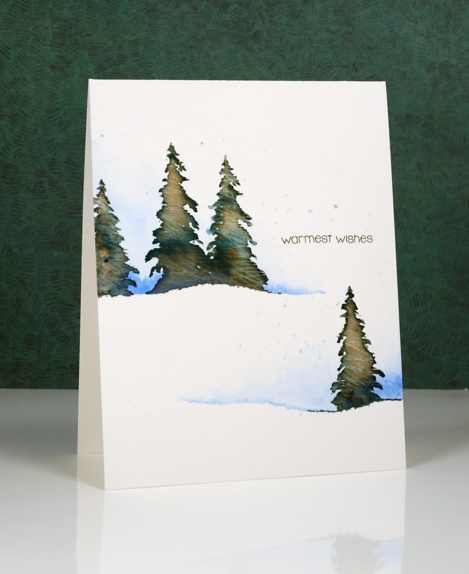
I am hosting the One Layer Simplicity Challenge this month and the theme is ‘Christmas in July’. I know some of you make Christmas cards all year but I usually start around now and keep going until December! If you haven’t even thought about Christmas cards then perhaps this challenge will be a motivator. Perhaps you want to enjoy the summer sun and not think about December at all – that is totally fine too!
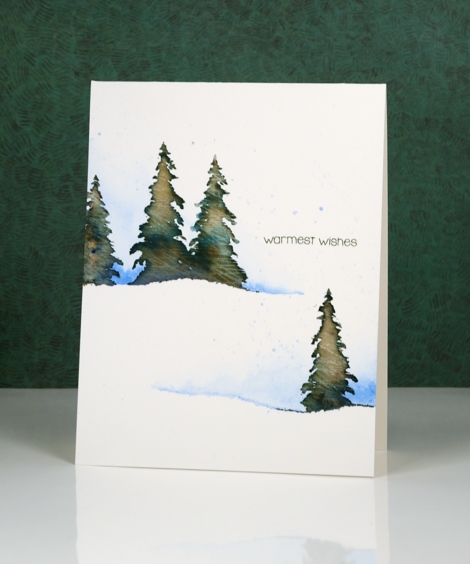
To make this one layer card I tore a piece of painter’s tape lengthwise into two strips and positioned them on my watercolour paper card base. I painted some blue along the torn tape edge and faded it to white. Keeping the tape in place I stamped a few trees in Memento Northern Pine ink and added a few dabs of black elegant writer pen. After stamping I painted over the tree to blend the ink. Northern Pine separates into brown and green when diluted which gives the foliage some variety in colour.
I’ve been reading a book called ‘The Non-Designer’s Design Book’ which has made me think about layout in terms of alignment, repetition, contrast and proximity. The book is concerned mainly with text documents like business cards, menus, ads, etc but the principles are relevant to art layout too. I found myself trying to apply what I’ve learnt when working out where my sentiment would go.
Supplies:
Stamps: Spread Cheer(PB)
Inks: Northern Pine Memento ink, Versafine Olympia green (Imagine Craft/Tsukineko)
Pencils & Pens: blue watercolour pencil (Faber Castell), elegant writer pen (Speedball)
Cardstock: Canson Moulin du Roy 100% cotton hot pressed watercolour paper
Love art poppies
Posted: June 14, 2016 Filed under: CAS, Love Art | Tags: Kuretake Zig clean color real brush markers, Penny Black stamps, Tsukineko Versafine inks 12 Comments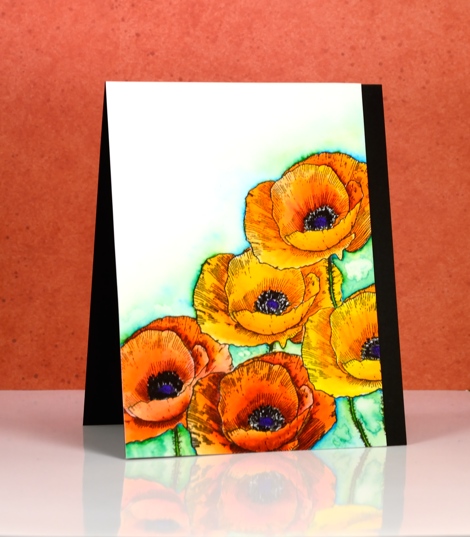
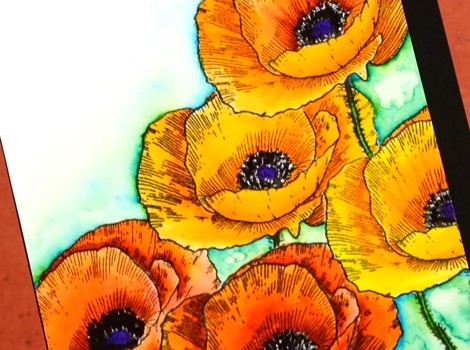
My inspiration for this panel came from my garden. I only have one colour of poppy in my garden, orange. I didn’t quite capture the colour; but it was a good colouring exercise. To create the collection of poppies I had to mask several times then stamp over my masks. Fortunately the cutting required for a mask of this poppy wasn’t too fussy!
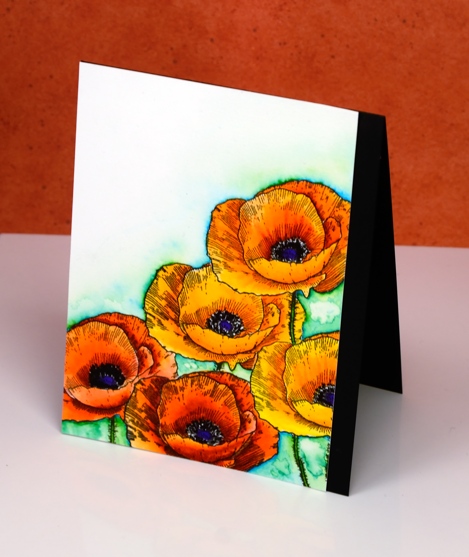
I used zig clean color real brush markers and worked with one orange, one yellow and one red. The colours remained bold and bright because I blended with very little water and just worked with a combination of red and orange or orange and yellow. The centres are purple and black. The background is also zig markers, a mix of blue and light green with water marks to break up the brightness and give a little texture.
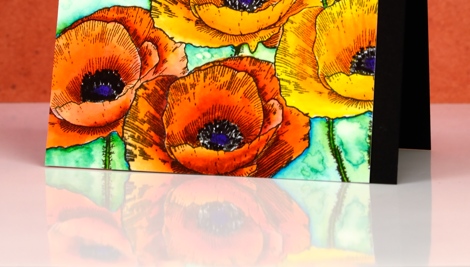
When I photograph my cards I sit them on a piece of glossy cardstock; I like the strong reflection I got this time.
I fully intended to add a sentiment in that big empty space in the top right corner but didn’t notice I hadn’t until I was editing my photos. I will wait and see who I send it to and add a sentiment later.
Supplies:
Stamps: Love Art (PB)
Mediums: Zig Clean color real brush markers(Kuretake) Versafine Onyx Black ink (Tsukineko)
Cardstock: Hot pressed Fabriano watercolour paper, Neenah Epic Black cardstock


