
Floral medley
Posted: February 16, 2018 Filed under: floral medley | Tags: Faber-Castell Albrecht Durer Watercolour pencils, Penny Black stamps, WOW embossing powders 7 Comments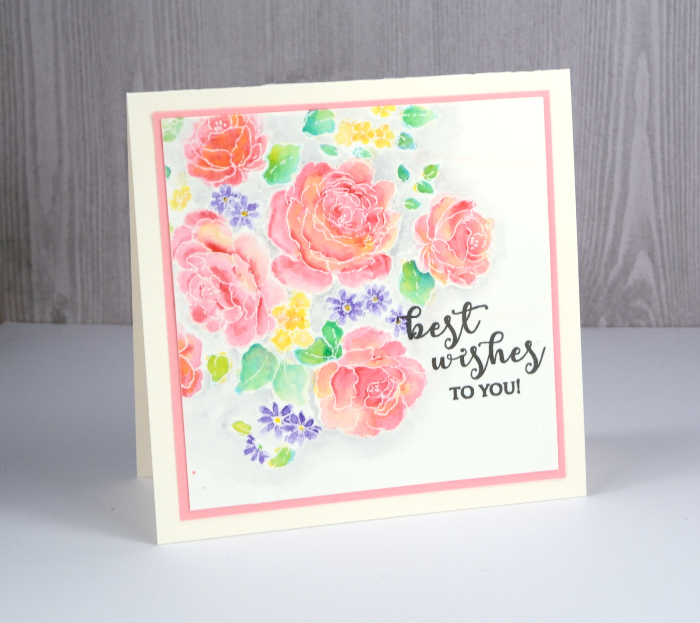
Sweet Spring has arrived, on the Penny Black blog that is! Sweet Spring is Penny Black’s brand new release and as you can imagine it’s full of flowers. I’ve been having fun using some of my favourite techniques to colour those flowers so let’s take a look at today’s blooms. This big stamp is called ‘flower medley’ and I’ve paired it with a new sentiment from the ‘grateful heart’ set. (list and links below)
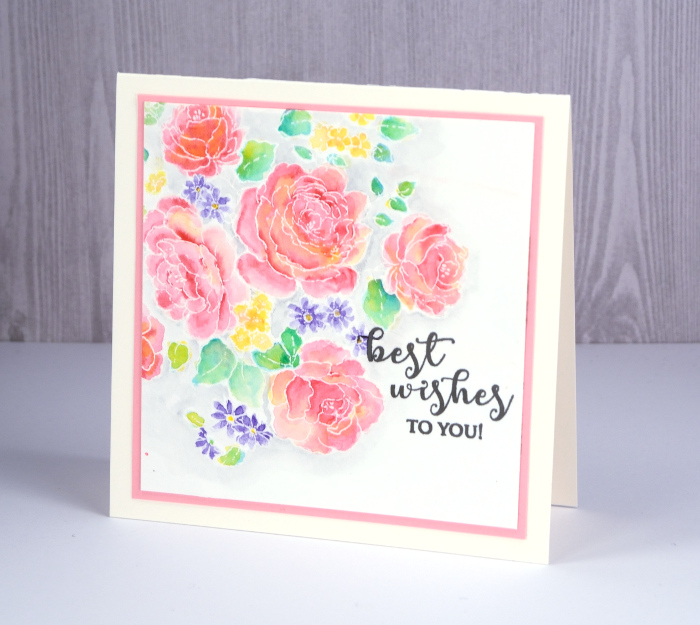
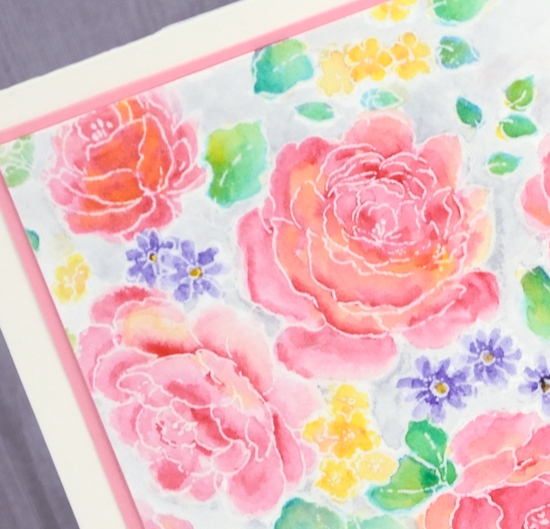
I embossed the flower medley stamp on hot pressed watercolour paper with white powder then used my watercolour pencils to paint in and around all the leaves and flowers. The embossing keeps everything contained so I was able to pick up colour from my pencils with a waterbrush, paint a petal or leaf then drop in more of the same colour for some depth or a different colour to create some blended areas. Once all the flowers and leaves were coloured I painted around them all with a grey watercolour pencil.
Next I used a trick I occasionally employ to flatten my watercoloured panels. I turned on my minc, popped the panel inside a folded piece of computer paper and ran it through the minc on a low heat setting. It ironed my panel nicely but also melted and removed some of the embossing. If I had used an embossing powder with some colour or shine then I wouldn’t have wanted it to disappear but clear or white embossing just masks the white paper underneath so melting it off didn’t change my design at all. The panel ended up very smooth so I was able to overlap the floral design with a sentiment stamped in versafine smokey gray ink. I matted the panel with co-ordinating pink cardstock and then added it to a square cream card base.
Now click on over to the Penny Black blog for the full reveal and a giveaway!
Supplies
Stamps


Inks: versamark, versafine smokey gray


Pencils: Faber-Castell Albrecht Dürer watercolour pencils
Paper: hot pressed watercolour paper, pink cardstock

Also: opaque white embossing powder, minc foil applicator


Good neighbours
Posted: February 13, 2018 Filed under: Coloured pencil, Good neighbours | Tags: Faber-Castell Polychromos Colour Pencil, Penny Black stamps 7 Comments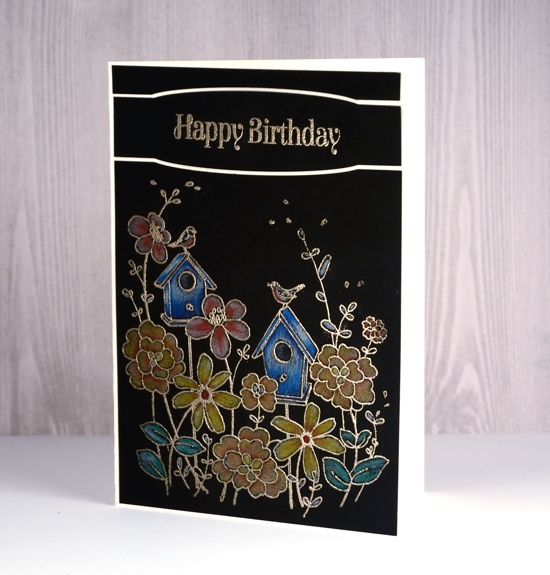
After teaching some colour pencil classes I am feeling inspired to use my pencils more often. I especially like the look on black cardstock but it is trickier to get a good photo. I used my Faber-Castell polychromos pencils for this card paired with the ‘good neighbors’ stamp from Penny Black.
I embossed the stamp with platinum powder then used a selection of coloured pencils to fill all the images. I wanted the sentiment to add some more interest to the black panel so I die-cut the top of my image panel with one of the PB stitched edges dies, used the same die to frame the sentiment then cut a little strip again with the same die to complete the rectangle again at the top.
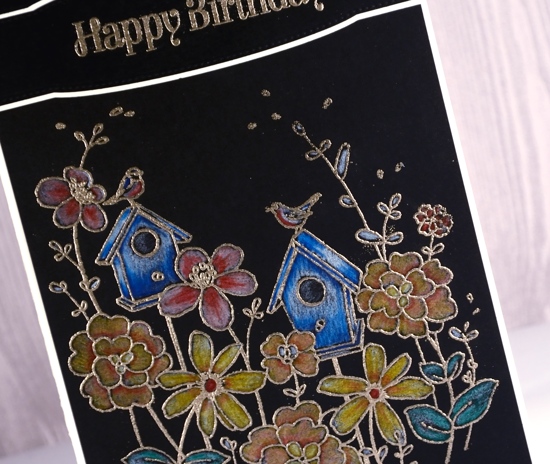
The sentiment is embossed in platinum and then all the panels are attached to a cream card base. A little larger than my usual, hence the side fold. I’m teaching a coloured pencil technique class in Toronto in April; you can find the details on my upcoming classes page.
Supplies
Stamps: good neighors, spice of life


Die: stitched edges

Ink: versamark
Also: WOW metallic platinum superfine embossing powder, Faber Castell Polychromos pencils
Botanical script
Posted: February 11, 2018 Filed under: Botanical Script | Tags: Darkroom Door stamps, Ranger Distress inks, Tsukineko Versafine inks 7 Comments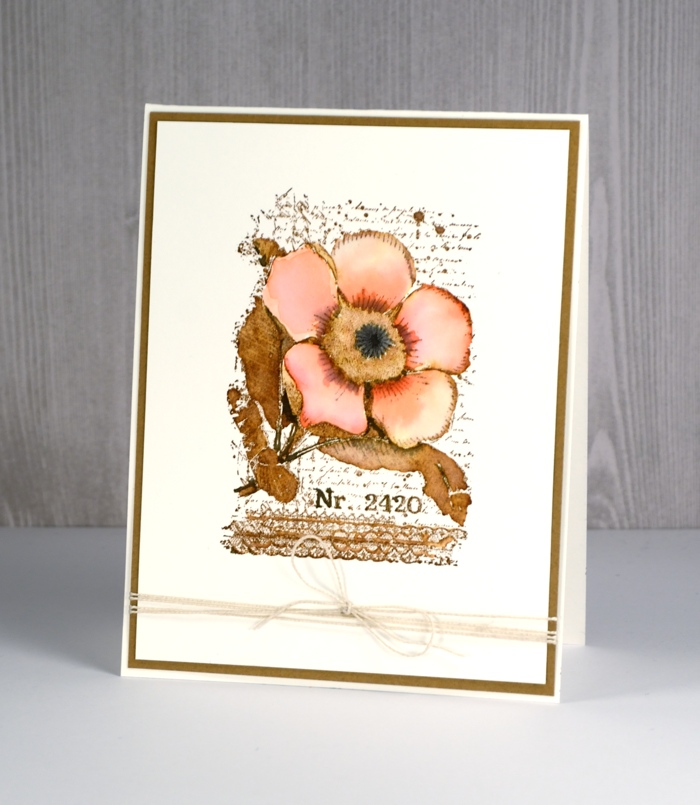
I am very happy to be sharing these two cards over on the Darkroom Door blog today. Both cards feature a floral collage stamp from the new Botanical Script set. You can find all the instructions over at Darkroom Door. My first card is done in a vintage style with distress inks.

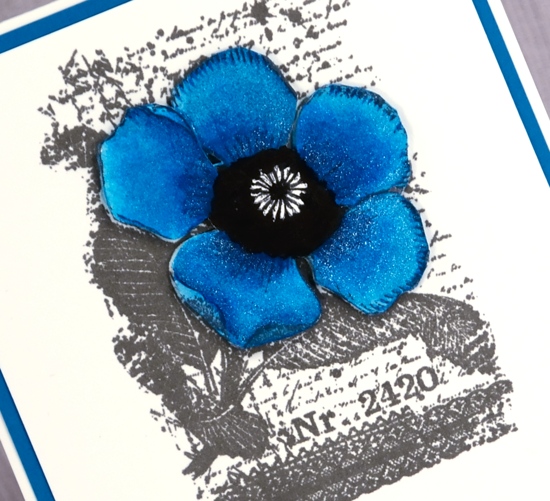
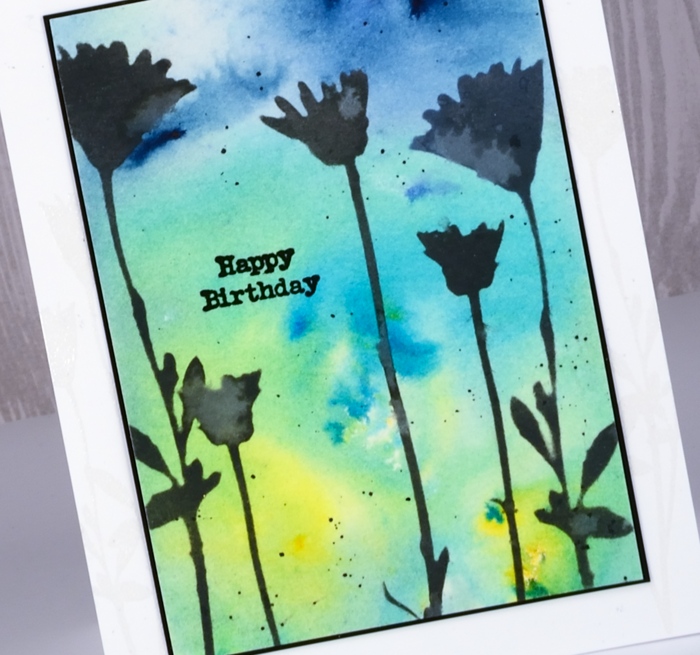
My second card is bolder and brighter with a sparkly blue and white colour scheme.
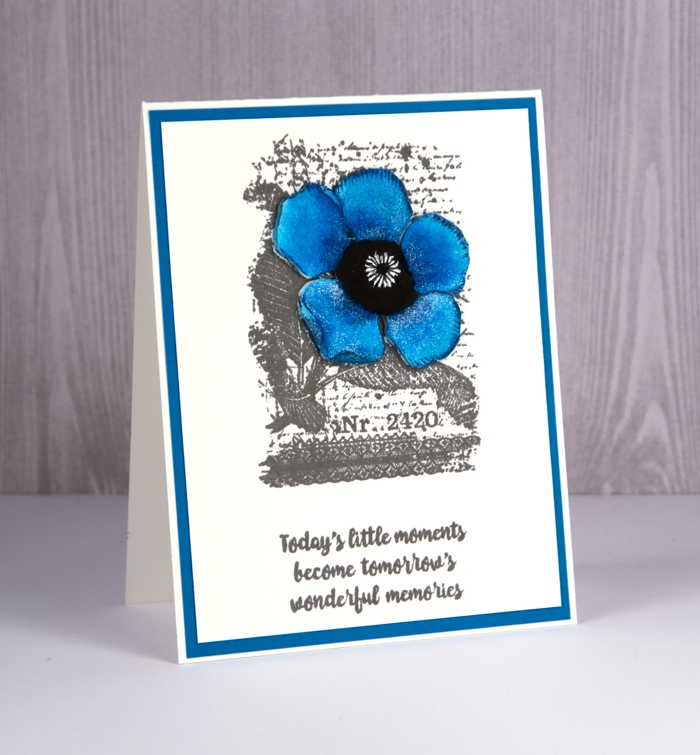
I layered this one by cutting out and painting an extra flower. All the steps and supplies are listed on the Darkroom Door blog. While you’re there you can see the other pretty stamps from the Botanical Script set.
Snow blooms
Posted: February 8, 2018 Filed under: a little secret, Effulgent | Tags: Penny Black stamps, Ranger Distress inks 12 Comments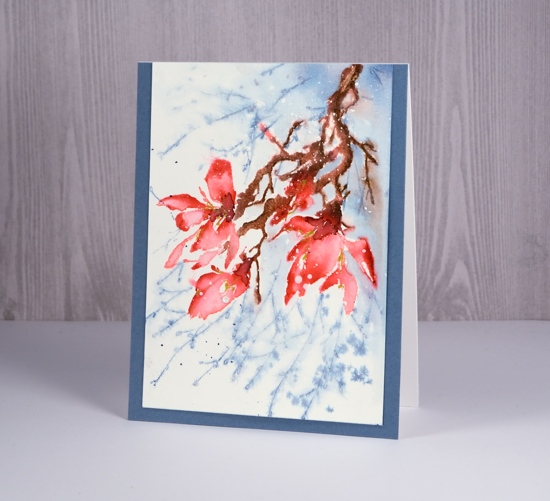
I sense a bit of a theme in this week’s cards; do you think maybe I’m thinking about spring? I am surrounded by gorgeous floral stamps in my workroom but by six foot snow banks outside. So today’s card started out as just a pretty pink magnolia but ended up caught in some flurries.
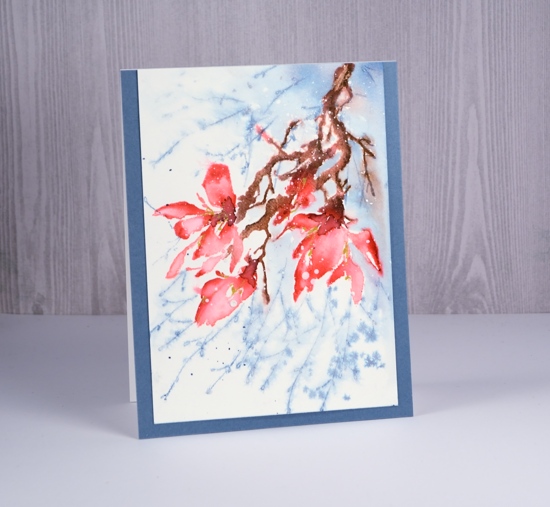
My plan was to build up colour step by step, keep it controlled and neat (not loose and watery). I stamped the whole stamp in worn lipstick ink then coloured the darker areas of the petals with a festive berries marker, the sepals in forest moss marker and the twigs in gathered twigs marker. I then blended the colour with water on a small brush so it was still fairly neat.
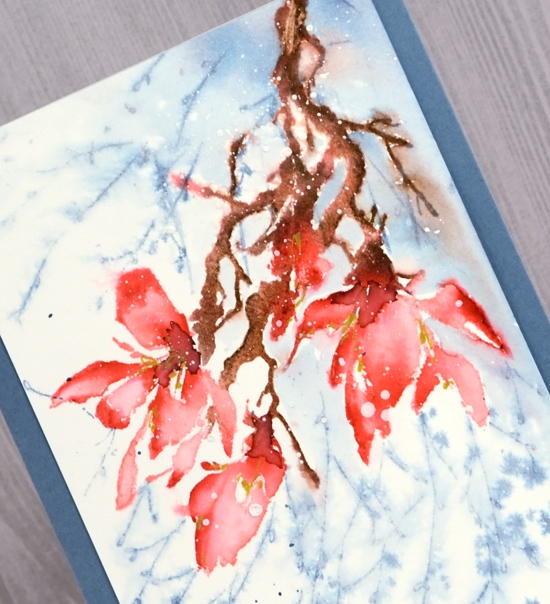
I wanted some extra foliage in the background and that’s when things started to go a little freestyle. I masked the flowers with a post it and stamped the ‘a little secret’ stamp a couple of times in stormy sky ink. The two stamps did not really look like they belonged together so I left behind my ‘neat’ plan and started spritzing the water around. The background softened but not quite enough so I painted some stormy sky into the background also. As I painted stormy sky right up to the edge of the branch the brown bled into the blue, things got loose and watery and, in my opinion, more appealing. I added some aged mahogany ink to the the centres of the flowers and some gold gel pen highlights. Then I wanted some snow as well so I splattered white gesso over the petals. I found a co-ordinating blue to frame the panel and kept it without a sentiment for now.
Supplies
Stamps: effulgent, a little secret


Distress inks and markers: worn lipstick, festive berries, forest moss, gathered twigs, stormy sky, aged mahogany


Paper: hot pressed watercolour paper,
Paint: white gesso

Also: gold gel pen

Graceful whisper
Posted: February 7, 2018 Filed under: graceful whisper | Tags: Penny Black stamps, Ranger Distress stains, Tsukineko Memento inks 14 Comments
This branch has been waiting patiently for some ink so I went rather non-traditional and pulled out some purples to create this card. I splattered a few panels of hot pressed watercolour paper with masking fluid yesterday so I would have them on hand for future projects. The effect is subtle on this one but you can see little white dots in the sky and foliage if you look closely.
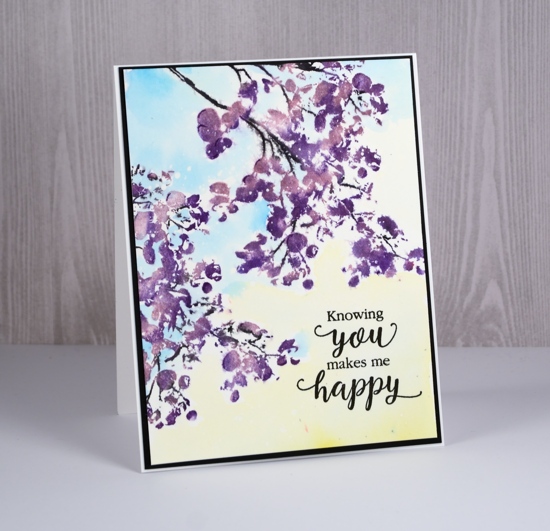
I used a couple of teardrop memento inks and a marker to ink the stamp. With the teardrops it is possible to apply ink somewhat strategically. I started with the lighter grape jelly ink and dabbed it here and there over the stamp. My panel was in my stamping platform so I was able to do grape jelly ink first, then add some dabs of the darker elderberry ink second. I went back and forth with the two inks and occasionally a spritz of water until I was happy with the image. I coloured the stems with a memento tuxedo black marker, stamped to complete the image then moved the panel to stamp a second branch the same way.
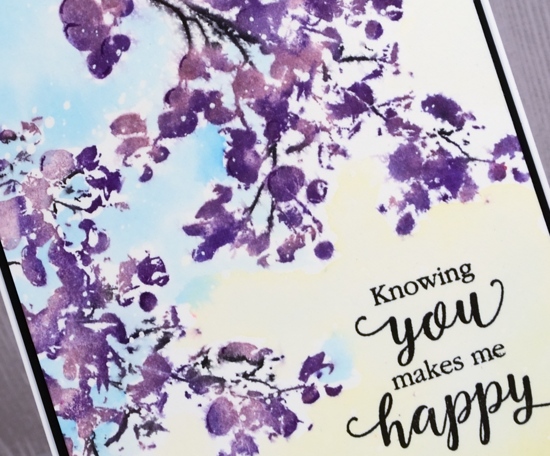
Once all the stamping dried I used mustard seed and salty ocean distress stain to paint the sky. I kept it fairly diluted and dabbed with a paper towel if I had too much water or stain. To finish it off I stamped the sentiment from the PB ‘sentiment collection’ set in versafine onyx black ink then matted the panel with black and attached it to a white card base.
Supplies
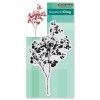
Stamps: graceful whisper, sentiment collection

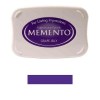
Inks: grape jelly, elderberry, tuxedo black marker

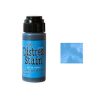
Stains: salty ocean, mustard seed
Paper: hot pressed watercolour, neenah epic black, neenah solar white


Also: masking fluid

Wings
Posted: January 31, 2018 Filed under: Butterflies, Classes, Coloured pencil | Tags: Darkroom Door stamps, Faber-Castell Polychromos Colour Pencil, Prismacolor pencils, Tsukineko Versafine inks 5 Comments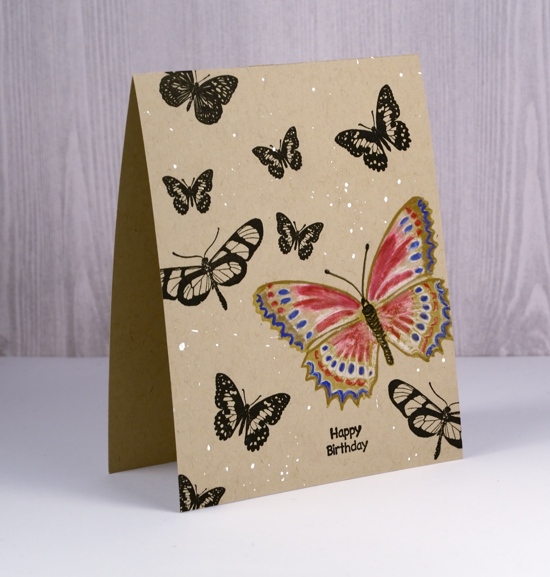
I spent a large chunk of today working on a future class, not the projects (the most fun part), but the photography, editing, promotional blurb, etc. While doing that I got inspired to combine the technique from the class next week with the theme from the class next month and this quick card was the result. I haven’t done a one layer card in a while and I rarely work with kraft cardstock so it was fun to change gear a little. I stamped butterflies from the Darkroom Door set, ‘Butterflies‘ in versafine onyx black and toffee inks then coloured the toffee one with coloured pencils.
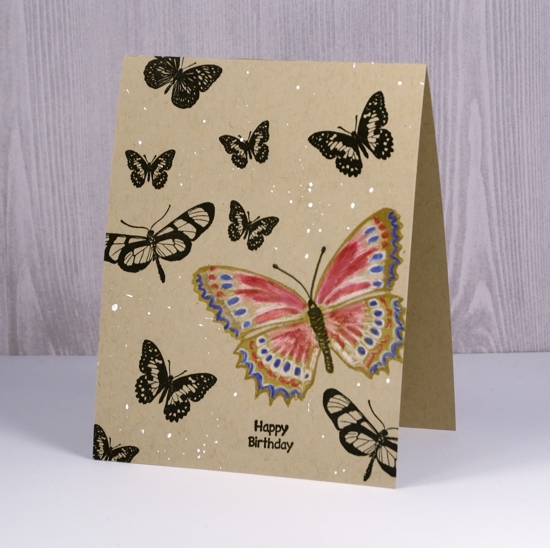
The white paint over the card front is part random splatter of copic opaque white pigment and part sigma white gel pen dots. The sentiment is from the DD set, Happy Birthday. I am always keen to participate in Kathy Racoosin’s 30 Day Coloring Challenge but never manage it on all thirty days. Today’s colouring did not take long, which is what she suggests, and it was fun to squeeze it in.
Roses all over
Posted: January 30, 2018 Filed under: Bister, My Favorite Things, Roses all over, Shades | Tags: Bister, My Favorite Things, Penny Black creative dies 15 Comments
I pulled out my bister powders the other day; they were kind of pushed to the back of the watercolour shelf. They turned out to be a perfect match for this ‘roses all over’ stamp from My Favorite Things. Bister (and brusho and colorburst) does wonderful things when sprinkled over embossing because the powder gets trapped inside the ‘walls’ of embossing and keeps colours and shades separate. If you are not familiar with bister, you can read about it here. The colours are earthier than brusho and colorburst which is nice for a change.

Believe it or not this panel is painted with just red bister; all that lovely variety is from one colour. I embossed the watercolour panel with platinum embossing powder then sprinkled the red bister over it and spritzed with water. I watched to see if sections were filling with colour before spritzing or sprinkling a second time. Once there was enough powder I used a paint brush in just a few places to blend or spread the colour. I did not have to do much with the brush because MAGIC.

I found a cardstock that co-ordinated to mat the panel and create a banner for the sentiment. The banner die is from the PB ‘shades’ set and the sentiment embossed in platinum is from the PB ‘banner sentiments’ set.
Thanks for dropping by.
Supplies
Stamps: roses all over (MFT), banner sentiments(PB)


Die: shades (PB)

Ink: versamark
Paint: bister powder red
Cardstock: hot pressed watercolour, neenah natural white, red cardstock

Also: platinum embossing powder

Wildflowers
Posted: January 26, 2018 Filed under: wildflowers | Tags: Brusho, Darkroom Door stamps, Darkroom Door stencils, distress oxide inks 4 Comments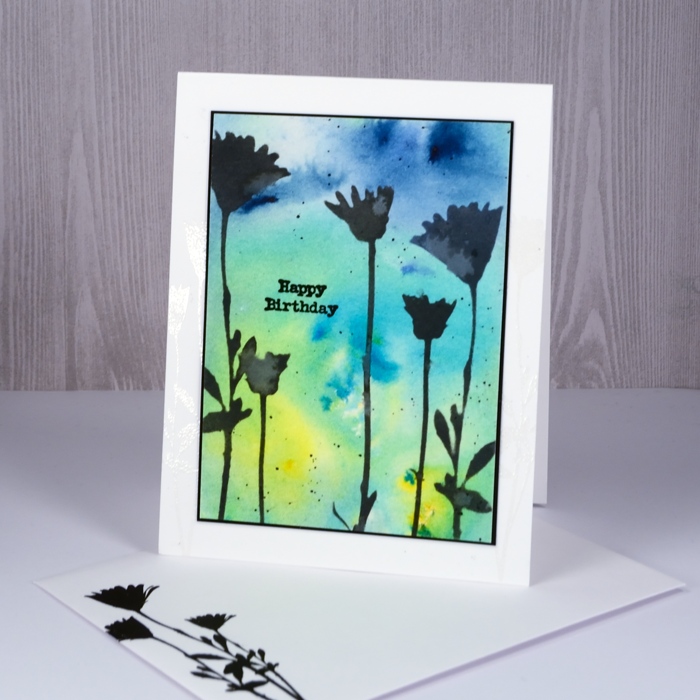
Happy Australia Day! What better to feature on the blog than a card made with Australia’s own Darkroom Door designs. The fact is though, by the time I get out of bed on Australia Day the festivities over there are practically over. I am currently sixteen hours behind my family on the east coast of NSW!
I’ve been pairing stencils with a few different things lately. For today’s card I sponged through the Darkroom Door stencil, wildflowers, with black soot distress oxide ink. You can see the watermarks on the stenciled flowers, a chalky white effect particularly obvious with the oxide inks. But before I did that I began by sprinkling brusho over a panel of watercolour paper. I spritzed with water and let the patterns happen. Once that was dry I sponged the black soot oxide through the stencil then splattered some droplets of water on top. I dabbed them up fairly quickly to create the watermarks.
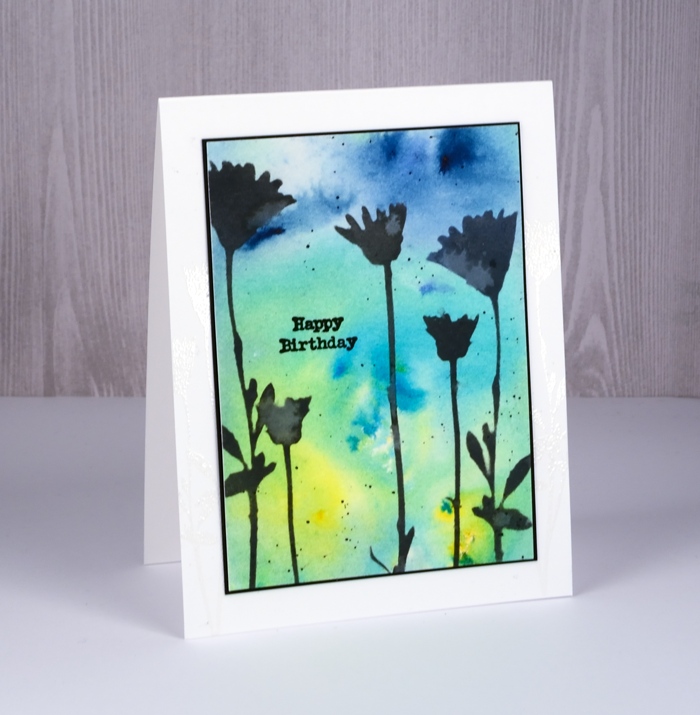
I cut a black mat to be a very narrow frame around the panel and added a black sentiment from the Darkroom Door Happy Birthday set.
Supplies
Stamps: happy birthday
Stencil: wildflowers
Paint: brusho paints sunburst lemon, leaf green, ost blue brusho
Ink: versafine onyx black, black soot distress oxide
Paper: hot pressed watercolour, solar white, epic black
Also: clear embossing powder
Circle of hearts
Posted: January 25, 2018 Filed under: hearts in circle | Tags: Brusho, Finetec artist mica watercolour paint, Penny Black creative dies 4 Comments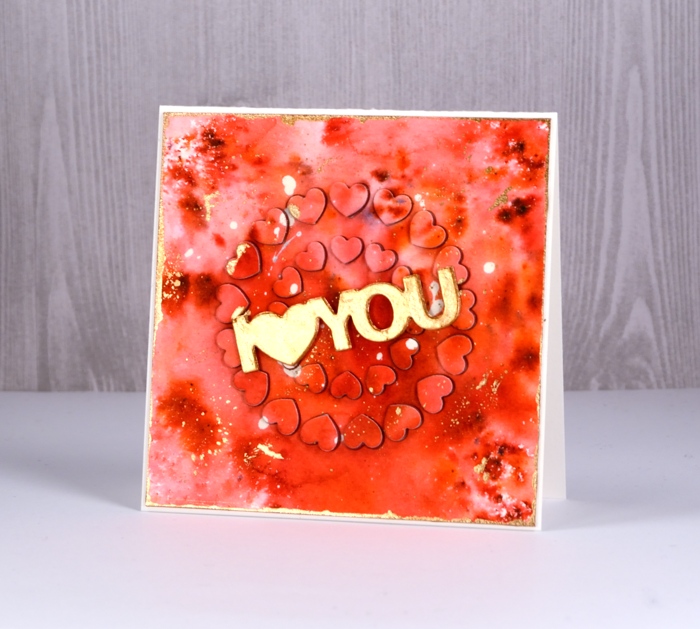
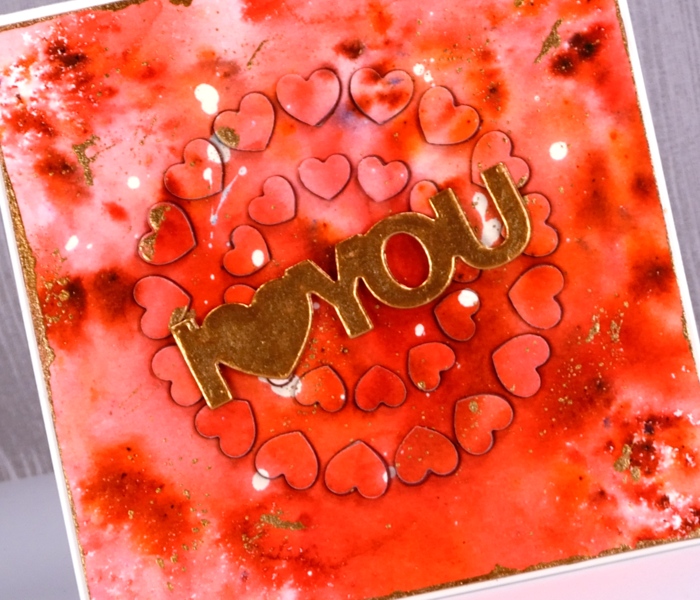
For today’s rather bold card I started, as I often do with a masking fluid splattered panel. I continued, as I often do by sprinkling brusho powder over the panel then spritzing with water to activate it. I do tend to be a ‘chap of one idea’ at times don’t I? (Can you place that quote from one of my favourite book series?) This time the brusho was rose red and terracotta. Once dry, I splattered gold finetec paint over the panel and let it dry. I removed the masking fluid, trimmed the panel to a square then painted the edges with gold paint.
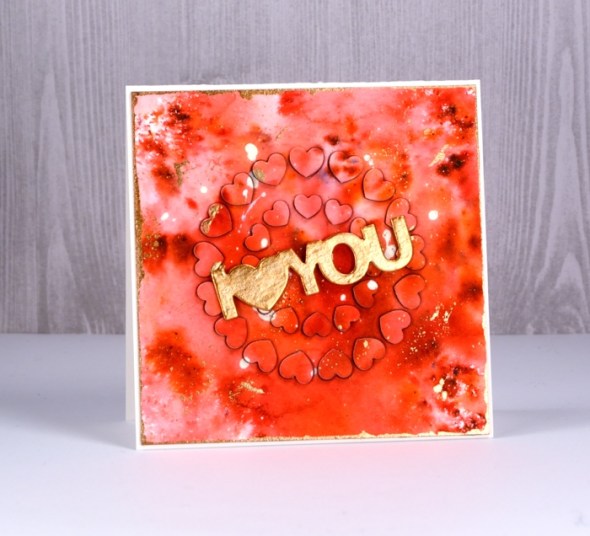
That was the easy part; after that the fiddliness factor rose considerably. I attached adhesive sheet to the back of the panel and die cut ‘hearts in circle’ from the centre of the panel and from a red adhesive backed foam sheet. I carefully saved the little hearts in formation on a piece of ‘press n seal’. I peeled the backing off the watercolour panel and attached it to the card front. Next I pressed the die cut adhesive backed foam hearts into each space in the die cut panel. Finally I peeled the backing off the die cut watercolour hearts and attached them on top of foam hearts. This was a little like completing a jigsaw puzzle.
Supplies


In my heart
Posted: January 24, 2018 Filed under: Tree heart, Triple Banner | Tags: Kuretake Gansai Tambi watercolour paints, Penny Black creative dies, Penny Black stamps, WOW embossing powders 4 Comments
This stamp is called ‘tree-heart’ but I always think of it as a family tree. After all what better to have on a family tree but a whole bunch of hearts? I stamped the tree in versamark and embossed with clear powder on hot pressed watercolor paper. Next I painted water over the top section of panel and added pink and blue watercolour paints. Keeping it loose I painted a heart shape over tree with both pink and blue. I filled in the heart leaves with more intense pink and blue paint then painted diluted pink over base area.
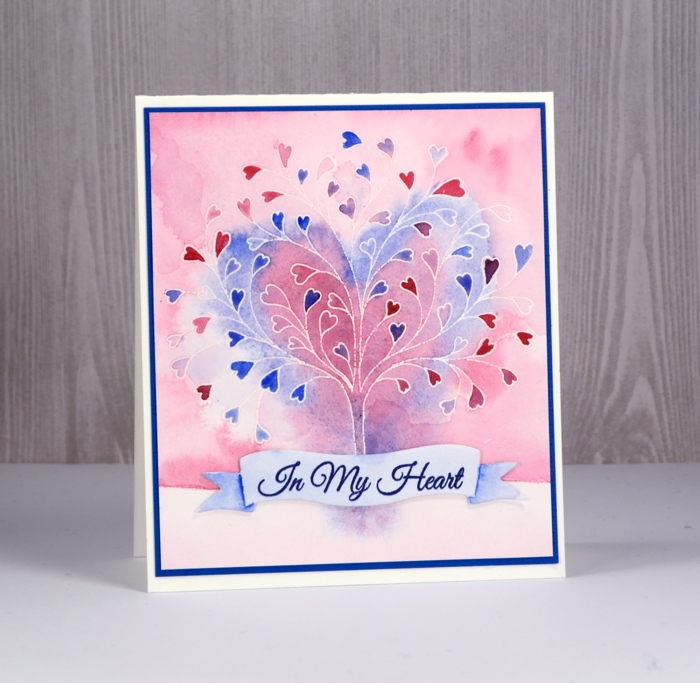
I grabbed a scrap of watercolour paper, painted diluted blue over it and stamped a sentiment from ‘happy hearts’ in versafine majestic blue ink. I die cut a banner to contain the sentiment and painted shadows on the ends of banner with blue paint.
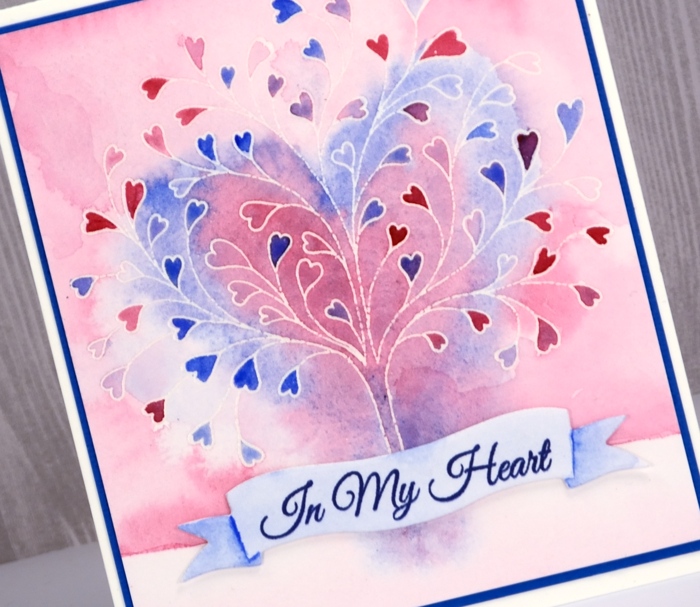
To finish I attached the banner to the tree panel with very low profile adhesive dots and matted the panel in blue cardstock before attaching to a white cardbase.
Supplies


