
Blue & Green Leaf Trails
Posted: May 7, 2024 Filed under: Alcohol Ink, gel press, Lavinia, leaf trails stencil, Taylored Expressions | Tags: Alcohol Ink, gel press, gel printing, Lavinia, Taylored Expressions 5 Comments
There are many ways to use stencils on the gel plate, one being with alcohol inks rather than acrylic paint. When I use alcohol inks I do pull the print with acrylic paint but most of the colour you see is from the initial layer of alcohol inks.
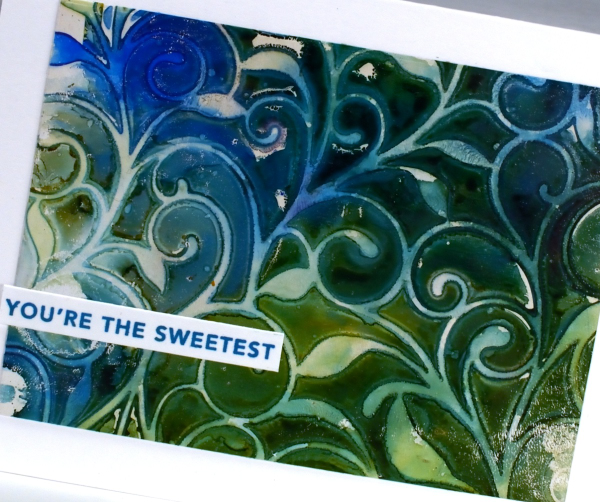
You can lay the stencil down then add alcohol inks or do it the other way round, dropping the stencil onto the wet alcohol ink. Some gel-printers add a layer of hand sanitiser first but that isn’t what I did to make these prints. I’m not 100% sure but I believe I lay the stencil down on top of a layer of alcohol ink for these prints. I use some isopropyl alcohol to help the inks move further and facilitate some blends between colours. I also use an air blower to push the ink around and speed up the drying process.
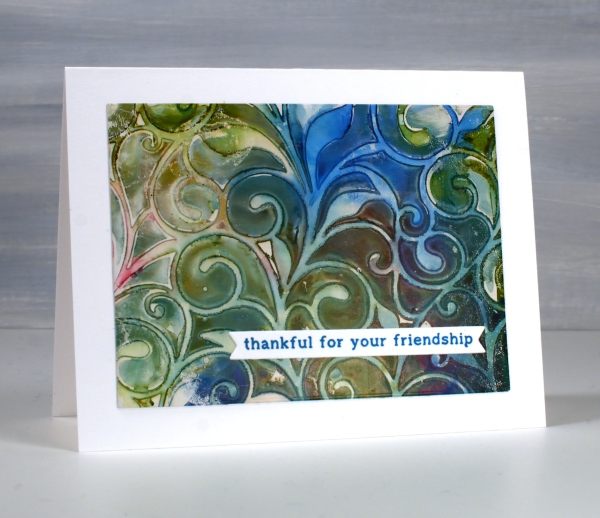
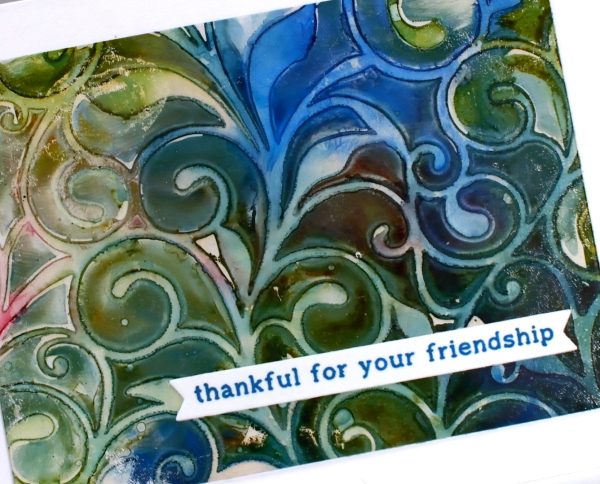
The pretty twirly patterns are from the Lavinia ‘leaf trails’ stencil. Lavinia has lovely organic stencils which often feature in my gel prints. I can’t remember the exact alcohol inks I used but the technique works with all sorts of colour combos so pick your faves. No surprise to see blue in my mix. I have mentioned before that I often gel print on printer paper but these panels I pulled with thick cardstock so when it came to making cards I just cut some rectangles from the print and added them to white card bases along with sentiments from Taylored Expressions.
Floral Collage Cards
Posted: April 8, 2024 Filed under: A Pocket Full, Collage cards, Dies, Penny Black, Taylored Expressions, this way | Tags: collage, Darkroom Door stamps, Penny Black creative dies, Penny Black stamps, Taylored Expressions 2 Comments
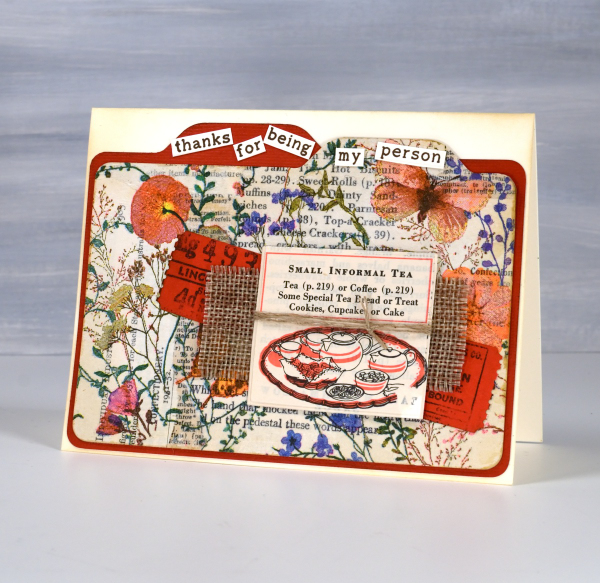
The collage and ephemera cards just keep coming. Today’s cards feature old book page collage overlaid with one layer of a floral napkin. I have a few collaged ‘mini masterboards’ made so I can cut elements or backgrounds out when I need them. For the card above I picked the rusty orange from the napkin to be the accent colour.
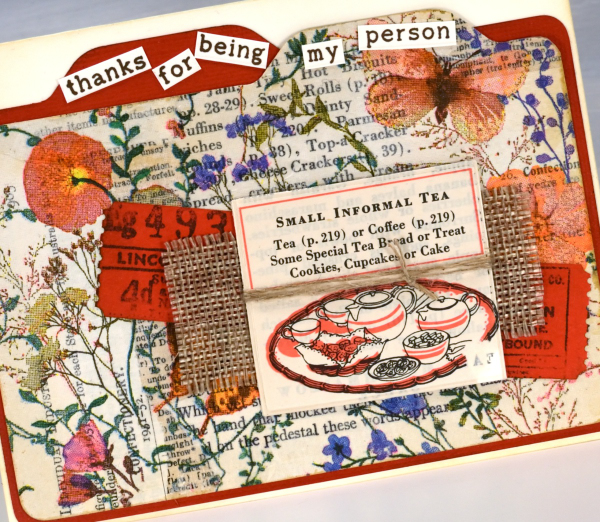
I recently bought a notch punch so I can create file dividers of any size; in the card above I made the blank orange one a little larger to show behind the floral & collage one. I added tickets stamped and die-cut, a scrap of hessian and a cut out from an old Betty Crocker ‘Good and Easy Cook Book‘!
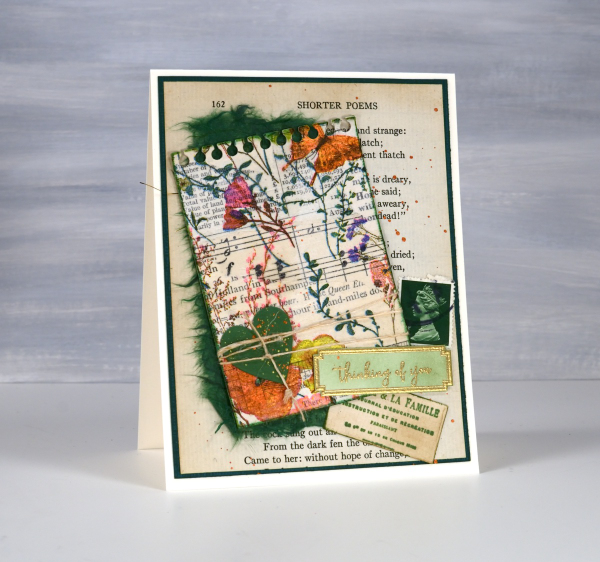
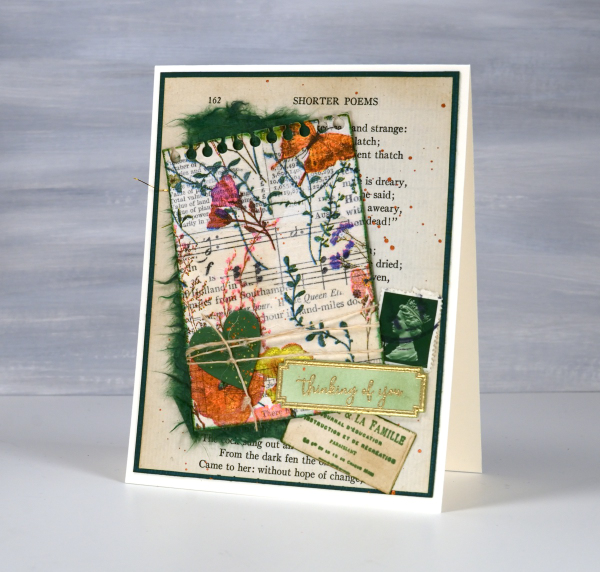
On the second card I used an aged book page as the background and added the paper napkin layer to the mini notebook page with some mulberry paper for framing and contrast. The little green postage stamp is real and the vintage label is stamped.
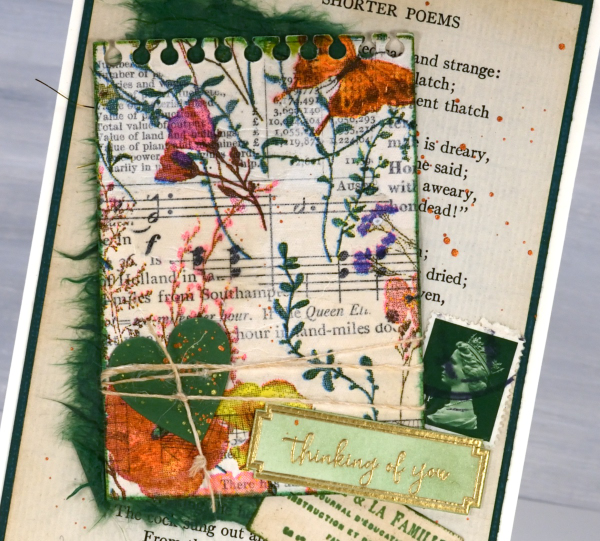
For the recent collage cards I have pulled out some supplies that I’d almost forgotten, the pretty label border stamps, the mulberry paper and the ‘office’ type dies from Penny Black are in the current rotation.
The file dividers on the card below remind me of a recipe card box which is why it ended up with the little recipe book snippet on it. The sentiment is from Taylored Expressions ‘Simple Strips – Thanks’ but I chopped it up to add to the file tabs.
This post includes affiliate links from Foiled Fox and Scrap’n’Stamp . If you buy through these links I receive a small commission at no extra cost to you.
Bubble Flowers
Posted: February 29, 2024 Filed under: bubble flowers, cricut, Echidna Studios, gel press, grafix, Taylored Expressions | Tags: cricut, Echidna Studios, gel printing, grafix, Taylored Expressions 3 Comments
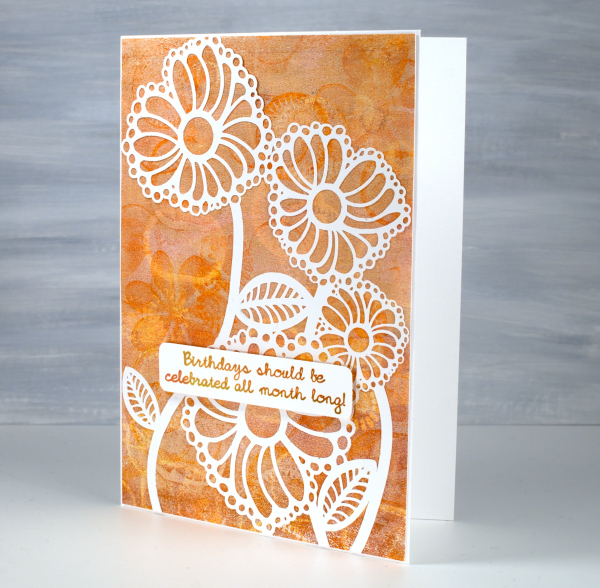
Aren’t these happy flowers? The design is called ‘bubble flowers‘ for obvious reasons and is one of mine. I was inspired by a vintage brooch. The digital design is available in the Echidna Studios etsy store and can be cut on a digital cutting machine as I have for today’s cards. It can also be printed, foiled and cut as a stencil for blending or gel printing. Do you get the idea you’ll be seeing more of the bubble flowers?
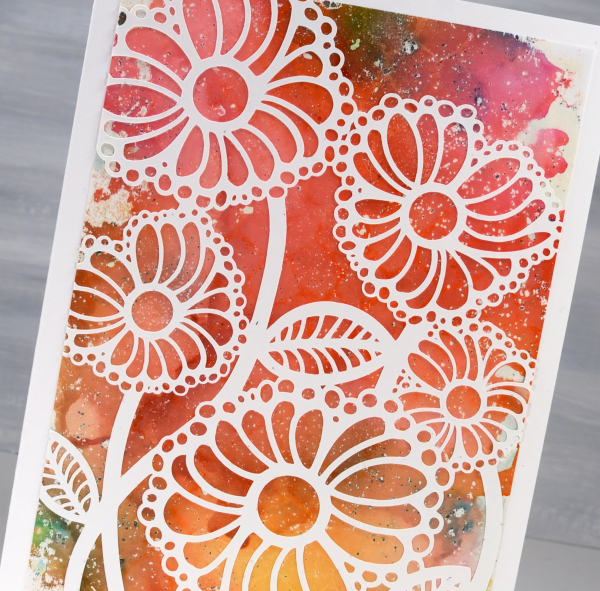
I cut the bubble flowers from thin white cardstock and you can probably tell there are some tiny cuts necessary. If I went much smaller than this I started to lose some of the bubbles so I kept it big enough for a 5″x7″ card.
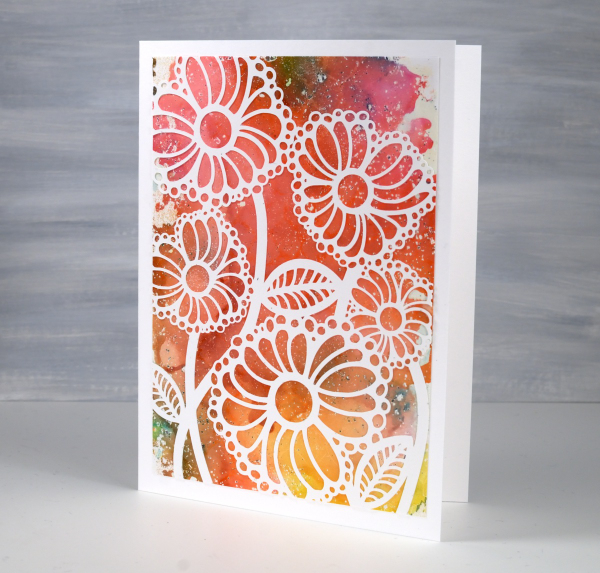
The backgrounds for both cards are gel prints. The multicoloured one above was created with alcohol inks then pulled with white acrylic paint. It was so pretty I didn’t want to cut it up or cut it down, hence the large card with a layer over the top.
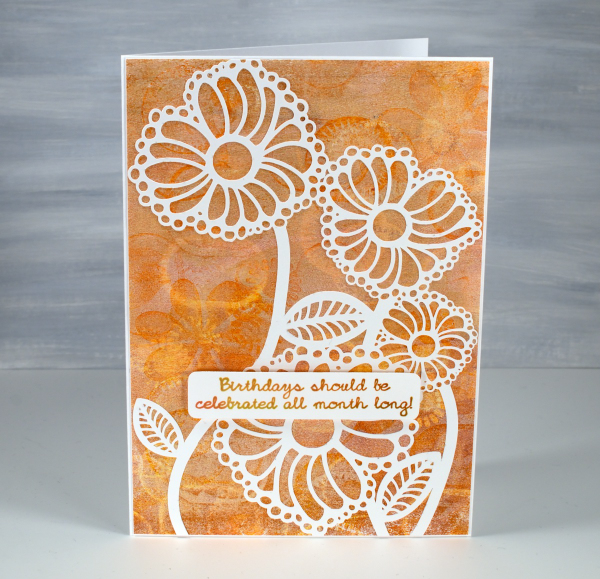
The second background panel was all done with acrylic paints and a selection of objects to add texture. I can see one of my die-cut stamps, some chocolate tray shapes, lid shapes and other found textures. I cover a wide range of techniques in my Gel Print Journey class and I think this might have been a print I did just as we finished filming. All my online classes are currently on sale 40% off by using the code LEAPYEAR40 at checkout or by simply clicking the link above.
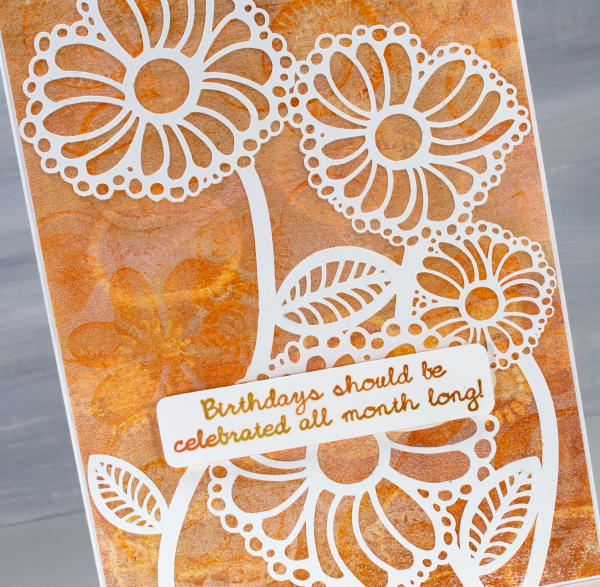
Because the bubble flowers are a delicate and detailed cut-out I used Grafix Artist Tac to glue them down. Once I had pressed the image onto the background I ran it through my die-cutting machine to burnish it. (quicker than doing it by hand). The sentiment is one I totally agree with and is from Taylored Expressions ‘In & Out Birthday’ set. Thank you for your lovely messages about our family’s February festivities; it was fun to share them with you in my previous post.
Holly Leaves – foiled
Posted: December 7, 2023 Filed under: Echidna Studios, holly leaves, Taylored Expressions | Tags: Echidna Studios, Fabriano Watercolour Paper, sennelier watercolours, Taylored Expressions 5 Comments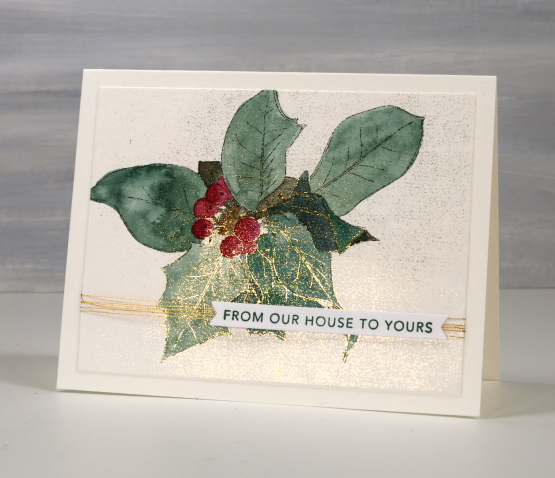
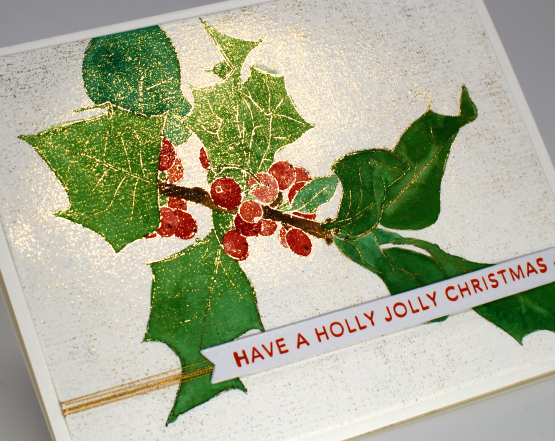
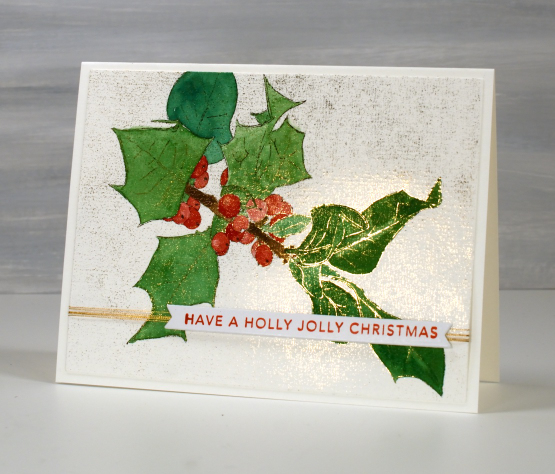
The foiling on these cards didn’t work properly yet here they are on display on my blog. I decided the foiling error was pretty enough to use anyway, I just can’t tell you for sure how to achieve this accidental look! The images are new digital stamps from Echidna Studios, called ‘Holly Leaves‘. I printed both images on hot pressed watercolour in my laser printer then foiled with gold foil. Whether it was a smudgy print or a different type of foil I’m not sure but foil attached to the background as well as the outline image.

As you can see, I was still able to watercolour the images using Sennelier watercolour paints. Even though the camera didn’t capture it, the whole outline image is foiled plus some speckling in the background.
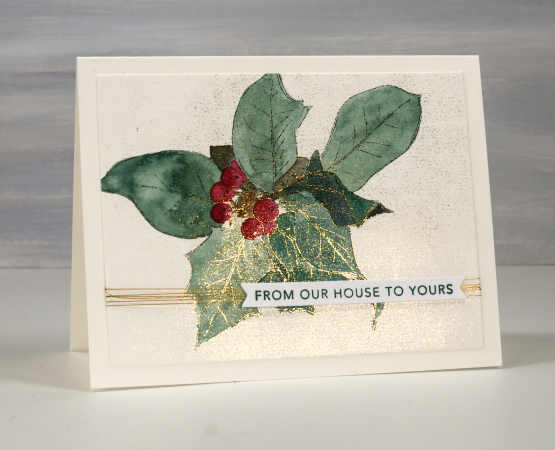
I’m not sure that holly comes in the blue green colour I chose for the card above but I like a bluey green so I keep choosing it on my projects. The green shown below might be more realistic.
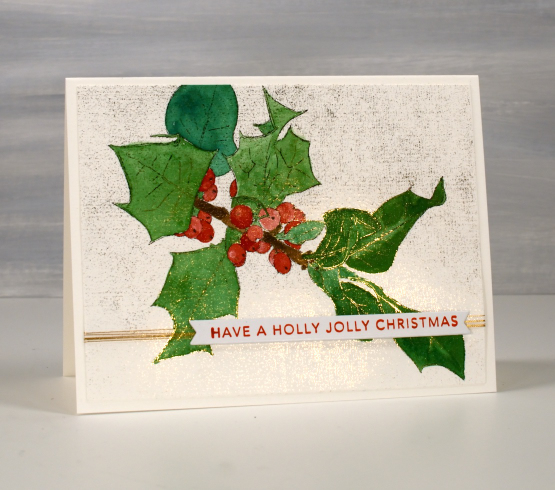
I added some gold metallic thread then finished both cards with Taylored Expressions sentiment strips.
I have also painted these holly images without foiling but I think this post is long enough so I will share those cards another day. I’ve noticed lately that when my posts are quite long an ad appears before the end of the post. Sadly I have no control over that. If I don’t want ads I have to pay extra to not have them. Just think of my posts like a magazine page, ads do pop up here and there.
I don’t make money from the ads but I do make a small commission if you click one of my links from Foiled Fox or Scrap’N’Stamp. When you buy a digital stamp or cutting file from Echidna Studios both my daughter and I get very excited and congratulate each other! You might have heard the line, ‘When you buy from a small business, an actual person does a little happy dance.’ We dance!
Christmas Filigree
Posted: November 23, 2023 Filed under: Christmas filigree, Dies, Echidna Studios, joy of giving, Penny Black, Taylored Expressions | Tags: digital stamps, Echidna Studios, Penny Black creative dies, Penny Black stamps, Taylored Expressions 2 Comments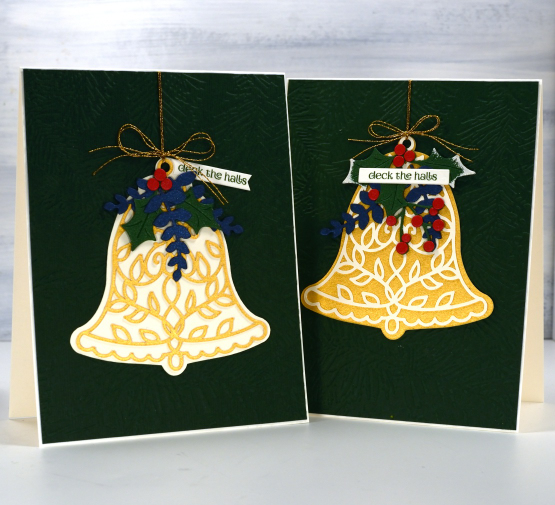
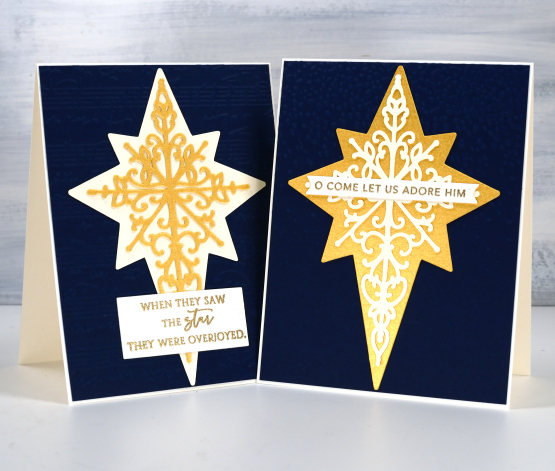
I am pretty excited about these new images. I think filigree patterns are very pretty and once I got the gist of it had a lovely time designing a bell, a star and a finial ornament. I thought it made sense to have a solid background to show off the filigree and, tada, the Christmas filigree digital stamp and cut file set came to be! This set is now in the Echidna Studios store along with three more new sets and some updated Christmas sets from last year. It’s beginning to look more like Christmas every day.
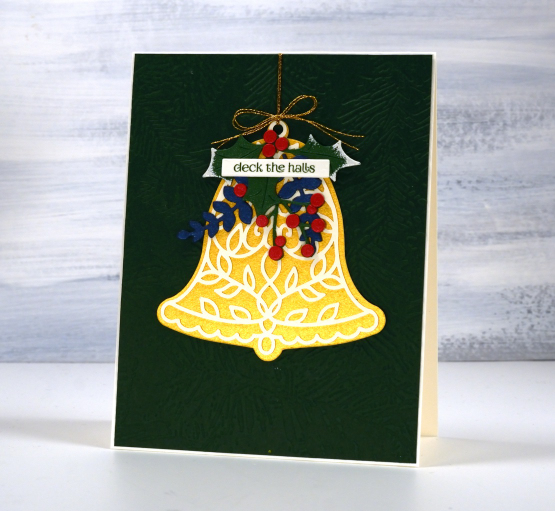
I think the bell is my favourite of the three images and will come in handy making wedding cards as well as Christmas. I wanted to show off the designs on dark backgrounds but when in comes to photographing shimmery gold, embossing on dark green or navy and the high contrast of cream cardstock as well, I can’t always nail it.
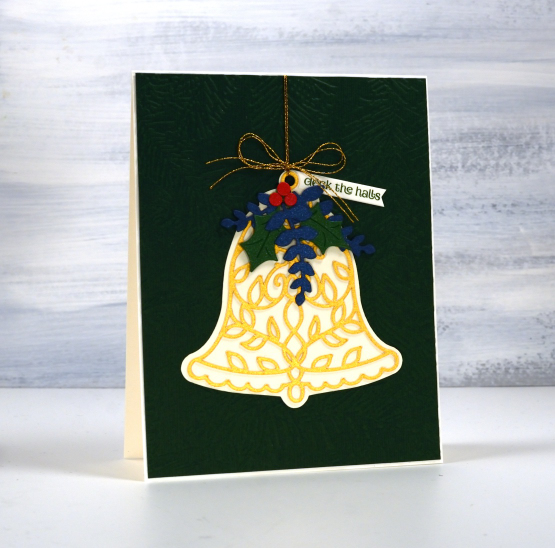
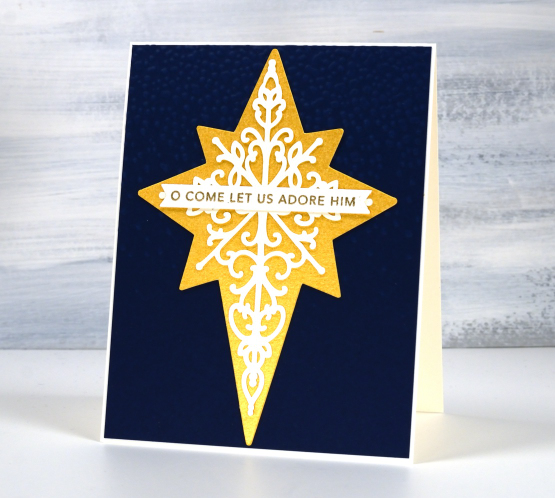
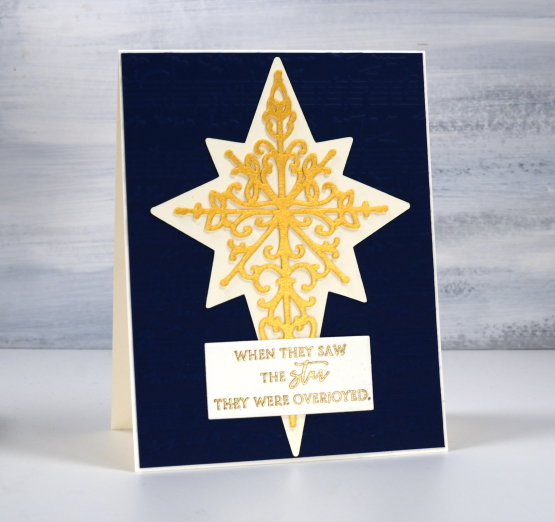
So let me tell you the bells are sitting on dark green panels embossed with Spellbinders ‘forever green’ folder. The green panel on the left below is also embossed with that folder but the one on the right is embossed with the Anna Griffin ‘regal braid’ folder. The star cards at the end of this very long post are on navy blue backgrounds and it is again a little tricky to see one base is embossed with the ‘speckles/snowfall‘ folder and the other with the Taylored Expressions ‘sheet music‘ folder.
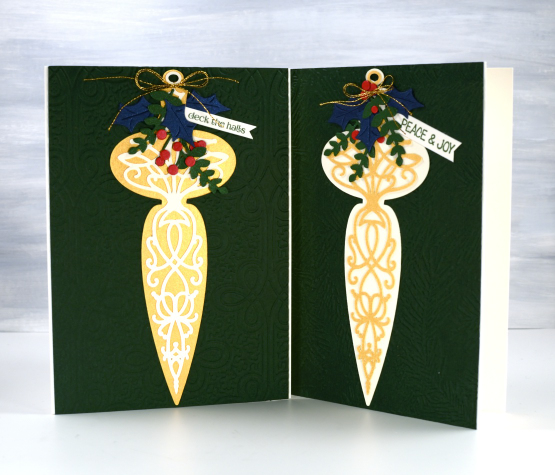
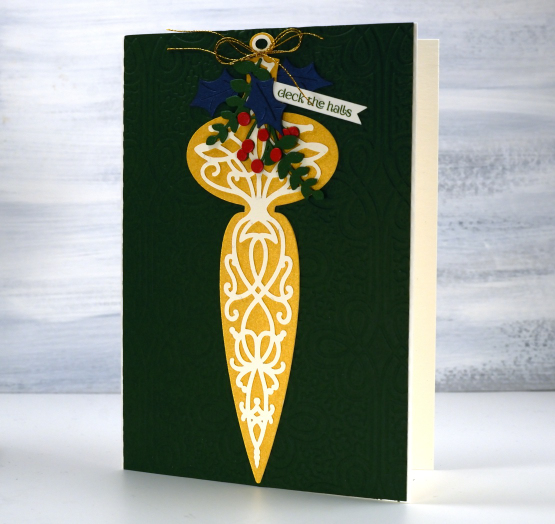
I decorated the finials and bells with a mix of die cut foliage from Penny Black including the ‘joy of giving‘ set.
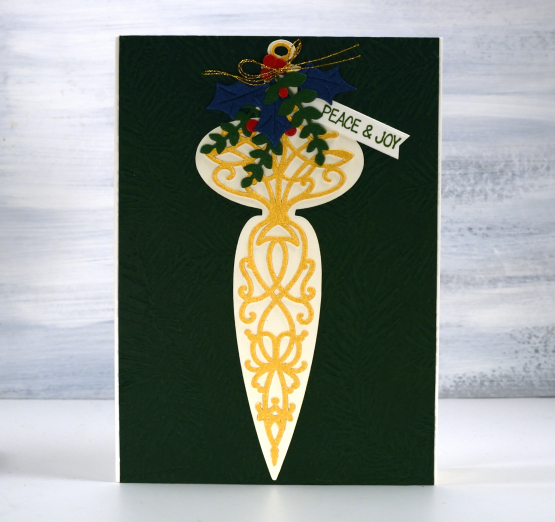
As the finial is such a long thin shape I made the card a little larger than usual, around 6″x4.5″.
I created the star cards without foliage but found suitable sentiment from PB and Taylored Expressions.
I think all three designs would make lovely tree ornaments either stacked to give them extra stability or cut from thick acrylic or thin board on a laser cutter. I don’t have a laser cutter but it is possible to book time on one at the library; if get some cut I will definitely show them here on the blog.
Thanks for scrolling all the way through this long post; I really appreciate you visiting the blog. Have a great day!
Today’s post features affiliate links to Scrap’n’Stamp. If you buy through these links I receive a small commission at no extra cost to you.
Mooneys Trees
Posted: October 6, 2023 Filed under: baby blue leaf embossing folder, Echidna Studios, Mooneys Trees, Paper Rose, Taylored Expressions, weathered | Tags: Echidna Studios, gel press, gel printing, Paper Rose, Taylored Expressions 6 Comments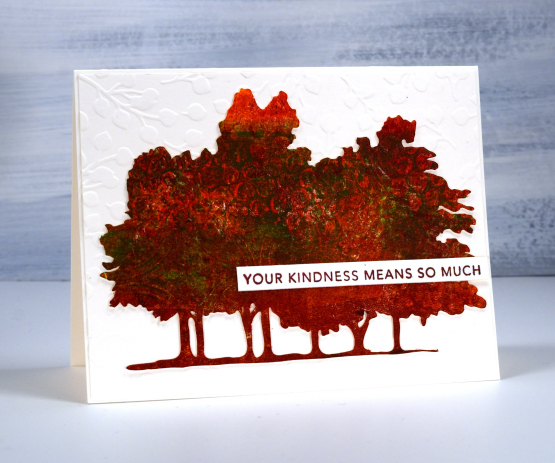
If you live in the same city as me you might have walked past these trees, sat under them or perhaps photographed them. My daughter worked from her own photo to create some digital stamps in different forms. Check out the sketch style, outline, silhouette and simplified version in the Echidna Studios etsy store. The set is named Mooneys Trees because they are growing in Mooneys Bay park.
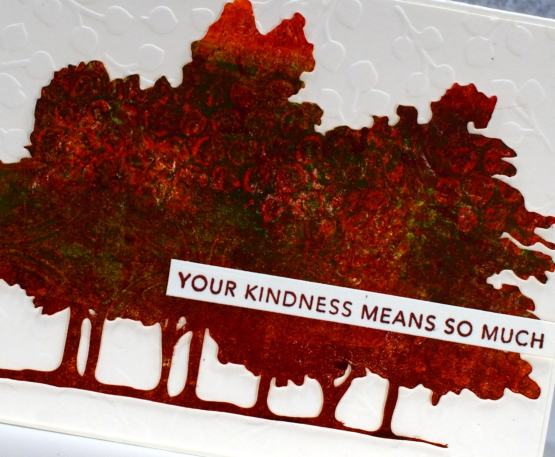
I used the simplified version to cut several pieces to gel print on. As you can see the trees fit on a 5.5″x4.25″ card base so I was able to print patterns on them on a 5×7 gel plate. If you are on IG you can watch a very short video of me printing the one above.
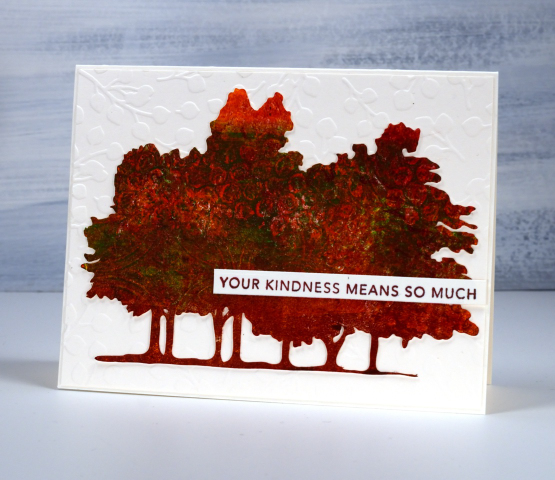
All the trees featured in this blog post were made by printing three layers of paint on top of each other, letting the paint dry in between layers. I varied the paint colours and texture on each layer. On the card above you might be able to pick out bubble wrap and textured cardboard patterns.
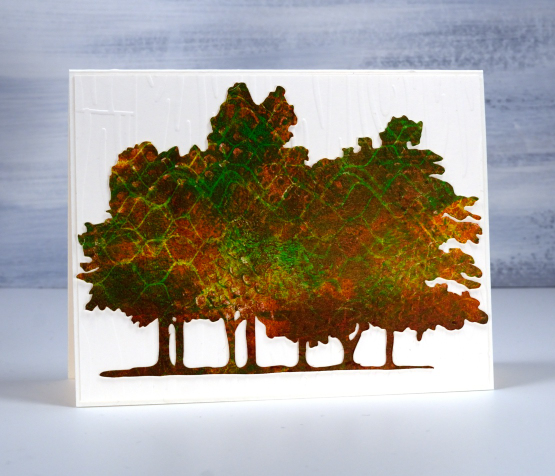
On the card directly above and below I used hessian (burlap) to add one texture as well as cardboard packaging on another layer. I also had plastic trays featuring criss-cross patterns to press on the gel plate.
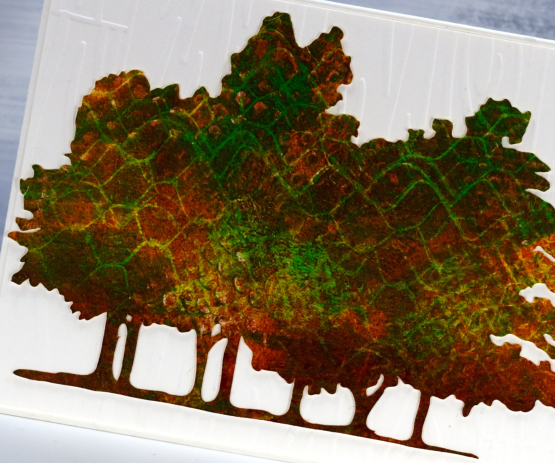
Each printed tree cutout is attached to an embossed panel of cardstock. Only one of the tree cutouts is popped up because that task had too much of a fiddliness factor! The embossed background below is called ‘weathered’ from Taylored Expressions. The embossing folder used on the card at the top of the page is ‘baby blue’ from Paper Rose Studio and the embossing folder on the second card is from Close to my Heart but I don’t know the name; it creates the look of a wooden fence.
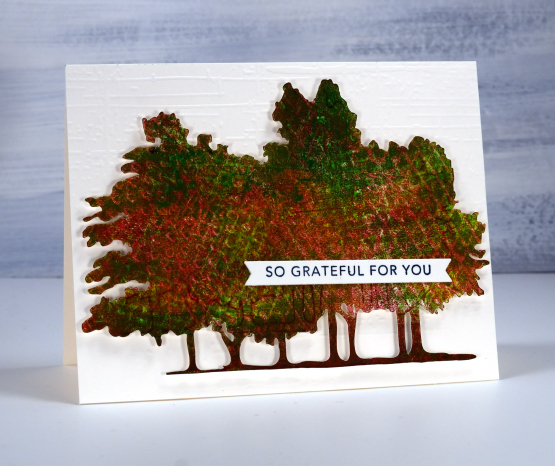
The two sentiments are from Taylored Expressions ‘simple strips background stamp‘ which stamps 18 sentiments to be cut out with the co-ordinating die. I really enjoyed making cards featuring local trees which are changing colour right now and of course I loved gel printing the cutouts to look autumnal.
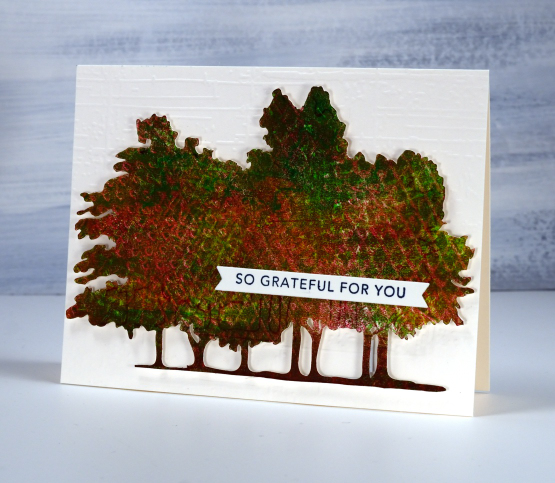
My blogpost today features affiliate links to Scrap’n’Stamp. If you buy through these links I receive a small commission at no extra cost to you.
Gelprinted Phlox
Posted: October 5, 2023 Filed under: gel press, Taylored Expressions | Tags: gel press, gel printing, Taylored Expressions 2 Comments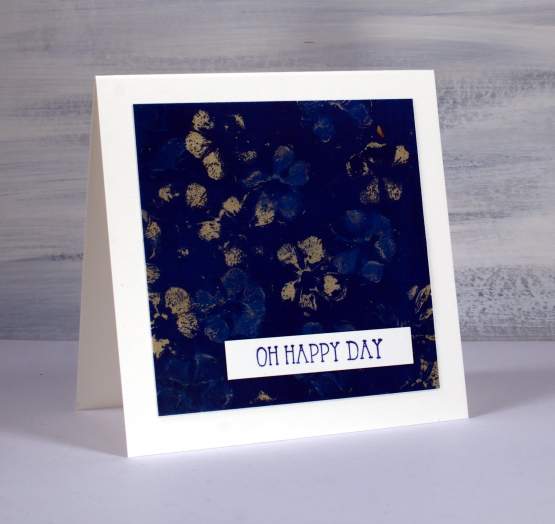
Yes, it’s another floral print from the gel plate. For this one I used phlox from my garden. I found that the phlox came apart quite easily so what I ended up doing was grabbing the little flowers that make up a whole flower head and stamping them individually. It took a little more time to press the flowers onto the plate one by one but the resulting print was very pretty.
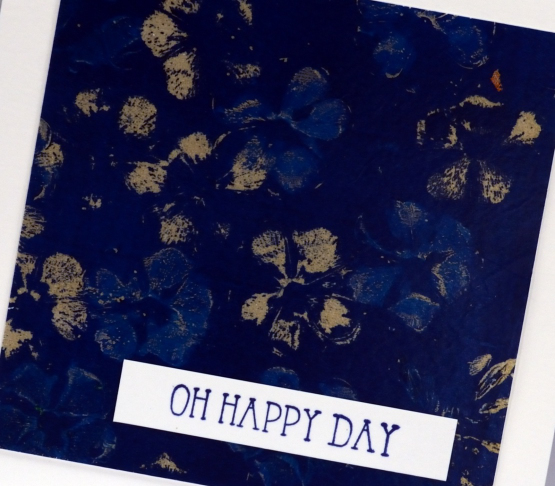
When you look closely you will see the flower prints are two different colours, tan and blue. I brayered dark blue paint on the plate then pressed the little phlox flowers into the paint. As I pressed a flower onto the plate it removed paint leaving an empty flower shaped space. If I immediately pressed the flower onto the plate again it left a blue print because the petals were already covered in paint and wouldn’t remove much more until I ‘stamped’ the paint off on scrap paper. I picked up the print with shimmery pale gold paint which shows through where the flowers removed more paint.
To see my technique for gel printing with flowers check out my recent youtube video.
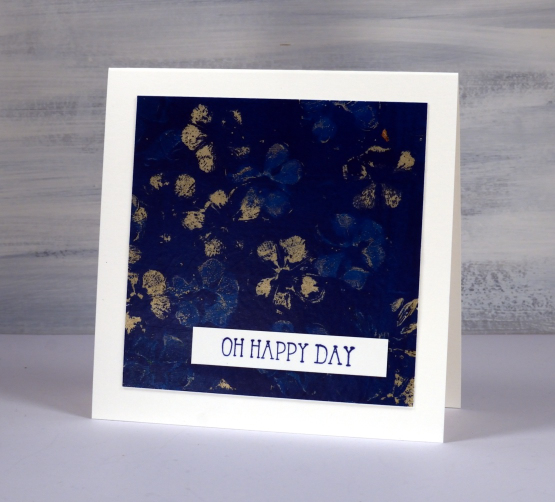
I used the print to make an anniversary card for a lovely couple celebrating their 55th wedding anniversary. Once again the sentiment from Taylored Expression stamped in versafine clair twilight ink said it all.
My blog features affiliate links to the following companies. If you buy through these links I receive a small commission at no extra cost to you.
More Alcohol Inks on the Gel Plate
Posted: September 25, 2023 Filed under: Alcohol Ink, Dies, Flutters, gel press, Lavinia, Penny Black, pods stencil, Taylored Expressions | Tags: Alcohol Ink, gel press, gel printing, Lavinia, Penny Black creative dies, Taylored Expressions 1 Comment
Using alcohol inks and stencils on the gel plate is a bit of an addiction for me right now so I filmed another one to show you. A friend let me know that if you receive my blog posts by email the video doesn’t show up in the email. To see the video just click on the title of the blog post and it will take you to my blog. If you would like to subscribe to my youtube channel too that would be delightful.
I started this print with the Lavinia pods stencil already covered in ink and then added more ink and isopropyl alcohol when it was on the gel plate. Take a look at the video below to see the process.
I would love to hear if you try this technique. As I mentioned last week I like pulling the prints with paper or cardstock because they are surfaces that I wouldn’t normally use with alcohol inks.
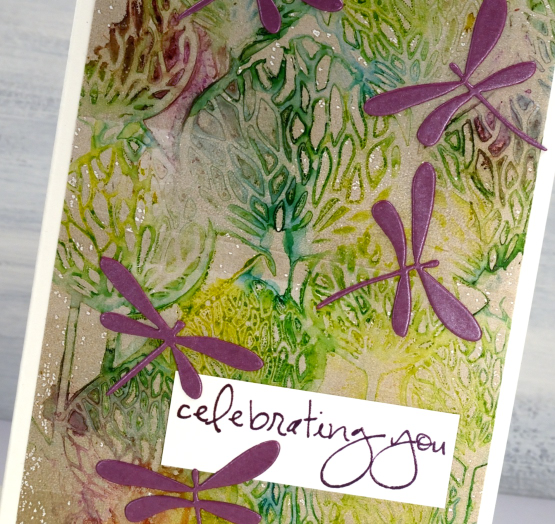
The finished card does include most of the print; it is a larger size than my usual A2 cards. I decided to add the Penny Black dragonflies in the wine colour which matches the alcohol ink I added very sparingly. In retrospect you will probably agree I could have added more. The sentiment is from Taylored Expressions ‘In and Out Birthday’ stamped in Chianti versafine clair ink.

My blog features affiliate links to the following companies. If you buy through these links I receive a small commission at no extra cost to you.
Ecstasy Crafts (Ecstasy Crafts offers a discount code heathertecs10 you can use for a 10% discount at checkout)
Happy Day Roses
Posted: September 5, 2023 Filed under: Brusho, My Favorite Things, Roses all over, Taylored Expressions | Tags: Brusho, My Favorite Things, Taylored Expressions 7 Comments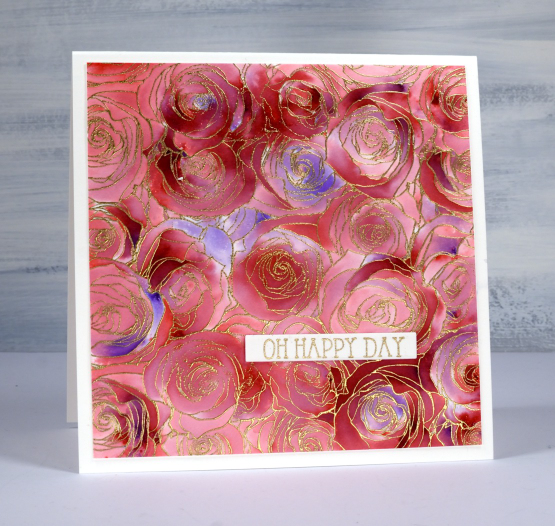
I made this large square card recently to give to a friend of ours on her wedding day. Our whole family was able to attend and celebrate with the bride and her family and it was indeed a happy day.
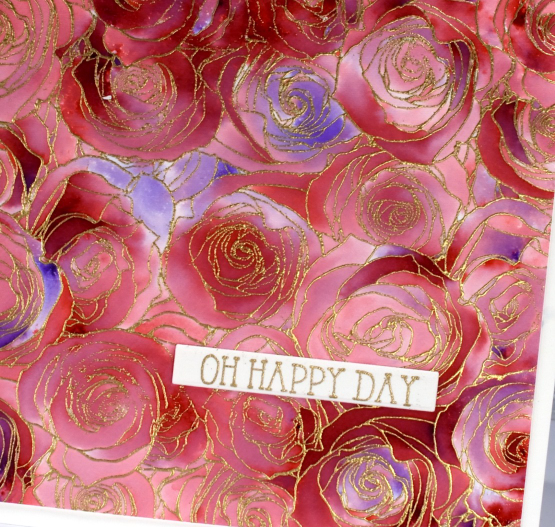
To make this card I used an old favourite technique with brusho and embossing. You might be surprised to know that I only used one colour of brusho, the crimson. I embossed the MFT ‘roses all over background stamp’ with gold powder on hot pressed watercolour paper. This stamp seems to be retired which is a travesty as it is lovely and also perfect for this technique. After a little research I discovered MFT have come out with a similar stamp which should also work. I could call the technique ‘sprinkle, spritz, trap, wait, wait, spritz and blend technique’ because that just about covers it. Sometimes with repeats.
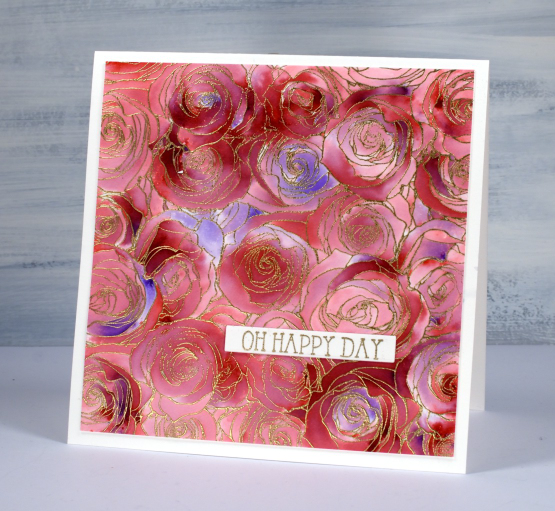
I sprinkle brusho powder over the embossed panel, not too generously, but hopefully some powder lands in most of the roses if not all the little sections. I spritz from above with water and then watch the brusho magic happen. You have to be patient and see how much colour spreads from that first spritz before you add more water. I want variation of colour trapped in the little sections so I don’t flood the panel with water. After the spritzing activates most of the brusho powder I use a paint brusho to fill the petals(sections) with colour. As you can see some areas are quite dark and others are pale. I pick up paint from the darkest areas with the paintbrush if I need to add paint to a bare section.
The sentiment is from a Taylored Expressions set called ‘in & out birthday’.
Here is another example of this technique but done with two colours of brusho.
Botanical Dream
Posted: August 30, 2023 Filed under: Alcohol Ink, botanical dream stencil, gel press, gelli plate, Taylored Expressions, The Crafter's Workshop, The Crafters Workshop | Tags: gel press, gel printing, Ranger Alcohol Ink, Taylored Expressions, The Crafter's Workshop 7 Comments
I think you’ve noticed my love of gel printing. Let me assure you it hasn’t diminished at all. Today’s card features an alcohol ink and stencil print completed on the gel plate then lifted with a layer of acrylic paint.

I’m not sure which alcohol inks I used but I am pretty sure there was a cloudy blue and a brown involved. I’ve learned to like blue and brown combos over recent years which has surprised me a bit. Often we use alcohol inks only on plastic surfaces such as yupo or craft plastic. What I like about using alcohol inks on the gel plate is the way I can lift the print with any paper at all. I plan to make a video showing this technique so stay tuned.

The lovely stencil featured here is called botanical dream from The Crafters Workshop. All the little spaces trap alcohol really well making it a great choice for this technique. I let the stencil sit on the alcohol ink pattern for a while so it dries then lift the print with acrylic paint. I finished the card with a cute greeting from the Taylored Expressions set ‘In & Out Birthday. The set is full of pretty fonts.
My blog features affiliate links to the following companies. If you buy through these links I receive a small commission at no extra cost to you.
Ecstasy Crafts (Ecstasy Crafts offers a discount code heathertecs10 you can use for a 10% discount at checkout)












