
Vintage Watercolour tutorial
Posted: May 4, 2016 Filed under: Fly High, Playful, Tutorial | Tags: Faber-Castell Albrecht Durer Watercolour pencils, Penny Black stamps, Ranger Distress inks, Speedball elegant writer, Tutorial, video 31 Comments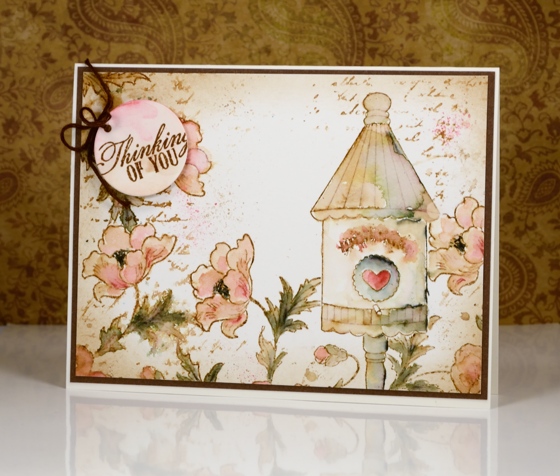
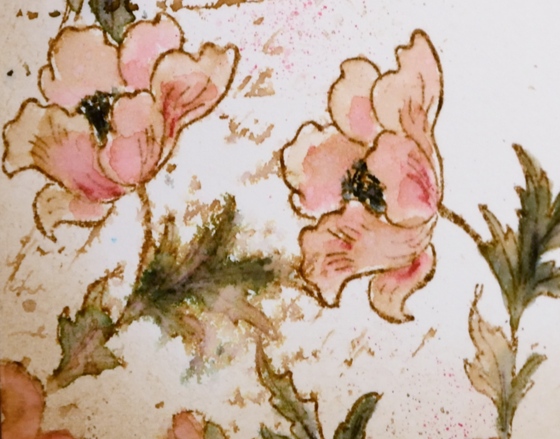
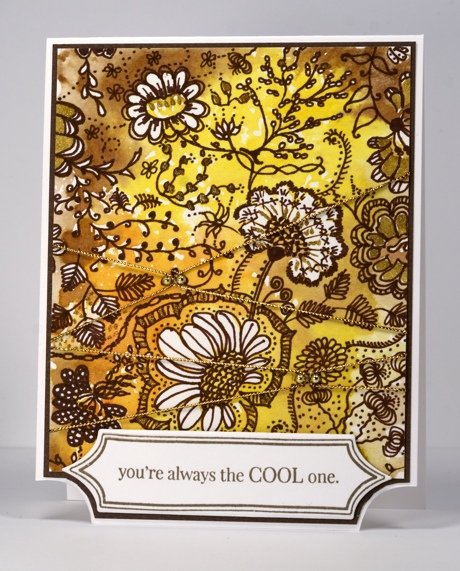
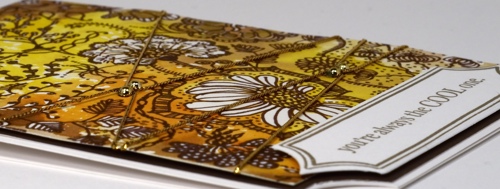
I have a tutorial for you today (gasp) which I made for SplitcoastStampers. In it I show my technique for creating a vintage style watercolour. By vintage style I am referring to muted sepia tones in this case with some blurred script and watermarks to give it an even more aged look.
I chose a birdhouse from the Fly High set and paired it with the Playful stamp using masks to stamp all my elements before I started watercolouring.
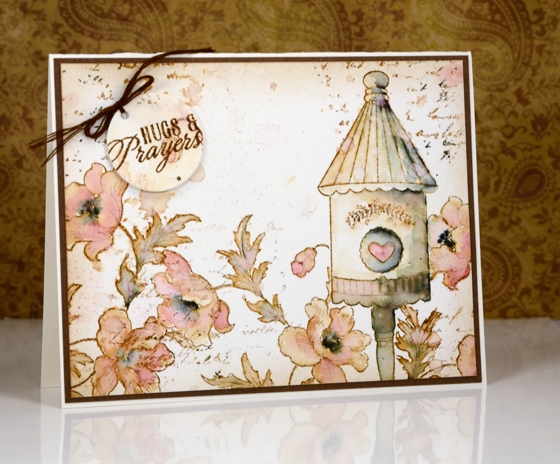
The two examples above are fairly similar; I changed the sentiment and naturally the watercolouring is not exactly the same. If you visit Splitcoaststampers you can see the stepped out photo tutorial or you can watch my video tutorial below.
This video came together quite smoothly (with the help of my son and my husband) so here’s to more!
Thank you for being so kind in your comments. You really are such an encouragement to me. I hope you try some vintage style stamping; all you need is some brown ink and a few watercolour pencils. The fun of the elegant writer pen is entirely optional.
Supplies:
Stamps: Playful, Fly High, Soar (PB)
Inks: Vintage Photo distress ink (Ranger)
Cardstock: Hot pressed Fabriano watercolour paper, brown cardstock
Also: elegant writer (Speedball) Albrecht Durer watercolor pencils 142, 180 (Faber-Castell)
Butterflies Die Photo Tutorial
Posted: May 26, 2015 Filed under: Butterflies, Tutorial, Watercolour | Tags: Kuretake Gansai Tambi watercolour paints, Penny Black creative dies, Tutorial 9 Comments
There are three new dies in the new Sunshine and Smiles. release all set in rectangular frames, which makes them a nice choice for the inlaid die technique. I used the Butterflies die to create the card above. Below is a photo tutorial with instructions below each photo describing my process.
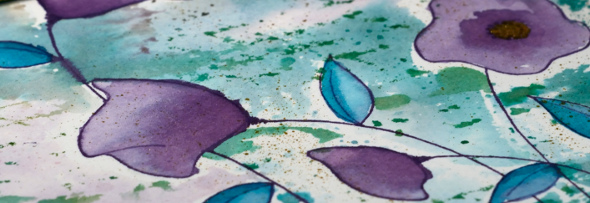
Spritz or paint water onto a piece of cold pressed watercolour paper then add watercolour paint ( I used Kuretake Gansai Tambi on Fabriano cold pressed) in three or four colours. Let it blend, tilt the paper, move it around with a paintbrush if it is not going where you want it to. Let it dry.
Add more paint to deepen the colours which will have dried paler than when you painted them. Add some metallic gold paint and some splatters. Let panel dry, then trim to desired size.
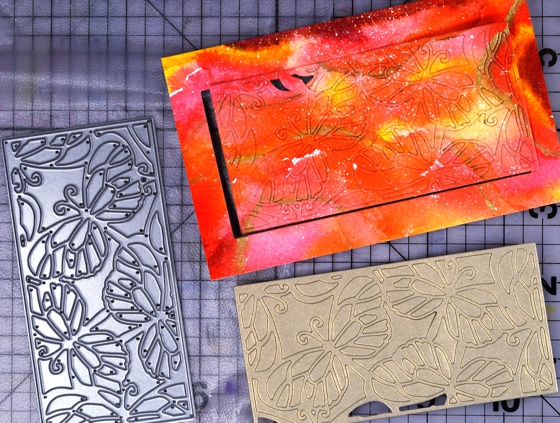
With the ‘Butterflies’ die cut a panel from your watercoloured piece and from a piece of metallic gold cardstock. Press both panels onto some ‘Cling film-Press & Seal’ to keep all the pieces together. I know it looks like I already lost some pieces but don’t worry they were there somewhere!

Attach a piece of double sided adhesive sheet (I used ‘stick it’) to a piece of cardstock larger than your die-cut panel.
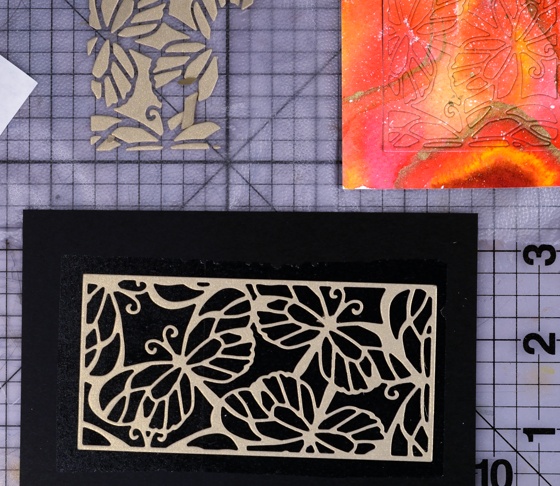
Remove the liner paper from the adhesive and press the gold ‘frame’ part of the butterflies die onto the adhesive covered cardstock.

Transfer the ‘inside’ pieces from the die-cut watercoloured panel into the gold frame pressing each one firmly onto the adhesive backing.
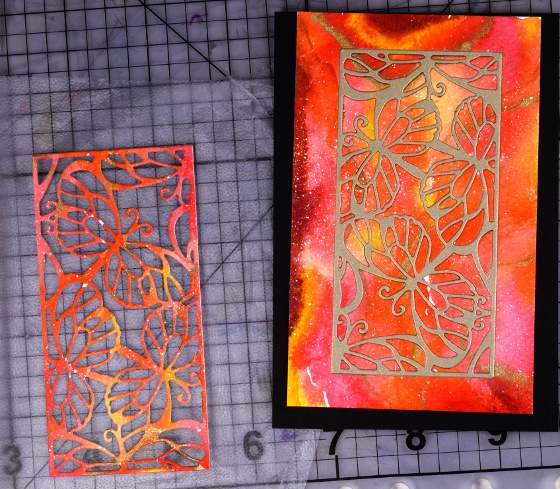
Attach the remaining border piece of watercoloured cardstock around the inlaid die-cut panel. Trim excess cardstock from the completed inlaid die cut panel. Mat with gold card then attach to co-ordinating card base.
Supplies
Creative Dies: Butterflies (PB)
Cardstock: Fabriano 100% cotton hot pressed watercolour paper, Pink and gold cardstock
Also: Kuretake Gansai Tambi watercolour paints, Stick it adhesive sheet
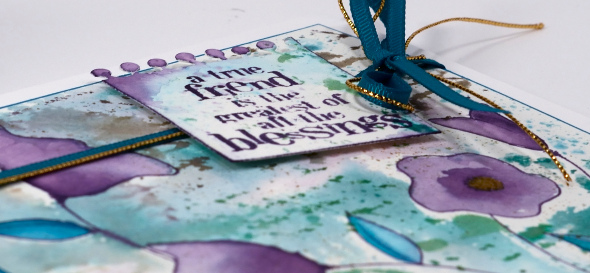
Collage of Wishes Watercolour Video Tutorial
Posted: May 25, 2015 Filed under: Collage of Wishes, Tutorial, Watercolour | Tags: Kuretake Gansai Tambi watercolour paints, Penny Black creative dies, Penny Black stamps, Tutorial, video 14 Comments
I hope you visited the Penny Black blog last week to enjoy a week of inspiration from our talented designer Jill Foster. This week I hope to inspire you with my projects featuring products from the new collection Sunshine and Smiles. Today’s project comes with a video tutorial. I know, unprecedented for me to have a video for you two weeks in a row! Last week I shared my technique for watercolouring with distress stains. Today I have a more traditional ‘keep within the lines’ approach using watercolour paints. The video is long so perhaps you should get a cup of coffee or tea and settle in. I have used the new slapstick cling set ‘Collage of Wishes’ and the pretty flourish die.

Supplies
Stamps: Collage of Wishes (PB)
Creative Dies: Flourish (PB)
Inks: Versafine Smokey Gray (Tsukineko)
Cardstock: Fabriano 100% cotton hot pressed watercolour paper, Kazazz cardstock discontinued
Also: Kuretake Gansai Tambi watercolour paints, Faber-Castell Polychromos pencils, Stick it adhesive sheet
Watercolour with Distress Stain Video Tutorial
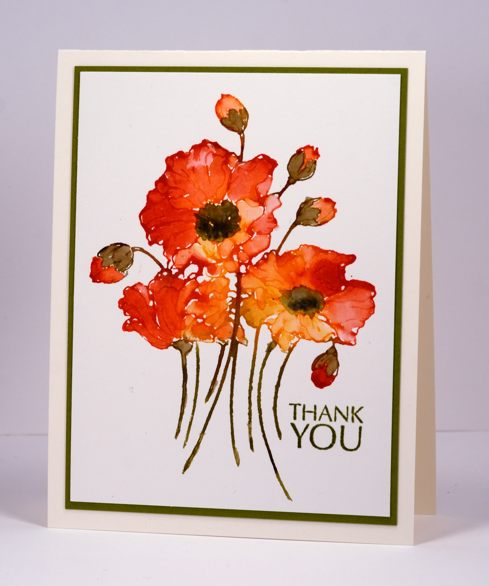
Posted: May 20, 2015 Filed under: Fresh, Tutorial | Tags: Fabriano Watercolour Paper, Penny Black stamps, Ranger Distress stains, Tutorial, video 29 Comments
I created a tutorial for Splitcoaststampers showing how I use distress stains to do watercolouring with outline stamps. There is both a photo tutorial and video on the Splitcoast website and I have included the video below. I used the same technique to create two cards, the one above is the star of the video, the one below is featured in the photo tutorial.
Supplies:
Stamps: Fresh , Flower Sparks (PB)
Inks: Peeled Paint, Barn Door, Spiced Marmalade, Scattered Straw, distress stains & Forest Moss, Black soot distress markers(Ranger), Versafine Spanish Moss ink (Imagine Craft/Tsukineko)
Cardstock: Fabriano 100% cotton hot pressed watercolour paper, Neenah Natural White cardstock
This is a favourite technique of mine; I used it for the following cards.
Falling Snow Video Tutorial
Posted: November 26, 2014 Filed under: Prancers, Stamped Landscapes, Tutorial | Tags: Fabriano Watercolour Paper, Penny Black stamps, Tsukineko Memento inks, Tutorial 16 Comments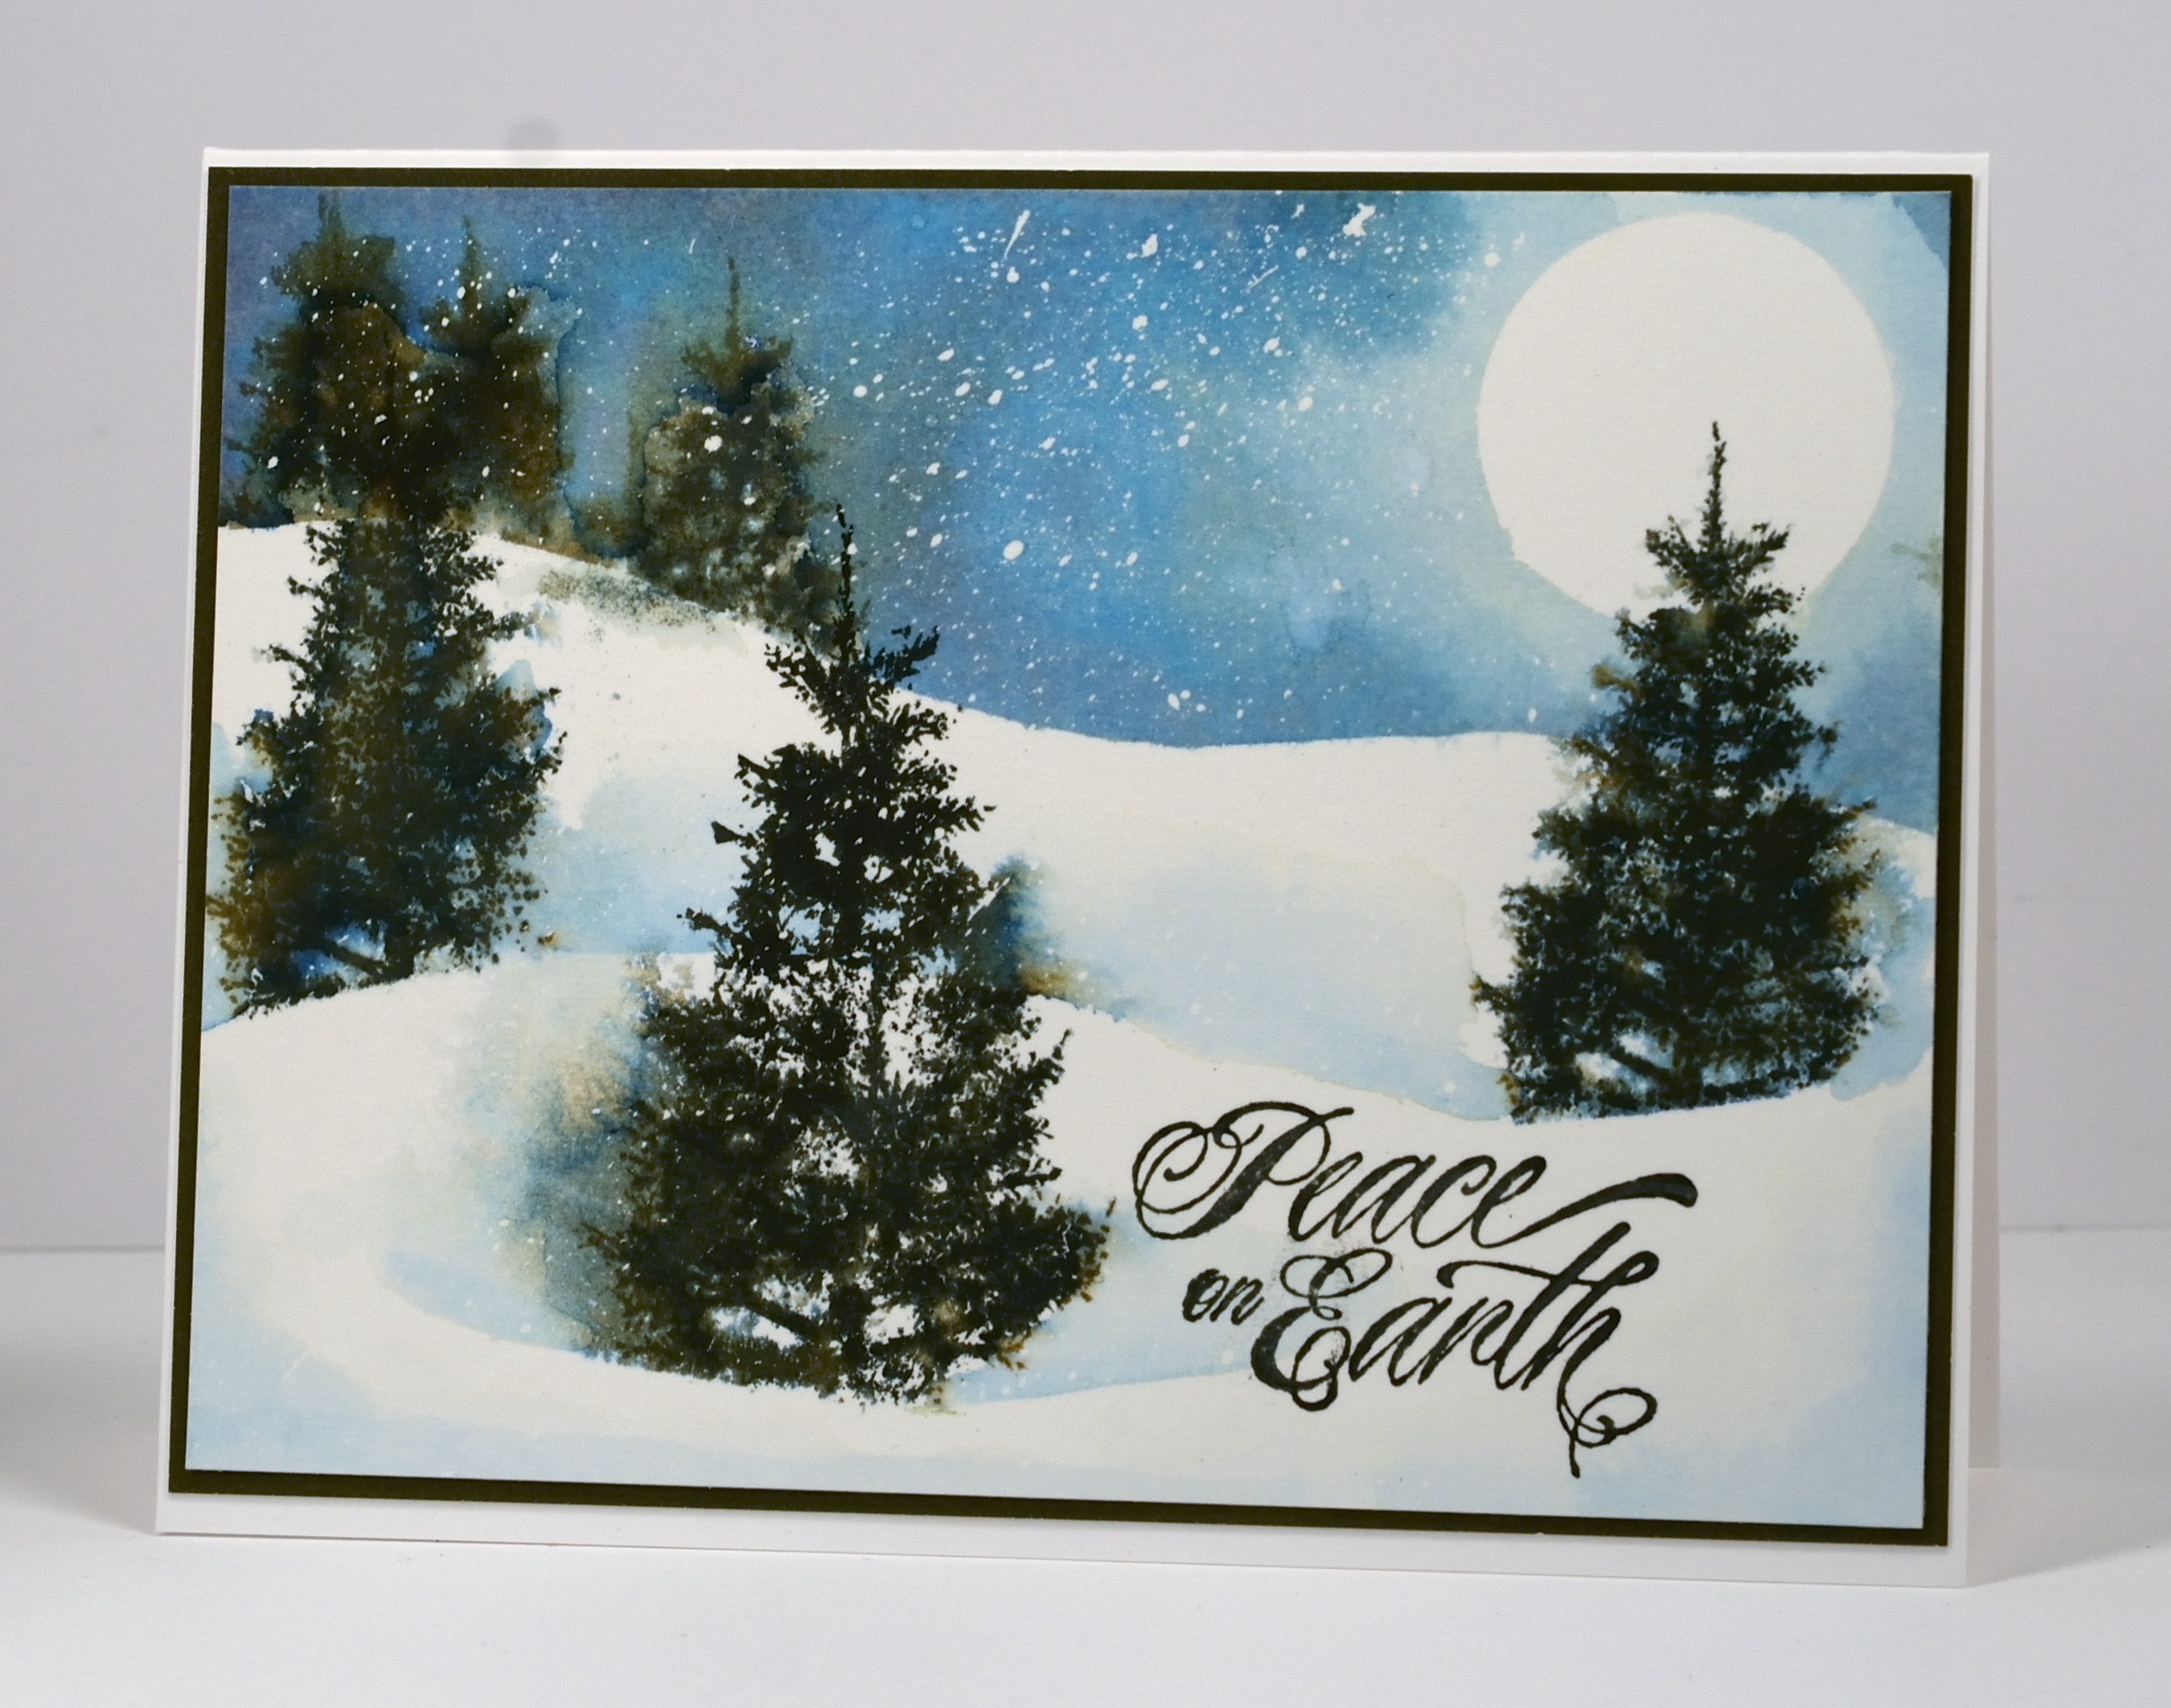
Today’s tutorial is one I created for Splitcoast Stampers. Splitcoast posts a new technique tutorial every Wednesday and in today’s I show how to create the look of falling snow on a watercolour card. I created both a photo and video tutorial for Splitcoast.
The video took me a few attempts so I have four slightly different versions of the card which supports my claim that watercolour techniques never give you the same result twice. The picture above is the first one I created and the one featured in the photo tutorial. It has quite a bit of masking fluid snow in the sky; the one in the video ended up with a lot less. I mention in the video that I have stopped using post-it notes to mask when I do watercolour scenes. I now use frisket film, a reusable, repositionable plastic film which doesn’t disintegrate when it gets wet. It is called Grafix Extra Tack Prepared Frisket Film.
I have another video showing in detail how to apply and remove the masking fluid here.
Supplies:
Stamps: Prancers, Hello Winter(PB)
Inks: Memento Nautical Blue, Bahama Blue, Northern Pine inks (Imagine Craft/Tsukineko)
Cardstock: Fabriano 100% cotton hot pressed watercolour paper, Neenah Solar White 110lb cardstock, Olive Green cardstock
Also: Winsor & Newton masking fluid, Kemper Spatter brush
Watercolour with a stencil
Posted: August 17, 2014 Filed under: Charming, Flower Dance, Tutorial, Watercolour | Tags: Penny Black stamps, Penny Black stencils, Ranger Distress stains, Tutorial 17 Comments
In creating today’s card I used a co-ordinating stamp and stencil from Penny Black. By applying ink to the Flower Dance stencil and pressing it onto my watercolour paper I was able to create background pattern and colour all around the flower image I later stamped and watercoloured. I have a video tutorial showing how I did it below.
This is the kind of technique that will never produce the same results twice. I’ve tried it already using another stencil with quite different results which I will share once I’ve completed the card.
Supplies:
Stamps: Charming, Friendship, Letter Background (PB)
Stencil: Flower Dance (PB)
Inks: Tumbled Glass, Milled Lavender, Evergreen Bough distress stains and Peacock Feather, Dusty Concord distress inks (Ranger)
Markers: Wink of Stella Gold pen
Cardstock: Neenah Classic Crest Avon Brilliant White 110lb smooth , Fabriano 100% cotton hot pressed watercolour paper, Penny Black Mix & Match Blue Lagoon paper
Also: Teal grosgrain ribbon, gold cord
Summer Sun Collaboration with Faber Castell
Posted: June 12, 2014 Filed under: Fresh Breeze, Fuchsia, Gelatos, Mixed Media, Tutorial | Tags: Faber Castell gelatos, Faber Castell Paper Crafter Crayons, Faber Castell Textural Accents, Penny Black creative dies, Penny Black stamps, Tutorial 4 Comments
All this week there is a special collaboration occuring between Faber-Castell Design Memory Craft and Penny Black. There are projects on the PB blog using Paper Crafter Crayons and Double Scoop Gelatos AND you’ll find projects from the Faber-Castell Design Memory Craft designers on their blog featuring PB stamps. Visit both Penny Black and Faber Castell Memory Craft for details of giveaways.
.
I decided to create a mixed media panel, a rare occurrence for me. I really enjoyed playing with the Textural Accents and the gorgeous colours in the Paper Crafter crayons and gelatos. (if you click on the tutorial pictures you will see more detail)
Next I spritzed with water and blended the colours with my fingers.
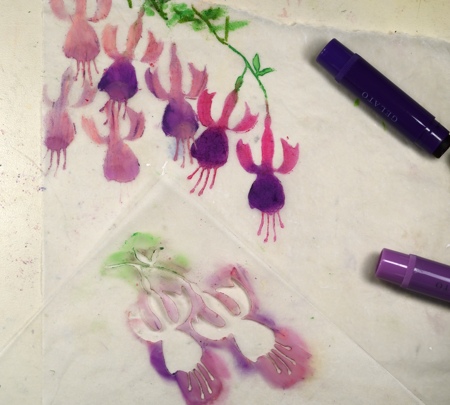
Using stencil plastic I created a stencil using the Fresh Breeze die. (I can’t find the packaging for the stencil plastic so I am not sure what brand but it was sold specifically for creating your own stencils. In order to cut it with a Big Kick I used a metal shim in the sandwich) I applied colour through the stencil with gelatos.
Next I spritzed with water and blended the greens with my fingers through stencil.
I created another stencil using the Fuchsia die and applied colour to tissue paper with lime, lavender, grape and guava gelatos, then blended with my fingers.
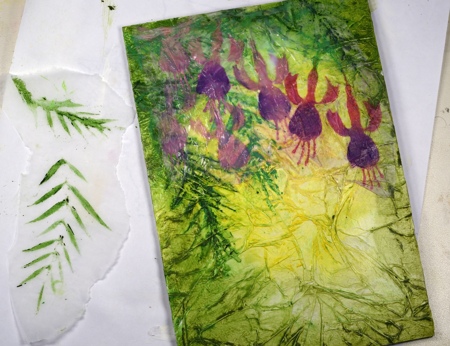
I stenciled some Fresh Breeze leaves with green gelatos on tissue paper and attached both tissue panels to the main panel with Gel Medium. The gelatos on tissue gave the flowers a background misty look that was exactly what I was after.
In other related and creative news, there is likely to be another lull here on the blog in the next few weeks. My daughter’s prom is in two weeks and the dress making countdown starts today! If I have a chance I will update you otherwise please understand that I am creating with tulle and silky fabric instead of paper and cardstock for the next little while.
Supplies:
Stamps: Truly Great (PB)
Creative Dies: Fuchsia, Fresh Breeze (PB)
Gelatos: Faber Castell
Paper Crafter Crayons: Faber Castell
Textural Accents: Gesso, Gel Medium, Glaze (Faber Castell)
Paper: Thick natural coloured cardboard, White 140lb smooth, Tissue paper, PB Mix & Match Periwinkle Paper
Stamp & Doodle
Posted: May 28, 2014 Filed under: Floral Tapestry, Tutorial | Tags: Fabriano Watercolour Paper, Penny Black stamps, Ranger Distress stains, Tutorial 16 Comments
I created this card from a stamped panel that was sitting around on my work table waiting for inspiration. I stamped the “Floral Tapestry” background stamp in Distress stains on watercolour paper. After stamping once I spritzed the stamp and stamped again on another piece of paper, then did it again so I had several panels sitting around, each one a little paler than the previous one. I think this one was the palest panel but it still had plenty of colour and the negative images of the flowers and leaves were clear enough to doodle around. If you watch the video you will see my doodling process. I did not have a plan; I just defined the flower shapes and added leaves, twirls and squiggles in and around them. When I was almost finished I decided a few gold highlights would be nice so I added them with a Wink of Stella pen.
I trimmed the floral panel and criss-crossed some gold cord over it. I added two gold half pearls in each place where the cord crossed and stuck the cord down with glossy accents. The cord did not want to stay in place but with a little pressure on top it finally did! After die-cutting the banner I decided to trim the dark brown mat and cardbase to co-ordinate.
Supplies:
Stamps: Floral Tapestry, Amazing! (PB)
Dies: Triple Banner (PB)
Inks: Versafine Vintage Sepia (Tsukineko) Vintage Photo, Spiced Marmalade, Mustard Seeds Distress stains (Ranger)
Cardstock: Neenah Classic Crest Avon Brilliant White 110lb smooth , Fabriano 100% cotton hot pressed watercolour paper
Watercolour butterfly tutorial
Posted: January 25, 2014 Filed under: Background Stamps, Schizeas, Soft Wings, Tutorial, Watercolour | Tags: Penny Black stamps, Tsukineko Memento inks, Tutorial 21 Comments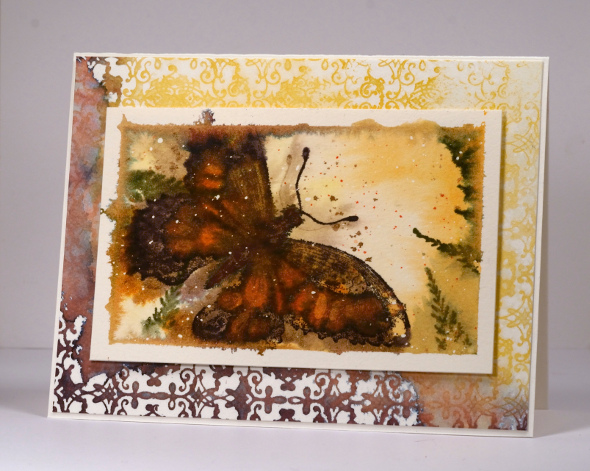
Believe it or not here is my second tutorial for the year and it’s still January! You will see in the video I am using a different watercolour block to the one I usually use. It is 7″x 10″ so I divided it into four panels to create four little watercolour pictures. Only two will end up on the blog, this one and a little snowscape. The other two were tossed. I flicked masking fluid over the watercolour paper before I began filming the tutorial. Embarrassingly the panel was not centred at the beginning of the video but I corrected it after a minute or so. You can see that some of the ink seeped under the painter’s tape I masked with. I didn’t crop that out because I thought it added to the whole “vintage-found it in the attic” feel of the card. As you know usually I would not mat with a patterned panel but I just wanted more of the lovely elderberry & cantaloupe colour combo so it is a little busier than my usual.
Supplies:
Stamps: Soft Wings, Decadence, Schizea (PB)
Inks: Memento Dandelion, Cantaloupe, Tangelo, Rich Cocoa, Elderberry, Olive Grove (Tsukineko)
Cardstock: CartieraMagnani 100% cotton hot pressed watercolour paper
Also: Winsor & Newton Masking Fluid
Winter Watercolour Tutorial
Posted: January 4, 2014 Filed under: Before the Snow, Stamped Landscapes, Tutorial, Watercolour | Tags: Fabriano Watercolour Paper, Penny Black stamps, Tsukineko Memento inks, Tutorial 37 Comments
Here is the first of my watercolour tutorials. I have used only one image stamp and one basic technique. There are several different techniques I use when creating watercolour scenes and cards because different stamps lend themselves to different approaches. I plan to cover more techniques in future tutorials.
I stress in the video that watercolouring is never the same twice and you cannot predict how the colours will blend and bleed in each scene. It is worth playing around with for a while to work out the amount of water to add to the paper, how long to let it dry between stamping images and how much colour to add and blend when creating backgrounds.
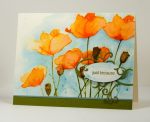
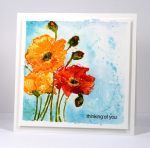
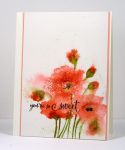
Here is a list of other cards made using the technique shown in this tutorial. Noel, Watercolour Night Sky, Watercolour Snowstorm, Poppies in a Field, Watercolour Sympathy.
Thanks for dropping in.
Supplies:
Stamps: Before the Snow, Flourish Thank you (PB)
Inks: Memento Cottage Ivy, Danube Blue & Versafine Majestic Blue (Tsukineko)
Cardstock: Fabriano 100% cotton hot pressed watercolour paper
Also: Winsor & Newton Masking Fluid


