
Pink Poppy Time
Posted: January 23, 2016 Filed under: Fresh, Poppy Time | Tags: Fabriano Watercolour Paper, Penny Black stamps, Ranger Distress stains 13 Comments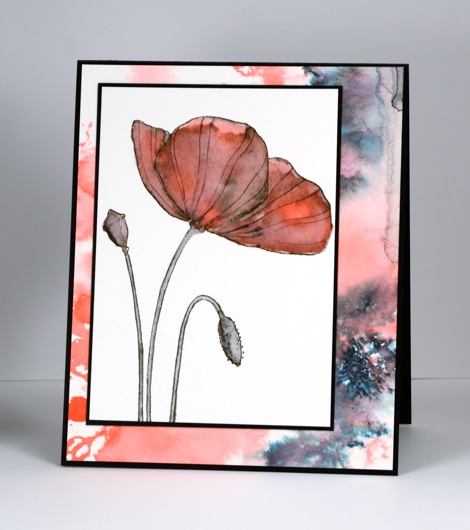
I don’t often add more than one mat or layer to a stamped panel but it was fun co-ordinating a patterned panel with the focal image. By working on two panels at once I was able to create one very controlled image panel along with a loose background one.
The single poppy I stamped in black soot ink then drew over a few of the outlines with the ‘elegant writer’ pen. When I started filling the poppy with pink stain the black ink bled into the pink giving it the watermarked grungy look. To create the patterned paper behind the panel I stamped the ‘Fresh’ poppy stamp in pink stain, added some detail with the elegant writer pen again and then flooded the panel with a spritzer. The pink spread and the black bled into black, pink and green.
I doubt you will start seeing oodles of layers on my cards; there are talented card makers who do that so well. From time to time however it is fun to get fancy with a few extra layers. Speaking of layers (or lack of)there is one day left to enter the One Layer Simplicity challenge for January. Even if you can’t squeak in with a card, check out the cool’sky inspired’ cards linked up there.
Supplies
Stamps: Poppy Time, Fresh (Penny Black)
Inks: Elegant Writer pen (Speedball) Black soot distress ink, Worn Lipstick distress stain (Ranger)
Cardstock: Fabriano cold pressed watercolour paper, Black cardstock
30 Day colouring challenge
Posted: October 2, 2015 Filed under: Fresh, Watercolour | Tags: Kuretake Zig clean color real brush markers, Penny Black stamps, Tsukineko Versafine inks 13 Comments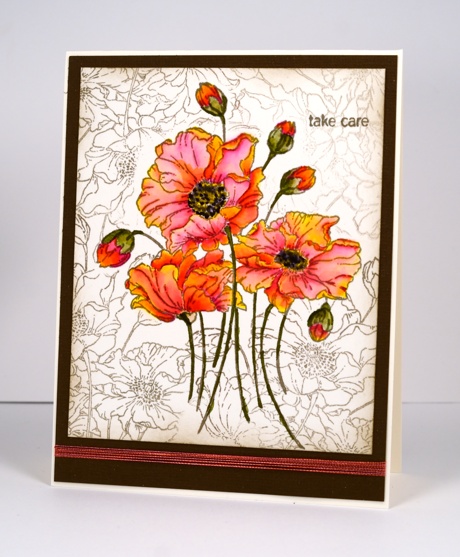
Kathy Racoosin of The Daily Marker is hosting a 30 Day Coloring Challenge during October. It is her third colouring challenge and her videos, blog posts and clever creations are very inspiring. I played along a few times during her last challenge and hope to participate even more this time. For all the details visit Kathy’s blog and check out her instagram also.

The colouring on my ‘fresh’ bouquet was done with Zig clean color real brush markers. I have 14 colours (so far), most of them quite bright so it was not difficult to get vivid petals by blending just the yellow, the pink and a little water. The background did involve fussy cutting a mask! Unlikely to happen often, I know. I stamped the background in versafine vintage sepia ink over the masked central image. Now that I think about it, several masks were needed so the background images did not stamp over the top of each other. This is why you don’t see this sort of thing very often on this blog. I do have a ‘too lazy to fussy cut and mask’ technique which often works well. I will share that some time soon.
Supplies:
Stamps: Fresh , Snippets (PB)
Inks: Versafine Vintage Sepia ink (Imagine Craft/Tsukineko)
Cardstock: Fabriano 100% cotton hot pressed watercolour paper, Neenah Natural White cardstock, Brown cardstock
Also: Zig clean color real brush markers, pink and orange thread
Watercolour with Distress Stain Video Tutorial
Posted: May 20, 2015 Filed under: Fresh, Tutorial | Tags: Fabriano Watercolour Paper, Penny Black stamps, Ranger Distress stains, Tutorial, video 29 Comments
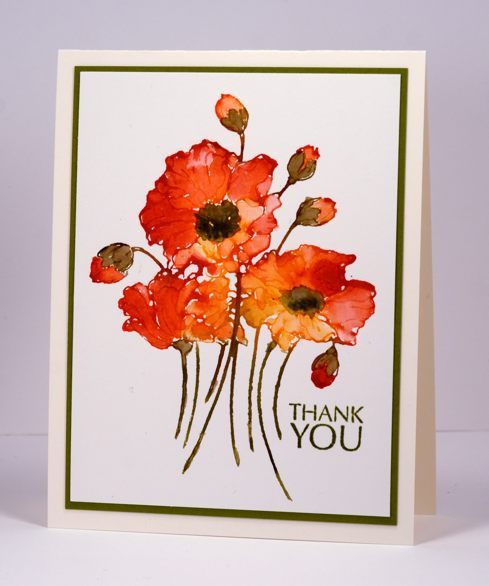
I created a tutorial for Splitcoaststampers showing how I use distress stains to do watercolouring with outline stamps. There is both a photo tutorial and video on the Splitcoast website and I have included the video below. I used the same technique to create two cards, the one above is the star of the video, the one below is featured in the photo tutorial.
Supplies:
Stamps: Fresh , Flower Sparks (PB)
Inks: Peeled Paint, Barn Door, Spiced Marmalade, Scattered Straw, distress stains & Forest Moss, Black soot distress markers(Ranger), Versafine Spanish Moss ink (Imagine Craft/Tsukineko)
Cardstock: Fabriano 100% cotton hot pressed watercolour paper, Neenah Natural White cardstock
This is a favourite technique of mine; I used it for the following cards.


More fresh poppies
Posted: February 15, 2015 Filed under: Fresh | Tags: Fabriano Watercolour Paper, Penny Black stamps, Ranger Distress stains 14 Comments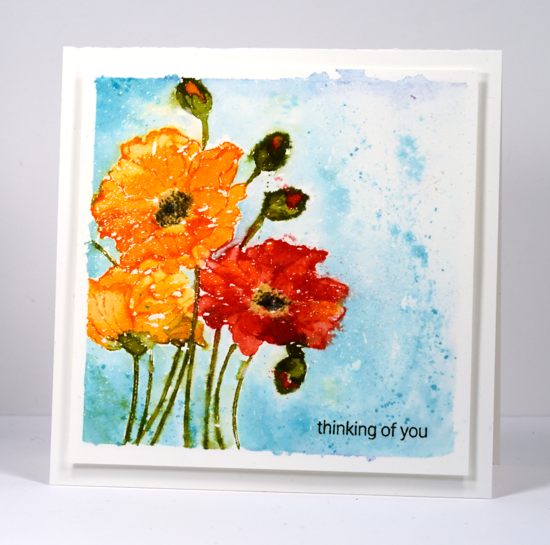
When I posted the first card made with the ‘fresh’ stamp I mentioned another watercolour panel where I painted the same stamped poppies but had created a different effect. Once again I stamped the image with several different distress inks and then painted inside the petals by pulling colour from the outline as well adding extra stain with a paintbrush. I worked a petal at a time so I could preserve some of the stamped outlines of the image. If I had spritzed with water at this point I could have ended up with a loose image like the pink one I posted first, but who knows; watercolour is an unpredictable technique. I painted the blue background after the poppies had dried to restrict the bleeding from the petals and stems into the background.
CAS-ual Fridays has a ‘Must Love Watercolor’ challenge at the moment so I will link there and also at the Crafting Cafe where the challenge is to use your favourite technique. Not too hard to guess what that is…
Have a great week
Supplies:
Stamps: Fresh , Snippets (PB)
Inks: Peeled Paint, Barn Door, Spiced Marmalade, Scattered Straw, Tumbled Glass, Broken China distress stains (Ranger), Memento Tuxedo Black, Bamboo Leaves inks (Imagine Craft/Tsukineko)
Cardstock: Fabriano 100% cotton hot pressed watercolour paper
Also: Winsor & Newton masking fluid
Sweet, fresh poppies
Posted: February 14, 2015 Filed under: CAS, Fresh | Tags: Fabriano Watercolour Paper, Penny Black stamps, Ranger Distress stains, Tsukineko Memento inks 17 Comments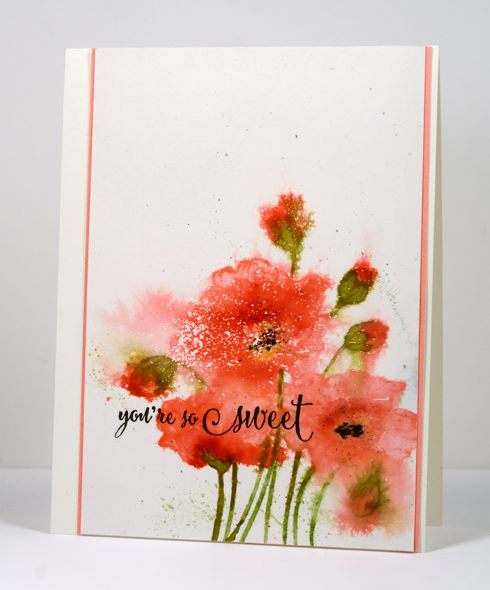
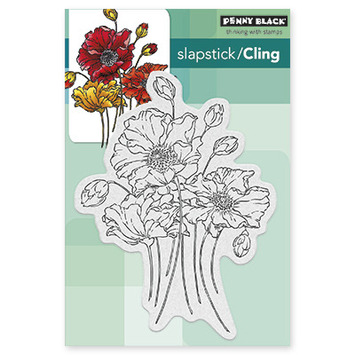
‘Fresh’ is one of the new slapstick cling stamps from the Penny Black “Bring on the Happy” release. I have been chasing deadlines all week so yesterday after getting all my ‘dirty dozen’ projects finished I pulled this nbus stamp out. I created two separate panels in different colour schemes using slightly different techniques. I started both the same way by stamping on watercolour paper in distress stain. Because distress stain is a liquid the stamp does not always ink up evenly but once stamped it does stay moist for longer than it would with the average dye ink. This gives me longer to pull colour from the stamped outline in to fill the petals, stems and buds (or whatever image I’m stamping). As you see in the stamp image below this is an outline stamp and I began by painting each petal, blending the colour with water to create light and dark shades within the petals. Although you wouldn’t know it to look at it now all the colouring was inside the lines!
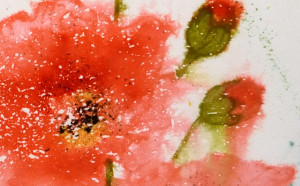
At this point I chose to go for a much freer look and spritzed the flowers with water several times. I waited until the image was almost dry before adding a little yellow and finally black to the poppy centres. You have probably guessed already that the white specks and spots were made by splattering masking fluid on the paper before I began.
I trimmed the panel so all that white at the top could to balance all that colour at the bottom. The current sketch from CAS(E) this sketch helped me position my sentiment and then I played around with the pink mat for a little while before settling on a very narrow strip on each side. I will turn my other panel into a card in the next few days so you can see the more controlled ‘inside the lines’ approach.
Supplies:
Stamps: Fresh , Sprinkles and Smiles (PB)
Inks: Worn Lipstick, Peeled Paint, Festive Berries, Scattered Straw distress stains (Ranger), Memento Tuxedo Black, Bamboo Leaves inks (Imagine Craft/Tsukineko)
Cardstock: Fabriano 100% & 25% cotton hot pressed watercolour paper, Coral Reef mix & match paper (PB)


