
Patterned Poppies
Posted: August 4, 2014 Filed under: Bashful, CAS, Field of Dreams, Indian Wheel, Wishes | Tags: Penny Black creative dies, Penny Black stamps, Ranger Distress stains 17 Comments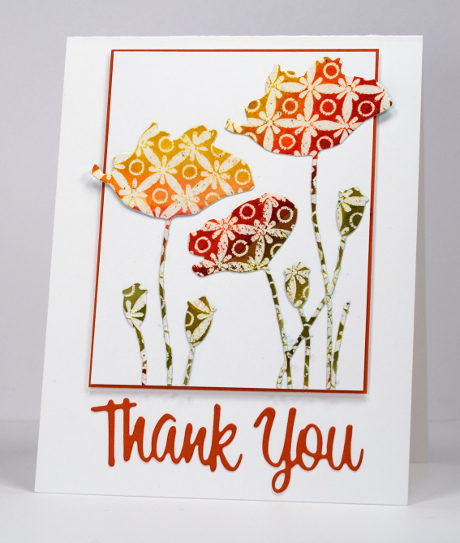
It seems to be nothing but poppies on the blog at present. I can assure you that changes tomorrow as something quite unseasonal will appear!
Today I have a card inspired by one of the techniques in the Stretch Your Stamps 2 online card class. I have created watercolour patterned paper for die cutting before but I don’t think I have die-cut any embossed designs. I embossed the background stamp, Indian Wheel, watercoloured with distress stains then cut out several poppies with the “Field of Dreams” die. I also cut the sentiment from the patterned panel but it was a bit much so I decided to a cut a plain orange sentiment.
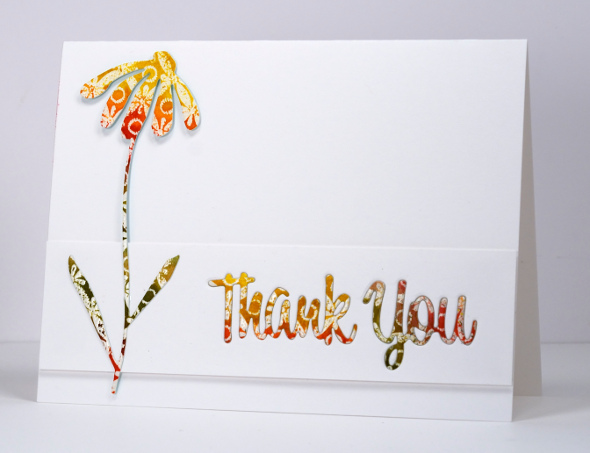
When I was photographing the top card and getting ready to post it I saw the pretty patterned sentiment and another die cut flower and decided a second card was possible. I had cut the daisy first from the patterned panel using the “Bashful” die but decided there was not enough patterned showing so switched to the poppies. It’s great when one design turns into two. The layout below is an adaption of the current Case Study Challenge #202 layout, one big flower and a sentiment strip stretching right across the card.
Supplies:
Stamps: Indian Wheel (Penny Black)
Inks: Vintage Photo, Peeled Paint, Mustard Seed, Spiced Marmalade, Barn Door, Crushed Olive, Bundled Sage distress stains (Ranger)
Creative Dies: Field of Dreams, Wishes, Bashful (PB)
Cardstock: Fabriano 100% cotton hot pressed watercolour paper, Fall Festival mix & match paper (Penny Black), Neenah Solar White 110lb card stock.
Sunflower Library Card
Posted: July 31, 2014 Filed under: A Pocket Full, Life's Journals, Remember This, Sunny Hello | Tags: Fabriano Watercolour Paper, Penny Black creative dies, Penny Black stamps, Ranger Distress stains, Tsukineko Memento inks 1 Comment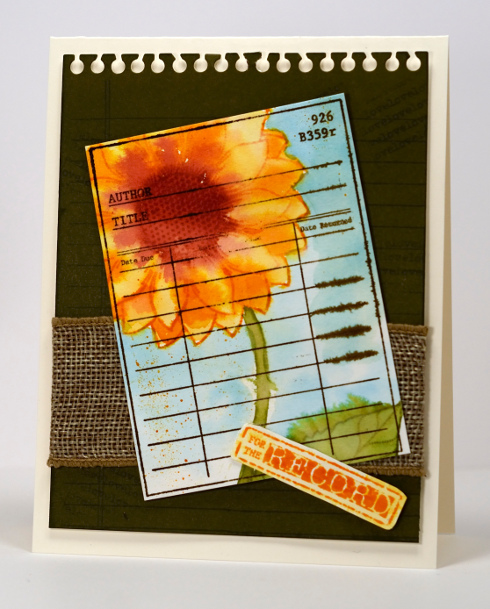
I remember when all the library books had cards tucked into a pocket inside the back cover. I don’t remember any of the library cards being particularly pretty though! I am enjoying using the library card stamp and the notebook page also from the set “Life’s Journals”
I created my library card with distress stains, first inking the stamp then spritzing and stamping it on watercolour paper. I used a waterbrush to blend the colours and add any extra colour including blue for the background. I stamped the library card image when the paper was almost dry. The olive notepad page behind was die cut in two steps. Because I wanted the notepad to be wide enough to almost fill the card base I ran the die through the Big Kick half-way then repositioned the die by lining up the little circles at the top and ran it through again. The library card and label are popped up over a piece of faux burlap ribbon.
I haven’t stamped anything inside the card yet but the “For the Record” stamp leaves me plenty of possibilities…
The Penny Black design team have been sharing projects featuring the new Pocket Treasures release all week so check out the blog if you haven’t done so already.
The details post is up on One Layer Simplicity highlighting some great one layer cards and the new challenge will go live tomorrow, August 1st.
Supplies:
Stamps: Sunny Hello, Life’s Journals, Remember This (PB)Creative Dies: A Pocket Full (PB)
Inks: Spiced Marmalade, Peeled Paint, Fired Brick, Walnut Stain Distress Stains, Broken China stain and ink (Ranger)
Paper: Neenah Natural White 110lb card stock, Olive Grove Mix & Match paper, Fabriano 100% cotton hotpressed watercolour paper
Also: May Arts Faux Burlap Wired Ribbon
A Fresh Bunch of Flowers
Posted: July 20, 2014 Filed under: Watercolour | Tags: Faber-Castell Albrecht Durer Watercolour pencils, Fabriano Watercolour Paper, Penny Black creative dies, Penny Black stamps 25 Comments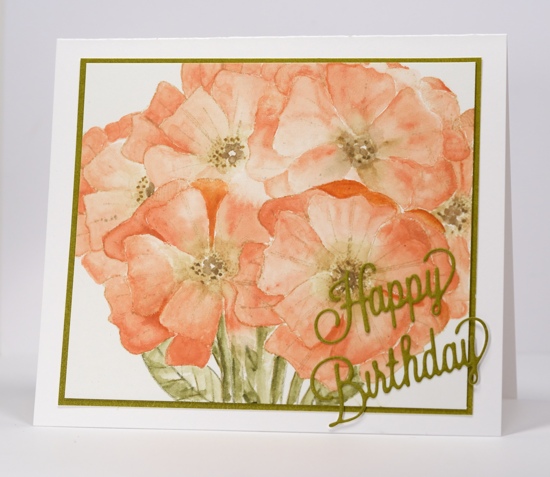
This watercolour has been sitting in the block for months; I had forgotten about it until I opened the block to use it for a new project. Some of my watercolour cards involve splashes of colour and loose blending in and outside the stamped lines. This is not one of those but a more controlled watercolour. I stamped the image in Memento Desert Sand ink using a post-it note mask to overlap the flowers. I then worked with watercolour pencils and a waterbrush to fill each flower with graduated colour. I drew stems and leaves to make a bunch, cropped the design, matted it and added a die cut sentiment.
Supplies:
Stamps: To You, (Penny Black)
Creative Dies: Celebrations
Inks: Memento Desert Sand (Tsukineko)
Also: Faber-Castell watercolour pencils dark orange 115, olive green 179, brown ochre 182, raw umber 180 and a water brush
To Treasure
Posted: July 16, 2014 Filed under: A Pocket Full, By the numbers, Dazzlers, Footnotes, Gelatos, Let's Chat, Life's Journals, Mixed Media, Remember This, Rose, Scrapbook Page, Textures | Tags: Faber Castell gelatos, Faber Castell Textural Accents, Faber-Castell Albrecht Durer Watercolour pencils, Fabriano Watercolour Paper, Penny Black creative dies, Penny Black stamps, Ranger Distress stains, Tsukineko Memento inks, Tsukineko Radiant Neon inks 13 Comments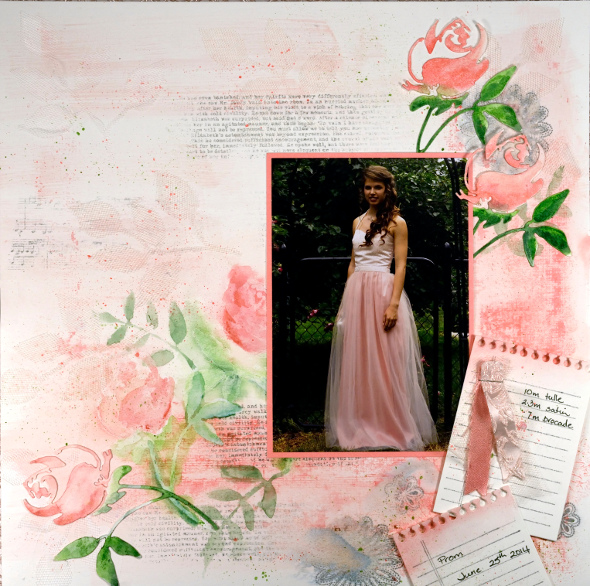
The new Pocket Treasures release from Penny Black inspired me to do something I haven’t done in years; I created a scrapbook page! I designed my page around one of my daughter’s prom photos. As the dress was finished the day before prom I still had all the fabric scraps lying around so I incorporated some of them into the page along with watercolouring, die cuts, stenciling and stamping. I used three new background panels from the Pocket Treasures release, text and music from “Footnotes” as well as canvas from “Textures”. I also used several intricate circle designs from the transparent set “Dazzlers”. The cute little notebook pages are cut with a die from ” A Pocket Full” set.
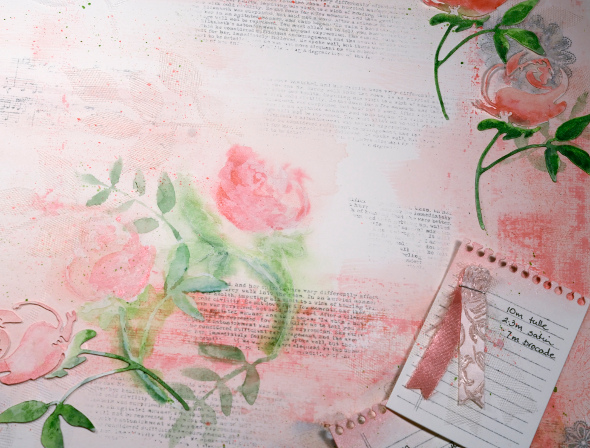
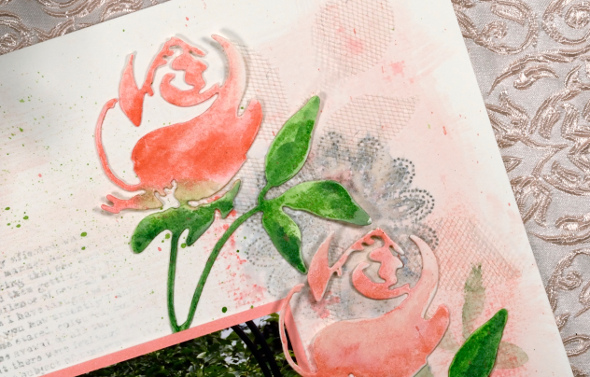
The 12 x 12 panel is watercolour paper. I have a large block of hot-pressed paper so I did all the work on the page while it was still attached to the block then peeled it off at the end and trimmed it to size. Three of the roses are die cut from watercolour paper and coloured with gelatos. The two paler roses were painted onto the page through a die cut stencil with gesso; I then added colour with gelatos.
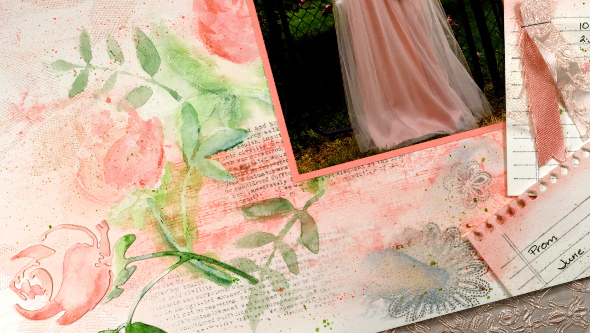
I used two dies from the “Leaves” set, one to die cut leaves out of tulle (the dress had four layers of tulle in the skirt), the other to create a stencil to paint through.
Supplies:
Stamps: Dazzlers, Footnotes, Life’s Journals, Textures (PB)
Creative Dies: A Pocket Full , Rose, (PB)
Gelatos: Metallic Melon, Green Tea, Guava (Faber Castell)
Watercolour Pencils: Medium Flesh 131, Pompeian Red, Pine Greren 267 (Faber Castell)
Inks: Memento London Fog, Cottage Ivy & Olive Grove Memento markers (Imagine Crafts Tsukineko), Worn Lipstick distress stains and ink (Ranger)
Textural Accents: Gesso, Gel Medium (Faber Castell)
Paper: Fabriano 100% cotton hot pressed watercolour paper, PB Mix & Match Coral Reef Paper
Also: Tulle, Satin, Staple
and now for something completely different…
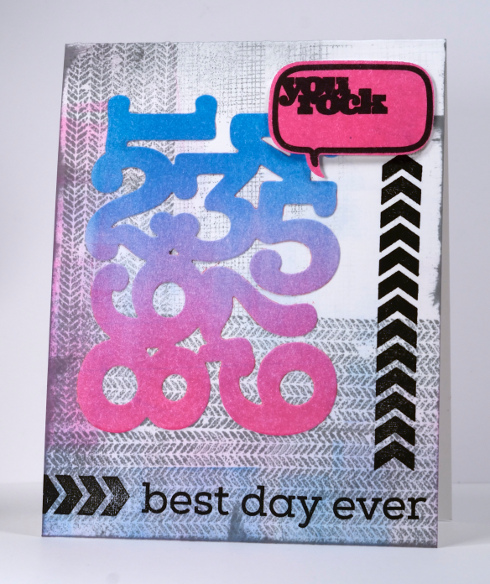
The stamps and dies in the Pocket Treasures release are not just for scrapbooking. I went in a very different direction when using some of the new products on a card. I can hardly bear to keep my soft romantic rosy scrapbook page and my neon grunge style card in the same post they are so contrasting. To create my card I used a brayer to apply blue and pink ink onto white cardstock then cut out a piece with the “By the Numbers” die. I used the same Radiant Neon inks to apply pale blue and pink to a white card base with the brayer. I featured yet another background stamp to add arrows along with canvas in grey ink. I then wiped the grey ink pad along the edges of card base for a distressed look. I stamped arrows from “Let’s Chat” in black and the sentiment from “Remember This” also in black. Finally I cut a speech balloon from “A Pocket Full” set out of brayered pink cardstock and stamped words in black ink.
Supplies:
Stamps: Textures , Let’s Chat, Remember This (PB)
Creative Dies: A Pocket Full , By the Numbers (PB)
Inks: Memento London Fog ink, Radiant Neon Electric Blue, Electric Pink, Versafine Onyx Black(Imagine Crafts Tsukineko)
Paper: Neenah Solar White 110lb card stock.
Birthday Lanterns
Posted: July 14, 2014 Filed under: After Glow | Tags: Fabriano Watercolour Paper, Penny Black creative dies, Penny Black stamps, Ranger Distress stains 8 Comments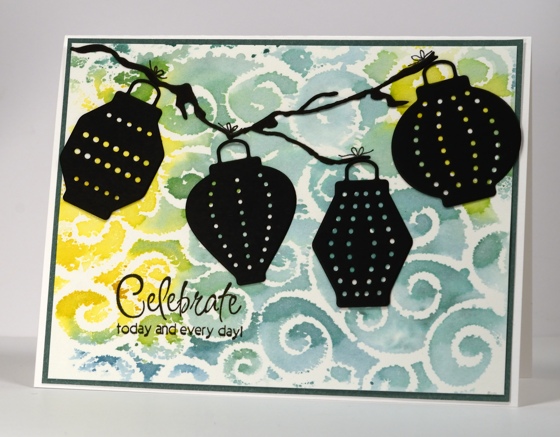
We celebrated my younger daughter’s birthday and the World Cup final yesterday. German friends of ours hosted a party which was a lot of fun. My daughter was very happy to watch the final on her birthday with friends, family and great food.
To create her card I used a technique I have seen on Karen’s blog many times; she is a master at it and I have been inspired to try it. I inked one side of an embossing folder with distress stains, spritzed with water then pressed a piece of watercolour paper onto the embossing folder and closed it. I didn’t run it through the die cut machine this time; I’ll try that another day. I used blue, yellow and green stains which blended with each other and varied in intensity. I trimmed the panel and matted it with Sea Breeze paper from Penny Black and added the die cut lanterns and branch. I trimmed the flowers off the branch for this card and added little bows with a fine tip marker.
Supplies:
Stamps: To You (PB)
Dies: After Glow, Dancing Blooms (PB)
Inks: Versafine Onyx Black (Tsukineko) Mustard Seeds, Evergreen Bough and Broken China Distress stains (Ranger)
Markers: Pitt Artist Pen (Faber Castell)
Cardstock: Neenah Classic Crest Avon Brilliant White 110lb smooth , Fabriano 100% cotton hot pressed watercolour paper
Fronds over at Simon Says Stamp
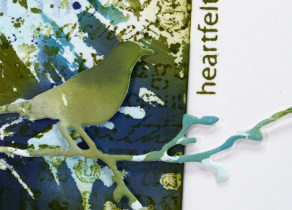
Posted: June 22, 2014 Filed under: Dies, Fronds, Penny Black | Tags: Penny Black creative dies, Penny Black stamps 4 CommentsI am guest designing over at Simon Says Stamp Blog today. To see the whole card and a description of the process pop over there.
Summer Sun Collaboration with Faber Castell
Posted: June 12, 2014 Filed under: Fresh Breeze, Fuchsia, Gelatos, Mixed Media, Tutorial | Tags: Faber Castell gelatos, Faber Castell Paper Crafter Crayons, Faber Castell Textural Accents, Penny Black creative dies, Penny Black stamps, Tutorial 4 Comments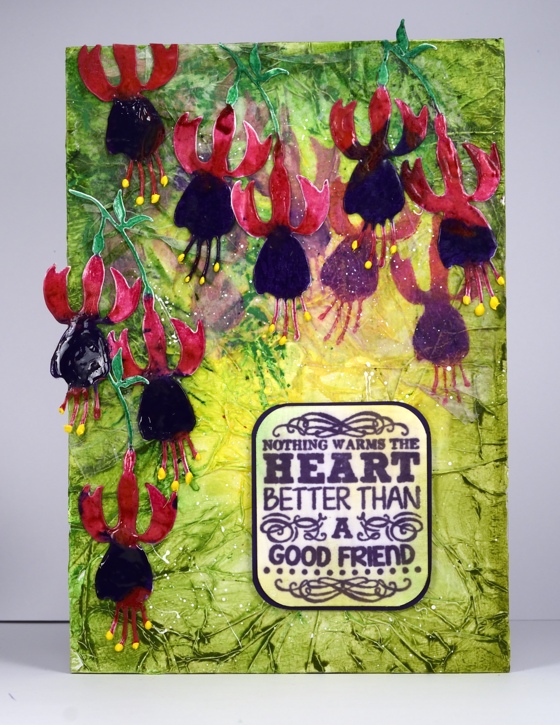
All this week there is a special collaboration occuring between Faber-Castell Design Memory Craft and Penny Black. There are projects on the PB blog using Paper Crafter Crayons and Double Scoop Gelatos AND you’ll find projects from the Faber-Castell Design Memory Craft designers on their blog featuring PB stamps. Visit both Penny Black and Faber Castell Memory Craft for details of giveaways.
.
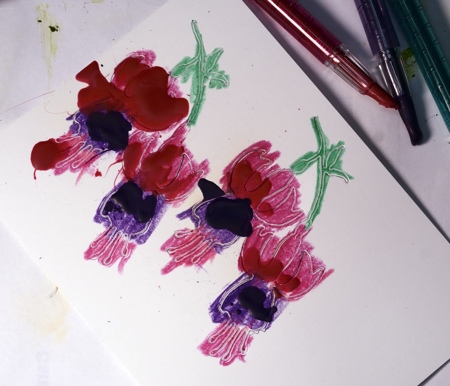
I decided to create a mixed media panel, a rare occurrence for me. I really enjoyed playing with the Textural Accents and the gorgeous colours in the Paper Crafter crayons and gelatos. (if you click on the tutorial pictures you will see more detail)
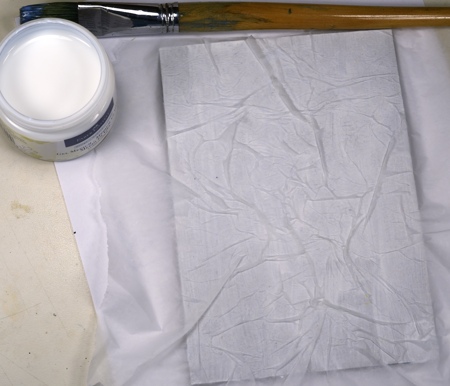
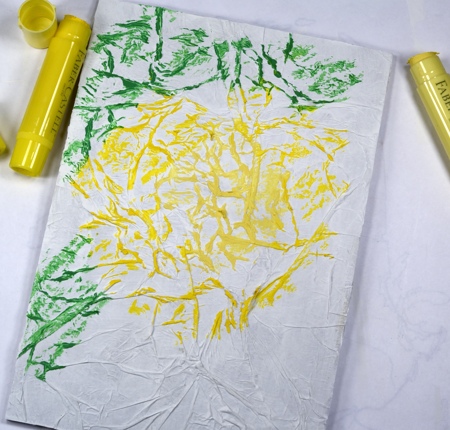
Next I spritzed with water and blended the colours with my fingers.
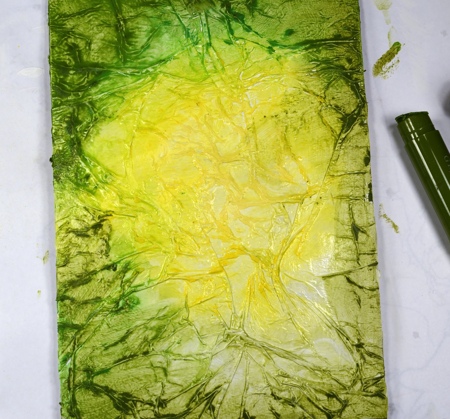
Using stencil plastic I created a stencil using the Fresh Breeze die. (I can’t find the packaging for the stencil plastic so I am not sure what brand but it was sold specifically for creating your own stencils. In order to cut it with a Big Kick I used a metal shim in the sandwich) I applied colour through the stencil with gelatos.
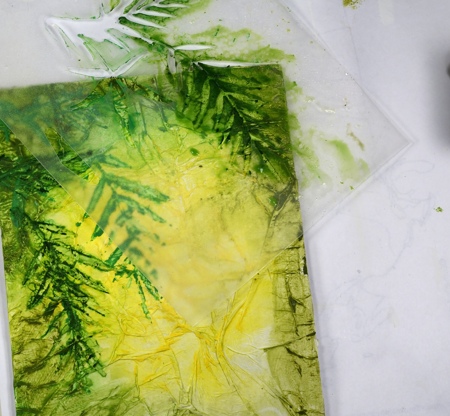
Next I spritzed with water and blended the greens with my fingers through stencil.
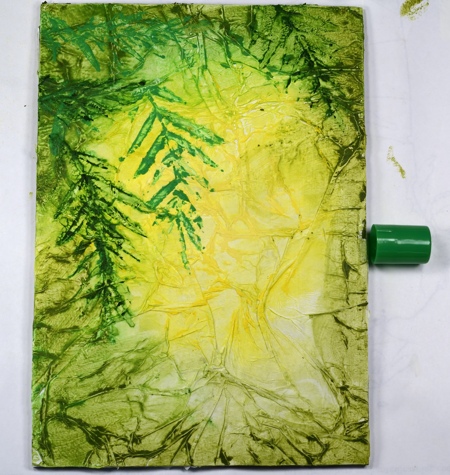
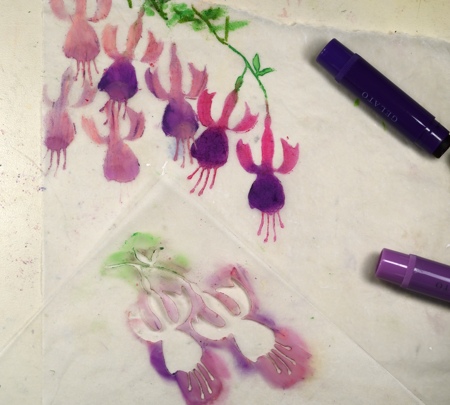
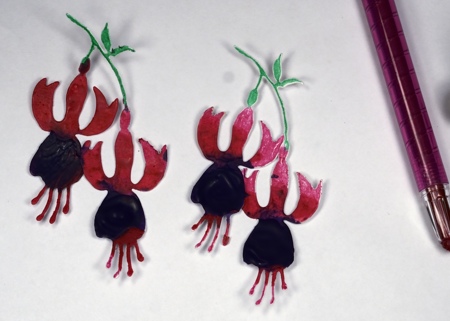
I created another stencil using the Fuchsia die and applied colour to tissue paper with lime, lavender, grape and guava gelatos, then blended with my fingers.
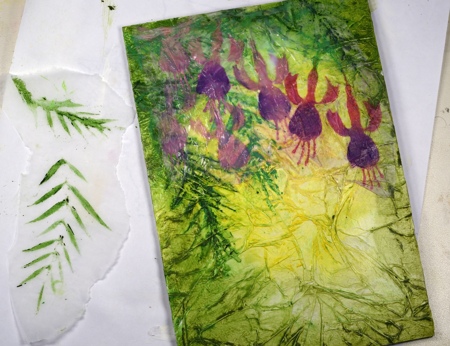
I stenciled some Fresh Breeze leaves with green gelatos on tissue paper and attached both tissue panels to the main panel with Gel Medium. The gelatos on tissue gave the flowers a background misty look that was exactly what I was after.
In other related and creative news, there is likely to be another lull here on the blog in the next few weeks. My daughter’s prom is in two weeks and the dress making countdown starts today! If I have a chance I will update you otherwise please understand that I am creating with tulle and silky fabric instead of paper and cardstock for the next little while.
Supplies:
Stamps: Truly Great (PB)
Creative Dies: Fuchsia, Fresh Breeze (PB)
Gelatos: Faber Castell
Paper Crafter Crayons: Faber Castell
Textural Accents: Gesso, Gel Medium, Glaze (Faber Castell)
Paper: Thick natural coloured cardboard, White 140lb smooth, Tissue paper, PB Mix & Match Periwinkle Paper
Nature’s Song
Posted: June 3, 2014 Filed under: Heathers, Nature's Song | Tags: Penny Black creative dies, Penny Black stamps, Tsukineko Memento inks 5 Comments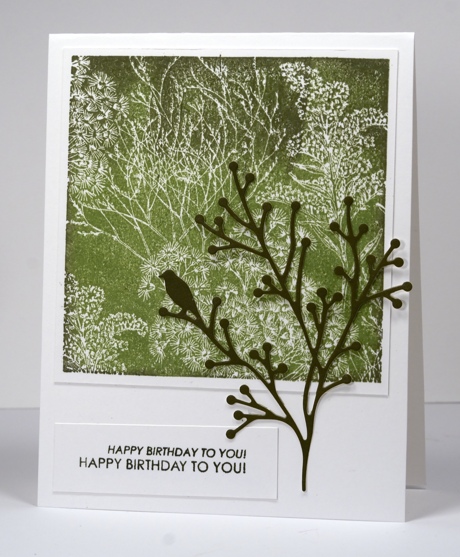
I know there has been very little activity here lately. The season of track meets, soccer tournaments and end of year events is upon us! I created this one a while ago thinking it could squeak by as a masculine card. I know it has flowers in the background but the colour scheme is more about foliage than petals!
I inked the ‘Heathers’ background stamp with Memento Pistachio & Olive Grove inks, spritzed them so they would blend a little then stamped on a white panel. I cut the branch from Olive Grove paper using the ‘Nature’s Song’ die and added a sentiment in Olive Grove ink.
Thanks for stopping by.
Supplies:
Stamps: Heathers, Wishing You (PB)
Inks: Memento Olive Grove, Pistachio (Tsukineko)
Creative Dies: Nature’s Song (PB)
Cardstock: Neenah Classic Crest Solar White 110lb smooth, Penny Black Olive Grove Mix & Match paper
Ten Tulips
Posted: May 18, 2014 Filed under: Promise Me, Triple Banner, Watercolour | Tags: Fabriano Watercolour Paper, May Arts ribbon, Penny Black creative dies, Penny Black stamps, Tsukineko Memento inks 8 Comments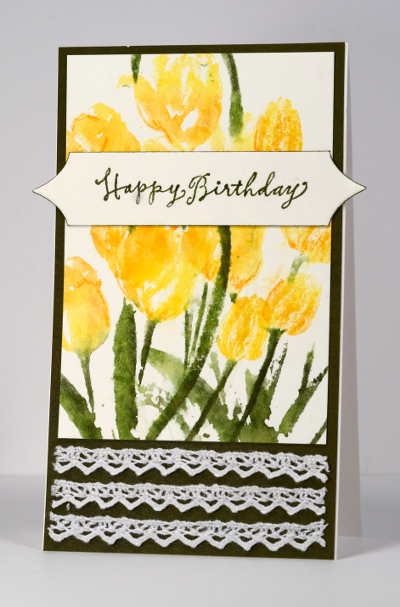
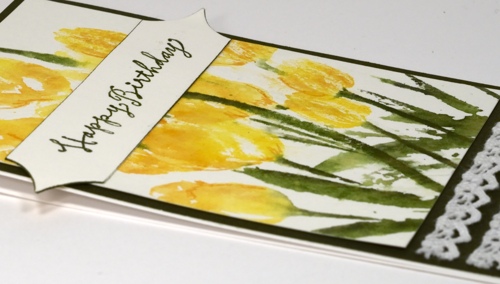
The Tulip Festival finishes tomorrow so I am glad I can slip one more tulip card in before the end. I worked on this one latish last night and all did not go according to plan. I stamped the tulips first on watercolour paper and they were fine. It was in the finishing off that I had problems. But I will go back to the beginning and explain my process.
I began by inking just the flower heads in Memento Dandelion and Cantaloupe using markers. I spritzed before stamping them at the top of the panel. I stamped just the tulip heads twice, one set under the other and the third time inked the stems and leaves as well. I was happy with the whole panel even the bit that is now covered by a large sentiment banner. I matted with Olive card stock and decided to attach the three strips of lace; I am still not sure if I like the lace there but I decided to stick with it. The panel is long and thin as you can see so it was difficult to work out where to put a sentiment on a 4.25×5.5 inch card base. I tried a sideways sentiment or a small sentiment beside the lace but neither looked right. Anyway, to make a long story a little shorter I stamped the sentiment on the tulips, messed it up and had to either cover the mess or crop the panel. I decided to cover it with a die cut banner and make a very narrow card so the points of the banner could go over the edge.
“Over the Edge” just happens to be the current challenge at Addicted to CAS and it’s a birthday card featuring May Flowers so I will join in at Seize the Birthday as well.
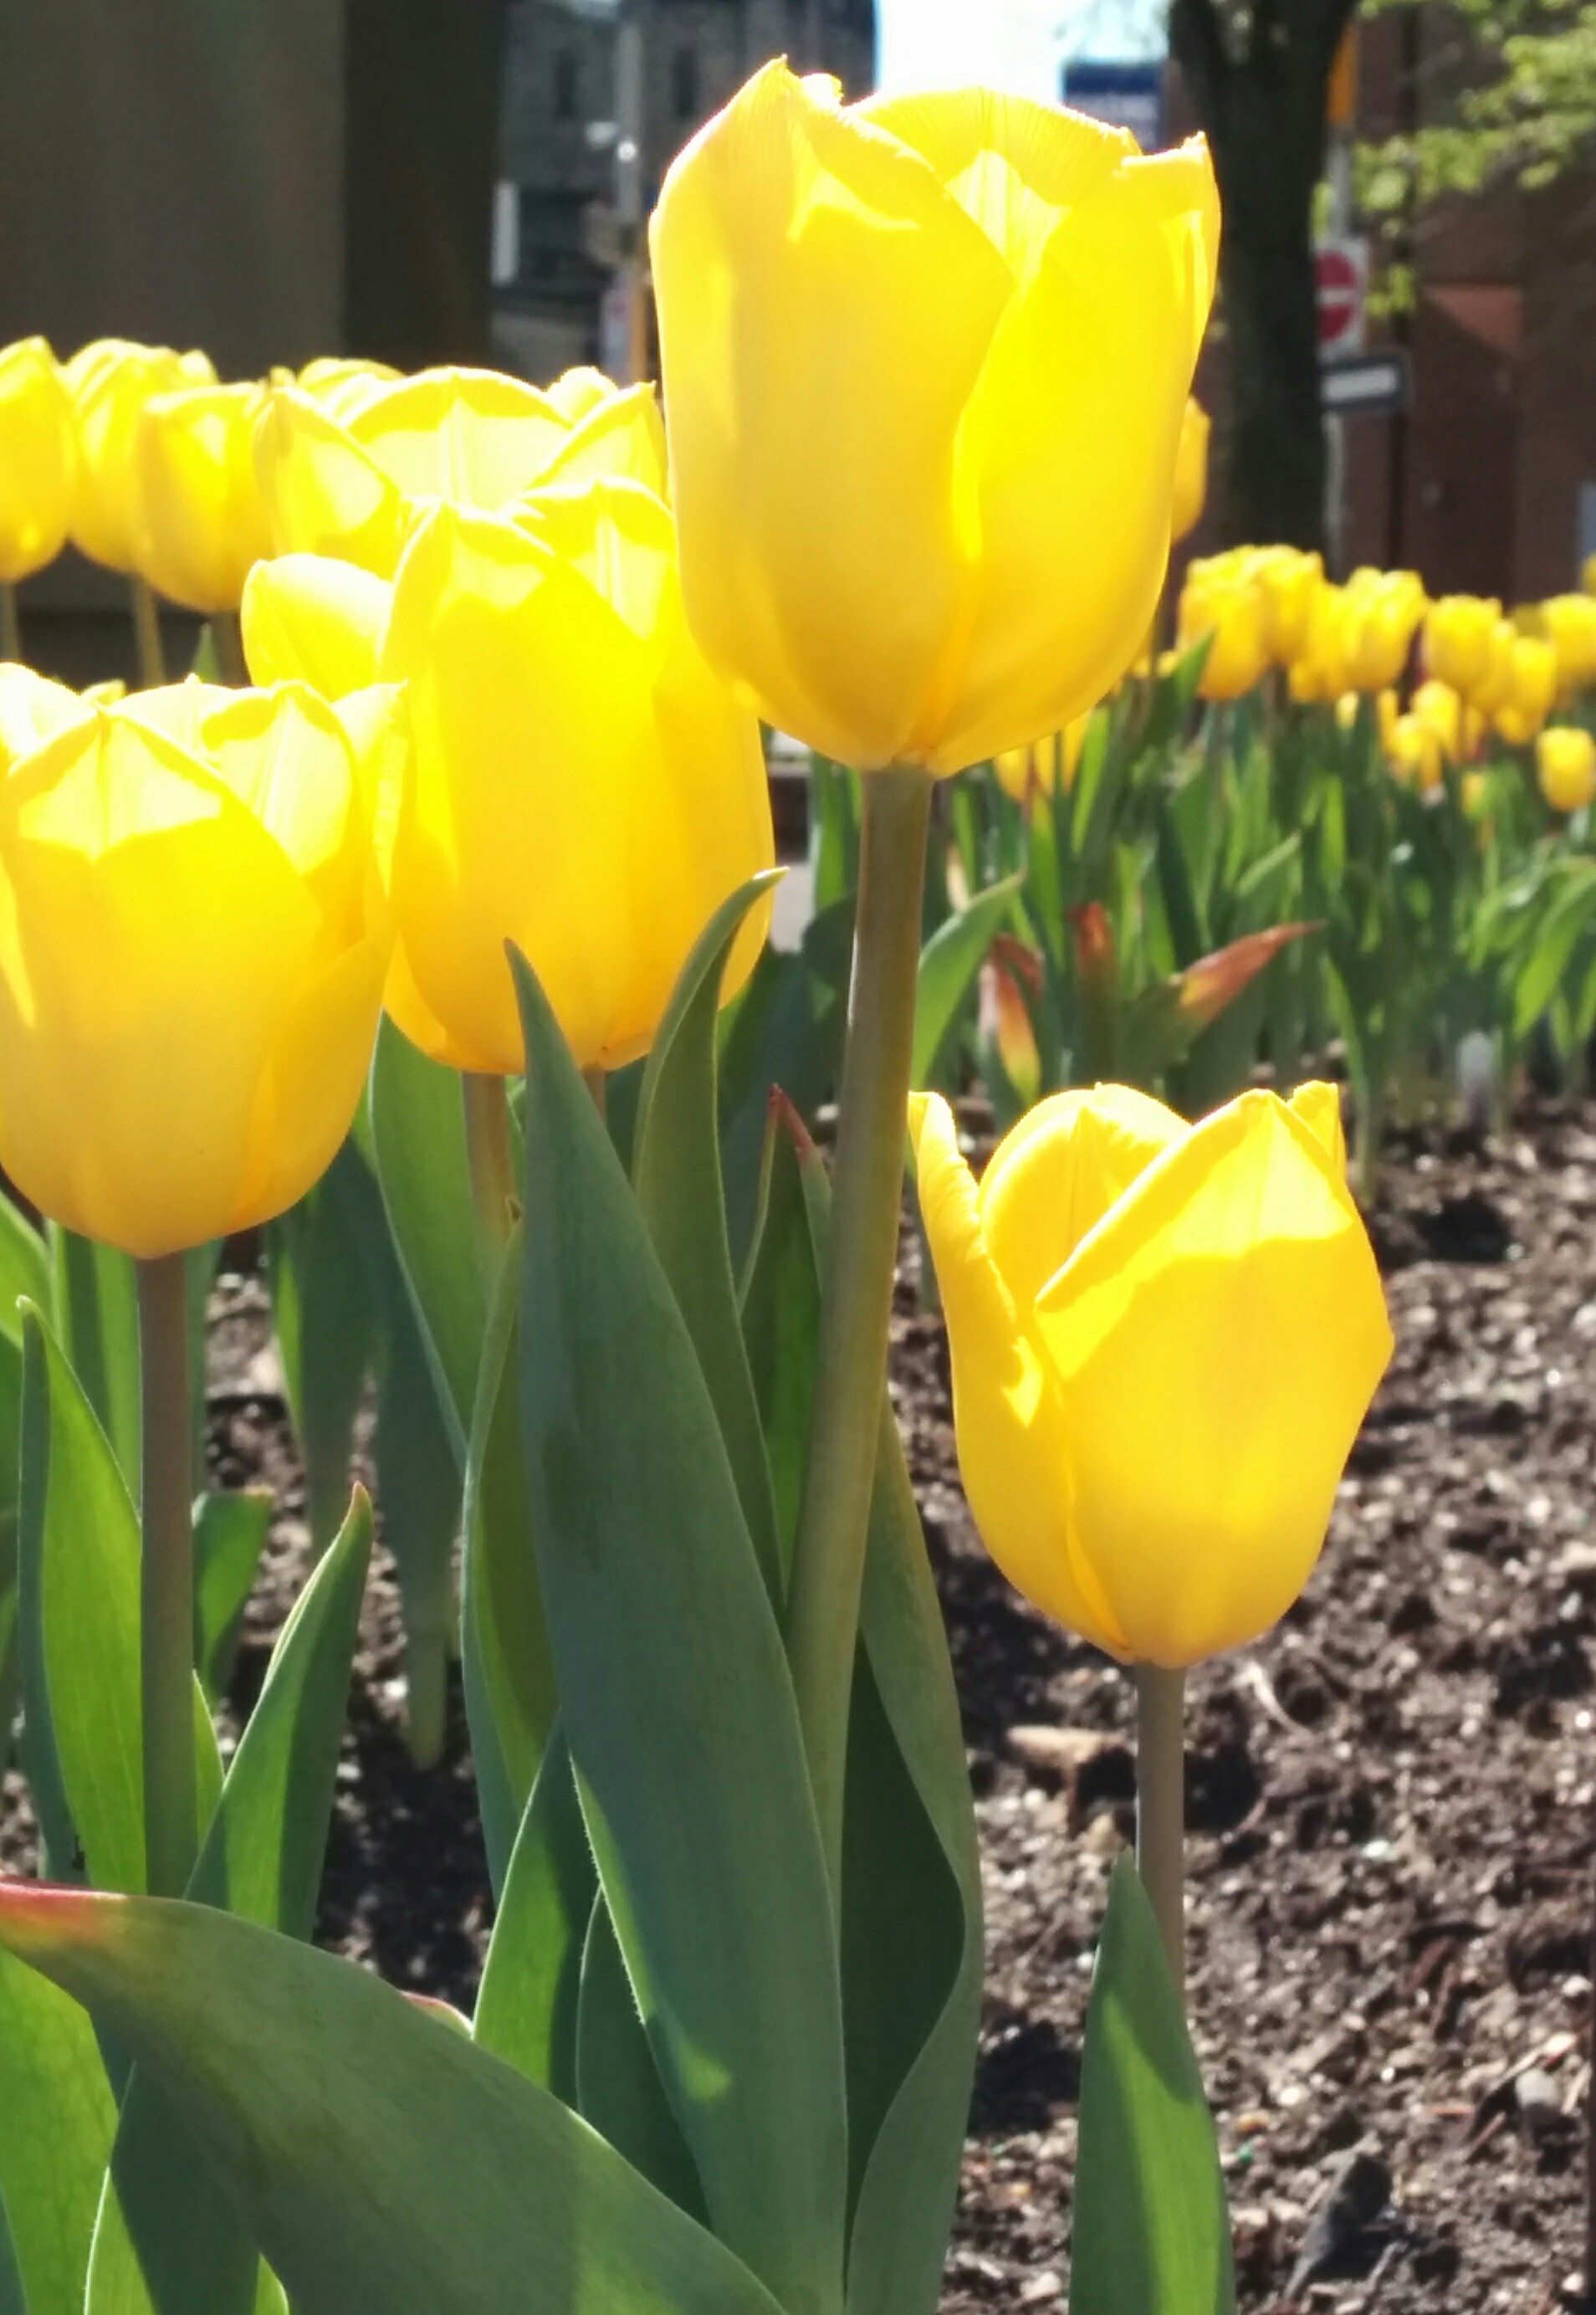
This morning we were down town having a coffee before church and I snapped these tulips in the sunshine.
Supplies:
Stamps: Promise Me, Tweet Wishes (PB)
Inks: Memento Dandelion, Cantaloupe, Bamboo Leaves & Olive Grove markers (Tsukineko)
Creative Dies: Triple Banner
Cardstock: Fabriano 100% cotton hot pressed watercolour paper, Neenah Classic Crest Avon Brilliant White 110lb smooth, Penny Black Olive Grove Mix & Match Papers
Also: Crochet Trim ribbon (May Arts Ribbon)
Two Tulips
Posted: May 11, 2014 Filed under: CAS, Dainty | Tags: CAS, Faber-Castell Albrecht Durer Watercolour pencils, Penny Black creative dies, Penny Black stamps, Tsukineko Memento inks 8 Comments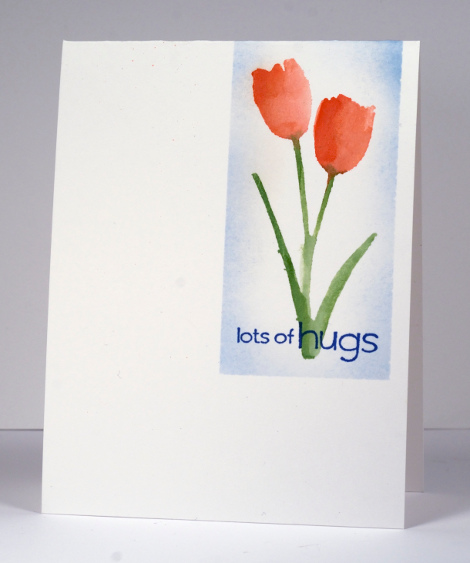
When I set out to make this card I had two things in mind. I wanted tulips to mark the beginning of the Tulip Festival here in Ottawa and I wanted to use the current sketch at CAS(E) this sketch. I did not plan to make it one layer at all; the sketch really looks like at least a two layer to me. I made a stencil in masking paper (removable grocery sticker paper) with the new tulip die from Penny Black. It’s called ‘Dainty’ and I can see myself reaching for it often. I stuck the mask down and painted with a waterbrush picking up colour from watercolour pencils. I did not lay down too much ‘paint’ or water; the card base is not watercolour paper so I didn’t want it to warp or soak through to the back.
My daughter came along at this point and commented on my ‘floating tulip’. It did need grounding; I just hadn’t worked out a method at that point. Anyway, I left it as I had promised to take my daughter shopping for a dress to wear to her Academic Dinner on Thursday. We arrived at the mall at 4:30 clueless that it was going to close at 5:00! First store, second dress, happy girl, thankful mother.
I came back to my card, masked and sponged a frame around it then looked for a suitable sentiment. My plan was to stamp the sentiment in green so it would double as some grass but none of my green inks matched the leaves. I was about to settle for less than the best green when the it occurred to me that a dark blue might work. It did.
And the card just happens to also work for the One Layer Simplicity challenge, Fabulous Flowers.
Supplies:
Stamps: Sweet Wishes PB)
Dies: Dainty (PB)
Inks: Memento Summer Sky, Danube Blue (Tsukineko)
Pencils: Albrecht Durer Watercolour Pencils Vermillion 117, Sap Green 167 (Faber-Castell)
Cardstock: Neenah Classic Crest Natural White 110lb smooth












