
Mooneys Trees
Posted: October 6, 2023 Filed under: baby blue leaf embossing folder, Echidna Studios, Mooneys Trees, Paper Rose, Taylored Expressions, weathered | Tags: Echidna Studios, gel press, gel printing, Paper Rose, Taylored Expressions 6 Comments
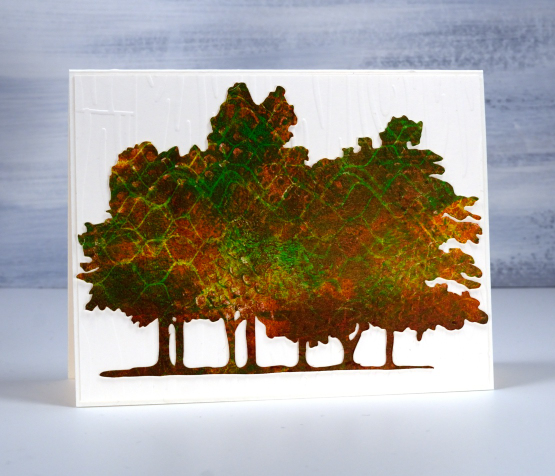
If you live in the same city as me you might have walked past these trees, sat under them or perhaps photographed them. My daughter worked from her own photo to create some digital stamps in different forms. Check out the sketch style, outline, silhouette and simplified version in the Echidna Studios etsy store. The set is named Mooneys Trees because they are growing in Mooneys Bay park.
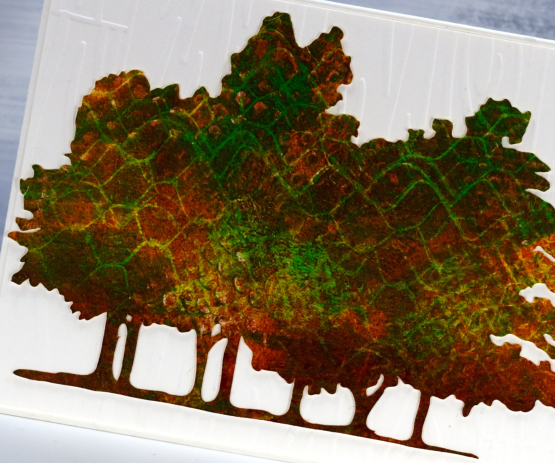
I used the simplified version to cut several pieces to gel print on. As you can see the trees fit on a 5.5″x4.25″ card base so I was able to print patterns on them on a 5×7 gel plate. If you are on IG you can watch a very short video of me printing the one above.
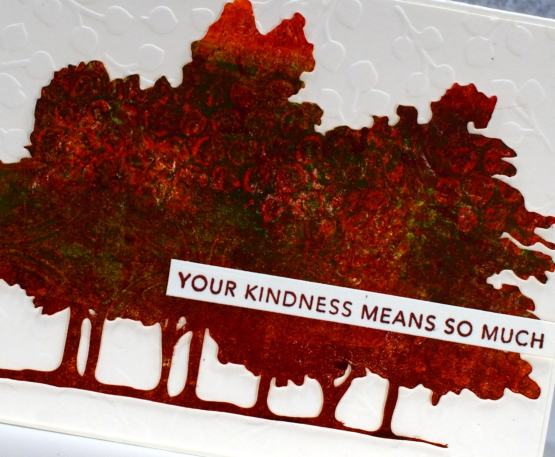
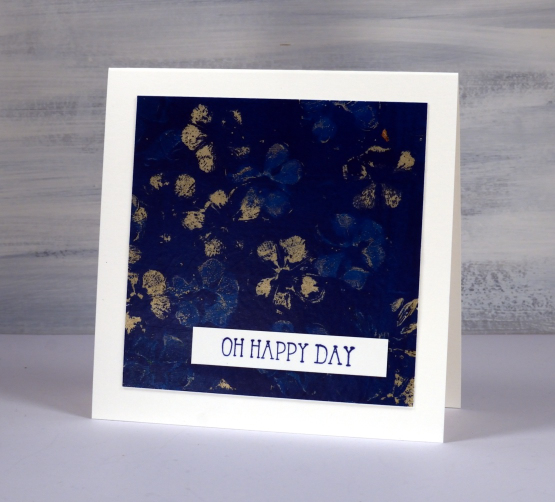
All the trees featured in this blog post were made by printing three layers of paint on top of each other, letting the paint dry in between layers. I varied the paint colours and texture on each layer. On the card above you might be able to pick out bubble wrap and textured cardboard patterns.
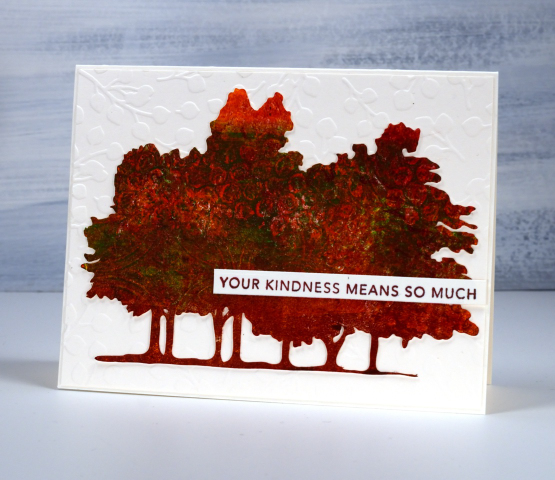
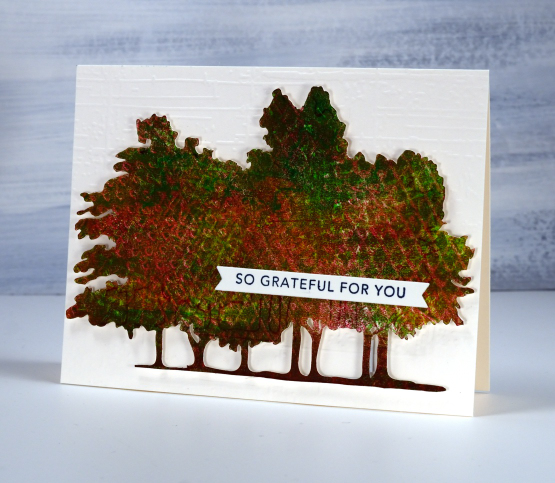
On the card directly above and below I used hessian (burlap) to add one texture as well as cardboard packaging on another layer. I also had plastic trays featuring criss-cross patterns to press on the gel plate.
Each printed tree cutout is attached to an embossed panel of cardstock. Only one of the tree cutouts is popped up because that task had too much of a fiddliness factor! The embossed background below is called ‘weathered’ from Taylored Expressions. The embossing folder used on the card at the top of the page is ‘baby blue’ from Paper Rose Studio and the embossing folder on the second card is from Close to my Heart but I don’t know the name; it creates the look of a wooden fence.
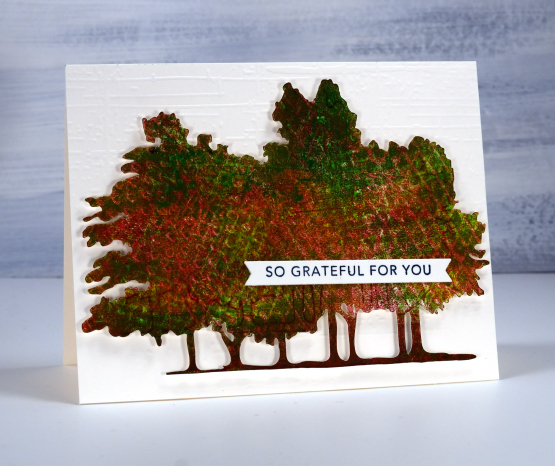
The two sentiments are from Taylored Expressions ‘simple strips background stamp‘ which stamps 18 sentiments to be cut out with the co-ordinating die. I really enjoyed making cards featuring local trees which are changing colour right now and of course I loved gel printing the cutouts to look autumnal.
My blogpost today features affiliate links to Scrap’n’Stamp. If you buy through these links I receive a small commission at no extra cost to you.
Gelprinted Phlox
Posted: October 5, 2023 Filed under: gel press, Taylored Expressions | Tags: gel press, gel printing, Taylored Expressions 2 Comments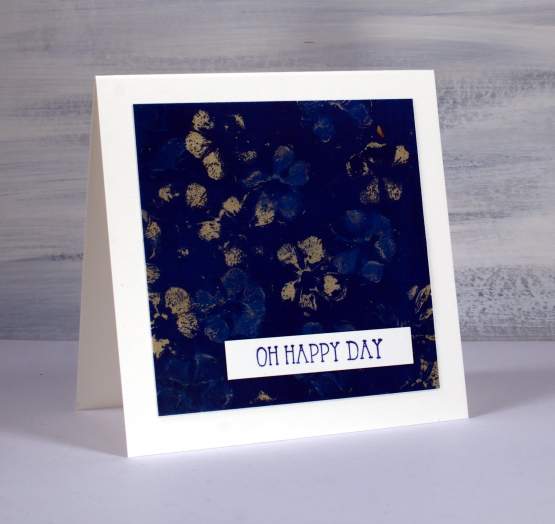
Yes, it’s another floral print from the gel plate. For this one I used phlox from my garden. I found that the phlox came apart quite easily so what I ended up doing was grabbing the little flowers that make up a whole flower head and stamping them individually. It took a little more time to press the flowers onto the plate one by one but the resulting print was very pretty.
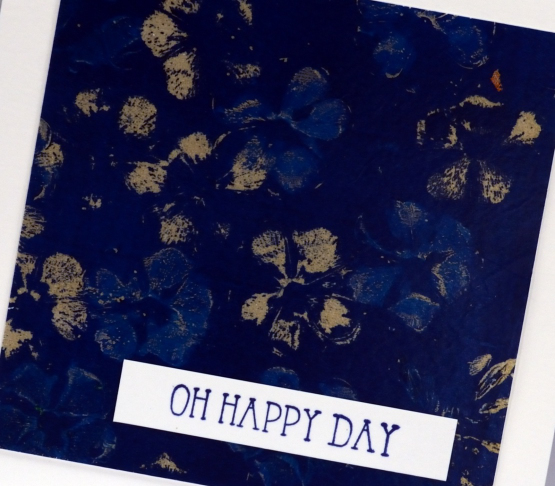
When you look closely you will see the flower prints are two different colours, tan and blue. I brayered dark blue paint on the plate then pressed the little phlox flowers into the paint. As I pressed a flower onto the plate it removed paint leaving an empty flower shaped space. If I immediately pressed the flower onto the plate again it left a blue print because the petals were already covered in paint and wouldn’t remove much more until I ‘stamped’ the paint off on scrap paper. I picked up the print with shimmery pale gold paint which shows through where the flowers removed more paint.
To see my technique for gel printing with flowers check out my recent youtube video.
I used the print to make an anniversary card for a lovely couple celebrating their 55th wedding anniversary. Once again the sentiment from Taylored Expression stamped in versafine clair twilight ink said it all.
My blog features affiliate links to the following companies. If you buy through these links I receive a small commission at no extra cost to you.
Gel Print Floral Card Combos – Video
Posted: October 2, 2023 Filed under: gel press, Tutorial | Tags: gel press, gel printing, Tutorial, video 2 Comments
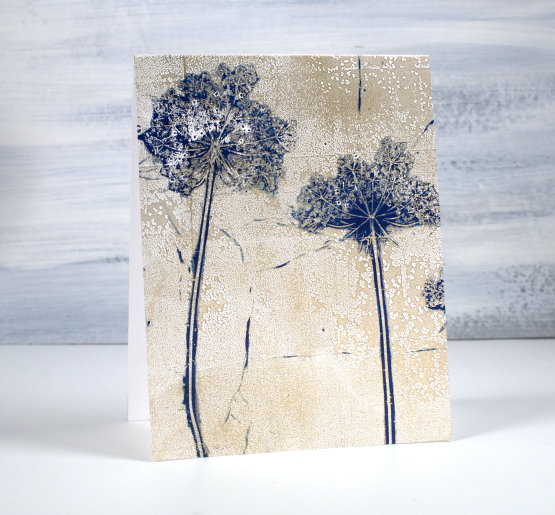
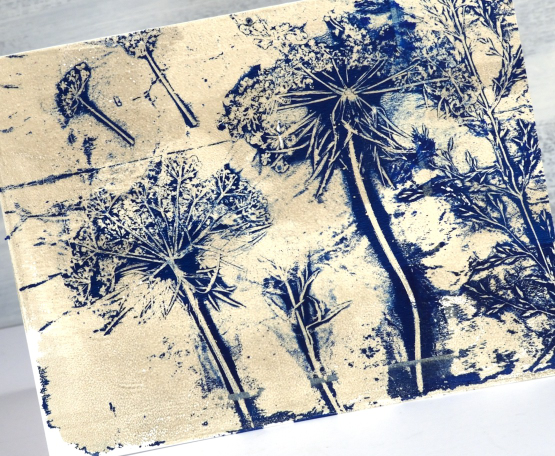
One of my favourite things to print on a gel plate is flowers. One of my favourite flowers to print is Queen Anne’s Lace. You might think, as I did, that Queen Anne’s Lace would be too fragile to print but it is surprisingly strong and the gel plate picks up all that delightful detail.
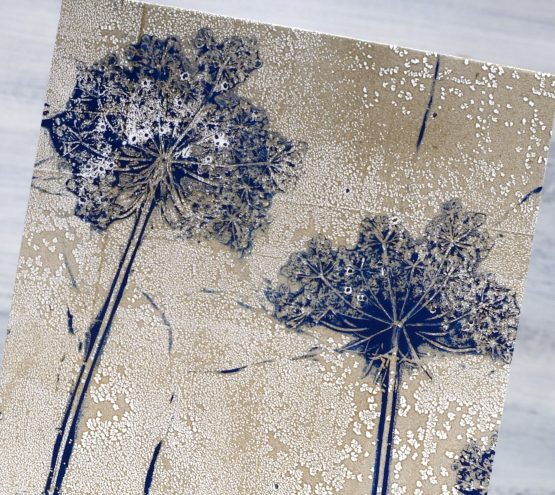
I don’t always print an envelope and card front in one go but it is a nice way to get a matching pair. I used a 9″x11″gel plate to easily fit both. I mention in the video that you can print the flowers over and over; the paint that clings to the flower head makes it sturdier rather than pulling it apart. The first few prints might leave some seeds on the gel plate and print but that just adds to the realism in my opinion.
Thank you to those of you who subscribed to my youtube channel last week. I am slowly building my community of subscribers again after losing my first channel. There are some of my early gel printing videos on the new channel marked with a ‘from the archives’ label and there is a gel printing playlist if you want to binge the lot.
If you don’t have a gel plate large enough to pick up a card front and envelope in one print you could always do two prints one after the other keeping your paint colours the same.
Below are a few more card and envelope combos I’ve printed using this same technique with a sticker to mask a space larger enough for the address.

You can see on this card featuring Queen Anne’s Lace and grasses that the print does not reach to the top of the card front. I guess I didn’t press down evenly when taking the print.
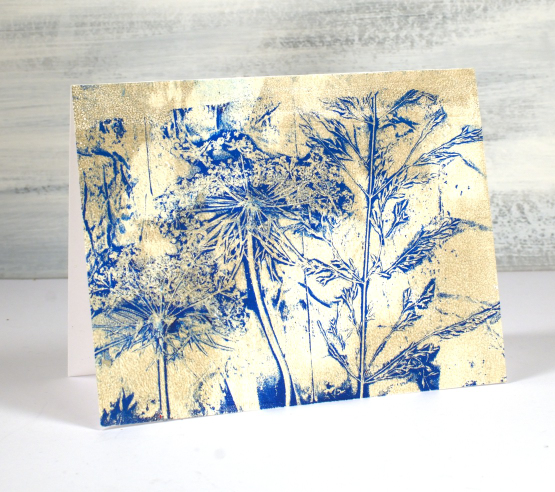
Of course you can make co-ordinating card and envelope prints using any pattern; it doesn’t have to be plants but when I have plants, not snow in the yard I like to choose plants. I’ve also used stencils.

I hope you give this technique a try; it makes an eye catching bit of mail to send. Make sure you use removable stickers to mask your address box; you can probably guess why I mention that!
If you are new to gel printing check out my online course Gel Print Journey to learn all the basics and try all sorts of patterns and combos.
Oops; I forgot your birthday
Posted: September 28, 2023 Filed under: Classes, gel press | Tags: Classes, gel press, gel printing, online class 2 Comments
My family and friends know I have issues with remembering birthdays in a timely manner. I combined a vintage sewing pattern image with a partial gel print to send an apologetic belated birthday greeting.
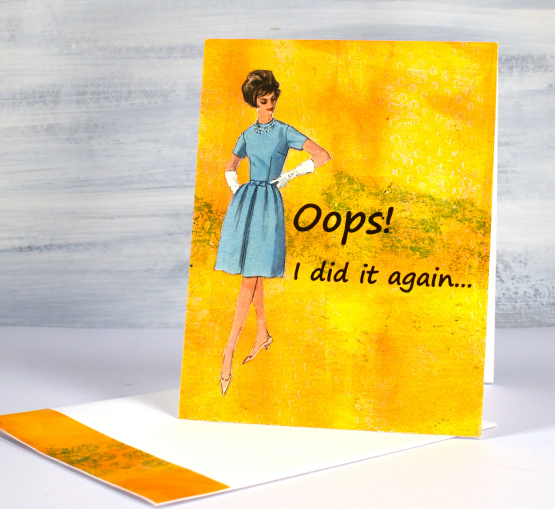
Combining vintage pictures or photos with gel prints on a card is an idea I got from my friend Betty. She has made many clever cards using the same combo. Now that I have made one of my own I’m going to have to do it again, hopefully not due to a missed birthday!
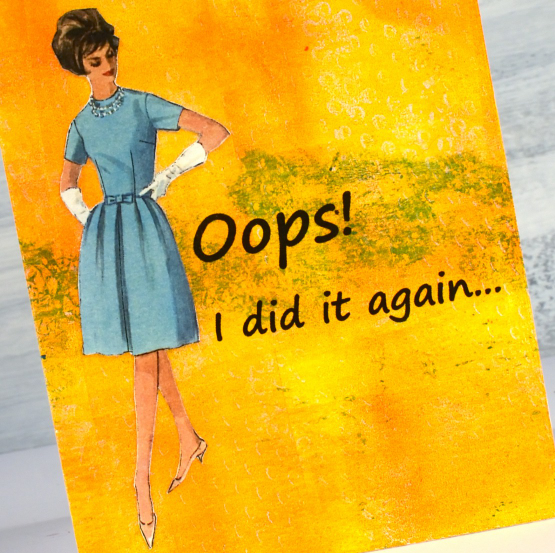
I’ve been prepping for my next Art Journal Adventure class which features images from vintage sewing patterns so that is how I happened to have this fashionista backed and cut out. The bright orange print is one from my online Gel Print Journey class and the contrast turned out to be a winner. Since I am talking about classes please check out my Classes page and if any of the online courses capture your interest use the code ENDOFSUMMERSALE at checkout for a 20% discount during September.
To be notified about future classes join my mailing list CLICK HERE.
Artsy Alcohol Ink on the Gel Plate
Posted: September 26, 2023 Filed under: Alcohol Ink, artsy stems, Darkroom Door, gel press, Tim Holtz | Tags: Alcohol Ink, Darkroom Door stamps, gel press, gel printing, Ranger Alcohol Ink 4 Comments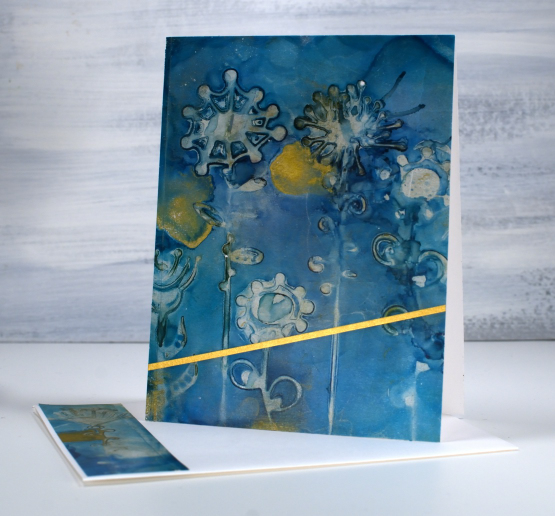
I have a couple of cards made from alcohol prints on the gel plate which is the technique feature in my last two youtube videos. I love the colours in this one and the funky patterns made using die-cut artsy stems, which are Tim Holtz dies.

The technique used in the recent youtube videos involves stencils not die-cuts but the effect is the same when the die-cuts are cut from stencil film or similar thin non-porous material. I use films from Grafix, either matte duralar or craft plastic.
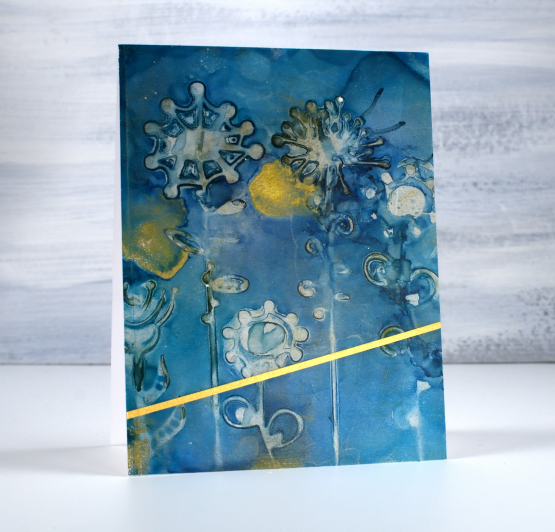
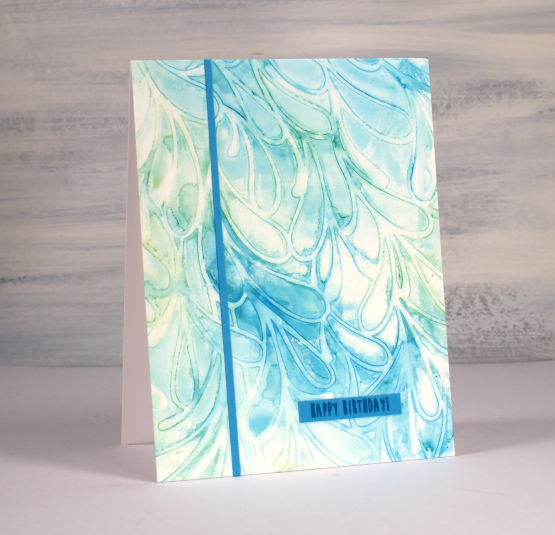
I can’t remember the exact inks I used for the panel above but my guess is a deep blue such as glacier as well as some gold mixative or alloy ink. I pulled the print with the transparent gold paint used in this video so the panel has a subtle shimmer to it in real life. I loved the pattern so much I decided to add the narrow strip of gold but no sentiment.
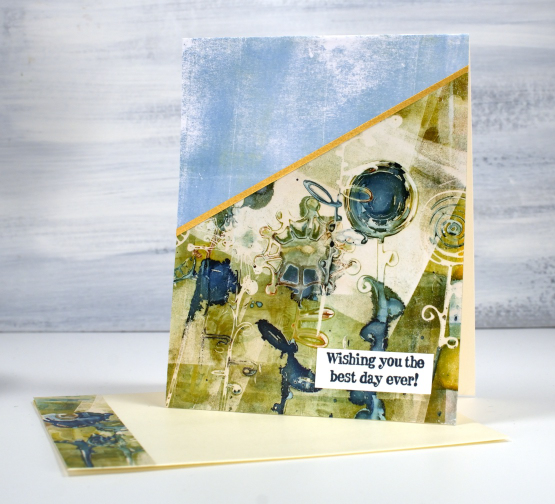
The second card was also made using alcohol inks on the gel plate but is a more grungy print due to the mix of green and cream paint used to pull the print and the mix of yellow, green and blue alcohol inks used to make the pattern on the gel plate.
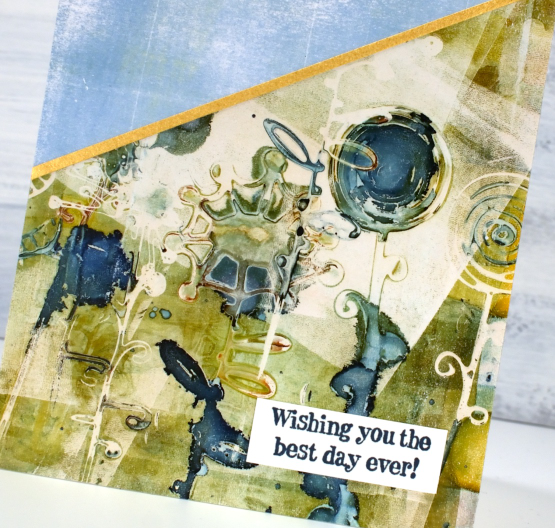
Rather than use the whole panel I added a simple blue gel printed piece to the top of the card front and once again a gold strip of cardstock. The sentiment is from the Darkroom Door happy birthday set.

I hope you enjoy these two examples of what can be made from alcohol ink gel prints. Let me know if you try the technique.
This post features affiliate links to the Scrap’n’Stamp. If you buy through these links I receive a small commission at no extra cost to you.
More Alcohol Inks on the Gel Plate
Posted: September 25, 2023 Filed under: Alcohol Ink, Dies, Flutters, gel press, Lavinia, Penny Black, pods stencil, Taylored Expressions | Tags: Alcohol Ink, gel press, gel printing, Lavinia, Penny Black creative dies, Taylored Expressions 1 Comment
Using alcohol inks and stencils on the gel plate is a bit of an addiction for me right now so I filmed another one to show you. A friend let me know that if you receive my blog posts by email the video doesn’t show up in the email. To see the video just click on the title of the blog post and it will take you to my blog. If you would like to subscribe to my youtube channel too that would be delightful.
I started this print with the Lavinia pods stencil already covered in ink and then added more ink and isopropyl alcohol when it was on the gel plate. Take a look at the video below to see the process.
I would love to hear if you try this technique. As I mentioned last week I like pulling the prints with paper or cardstock because they are surfaces that I wouldn’t normally use with alcohol inks.

The finished card does include most of the print; it is a larger size than my usual A2 cards. I decided to add the Penny Black dragonflies in the wine colour which matches the alcohol ink I added very sparingly. In retrospect you will probably agree I could have added more. The sentiment is from Taylored Expressions ‘In and Out Birthday’ stamped in Chianti versafine clair ink.

My blog features affiliate links to the following companies. If you buy through these links I receive a small commission at no extra cost to you.
Ecstasy Crafts (Ecstasy Crafts offers a discount code heathertecs10 you can use for a 10% discount at checkout)
Alcohol Inks + Stencil on the Gel Plate
Posted: September 18, 2023 Filed under: Alcohol Ink, Dies, gel press, Lavinia, Penny Black, Tutorial | Tags: Alcohol Ink, gel press, Lavinia, Tutorial, video 5 Comments
Recently I posted a card featuring a gel print made with alcohol inks and a stencil. You can check out that card here. There was quite a lot of interest in seeing a video of my process so that is what I have for you today. One of the bonuses of this technique is the way I can make more than one print from the same initial application of alcohol ink. I worked with T-Rex alcohol inks on a 5″x7″ gel plate.

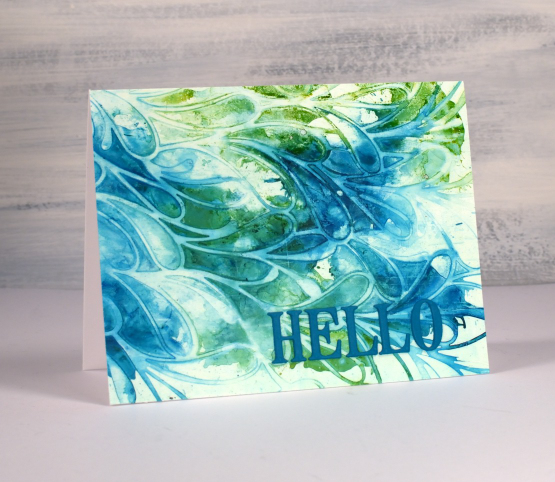
As you will see in the video the first card (shown above) is made from the first print pulled from the gel plate.
The second print pulled from the gel plate features the same inks but they are more muted because I diluted them to move them from the stencil to the plate. I quite like the softness of the second print.

If a print works for me and honestly, they don’t all work, I often don’t want to cover them up with extra decoration or die cuts. That’s why I kept these card designs very simple with just a die cut ‘hello’ added to the first card. The second print which I made into the card below features an even smaller birthday sentiment and one thin strip of the same cardstock.

One of the reasons I like to work with alcohol inks on the gel plate is the fact that I can pull the prints with a piece of paper, in the case of these prints I used printer paper. When I work with alcohol inks apart from the gel plate I generally use a thicker plastic surface such as yupo or craft plastic. The inks move beautifully on those surfaces but the plastics are bulkier and a bit more expensive so it is nice to have the gel plate + paper option. The featured prints from today’s video were done on a 5″ x 7″ gel plate which meant I could get a 5.5″ x 4.25″ card front as well as a left over strip to add to the envelope.
If you are new to gel printing in general and would like to know more about creating a range of patterned prints please consider my online class, Gel Print Journey, where I cover all the basics with acrylic paint and all sorts of patterned and textured items. If you purchase any of my online classes before the end of September use the code: ENDOFSUMMERSALE for a 20% discount.
Botanical Dream
Posted: August 30, 2023 Filed under: Alcohol Ink, botanical dream stencil, gel press, gelli plate, Taylored Expressions, The Crafter's Workshop, The Crafters Workshop | Tags: gel press, gel printing, Ranger Alcohol Ink, Taylored Expressions, The Crafter's Workshop 7 Comments
I think you’ve noticed my love of gel printing. Let me assure you it hasn’t diminished at all. Today’s card features an alcohol ink and stencil print completed on the gel plate then lifted with a layer of acrylic paint.

I’m not sure which alcohol inks I used but I am pretty sure there was a cloudy blue and a brown involved. I’ve learned to like blue and brown combos over recent years which has surprised me a bit. Often we use alcohol inks only on plastic surfaces such as yupo or craft plastic. What I like about using alcohol inks on the gel plate is the way I can lift the print with any paper at all. I plan to make a video showing this technique so stay tuned.

The lovely stencil featured here is called botanical dream from The Crafters Workshop. All the little spaces trap alcohol really well making it a great choice for this technique. I let the stencil sit on the alcohol ink pattern for a while so it dries then lift the print with acrylic paint. I finished the card with a cute greeting from the Taylored Expressions set ‘In & Out Birthday. The set is full of pretty fonts.
My blog features affiliate links to the following companies. If you buy through these links I receive a small commission at no extra cost to you.
Ecstasy Crafts (Ecstasy Crafts offers a discount code heathertecs10 you can use for a 10% discount at checkout)
Vintage Butterfly Journal page
Posted: August 8, 2023 Filed under: 49 and Market, 6"x 6" journal, Art Journal, Curators Adverts, gel press | Tags: Art Journal, gel press, gel printing 4 Comments
I recently completed this spread in my Ranger 6″x6″ kraft journal. The background or base of my page is covered in collage so by the time the page was finished very little of the kraft colour showed through.
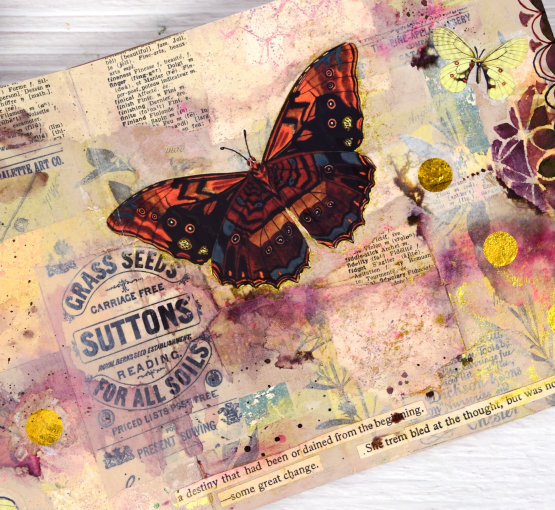
When I started this page I didn’t have a plan but I did have patterned papers on my table. I had some pink, yellow and apricot coloured gel print scraps, some yellow-green tissue paper printed with botanical images and as always, some vintage book pages. Some of the gel printed scraps were left over from the cards I featured in a post last week. I glued down the gel print scraps in no particular arrangement then began gluing the green tissue over the top. I have some fancy washi tape called ‘Curators Adverts‘ which is 4″ wide and covered in black-on-cream ads. I tore some pieces of that and added them over the paper collage.

The collaged page sat on my desk for several weeks before I resumed by adding acrylic paint in pale neutral tones including sand and old ivory. The paint began to tie the page together but it was still lacking a focal point. I flipped through the DK Bees, Birds and Butterflies Sticker Anthology and chose a few pale yellow butterflies which I added to the bottom left and top right corner.

You know I love splatter on my cards and journal pages so I added some droplets of dark brown ink, then spritzed it to dilute and move it around the page. The brown ink diluted to burgandy and pink tones which made me go back to the sticker anthology in search of a bolder butterfly. Once I had added it to the page I worked with walnut stain distress ink and Parker writing ink to add scallop patterns by hand and through the beaded mandala stencil.
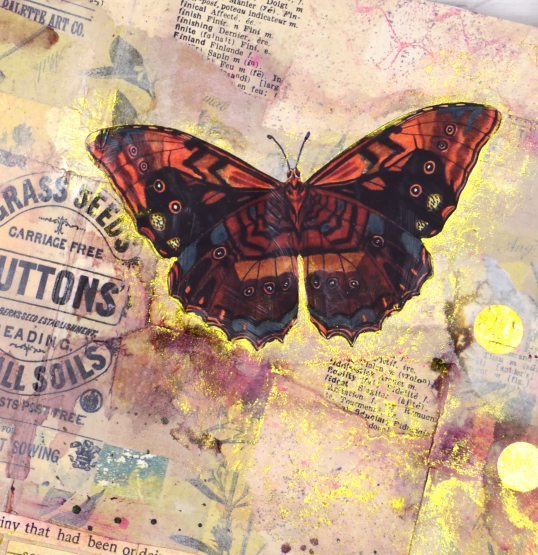
Final touches included some gold polka dot tissue paper, some sentences cut from book pages and sparkly gold watercolour paint. I really like the warm pinky brown tones of this page with some subtle yellow and green appearing sparingly. The vintage ad for grass seed is also a nice feature, centered but not the main attraction.
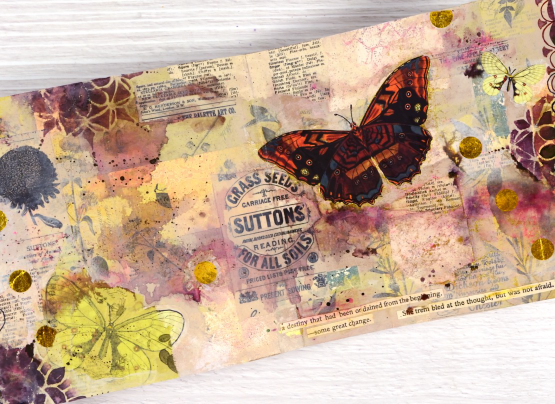
Collage is a favourite technique for me when beginning journal pages, how do you like to get started on a fresh new spread?
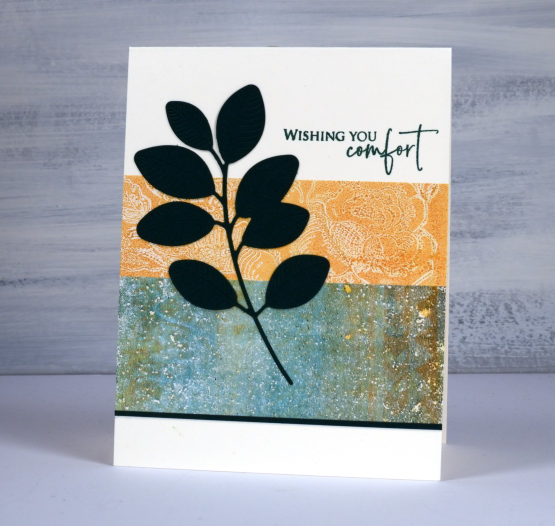
Wishing you comfort
Posted: August 3, 2023 Filed under: Branch 9 die, gel press, Moda Scrap, Penny Black, whisper | Tags: gel press, gel printing, Penny Black creative dies, Penny Black stamps 3 Comments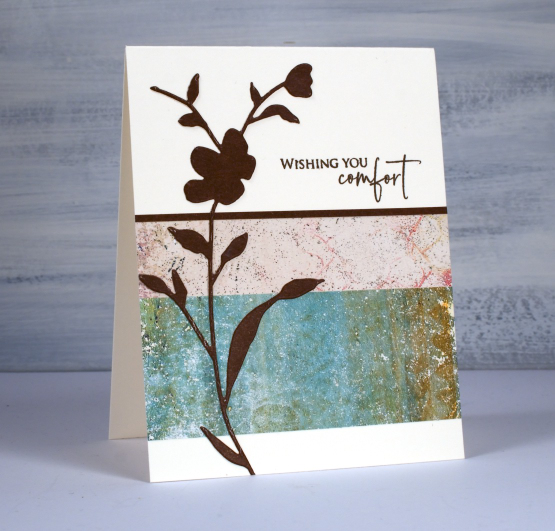
I’m always looking for ways to use my gel prints because I have many and want to make more! I found this two panel idea on Victoria Wilding’s instagram. I chose not to stamp on my prints but instead added the Penny Black ‘whisper’ die-cut over the top, a strip of cardstock along the edge and a sentiment from the PB set ‘strength‘.
If you don’t have gel prints you could use any kind of patterned paper but I would encourage you to check out my online course ‘Gel Print Journey‘ if you are interested in learning or trying new techniques.
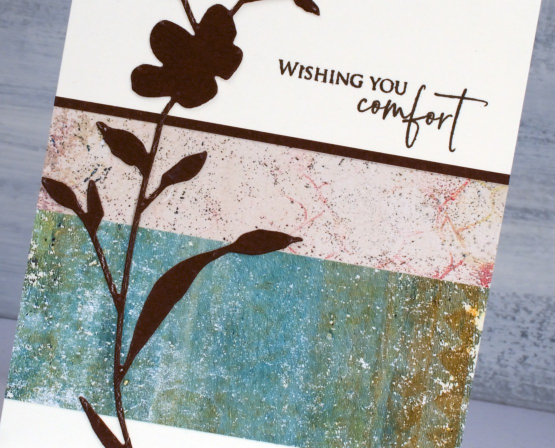
I thought the muted tones of the gel prints lent themselves to a sympathy card as did the dark brown cardstock rather than bold black.
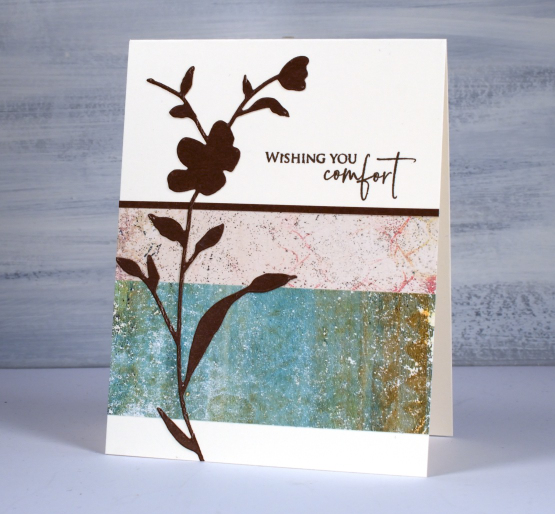
These gel prints are not very bulky as I printed on paper not cardstock. I added double sided adhesive to the back then attached the strips to the card base and trimmed off any overhanging paper.
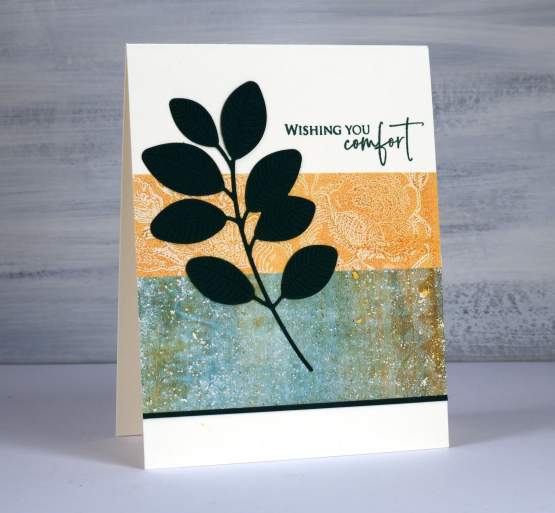
You might recognise the same greeny brown print on this second card but this time paired with a print featuring the PB background stamp, ‘bed of roses’.
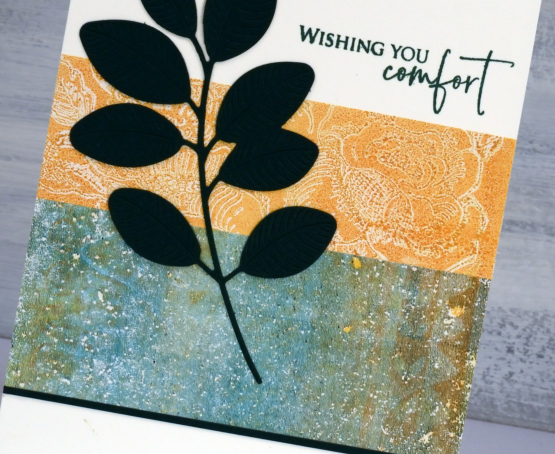
I cut both the Moda Scrap ‘branch 9‘ die and the edge strip from dark green cardstock and used a similar coloured ink for the sentiment. I know the cardstock looks black in the photo but it is truly dark green in real life.
I liked the clean but pretty effect of two gel printed strips together and was able to make several cards using bits of 6″x6″ prints. I kept all the left over scraps too; you will see them in an upcoming journal page.


