
DiOx background
Posted: November 16, 2017 Filed under: Flower sparks | Tags: distress oxide inks, Penny Black stamps 8 Comments
I taught a class a while ago where we created distress oxide backgrounds similar to this one. I began with a piece of hot pressed watercolour paper, swiped my salty ocean and fossilized amber distress oxide inks across the panel then spritzed it generously while holding the paper upright which enabled the ink to run down towards the bottom of the panel. I held it the opposite way so the lighter colour ran back into the darker. I kept doing this until I had a fully covered, blended background.

It’s hard to see in the photo but I spritzed with pearl-ex spray which created a sparkly sheen over everything. (I create my own pearl-ex spray by adding less than ¼tsp pearl-ex powder to a small spritzer full of water) Once the panel was dry I splattered some more spray over the background and dabbed it off with a paper towel to created the patchy light and dark effect.

I stamped the Queen Anne’s lace stamps from the Penny Black Flower Sparks set in fossilized amber, salty ocean and black soot distress oxide inks. To finish I attached to a white card base and added a white on black embossed sentiment. All the supplies are listed below; some include affiliate links which give me a small commission but add nothing to your costs. Anytime you feel like browsing in The Foiled Fox online store, clicking through from the Foiled Fox promo in my side bar will send some commission my way if you make a purchase. And while we are chatting about the lovely folk at The Foiled Fox I have an inside scoop: they are starting a loyalty program where you will earn ‘foxy dollars’ every time you make a purchase there. Even though it hasn’t officially begun any November purchases will count towards your future foxy dollars!
Supplies
Stamps:Flower Sparks, Happy Snippets (made by Penny Black)
Inks: fossilized amber, salty ocean, black soot distress oxide inks (Ranger) Versamark (Tsukineko)
Papers: hot pressed watercolour paper, Neenah solar white cardstock, Neenah epic black cardstock
Tools: heat tool
Added extras: interference blue pearl-ex powder
Under the trees
Posted: November 13, 2017 Filed under: under the trees | Tags: Penny Black stamps, Ranger Distress inks, Ranger Distress stains, Tsukineko Versafine inks 5 Comments
So many of the stamps from the ‘Be Merry’ release are suitable for seasons other than winter and occasions other than Christmas. For this card I used the ‘under the trees’ stamp, masked out the little critters, snowflakes and gift and chose a warm colour scheme to make an autumn card. I stamped the ‘under the trees stamp in versafine vintage sepia ink. I cut a little post-it mask to protect the area where the critters and hanging snowflakes were as well as wiping ink off the circles in the sky so they wouldn’t stamp either. I left the stamp in the stamp positioning tool for re-stamping later. I began by paint a pale wash of tumbled glass distress stain over the whole piece of hot pressed watercolour paper keeping the edges darker than the centre. I added some forest moss, crushed olive, mustard seed, spiced marmalade painting around the trees and ground as well as painting some loose background trees into the damp panel.
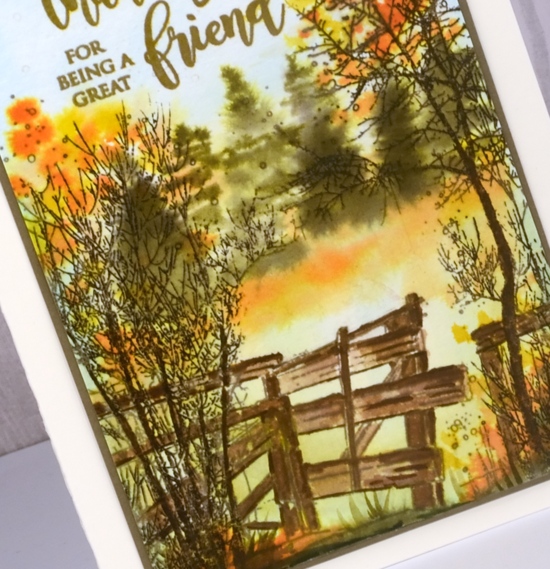
I dried the panel before painting the wooden fence so the distress stains would not bleed out of the stamped image as in the background area. I used gathered twig and vintage photo distress stains to paint the fence then dried the panel again so I could restamp in the stamp positioner. By the time I had added all the blended colour the original stamped trees and bushes were less prominent so I inked them with a ground espresso marker and re-stamped and then painted over until they stood out once more.
To finish it off I stamped a sentiment from Penny Black’s ‘happy wishes’ set in fossilised amber distress ink then versafine vintage sepia several times over the top.
Supplies
Snowy Perch
Posted: November 8, 2017 Filed under: Snowy Perch | Tags: Faber-Castell Albrecht Durer Watercolour pencils, Penny Black stamps, Ranger Distress inks 14 Comments
This little bird and its snowy perch are all part of one stamp. It took me a bit of playing to work out how I wanted to colour the stamped image. I have another card to share where I took a slightly different approach. I started by stamping the whole stamp with antique linen distress ink. Using a pale ink with a detailed stamp helps me see the whole image so I can add colours one by one using a stamp positioning tool. I coloured with both a mix of inks added to the stamp and watercolour pencils added to the stamped image. I inked the branch and twig sections of the stamp with several brown inks (listed below) and blended the stamping with water.
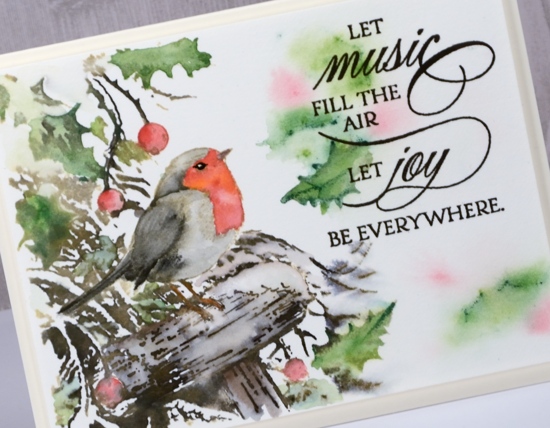
I used a wet paintbrush to pick up colour from watercolour pencils to apply colour to the bird, berries and leaves. By working wet into wet I was able to paint a lighter colour first then add either a darker colour or more of the same colour to darken a shadowed area. You can see I added a lot more water to the leaves on the right hand side so they appeared less prominent and more suitable as a background for the sentiment. Once all the colouring was finished I used a fine tip black pen to make sure the eye stood out. I trimmed the panel then popped it up on craft foam.
Thanks for dropping by.
Supplies
Stamps: snowy perch, sweetest moments

Inks: antique linen, vintage photo distress inks (Ranger), versafine vintage sepia, espresso truffle memento marker (Tsukineko), black micron pen (Pigma)
Paper: 100% cotton hot pressed watercolour paper (Fabriano)
Pencils: juniper green, sap green, dark carmine, light orange, black & cold greyIV Faber Castell Albrecht Durer watercolour pencils
Bright night
Posted: November 4, 2017 Filed under: peaceful winter, snowy village 11 Comments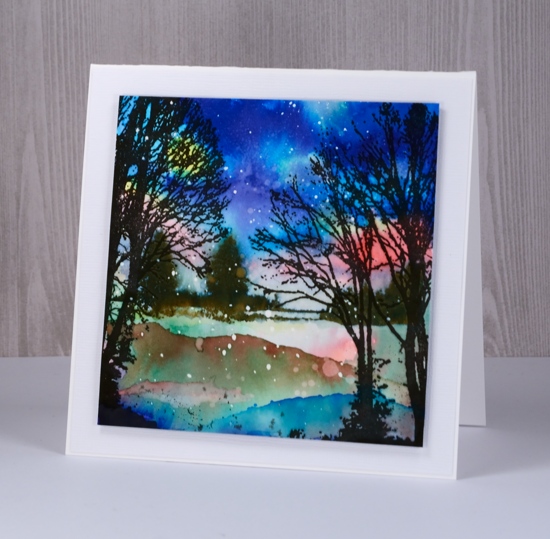
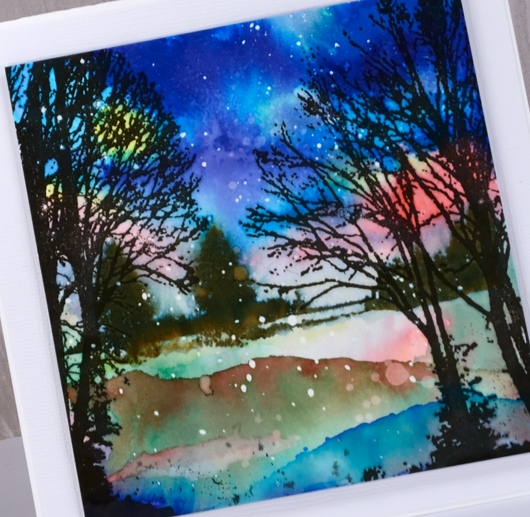
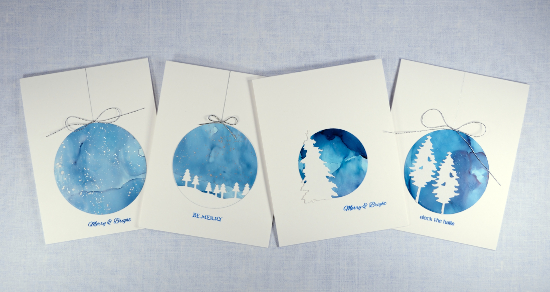
Would you believe some new tree stamps join my collection? You can never have too many! These two artistic silhouettes are not two halves of the same tree as you might first think but two separate stamps by Penny Black which come in a set of three, Snowy Village, including a little village stamp that would look cute in the distance between the two trees. My scene leans a little more to the whimsical side of things with a multicoloured starlit landscape.
I started by splattering masking fluid over a piece of hot pressed watercolour paper. When it was dry I used a stamp positioning tool to stamp the two large trees on either side of the panel. The stamp positioner made it possible to stamp several times with versafine onyx black ink so I had completely black images. Once the ink dried I began painting with a range of Ken Oliver’s colorburst powders. I tapped a tiny bit out of a bunch of bottles into a palette then added a drop of water when I was ready to use that colour. I began by painting a section of water in the middle of the panel which stayed fairly light as I added colour above and below. I used mainly blues and pinks above the horizon with a spot of yellow here and there. Below the horizon I added more green and painted some hard edges to suggest gullies and rises. I let the panel dry a bit but not completely before I stamped a strip of distant trees in memento northern pine ink. The strip of trees is from another new PB set, Peaceful winter. As the panel was still damp the background trees softened and bled into the surrounding area.
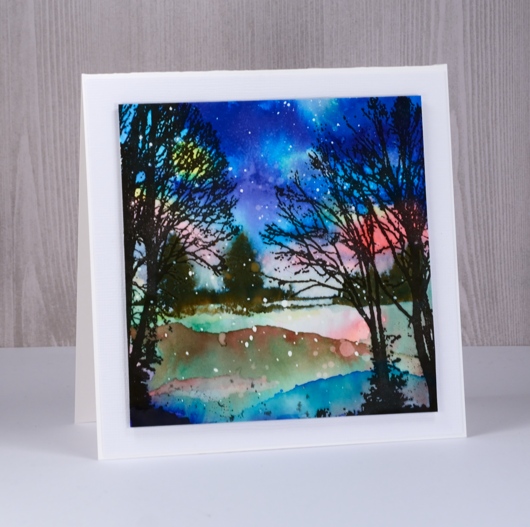
To finish the scene I splattered water then soaked it up again with a paper towel to get some ghostly dots then splattered a bit of black over the base area. It was tricky deciding whether to mat or not but I ended up popping it up over a white card base.
My inspiration for this bright scene was a painting I saw on Pinterest; you can see the artist’s work here.
Supplies
Stamps: Snowy Village, Peaceful winter (made by Penny Black)
Inks: versafine onyx black, memento northern pine (made by Tsukineko)
Paint: Colorburst ultramarine blue, indigo, cerulean blue, tangerine, terre verte, pthalo green, chartreuse, burnt sienna, fuchsia
Papers: Neenah solar white 110lb, Fabriano hot pressed watercolour paper, white textured cardstock
Also: Pebeo drawing gum
Thank you for your kindness
Posted: November 2, 2017 Filed under: Leaves, Woodgrain 22 CommentsIt is nice to be back with my family in Canada, back in my workroom and back on my blog. Before I talk about today’s card, however, I would like to thank you, my blog readers for the outpouring of kindness I received in the comment section last month when I let you know my mother had died. I read every message; my dad did also and we deeply appreciate the time you took and the words you wrote to me and my family. I am grateful for your prayers, your thoughts and your words of understanding. Many of you shared that you have been through the same sadness. All you of you wrote to me with such kindness and concern that I feel very blessed to be part of such a caring community. I waited until I returned home to respond as I wanted to make a thank you card to post here on the blog along with my heartfelt thanks. I’m sorry it isn’t a real life card turning up in your mail box but it is made especially for you all the same. I recognised many names but there were many others who commented for the first time just to extend their sympathy to me; thank you all for taking the time. My father left his thanks to you, my blog readers, in a comment on that post; it is towards the end of the comments section if you care to pop back and read it.
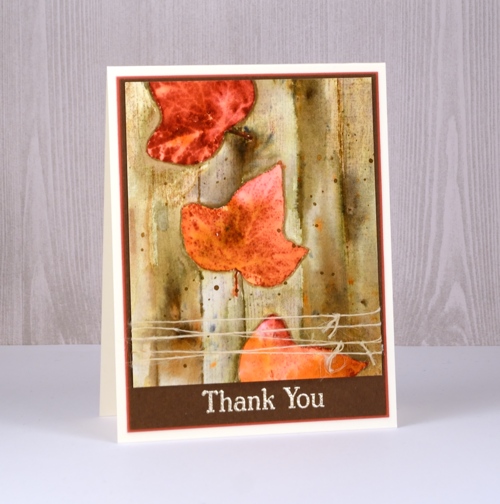
While I was in Australia I enjoyed some warm weather extending my summer by a few weeks. When I returned to Canada I was surprised to find many trees with leaves still changing colour and a yard full of leaves still to be collected. My first full day back was delightfully warm – sandals weather actually – but that seems to be over now; the temperatures have fallen along with a whole lot of rain! My card is inspired by the season here at home and stamped with Darkroom Door stamps. I used a leaf from the Leaves set and the woodgrain background stamp.
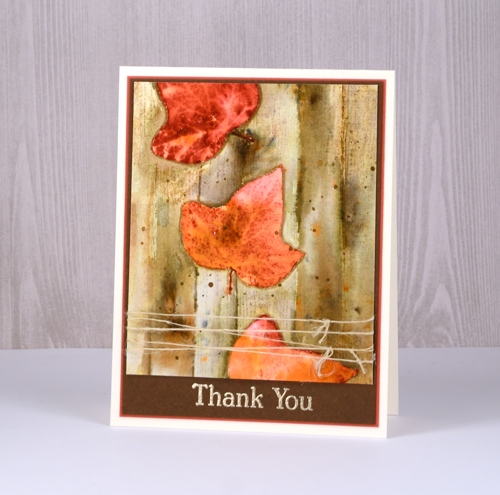
I stamped the leaf three times on hot pressed watercolour paper without re-inking in between, that way I was able to get a dark red, medium and a pale red impression (inks listed below). I stamped the leaf on post-it notes also and cut them out to use as masks. With masks in place I inked the woodgrain stamp in three shades of brown and stamped over the leaves. With all the stamping done I switched to painting using a small watercolour brush and some water to blend the distress inks. As I blended I sprinkled some brusho into the leaves and later onto the woodgrain to add some extra shades of colour and appearance of texture.
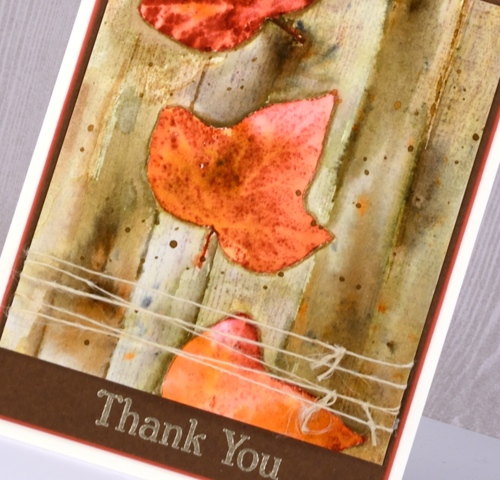
The panel is matted with two different browns and the sentiment stamped then embossed with platinum embossing powder. Its the first time I’ve used platinum and it seems to have co-ordinated well with the brown tones. I hope its one of those magical tones that looks good with a whole range of colours. I finished off the panel by wrapping some vintage French twine around then attached it all to a natural cardbase.
Thank you, again for your kindness; I read through your comments again as I wrote this post and I’m sure will I return to them in the future.
Supplies
Stamps: Leaves, Woodgrain, Thank you (made by Darkroom Door)
Distress Inks: frayed burlap, fired brick, antique linen, vintage photo (made by Ranger)
Paint: brusho sandstone & light brown
Papers: Neenah natural white 110lb, Fabriano hot pressed watercolour paper, brown toned cardstock
Also: versamark ink pad, WOW metallic platinum superfine embossing powder
Watercolour pencil: Faber Castell Albrecht Durer raw umber
Alcohol Ink Baubles – a tutorial
Posted: October 8, 2017 Filed under: Alcohol Ink, baubles, inspired, tall trees, trees and hills | Tags: Penny Black creative dies, Penny Black stamps, Ranger Alcohol Ink, Tsukineko Versafine inks 22 Comments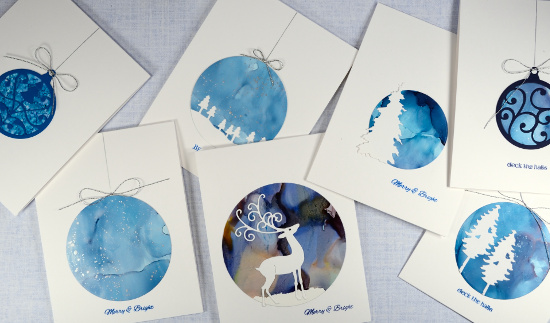
I am happy to finally have a video tutorial to share with you today. It’s been a while I know. This one I created for Splitcoaststampers “Falliday Fest”.
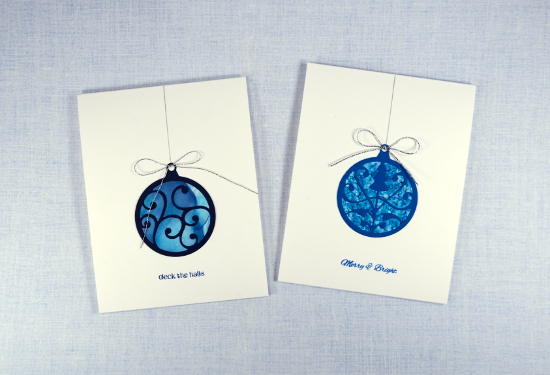
The card designs are very simple, the intricacy is in the patterns the alcohol ink makes.
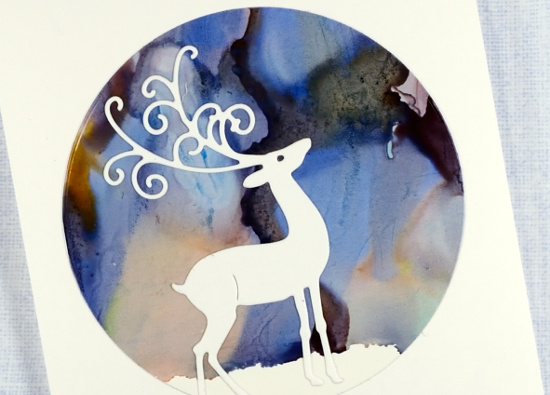
I included several different methods of making alcohol ink patterns and also a few ideas for making the patterned panels into cards by die cutting circles to turn into baubles or snow globes. Method one involved blending alcohol inks on a non-stick craft sheet then swiping a piece of yupo paper through the ink to create a pattern. In method two I used a felt applicator with dots of alcohol ink on it to apply ink to the yupo paper. Method three was alcohol ink applied directly to the yupo paper. You can see all three methods in detail on my video tutorial below.
This post includes affiliate links to The Foiled Fox online store. At no extra cost to you I will receive a commission if you make a purchase after clicking a link to The Foiled Fox from this blog. The affiliate links are a new feature on my blog. I have been working with The Foiled Fox for quite a while now and I can recommend their store wholeheartedly. They have an extensive range of art and craft products and prompt and helpful service (also lovely packaging!)
Supplies:
Stamps: holiday snippets (Penny Black)
Dies: baubles, tall trees, nature’s creatures, inspired, trees and hills (all Penny Black), circle dies
Inks: stream, pool, stonewashed, shell pink, cloudy blue, denim, silver, snow cap, eggplant, lemonade alcohol inks (made by Ranger) majestic blue versafine ink & deep lagoon versafine ink
Paper: yupo paper, neenah solar white paper
Also: silver cord
My Mother
Posted: September 28, 2017 Filed under: Uncategorized 129 Comments
My dear mother passed away earlier this week and I am now in Australia with my family. She died peacefully with my father and brother by her side. My mother was a faithful, loving, wonderful wife, mother, sister, Nanna and friend. She is now in the presence of Jesus, her saviour whom she loved and trusted throughout her 82 years. I am so blessed to have had such a loving, prayerful, unselfish role model and friend.
Peaceful moments
Posted: September 25, 2017 Filed under: peaceful moment | Tags: Brusho, Penny Black stamps, Ranger Distress stains, Tsukineko Versafine inks 5 Comments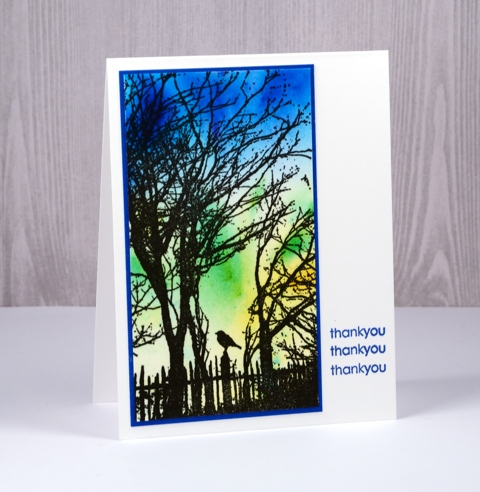
Sometimes when I am planning classes or just trying new stamps or techniques I end up with a pile of ‘experiments’ which were not what I had hoped for but were still worth saving. They often go into the ‘pile of possibility’ to be used later. From time to time the ‘pile’ gets so big I have to throw some experiments away because I know I will never actually choose to do anything with them. Today’s cards were made from panels stamped with the ‘peaceful moments’ stamp.
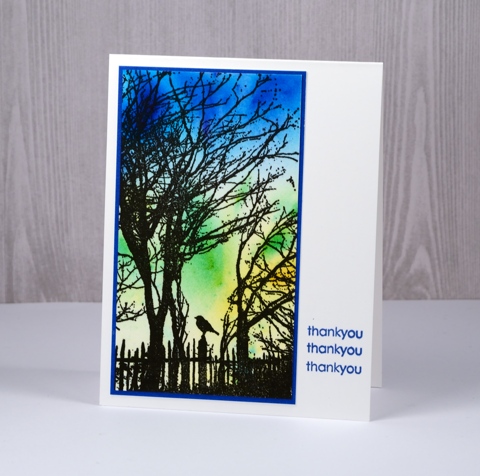
This thank you card was created by stamping the peaceful moments stamp over a brusho background. I sprinkled brusho on a craft mat, spritzed and swiped my watercolour paper through it. I matted and stamped the sentiment three times in a co-ordinating colour.
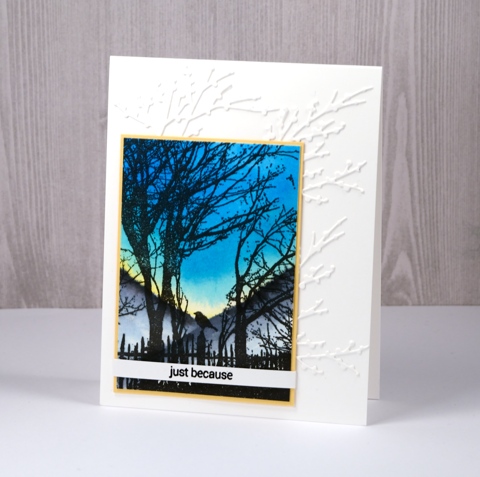
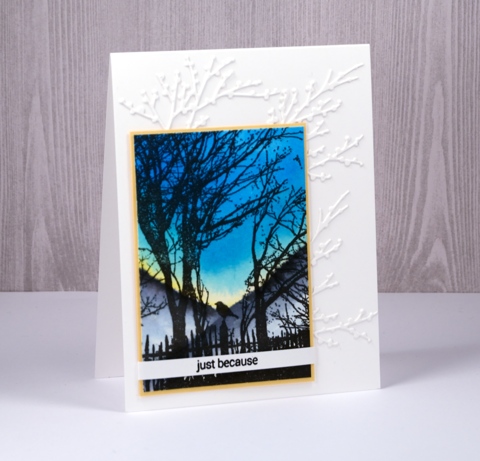
The order for the just because card was a little different because I needed the image stamped first before I could paint the background. I stamped in versafine onyx black ink then painted a ‘V’ of yellow, a strip of pale blue then topped that with a darker blue. Once that was dry I painted grey hills below the sky. I matted in yellow then embossed a sentiment on a thin strip of cardstock to wrap around the panel. For added texture I attached some branch die cuts to the card base.
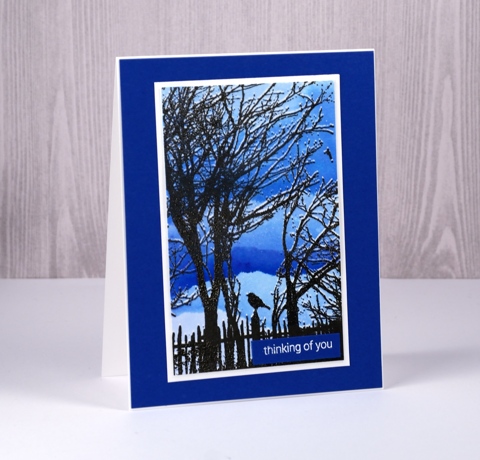
I used the embossed offset technique (described here)to create the thinking of you card then painted hills in blueprint sketch distress stain across the background, some were diluted and blended others I kept an hard edge and strong colour.
I hope these few cards give you a few ideas for working with silhouette stamps.
Supplies
Stamps: peaceful moment, snippets
Dies: winter branch
Inks: versafine onyx black, versamark, danube blue memento ink (tsukineko) scattered straw, tumbled glass, weathered wood, black soot, blueprint sketch distress stains (ranger)
Paint: brusho
Paper: hot pressed watercolour paper
Also: white embossing powder, clear embossing powder
Season’s greetings
Posted: September 21, 2017 Filed under: Berry speckled | Tags: Fabriano Watercolour Paper, Penny Black stamps, Ranger Distress inks, Ranger Distress stains, Tsukineko Memento inks, WOW embossing powders 4 Comments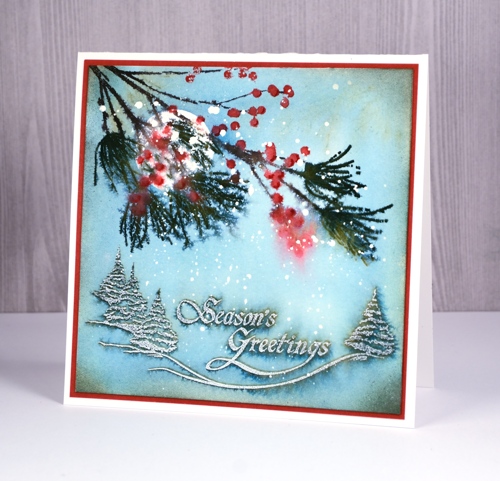
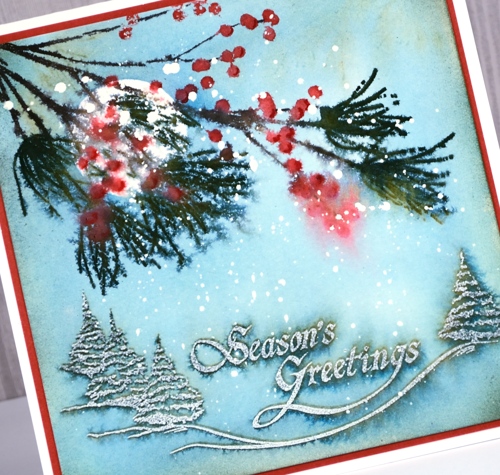
I have yet more snow on the blog today with this wintry berry branch over a snow dusted sentiment. The look is a little vintage again but with muted colours rather than lots of brown. I have some old Christmas cards of my mothers tucked away somewhere I should pull them out because this look reminds me of some of them.
I began with a splattering of masking fluid over a piece of hot pressed watercolour paper. Once dry, I positioned the panel in a stamp positioning tool and stamped the ‘tree & greeting stamp’ from ‘A Festive Season’ set in memento northern pine ink. I removed the panel from stamp positioner but left the stamp in place. In the top left corner I stuck a circle of frisket film to mask a moon shape then painted over the whole panel with water. Colour bled out of the northern pine ink and started filling the panel; I added faded jeans distress stain so I could cover the whole piece with diluted blue/green colour. Once the panel was dry I removed the mask and placed the panel back in the stamp positioner away from the ‘tree & greeting’ stamp so I could place the ‘berry speckled’ stamp to overlap some of the moon. I inked and stamped one colour at a time with the following markers: berries – candied apple distress marker, needles – northern pine memento marker, and branch & twigs – espresso truffle and rich cocoa memento markers.To soften the look of the branch I spritzed it and let some colour bleed into the surrounding area. When dry I added shadows on the berries with the bullet tip of the candied apple marker.
Supplies
Tweet conversation
Posted: September 20, 2017 Filed under: tweet conversation | Tags: Dr Ph Martin Hydrus watercolor paints, Penny Black stamps, Tsukineko Versafine inks 3 Comments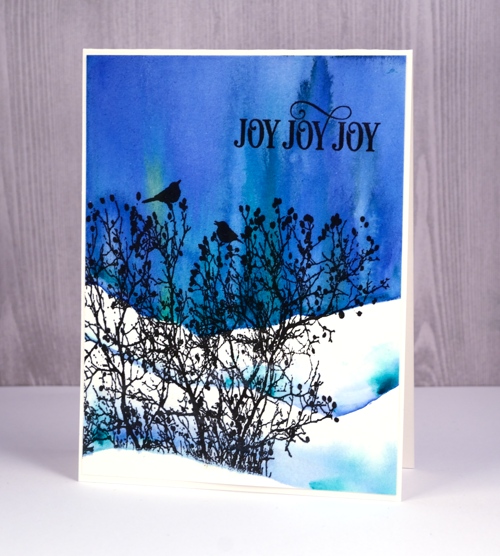
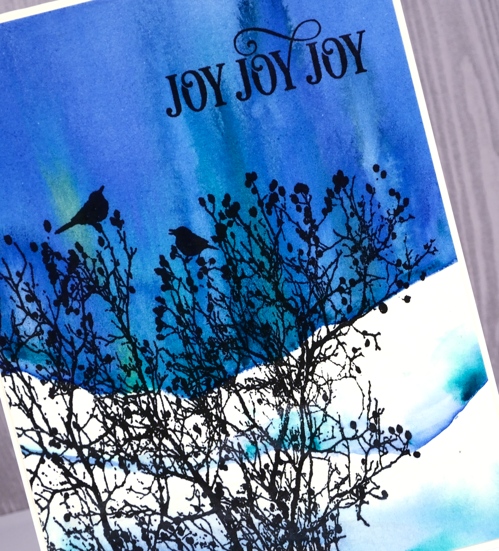
To finish the card I trimmed the panel, added a sentiment in black and attached to natural coloured card base.
Supplies
Stamps: tweet conversation, joyful wishes (PB)
Ink: versafine onyx black
Paint: Hansa Yellow light, Phthalo green, Ultramarine Dr Ph Martin’s Hydrus watercolours,
Paper: hot pressed watercolor paper


