
Purple Iris
Posted: February 14, 2017 Filed under: Pure Iris | Tags: Penny Black stamps, Tsukineko Memento inks 13 Comments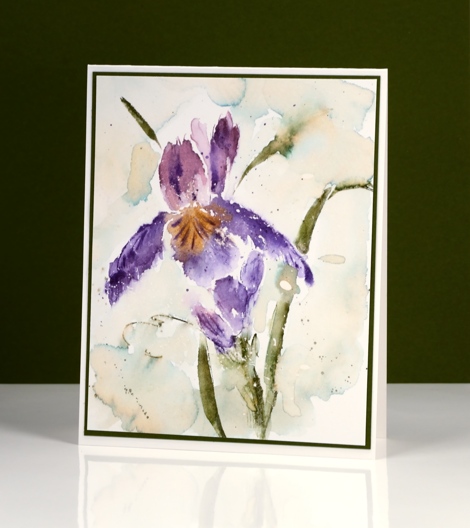
This iris card is a project from last year; it features one of my favourite techniques for brush stroke stamps: inking with memento markers. You could use any water soluble markers I imagine, it is easy to apply colour to the stamp with them and their water solubility makes it possible to get nice colour blends. I stamped on a piece of hot pressed watercolour paper which I had splattered some masking fluid over.
I began with some drips of water on the watercolour paper panel. I inked the stamp with the markers listed below, spritzed the stamp and used the MISTI to stamp on the panel. Wherever the stamp hit the water droplets it bled into the surrounding area. I also blended the ink with a paint brush and water. When the panel was almost dry I stamped again in purple and green to get some extra definition on the leaves and petals. To frame the iris I painted some very diluted northern pine ink around the background then waited for it to dry again before adding some splatter.
I remember when I did made this panel I ended up stamping several at the same time; some ended up darker and more defined, others were pale and looser. It all depended on how much ink and water I applied to the stamp.
Thanks for dropping in; I’ll be back tomorrow with brand new stamps from Penny Black!
Supplies:
Stamps: Pure Iris(PB)
Inks: Memento Cantaloupe, Grape Jelly, Sweet Plum, Olive Grove, Pistachio (Tsukineko)
Cardstock: Hot pressed Fabriano watercolour paper, Olive Green cardstock
Also: masking fluid
Stillness
Posted: February 2, 2017 Filed under: Stamped Landscapes, Winter Ledge | Tags: Penny Black stamps, Tsukineko Memento inks, WOW embossing powders 12 Comments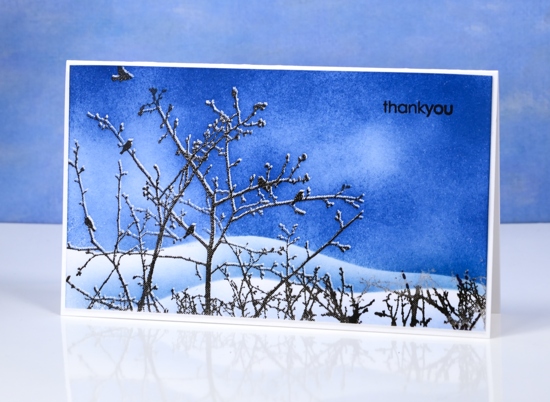
After a week of balmy temperatures hovering around zero, we are back to real winter weather again and bright scenes like this one. Winter here is often prettiest when it’s the coldest.
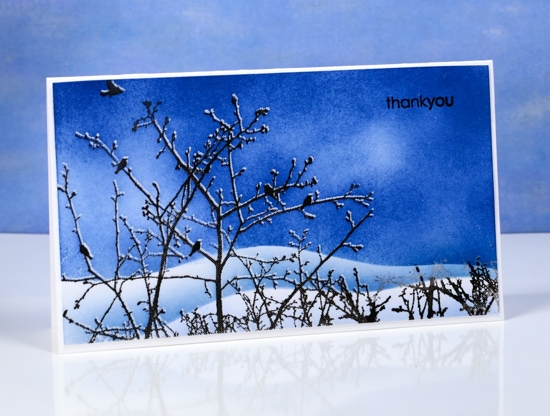
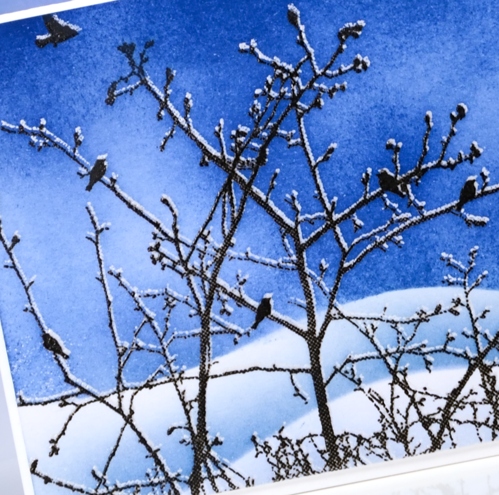
I stamped and embossed this scene using ‘winter ledge’ and a stamp positioner so I could get the thin layer of snow on the branches. The trick to this is to stamp first in versamark then move the cardstock up ever so slightly then stamp in pigment ink, in this case versafine onyx black. Once the panel is stamped twice you can emboss both images at once. The embossing resists ink once you sponge or paint over the top. I sponged this scene in memento Danube blue ink creating snowy hills behind the branches with post-it note masks.
I hesitate to say that I hope you are all staying warm as I know our family in Australia have been wishing for a little respite from the heat. I hope you are enjoying the weather, whatever the weather, whether you like it or not!
Supplies
Stamps: winter ledge, snippets (PB)
Inks: versamark, versafine onyx black, memento danube blue (Tsukineko)
Papers: Neenah solar white
Also: clear embossing powder
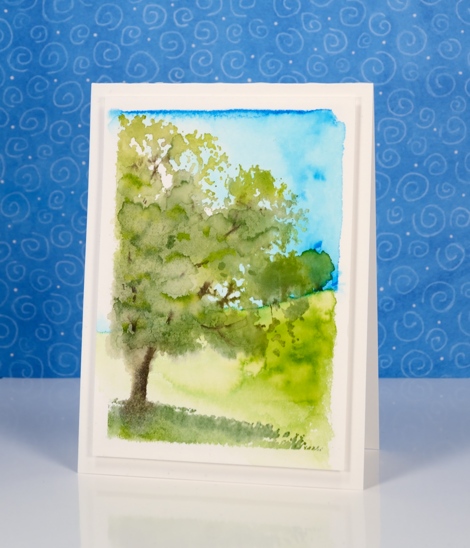
African Trees 2 Ways
Posted: January 23, 2017 Filed under: African Trees, Darkroom Door | Tags: Darkroom Door stamps, Ranger Distress inks, Ranger Distress stains, Tsukineko Memento inks 14 Comments
I have something new to share with you today, some stamps from my homeland! No, not Africa, Australia. The images are of African trees but the stamps themselves are from Darkroom Door in Australia. I have recently added Darkroom Door designs to my teaching schedule so I will also be sharing some projects here on the blog. My first class with Darkroom Door stamps is in February; it features these trees and you can find it on my Upcoming Classes page.
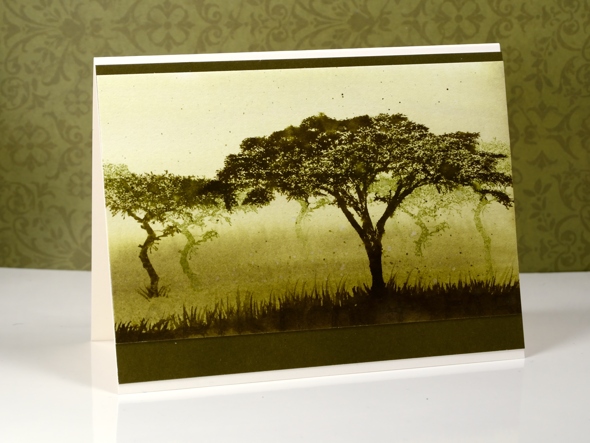
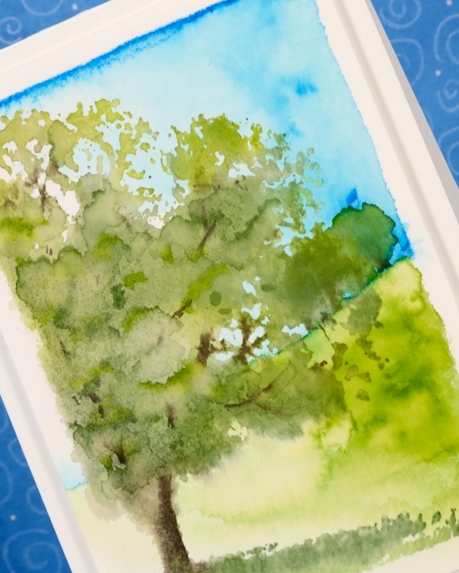
I decided to make two cards of similar design but with different techniques. On the one above I painted a distress stain background to create a graduated wash then stamped the trees in distress inks. I did first and second generation stamping to get some paler more distant trees. I stamped and spritzed the darker foreground trees then painted grass at the base.

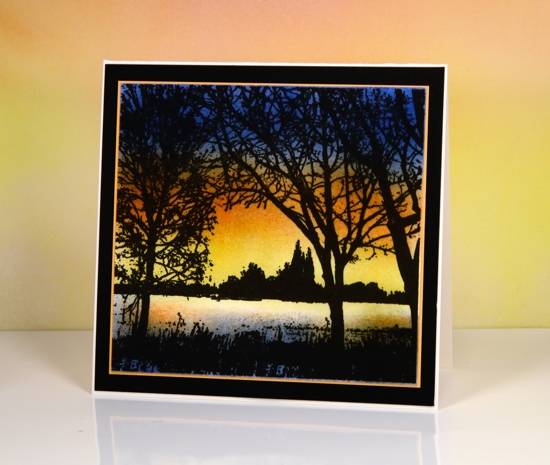
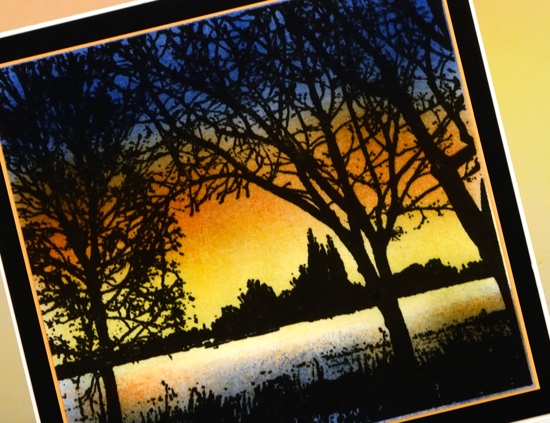
The second card doesn’t include any watercolouring. I began by brayering a pale green sky, dark at the bottom and pale at the top. I used first and second generation stamping again to add background trees then sponged some ground at the base and stamped darker trees followed by even darker ground. I like the misty feel of this one; I haven’t been to the African plains but I think maybe they look a bit like this in the early morning or perhaps when its very dry and dust is in the air.

Supplies:
Stamps: African Trees (Darkroom Door)
Inks: Memento new sprout, bamboo leaves, olive grove (Tsukineko) & Distress peeled paint, forest moss stains and inks (Ranger)
Cardstock: hot pressed watercolour paper, neenah natural white cardstock, co-ordinating green cardstock
Magnolia
Posted: January 7, 2017 Filed under: The Unfolding | Tags: Penny Black stamps, Tsukineko Memento inks 20 Comments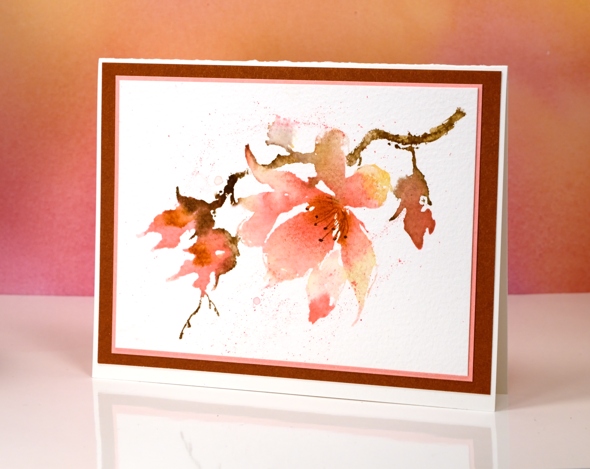
I thought I’d share a spring bloom even though it will be a long time before we see any around here. We are experiencing serious winter weather right now; we’ve got plenty of snow, plenty of ice and plenty of cold! I’m sure I will be creating more wintry scenes in the weeks ahead because although cold outside, it is also beautiful.
To create this watercoloured magnolia I inked the ‘unfolding’ stamp with memento markers, spritzed the stamp and stamped on cold pressed watercolour paper. I used a brush to blend colour within the petals and stems and to splatter some ink over the stamped image. Creating such a loose print meant that the sepals on the stamp were lost so I drew them on after the stamping dried.

Supplies:
Stamps: The Unfolding (PB)
Inks: potter’s clay, espresso truffle, cantaloupe, rose bud memento inks (Tsukineko)
Cardstock: Fabriano 100% cotton cold pressed watercolour paper, coordinating cardstock for mats
Let it snow
Posted: October 31, 2016 Filed under: Skis 'n' sled, Woodland Beauty | Tags: Penny Black creative dies, Penny Black stamps, Ranger Distress inks, Tsukineko Memento inks 11 Comments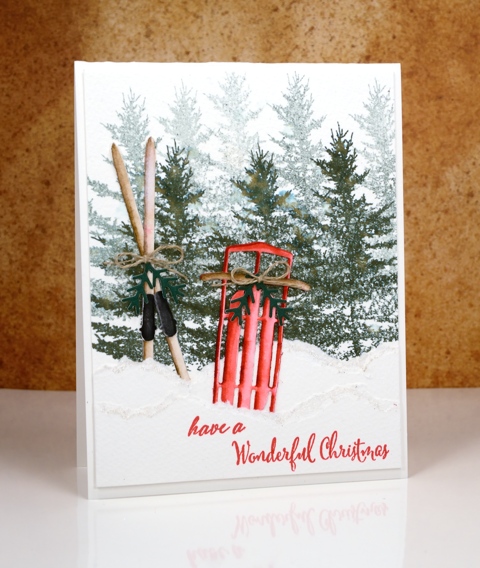
I am writing this post from sunny warm Australia while my Ottawa family is sending me photos of the snow that has already fallen. I have a series of ‘Winter Warmth’ posts this week featuring dies and stamps from the latest Penny Black releases. I chose to pair watercoloured die-cuts with watercoloured backgrounds to make some indoor and outdoor winter scenes. You might think that sledding or skiing is not a particularly ‘warm’ activity but consider the trudge up the hill with the sled or the energy expended cross-country skiing; you can end up quite heated!
I created my background forest on cold pressed watercolour paper by doing first and second generation stamping with memento northern pine ink. I then tore a few snow banks from the same paper and layered them in front of the trees.
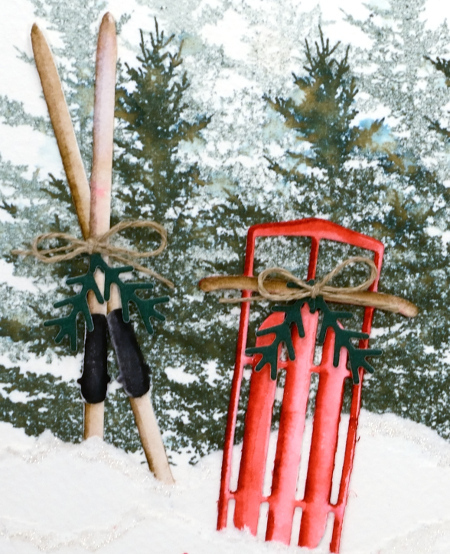
I die-cut the sled and skis from hot pressed watercolour paper then coloured them with distress markers, blending with water to get shadows and dimension. I added some die-cut greenery and a little twine bow to both the skis and the sled then tucked them in behind the torn paper snow banks. I added some clear wink of stella to the torn edges to make the snow banks glisten a little.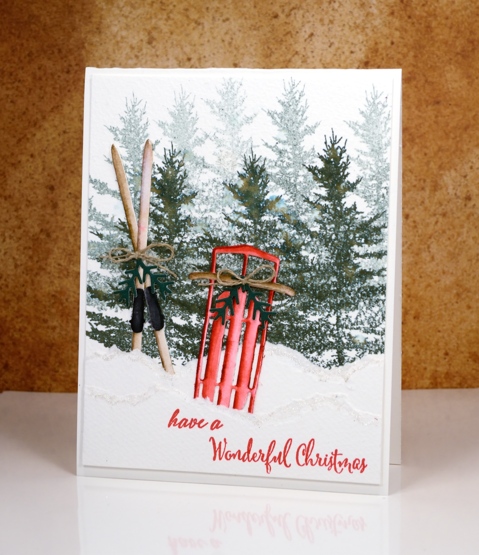
Supplies
Stamps: woodland beauty, festive snippets
Dies: Sled ‘n’ skies, winter lantern
Inks: memento northern pine, tuxedo black (Tsukineko), festive berries, gathered twigs distress markers (Ranger)
Paper: hot and cold pressed watercolour papers (Fabriano), green cardstock
Also: clear wink of stella, linen twine
On the lake
Posted: October 4, 2016 Filed under: On the lake | Tags: Penny Black stamps, Tsukineko Memento inks 12 Comments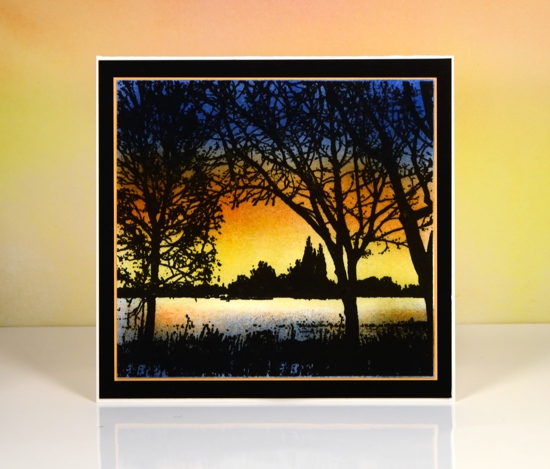
All this week and next Penny Black is sharing sneak peeks of the new ‘Festive Wishes’ release. As usual there are beautiful stamps and dies, some which don’t need to be reserved only for Christmas. The stamp featured above, On the Lake, can be used all year round.
To create this sunset scene I stamped in versafine onyx black ink on neenah solar white cardstock. I used a misti so I could stamp several times to get a solid black image. Once the ink was totally dry I sponged blue at the top, orange then yellow above the trees. I then sponged some yellow and orange over the water and blue from the edge of the water to the bottom of the panel. It has been a while since I sponged a scene; some of you might remember I used to do it all the time!
There are more teasers on the Penny Black blog and a chance to win some product from the new release.
There is also a new One Layer Simplicity Challenge hosted by the artistic Karen Dunbrook.
Supplies
Stamps: On the lake (PB)
Ink: Versafine onyx black ink, Memento Dandelion, Tangelo and Danube blue ink(Tsukineko)
Paper: Neenah solar white paper, Neenah epic black cardstock, orange cardstock
Birch and Brusho
Posted: September 1, 2016 Filed under: Grateful, Nature's Gifts, Nature's Silhouettes, Woodland Beauty | Tags: Brusho, Penny Black stamps, Tsukineko Memento inks 15 Comments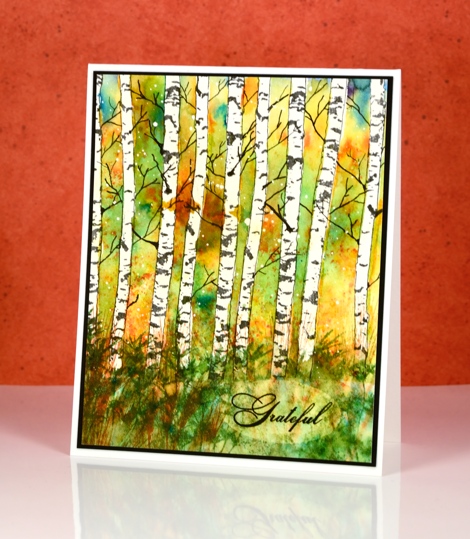
The tree stamp I have to share with you today is not technically a ‘tree’, it’s really a pair of trunks but it is oh, so versatile when creating trees for landscape scenes. I stamped it multiple times on this panel but you could just as easily stamp a single tree, a bent tree, or even some logs lying on the ground.
Before stamping I splattered a piece of watercolour paper with masking fluid, cut a hill shaped mask out of a post-it note and positioned it at the bottom of the panel. I stamped birch trees across the panel in versafine onyx black ink which is waterproof. To mask the trunks I painted masking fluid over all the trunks and let it dry. The next steps I did over a long period of time, not because I had to but because I wanted to let it dry naturally each time I added colour. With the trees and the ground masked I sprinkled a little leaf green and yellow brusho over the panel, spritzed it and let it dry. Later I came back and did it again but added some gamboge to the mix. I did this several times, always letting it dry in between. This allowed me to create patches of colour rather than the one big blend of green, orange and yellow I would have created if I had done it in one go.
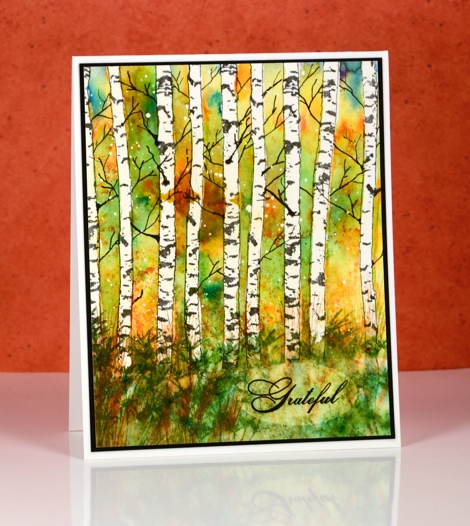
After all the panel dried I removed the masking fluid from the trees and added some brusho to the ground area. While it was still wet from spritzing I added a couple of grassy stamps with memento inks. The grasses blended into the damp paper. I waited until it was almost dry then stamped the same grasses again resulting in a bit more definition. To finish the scene I used some pigma micron pens to add thin twiggy branches between the trunks. Finally I removed the splattered masking fluid.
I wanted to add the sentiment without adding another layer but the colour of the grassy area was too dark. To lighten it I punched an oval out of frisket film then positioned the aperture piece over the watercolour panel so I could remove paint with a damp brush and a paper towel. The result was a lighter oval patch where I could stamp the one word sentiment in black.

The two birch trunks in the Nature’s Silhouette set are going to be so handy for adding birch trees to cards for any season. I’ve already tried it on a winter scene which I will share another day.
Supplies:
Stamps: Woodland Beauty, Nature’s Silhouettes, Grateful, Nature’s gifts (PB)
Paints: Leaf green, yellow & gamboge Brusho powders (Colourcraft)
Inks: Potter’s Clay, Cottage Ivy Memento ink (Tsukineko)
Cardstock: Moulin du Roy 100% cotton hot pressed watercolour paper
Also: masking fluid
A day of woodland beauty
Posted: August 30, 2016 Filed under: Nature's Silhouettes, Stamped Landscapes, Woodland Beauty | Tags: Fabriano Watercolour Paper, Penny Black stamps, Ranger Distress stains, Tsukineko Memento inks 10 Comments
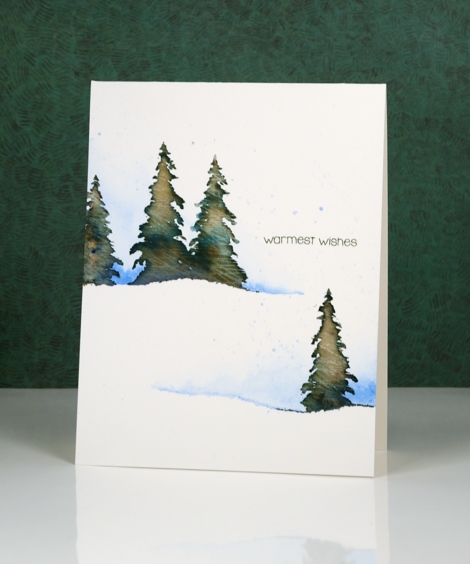
As this tree is one of my favourite stamps from the new Christmas release I decided to create a day scene and a night scene as part of my ‘Top Three’ feature on the Penny Black blog this week. For the night scene I painted the sky before stamping the tree, on this panel I did the opposite.
I began as I often do by splattering some masking fluid on a piece of hot pressed watercolour paper. I did some partial stamping with the tree stamp so I could make the base of each tree look like it was stuck in a snow bank. To do partial stamping or ‘faux masking’ I ink the stamp then remove some of the ink with a wet wipe, in this case I removed the base of the tree so no trunk showed and the bottom edge was a little different each time I stamped it. I chose memento northern pine ink again because the colour separates when I spritz a little water over it (which I did each time before stamping).
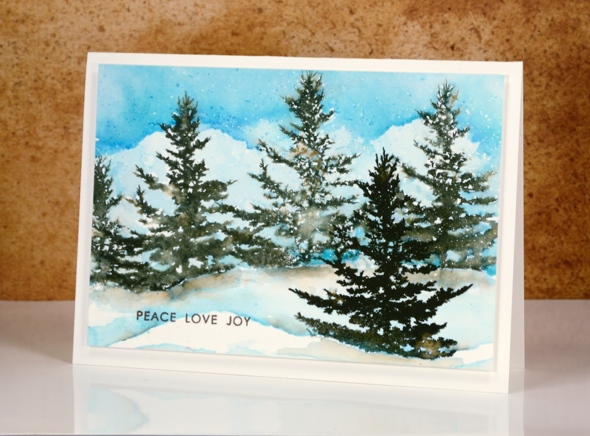
I let the trees dry then painted the sky in three blue stains blending and removing colour to make it look like there were clouds. I used a small round watercolour brush and painted right up to and sometimes over the edge of the branches so there would be some blending of colour as well as some white spaces which end up looking a bit like snow.
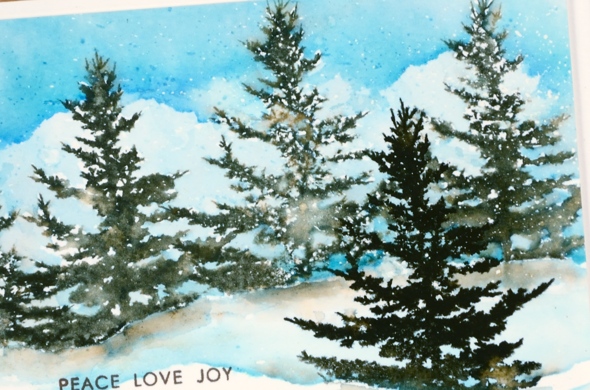
Once all the sky was dry I stamped a single tree in the foreground and made it darker by re-stamping in the same colour. I painted a snow bank either side of the foreground tree with stain then added some shadows at the base of the trees using diluted northern pine ink as my paint. To finish I removed the masking fluid, added a sentiment in brown then popped it up on a cream card base.
If you didn’t catch my night time scene with this stamp, you can find it here along with a video tutorial.
Supplies
Stamps: Woodland beauty, Nature’s Silhouettes (PB)
Ink: memento northern pine (Tsukineko) tumbled glass, broken china, salty ocean distress stain(Ranger)
Paper: hot pressed Fabriano watercolour paper
Also: Daler Rowney masking fluid
OLS29 Christmas in July
Posted: July 1, 2016 Filed under: CAS, One-Layer Simplicity challenge, Spread Cheer | Tags: Faber-Castell Albrecht Durer Watercolour pencils, Penny Black stamps, Speedball elegant writer, Tsukineko Memento inks, Tsukineko Versafine inks 18 Comments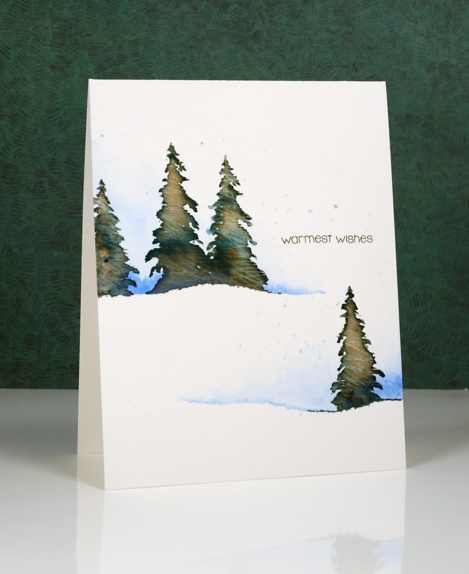
I am hosting the One Layer Simplicity Challenge this month and the theme is ‘Christmas in July’. I know some of you make Christmas cards all year but I usually start around now and keep going until December! If you haven’t even thought about Christmas cards then perhaps this challenge will be a motivator. Perhaps you want to enjoy the summer sun and not think about December at all – that is totally fine too!
To make this one layer card I tore a piece of painter’s tape lengthwise into two strips and positioned them on my watercolour paper card base. I painted some blue along the torn tape edge and faded it to white. Keeping the tape in place I stamped a few trees in Memento Northern Pine ink and added a few dabs of black elegant writer pen. After stamping I painted over the tree to blend the ink. Northern Pine separates into brown and green when diluted which gives the foliage some variety in colour.
I’ve been reading a book called ‘The Non-Designer’s Design Book’ which has made me think about layout in terms of alignment, repetition, contrast and proximity. The book is concerned mainly with text documents like business cards, menus, ads, etc but the principles are relevant to art layout too. I found myself trying to apply what I’ve learnt when working out where my sentiment would go.
Supplies:
Stamps: Spread Cheer(PB)
Inks: Northern Pine Memento ink, Versafine Olympia green (Imagine Craft/Tsukineko)
Pencils & Pens: blue watercolour pencil (Faber Castell), elegant writer pen (Speedball)
Cardstock: Canson Moulin du Roy 100% cotton hot pressed watercolour paper
Autumn Mist
Posted: June 2, 2016 Filed under: Shade Canopy, Stamped Landscapes | Tags: Fabriano Watercolour Paper, Penny Black stamps, Tombow dual brush pens, Tsukineko Memento inks 8 Comments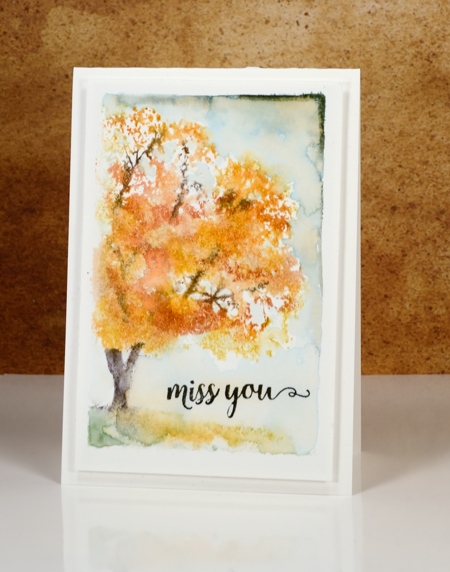
Don’t worry I am not switching over to fall cards. I just happen to have made a card in autumn colours with a misty look about it so the line from Puff the Magic Dragon sprang to mind. I created both of today’s cards with the ‘shade canopy’ stamp from Penny Black. The little scenes are framed with the white edge made when I tape the watercolour paper down with painter’s tape.
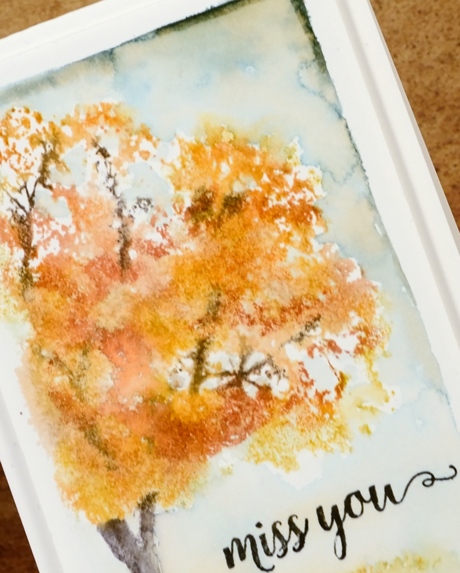
I used markers to ink the stamp and for the backgrounds on both cards. The autumn card is coloured with memento markers and the summer one with tombow dual brush pens.
It is possible to get quite a lot of definition in the foliage by inking the stamp and adding little or no water or, as I did, use more water on the stamp and achieve a looser more impressionistic look. On the summer card I coloured the sky and hill first then added the tree over the top. For the fall card I painted the sky last, adding it around the foliage.
Supplies:
Stamps: Shade Canopy, Words of Kindess(PB)
Inks: Tangelo, Potter’s Clay, Espresso Truffle, Northern Pine Memento markers Versafine Onyx black (Tsukineko), 173, 452, 126, 228 dual brush pens (Tombow)
Cardstock: Fabriano 100% cotton hot pressed watercolour paper


