
Correspondence
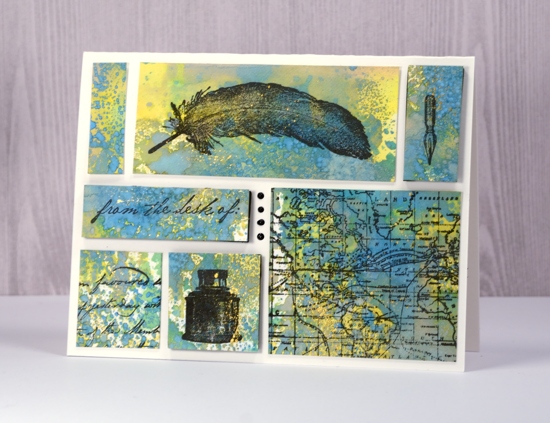
Posted: November 30, 2017 Filed under: Correspondence, World Map | Tags: Darkroom Door stamps, distress oxide inks, Finetec artist mica watercolour paint 7 Comments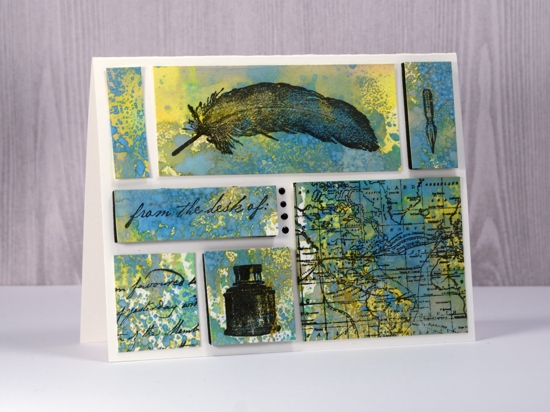

Supplies used:
Stamps: Darkroom Door Correspondence set, Darkroom Door World Map
Ink: Versafine Ink Onyx Black
Distress Oxide inks: Fossilized Amber, Broken China, Cracked Pistachio
Also: gold paint, Nuvo Black ebony crystal drops, black foam sheet, craft mat
Paper: Neenah solar white, Hot pressed watercolour paper
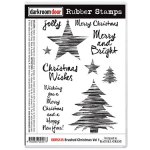
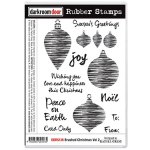
Brushed Christmas Joy
Posted: November 21, 2017 Filed under: Brushed Christmas vol 1&2 | Tags: Darkroom Door stamps, Tsukineko Memento inks 4 Comments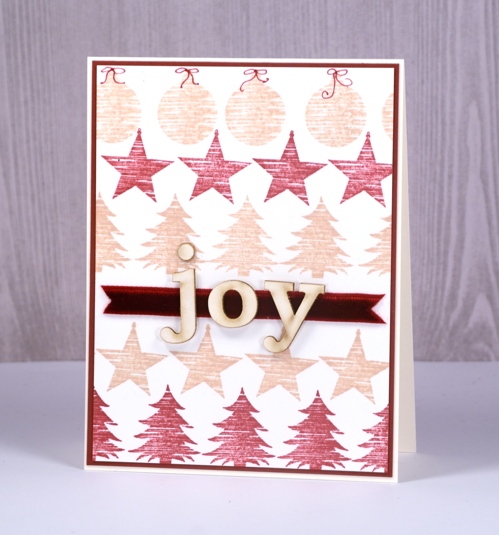
I had some fun with small stamps and a stamp positioner to create this simple card. Darkroom Door has two ‘Brushed Christmas’ sets containing stamps with the brushed look you see in these images. There are big trees and little trees, bit and little stars and baubles as well. It was easy enough to stamp one image, slide my cardstock along and stamp the next and so on to reach across the panel. I centred the trees by starting with the middle tree but I wasn’t quite so particular with the stars or baubles.
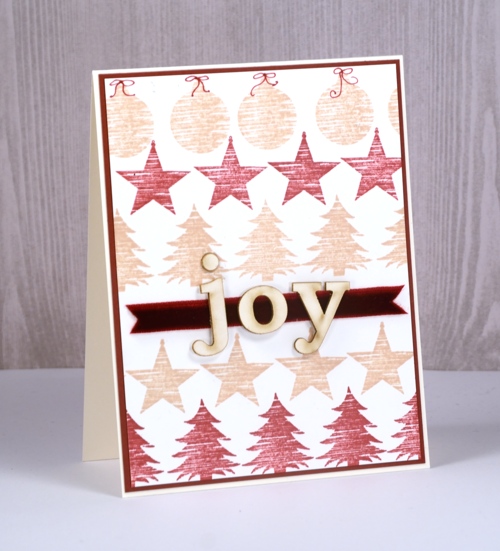
The ribbon across the panel is velvet and the laser cut letters are left over from a mixed media class I did a while back. I think it’s cute that the ‘o’ on the velvet looks like a buckle on Santa’s belt (totally unplanned ofcourse)
Supplies
Brushed Christmas vol 1 & 2
Memento Inks: desert sand, rhubarb stalk

Papers: neenah natural white, burgandy cardstock
Tools: MISTI stamp positioner

Also: velvet ribbon, laser cut letters, memento rhubarb stalk marker
Brusho sky with wildflowers
Posted: September 4, 2017 Filed under: Brusho, Wildflowers Vol 2 | Tags: Brusho, Darkroom Door stamps 6 Comments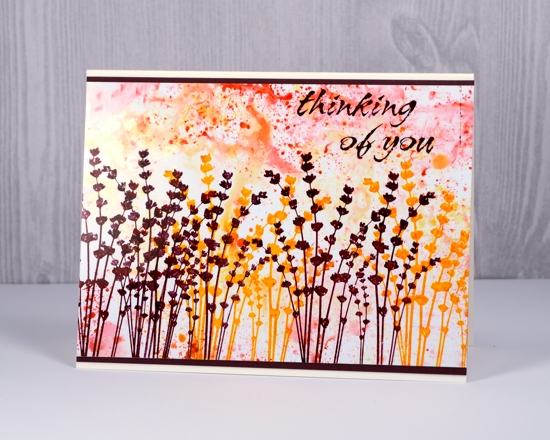
Brusho skies and stazon flowers. I have had fun playing with brusho on photo paper and it is one of the techniques we’ll be using in my upcoming autumn leaves class.
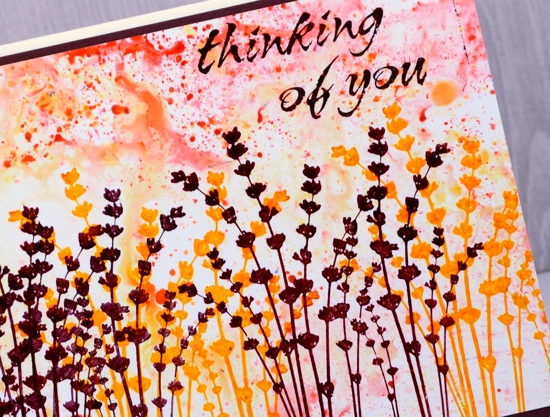
I used warm colours for the panel above then stamped the flowers several times in a burgandy and a yellow ink before framing with co-ordinating cardstock.
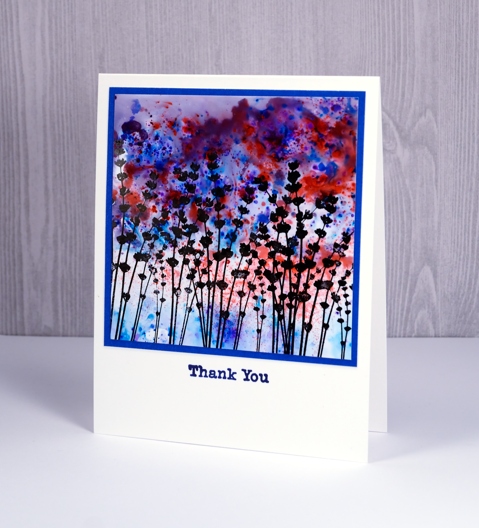
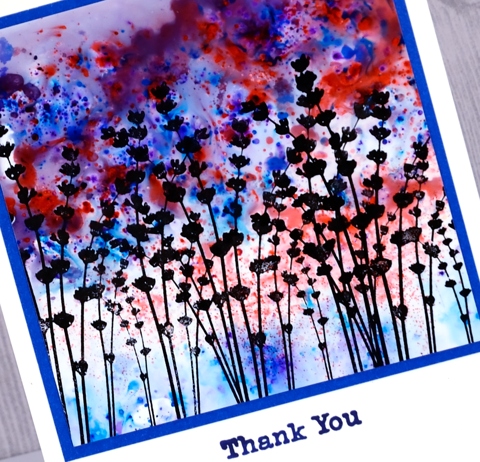
My colour scheme for the second card is a bit more dramatic as I played with two primary colours and ended up with the secondary purple for a dramatic sky and black silhouetted flowers.
There are so many ways to colour backgrounds then turn them into cards with some simple foreground florals. If you are looking for a gorgeous way to create a background, check out Kathy Rac’s beautiful underwater background here and get inspired to join in her Daily Marker 30 day coloring challenge.
Supplies
Stamps: Wildflowers vol 2 Thank you (Darkroom Door)
Inks: claret, orange zest, jet blackStazon ink (Tsukineko)
Paper: Neenah solar white, Kirkland glossy photo, burgandy & blue cardstock
Paint: brusho (Colourcraft)
A wilderness path
Posted: August 27, 2017 Filed under: Alcohol Ink, Brusho, Wilderness Vol.2 | Tags: Brusho, Darkroom Door stamps, distress oxide inks, Ranger Alcohol Ink 7 Comments
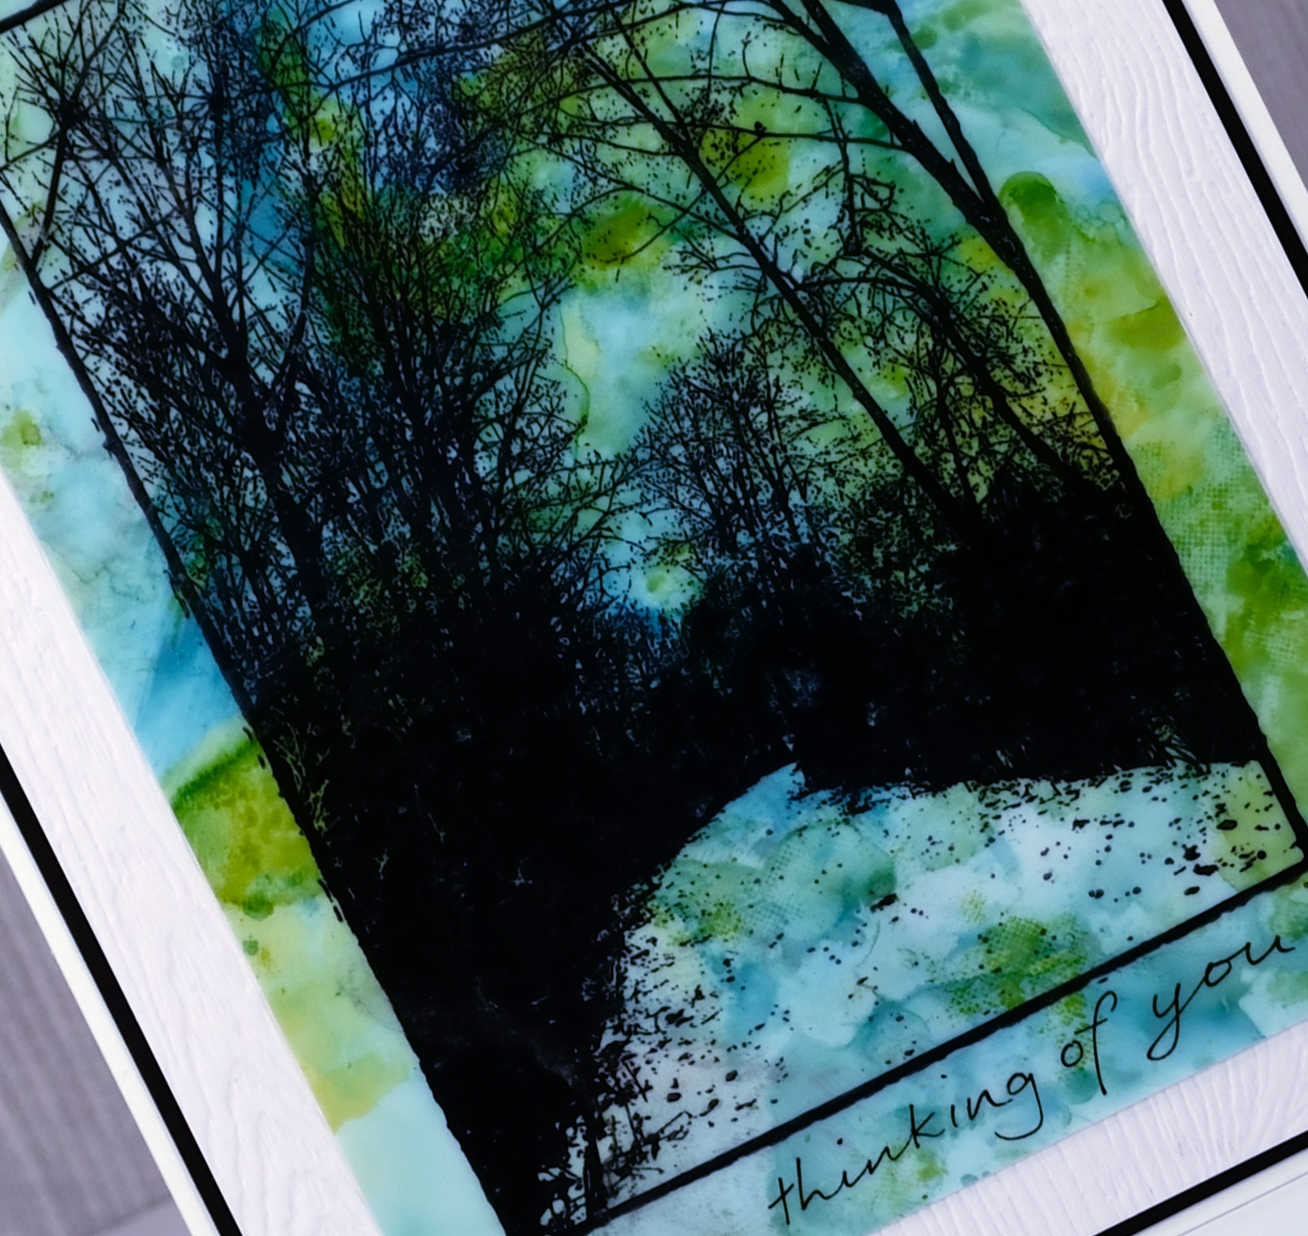
This peaceful wilderness path is a scenic stamp from Darkroom Door. I’ve used it in three different ways to create some seasonal backgrounds. For the card above I created an alcohol ink background on yupo in the blues and greens of summer. I stamped the path stamp over the alcohol ink panel in stazon jet black ink. I hand wrote the little sentiment with a fine micron pen.
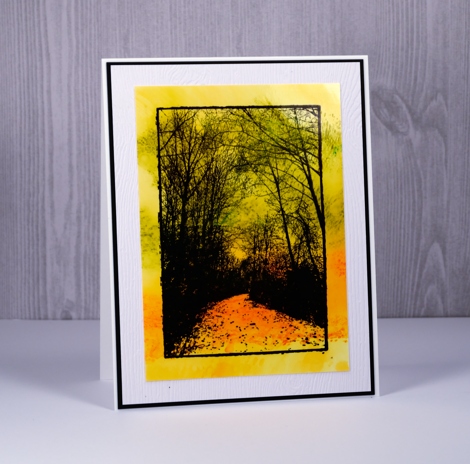
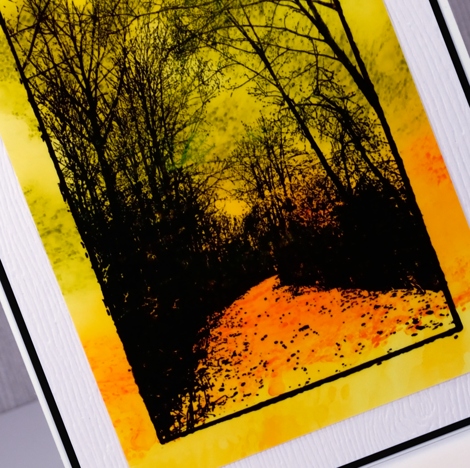
To create my golden fall scene I used distress oxide inks on glossy photo paper. I pressed the orange and yellow inks onto a craft mat, spritzed them and swiped my photo paper panel through the ink. Most of the colour soaked into the paper immediately but I set it aside to dry for a while and found there was a chalky residue that stayed on top. I wiped that off and was left with a background to which I stamped over with stazon jet black ink.
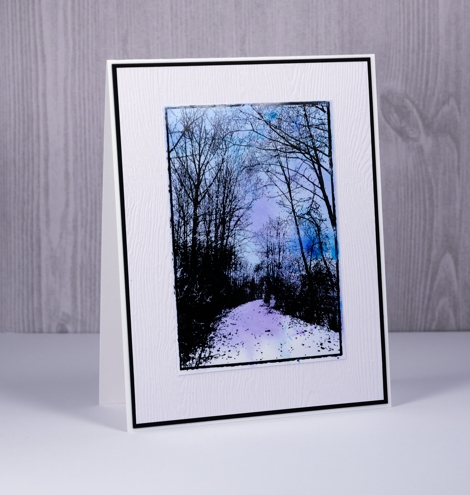
My chilly winter scene was created using brusho powders on a craft mat. I sprinkled some blue and purple on the mat, spritzed it then swiped some photo paper through the colour. The first print is usually quite intense so I think the one below must have been a second impression.
These cards are also on the Darkroom Door blog today so pop over there for all the complete supply list.
Wildflowers blue
Posted: August 7, 2017 Filed under: Bright Blossoms vol 1&2, Brusho, French Script, Wildflowers Vol 2 | Tags: Brusho, Darkroom Door stamps, Ranger Distress inks, Ranger Distress stains, WOW embossing powders 7 Comments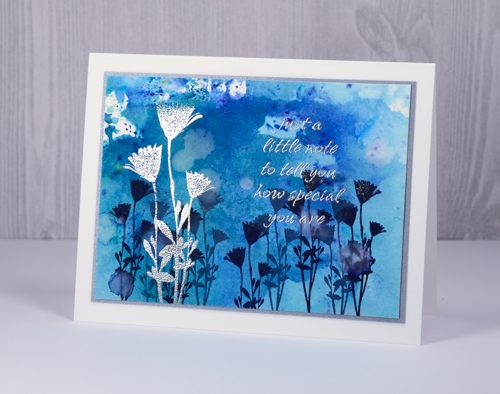
I have a couple more cards that came out of my session with the Darkroom Door Wildflowers vol 2 stamps recently. I began by making blue watercolour backgrounds with brusho paints on hot pressed watercolour paper. Rather than apply the paint directly to the paper, I sprinkled it on a craft sheet, spritzed, then pressed the paper into the paint. I was able to pick up paint that was almost in crystal form as well as soft blended sections.
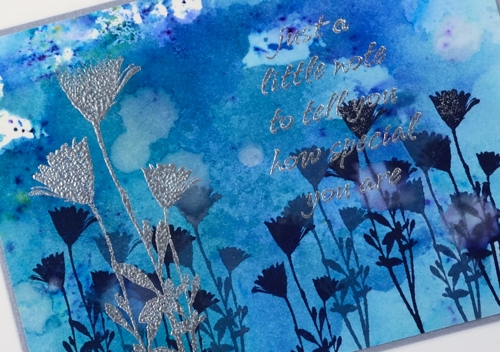
In the Wildflowers vol 2 set there is a large and a small version of the same flower so I used the small stamp on the panel above to create a base of flowers in chipped sapphire and stormy sky distress inks. I shook water droplets onto the panel to create pale watermarks here and there. Once the panel was dry I wiped an anti-static powder pillow across it and embossed the flowers and a sentiment from Bright Blossoms vol 1 in silver over the top of the blue. The silver catches the light depending on the angle but is tricky to capture with the camera.
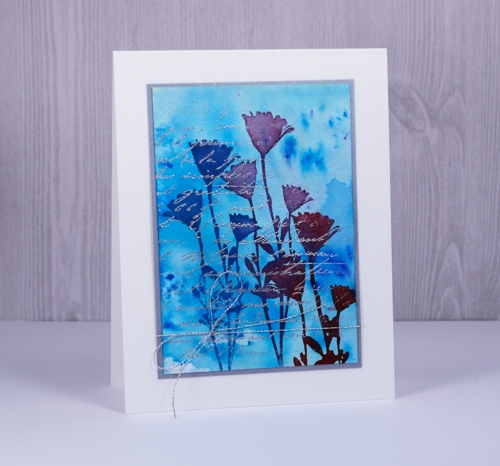
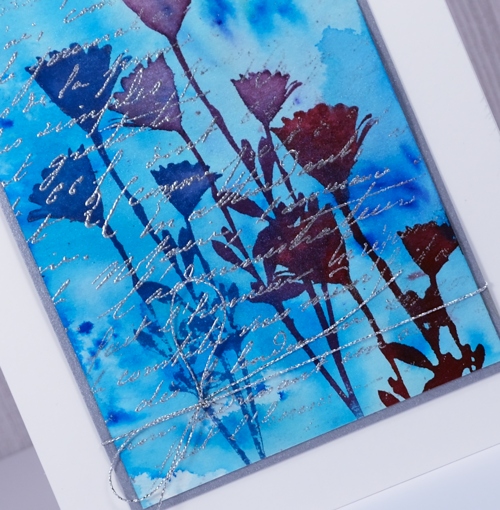
On my second card I created the painted background the same way then stamped the flower three times in different distress stains. Once again I embossed over the top with silver, this time using a partial stamping of the French Script background stamp. I framed both panels in silver cardstock and added silver thread around the second panel before attaching to white card bases.
Supplies
Stamps: Wildflowers vol 2 , French Script, Bright Blossoms vol 1 (Darkroom Door)
Inks: chipped sapphire, stormy sky distress inks & blueprint sketch, seedless preserves, aged mahogany distress stains (Ranger) versamark (Tsukineko)
Paper: Neenah solar white, hot pressed watercolour paper, brushed silver cardstock
Paint: prussian blue, cobalt brusho (Colourcraft)
Also: silver cord, silver embossing powder
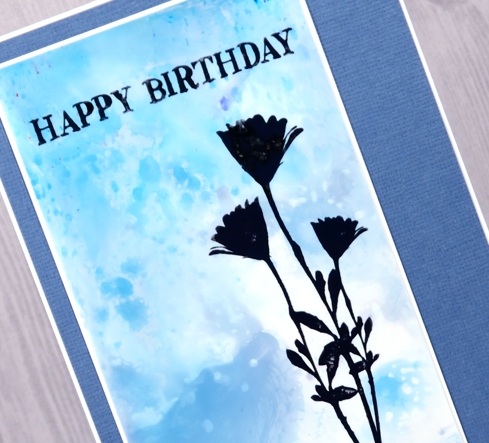
Blue sky birthday
Posted: August 2, 2017 Filed under: Brusho, Wildflowers Vol 2 | Tags: Brusho, Darkroom Door stamps, Tsukineko Stazon inks 9 Comments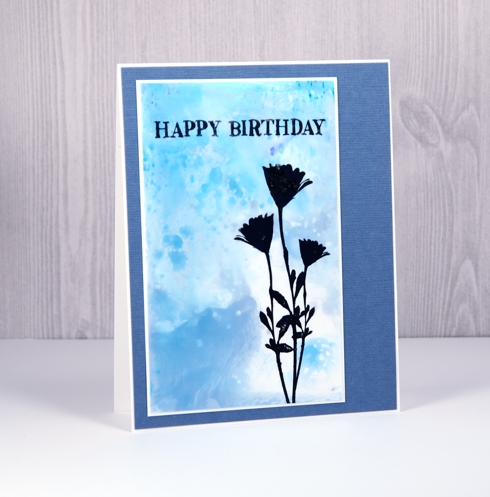
Here is another ‘wildflower’ card from the bunch I made last week. Sometimes it is fun to get out one set of stamps and play around with colours and techniques to create a range of looks. The flower is from the Darkroom Door ‘Wildflowers vol. 2″ set and the sentiment from the DD “Happy Birthday” set. I created this background with brusho paints on glossy photo paper using an impermeable mat. I sprinkled some turquoise and violet brusho on the mat, spritzed it, then swiped the photo paper through the paint to pick up the colour.
I chose a grey ink rather than black to stamp but after the final result after a few impressions looks almost black.
Supplies
Stamps: Wildflowers vol 2 Happy Birthday (Darkroom Door)
Inks: Cloudy Sky Stazon ink (Tsukineko)
Paper: Neenah solar white, Kirkland glossy photo, texture blue cardstock
Paint: violet, turquoise brusho (Colourcraft)
Golden wildflowers
Posted: July 24, 2017 Filed under: Wildflowers Vol 2 | Tags: Brusho, Darkroom Door stamps, Ranger Distress inks, Tsukineko Versafine inks 6 Comments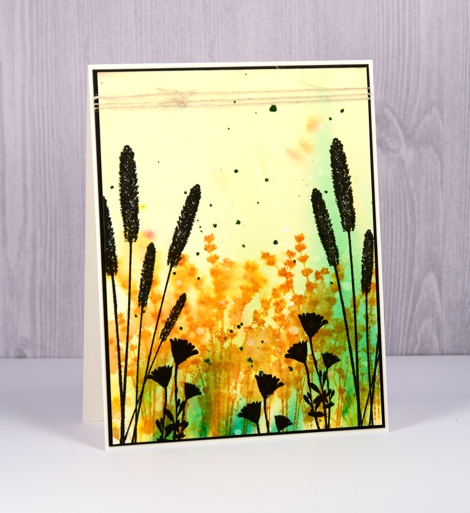
I made a bunch of cards with the Wildflowers Vol 2 set from Darkroom Door the other day. I had my distress oxide inks out and some brusho and alcohol ink backgrounds on hand to add flowers to. For this card I began with a soft brusho background of yellow and green then added distress ink flowers over the top. I spritzed after stamping to blur the images into each other.
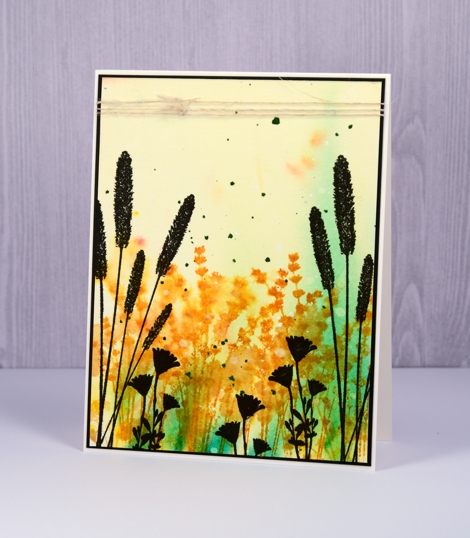
Once the coloured stamping dried I added black silhouettes to the foreground and sides to frame the panel, some dark green splatter and a black mat to finish it off.
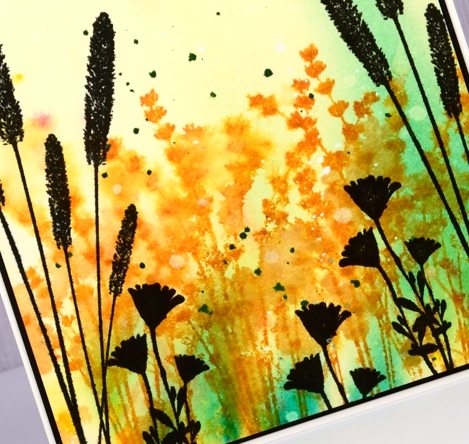
Because the colours reminded me of a country scene I wrapped some rustic hemp twine around the panel before attaching it to a natural coloured card base.
Supplies
Stamps: Wildflowers vol 2 (Darkroom Door)
Inks: wild honey distress ink (Ranger), versafine onyx black ink (Tsukineko)
Paper: hot pressed watercolour paper (Fabriano)
Paint: yellow, leaf green brusho (Colourcraft)
Also: hemp twine
Dusk reflections
Posted: July 21, 2017 Filed under: African Trees, Stamped Landscapes | Tags: Darkroom Door stamps, Ranger Distress inks, Ranger Distress stains 18 Comments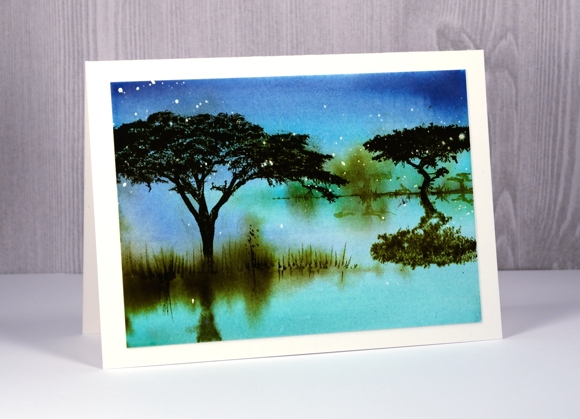
As I have said before, you can never have too many tree stamps! The African trees set from Darkroom Door not only has four lovely tree stamps but also five animals and a flock of birds. It’s a beautiful set that I am really enjoying trying with different colours and mediums. This time I wanted the feeling of dusk around the waterhole. I almost added an African deer to this scene but I had achieved the look I was after and didn’t want to risk spoiling it at the last minute (as I did with a new card yesterday. grrr)
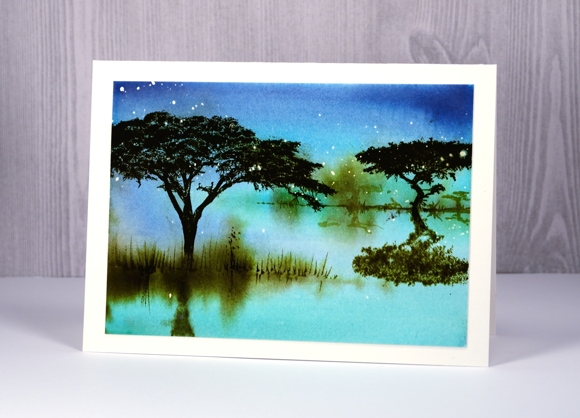
The scattering of stars was created with by splattering masking fluid on hot pressed watercolour paper before I started painting. Once it was dry I painted the sky and water in chipped sapphire, broken china and tumbled glass distress stains. I kept the panel wet so I could blend from colour to colour but dabbed up excess liquid at the sides. While the panel was still damp I painted two areas of grass with forest moss distress stain. I let the panel dry a bit more but not too much before stamping the reflections of both trees. To achieve the mirror stamped image I stamped it on a piece of acetate then pressed it onto the damp panel. When I was happy with all my soft edge images I dried the panel completely before adding the trees and grass that I wanted sharp. I used a stamp positioner to stamp the trees several times in forest moss distress ink then painted grass with a fine tipped brush.
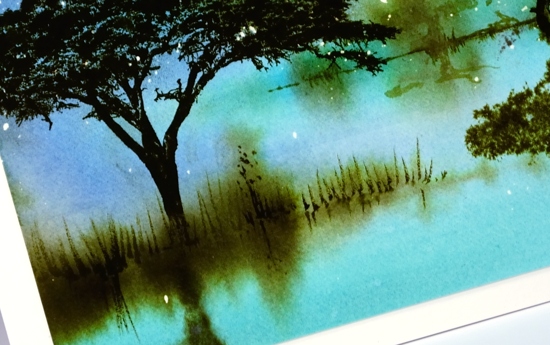
Lastly I removed the masking fluid to reveal the little stars then mounted my panel on a piece of natural coloured cardstock.
Supplies:
Stamps: African Trees (Darkroom Door)
Inks: Distress tumbled glass, broken china, forest moss stains and inks (Ranger)
Cardstock: hot pressed watercolour paper
Also: Pebeo masking fluid
Ferns
Posted: July 20, 2017 Filed under: Alcohol Ink, CAS, Wilderness Vol.2 | Tags: Darkroom Door stamps, Ranger Alcohol Ink, Tsukineko Stazon inks, Tsukineko Versafine inks 5 Comments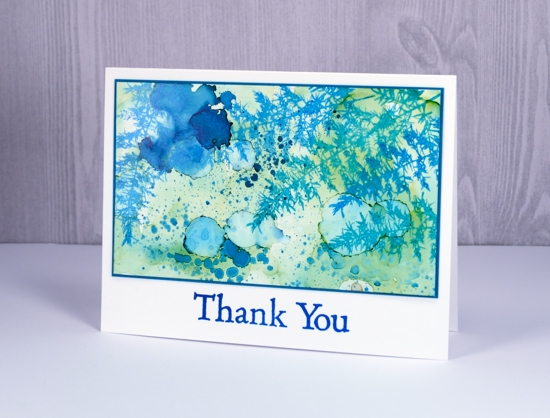
Here ends a week without internet at home! I think some internet free time is definitely a good thing but I’d rather it be planned than thrust upon me. One happy outcome is the stack of edited photos I have ready to slot into blog posts.
This one is an alcohol ink on yupo panel. The abstract panel has been sitting in my ‘pile of possibility’ for some time so I don’t remember which colours of ink I used. Just guessing though, I would say pool and juniper but I might be wrong about juniper. There’s a blue and a green for sure, possibly two blues. I used opaque yupo paper but it is still worthwhile to back it with white cardstock to keep the colours bright so I did that before matting it with teal.
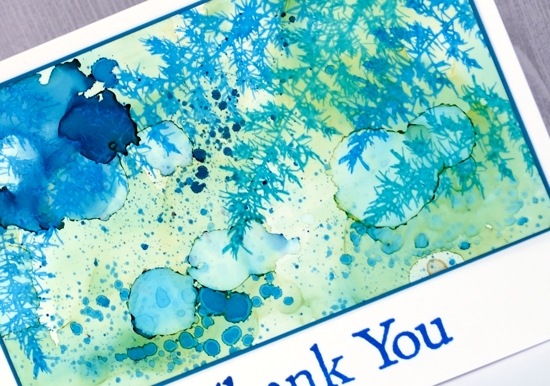
I stamped the fern from Darkroom Door’s Wilderness Vol 2 set. It is a lovely delicate image. I used stazon ink on the yupo and it spread ever so slightly but as you can see not enough to lose the fine detail of the stamp. At first I didn’t have a sentiment but the white space below the panel did look a bit empty so I added a simple thank you. Stamps and inks are linked below.
Supplies:
Stamps: wilderness vol 2, thank you (Darkroom Door)
Inks: pool & juniper alcohol inks (Ranger) blue Hawaii stazon, deep lagoon versafine (Tsukineko)
Papers: opaque yupo, neenah solar white cardstock, teal cardstock
Roses three ways
Posted: June 7, 2017 Filed under: Bright Blossoms vol 1&2, Roses | Tags: Darkroom Door stamps, Ranger Distress stains, Tsukineko Memento inks, WOW embossing powders 5 Comments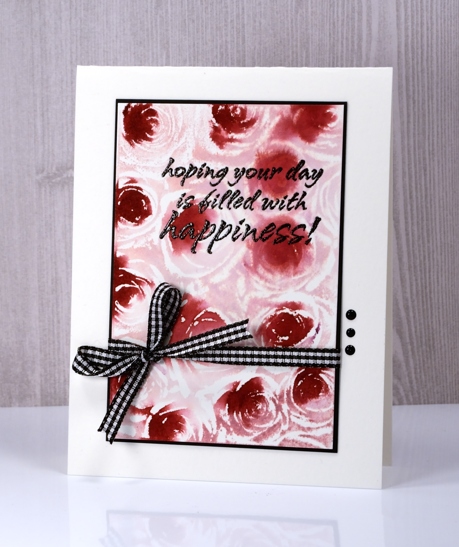
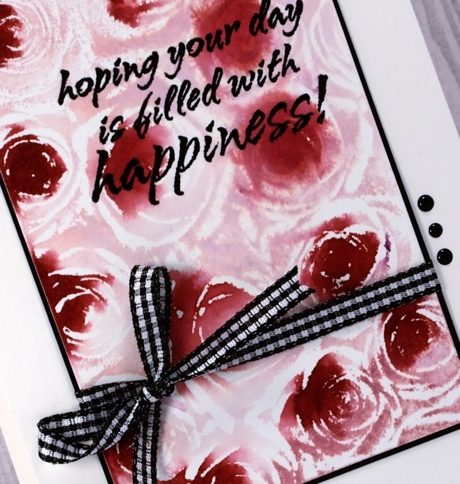
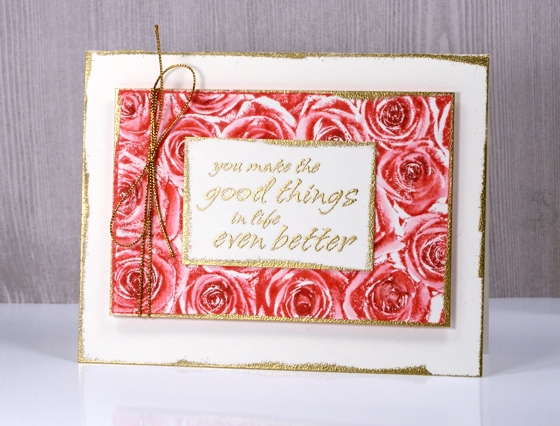
I love to use distress stains applied with the sponge dauber so I had to try them with this stamp from Darkroom Door. I tried two other techniques shown further down in the post and taught a couple more techniques in my most recent class. For the card above I used a stamp positioner so I could add one colour at a time. I inked the Roses stamp with Victorian velvet and stamped on hot pressed watercolour paper. I then dabbed the Aged Mahogany stain on the centres of the Roses in the stamp and and stamped again. The colours blended as both were wet. I chose to make all the accents black, adding an embossed sentiment from Bright Blossoms vol 1, a black mat, b&w gingham ribbon and three dots of black crystal drops.
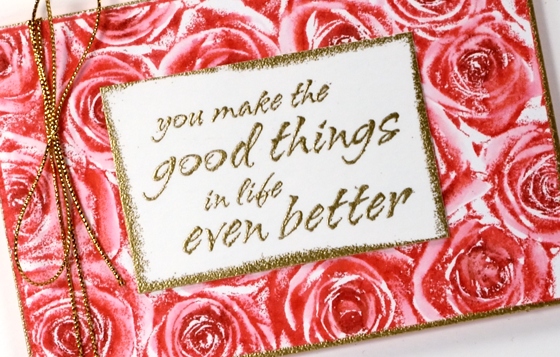
I stuck with the same two distress stains for the next card but adding them over the embossed image created the negative of the one above.
I painted Victorian velvet stain over the whole embossed image then added aged mahogany with a paintbrush here and there to create darker roses or just darker accents. I finished it off again with a ribbon and embossed sentiment, framing the sentiment by swiping the crimson red ink around the edges of the panel then embossing in clear powder.
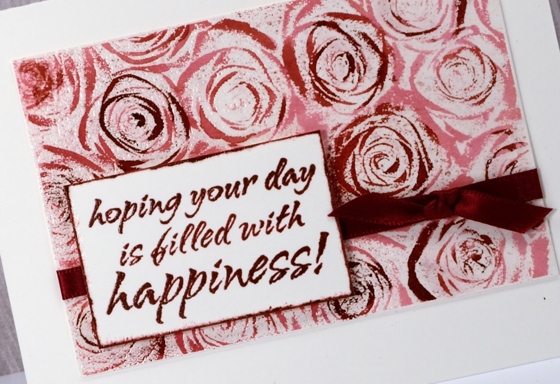
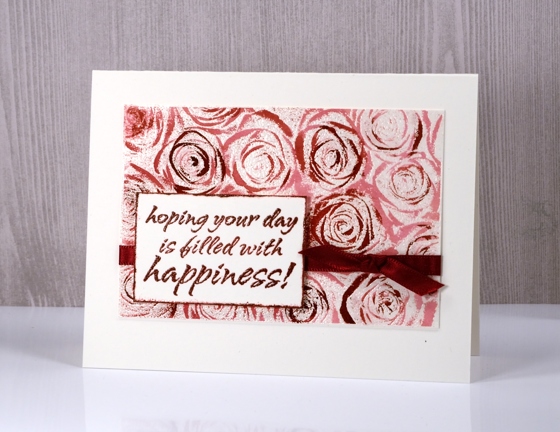
My third technique was done with Memento ink but would work well with any dye based water soluble ink. I covered the stamp with memento love letter ink then darkened the centres of the roses with a rhubarb stalk marker, spritzed the stamp lightly and stamped it on hot pressed watercolour paper.
I used a small round watercolour brush (or water brush, can’t remember) to blend the stamped ink. This gave the petals a soft pink colour, left the stamped areas as dark shadows and in a few places where I didn’t blend at all there are some contrasting white areas.
I finished it off with gold accents running the versamark pad around the edges of the sentiment panel, rose panel and card front then embossing those edges in gold powder.
The stamp itself is very detailed so it doesn’t need too much in the way of colouring but I was happy to come up with techniques that gave me the option of sharper images or softer blended images.
Supplies
Stamps: Roses, Bright Blossoms vol 1 & 2 (Darkroom Door)
Inks: versamark, versafine onyx black & crimson red, memento love letter ink, memento rhubarb stalk marker (Tsukineko) Victorian Velvet & Aged Mahogany distress stains (Ranger)
Papers: hot pressed watercolour paper, neenah solar white & epic black cardstock
Also: gold & clear embossing powder, gingham ribbon, burgandy satin ribbon, nuvo black ebony crystal drops, gold cord


