
Twilight Trees
Posted: November 12, 2015 Filed under: Joy to All, Stamped Landscapes | Tags: Canson watercolour paper, Penny Black stamps, Ranger Distress inks 12 Comments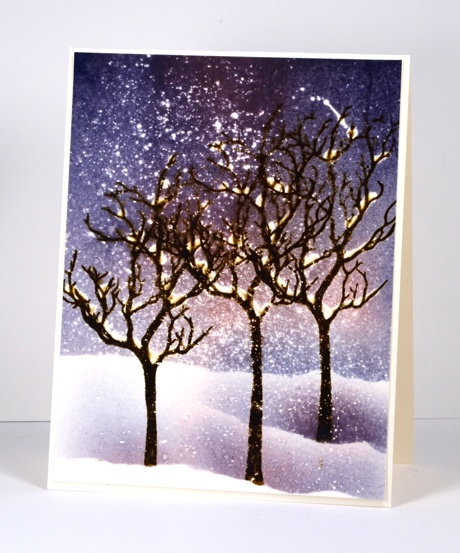
When I first featured this tree stamp I said I would be back with more designs but then forgot this one was waiting in the wings. I started this one with masking fluid, quite a bit, splattered over the panel. Once the masking fluid was dry I stamped the trees in brown dye ink then painted masking fluid on some of the branches. When that was dry I positioned a mask two thirds down the panel so I could brayer the sky with blue and pink inks. I removed the horizon mask and used smaller masks below the tree trunks to sponge some snow drifts. I looked for a place to add a sentiment but decided to leave it blank on the front and add something later inside.
I am happy to report here in Ottawa there are no scenes even remotely resembling this. We have made a start on leaf collection but still have half the backyard to finish. The weather has been kind.
Supplies:
Stamps: Joy to All (PB)
Inks: Chipped Sapphire, Worn Lipstick, Vintage Photo distress inks, (Ranger)
Cardstock: Canson 100% cotton hot pressed watercolour paper, Neenah natural white
Also: Winsor & Newton masking fluid
All is calm under a brusho sky
Posted: November 9, 2015 Filed under: Brusho, Gleeful | Tags: Brusho, Canson watercolour paper, Penny Black stamps, Tsukineko Versafine inks 13 Comments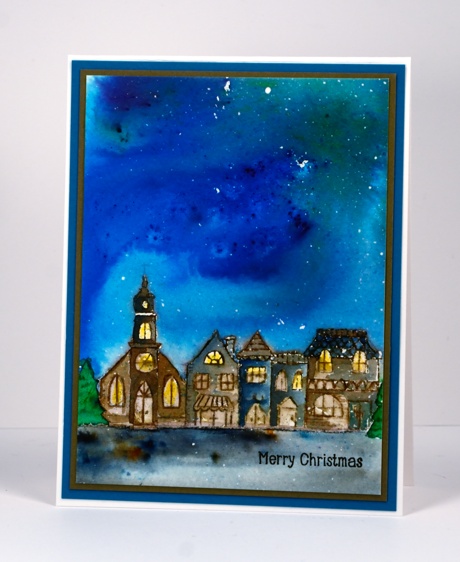
I have painted quite a few expansive coloured skies lately. On Saturday I taught the last of my Merry & Bright class which included a bister night sky over a die cut tiny town. As I demonstrated the technique all of my skies were different and class participants also created unique and beautiful skies. Today’s card is similar in layout to the class card but instead of bister I used brusho and instead of die cutting I painted the little street with the help of a stamp from the ‘Gleeful’ set. I stamped the town first in versafine vintage sepia then added brusho and water to the sky area. I didn’t need to use much because the powder is so potent. I blended the blue and green with a brush and painted right up to the roof tops then let it dry. I used brown, blue, green and yellow brusho to paint the buildings and trees then finished the foreground with black brusho which separates into several colours. I added a tiny sentiment in versafine onyx black, removed the masking fluid to reveal stars then matted with a couple of co-ordinating colours.
Thanks for dropping by; I hope you have a great week.
Supplies:
Stamps: Gleeful, Holiday Snippets (PB)
Mediums: Brusho powders, Versafine Onyx Black ink
Cardstock: Hotpressed Canson watercolour paper, Neenah avon brilliant white, brown and teal cardstock
Brusho Northern lights
Posted: November 7, 2015 Filed under: Brusho, Prancers, Stamped Landscapes, Watercolour | Tags: Brusho, Penny Black stamps 10 Comments
I have another brusho card to share today with a different look. I blended all the colour on this panel rather than leave the speckled patterns of the previous cards. The brusho colours are intense so I didn’t use much to create this sky. I sprinkled some blue, green red and purple over a panel splattered with masking fluid, then blended with water as I would with other watercolour paints. I stamped the trees and sentiment in black then, once the ink was dry I removed the masking fluid to reveal a scattering of stars or perhaps snow.
Supplies:
Stamps: Seasons Wishes, Prancers (PB)
Mediums: Brusho powders, Versafine Onyx Black ink
Cardstock: Hotpressed Canson , Neenah Solar White, Epic Black
Silver wreath
Posted: November 6, 2015 Filed under: Winter moments 7 Comments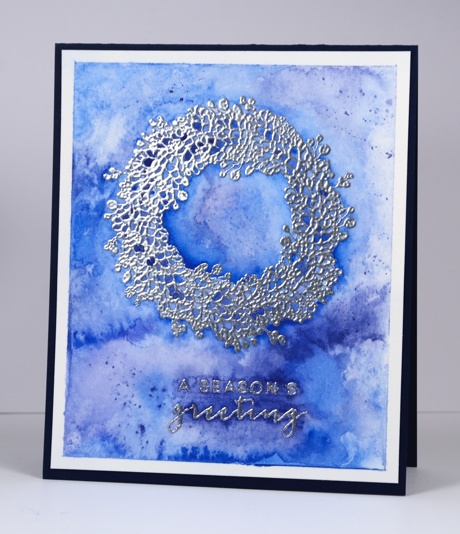
On the PB blog this week the designers have been sharing favourite colour schemes. I mix up the Christmas decorating at our place by choosing a different colour scheme each year. I have a collection of silver baubles and gold baubles so I usually pick one or the other then add a colour. We have had red and gold, red and silver, green and silver, etc. One of my favourite combinations is blue and silver. I love the way blue sets off the silver accents. It is like the night sky.
My card features a silver embossed wreath and greeting on a blue watercoloured background. I used three blues from my gansai tambi watercolour set, layering and blending them over the embossing.
By letting the paint dry a little between applications I was able to build up more colour in some places to accentuate the edges of the pretty silver wreath.
Supplies:
Stamps: Peace & Harmony, Winter Moments (PB)
Inks: Versamark ink (Tsukineko)
Cardstock: Canson 100% cotton hot pressed watercolour paper, Neenah patriot blue cardstock
Also: silver embossing powder
Hide, Seek and Paint with Brusho
Posted: November 5, 2015 Filed under: Brusho, Hand drawn, Hand lettered | Tags: Brusho, Fabriano Watercolour Paper, Hand lettering 11 Comments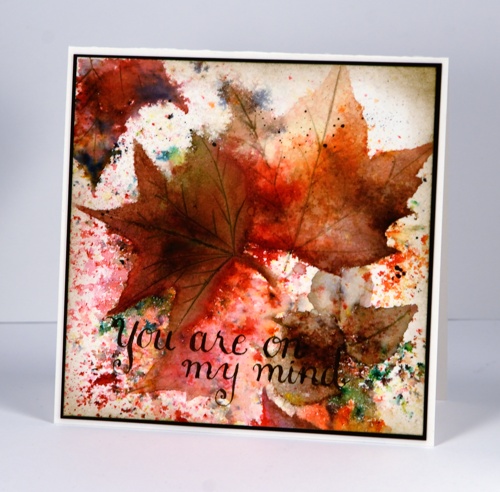
The brusho magic continues as I said it would! I keep referring to it as magic because you really don’t know what is going to appear when you spritz water and add the brusho powders. How much water, how much powder, which you do first, how much you continue to add – all these factors will affect the outcome. The unpredicability of the medium did make my live brusho periscope yesterday a little nerve wracking but I still enjoyed myself with those who were able to join me live. It will be available for a bit longer on Katch. (wish you could fast forward through the clumsy beginning; I promise it gets better!)
My process for arriving at the finished leaf card involved several steps beginning with the random scattering of warm toned powders plus a little green. I spritzed, sprinkled powder and repeated until I had pretty patterns appearing then I left it; I walked away and went and ran errands so there was no temptation to fiddle with it before it dried. When I returned I looked for leaf shapes or sections of leaves that had occurred randomly in the panel, then enhanced and completed those shapes. The painting step did take quite a while and involved stopping and starting. I tried to move the existing colour on the panel with a brush as much as possible but sometimes added a bit more brusho where needed. There were two small brown leaves that emerged in the bottom right hand corner so I painted a couple more to make a little pile. I add veins to one leaf with a craft knife then added brown paint which settled in the cuts but it turned out darker than I wanted so I switched to a watercolour pencil to add the veins to the other leaves.
The sentiment is hand drawn with pen and ink, something I have been practising lately. Unfortunately it is not easy on my hands so I can’t do too much. I did learn traditional calligraphy years ago so some of the concepts are familiar and others are new and tricky!
You may have heard that Jennifer McGuire is hosting a Share Handmade Kindness Campaign during November at present and challenging card makers to send their cards out and make a difference to someone’s day. I don’t need the reminder to do the handmaking but the actually sending through the mail is a challenge I am taking on; I want to get this card in the mail today! Susan Raihala is challenging us to make and send Gratitude cards right now also. And if you’re forging ahead with your Christmas cards don’t forget the Caring Hearts card drive.
Thanks for dropping by. There will be a break from the Brusho tomorrow while Gansai Tambi paints take the stage instead.
Supplies:
Medium: Brusho powders & Faber Castell Albrect Durer watercolour pencils, Brown ink
Cardstock: Hotpressed Fabriano paper, Epic Black Neenah cardstock
Brusho is in the house!
Posted: November 4, 2015 Filed under: Brusho | Tags: Brusho, Kuretake Zig clean color real brush markers 14 Comments
When I started experimenting with bister powders there was perhaps a slight overload of bister projects here on the blog. I am still really enjoying the colours, the texture and watching the magic when the bister reacts with water, but I have some Brusho in the house now and I have to say it is also much fun. Blog readers and some of my class members have been asking whether I prefer Bister, Brusho or Colorburst. I am happy to be undertaking the creative research to answer that question.
All that to say; I’ll be sharing Brusho projects for the next few days! Today’s brusho experiment involved a little magic, some searching and painting. Sandy Allnock used this technique a while back but I can’t find the technique on her blog which makes me wonder whether it was a periscope. (Here is a link to a post where she shared a wonderful amount of information about working with Brusho and Colorburst)
I started by creating a random pattern of colour with Brusho powders. I sprinkled some of my favourite colours on watercolour paper then spritzed with water. I waited, watched the magic, added some more powder, more water and watched more magic. I did several different panels then went to bed. The next day I worked out how to use my panels. This one was a speckly one because I did not move the colour around with a brush while the panel was wet; I just let it dry. The result is lots of little coloured shapes and feathery patterns. Because of the concentration of blues and greens at the top of the panel I decided to turn that area into trees by painting on some branches and trunks. 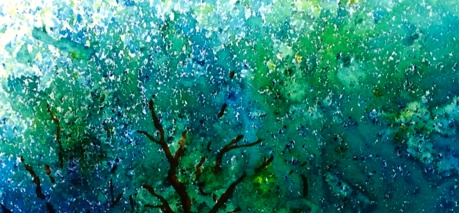
The blue speckles to the right looked a bit like delphiniums so I added more paint with a brush and some extra definition with a zig brush pem. I also painted leaves at the base of the delphiniums with more green brusho. I was working with patterns of colour already on the panel and adding more definition with sprinkles of powder, a wet brush and a few zig clean color real brush pens. This is only part of the panel; perhaps I will pull a picture out of the left over scrap too.
To finish I added a sentiment, then matted with watercolour paper and added it to a watercolour card base.(you know I am all about the matchy-matchy!)
Supplies:
Stamps: Special Wishes (PB)
Paint: Brusho powders & Zig clean color real brush pens
Cardstock: Hotpressed Canson & Fabriano paper
Bister landscape
Posted: November 2, 2015 Filed under: Bister, In the winter | Tags: Bister, Penny Black creative dies 11 Comments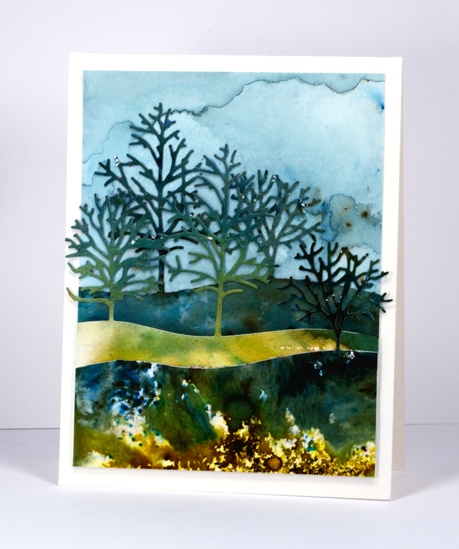
If your creating goes anything like mine you probably end up with multiple experiments scattered across your work space. After playing with bister, the green, blue and yellow powders in particular, I ended up with three extra panels, some dark, some light. The patterns and colours just called out to be made into a landscape using the new triple tree die from Penny Black. The die is called ‘in the winter’ but I know it is going to be handy all year round. I die cut the same hillside of trees from each panel then snipped off the trees I didn’t need so I could have the distant trees peeping out between the mid ground trees. I painted a new panel for the sky using just blue bister which I diluted so the trees would stand out against it.
Now that I have used up those stray scraps of bistered beauty; it’s time to play with some brusho. Stay tuned.
Supplies:
Dies: In the winter (PB)
Inks: Bister
Cardstock: Hot & Cold Pressed Canson
Stencilled Trees
Posted: October 29, 2015 Filed under: Nature's Beauty, Tiny Tree | Tags: Penny Black creative dies, Tsukineko Memento inks 6 Comments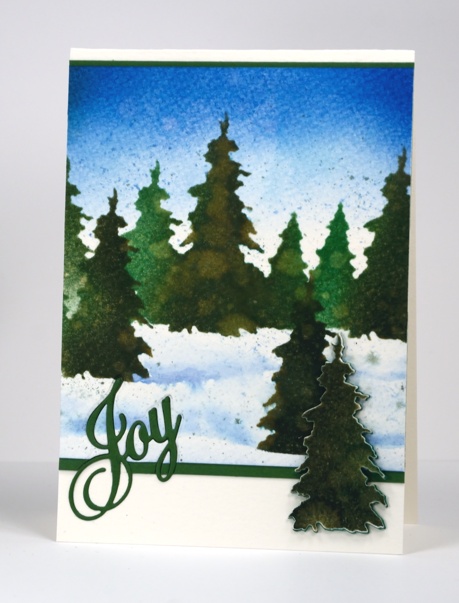
You know I have said before, ‘You can never have too many tree stamps!’ Well if you find yourself running short you can always make a few tree stencils to help you through that difficult time. I was happy to see some new tree dies in the latest release from Penny Black and decided to make my own stencil by die-cutting a row of trees using two different sized tree dies.
I used a piece of Plaid stencil plastic and cut a row of trees with the die from ‘Nature’s Beauty’ set and a smaller tree from the ‘Tiny Tree‘ set. I sponged a gradated sky with two blue inks then sponged two greens through the stencil. I was going to spritz the images quite generously to make the colours bleed together but I decided to stop after a couple of spritzes because the watermarks and texture from the paper already looked interesting. I diecut a single tree from the stencil plastic also so I could sponge isolated trees then painted the shadows of the snow drifts around them. The foreground tree was sponged and spritzed the same way then die cut and popped up on some die cut fun foam for added dimension.
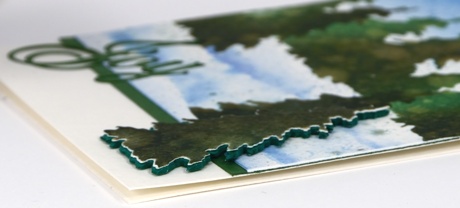
I decided to inlay the word Joy which was not a brilliant idea because I had already attached the thick watercolour paper to the green cardstock mat and die cutting an intricate word ended up being rather tricky.
Supplies:
Dies: Nature’s Beauty, Tiny Tree, Greetings (PB)
Inks: Memento Northern Pine, Cottage Ivy, Summer Sky, Danube Blue (Imagine Craft/Tsukineko)
Cardstock: Cold Pressed Canson, Green cardstock
Also: fun foam, Plaid stencil blank
Sunset Tree
Posted: October 28, 2015 Filed under: Joy to All | Tags: Penny Black stamps, Ranger Distress stains, Tsukineko Versafine inks 14 Comments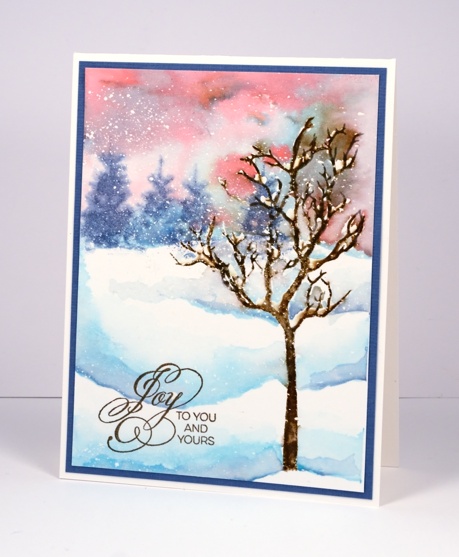
Last week Penny Black released the Winter Romance collection of stamps and dies. I went for a romantic sunset look on today’s card and used the new tree from the transparent set ‘Joy to All’. (At the same time I stamped the tree on several different panels and used different colouring techniques so you will be seeing it again before too long.)
I began with a panel splattered with masking fluid taped to a board to prevent it from warping once it got wet. I stamped the tree stamp with brown ink then, when it was dry, painted some masking fluid above some of the branches where snow would accumulate. I used pink and blue distress stains to paint both the sky and snow drifts then stamped the trees on the horizon while the sky was still wet so they would be look soft and distant. Some of the brown ink did bleed into the sky as I painted which doesn’t bother me but if you wanted to prevent that you could stamp the tree with pigment ink .
Supplies:
Stamps: Joy to All, Season’s gifts (PB)
Inks: Tumbled Glass, Worn Lipstick distress stains, Vintage Photo, Stormy sky distress inks (Ranger) Vintage SepiaVersafine ink (Tsukineko)
Cardstock: Canson 100% cotton hot pressed watercolour paper, Kazzazz blue cardstock
Also: Winsor & Newton masking fluid
Snowy Stamping
Posted: October 26, 2015 Filed under: Snow time, Winter moments | Tags: Penny Black creative dies, Penny Black stamps, Tsukineko Memento inks 8 Comments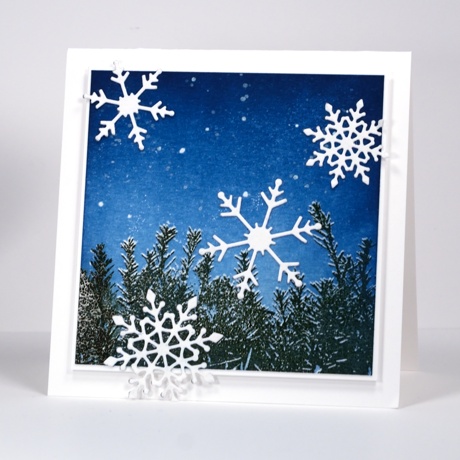
Last week Penny Black released ‘Winter Romance’, a sweet new collection of snowy stamps and dies. I have featured both a new stamp and a fresh die sets on today’s card. I chose to use a technique I haven’t done in a while to make a crisp wintry scene. If you look closely you can see a dusting of snow on top of the hedge. To create this look you need a stamp positioning tool. I used the MISTI (of course) but when I first dreamed up this technique I used a stamp-a-ma-jig.
I stamped the hedge first in versamark on white cardstock then, with the help of the MISTI I stamped the hedge again ever-so-slightly lower in green ink. Next I embossed the hedge with clear powder. I brayered the sky with two blue inks, first the lighter ‘Summer Sky’ then the darker ‘Nautical Blue’. The embossed hedge resisted the ink revealing the fine snowy edge. I splattered white wink of stella over the sky to look like snow or stars then added the four snowflakes cut with the new ‘snow time’ set.
Supplies:
Stamps: Winter moments (PB)
Dies: Snow Time (PB)
Inks: Versamark, Memento Northern Pine, Summer Sky, Nautical Blue (Imagine Craft/Tsukineko)
Markers: White Wink of Stella (Kuretake)
Cardstock: Neenah Solar White 110lb
Also: clear embossing powder


