
Snow Covered Berries
Posted: August 14, 2014 Filed under: Happy Berries | Tags: Fabriano Watercolour Paper, Penny Black stamps, Ranger Distress stains 4 Comments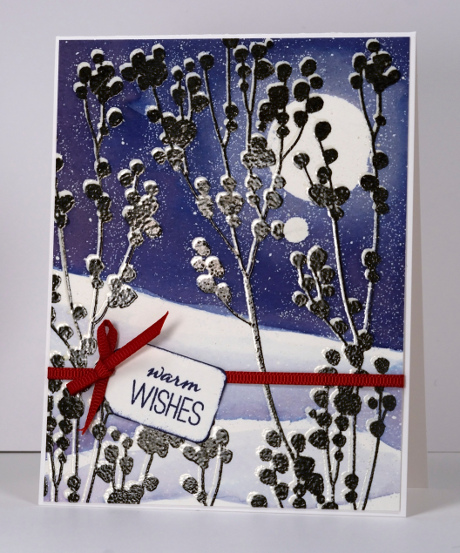
I have another berry stamp from the new “Season’s Greetings” release to feature today. Once again I used some watercolouring but the main technique on this card is embossing. I began with a panel splattered with masking fluid as I like to do with winter scenes. Once the masking fluid was dry I stamped the large berry stamp in versamark taking care to place a stamp positioner beside the stamp before I lifted it. I then re-inked the stamp in versafine onyx black, moved the stamp positioner down and to the right ever so slightly and stamped in black. I embossed the image in clear powder some of which also stuck to the masking fluid which just ended up giving the impression of even more tiny snowflakes in the sky.
With the embossing done I positioned a circle mask and painted the sky. I started with chipped sapphire distress stain and water. I painted water in the area I wanted blue then added the stain. When I was happy with the coverage I used a dry brush to take some of the colour out around the moon. I added some dusty concord distress stain to the sky also to vary the colour a little. To create the snow bank I painted a diluted mix of dusty concord and chipped sapphire in the hill shape and immediately blended it upwards with water to fade the colour out. I did the same a second time to create another snowbank near the base of the panel. When it was all dry I added a tag and a red ribbon. It was crying out for a bit of red.
Don’t forget to check the PB blog and Facebook page if you are interested in seeing more Christmas stamping.
Supplies:
Stamps: Happy Berries, Joy Filled (PB)
Inks: Chipped Sapphire, Dusty Concord distress stains (Ranger) Versamark & Versafine Onyx Black (Imagine Craft/Tsukineko)
Cardstock: Fabriano 100% cotton hot pressed watercolour paper, Neenah Solar White 110lb cardstock
Also: Winsor & Newton masking fluid, Clear embossing powder
Berry Merry Christmas
Posted: August 13, 2014 Filed under: Berry Merry Christmas, Watercolour | Tags: Fabriano Watercolour Paper, Penny Black stamps, Ranger Distress inks, Ranger Distress stains 10 Comments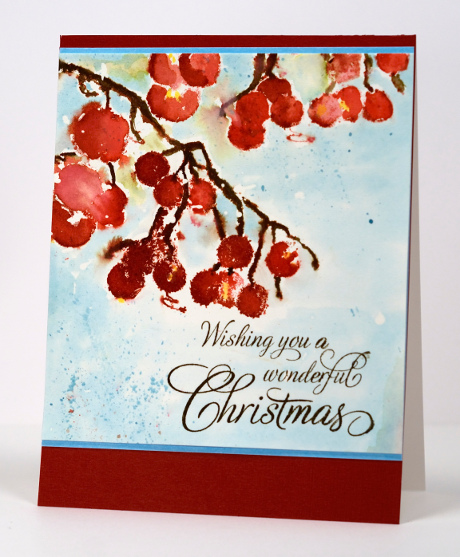
I think these berries might be one of my favourite stamps from the new “Season’s Greetings” release from Penny Black. I opted once again for a watercolour design when creating this card starting with a piece of hotpressed watercolour paper splattered with masking fluid. I inked the stamp with barn door distress stain on the berries and vintage photo distress stain on the stems. I spritzed the inked stamp and stamped it twice on the panel. Using brush and some water I added fired brick ink to some of the berries to give them a bit more dimension. I added water here and there to blend and spread the colours. I added some peeled paint in the background but decided to primarily use broken china stain to paint the sky. I painted around the images with water and broken china stain letting some of the berries and stems bleed into the blue. When it was almost dry I added some yellow highlights with a watercolour pencil and splattered some undiluted broken china distress stain over the sky areas.
To finish off the card I removed the masking fluid then added the sentiment in walnut stain distress ink and matted with blue before attaching to a deep red card base.
Supplies:
Stamps: Berry Merry Christmas, Festive Wishes (PB)
Inks: Barn Door, Peeled Paint, Vintage Photo, Fired Brick, Broken China, Walnut Stain distress stains and inks (Ranger)
Pencils: Albrecht Durer watercolour pencils Lemon 107 (Faber Castell)
Cardstock: Fabriano 100% cotton hot pressed watercolour paper
Also: Winsor & Newton masking fluid
Poinsettias
Posted: August 11, 2014 Filed under: Exultation, Festive Florals, Red Star, Watercolour | Tags: Fabriano Watercolour Paper, Penny Black creative dies, Penny Black stamps, Ranger Distress stains 8 Comments
Are you ready for a week of Christmas designs? Penny Black’s new “Season’s Greetings” release is available today so I will be featuring some of the new stamps here on Bits & Pieces during the week and the PB blog and Facebook will be full of projects made with the new stamps, dies and stencils too.
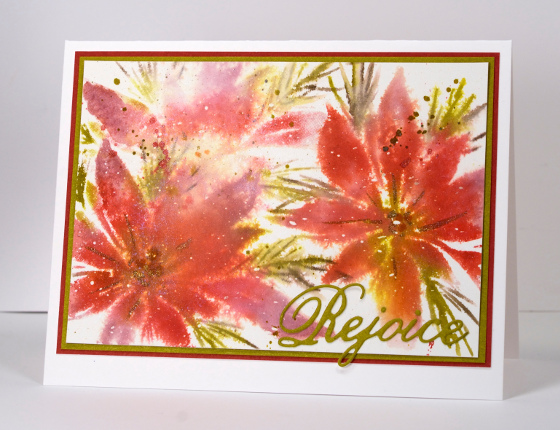
I have two poinsettia cards for you today. Poinsettias pop up at least five times in the new catalog on stamps and dies. I have watercoloured both these cards but my methods were different for each one. The top stamp, Red Star, is a slapstick cling stamp with textured petals so I inked the whole stamp with distress stains and spritzed both the stamp and the watercolour paper. The pigment in distress stains is quite intense so I spritzed with water after the first impression, then stamped again to achieve a slightly paler image. The panel is splattered with gold “Wink of Stella”, distress stains and masking fluid. The masking fluid was of course splattered on the panel before I started stamping and removed when all the ink was dry.
Supplies:
Stamps: Red Star (PB)
Inks: Victorian Velvet, Pine Needles, Crushed Olive, Mustard Seed, Barn Door Distress Stains (Ranger)
Cardstock: Fabriano 100% cotton hot pressed watercolour paper, Olive Grove mix & match papers, Neenah Avon Brilliant White 110lb card stock
Creative Dies: Exultations (PB)
Also: Gold Wink of Stella pen, Winsor & Newton masking fluid
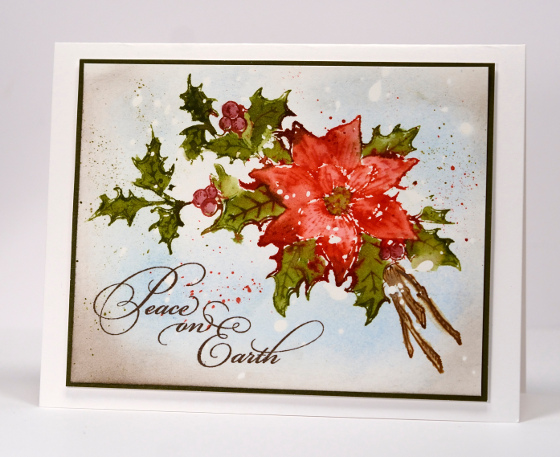
The second poinsettia image is also a slapstick cling stamp but a line art image from the set Festive Florals. I inked the components of the design separately in distress inks and stamped on dry watercolour paper. I painted diluted distress stains onto the image and used a couple of watercolour pencils for the berries and stems. Again I added splatter and started with masking fluid splatter. The background is a pale wash of Memento summer sky and rich cocoa inks.
Supplies:
Stamps: Festive Florals, Peace on Earth (PB)
Inks: Memento Summer Sky, Rich Cocoa (Imagine Craft/Tsukineko) Barn Door, Peeled Paint, Vintage Photo distress stains and inks (Ranger)
Pencils: Albrecht Durer watercolour pencils Dark Red 225, VanDyke Brown 176 (Faber Castell)
Cardstock: Fabriano 100% cotton hot pressed watercolour paper, Sticks & Stones mix & match papers, Neenah Avon Brilliant White 110lb card stock
Also: Winsor & Newton masking fluid
Happy Birthday Balloons
Posted: August 9, 2014 Filed under: CAS, Uplifting | Tags: CAS, Penny Black creative dies, Penny Black stamps, Tsukineko Radiant Neon inks 6 Comments
I am enjoying the Stretching Your Stamps 2 class and found a little time to try another technique this morning. I was inspired by another class participant who used sentiments inside speech bubbles to make a very cool card. I put mine inside balloons instead.
I cut balloons out of masking paper and kept both the positive and the negative. I was then able to stamp the words and sponge the balloon shape through the negative and mask the balloons after completing them with the positive. I used Radiant Neon inks which are so easy to sponge onto to a card. They blend and cover the area quickly and smoothly. The littlest balloon is stamped in gold but it looks more like a sad brown I’m afraid. I performed more stamp surgery to make this card by cutting the happy birthday stamp from “Edge to Edge” into three sections. I can always stamp them together another time if I want to.
Enjoy your weekend.
Supplies:
Stamps: Edge to Edge (PB)
Creative Dies: Uplifting (PB)
Inks: Versafine Onyx Black, Radiant Neon Electric Coral, Electric Green, Electric Blue & Encore Gold (Imagine Craft/Tsukineko)
Cardstock: Neenah Solar White 110lb
Also: Black Pitt Artist Pen (Faber Castell)
The Cool One
Posted: August 8, 2014 Filed under: CAS, Uplifting | Tags: CAS, Fabriano Watercolour Paper, Penny Black creative dies, Penny Black stamps, Ranger Distress stains 16 Comments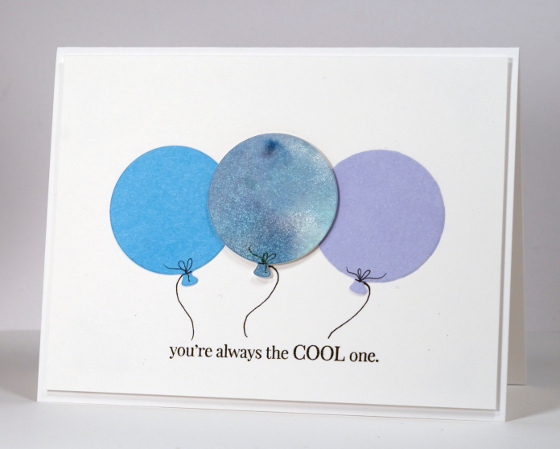
You wouldn’t believe how long this “simple” card took me! It all started because I had a piece of watercoloured paper all sparkly and blue which wasn’t working in the way I needed it to for a project I no longer remember. I couldn’t let that pretty sparkly blue panel go to waste so I stamped something on it in black, again can’t remember what. That didn’t work either but I wasn’t prepared to throw the sparkly blue away so I die cut as many balloons as I could without getting black stamping on them. Most that I cut ended up with a little stamping so I tried 3021 different arrangements where one balloon would overlap another to cover little bits of black ink. Finally I realized I was going round in circles so instead I cut balloons out of plain but co-ordinating colours and decided on the design above. It took me three attempts to get the above card made without inky fingerprints and failed inlaid diecuts. Even this one is a little unbalanced; the balloons should be higher.
I like the sentiment and of course the sparkly blue that started it all.
Supplies:
Stamps: Amazing (PB)
Creative Dies: Uplifting (PB)
Inks: Versafine Onyx Black (Tsukineko) Chipped Sapphire, Tumbled Glass, Broken China Distress Stains (Ranger)
Cardstock: Fabriano 100% cotton hot pressed watercolour paper, Periwinkle & Clear Skies Mix & Match Papers (PB)
Also: Pearl Ex
Merry! Already?
Posted: August 5, 2014 Filed under: A Pocket Full, Flourish Holly, Footnotes, Shades, Tannenbaum, Textures | Tags: Fabriano Watercolour Paper, Penny Black creative dies, Penny Black stamps, Ranger Distress inks 5 Comments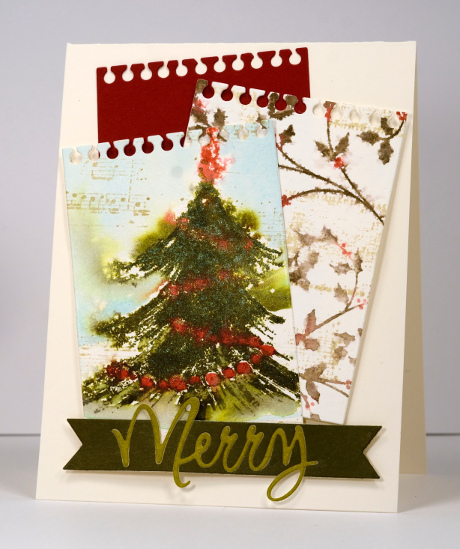
I know. It’s only August but I imagine many of you have been creating Christmas cards since… well, Christmas! I have only just started and believe me I find it hard to stamp snow in summer. There is however a very good reason for this little bit of merry. Penny Black is releasing their new Christmas Collection next week so the team are getting you in the mood for Christmas stamping by pulling out a few favourites from last year.
This tree was definitely a favourite of mine last year. (it’s here, here and here). For this little trio of notebook pages I inked it with distress inks, stamped it on watercolour paper, spritzed the image to make the colour bleed and added a little music in the background. I did the same with the holly stamp but added canvas in the background. The third notebook page and the sentiment banner repeated the colours in the two picture panels to tie it all together.
The sentiment banner is my first attempt at inlaid diecuts. (There is one in yesterday’s card but this was my first go) I cut the word merry from light green and a dark green piece of cardstock. I placed a piece of tape behind the dark green negative piece then ran it through the diecut machine again with the banner die. Because the tape was in place it held together. I then pressed the light green “Merry” onto the tape and snipped the exposed tape from above the ‘M’ and the loop of the ‘y’.
How is your Christmas card pile going? Have you started? Have you finished! Counting this one I think I might have thirteen completed.
Supplies:
Stamps: Tannenbaum, Flourish Holly, Textures, Footnotes (PB)
Inks: Antique Linen, Forest Moss, Salty Ocean, Barn Door Distress Inks (Ranger)
Cardstock: Fabriano 100% cotton hot pressed watercolour paper, Olive Grove mix & match papers, Neenah Natural White 110lb card stock
Creative Dies: A Pocket Full, Shades, Love & Joy
Patterned Poppies
Posted: August 4, 2014 Filed under: Bashful, CAS, Field of Dreams, Indian Wheel, Wishes | Tags: Penny Black creative dies, Penny Black stamps, Ranger Distress stains 17 Comments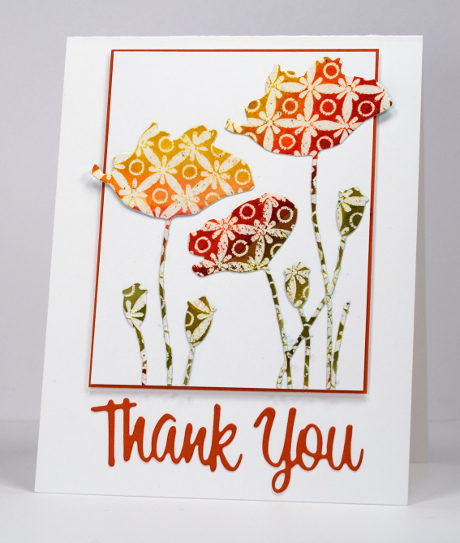
It seems to be nothing but poppies on the blog at present. I can assure you that changes tomorrow as something quite unseasonal will appear!
Today I have a card inspired by one of the techniques in the Stretch Your Stamps 2 online card class. I have created watercolour patterned paper for die cutting before but I don’t think I have die-cut any embossed designs. I embossed the background stamp, Indian Wheel, watercoloured with distress stains then cut out several poppies with the “Field of Dreams” die. I also cut the sentiment from the patterned panel but it was a bit much so I decided to a cut a plain orange sentiment.
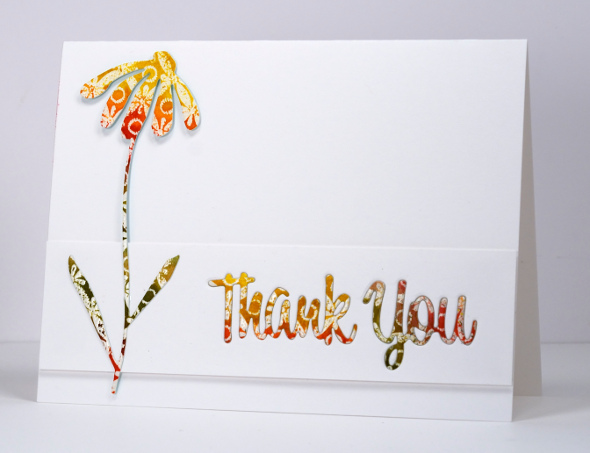
When I was photographing the top card and getting ready to post it I saw the pretty patterned sentiment and another die cut flower and decided a second card was possible. I had cut the daisy first from the patterned panel using the “Bashful” die but decided there was not enough patterned showing so switched to the poppies. It’s great when one design turns into two. The layout below is an adaption of the current Case Study Challenge #202 layout, one big flower and a sentiment strip stretching right across the card.
Supplies:
Stamps: Indian Wheel (Penny Black)
Inks: Vintage Photo, Peeled Paint, Mustard Seed, Spiced Marmalade, Barn Door, Crushed Olive, Bundled Sage distress stains (Ranger)
Creative Dies: Field of Dreams, Wishes, Bashful (PB)
Cardstock: Fabriano 100% cotton hot pressed watercolour paper, Fall Festival mix & match paper (Penny Black), Neenah Solar White 110lb card stock.
One Layer Simplicity: Shades of Summer
Posted: August 1, 2014 Filed under: CAS, Coloured pencil, One-Layer Simplicity challenge, Poppy Time | Tags: CAS, Faber-Castell Polychromos Colour Pencil, Penny Black stamps, Tsukineko Memento inks 14 Comments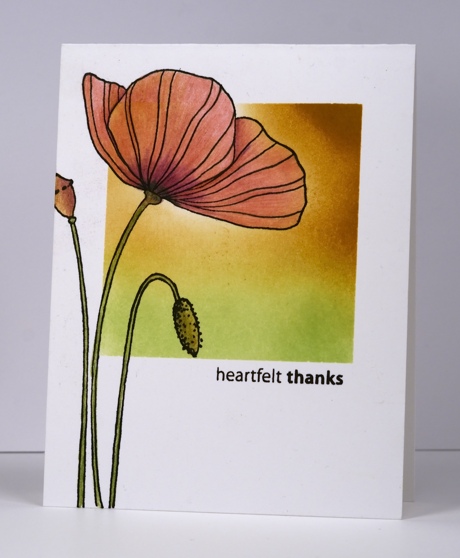
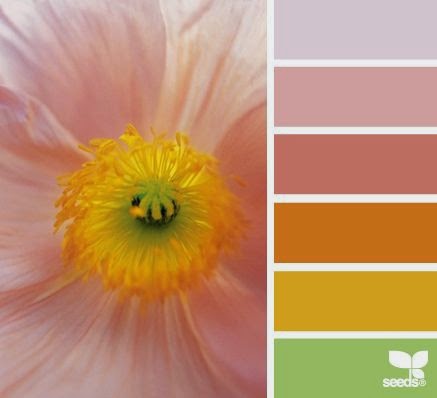
Susan is hosting the new One Layer Simplicity Challenge and she has chosen six gorgeous summer colour palettes to inspire us. I chose the one below which was a challenge as I don’t often combine pinks and yellows.
I just did a big clean up and reorganization of my craft area and in doing so found the card base above with the square already masked and the green sponging started. I sponged more of the square in memento peanut brittle. I then removed the mask and stamped the poppy in versafine onyx black. I decided to use my coloured pencils for the poppy because I had the colours in the photo. I blended one colour pencil over another rather than using a blending fluid or blender pencil.
Also entered in Inkspirational Challenge to use markers or pencils
Supplies:
Stamps: Poppy Time, Amazing (Penny Black)
Inks: Versafine Onyx Black, Memento New Sprout, Peanut Brittle (Tsukineko)
Also: Faber-Castell Artist Polychromos Colour Pencils
Sunflower Library Card
Posted: July 31, 2014 Filed under: A Pocket Full, Life's Journals, Remember This, Sunny Hello | Tags: Fabriano Watercolour Paper, Penny Black creative dies, Penny Black stamps, Ranger Distress stains, Tsukineko Memento inks 1 Comment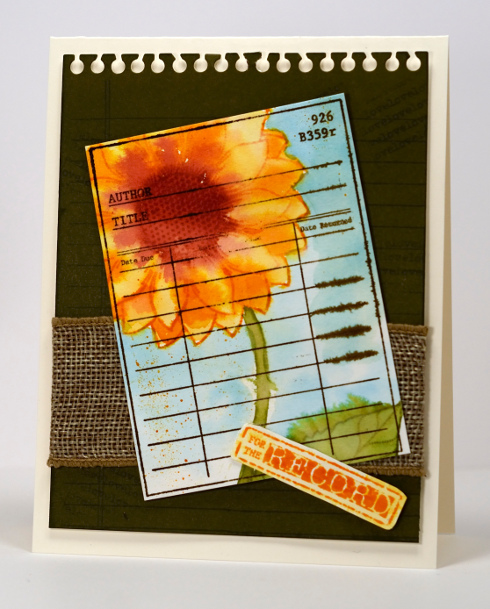
I remember when all the library books had cards tucked into a pocket inside the back cover. I don’t remember any of the library cards being particularly pretty though! I am enjoying using the library card stamp and the notebook page also from the set “Life’s Journals”
I created my library card with distress stains, first inking the stamp then spritzing and stamping it on watercolour paper. I used a waterbrush to blend the colours and add any extra colour including blue for the background. I stamped the library card image when the paper was almost dry. The olive notepad page behind was die cut in two steps. Because I wanted the notepad to be wide enough to almost fill the card base I ran the die through the Big Kick half-way then repositioned the die by lining up the little circles at the top and ran it through again. The library card and label are popped up over a piece of faux burlap ribbon.
I haven’t stamped anything inside the card yet but the “For the Record” stamp leaves me plenty of possibilities…
The Penny Black design team have been sharing projects featuring the new Pocket Treasures release all week so check out the blog if you haven’t done so already.
The details post is up on One Layer Simplicity highlighting some great one layer cards and the new challenge will go live tomorrow, August 1st.
Supplies:
Stamps: Sunny Hello, Life’s Journals, Remember This (PB)Creative Dies: A Pocket Full (PB)
Inks: Spiced Marmalade, Peeled Paint, Fired Brick, Walnut Stain Distress Stains, Broken China stain and ink (Ranger)
Paper: Neenah Natural White 110lb card stock, Olive Grove Mix & Match paper, Fabriano 100% cotton hotpressed watercolour paper
Also: May Arts Faux Burlap Wired Ribbon
Stenciled with text
Posted: July 28, 2014 Filed under: CAS, Footnotes, Verdant | Tags: CAS, Faber-Castell Albrecht Durer Watercolour pencils, Fabriano Watercolour Paper, Penny Black stamps, Penny Black stencils 14 Comments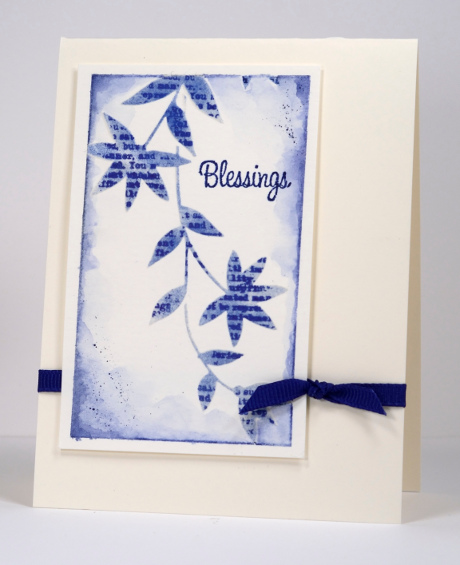
I have been experimenting with my stencils trying different techniques and one thing I wanted to do was stamp a pattern through the stencil onto the card underneath. I ended up using some modeling paste first to give me a slightly raised image. I taped the stencil to some watercolour paper first then spread modelling paste over it with a palette knife. I removed the stencil to let the paste dry thoroughly then replaced it before stamping. I used the text stamp from “Footnotes” and did not stick it to an acrylic block first, instead I kept it flexible and pressed it onto each leaf and flower space in the stencil. As I had stamped it with Versafine Majestic Blue I lightly sponged the same ink over the stencil to captures the stems and define the design a little more. The panel was taped to my work surface so I used the edge of the tape as a border adding blue with a watercolour pencil and blending the colour into the panel. I finished it off with just a few little splatters and a small sentiment. The panel is popped up over a grosgrain ribbon.
You can’t see the modeling paste in my photo but the effect on the card is a subtle raised image. I have more experimenting with stencils to share in the days to come. Thanks for dropping by.
Supplies:
Stamps: Footnotes, Treemendous (PB)
Stencil: Verdant (PB)
Inks: Versafine Majestic Blue (Tsukineko)
Pencils: Albrecht Durer Indianthrene Watercolour pencil 247 (Faber Castell)
Paper: Fabriano 100% cotton hot pressed watercolour paper, Neenah Classic Crest Natural White 110lb smooth
Texture: Modelling paste












