
Speaking my Language
Posted: June 19, 2018 Filed under: Bister, friend duo die, Nuvo shimmer powder, typewriter text | Tags: Bister, My Favorite Things, Nuvo shimmer powder 4 Comments
After the interest and kind comments expressed yesterday about the bister & emboss resist combo I thought I’d show you another done with the same ingredients. I embossed the typewriter text stamp on hot pressed watercolour paper and created two different looks with two brands of paint powder. The blue one features blue bister, like yesterday’s card and the tones are muted and earthy. The pink card features Nuvo cherry bomb shimmer powder and the tones are bright and sparkly.
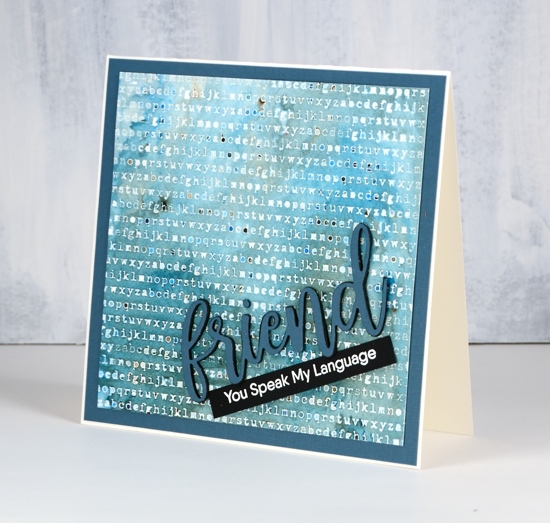
Once again the paint powders created a range of shades and pooled in different places trapped by the embossing. I thought it was particularly clever the way the letters trapped dark colour at times and white space at other times.
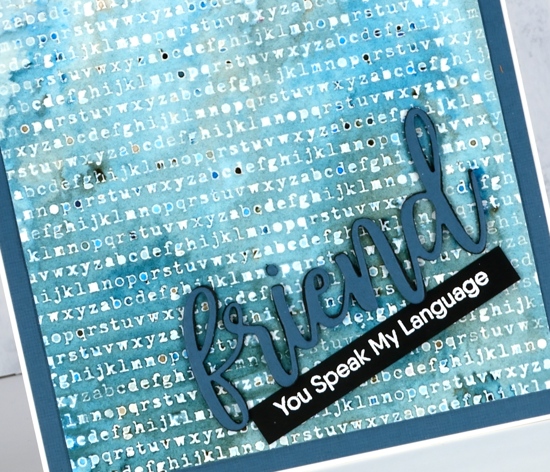
I cut the ‘friend’ die cut in blue card and black foam to make a stacked word then added the embossed sentiment strip underneath.
The pink card features the same steps but there is shimmer here and there over the panel. I also added sparkle to the die cut ‘friend’ by embossing the whole word with versamark and clear sparkle powder.

I doubt I will ever tire of playing with paint powders; the results are different every time!

Supplies
Stamps: Anything but basic friendship, typewriter text (MFT)


Dies: friend duo

Inks: versamark, versafine clair charming pink

Paints: blue bister, cherry bomb nuvo shimmer powder
Papers: hot pressed watercolour paper, Neenah solar white, Neenah natural, Neenah black, pink, blue


Also: clear sparkle embossing powder, white embossing powder (WOW), black foam
![]()


Happy Together
Posted: June 18, 2018 Filed under: Bister, Happy together, Tranquility | Tags: Bister, Penny Black stamps 19 Comments
I am quite happy with the way these little cacti turned out using only one colour of bister paint powder. Bister can create surprising results. I used blue bister powder on hot pressed watercolour paper over clear embossing.
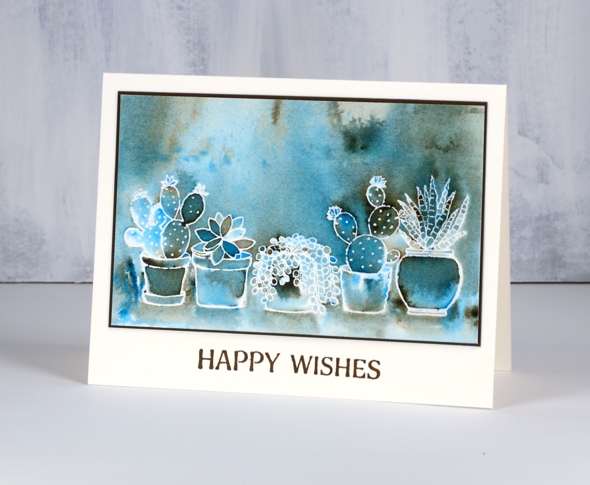
Bister paint powders have an earthy tone to them which you can see clearly on this panel. I sprinkled blue bister over the panel and spritzed with water until the paint activated. I tilted and turned the panel until the paint pooled in certain places. Where there was very little colour I used a paint brush to transfer some from a darker area. Once there was good coverage I let it dry partially then picked up some brown from the panel and painted shadows below each of the pots. I matted the panel in brown and added the sentiment in vintage sepia versafine ink.
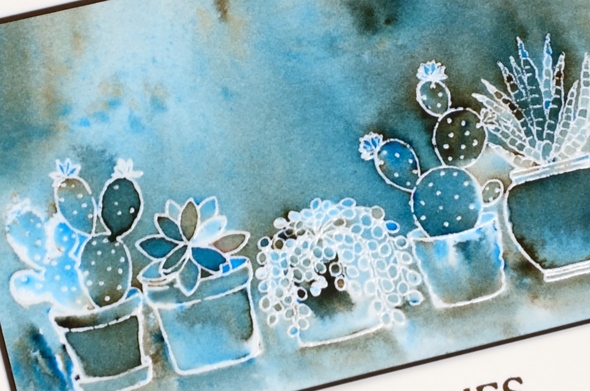
I thought it was very cool the way all those leaf shapes in the second from left cacti turned out different colours. This is why I love playing with paint powders.
Supplies
Stamps: happy together, tranquility


Paper: hot pressed watercolour, neenah natural white, brown
Inks: versamark, vintage sepia

Paint: blue bister (available in USA from ‘I Brake for Stamps’ and in Ottawa from ‘Crop A While’)
Also: clear embossing powder
![]()
Shimmery Summer Glow
Posted: June 6, 2018 Filed under: Nuvo shimmer powder, summer glow | Tags: Nuvo shimmer powder, Penny Black stamps 13 Comments![]()
I was lucky enough to be in my local scrapbooking store, Crop A While, recently when they were unpacking the Nuvo shimmer powders. I jumped at the chance to give them a little test drive, after all they are watercolour powders! I used the summer glow iris from Penny Black and three colours of shimmer powder. I made one sample at the store then played around with the same image and three powders at home.
![]()
I embossed ‘summer glow’ in clear powder on two hot pressed watercolour paper panels and one cold pressed panel. My experiments moved from careful ‘stay inside the lines’ painting to free flowing colours all over the panel. The most controlled one I completed by dropping a little violet brocade, blue blitz and solar flare powders on my craft mat so I could pick some up with a damp brush. As with most powders the colour is intense; I was able to pick up a tiny bit, paint it into a petal then blend with water to get the depth I was after. I used violet brocade for the petals and ended up with some pink and blue sections as well as deep purple. To colour the stems and leaves I mixed the blue and yellow, adding more blue where I wanted shading.
![]()
I used the cold pressed paper for a looser style and sprinkled some powder directly on the panel. It is tricky to sprinkle tiny amounts at a time but I tried to drop some violet brocade into the flowers and buds. I held my hand over the stems while I spritzed the flowers. The paint activated straight away, some inside and some outside the petals. I used a paintbrush to fill any petals that were too pale but tried not to alter the ‘random magic’ too much. Next I sprinkled the blue blitz and solar flare powders over the stems and leaves and spritzed with water. Again I moved the paint a bit with a paint brush to fill the areas enclosed by embossing.
![]()
On the final panel I sprinkled the powders in the same areas and spritzed water liberally over the top so the colours filled the background as well as the embossed iris.
![]()
I know the messiness of this one won’t be to everyone’s taste but I think it turned out a little fun and funky.
![]()
I popped up the panels with foam on cream card bases.
![]()
What you don’t see in the photos is the pretty shimmer in the paint when it dries. ( Since my first experiments I have bought a couple more colours so the fun will continue)
Supplies
Stamp: summer glow 40-610 (PB)

Ink: versamark
Paper: cold pressed watercolour paper, hot pressed watercolour paper, Neenah natural white

Paint: Nuvo shimmer powders blue blitz, violet brocade, solar flare
Also: clear embossing powder
![]()
Summer Dream
Posted: May 30, 2018 Filed under: summer dream | Tags: Penny Black stamps, Ranger Distress inks, Tsukineko Memento inks 3 Comments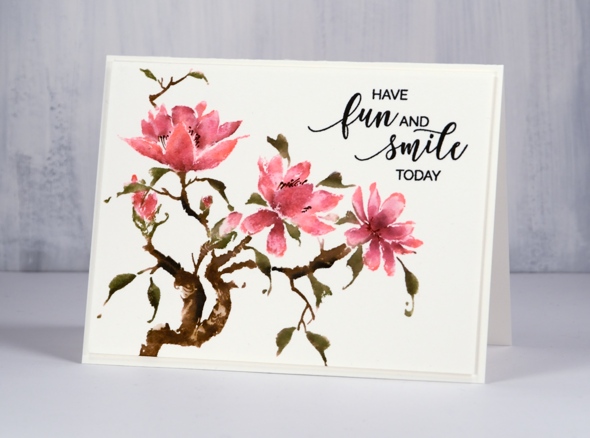
Penny Black has a selection of magnolia stamps including ‘Summer Dream’, featured on today’s card. I used a memento inkpad and distress markers to colour it, making use of a stamp positioning tool to let me add colour little by little.
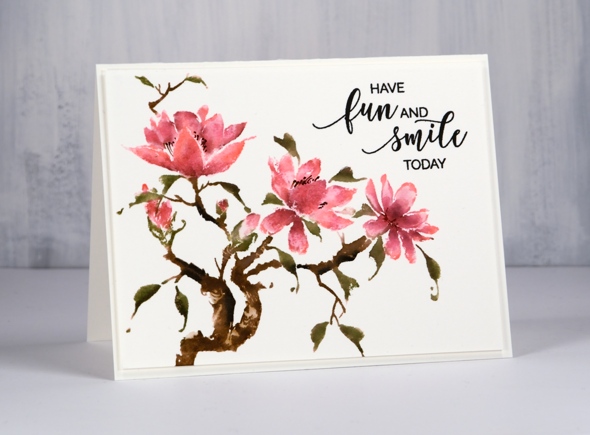
I inked the whole stamp with memento angel pink ink and stamped on hot pressed watercolour paper. Angel pink is a very pale ink so it is good for layering over. I used worn lipstick, picked raspberry and aged mahogany distress markers to build up detail and shading on the flowers then peeled paint and forest moss markers to create two toned leaves. I finished off the flowers by drawing the stamen with a black marker. I added gathered twigs and black soot marker to the twigs and stems to complete the image. When I ink with dye based markers I spritz the stamp lightly before stamping so the colour begins to blend on the stamp. I sometimes use a damp brush to blend on the paper also.
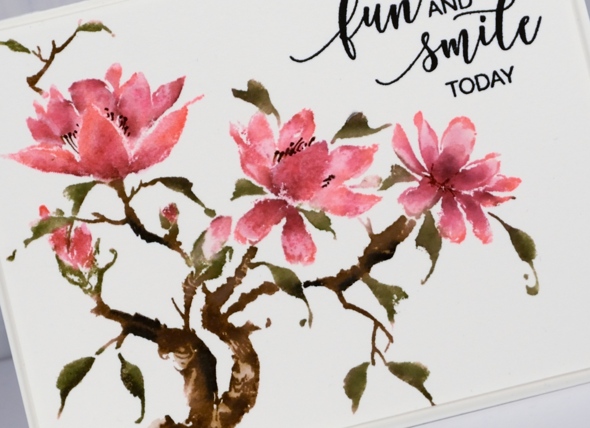
The sentiment from ‘Smile today!’ is stamped in versafine clair nocturne and the panel popped up on foam over a natural coloured card base.
Supplies:
Stamps: summer dream, smile today


Distress markers: worn lipstick, picked raspberry, aged mahogany, gathered twigs, peeled paint, forest moss, black soot


Ink: angel pink memento, nocturne versafine clair

Paper: hot pressed watercolour paper
Also: white foam

Knock knock
Posted: May 28, 2018 Filed under: Art Impressions WC stamps, border edgers | Tags: Art Impressions watercolor stamps, Kuretake Zig clean color real brush markers, My Favorite Things, Penny Black creative dies, Ranger Distress inks 11 Comments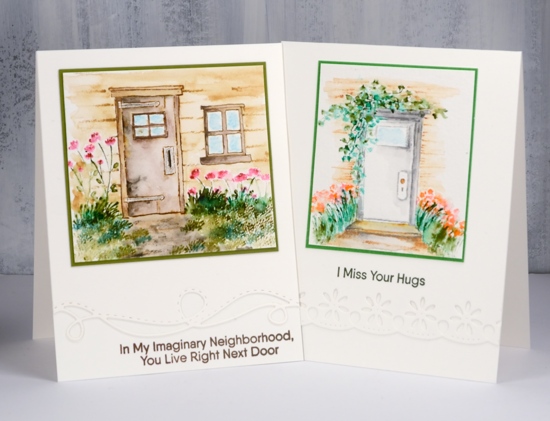
I’m collaborating with the Foiled Fox team today so you can read more about these cards on their blog. These are my first cards created with Art Impressions ‘Watercolor’ stamps. The stamps are designed for creating scenes; there are a lot of little stamps depicting stems, branches, foliage and flowers. The stamper can combine them however they wish, use a water soluble ink then blend with a little water to turn all the stamping into ‘watercolor paintings’.
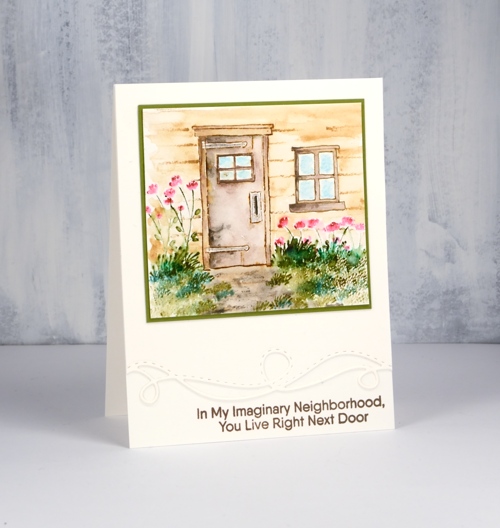
I used a combination of foliage and flower sets to decorate two cards featuring doors from the Art Impressions ‘Door’ set. It was fun to create little scenes around the doors. One ended up being a rustic cabin type door and the other a simple white door at the end of a garden path.
I chose frayed burlap distress ink to stamp one of the doors and grey zig clean color real brush marker to ink the other door. I also used the zig markers for the floral and foliage stamps. I learnt on the Art Impressions youtube channel that the best way to stamp the flowers and leaves is to ink them, then stamp several times just slightly offset each time. That way you create more volume and variety in colour. After you have done your stamping (with watersoluble inks like distress and zig clean color) you can blend all the images with a damp brush to create the watercolour look.
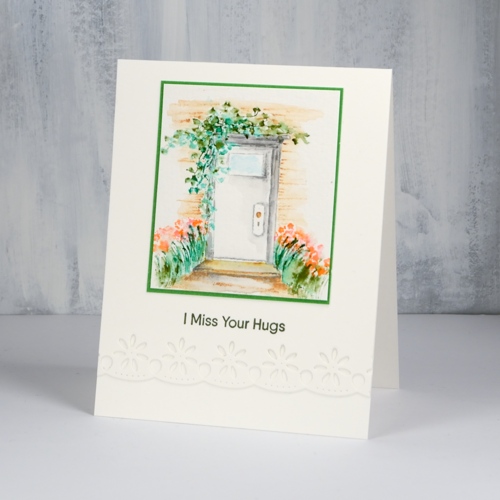
I added some elements with the zig markers and watercolour pencils to fill out the scenes. front path, bricks and planks around the doors and a hand drawn window. Pop over to the Foiled Fox blog to read about my method in more detail.
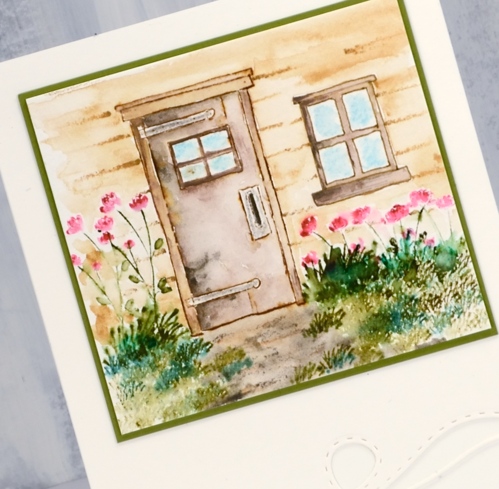
I really enjoyed playing with these stamps to create my own scenes. The stamps are tiny but you can fill a garden quickly by stamping a mass of flowers and foliage then blending it every so lightly with water. I would love to hear from you in the comments below if you have already done some creating with the Art Impressions watercolour stamps or if you are feeling inspired to give it a try. I will definitely be back with more scenes.
Supplies
Art Impressions Stamps: WC Foliage set 3, WC Flower set 3, WC door set, WC Foliage set 1, Flower


MFT Stamps: Anything but Basic Friend set
Inks: frayed burlap distress ink, versafine sepia, versafine olympia green


Dies: Penny Black border edgers

Papers: cold pressed watercolour paper, neenah natural white, green cardstocks
Also: zig clean color real brush pens, watercolor pencils


Pencil on black
Posted: May 23, 2018 Filed under: Appreciation, Coloured pencil, ebulliant | Tags: Faber-Castell Polychromos Colour Pencil, Penny Black stamps 3 Comments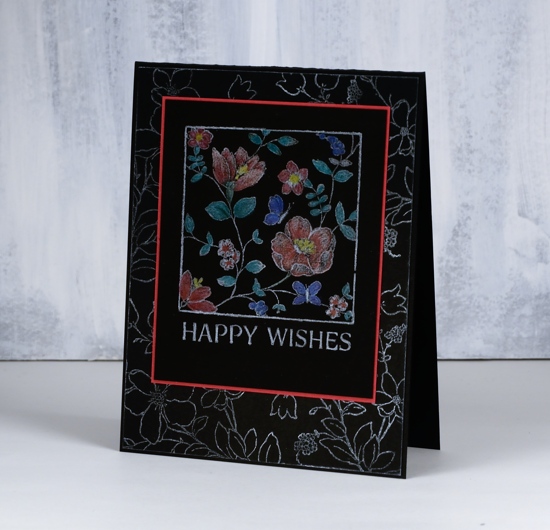
My coloured pencils feature more often in my projects these days. To create this card I stamped the Penny Black floral stamps in delicata white shimmer ink then coloured with my Faber Castell polychromos pencils. The feature image is from a 2-stamp set called ‘appreciation’ and the background image from a floral set called ‘ebulliant’.
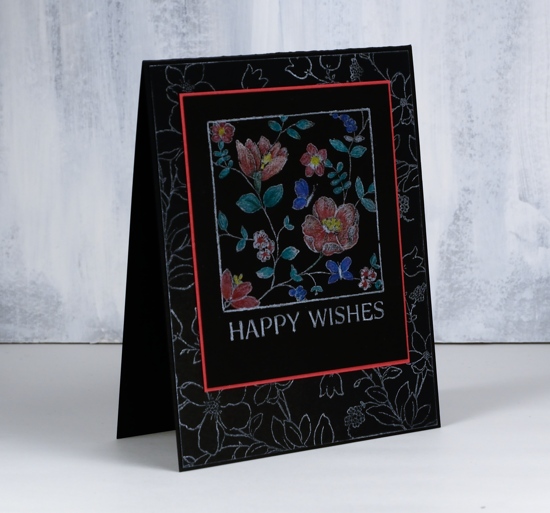
I used a white pencil to lightly colour the flowers and leaves before adding other colours over the top. I also coloured over the border and sentiment with a sharp white pencil to make them pop a little more.
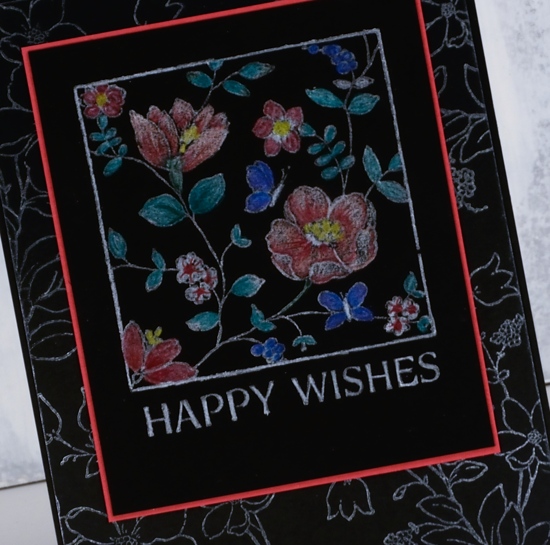
The delicata shimmer white ink definitely has shimmer to it and the overall effect of the pencils and ink on black is a bit like a printed fabric
Supplies
Stamps: appreciation 30-488, tranquility 30-484, ebulliant 30-747 (PB)


Inks
![]()
Paper: neenah black, red

Pencils: Faber Castell Polychromos

Belle
Posted: May 21, 2018 Filed under: A Pocket Full, belle, Foiling, Zigs & zags | Tags: Kuretake Zig clean color real brush markers, Minc, Penny Black creative dies, Penny Black stamps, WOW embossing powders 4 Comments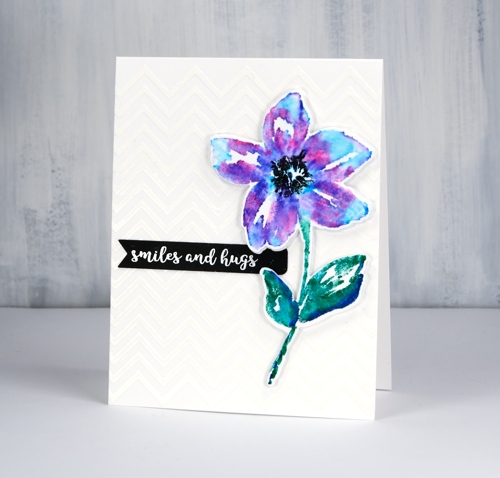
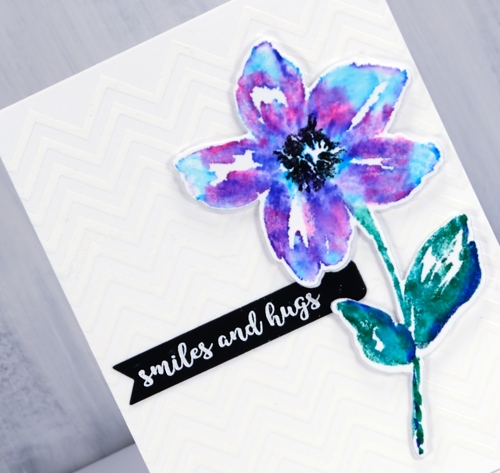
The zigs & zags stencil has popped up again today as a background for this die cut and watercoloured flower. I applied deco transfer gel directly to my card base (neenah solar white 110lb) then ran it through my minc with white foil. The result is a subtle chevron background. I wanted my flower to match the white card base exactly so I used the same neenah solar white which meant I did not add much water at all when blending my zig pens after stamping. I used a mix of blue, pink and purple and a blue/green combo on the leaves and stem then just a damp brush to blend with water. I made sure the blending was dry before stamping the black centre several times then used the co-ordinating die to cut out the flower plus a white foam one to pop it up over the background.
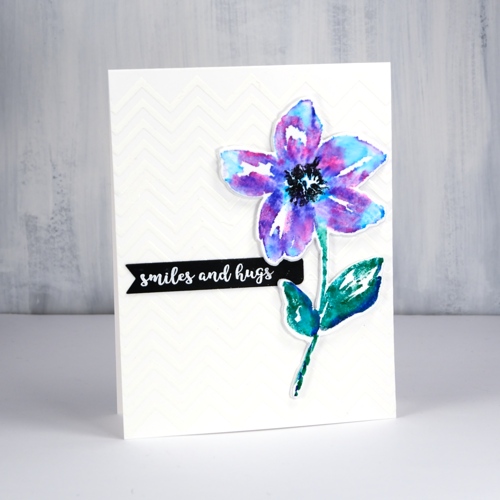
The little black banner was die cut with one of the dies from the PB ‘pocket full’ die set. I have pulled out all my little label, banner and tag dies from different sets and grouped them together so I can quickly cut the right size for a sentiment. This sentiment from the handy ‘banner sentiments’ set is embossed in white powder.
Supplies
Stamps: belle, banner sentiments


Die: belle cut out, a pocket full


Stencil: zigs & zags

Paper: neenah solar white, neenah epic black
Markers: kuretake zig clean color real brush pens pink, blue, violet, cobalt blue, green, black
Also: transfer gel, white foil, foam, minc, white embossing powder
![]()


Alcohol ink splatter
Posted: May 18, 2018 Filed under: Alcohol Ink, branching out, cherry blossom | Tags: Penny Black creative dies, Ranger Alcohol Ink, Yupo Paper 3 Comments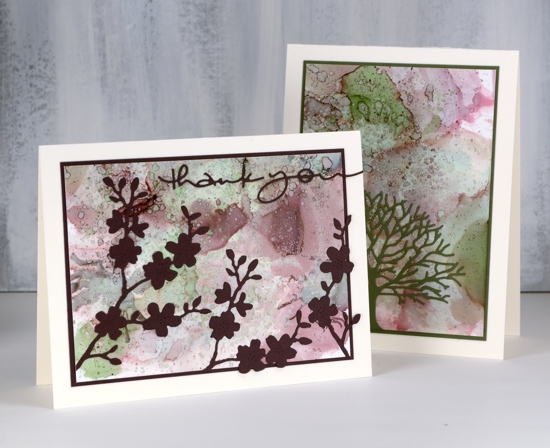
I hope you have enjoyed my alcohol ink projects this week. I could have happily continued playing with colour combinations and different techniques but other projects beckoned.
Once again I used a colour combination curated by Ranger; this one is called ‘Cottage Path’ and includes slate, currant and meadow. I worked on the heavyweight yupo paper and dropped inks randomly over the panel to begin. Once there was plenty of coverage I used a small cheap paintbrush (plastic bristles) to flick rubbing alcohol as well as the ‘cottage path’ inks over the panel. The result is very fine circles over the top of the larger blobs of colour.
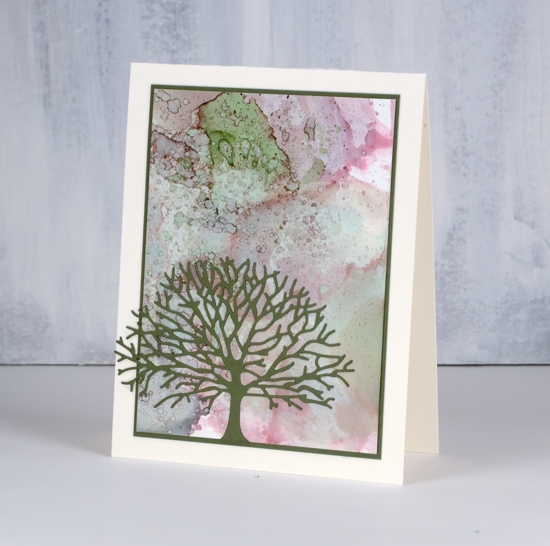
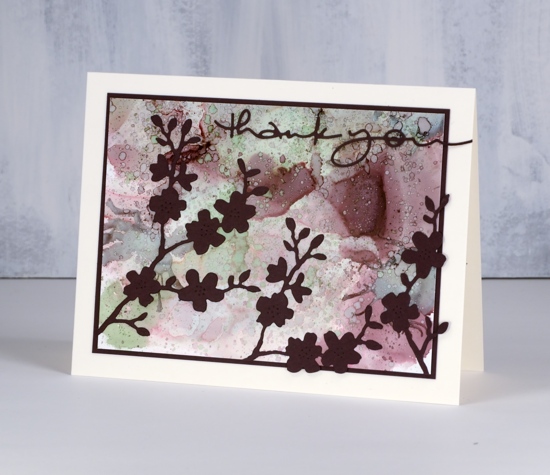
I matched my cardstock to the ink colours and die cut a tree from green using the Penny Black ‘branching out’ die then matted my panel with the same colour. On the other card I cut a couple of ‘cherry blossom’ die cuts plus a sentiment.
Supplies
Dies: branching out, cherry blossom, many thanks


Inks: Cottage path alcohol inks (Ranger)

Paper: heavyweight yupo (Legion) natural white (neenah), burgandy and green

Amazing Friend
Posted: May 16, 2018 Filed under: Alcohol Ink, Anything but basic friendship | Tags: My Favorite Things, Ranger Alcohol Ink, Yupo Paper 7 Comments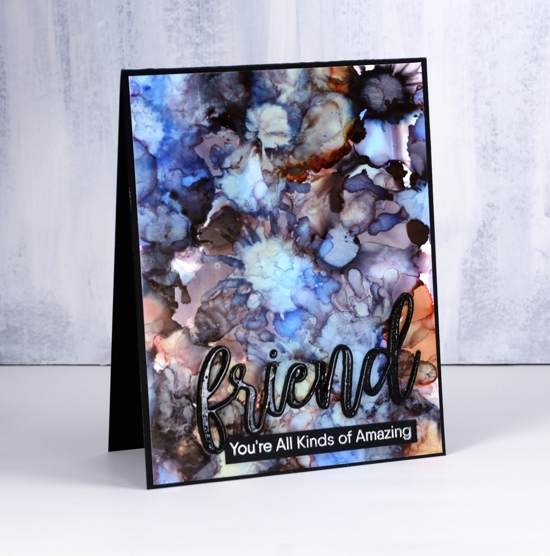
If you have played with alcohol inks you will know it’s hard to stop once you get started. When I was trying out my new heavyweight yupo from the Foiled Fox I decided to experiment with another colour combo packaged by Ranger. This panel features the three inks from the Miner’s Lantern set, stonewash, rust and pitch black. What I loved about these colours as I started experimenting was the variety of tones and shades I was able to get as the colours mixed.
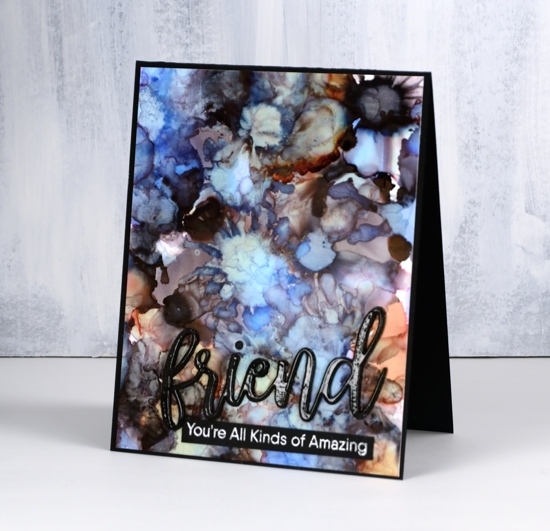
To create the patterns I dropped the colours randomly on the yupo then blew air on the drops with a straw. You can use a can of compressed air or an air brushing tool also. If you blow on the inks when they are still wet they spread into flower shapes and create pale transparent patterns. I used some drops of rubbing alcohol also which dilutes and mixes the inks.
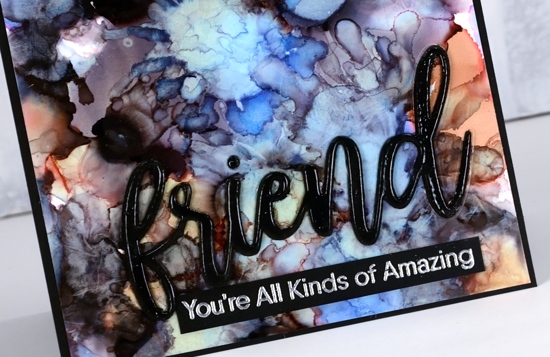
When the panel was dry I trimmed it to fit on a black card base and added a die cut sentiment and an embossed sentiment both from My Favorite Things. The word die (from the ‘friend duo’ set) I cut from black foam and black cardstock. Before I attached them to the panel I embossed the black cardstock word in clear powder to give it a shiny surface. I glued the foam down first, then the embossed cardstock ‘friend’ on top. I embossed a phrase from the MFT ‘Anything but basic Friendship’ set in gun metal embossing powder – a new colour from Ranger.
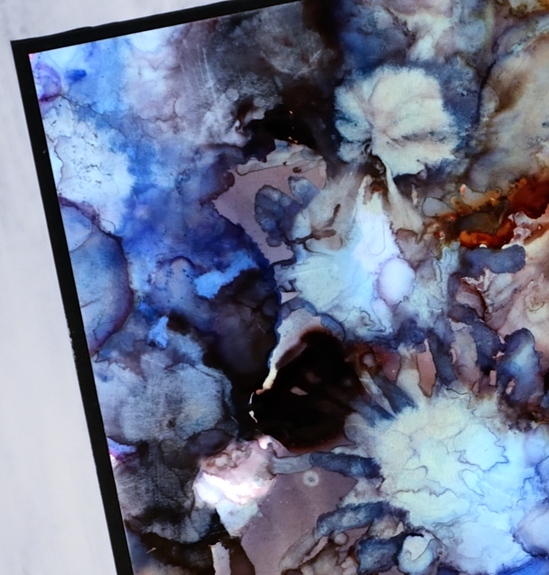
My favourite part of the panel is this top left corner with all the blues!
Supplies
Stamps: Anything but Basic Friendship (MFT)
Die: Friend Duo (MFT)
Ink: Miner’s Lantern Alcohol ink (Ranger), Versamark (Tsukineko)

Paper: Heavy weight yupo, Neenah black cardstock
Also: black foam, clear embossing powder, gun metal embossing powder (Ranger)
![]()
Yay for Yupo
Posted: May 14, 2018 Filed under: Alcohol Ink, Foiling, YAY for you | Tags: Foiling, My Favorite Things, Ranger Alcohol Ink, WOW embossing powders 5 Comments
I’m sharing some sweet patterned cards over on the Foiled Fox blog today. Pop over there to see how I made these alcohol ink and foil cards.
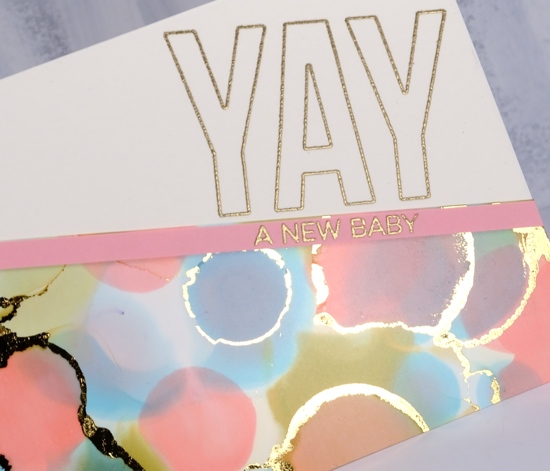
I used heavy weight yupo paper which was great to work with and I love the shine of foiling over alcohol ink!

I ran my alcohol ink panel through my Minc on the zero heat setting but you don’t have to have a minc; you could use your die cutting machine to apply pressure or just burnish with your fingers to get the foil to stick to the alcohol ink.
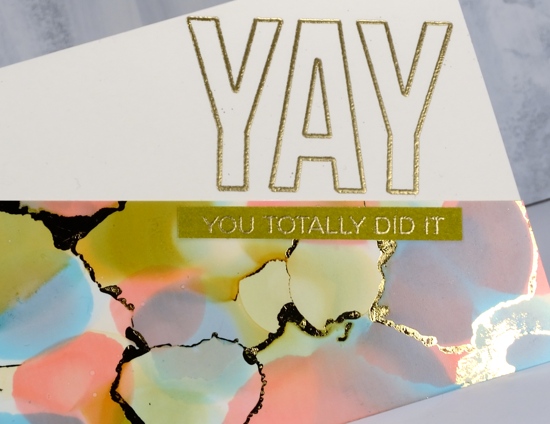
The ‘Yay for you’ set from My Favorite Things gave me all sorts of options for sentiments; I settled on a baby card and an achievement/congratulations card. You can read my step by step instructions over at the Foiled Fox.
Supplies
Stamps: Yay for you (MFT)

Paper: heavy weight yupo, neenah natural white, pink, olive green
Inks: shell pink, willow, cloudy blue alcohol inks (Ranger), delicata golden glitz ink


Also: WOW gold embossing powder, gold foil, minc


