
Central Park in snow & masking fluid questions answered
Posted: November 6, 2014 Filed under: City lights, Prancers, Skyline, Stamped Landscapes, Tutorial | Tags: Fabriano Watercolour Paper, Penny Black stamps 16 Comments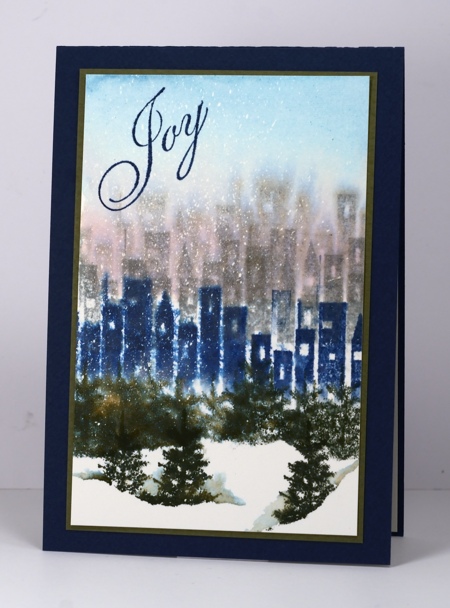
Last week I posted a very snowy card and received several questions about using masking fluid. I decided to make a short video showing my set up for flicking masking fluid. Masking fluid isn’t just for flicking, of course, but you could be excused for thinking that when you see how rarely I do anything else with it!
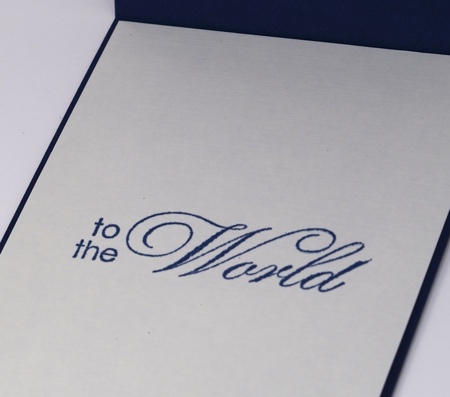
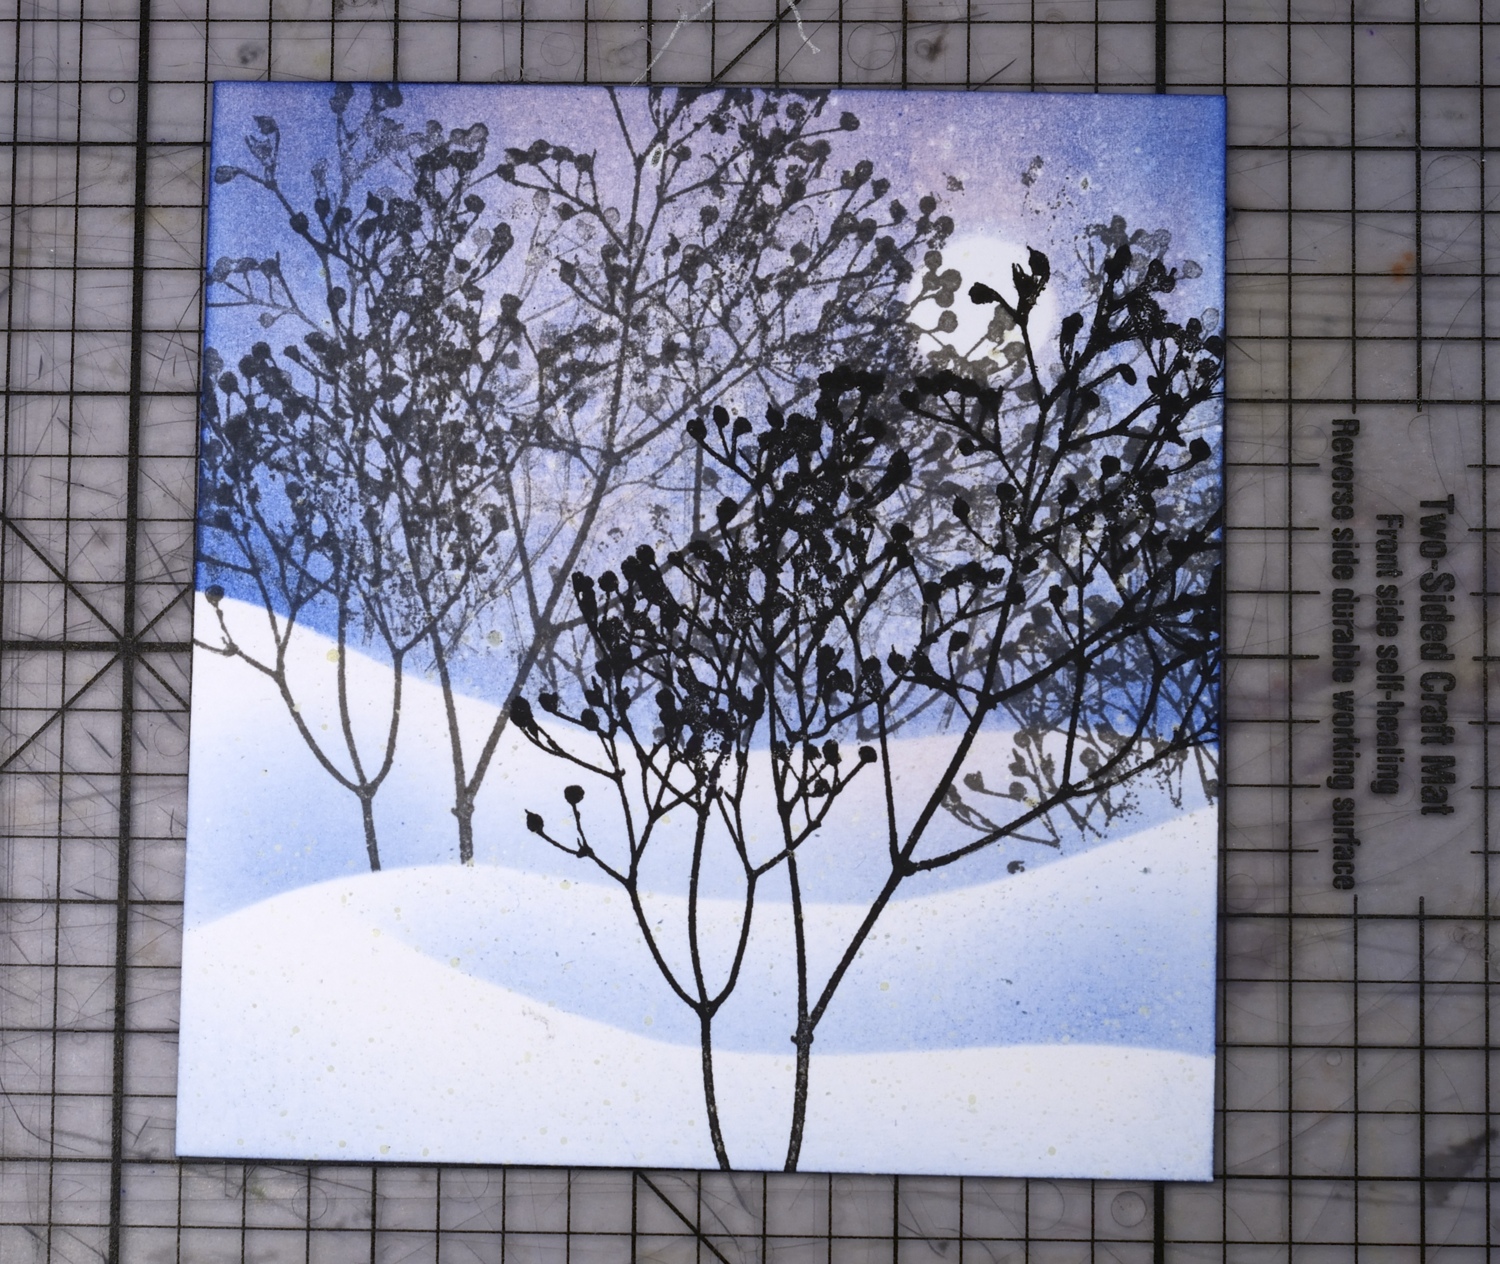
I included the card above because it shows snow created after flicking a generous amount of masking fluid on a piece of watercolour paper. It is actually the piece I flicked in the video. I painted over the masking fluid with a blue and a pink distress stain (listed below) and then while the paper was still damp stamped the Skyline stamp in grey a few times then blue. I once again used the little tree from the Prancers set in the foreground. I cut the large sentiment from Yuletide Greetings into two pieces and stamped the front and the inside of the card.
Some answers to your questions about masking fluid
What is masking fluid?
A non-staining liquid composed of rubber latex for masking areas of work needing protection when colour is applied over the top
What type do you use?
Winsor & Newton non permanent masking fluid with a slight yellow tint. The yellow tint makes it easier to see where it has been applied. This is probably more useful when carefully painting the masking fluid onto a project rather than flicking it with careless abandon!
Are all brands the same?
I have used the Winsor & Newton brand for years and cannot comment on other brands. I think the key is to make sure you buy non permanent because you want to remove it after all your stamping/sponging/painting is completed.
Where do I find masking fluid?
Masking fluid is an art supply often used by watercolour artsists so you can find it in art supply stores, usually with the watercolour supplies.
How do you remove masking fluid without ripping the paper?
I must admit I haven’t had too many instances of masking fluid ripping my paper. The spots from splattering are small and rub off very easily. Sometimes with larger dots or sections it is harder to remove the masking fluid. If you are painting a larger area do a test on your paper first to make sure you can remove the masking fluid successfully. I always use my fingers to rub it off but you can use a clean soft eraser.
The video I have created shows how I splatter panels for projects such as the one above. Hopefully some of your questions will be answered once you have watched my process.
Supplies:
Stamps: City Lights, Prancers, Season’s Wishes (PB)
Inks: Memento Nautical Blue, London Fog, Northern Pine (Imagine Craft/Tsukineko) Victorian Velvet, Broken China distress stains(Ranger)
Cardstock: Neenah Solar White 110lb cardstock, Fabriano 100% cotton hot-pressed watercolour paper, textured blue cardstock, textured green cardstock, linen textured paper
Also: Winsor & Newton masking fluid, Kemper Spatter brush
Watercolour with a stencil
Posted: August 17, 2014 Filed under: Charming, Flower Dance, Tutorial, Watercolour | Tags: Penny Black stamps, Penny Black stencils, Ranger Distress stains, Tutorial 17 Comments
In creating today’s card I used a co-ordinating stamp and stencil from Penny Black. By applying ink to the Flower Dance stencil and pressing it onto my watercolour paper I was able to create background pattern and colour all around the flower image I later stamped and watercoloured. I have a video tutorial showing how I did it below.
This is the kind of technique that will never produce the same results twice. I’ve tried it already using another stencil with quite different results which I will share once I’ve completed the card.
Supplies:
Stamps: Charming, Friendship, Letter Background (PB)
Stencil: Flower Dance (PB)
Inks: Tumbled Glass, Milled Lavender, Evergreen Bough distress stains and Peacock Feather, Dusty Concord distress inks (Ranger)
Markers: Wink of Stella Gold pen
Cardstock: Neenah Classic Crest Avon Brilliant White 110lb smooth , Fabriano 100% cotton hot pressed watercolour paper, Penny Black Mix & Match Blue Lagoon paper
Also: Teal grosgrain ribbon, gold cord
Summer Sun Collaboration with Faber Castell
Posted: June 12, 2014 Filed under: Fresh Breeze, Fuchsia, Gelatos, Mixed Media, Tutorial | Tags: Faber Castell gelatos, Faber Castell Paper Crafter Crayons, Faber Castell Textural Accents, Penny Black creative dies, Penny Black stamps, Tutorial 4 Comments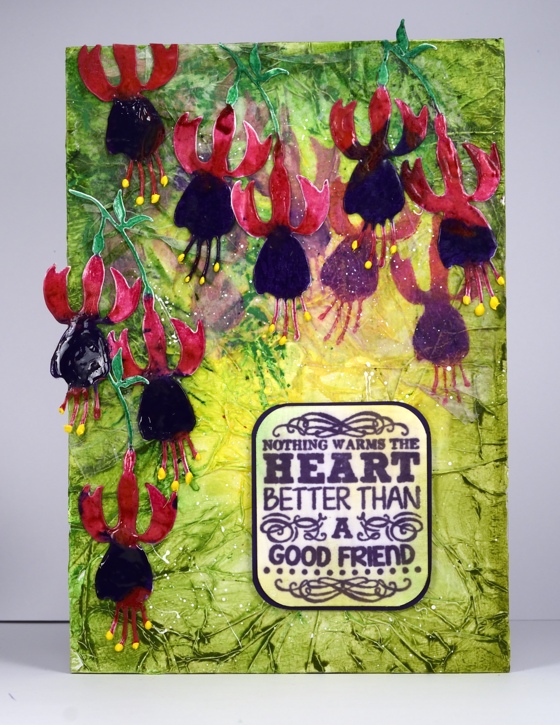
All this week there is a special collaboration occuring between Faber-Castell Design Memory Craft and Penny Black. There are projects on the PB blog using Paper Crafter Crayons and Double Scoop Gelatos AND you’ll find projects from the Faber-Castell Design Memory Craft designers on their blog featuring PB stamps. Visit both Penny Black and Faber Castell Memory Craft for details of giveaways.
.
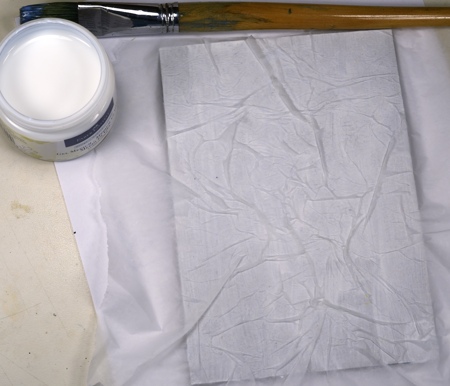
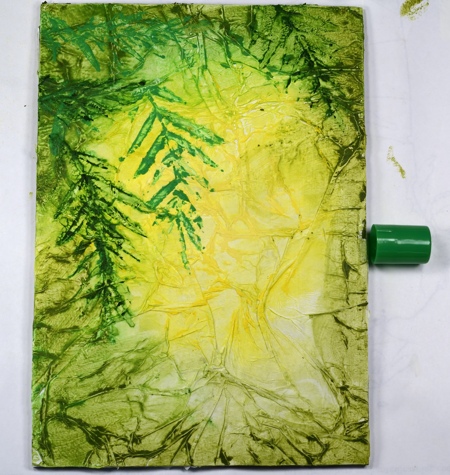
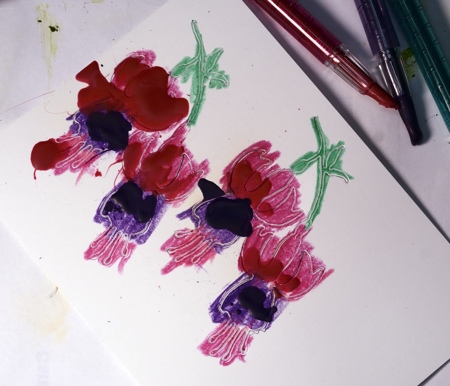
I decided to create a mixed media panel, a rare occurrence for me. I really enjoyed playing with the Textural Accents and the gorgeous colours in the Paper Crafter crayons and gelatos. (if you click on the tutorial pictures you will see more detail)
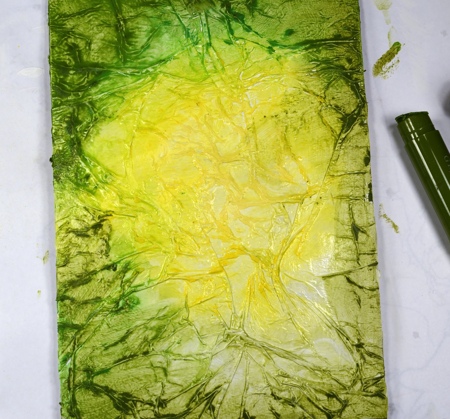
Next I spritzed with water and blended the colours with my fingers.
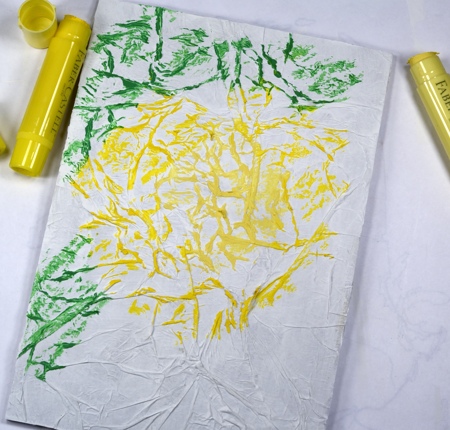
Using stencil plastic I created a stencil using the Fresh Breeze die. (I can’t find the packaging for the stencil plastic so I am not sure what brand but it was sold specifically for creating your own stencils. In order to cut it with a Big Kick I used a metal shim in the sandwich) I applied colour through the stencil with gelatos.
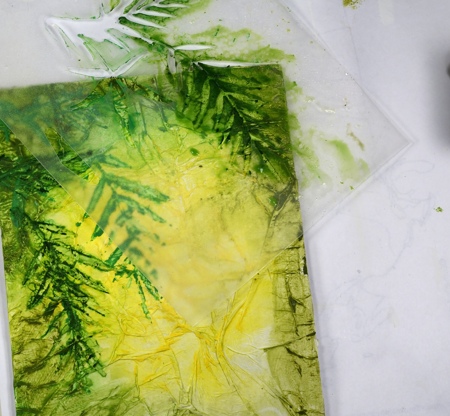
Next I spritzed with water and blended the greens with my fingers through stencil.
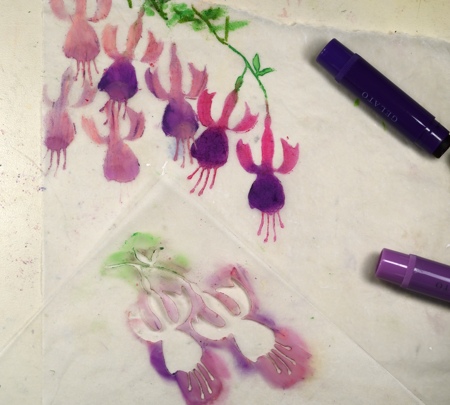
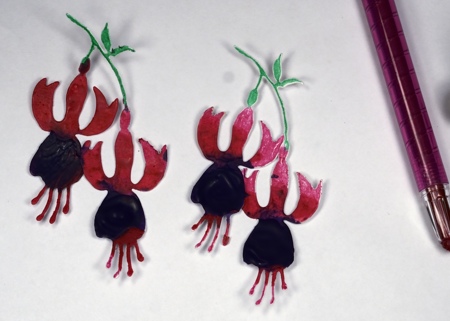
I created another stencil using the Fuchsia die and applied colour to tissue paper with lime, lavender, grape and guava gelatos, then blended with my fingers.
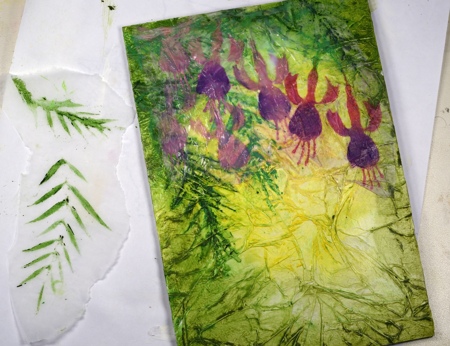
I stenciled some Fresh Breeze leaves with green gelatos on tissue paper and attached both tissue panels to the main panel with Gel Medium. The gelatos on tissue gave the flowers a background misty look that was exactly what I was after.
In other related and creative news, there is likely to be another lull here on the blog in the next few weeks. My daughter’s prom is in two weeks and the dress making countdown starts today! If I have a chance I will update you otherwise please understand that I am creating with tulle and silky fabric instead of paper and cardstock for the next little while.
Supplies:
Stamps: Truly Great (PB)
Creative Dies: Fuchsia, Fresh Breeze (PB)
Gelatos: Faber Castell
Paper Crafter Crayons: Faber Castell
Textural Accents: Gesso, Gel Medium, Glaze (Faber Castell)
Paper: Thick natural coloured cardboard, White 140lb smooth, Tissue paper, PB Mix & Match Periwinkle Paper
Stamp & Doodle
Posted: May 28, 2014 Filed under: Floral Tapestry, Tutorial | Tags: Fabriano Watercolour Paper, Penny Black stamps, Ranger Distress stains, Tutorial 16 Comments
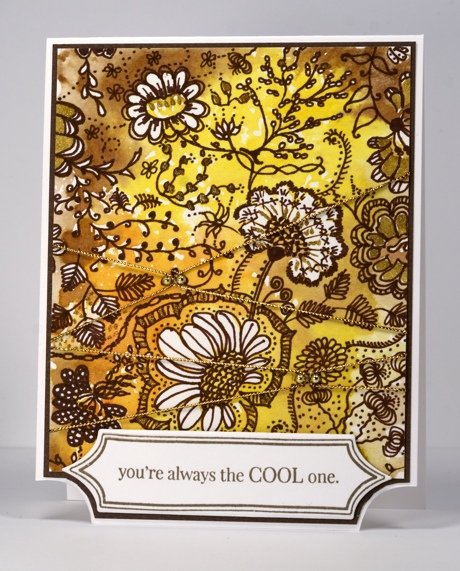
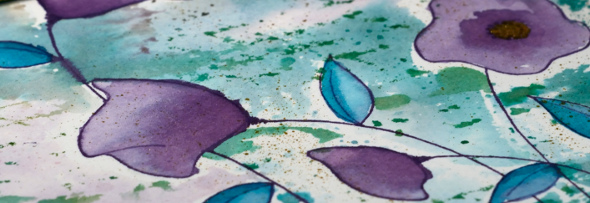
I created this card from a stamped panel that was sitting around on my work table waiting for inspiration. I stamped the “Floral Tapestry” background stamp in Distress stains on watercolour paper. After stamping once I spritzed the stamp and stamped again on another piece of paper, then did it again so I had several panels sitting around, each one a little paler than the previous one. I think this one was the palest panel but it still had plenty of colour and the negative images of the flowers and leaves were clear enough to doodle around. If you watch the video you will see my doodling process. I did not have a plan; I just defined the flower shapes and added leaves, twirls and squiggles in and around them. When I was almost finished I decided a few gold highlights would be nice so I added them with a Wink of Stella pen.
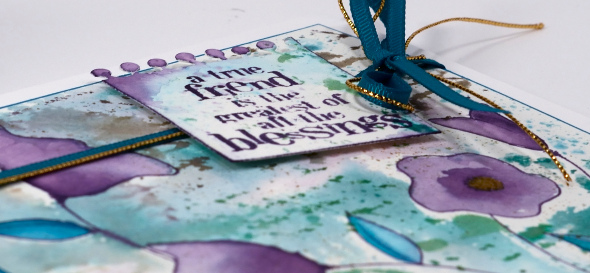
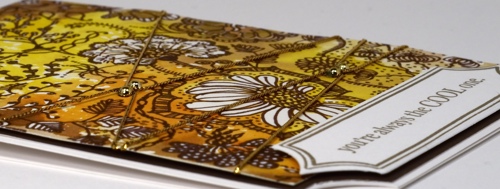
I trimmed the floral panel and criss-crossed some gold cord over it. I added two gold half pearls in each place where the cord crossed and stuck the cord down with glossy accents. The cord did not want to stay in place but with a little pressure on top it finally did! After die-cutting the banner I decided to trim the dark brown mat and cardbase to co-ordinate.
Supplies:
Stamps: Floral Tapestry, Amazing! (PB)
Dies: Triple Banner (PB)
Inks: Versafine Vintage Sepia (Tsukineko) Vintage Photo, Spiced Marmalade, Mustard Seeds Distress stains (Ranger)
Cardstock: Neenah Classic Crest Avon Brilliant White 110lb smooth , Fabriano 100% cotton hot pressed watercolour paper
Ski slopes
Posted: February 17, 2014 Filed under: Christmas Park, Tutorial, Watercolour | Tags: CAS, Penny Black stamps, Ranger Distress stains, Tsukineko Memento inks 19 Comments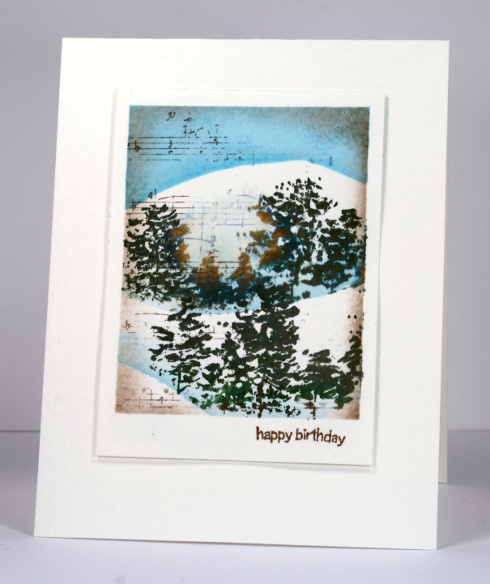
It is my husband, Andrew’s birthday today and this is the card I made for him. Now that he has opened it I can publish it here. I actually made it two days ahead which is a bit of a record for me. I hate to say it but I often make my family’s cards late the night before or even the morning of the birthday. He has been enjoying skiing in Gatineau Park this winter so I attempted a few ski slopes with a little music motif as well because he is also a musician. The plan is to go skiing today after a family breakfast and then tonight our family will attend the Ottawa Symphony concert where our elder daughter is playing.
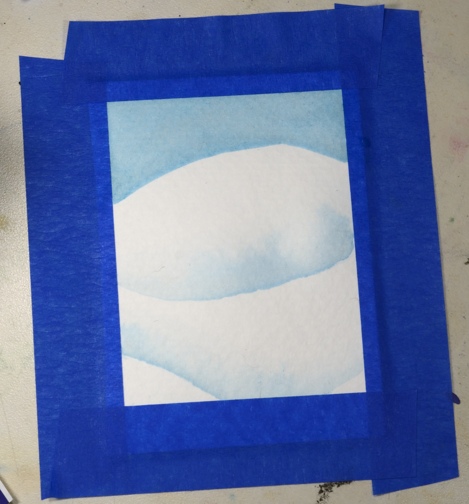
Not only did I make the card ahead of time I remembered to take photos along the way. For a change I used cold pressed watercolour paper. It is more textured so the ink pools in the ‘dents’ a little. I taped a piece to my work table then painted Tumbled Glass distress ink onto the sky area. I painted several layers for a strong colour then painted two snow bank shadows by painting the ink on in a curved line then immediately blending water into the ink to dilute and spread it up the panel.
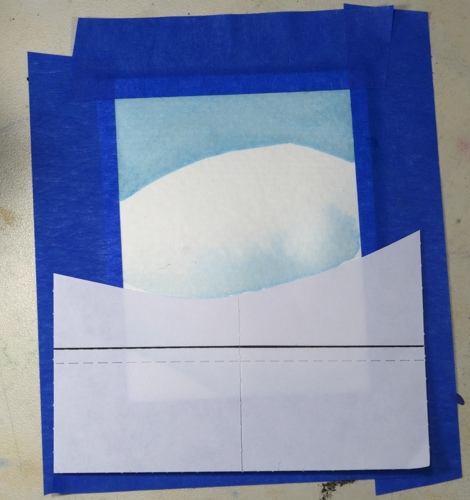
Next I cut a mask to match the top snow bank so I could stamp trees above it.
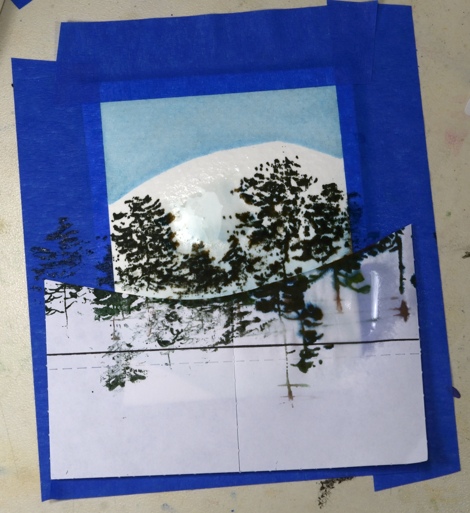
I inked the stamp with two greens, spritzed it with water then stamped it over the mask. I spritzed some water onto the panel to make the colour bleed a little
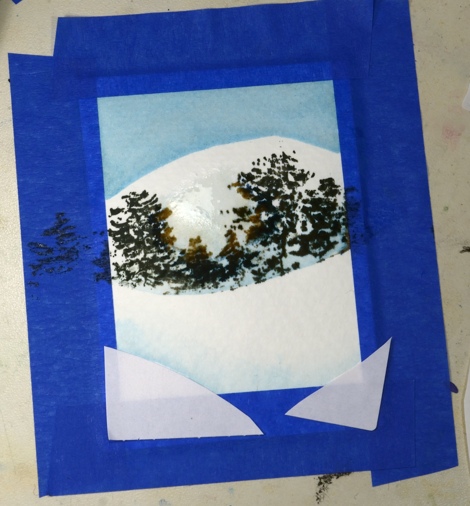
Before stamping trees on the next slope I masked the two lower banks to keep them white.
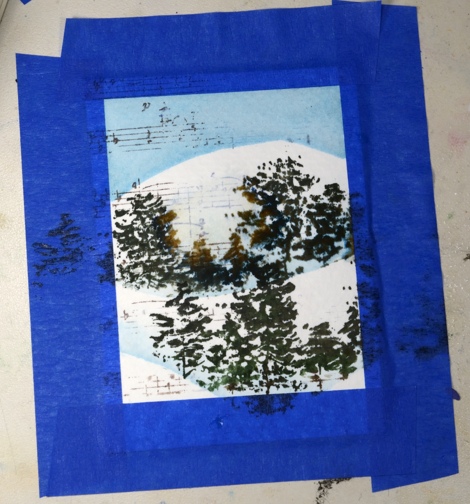
I inked the music background stamp in brown, wiped some of the ink off, stamped on scrap then stamped onto the watercolour panel.
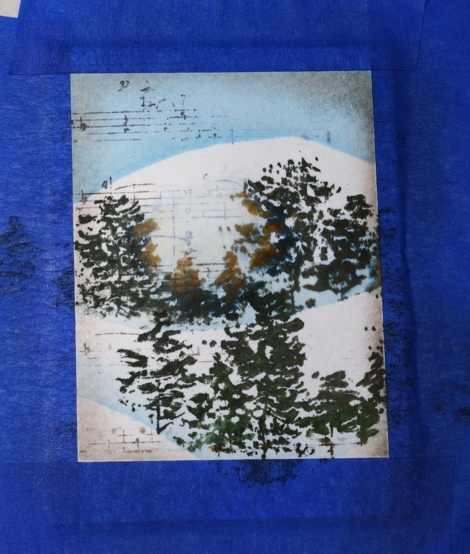
To complete the panel I sponged some brown around the edges. When I removed the painter’s tape I remembered I had left more blank space at the bottom which made it look a little like a polaroid. On the rare occasions I do go skiing I usually wish I had my camera with me to capture the beauty but it is too heavy and my skiing style too unstable to take the risk of carrying it with me.
Supplies:
Stamps: Christmas Park, Summer Fun (PB)
Inks: Memento Cottage Ivy, Northern Pine, Rich Cocoa (Tsukineko)
Distress Stains: Tumbled Glass
Cardstock: Strathmore 140lb cold pressed watercolour paper
Watercolour butterfly tutorial
Posted: January 25, 2014 Filed under: Background Stamps, Schizeas, Soft Wings, Tutorial, Watercolour | Tags: Penny Black stamps, Tsukineko Memento inks, Tutorial 21 Comments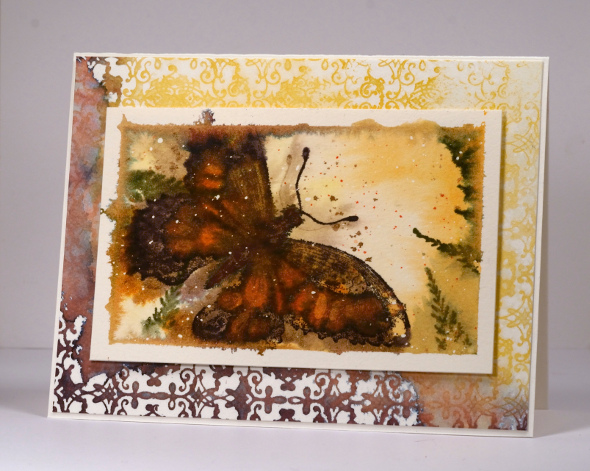
Believe it or not here is my second tutorial for the year and it’s still January! You will see in the video I am using a different watercolour block to the one I usually use. It is 7″x 10″ so I divided it into four panels to create four little watercolour pictures. Only two will end up on the blog, this one and a little snowscape. The other two were tossed. I flicked masking fluid over the watercolour paper before I began filming the tutorial. Embarrassingly the panel was not centred at the beginning of the video but I corrected it after a minute or so. You can see that some of the ink seeped under the painter’s tape I masked with. I didn’t crop that out because I thought it added to the whole “vintage-found it in the attic” feel of the card. As you know usually I would not mat with a patterned panel but I just wanted more of the lovely elderberry & cantaloupe colour combo so it is a little busier than my usual.
Supplies:
Stamps: Soft Wings, Decadence, Schizea (PB)
Inks: Memento Dandelion, Cantaloupe, Tangelo, Rich Cocoa, Elderberry, Olive Grove (Tsukineko)
Cardstock: CartieraMagnani 100% cotton hot pressed watercolour paper
Also: Winsor & Newton Masking Fluid
Winter Watercolour Tutorial
Posted: January 4, 2014 Filed under: Before the Snow, Stamped Landscapes, Tutorial, Watercolour | Tags: Fabriano Watercolour Paper, Penny Black stamps, Tsukineko Memento inks, Tutorial 37 Comments
Here is the first of my watercolour tutorials. I have used only one image stamp and one basic technique. There are several different techniques I use when creating watercolour scenes and cards because different stamps lend themselves to different approaches. I plan to cover more techniques in future tutorials.
I stress in the video that watercolouring is never the same twice and you cannot predict how the colours will blend and bleed in each scene. It is worth playing around with for a while to work out the amount of water to add to the paper, how long to let it dry between stamping images and how much colour to add and blend when creating backgrounds.
Here is a list of other cards made using the technique shown in this tutorial. Noel, Watercolour Night Sky, Watercolour Snowstorm, Poppies in a Field, Watercolour Sympathy.
Thanks for dropping in.
Supplies:
Stamps: Before the Snow, Flourish Thank you (PB)
Inks: Memento Cottage Ivy, Danube Blue & Versafine Majestic Blue (Tsukineko)
Cardstock: Fabriano 100% cotton hot pressed watercolour paper
Also: Winsor & Newton Masking Fluid
Moonlit snowfall
Posted: December 11, 2013 Filed under: Berry Tree, Tutorial | Tags: Penny Black stamps, Tsukineko Memento inks, Tutorial 12 Comments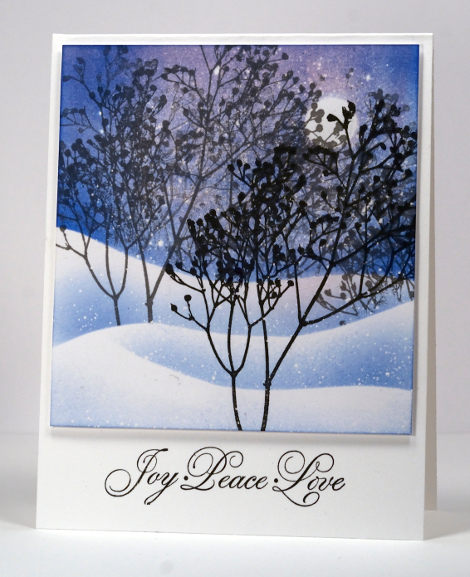
The Winter Wonderland fun continues here and on the Penny Black Blog today with a step by step tutorial.
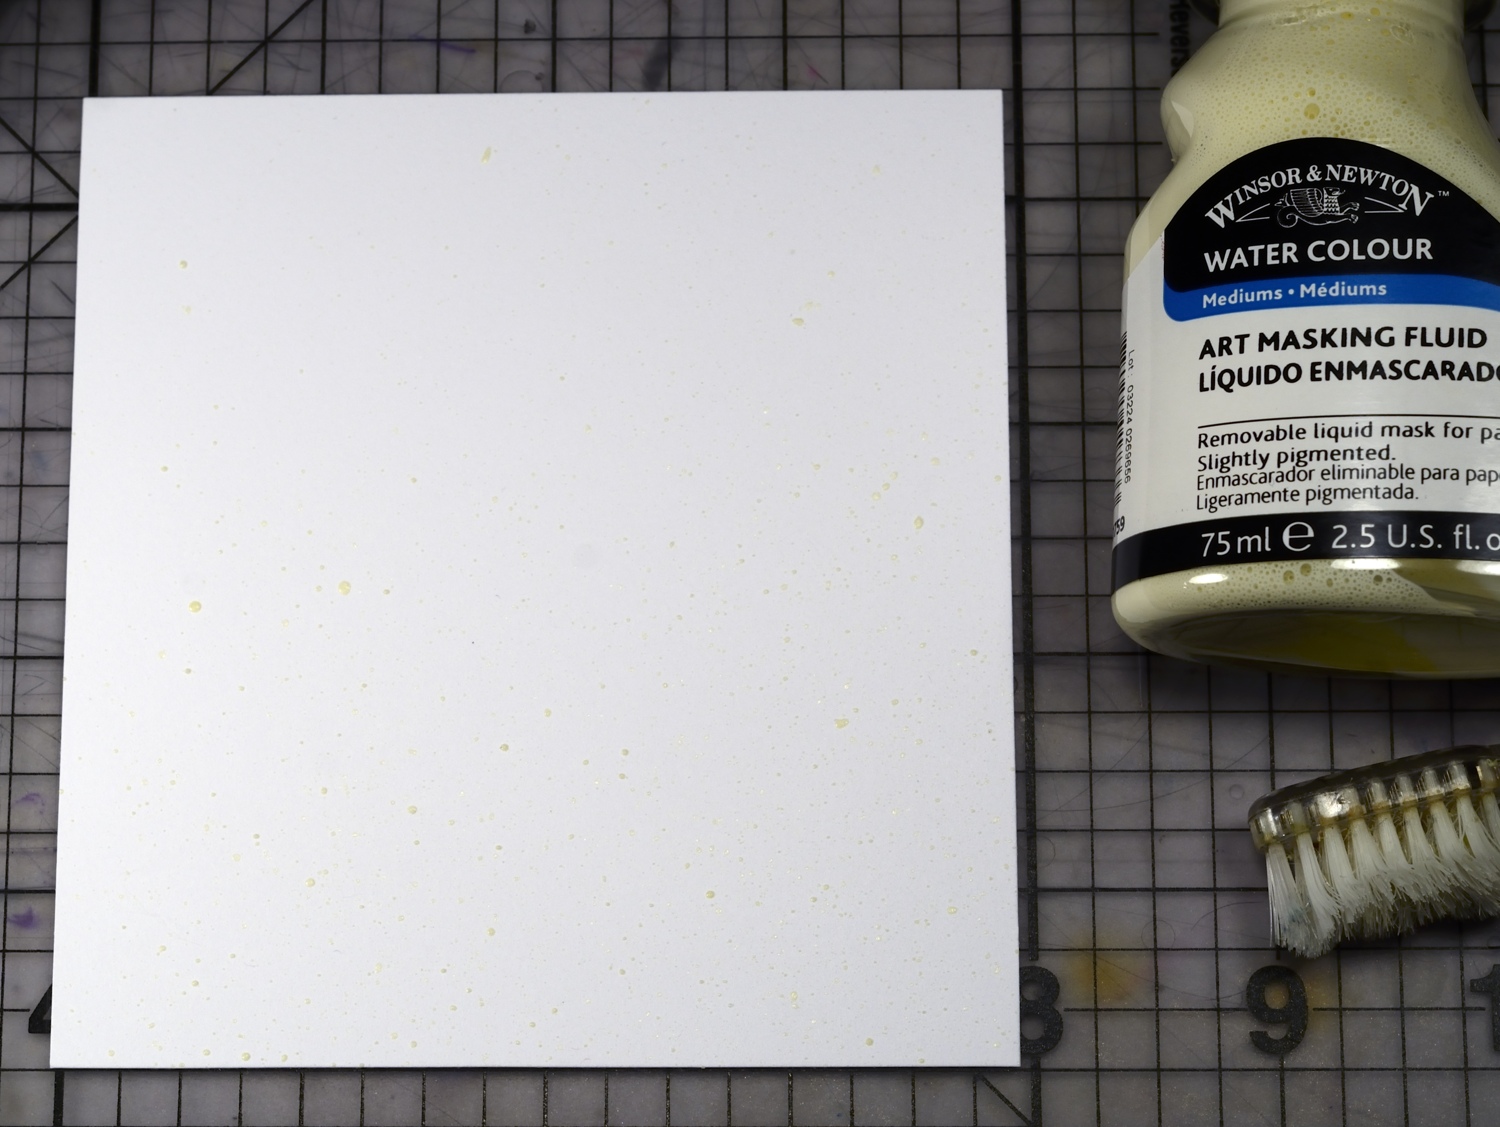
1. With a toothbrush or paint brush flick masking fluid over panel. Leave to dry for at least 20 minutes. I you use a paintbrush dip it in detergent and squeeze the detergent out before dipping the brush in the masking fluid. Wash the brush straight away after you have finished flicking.
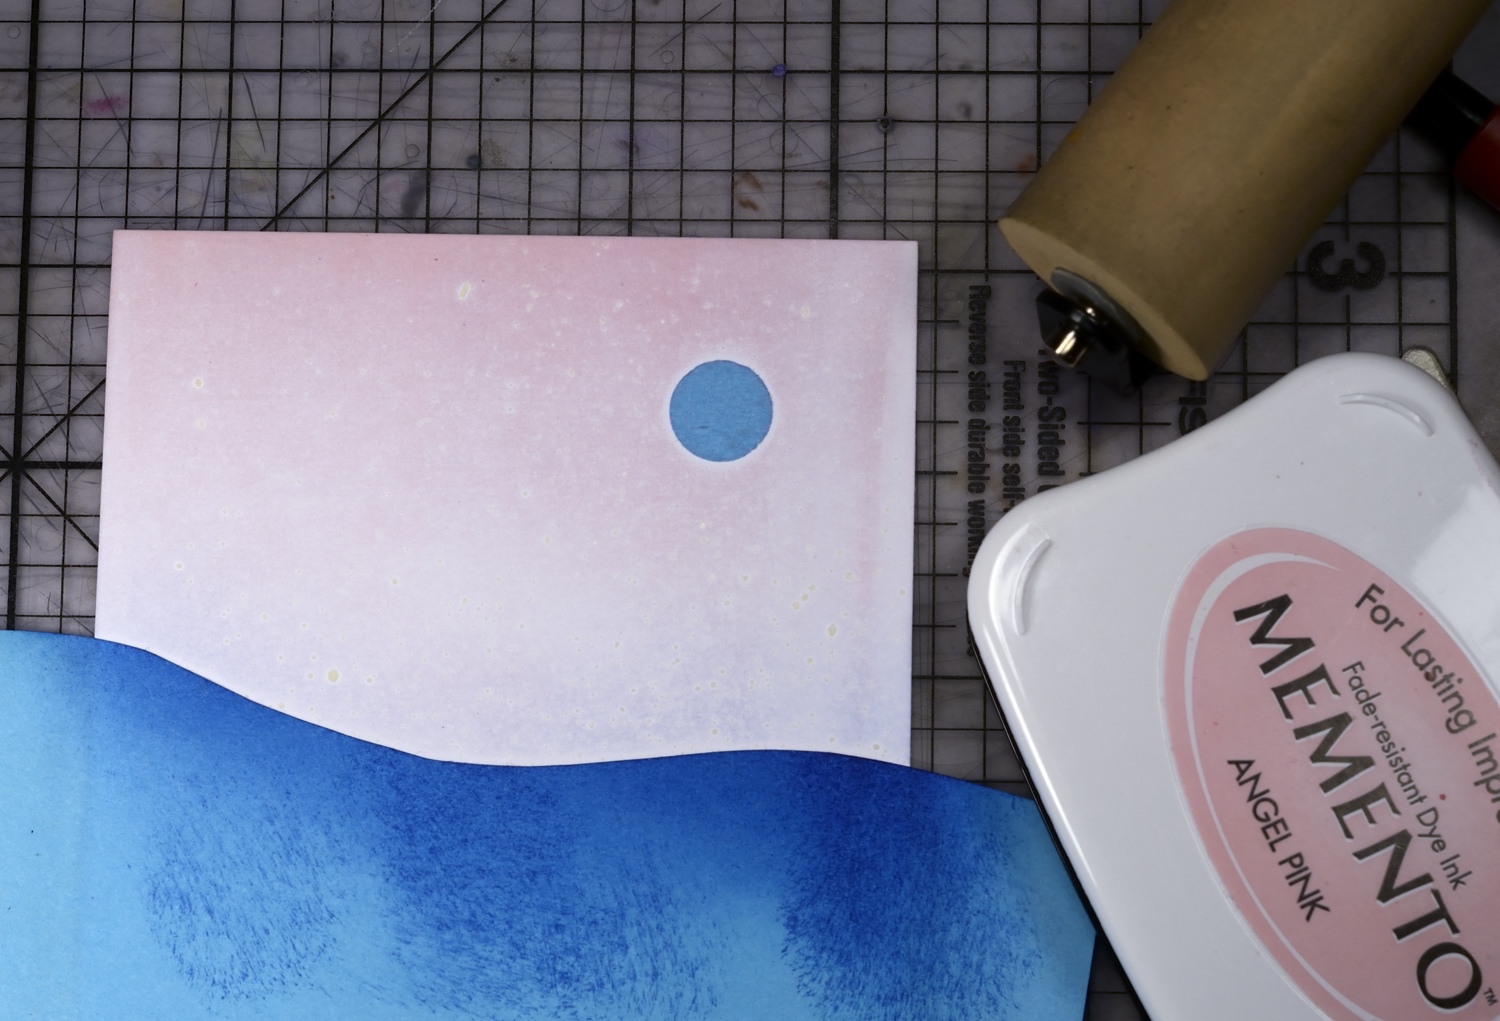
2. Punch a circle from a post-it note or masking paper and position in the sky. Cut a hill shaped mask and position it half way down the panel. Using a rubber brayer apply pink ink to sky area.
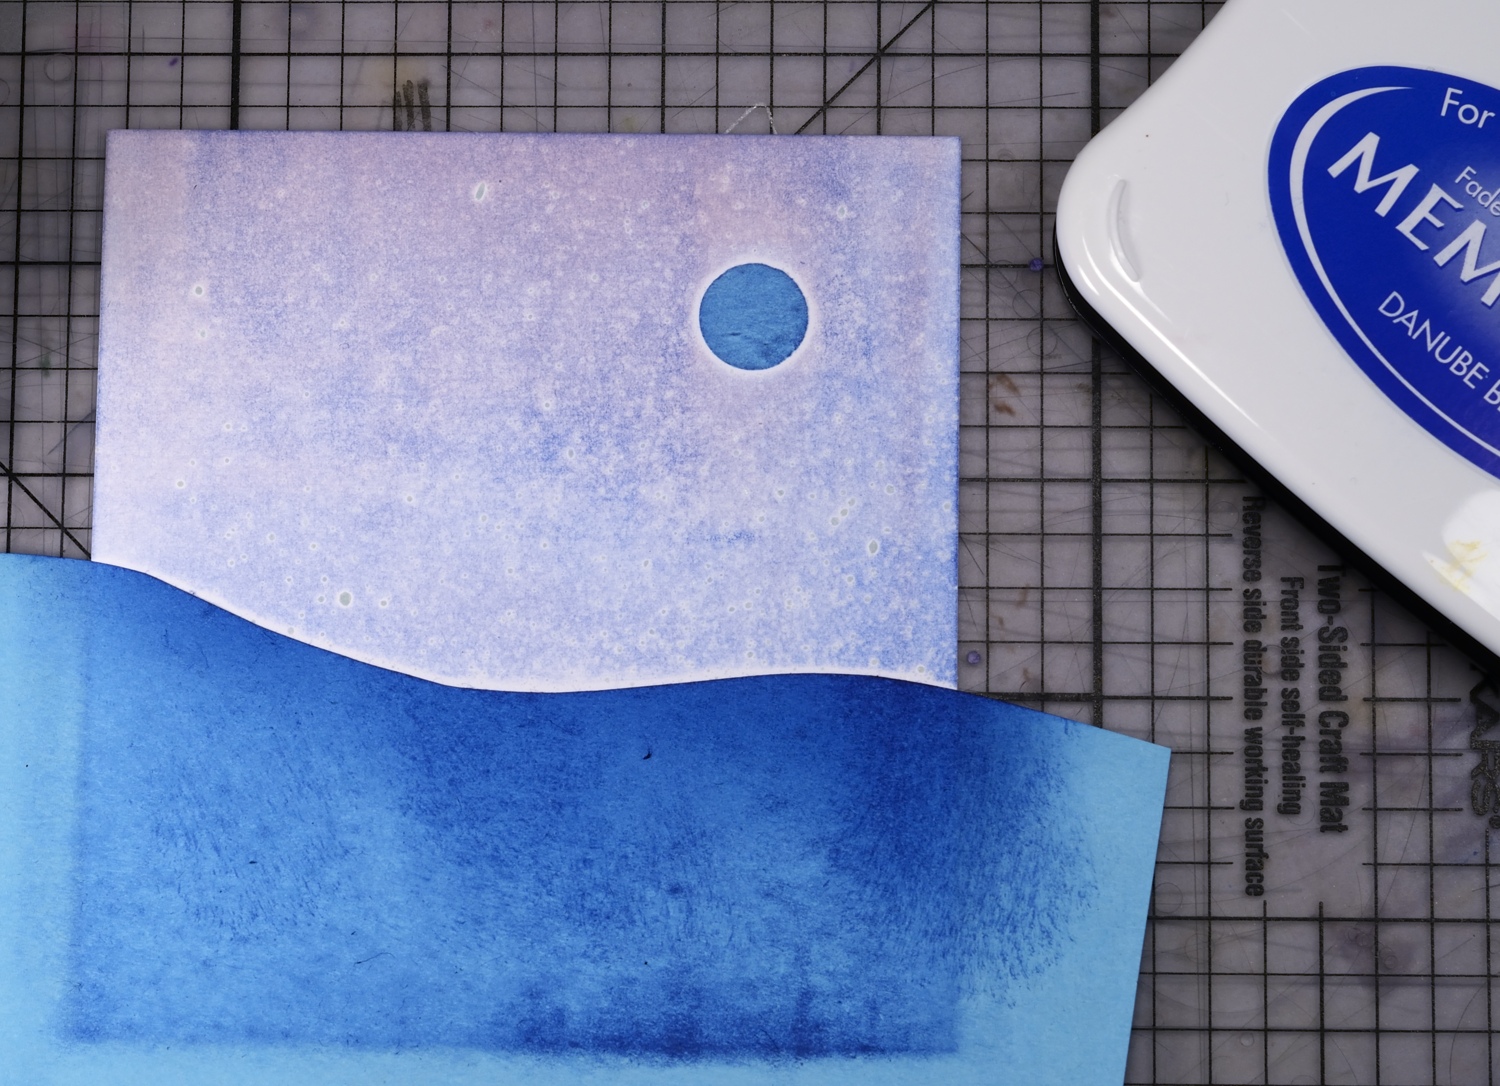
3. Brayer blue ink over the sky area.
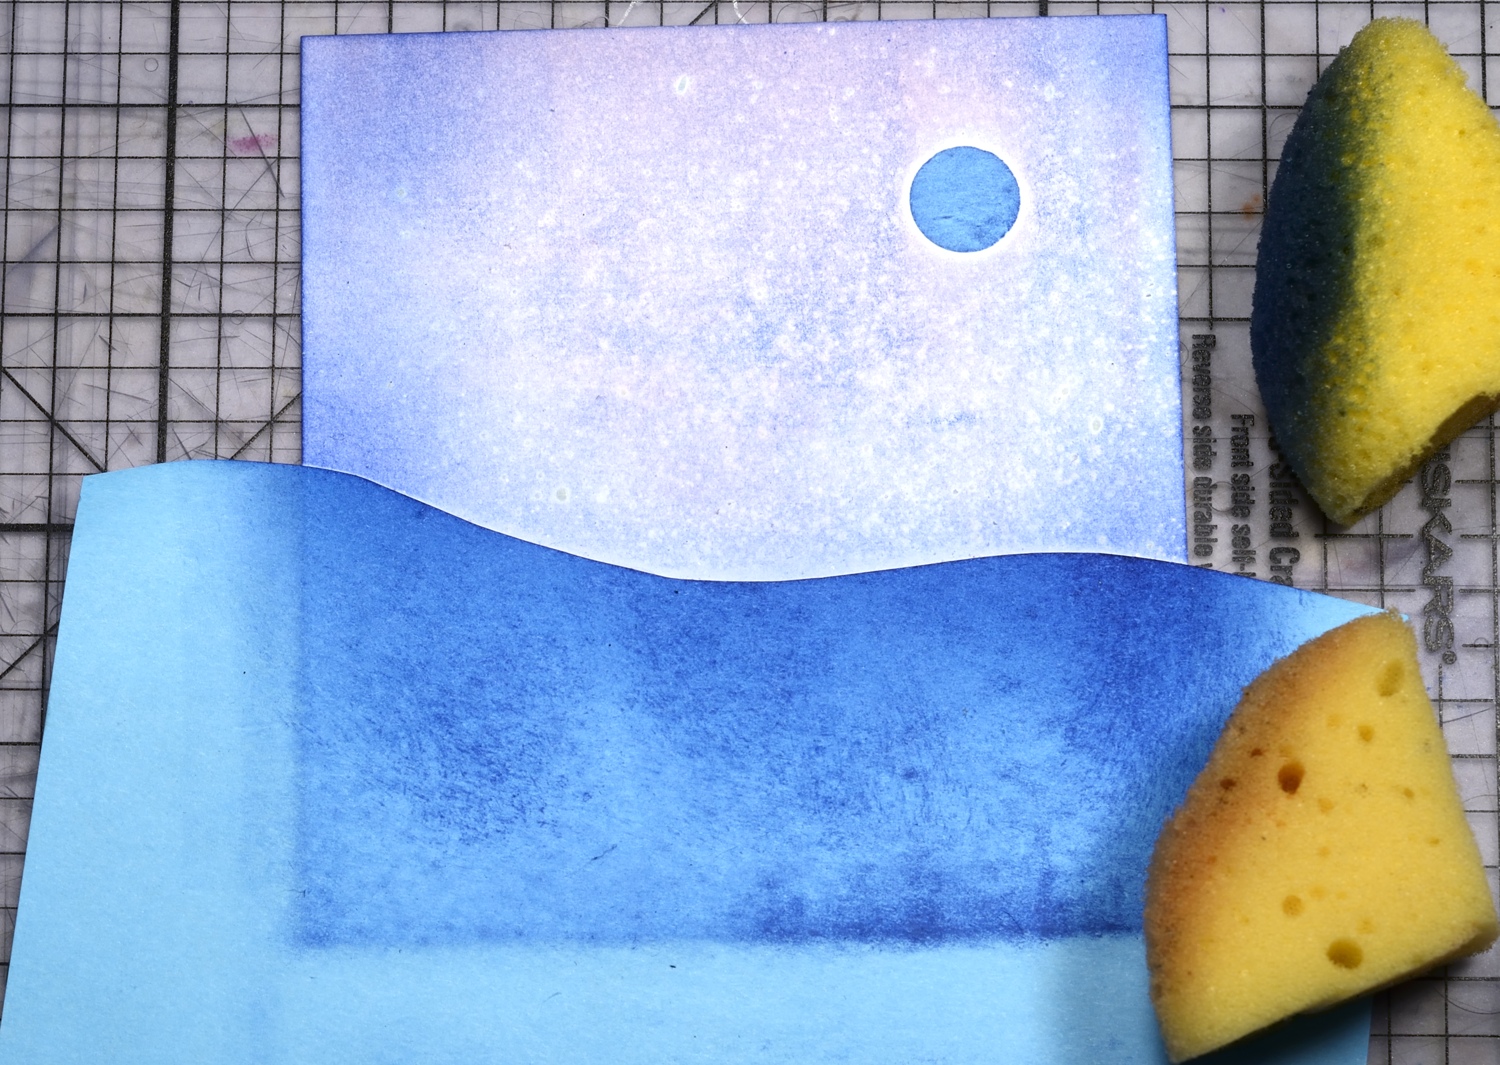
4. Add a little more blue ink around edges with a sponge. Add a little more pink ink to suit your preference.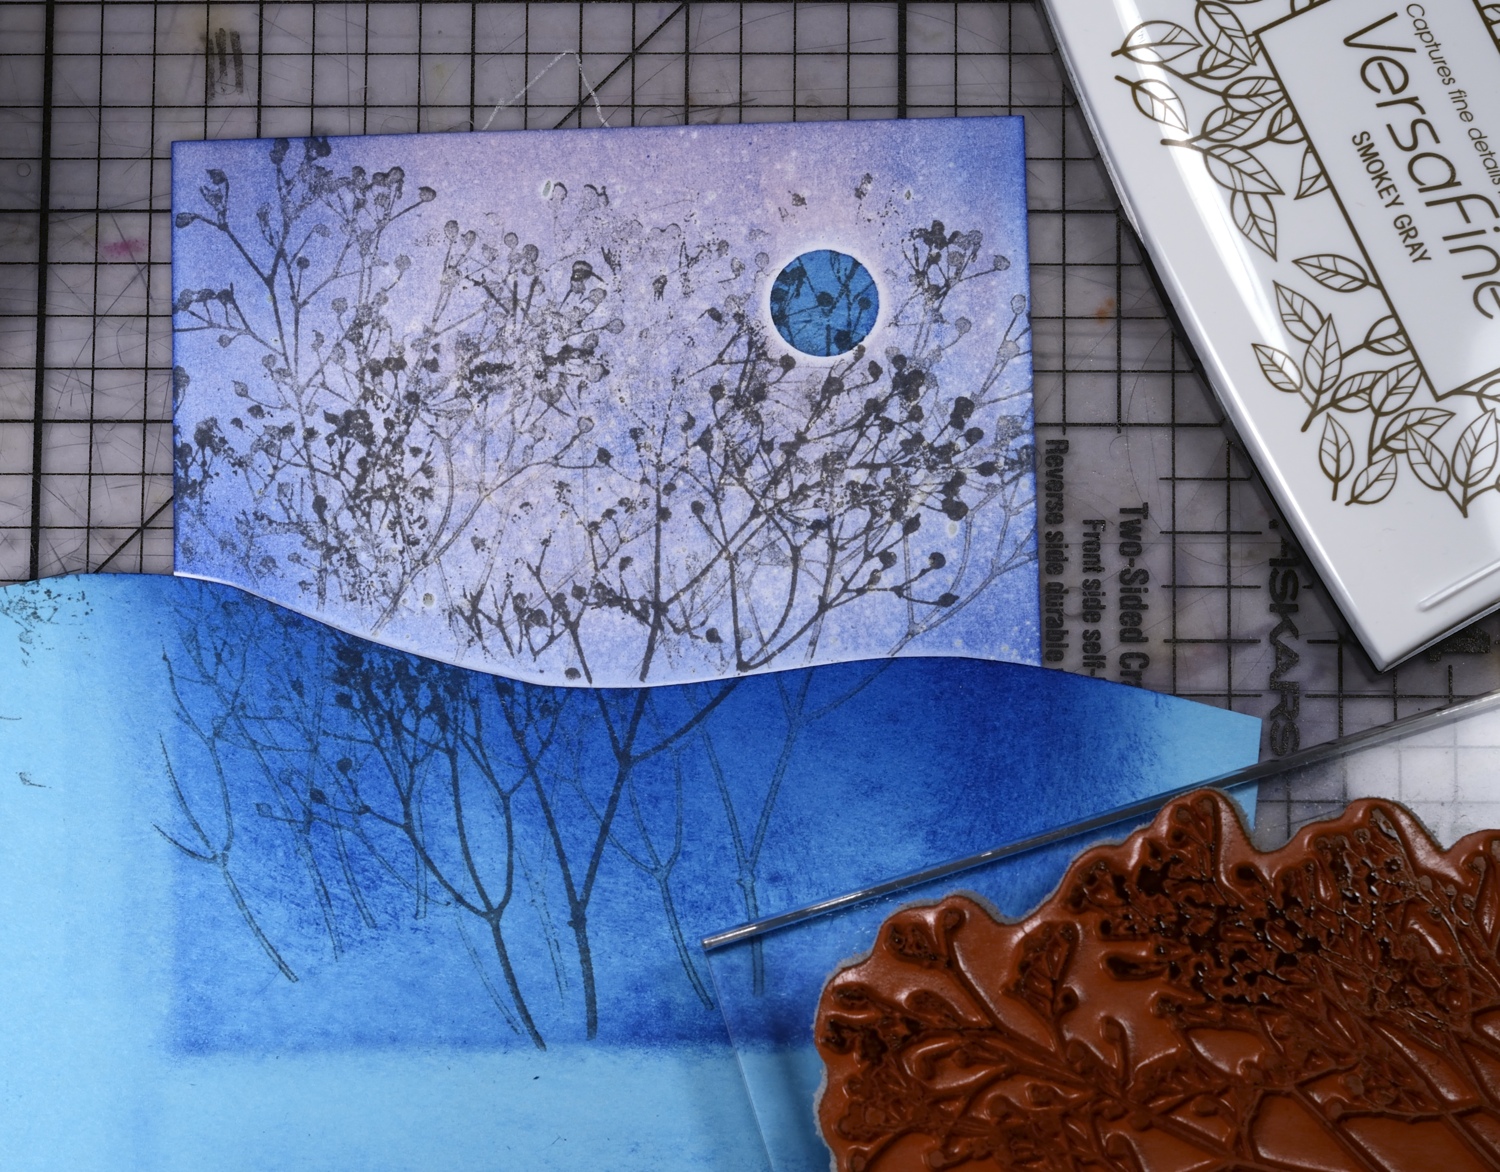
5. Stamp trees randomly with grey ink before moving either mask. These trees are in the background and do not need to be well defined.
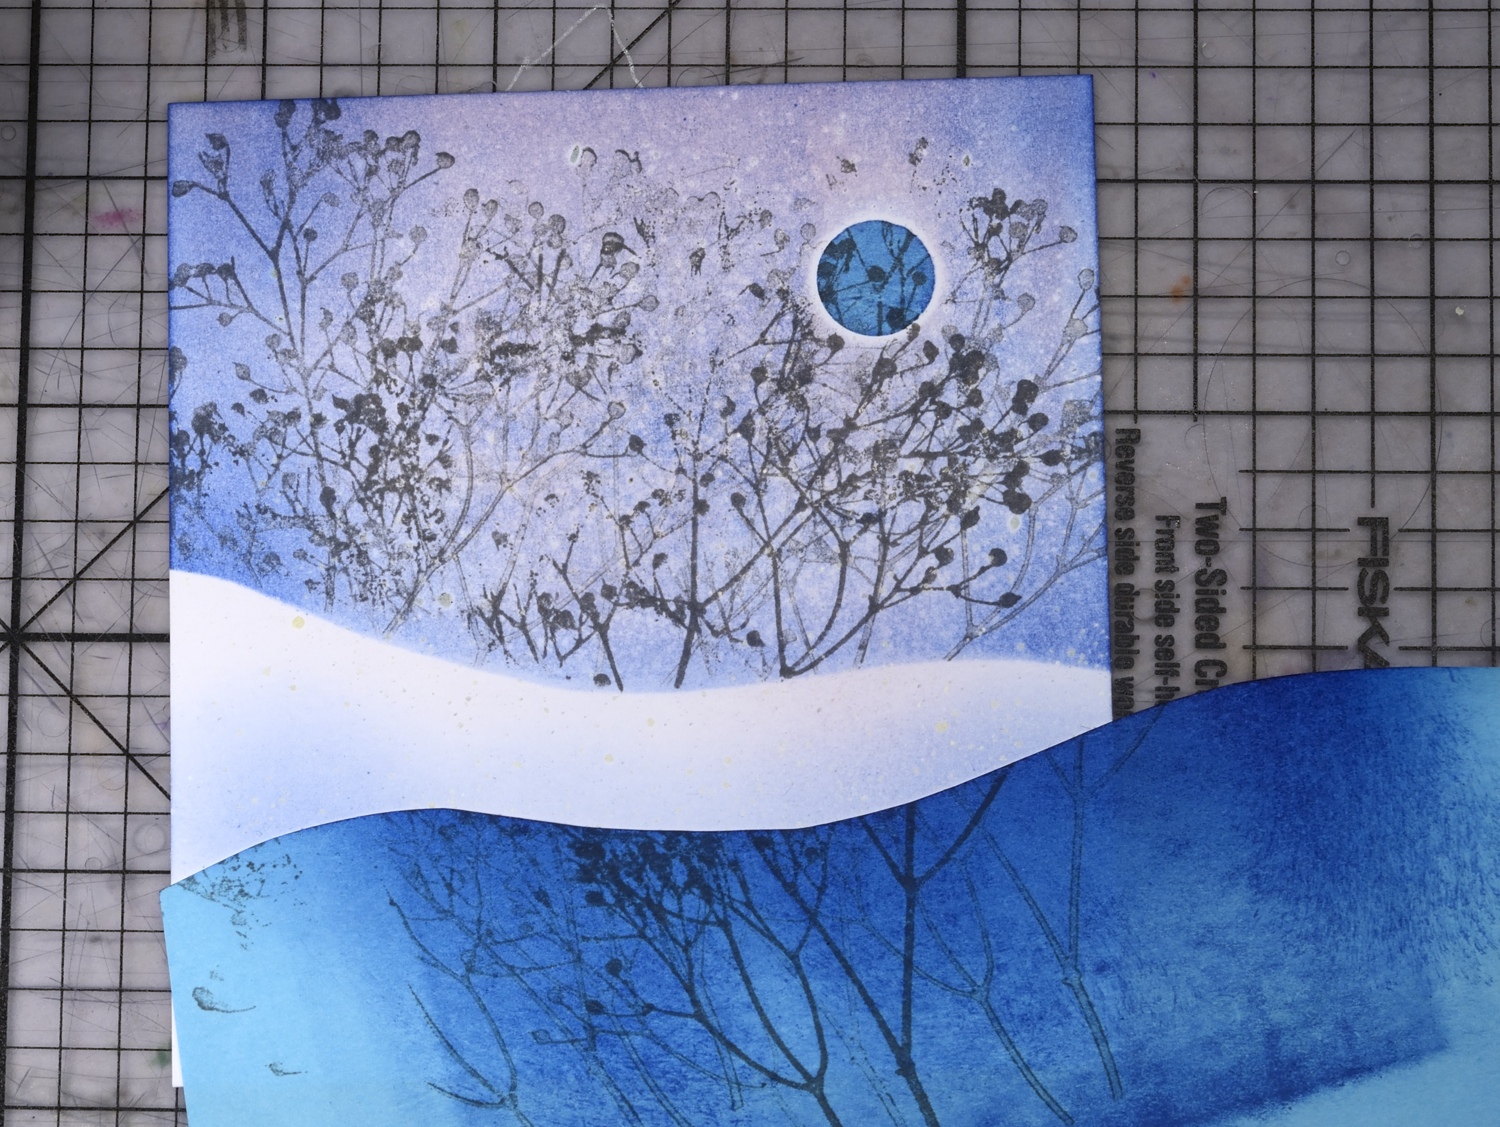
6. At this point remove the circle mask to expose the moon (I forgot to do that in the tutorial photo and had to stamp a couple of twigs in later!) Lower the hill mask and sponge blue ink along the edge and on the exposed snow bank but stop short of the horizon in order to keep it crisp and white. 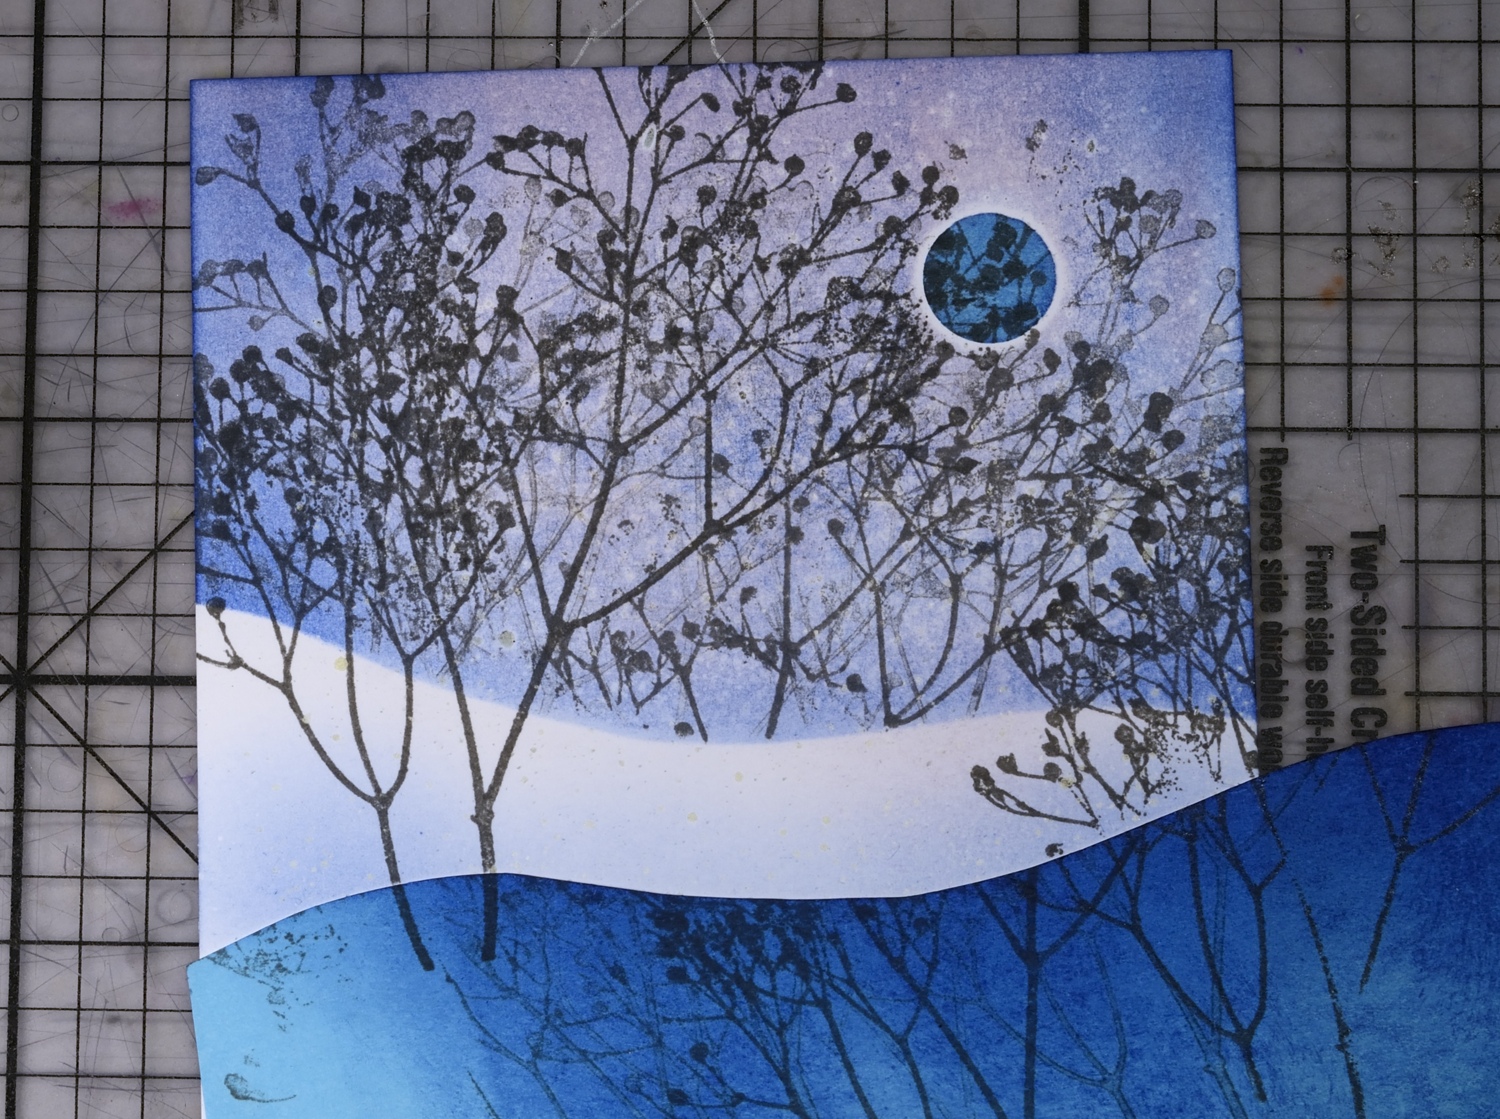
7. Stamp two more trees in grey. (remember the moon mask should have been removed before this point)
Supplies:
Stamps: Berry Tree, A Better World(PB)
Inks: Memento London Fog, Angel Pink, Summer Sky & Versamark (Tsukineko)
Also: Winsor & Newton Masking Fluid
A blossom tree
Posted: May 20, 2013 Filed under: CAS, Tutorial | Tags: Tutorial 15 CommentsI am honoured to be the guest designer at Scrap Rendez-vous today. I have a short tutorial over there describing my masking and sponging technique for this card:

Supplies:
Stamps: Winter Berries, Friendship (PB)
Inks: Memento Rose Bud, Pistachio, Bamboo leaves, Summer Sky (Tsukineko)
Background stamp tutorial
Posted: February 25, 2013 Filed under: Background Stamps, CAS, Glory of Modesty, Penny Black, Tutorial 38 Comments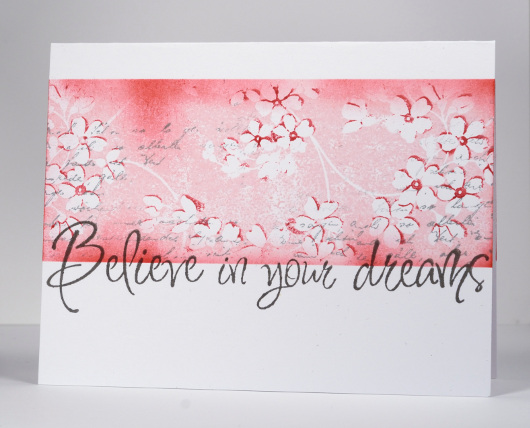
After creating a one layer card with the background stamp Glory of Modesty or GOM for short, I decided to use the same technique and let you in on one step I didn’t mention when I explained my process the first time. It is not a complex step at all, simply one which is easier to show than explain with words.
When I posted the card below my friend, Lindsey from Bashful Blogging commented that “the flowers really do seem on a slightly higher plane despite it being one layer”. I have created another card and a tutorial showing how to get your flowers to appear to be on a “higher plane”.

I used the same stamp because this technique works beautifully with this stamp but I changed my colour scheme and the size of the image panel.
Supplies:
Stamps: Glory of Modesty, Edge to Edge, Letter Background(PB)
Inks: Memento Angel Pink, Love Letter, London Fog & Versafine Smokey Grey (Tsukineko)


