
More skies & dies
Posted: December 6, 2018 Filed under: berry flourish, Brusho, deer in tree, holly flourish, winter berry branch | Tags: Brusho, Penny Black creative dies, Penny Black stamps 4 Comments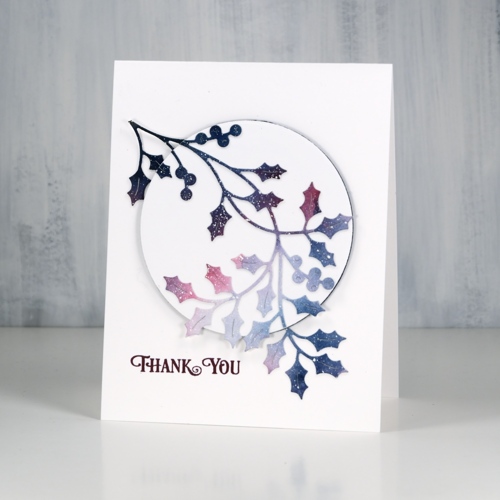
I have a few more simple Christmassy cards to share; these ones are kind of the opposite to the ones in the previous post. I had a large watercolour galaxy panel with white splatter (aka ‘stars’) all over it. I die cut three branches from the panel to pop up on three white card bases.
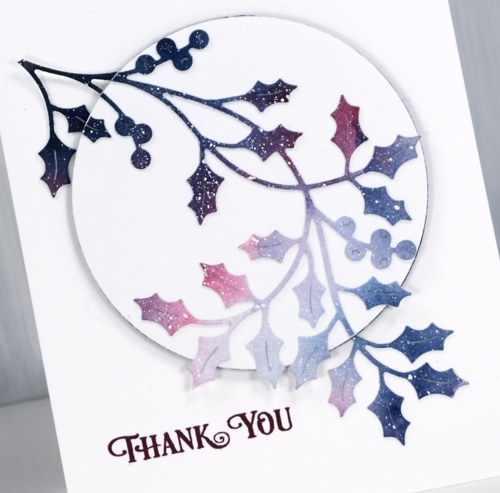
I realise now it would have been a good idea to take a photo of the panel before I cut it up. It was a panel I painted with brusho a while ago, a mix of blues and pinks, light in the centre and dark around the edges with white paint splattered over the whole thing. The holly is a PB die called ‘holly flourish’, the mistletoe is ‘berry flourish’.
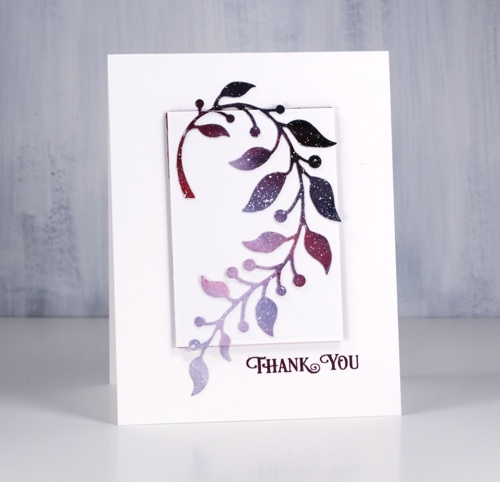
After I had die cut all three branches I chose a shape die a little smaller than each of the branches so some foliage would hang over the edge. I die cut a shape from neenah solar white cardstock and from coloured adhesive backed foam. The foam pieces that pop up the white panels are either burgandy or navy to co-ordinate with the paint colours.
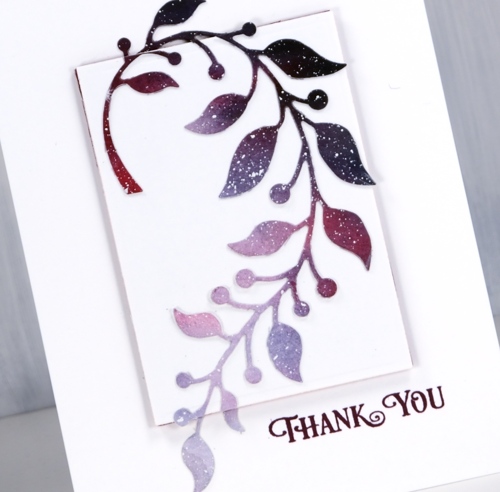
To assemble the cards I first glued the die cut to the white cardstock shape then snipped off and saved any bits hanging over the edge. Next I adhered the white panel to the foam and then all to the white card base. Once the popped up panel was in place I stuck the snipped off bits directly onto the card base lining them up with the rest of the die-cut.
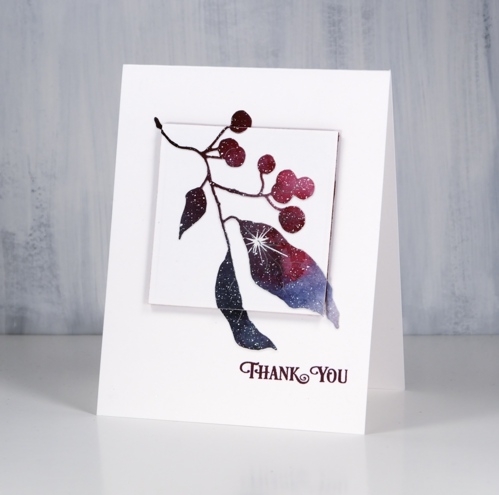
I made all these cards into thank yous. I’m hoping to need many as I am once again participating in Dressember, and will be sending hand made cards to all who donate to the campaign. If you are new to my blog you might not know that I have twice before taken on the challenge of wearing a dress every day in December as part of a worldwide campaign to raise funds for and awareness about the fight to end modern day slavery. If you are interested in donating I have set up a CAMPAIGN PAGE and I am posting photos on pinterest and instagram just so you can check up on me to make sure I’m wearing a dress each day! I have written a little more about Dressember on my other (sadly neglected) blog, Sentient.
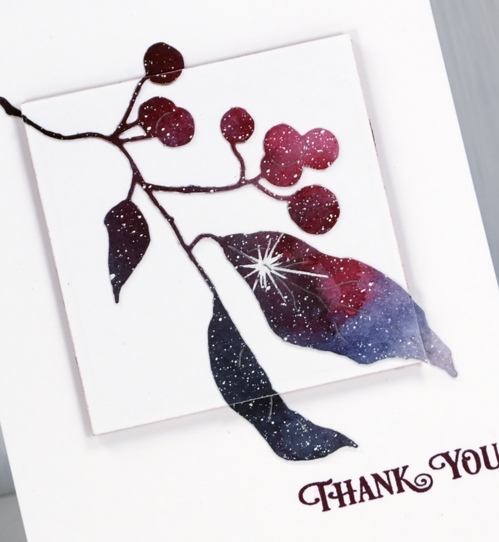
This last branch die is called ‘winter berry branch’ also from Penny Black. The sentiment is from the ‘banner sentiments’ set and is stamped in chianti versafine clair ink.
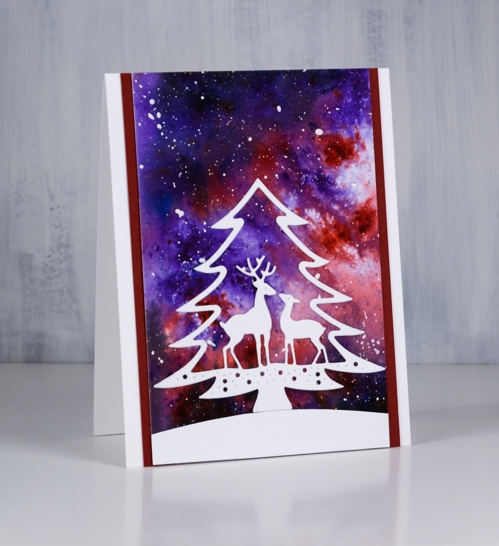
And now a bonus card made with my last watercolour sky piece. I matted it on two sides with burgandy cardstock then cut a snow bank and the ‘deer in tree’ die from neenah solar white cardstock. It is a pretty die but would the deer be standing in a tree? I think not!
Supplies
Stamps: banner sentiments (PB)

Dies: holly flourish, berry flourish, winter berry branch, deer in tree (PB)


Ink: chianti versafine clair ink

Cardstock: hot pressed watercolour paper, neenah solar white, burgandy cardstock


Paint: brusho, white gesso


Also: on point gule

Skies & dies
Posted: December 4, 2018 Filed under: Brusho, holiday hello, neighbourhood border, winter trees | Tags: Brusho, Penny Black creative dies 9 Comments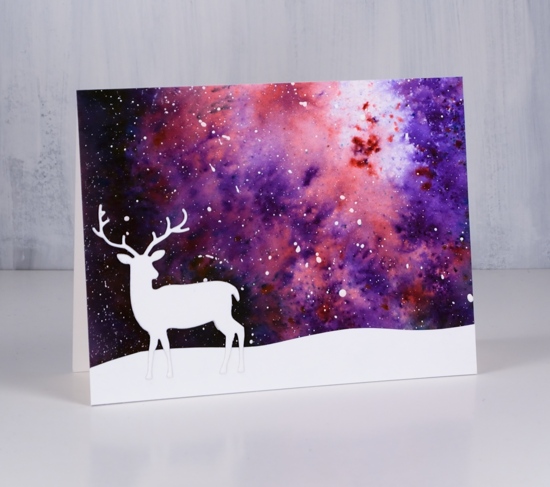
I have three simple cards to show you today, simple that is if you have some watercolour backgrounds sitting around as I often do. Even if you don’t it would not take too long to create a large multicoloured panel with brusho, distress stains or some other watercolour medium then when its dry splatter white paint over it to look like stars or snow.
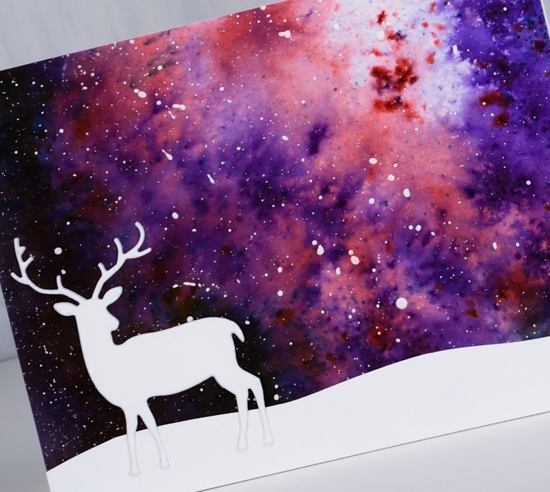
I trimmed my background panels then added a hand cut snow bank to the card above plus the deer from the Penny Black ‘holiday hello’ set. I know it is very minimal but I rather like the way the deer could be looking up into the vast sky.
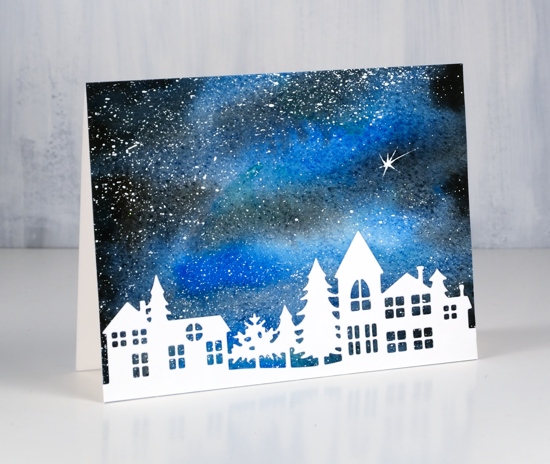
On the second card all I added to the star filled sky was the PB ‘neighborhood border’ die. All the die cuts are neenah solar white cardstock. For some I used liquid glue, others I attached using stick it adhesive.
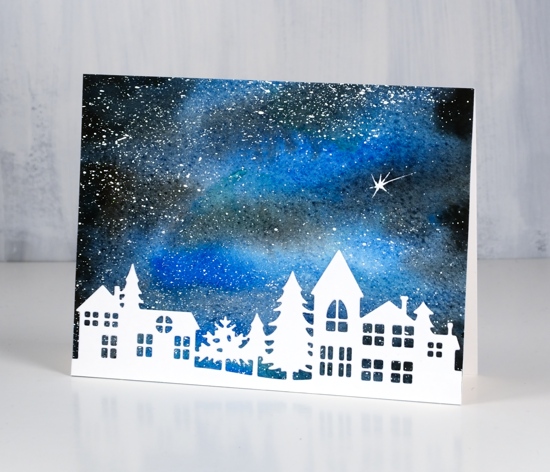
I added the shooting star when I created the watercolour sky with the same white paint.
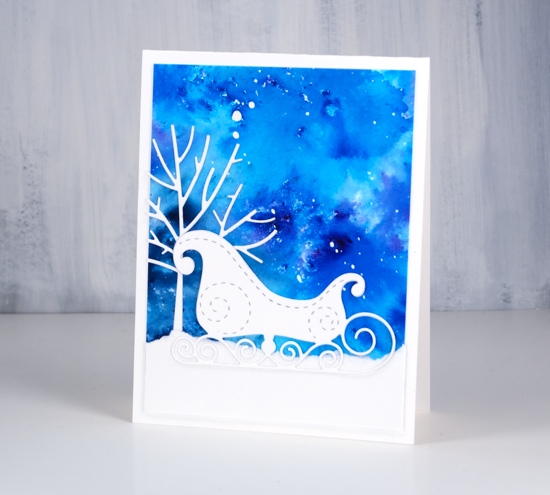
The background sky for this final card is the last scrap of a large panel I painted very randomly with turquoise and blue brusho. I tore a strip of white cardstock to create the snow bank, die cut a tree to tuck behind it and a sleigh to sit on top. The tree is the smaller one from the PB set, ‘winter trees’ and the sleigh is also from Penny Black.
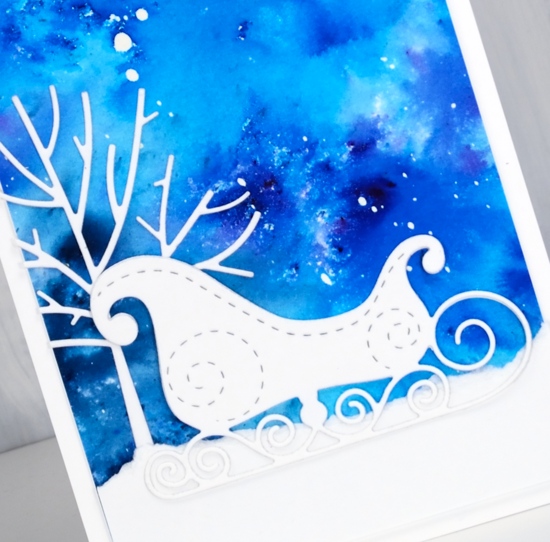
I’m going to leave these without sentiments for now; they might be handy to use as thank you cards after Christmas.
Supplies
Dies: winter trees, sleigh, neighborhood border, holiday hello (PB)


Cardstock: hot pressed watercolour paper, neenah solar white
Paint: brusho, white gesso
Also: stick it adhesive, on point gule

Winter Tree
Posted: November 28, 2018 Filed under: xmas poinsettia cut out | Tags: Penny Black creative dies, Penny Black stamps, Ranger Distress inks, Ranger Distress stains 15 Comments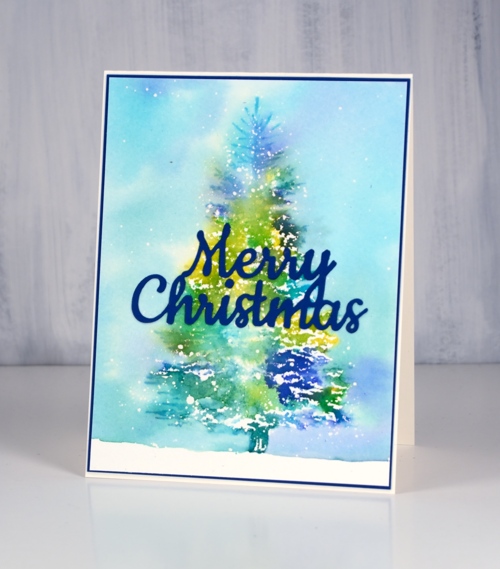
It is hard to believe I haven’t shared this beautiful tree stamp already. It is a large rubber cling stamp called winter tree and it looks snow laden when stamped. It is a very detailed tree but my treatment has it looking a little more impressionistic. To create the card above I lay the tree stamp on my cold pressed watercolour paper and positioned masking paper around the edges of the stamp. When I lifted the stamp there was a tree shaped space exposed.
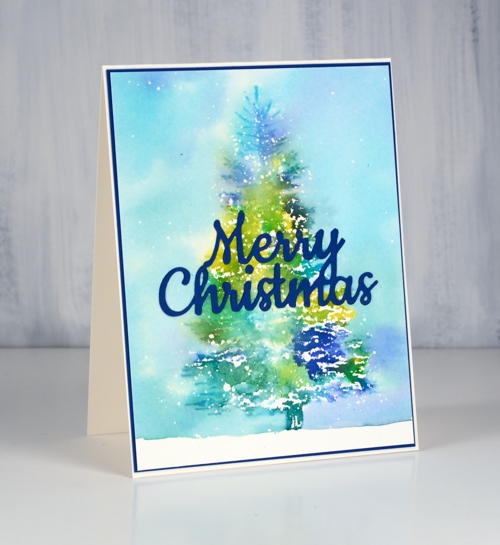
I splattered masking fluid over the panel so there were lots of drops in the shape of a tree. When I removed the masking paper I splattered a few more drops of masking fluid around the tree. I placed the panel and stamp in my stamp positioner and dotted distress stain on the stamp. For this tree I used mustard seed, mermaid lagoon, pine needles and blueprint sketch. I stamped a couple of colours at a time until the tree was completely stamped albeit in a loose and watery way. To fill in the background I wanted the same colours but more diluted so I put stain on my glass mat so I could pick it up with a paint brush.
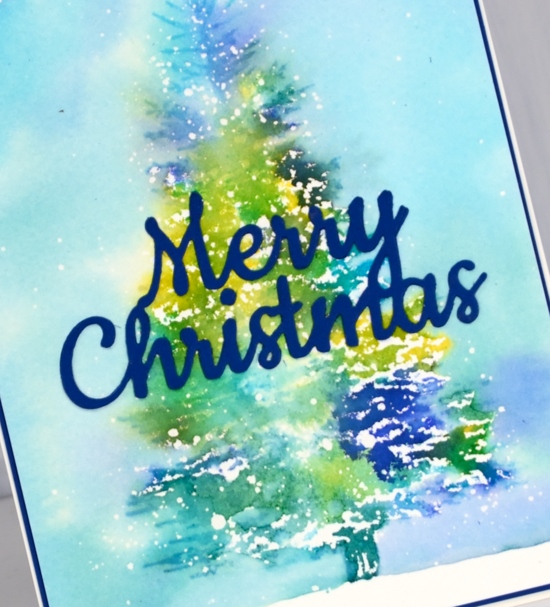
I painted around the tree with water touching the edges of the tree with the paintbrush so the colour would bleed into the sky. To fill the sky I picked up extra colour from my glass mat. When all the paint was dry I removed the masking fluid and added a die cut sentiment and a matching mat.
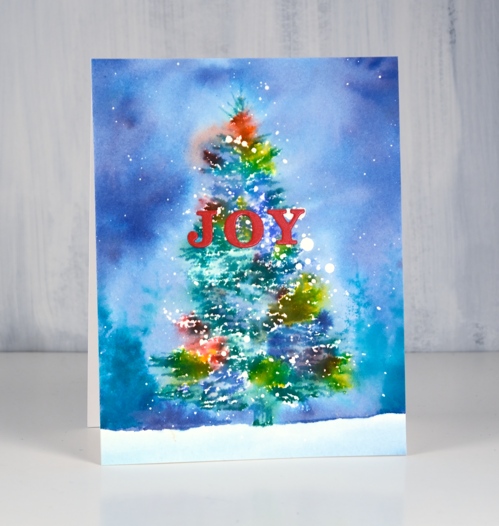
I followed the same process for the second card but used hot pressed watercolour paper and more colours of distress stain. I also stamped a few trees in the background using a tree from the ‘prancers‘ set and peacock feathers distress ink.
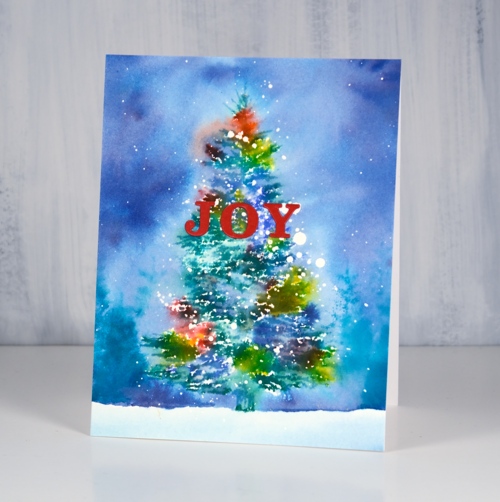
When snow completely covers our Christmas lights the colour does look a bit blurry shining through the snow. That’s what these cards remind me of.
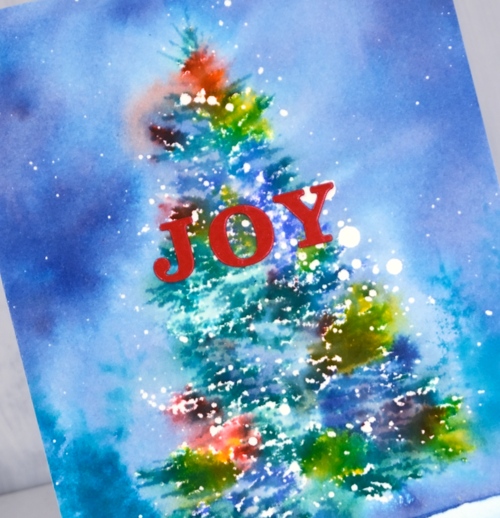
Not that there are any Christmas trees or lights up around here yet. There are members of this family with strong feelings about Christmas decorations!
Supplies
Stamps: winter tree, prancers

Stains: mustard seed, blue print sketch, peacock feathers, pine needles


Die: merry Christmas (PB)


Paper: cold pressed watercolour paper, deep blue cardstock


Tools: MISTI, T ruler, stick-it adhesive, glass mat


Snow trails
Posted: November 20, 2018 Filed under: snow trails, Tagged | Tags: Peerless Transparent Watercolors, Penny Black stamps 7 Comments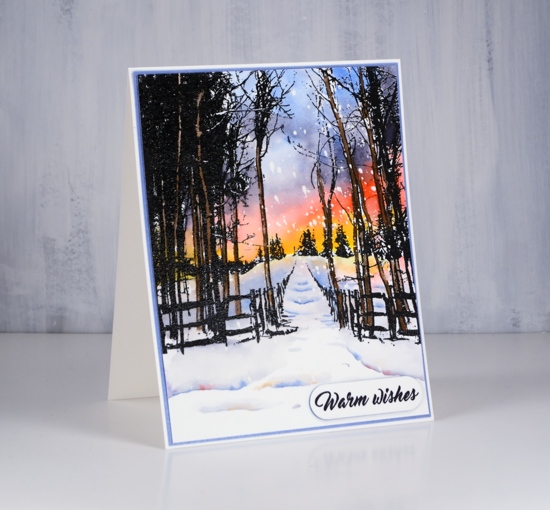
We’ve had some beautiful skies lately, the heavens declaring the glory of the Lord. I decided to add bold colour to this beautiful ‘snow trails’ stamp from Penny Black for a similarly dramatic sky. To begin I embossed the stamp on hot pressed watercolour paper then splattered masking fluid over the panel.
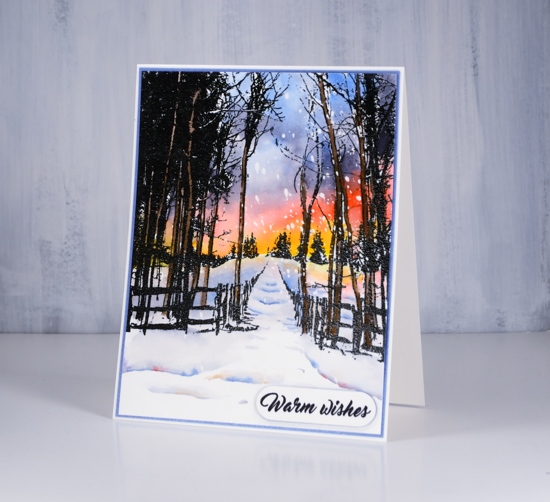
I painted the sky from yellow up adding a colour at a time and blending each into the next. I used my peerless watercolours for all the painting and they blended beautifully. I decided to paint the tree trunks that were not already black in brown, that way I did not have to preserved white ‘birch’ trunks as I painted in the sky. I used the same colours but more diluted to paint colour on the snow and create shadows along the path and in the foreground. Once dry I removed the masking fluid to reveal the falling snow.
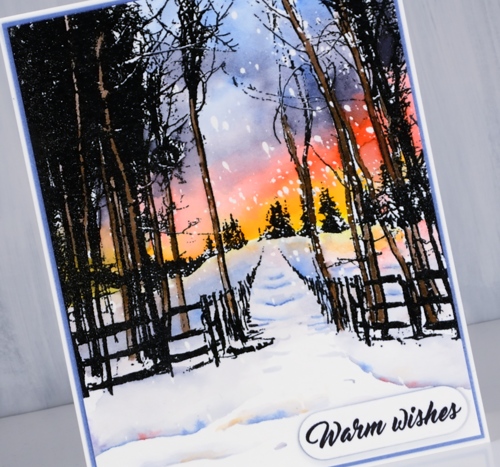
The popped up sentiment in the corner became a necessity when I botched the sentiment directly on the painted panel. I framed the panel in blue and attached it to a natural white card base. Can’t wait to paint another of these panels; it is such a peaceful scene.
Hope you are having a peaceful day.
Supplies
Stamps: snow trails


Die: tagged

Ink: versafine clair nocturne

Paper: hot pressed watercolour paper, blue shimmer paper
Paint: peerless transparent watercolours

Also: clear embossing powder

Pretty Paper Neighbourhood & a Wreath
Posted: November 16, 2018 Filed under: Alexandra Renke, neighbourhood border, starry night, whirl wreath | Tags: Alexandra Renke cardstock, Penny Black creative dies, Penny Black stamps, Ranger Distress inks, Tsukineko Versafine inks 6 Comments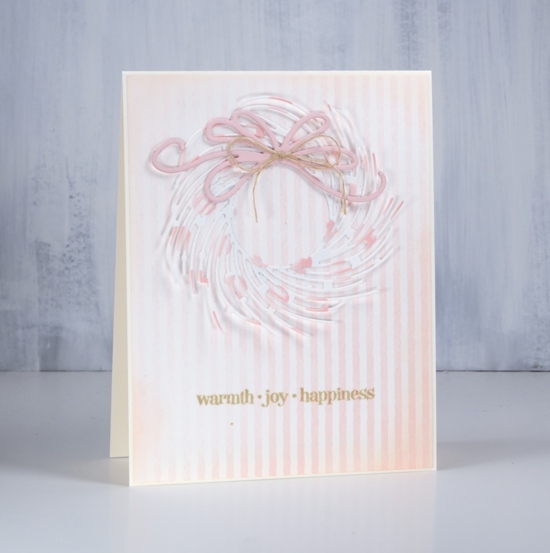
It’s all soft and subtle on the blog today. I have two projects featuring the beautiful Alexandra Renke cardstock the Foiled Fox recently started carrying in their store. The weight of the cardstock is somewhere between a good quality printer paper and a piece of cardstock. There is definitely enough weight to die cut nicely.
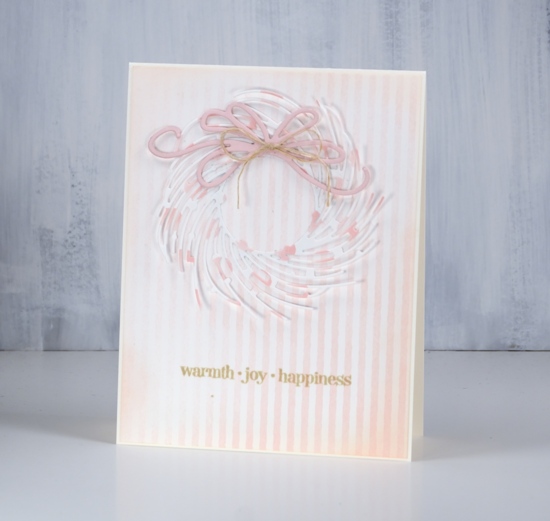
I chose the elegant ‘whirl wreath’ by Penny Black and cut one out of ‘pink dots’ cardstock. I attached it around the centre circle with adhesive but left the branches unattached ( so I will be careful putting it in a envelope) The background is ‘rose stripes’ which matches the pink dots perfectly. I cut the bow out of a piece of cardstock from my stash and layered a few together to give it some extra weight. I blended around the edge of the striped panel with tattered rose distress ink and attached everything to a cream cardbase.
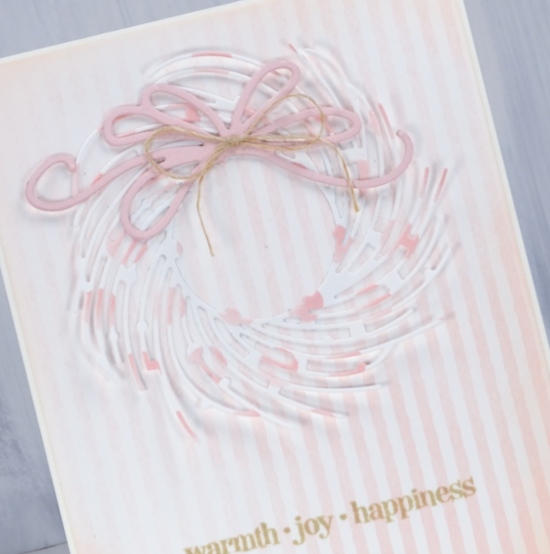
I chose to add a natural twine bow to the die cut bow then had to co-ordinate the sentiment with antique linen distress ink.
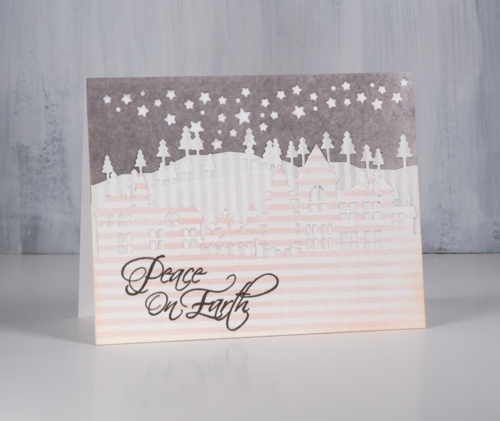
For my little neighbourhood card I use three patterns of Alexandra Renke cardstock, the rose stripes, gray stripes and medium mud watercolour. I know it is hard to see the details of the die cuts in my photo but in real life the pink striped neighbourhood is clear against two lines of gray striped trees in front of a gray mud starry sky.
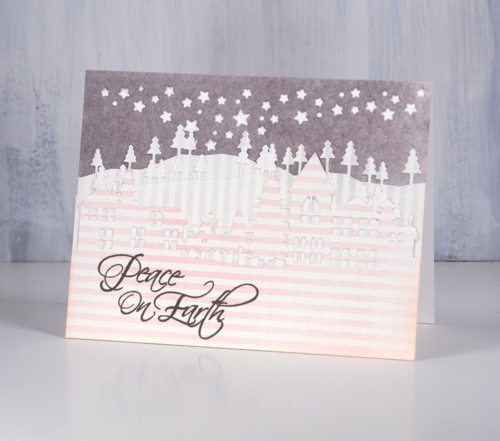
I have been wanting to try a white on white layered die cut scene and I probably still will but chose to try it with these pretty papers first. The neighbourhood is layered over two layers of trees cut with the ‘trees and hills’ dies which are layered over a gray piece cut with the starry sky night die attached directly to a white card base.
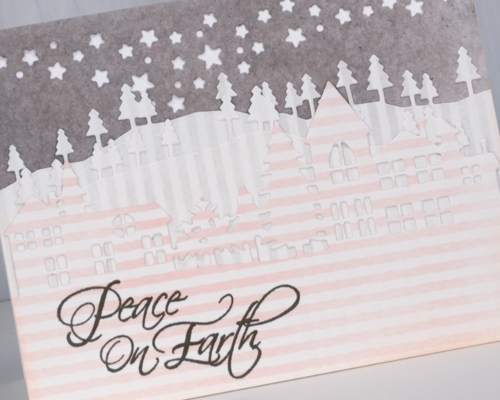
I featured some of the subtle colours and patterns from Alexandra Renke today but I do have some bold patterns and solids to share another day.
Have a great weekend.
Supplies
Stamps: Christmas sentiments, winter days (PB)


Dies: whirl wreath, neighbourhood border, starry night die, trees & hills die set (PB)


Cardstock: Alexandra Renke medium mud watercolor, gray stripes, rose stripes & Neenah solar white, cream, pink


Inks: tattered rose, antique linen distress ink, smokey gray versafine ink


Also: hemp twine
Simple and elegant poinsettias
Posted: November 5, 2018 Filed under: Christmas poinsettia, xmas poinsettia cut out | Tags: Alexandra Renke cardstock, Kuretake Zig clean color real brush markers, Penny Black creative dies, Penny Black stamps, WOW embossing powders 4 Comments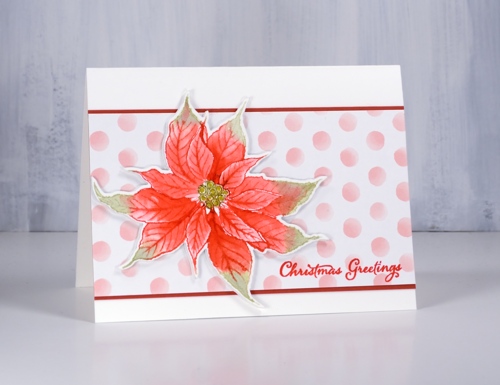
Today’s cards show two different looks from the Penny Black ‘Chrismtas poinsettia’ stamp. The first is simple distress ink colouring popped up on a fun polka dot background and the second is a bit more elegant with bold colouring inside a gold embossed image. I stamped this first poinsettia in festive berries and shabby shutters distress inks on hot pressed watercolour paper then blended the ink with water to fill the petals. If I needed extra ink for shadows and depth I picked it up from my glass mat which acted as a palette.
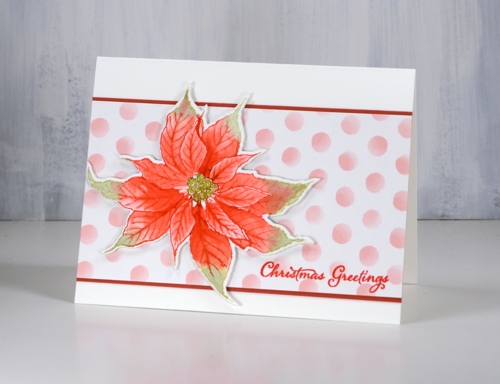
When I inked the stamp I wiped off the festive berries ink from the centre of the stamp so I could add peeled paint ink with a distress marker. After I had done all the blending I coloured the circles in the centre of the flower with a gold gel pen. My favourite part of the card though is the polka dot paper; it is so pretty. It is just one of a series of papers by Alexandra Renke. The Foiled Fox sent me some Alexandra Renke papers to try out and they are lovely. I will share more of them with you in the coming weeks. The weight is between paper and cardstock so it die cuts well but doesn’t add too much bulk when you layer it.
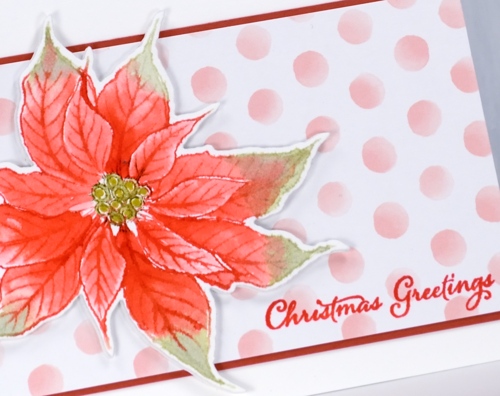
I cut my poinsettias out with the co-ordinating die but they wouldn’t be too hard to cut by hand, especially if you have fussy cutting skills (which I don’t). I matted the polka dot panel in red and added a sentiment from ‘festive snippets’ in versafine crimson red.
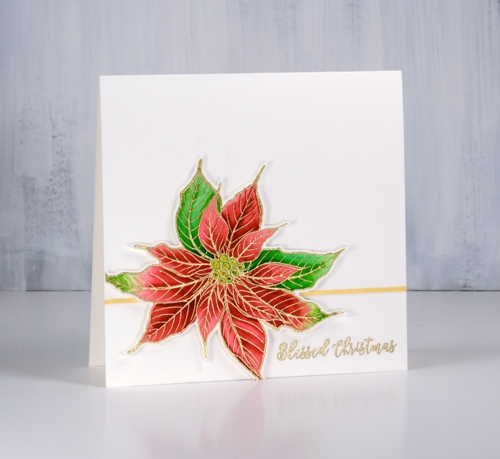
I embossed my second poinsettia in gold powder then coloured with zig clean color real brush markers. As I often do I used two reds and two greens, colouring first with the light marker then adding the darker colour at one end before blending with water to fill the petals.
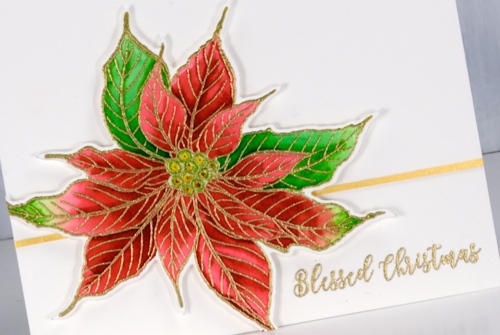
I applied adhesive to a strip of gold cardstock then trimmed it even narrower to position behind the popped up poinsettia. I embossed a sentiment in the same gold embossing powder used for the flower.
I am continuing to participate in Kathy Racoosin’s 30 Day colouring challenge. If you want some colouring inspiration pop over to her blog and check out her tutorials and link up. Let me know if you are participating.
Supplies
Stamps: Christmas poinsettia, festive snippets (PB)


Dies: xmas poinsettia cut out (PB)
Paper: hot pressed watercolour paper, Alexandra Renke pink dots, gold shimmer, red cardstock

Ink: festive berries, shabby shutters distress inks, , versamark, versafine crimson red


Markers: clean color real brush markers, peeled paint distress marker


Also: metallic gold rich embossing powder, glass mat

Stamping is for the birds part 2
Posted: October 31, 2018 Filed under: A Bright Tomorrow, gift card pocket, Peerless watercolours, winter lookout | Tags: Peerless Transparent Watercolors, Penny Black creative dies, Penny Black stamps, Tsukineko Versafine inks 5 Comments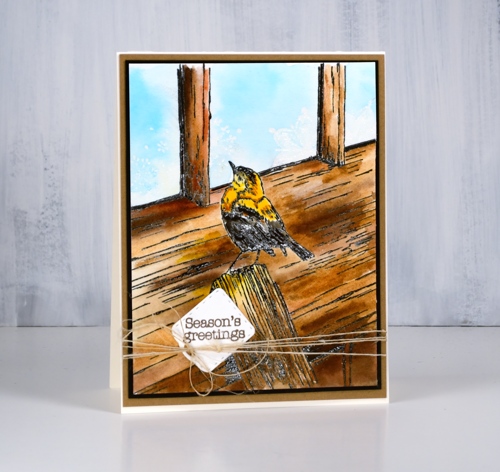
The second installment of my ‘stamping is for the birds‘ series features the Penny Black stamp ‘Winter lookout’ with a little bird on the outside looking in. I have seen a few other beautiful cards using this stamp and wish I had added a little foliage but there is always next time. Take a look at this gorgeous card by Susie Lessard.
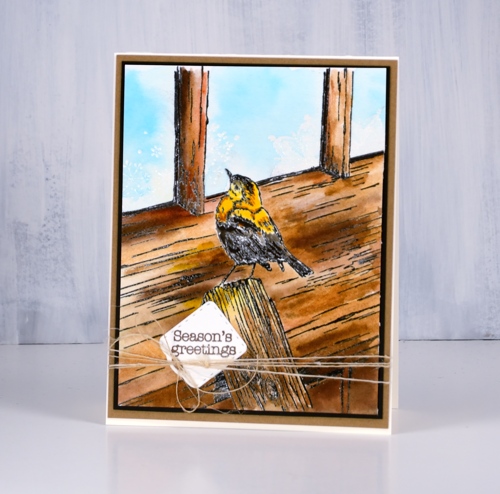
I stamped in versafine clair nocturne ink and embossed in clear powder then painted the bird and all the wood with my peerless watercolours. To create variation in the wood I painted with several browns and some warm mustard yellow as well. Once I had finished the woodwork I had to decide how I would do the window. I chose frosty patterns like we often get on our windows in winter so I used the delicate snowflake stamp from the PB set, ‘A bright tomorrow’ to emboss in clear powder. When I painted pale blue into the window area it resisted the snowflake shapes.
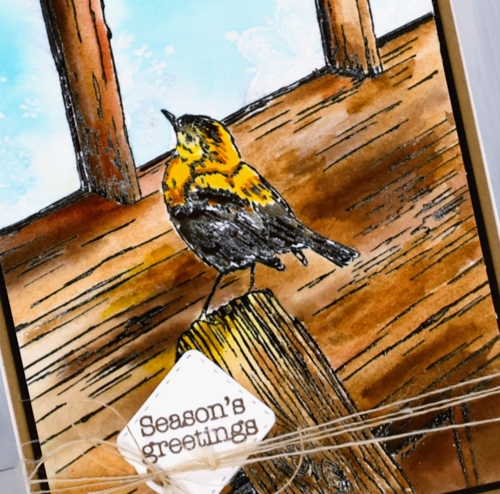
I tried a second colour scheme embossed in versafine smokey grey, featuring greys and blues and stamped some pine branches inside the windows as if garlands were hanging there.
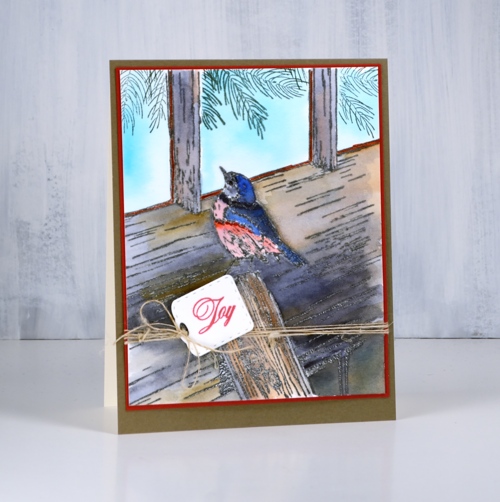
I finished both cards with co-ordinating mats and sentiments stamped on little tags from the ‘gift card pocket’ die set. I think I have only once made a gift card pocket but I often use the little tags and banner dies from the set. I added some finer details to both cards with black and brown markers once the painting was all finished as sometimes embossing does not preserve all the definition.
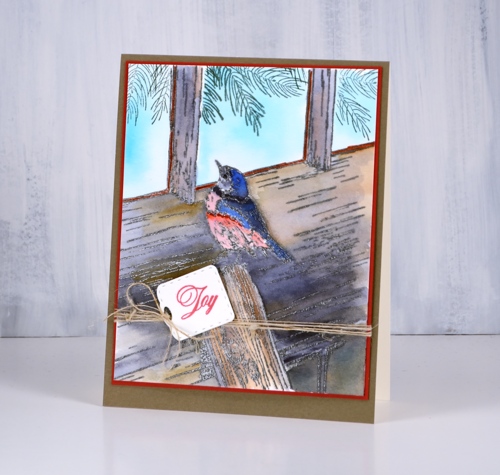
Supplies
Stamps: winter lookout, a bright tomorrow, festive snippets, joy of peace (PB)


Die: gift card pocket (PB)

Ink: versamark, nocturne versafine clair, morning mist versafine clair, northern pine memento


Paper: hot pressed watercolour, neenah cream, neenah black, kraft, red, olive green


Paint: peerless watercolours
Also: clear embossing powder, brown marker, black marker, twine
When a plan goes awry
Posted: October 17, 2018 Filed under: Christmas berries, dancing daisies, gift card pocket, winter branches | Tags: Penny Black creative dies, Penny Black stamps, Ranger Distress inks 10 Comments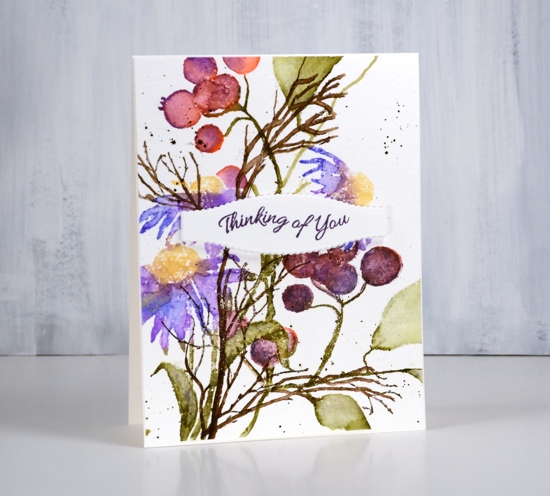
Today’s card was the result of a thought I had after making a Christmas themed card featuring the berries seen on this one. The Penny Black berry stamp is called ‘Christmas berries’ so it is hardly surprising that I made a Christmas card with them but I wanted to see if I could put them to use in a non-Christmas card too.
I started by stamping the dancing daisies in blue, purple, green and yellow (they were all distress inks and I will make a guess at them in the list below but once again I didn’t write them down). After stamping I blended the petals and leaves with water and a paint brush. I masked the daisies as I had saved masks from a previous project, stamped the berries in pinky, purply colours so they wouldn’t look Christmassy and blended again with water.
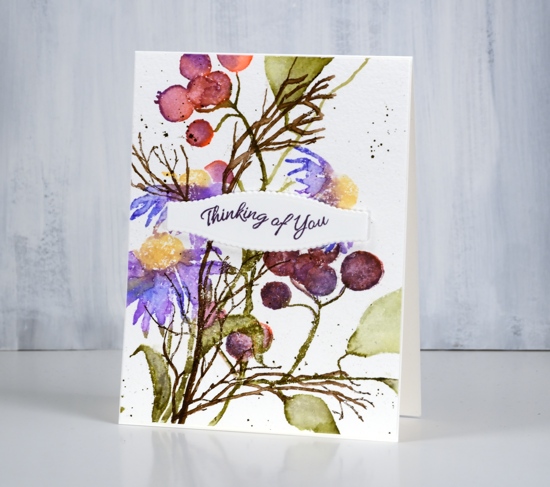
Finally I added some ‘winter branches’ in brown ink. This is where my plan started to unravel. I didn’t want to mask all those berries and flowers to put the winter branches in the background so I stamped them over the top and blended them with a paintbrush also. With the blending they became more prominent than I wanted; without the blending they looked badly stamped because I was working on textured cold pressed watercolour paper.
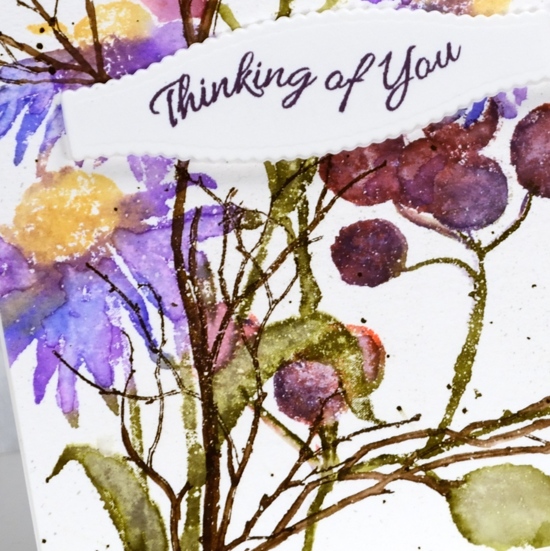
I finished off the panel with some dark brown splatter then moved onto another project undecided whether to turn this one into a card or not. When I came back to this panel later I decided to break up the dominance of the brown winter branches with a sentiment panel. I used a die from the gift card pocket set to cut a decorative shape from hot pressed watercolour paper and adhesive backed foam then stamped a sentiment from the banner sentiments set. I ended up liking the idea and the colours of this card but it’s not my best layout.
Supplies
Stamps: dancing daisies, Christmas berries, winter branches, banner sentiments (all PB)


Inks: blueprint sketch, dusty concord, fossilized amber, forest moss, festive berries, gathered twigs distress inks & monarch versafine clair


Paper: cold pressed watercolour paper, hot pressed watercolour paper
Die: gift card pocket (PB)
Tools: adhesive backed foam, Misti

Flowers & Scrolls
Posted: June 28, 2018 Filed under: floral edger, scrolls half edger | Tags: Cutterpillar glass mat, distress oxide inks, Penny Black creative dies 8 Comments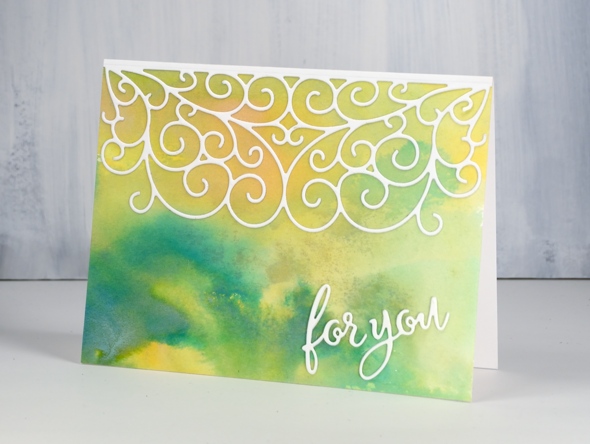
I have a new glass mat on my work table and it’s been fun trying some of my favourite techniques on the glass surface. To create the backgrounds for these two cards I swiped distress oxide inks on the glass, spritzed some water over the ink then swiped hot pressed watercolour paper through it.
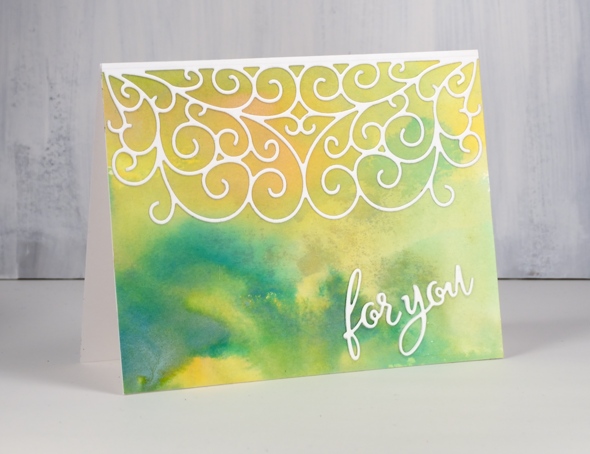
For this card the oxide inks were wild honey and lucky clover. I topped the panel with the scrolls half edger die cut and a stacked sentiment. I backed the white cardstock with adhesive sheet first before cutting to make it easier to attach.
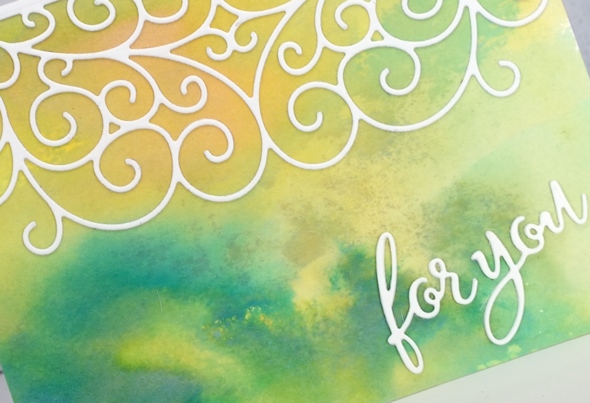
The second background was made by swiping watercolour paper through wild honey, lucky clover and abandoned coral oxide inks then splattering some more ink and water over the top.
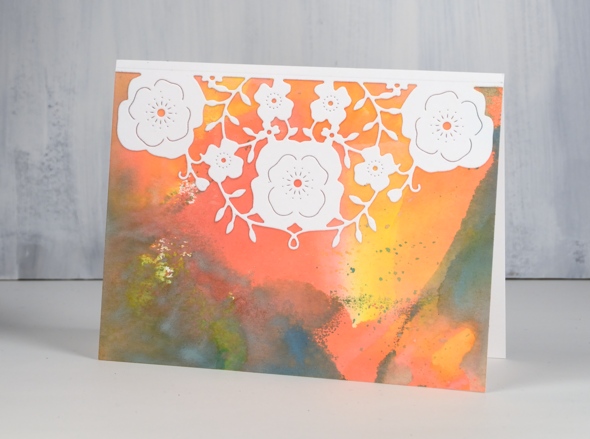
This one I decorated with the ‘floral half’ die cut edger. Both decorative dies cut all the intricate detail on one side and leave the opposite edge uncut
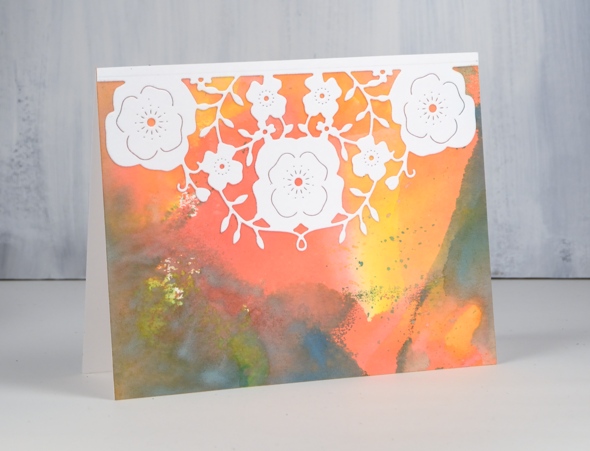
The cutterpillar glass mat worked beautifully for smooshing ink onto. I managed to spill half a bottle of glue on it while putting these cards together and ended up leaving it to dry for a day or two then peeled it off with ease. I have linked to the glass mat below so you can take a look (in the photo it is shown on top of the Cutterpillar Glow light pad). I really like the size as I can complete inky-painty projects on it but it doesn’t take over my whole work table. I will share more about it as I put it through its paces with other techniques.
Supplies
Dies: scrolls half edger, floral half, party for you


Inks


Papers: hot pressed watercolour, neenah solar white
Tools: stick-it adhesive, Cutterpillar Glow Tempered Glass mat

Knock knock
Posted: May 28, 2018 Filed under: Art Impressions WC stamps, border edgers | Tags: Art Impressions watercolor stamps, Kuretake Zig clean color real brush markers, My Favorite Things, Penny Black creative dies, Ranger Distress inks 11 Comments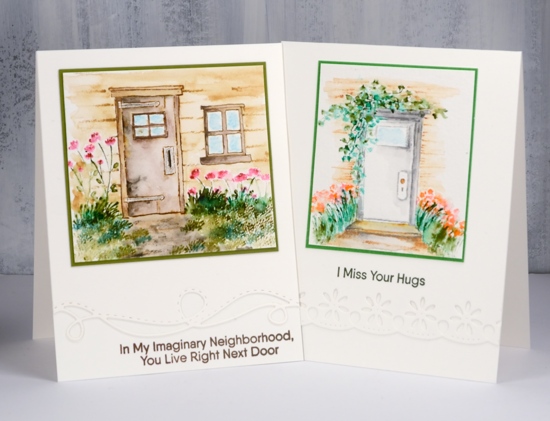
I’m collaborating with the Foiled Fox team today so you can read more about these cards on their blog. These are my first cards created with Art Impressions ‘Watercolor’ stamps. The stamps are designed for creating scenes; there are a lot of little stamps depicting stems, branches, foliage and flowers. The stamper can combine them however they wish, use a water soluble ink then blend with a little water to turn all the stamping into ‘watercolor paintings’.
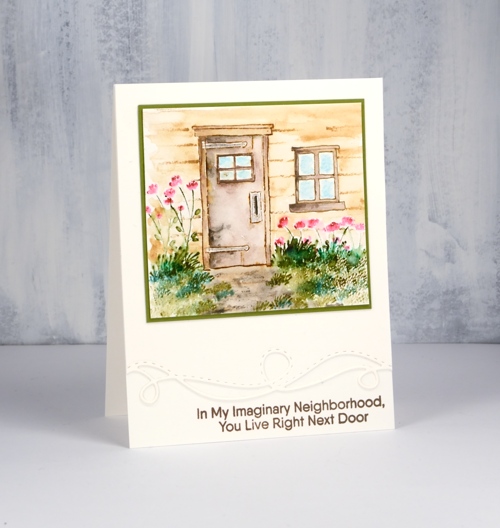
I used a combination of foliage and flower sets to decorate two cards featuring doors from the Art Impressions ‘Door’ set. It was fun to create little scenes around the doors. One ended up being a rustic cabin type door and the other a simple white door at the end of a garden path.
I chose frayed burlap distress ink to stamp one of the doors and grey zig clean color real brush marker to ink the other door. I also used the zig markers for the floral and foliage stamps. I learnt on the Art Impressions youtube channel that the best way to stamp the flowers and leaves is to ink them, then stamp several times just slightly offset each time. That way you create more volume and variety in colour. After you have done your stamping (with watersoluble inks like distress and zig clean color) you can blend all the images with a damp brush to create the watercolour look.
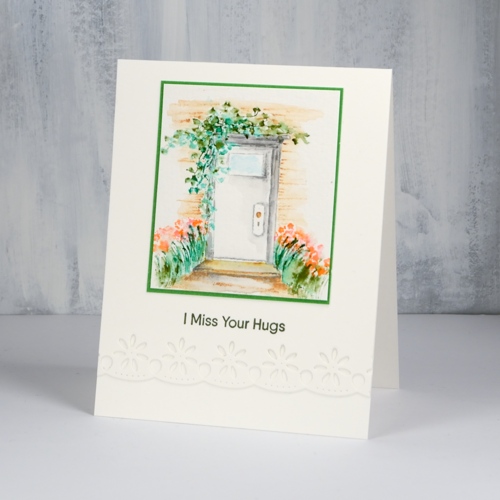
I added some elements with the zig markers and watercolour pencils to fill out the scenes. front path, bricks and planks around the doors and a hand drawn window. Pop over to the Foiled Fox blog to read about my method in more detail.
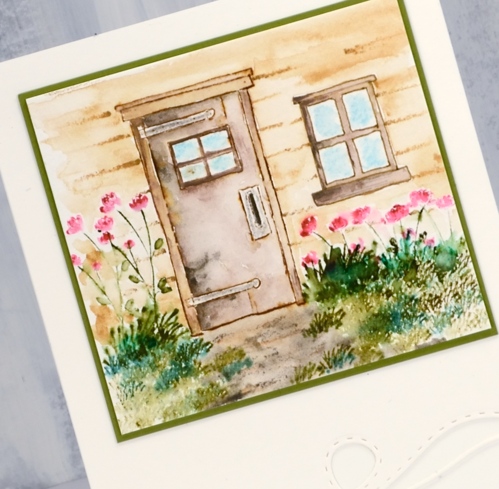
I really enjoyed playing with these stamps to create my own scenes. The stamps are tiny but you can fill a garden quickly by stamping a mass of flowers and foliage then blending it every so lightly with water. I would love to hear from you in the comments below if you have already done some creating with the Art Impressions watercolour stamps or if you are feeling inspired to give it a try. I will definitely be back with more scenes.
Supplies
Art Impressions Stamps: WC Foliage set 3, WC Flower set 3, WC door set, WC Foliage set 1, Flower


MFT Stamps: Anything but Basic Friend set

Inks: frayed burlap distress ink, versafine sepia, versafine olympia green


Dies: Penny Black border edgers

Papers: cold pressed watercolour paper, neenah natural white, green cardstocks
Also: zig clean color real brush pens, watercolor pencils












