
Pink & Gold Poinsettias
Posted: December 6, 2014 Filed under: Joyous, Red Star, World of Wishes 18 Comments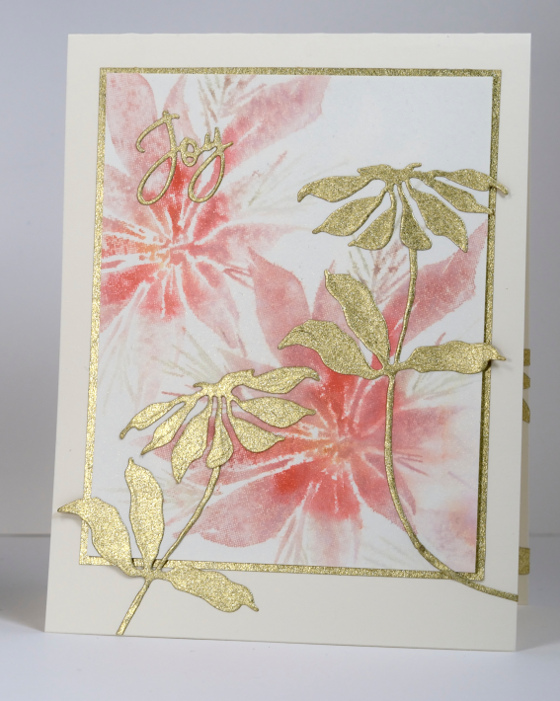
The panel pink panel on this card is one of the bits and pieces I had sitting around. When I was creating cards with the “Red Star” pointsettia stamp and distress stains I often stamped once or twice on a panel without re-inking. The distress stain pigment is intense and the liquid on the stamp is usually enough to get a few impressions. The panel on the card above would have been one of the third or fourth impressions, hence the pale watery pinks. (To see the more vibrant first and second impressions take a look at this card) I chose to embellish and mat with gold because there is a subtle gold sheen over the watercoloured panel made by spritzing with my pearl-ex interference gold spray (home made).
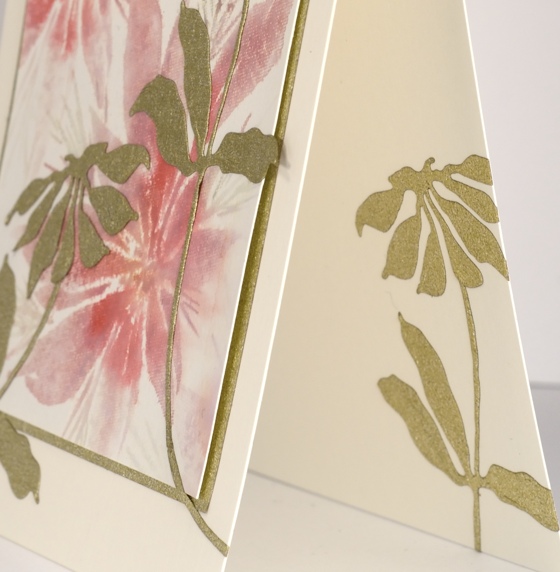
The gold poinsettias are cut from gold wrapping paper using the “Joyful” dies. Before cutting I applied an adhesive sheet to the back of the paper so I could easily stick the flower and stem onto the card. The effect looks a little like gilding because the paper is so much thinner than cardstock. The word ‘joy’ is also cut from the same wrapping paper.
I’ve linked to Simon Says Christmas challenge and Virginia’s View All Things Distressed challenge.
Supplies:
Stamps: Red Star (PB)
Inks: Victorian Velvet, Bundled Sage, Mustard Seed, Barn Door Distress Stains (Ranger)
Cardstock: Fabriano 100% cotton hot pressed watercolour paper, Neenah Natural White 110lb card stock, Gold wrapping paper
Creative Dies: Joyful, World of Wishes (PB)
Also: Interference Gold Pearl-ex spray
Woodland Dusk
Posted: December 3, 2014 Filed under: Woodland Wonder | Tags: Penny Black stamps 24 Comments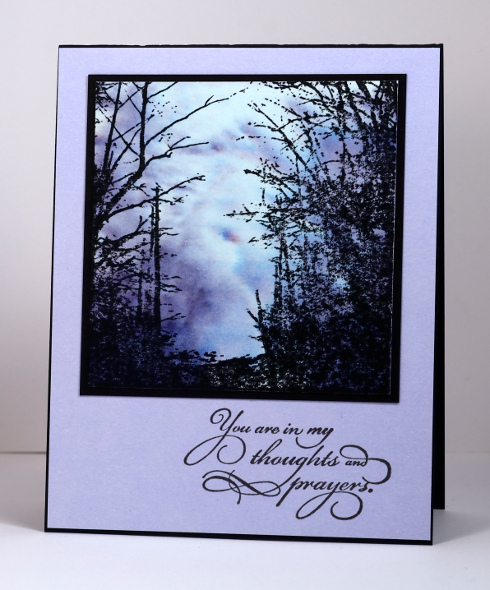
The ‘Woodland Wonder’ stamp works beautifully for a restful or dramatic scene depending on the colours you add to the sky. The soft colours of dusk in the sky above seemed to fit with a sympathy or prayerful sentiment. The sky was a scrap waiting for a purpose; it was created when I stamped the image of the woodland wonder stamp on acetate to use with the stamp positioner. Several days later the ink was still wet on the acetate so I pressed it onto some wet watercolour paper. The blurry blues you see are the result. I added the black image then stayed within the colour scheme for matting and card base. I’m not sure what the ink on the acetate was but my guess is Memento Paris Dusk.
Supplies:
Stamps: Woodland Wonder, Eloquence (PB)
Inks: Memento Paris Dusk & Versafine Onyx Black(Imagine Crafts/Tsukineko)
Cardstock: Fabriano hotpressed watercolour paper, Neenah Epic Black 100lb cardstock, Mix & Match Periwinkle paper (PB)
Dressember
Posted: December 2, 2014 Filed under: CAS, Watercolour | Tags: Dressember 2014, Faber-Castell Albrecht Durer Watercolour pencils, Penny Black stamps 5 Comments
Today’s post is quite different from my normal posts for two reasons. Firstly, there is a person stamped and coloured on my card; that rarely happens! Secondly, and more importantly, this post is to let you know about a non-stamping challenge I have taken on during the month of December hoping to raise funds for a very important cause. The fact that the girl on the stamp is in a dress is significant. I have joined in “Dressember 2014” which challenges me to wear a dress every day in December. I am aiming to raise awareness and funds for the International Justice Mission which works all over the world to rescue thousands, protect millions and prove that justice for the poor is possible. The heart of Dressember is dignity for all women so I thought I would share it with my readers, all of whom I appreciate for their support and kind comments, their interest in paper crafts and the enjoyment I get from being part of such a great online community.
I have created a fundraising page. on the Dressember site, just click HERE to visit, look around and, if you are able, donate to the cause. Money raised around the world during Dressember will help stop human trafficking. I will be providing occasional updates on my other blog, Sentient, as well as posting my daily dress on Pinterest and Instagram.
Perhaps there will be more dress cards during December; I could do with the practice! The one above is my second attempt and I had difficulty knowing how to finish it as a card. You can’t tell in the photo but it is matted in a dark blue/gold paper which does co-ordinate with her dress. I even tried a few sequins but they didn’t make the final cut. The image is stamped in Memento Angel Pink and coloured with water colour pencils.
Thanks for visiting today, I appreciate you taking the time to read about a different interest of mine.
Supplies:
Stamps: Reflection (PB)
Inks: Memento Angel Pink (Imagine Crafts/Tsukineko)
Pencils: Albrecht Durer watercolour pencils (Faber Castell)
Cardstock: Fabriano hotpressed watercolour paper, dark gold paper, Neenah solar white
Also: gold wink of stella pen
Oh Christmas Tree
Posted: December 1, 2014 Filed under: Oh Christmas Tree | Tags: Fabriano Watercolour Paper, Penny Black stamps, Ranger Distress inks, Ranger Distress stains, Sharpies 8 Comments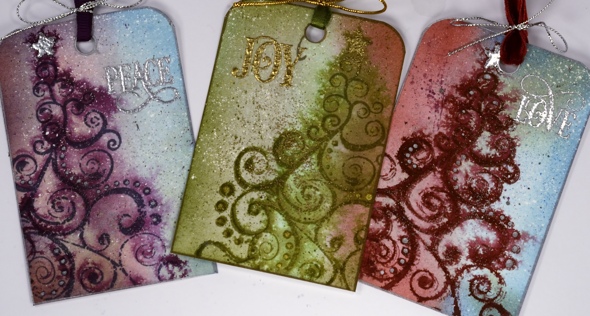
Oh Christmas Tree, a beautiful slapstick cling stamp from Penny Black, is the star of the Penny Black blog this week. You can see this stamp featured everyday on projects created by the PB Design Team. I dreamed up tags in three colour schemes featuring only a portion of the stamp but the same technique. All three tags started on the same panel as you can see below.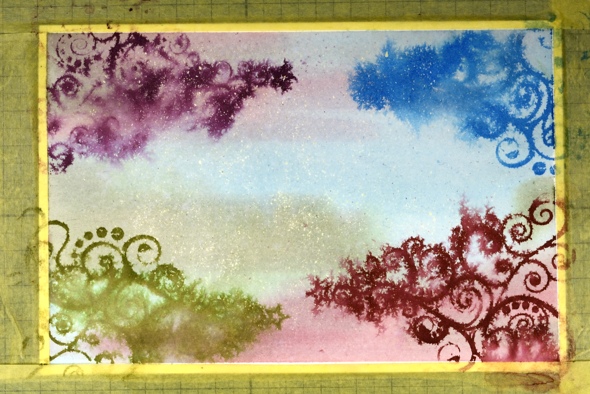
I used watercolour paper splattered with masking fluid and coloured with three distress stains (Victorian Velvet, Bundled Sage and Tumbled Glass). I swiped the stains directly onto the paper then blended them with water. While the panel was still wet I stamped ‘Oh Christmas Tree’ four times in distress inks (Seeded Preserves, Peeled Paint, Aged Mahogany, Salty Ocean). When the panel was dry I switched to pigment inks that would not bleed or blend to stamp a defined image in similar colours of Versafine ink (Crimson Red, Spanish Moss, Imperial Purple, Deep Lagoon).
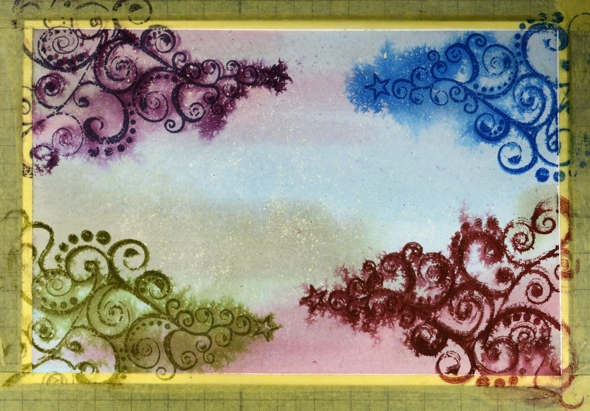
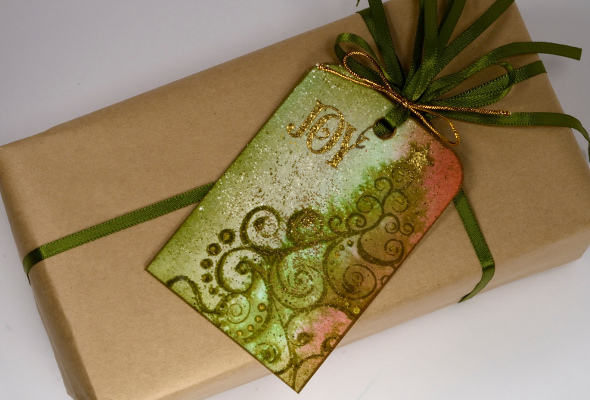
I cut the panel into four tags but the blue one did not advance to the next level. Each of the three remaining trees became a tag with rounded top corners and gold or silver highlights and sentiment. Using the colours in the background as a guide I darkened the edges of each tag with sponged distress inks. I highlighed the dots with gold or silver sharpies and added a splatter of distress stain and wink of stella pen over each tag. I think it was at this point that I removed the masking fluid to reveal the fine white specs. To continue the gold and silver details I stamped ‘Love’, ‘Joy’ & ‘Peace’ from “Joy Filled” and embossed with silver or gold embossing powder. I sprinkled embossing powder randomly and sparingly on top of the tags then heat set from underneath so as to not blow the powder off. To emboss the star I coloured it with a gold wink of stella marker then sprinkled gold embossing powder and heat set.
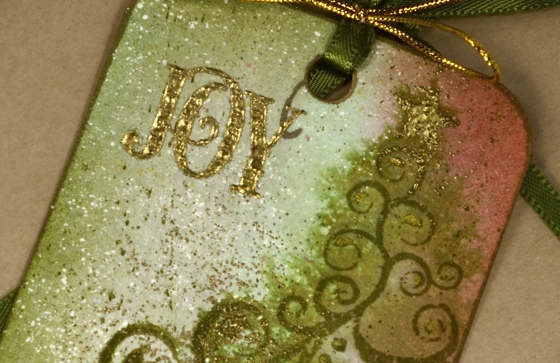
I gilded the edge of the tag with the co-ordinating sharpie then finished by adding matching ribbon and metallic cord.
Supplies:
Stamps: Joy Filled, Oh Christmas Tree (PB)
Inks: Victorian Velvet, Bundled Sage, Tumbled Glass distress stains & Seeded Preserves, Peeled Paint, Aged Mahogany, Salty Ocean(Ranger) & Crimson Red, Spanish Moss, Imperial Purple, Deep Lagoon & Versamark(Imagine Crafts/Tsukineko)
Cardstock: Fabriano 100% cotton hot pressed watercolour paper
Also: Winsor & Newton masking fluid, gold & silver sharpies, gold and silver embossing powder, gold and silver wink of stella pens.
Pine needles & cones
Posted: November 27, 2014 Filed under: CAS, Nature's Gifts | Tags: Penny Black stamps, Ranger Distress inks, Ranger Distress stains, Tsukineko Memento inks 12 Comments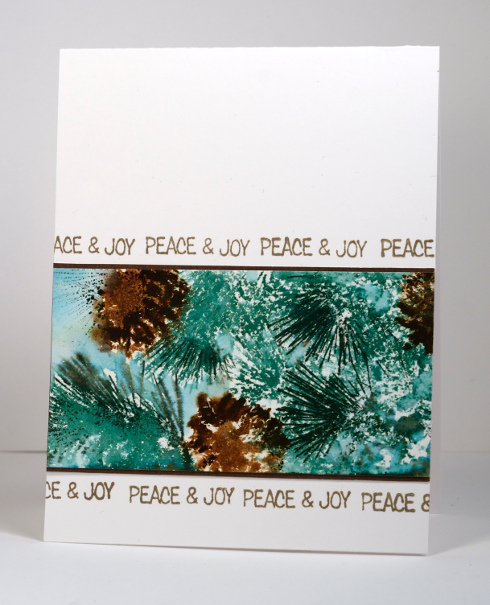
This panel of pine cones and needles is one of the bits & pieces that was waiting to be turned into something. I made the panel quite a while ago so here is my best guess at how I did it. I splattered some masking fluid on watercolour paper then inked the pine cones with vintage photo distress ink spritzed them with water then stamped them on the panel. I did the same with the pine needles in, surprise, surprise, pine needle distress ink. At this point I may have painted a little tumbled glass stain around the needles and cones as a background. When the panel had partially dried I restamped sections of the pine cone for added definition. I switched to Memento Northern Pine ink to add some darker needles. When all was dry I rubbed off the masking fluid.
I trimmed it a little and matted it with brown and then tried to think of a background that would add interest but not compete with the panel itself. I tried embossing the needles and cones from the “Nature’s Gifts” set on the card base in a pearl powder. The powder is very pretty and I will try it again on another project but it didn’t work for this one. I ended up with no more pattern on the card base that the stripes of repeated sentiments. Keeping it clean and simple qualifies it for the Less is More challenge this week to be ‘Christmassy’.
Supplies:
Stamps: Nature’s Gifts, Winter Magic (PB)
Inks: Tumbled Glass distress stains & Pine Needle, Vintage Photo distress ink(Ranger), Memento Northern Pine, Versafine Vintage Sepia (Imagine Craft/Tsukineko)
Cardstock: Neenah Avon Brilliant 110lb cardstock, Fabriano 100% cotton hot pressed watercolour paper, Sticks & Stones mix & match paper (Penny Black)
Also: Winsor & Newton masking fluid
Falling Snow Video Tutorial
Posted: November 26, 2014 Filed under: Prancers, Stamped Landscapes, Tutorial | Tags: Fabriano Watercolour Paper, Penny Black stamps, Tsukineko Memento inks, Tutorial 16 Comments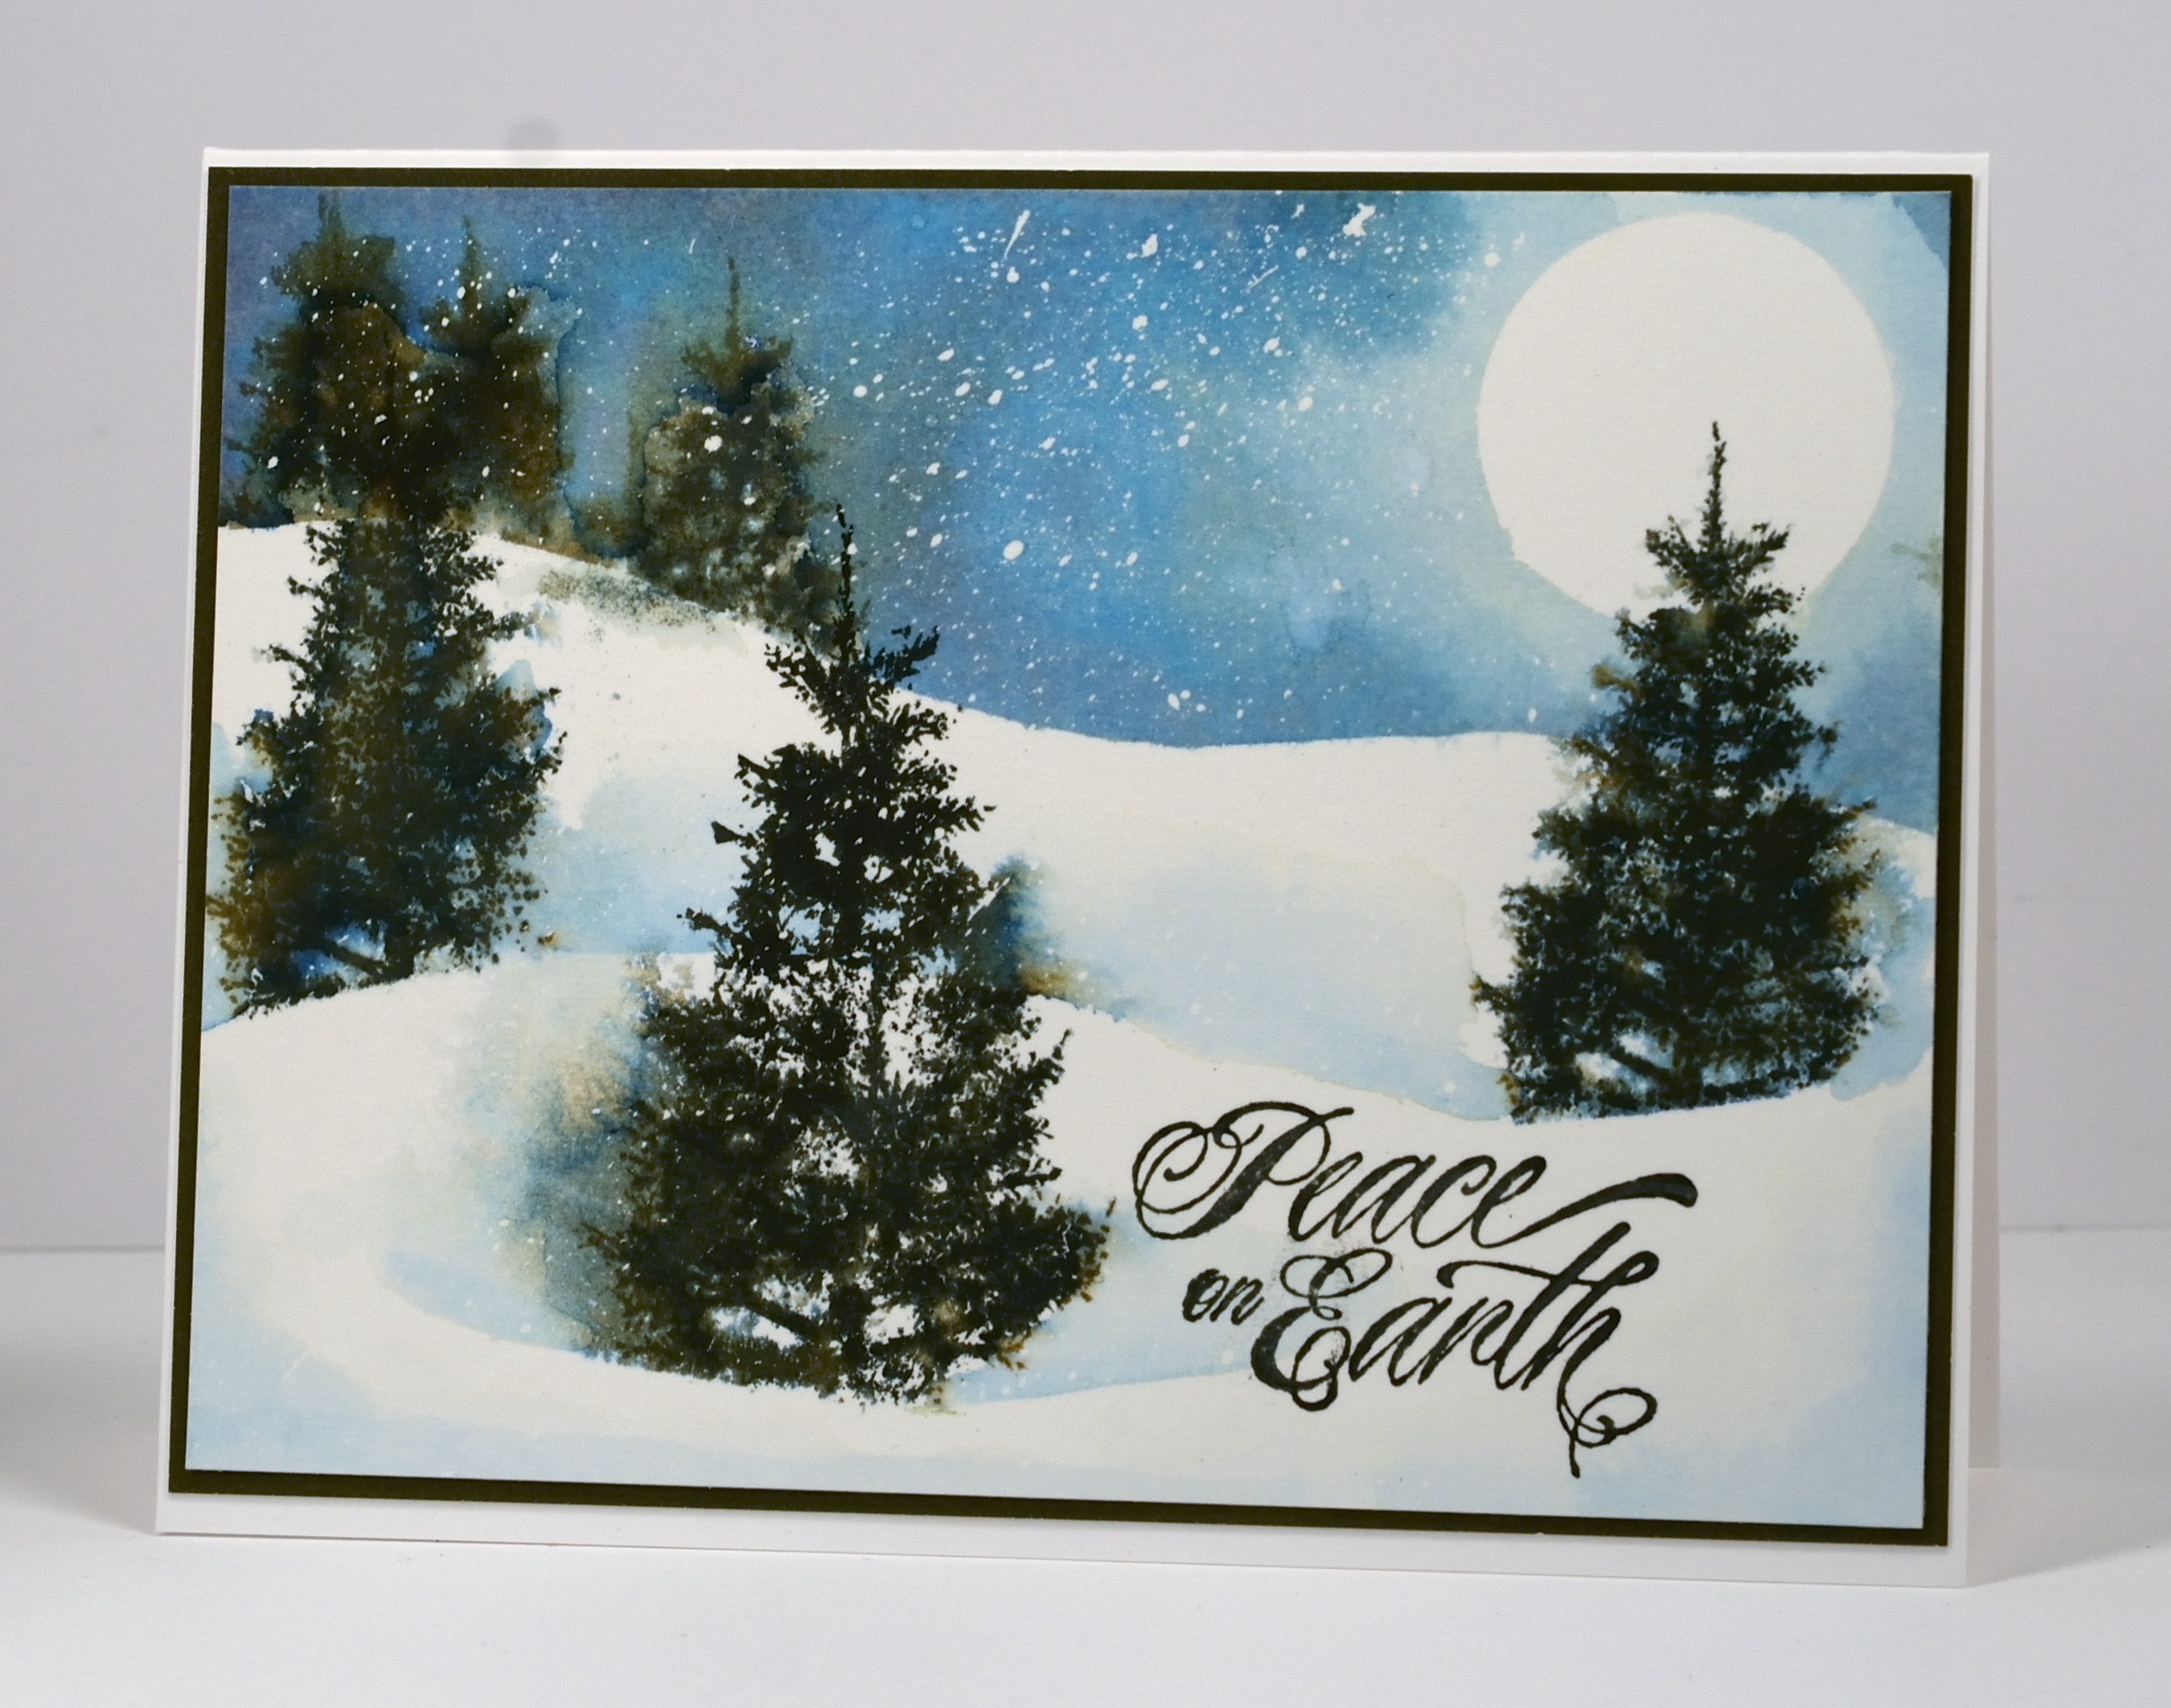
Today’s tutorial is one I created for Splitcoast Stampers. Splitcoast posts a new technique tutorial every Wednesday and in today’s I show how to create the look of falling snow on a watercolour card. I created both a photo and video tutorial for Splitcoast.
The video took me a few attempts so I have four slightly different versions of the card which supports my claim that watercolour techniques never give you the same result twice. The picture above is the first one I created and the one featured in the photo tutorial. It has quite a bit of masking fluid snow in the sky; the one in the video ended up with a lot less. I mention in the video that I have stopped using post-it notes to mask when I do watercolour scenes. I now use frisket film, a reusable, repositionable plastic film which doesn’t disintegrate when it gets wet. It is called Grafix Extra Tack Prepared Frisket Film.
I have another video showing in detail how to apply and remove the masking fluid here.
Supplies:
Stamps: Prancers, Hello Winter(PB)
Inks: Memento Nautical Blue, Bahama Blue, Northern Pine inks (Imagine Craft/Tsukineko)
Cardstock: Fabriano 100% cotton hot pressed watercolour paper, Neenah Solar White 110lb cardstock, Olive Green cardstock
Also: Winsor & Newton masking fluid, Kemper Spatter brush
Together under the Northern Lights
Posted: November 25, 2014 Filed under: Together | Tags: Penny Black creative dies, Penny Black stamps, Ranger Distress inks, Ranger Distress stains 21 Comments
I have a stack of watercoloured backgrounds and images on my work table waiting to be turned into something. Some are practice pieces that worked, others are left over from classes I taught and some are experiments still needing some tweaking. Most of them are wintery or Christmassy so now is the time to work with them. The background above is just one of the bits & pieces that was ready to be used. It was made with distress stains blended over splattered masking fluid. I cut out the deer with the ‘Together’ die and popped them up over the background then added two hand cut snow banks and some branches cut with the ‘Nature’s Song’ die. The challenge at Less is More this week is to use something Christmassy on your card. I think this qualifies.
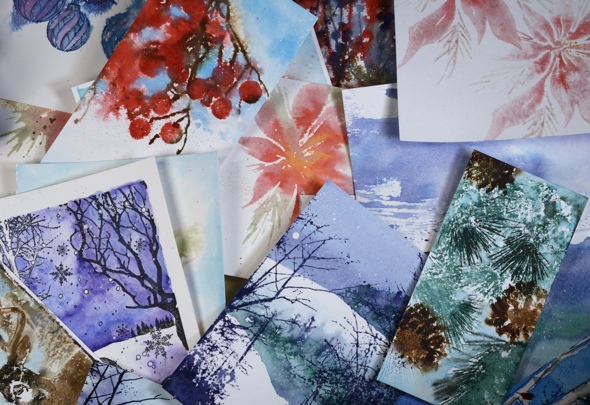
I will have more projects made from the bits & pieces pictured below later in the week but tomorrow I’ll be back with a video tutorial.
Supplies:
Stamps: Joy Filled (PB)
Creative Dies: Together, Nature’s Song (PB)
Inks: Chipped Sapphire, Bundled Sage, Tumbled Glass distress stains & Chipped Sapphire distress ink(Ranger)
Cardstock: Neenah Avon Brilliant 110lb cardstock, Fabriano 100% cotton hot pressed watercolour paper
Also: Winsor & Newton masking fluid
Bits & Pieces waiting for time and inspiration:
Inch by Inch 5: Christmas Village
Posted: November 21, 2014 Filed under: Frame, Gleeful | Tags: Faber-Castell Albrecht Durer Watercolour pencils, Penny Black creative dies, Penny Black stamps 6 Comments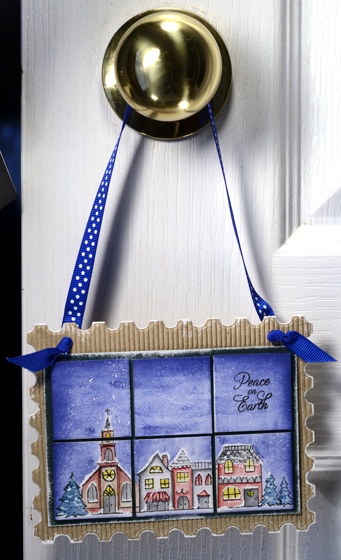
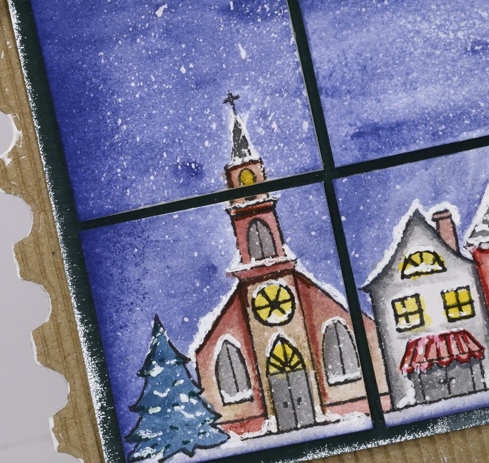
I hope you have enjoyed the Inchie Arts projects this week. My final one (for now) is a door handle decoration, a little panel with a winter scene on six 1.5″ squares.
To create this panel I began by splattering masking fluid on six squares then, when the fluid had dried I placed them edge to edge in a 2×3 array on masking paper to hold them together while I stamped and coloured. I stamped the village from the transparent set, “Gleeful” on an array of tiles in versafine onyx black. Using a waterbrush I picked up blue from a watercolour pencil to paint the sky. With a selection of watercolour pencils I coloured and blended the buildings and trees in the stamped image. Once the watercolouring had dried I rubbed off all the masking fluid to reveal the ‘falling snow’. I used ultrafine sharpie markers to highlight some features on the fillage and a clear wink of stella pen to make the windows glisten. With a white gel pen I drew snow on roofs, window trim and around doorways to finish off the picture.
To assemble the decoration I cut a corrogated cardboard base using the ‘Frame’ die and a green mat for the squares then painted the frame edges with white gesso and the green card with wedding dress luxe ink. I mounted the art squares on the green with a small margin between each square then finished it off with a blue and white polka dot ribbon.
Make sure you visit the Penny Black and the Inchie Arts blogs for more Inchie inspiration and for a chance to win some stamps and art squares.
Supplies:
Stamps: Gleeful (PB)
Creative Dies: Frame and Pattern (PB)
Inks: Versafine Onyx Black (Imagine Crafts/Tsukineko)
Pencils: Albrecht Durer watercolour pencils (Faber Castell)
Cardstock: Green cardstock, Natural corrogated cardstock, Inchie Arts 1.5″ white square
Also: Winsor & Newton masking fluid, polka dot ribbon, white gesso, white gel pen, clear wink of stella pen, ultrafine sharpies
Inch by Inch 4: Vintage Skyline
Posted: November 20, 2014 Filed under: Skyline, Stamped Landscapes | Tags: Faber-Castell Albrecht Durer Watercolour pencils, Inchie Arts, Penny Black stamps 16 Comments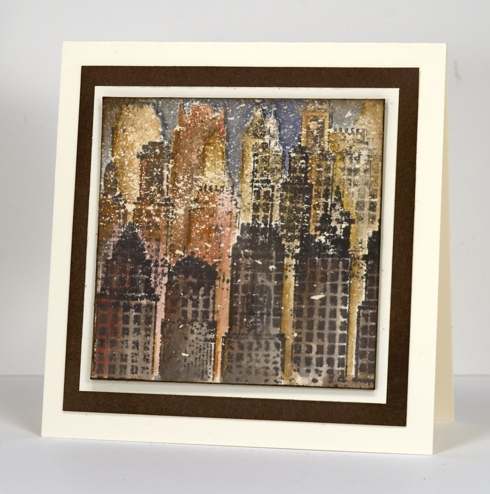
From a snowscape to a vintage cityscape my Inchie experiments continue. I never would have guessed when I first saw this skyline stamp that it would become such a favourite. Working on a 3″square splattered with masking fluid, I stamped ‘Skyline’ several times, never a full impression just the top of the buildings and without reinking so that the foreground images were darker than the background. I added colour with several earth tone watercolour pencils layering and blending colour until I was happy with the values and shadows. I mixed a blue and green to make a dark colour for the sky then added brown over the top to make it more muted. Finally I removed the masking fluid to reveal the cream flecks which I think make it look like an old damaged photo.
Deciding what to turn it into was difficult. I would have liked to create a notebook but time was not on my side so I made a card. I tried a patterned background, a portrait oriented and a landscape oriented rectangular card and two different sentiments before deciding less was once again more. Don’t forget more inchie arts inspiration on the Penny Black and the Inchie Arts blogs.
Supplies:
Stamps: Skyline (PB)
Inks: Memento Rich Cocoa (Imagine Crafts/Tsukineko)
Pencils: Albrecht Durer watercolour pencils (Faber Castell)
Cardstock: Neenah Natural White 110lb cardstock, Inchie Arts 3″ cream square, Penny Black mix & match Sticks and Stones paper
Also: Winsor & Newton masking fluid
Inch by Inch 3: Mini Snowscape
Posted: November 19, 2014 Filed under: CAS, Prancers, Stamped Landscapes | Tags: Inchie Arts, Penny Black stamps 6 Comments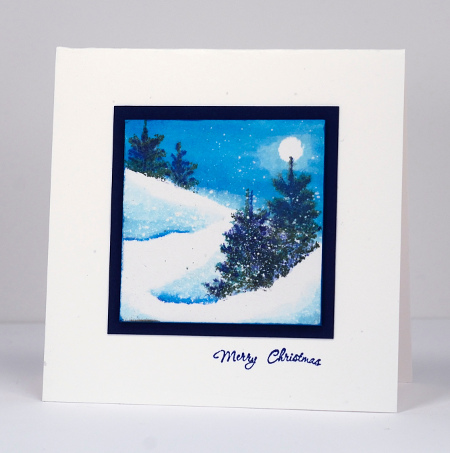
A mini snowscape was a must with the Inchie Arts squares so for day 3 I watercoloured a tiny scene using distress inks and memento inks. I used the same techniques I’ve used on previous snowscapes, a punched mask for the moon, a cut mask for the hill side and snowbanks and of course a splatter of masking fluid to create the appearance of falling snow. I have a tutorial showing the process on a larger scale here. When I was creating my masking fluid tutorial recently I splattered quite a few inchies at the same time so I would have a few ready when inspiration struck. The trees on this little scene were stamped in Memento Northern Pine ink which is my first choice for stamping pine trees. I added some Paris Dusk ink to the trees with a marker as they were looking a little flat. The teeny sentiment is a result of stamp surgery performed on a circular stamp from the Hello Winter set. The finished card is 3.5″ square.
If you are wondering where to buy art squares there is a list of retailers on the Inchie Arts blog. Don’t forget to visit both the Penny Black and the Inchie Arts blogs for more inspiration and giveaways.
Supplies:
Stamps: Prancers, Hello Winter (PB)
Inks: Memento Northern Pine, Paris Dusk ink (Imagine Crafts/Tsukineko) Chipped Sapphire, Salty Ocean distress ink(Ranger)
Cardstock: Neenah Solar White 110lb cardstock, Navy cardstock, Inchie Arts 2″ white square
Also: Winsor & Newton masking fluid


