
For the grad
Posted: April 8, 2015 Filed under: For the grad | Tags: Kuretake Gansai Tambi watercolour paints, Penny Black stamps, Sharpies 13 Comments
I’m playing with the whole “sailed off into the sunset and lived happily ever after” idea on this card. Of course it would have to be “flew off into the sunset” and although graduation is the end of one adventure it is usually the start of an even bigger one. Regardless I have a bird flying free over a watercoloured sky, painted of course with my new gansai tambi paints.
To create the watermarked look or ‘back runs’ I blended colours then let them dry a bit before adding more paint. I worked from blues to pink, red, orange then yellow in the bottom left hand corner. When it was all dry I stamped the two images and sentiment from the transparent ‘for the grad’ set.
There are celebratory cards on the PB blog all this week.
Supplies
Stamps: For the grad (PB)
Inks: Versafine onyx black ink
Cardstock: Fabriano 100% cotton hot pressed watercolour paper, Neenah Epic Black 100lb cardstock
Also: Kuretake Gansai Tambi watercolour paints
Oh Christmas Tree
Posted: December 1, 2014 Filed under: Oh Christmas Tree | Tags: Fabriano Watercolour Paper, Penny Black stamps, Ranger Distress inks, Ranger Distress stains, Sharpies 8 Comments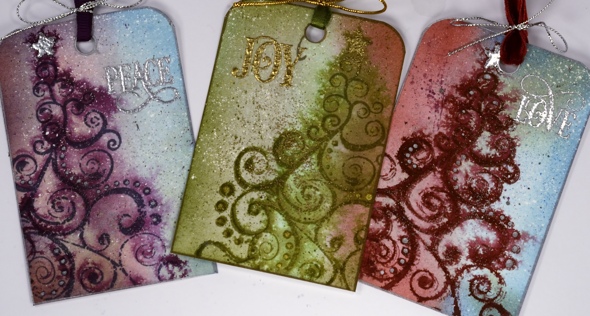
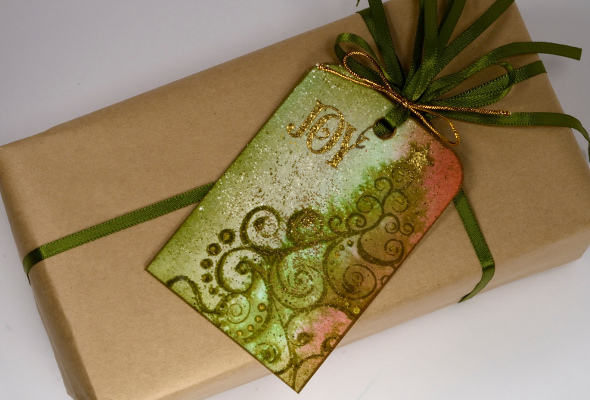
Oh Christmas Tree, a beautiful slapstick cling stamp from Penny Black, is the star of the Penny Black blog this week. You can see this stamp featured everyday on projects created by the PB Design Team. I dreamed up tags in three colour schemes featuring only a portion of the stamp but the same technique. All three tags started on the same panel as you can see below.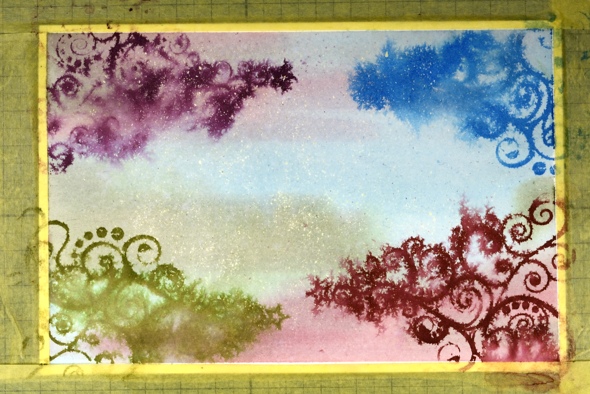
I used watercolour paper splattered with masking fluid and coloured with three distress stains (Victorian Velvet, Bundled Sage and Tumbled Glass). I swiped the stains directly onto the paper then blended them with water. While the panel was still wet I stamped ‘Oh Christmas Tree’ four times in distress inks (Seeded Preserves, Peeled Paint, Aged Mahogany, Salty Ocean). When the panel was dry I switched to pigment inks that would not bleed or blend to stamp a defined image in similar colours of Versafine ink (Crimson Red, Spanish Moss, Imperial Purple, Deep Lagoon).
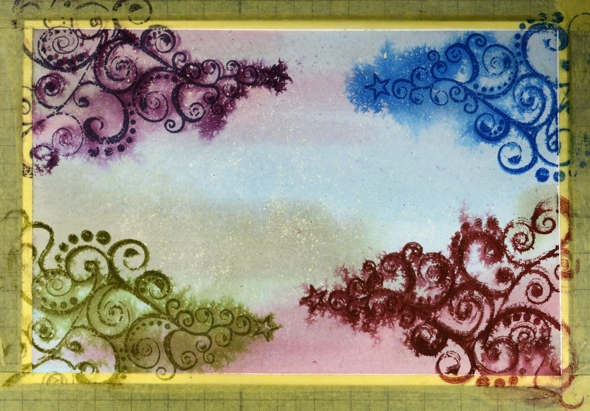
I cut the panel into four tags but the blue one did not advance to the next level. Each of the three remaining trees became a tag with rounded top corners and gold or silver highlights and sentiment. Using the colours in the background as a guide I darkened the edges of each tag with sponged distress inks. I highlighed the dots with gold or silver sharpies and added a splatter of distress stain and wink of stella pen over each tag. I think it was at this point that I removed the masking fluid to reveal the fine white specs. To continue the gold and silver details I stamped ‘Love’, ‘Joy’ & ‘Peace’ from “Joy Filled” and embossed with silver or gold embossing powder. I sprinkled embossing powder randomly and sparingly on top of the tags then heat set from underneath so as to not blow the powder off. To emboss the star I coloured it with a gold wink of stella marker then sprinkled gold embossing powder and heat set.
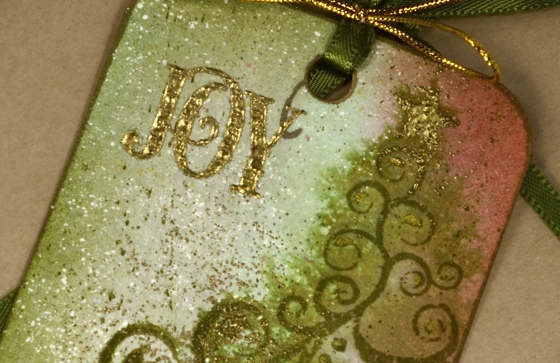
I gilded the edge of the tag with the co-ordinating sharpie then finished by adding matching ribbon and metallic cord.
Supplies:
Stamps: Joy Filled, Oh Christmas Tree (PB)
Inks: Victorian Velvet, Bundled Sage, Tumbled Glass distress stains & Seeded Preserves, Peeled Paint, Aged Mahogany, Salty Ocean(Ranger) & Crimson Red, Spanish Moss, Imperial Purple, Deep Lagoon & Versamark(Imagine Crafts/Tsukineko)
Cardstock: Fabriano 100% cotton hot pressed watercolour paper
Also: Winsor & Newton masking fluid, gold & silver sharpies, gold and silver embossing powder, gold and silver wink of stella pens.
Inch by Inch 1: Gold Snowflakes
Posted: November 17, 2014 Filed under: All is Bright, Winter Pine | Tags: Inchie Arts, Penny Black stamps, Ranger Distress stains, Sharpies 20 Comments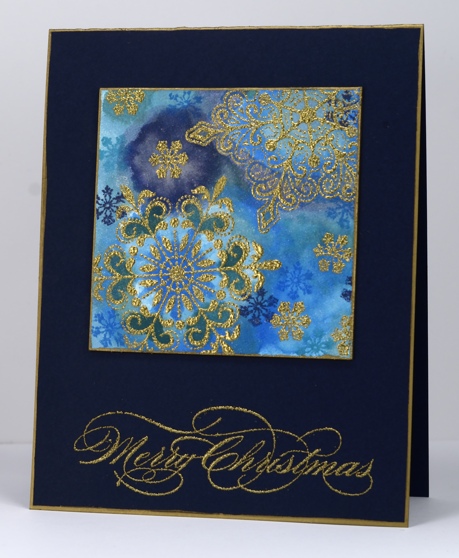
The Penny Black design team are collaborating with Inchie Arts this week and I will be sharing an Inchie Arts project here each day too. I have really enjoyed creating on a smaller scale, trying to make a visual impact in a couple of inches square. I have several projects on a single square and a couple where I lined up more than one. I did not end up working with ‘true inchies’ (1″x 1″); I had 1.5 inch, 2 inch and 3 inch matboard tiles to experiment with.
Today’s card features a 3 inch cream square. I started by embossing the snowflakes in gold powder then used distress stains to add colour. Distress stains react a little differently on matboard than on watercolour paper as the matboard absorbs liquids more quickly. I not only blended the colours on the matboard but layered them creating different colours and tones. The matboard is sturdy and does not warp with the addition of water and stains. I can’t remember exactly which distress stains I used (sorry) but I have taken a guess in the list below. I also stamped a few little snowflakes in light and dark blue ink. I added a border to both the square and the navy card base with a gold sharpie. I was impressed that the sharpie matched the embossing so well and showed up on the dark cardstock. Running the sharpie along the edge is a very quick way to ‘gild’ the edge of panels.
Thanks so much for visiting today.
Supplies:
Stamps: All is Bright, Most Wonderful, Winter Pine (PB)
Inks: Versamark ink (Imagine Crafts/Tsukineko) Chipped Sapphire, Salty Ocean, Pine Needles, Tumbled Glass distress stains & Chipped Sapphire, Salty Ocean distress ink(Ranger)
Cardstock: Neenah Navy 100lb cardstock, Inchie Arts 3″ cream square
Also: gold embossing powder, gold sharpie
Gold leaves and sharpies
Posted: August 21, 2014 Filed under: CAS, Foliage Fancy, Wondrous | Tags: CAS, Penny Black stamps, Sharpies 7 Comments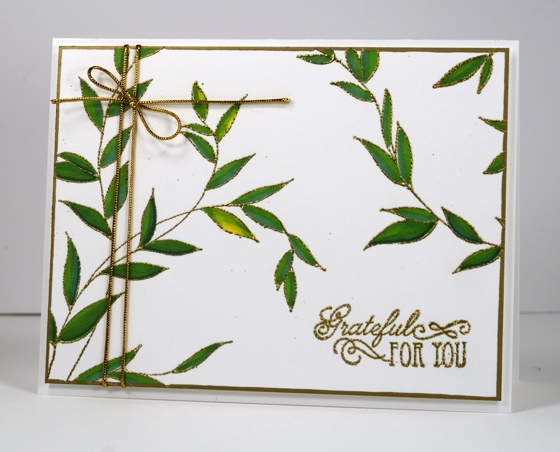
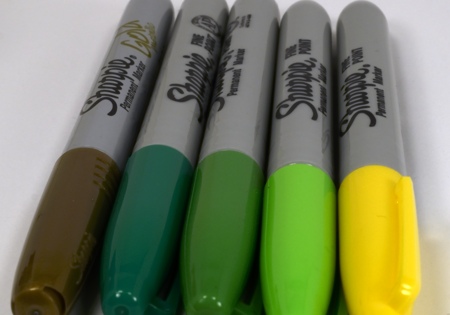
I tried something new on today’s card, colouring with Sharpies. If you visit here often you know I do most of my colouring with inks, watercolours and pencils but there was a 24 pack of Sharpies at Costco recently on sale for $9.99 and it called out to me. I have done very little colouring with markers so this was quite experimental and I thought I was less likely to make a mess with a simple design of leaves. To help me “keep inside the lines” I embossed the leafy stamp, “Wondrous” in gold powder first. I used the three greens below plus a touch of yellow. I began with the lightest green on one side of each leaf then added the middle green, then went back over both with the lighter green. I was pleased to see the darker colours did not stain the tips of the lighter colours. When I was finished I added a thin strip of the darkest green to a few leaves. The gold marker was used to make a border around the whole panel which I popped up on a white card base with dimensional tape. The sharpies don’t seem to have colour names or numbers so I added a photo of the ones I used below.
While the “Wondrous” stamp was out on my table I made another card in a very different style which I will share tomorrow. Thanks for your kind words about our “lights” cards yesterday; I shared your comments with my son.
Supplies:
Creative Dies: Wondrous, Foliage Fancy (PB)
Inks: Versamark (Imagine Craft/Tsukineko)
Cardstock: Neenah Solar White 110lb, Black cardstock
Also: Gold Sharpie, Green & Yellow Sharpies, Gold cord, Gold embossing powder


