
Watercolour pine bough
Posted: December 18, 2013 Filed under: Needles and cones, Watercolour | Tags: CAS, Fabriano Watercolour Paper, Penny Black stamps, Ranger Distress stains, Tsukineko Memento inks 14 Comments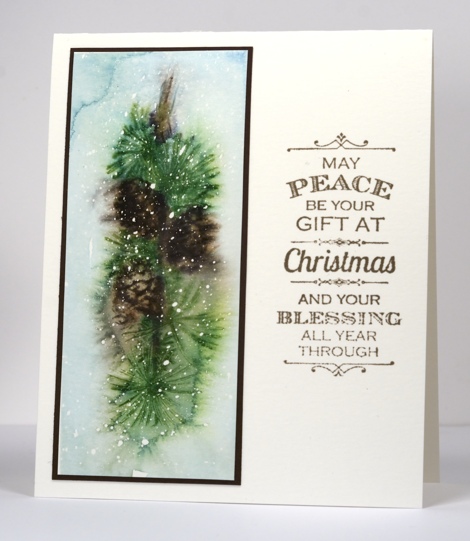
I have another watercolour card today created using a similar technique to this card. I had a piece of watercolour paper was already covered with little flecks of masking fluid so I wet the panel, inked the pine bough stamp with Memento markers and stamped it onto the wet paper. It bled quite a bit so I let it dry a little then re-inked and stamped again to give definition to the pine cones and needles. I painted the background with diluted distress stain which blended in some places with the stamping. Because I chose to mat my picture panel I did not want another border around the sentiment so I stamped the sentiment on a post-it note and cut out the centre text creating a window mask to stamp through.
My daughter made some cute cookies this week.
Supplies:
Stamps: Needles and cones, Glad Tiding (PB)
Inks: Memento Cottage Ivy, EspressoTruffle & Distress Stain Broken China (Tsukineko)
Cardstock: Fabriano 25% cotton hot pressed watercolour paper
Also: Winsor & Newton Masking Fluid
Blue Hillflowers
Posted: October 22, 2013 Filed under: CAS, Hillflowers | Tags: CAS, Penny Black stamps, Tsukineko Memento inks 18 Comments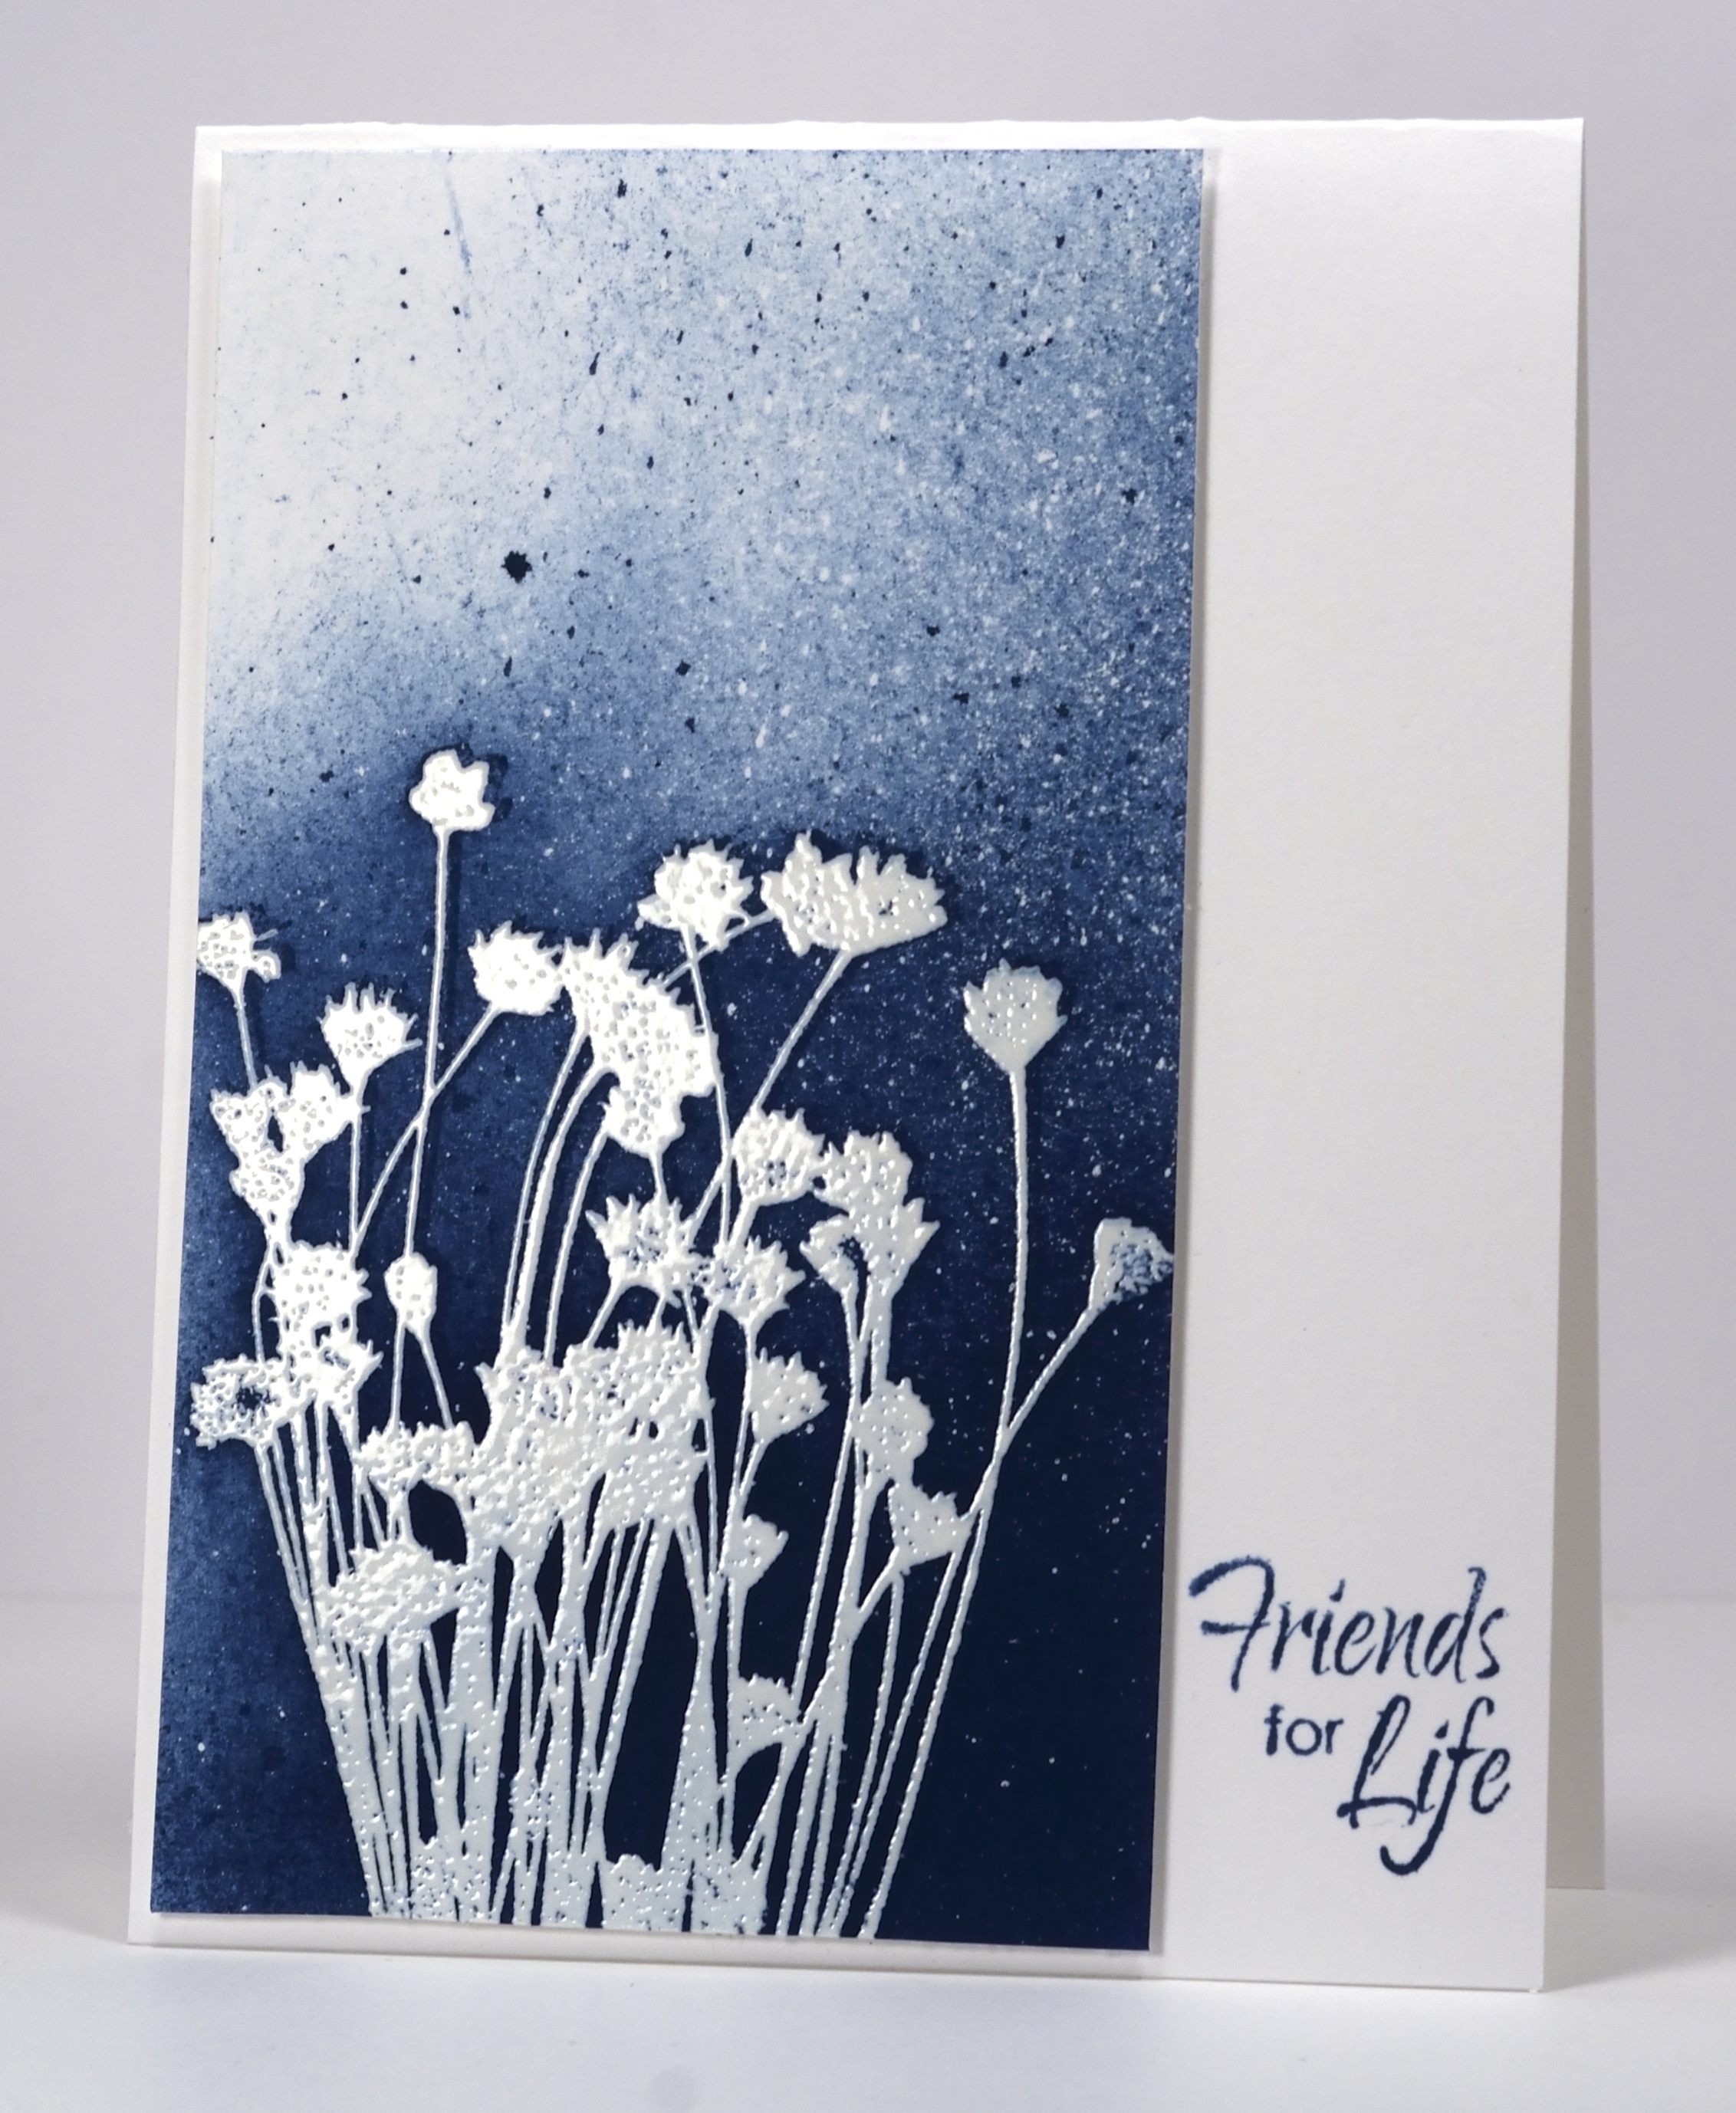
As I mentioned in my last post I am on the other side of the world. I am visiting my parents who live in the Blue Mountains west of Sydney. My mother is currently in hospital so I have been spending part of each day visiting her with my father. When not at the hospital we have been preparing for possible evacuation due to the serious bush fires in the area. I have written a bit more and posted some photos on my other blog, Sentient. Thank you to all who have participated in my One Layer Wednesday challenge to use leaves. I have not been able to visit all of your blogs just yet. Things have been a little busy.
The card above is one of my favourites from the classes I taught in Washington last June. I started by embossing the hillflowers stamp in clear embossing powder onto white cardstock then flicked masking fluid over the whole panel. I applied the blue ink by sponging from one corner towards the other fading the colour out toward the “light source”. I only used one blue ink and finished the design by flicking some of it over the whole panel. Once all the ink was all dry I rubbed off the masking fluid to reveal the little white flecks.
Supplies:
Stamps: Hill flowers , Eloquence PB)
Inks: Memento Nautical Blue & Versamark (Tsukineko)
Also: clear embossing powder, Winsor & Newton masking fluid
White berry collage
Posted: September 28, 2013 Filed under: Background Stamps, Berry Branch, CAS, Lace Trims, Winter Berries | Tags: CAS, Penny Black stamps, Tsukineko Memento inks 23 Comments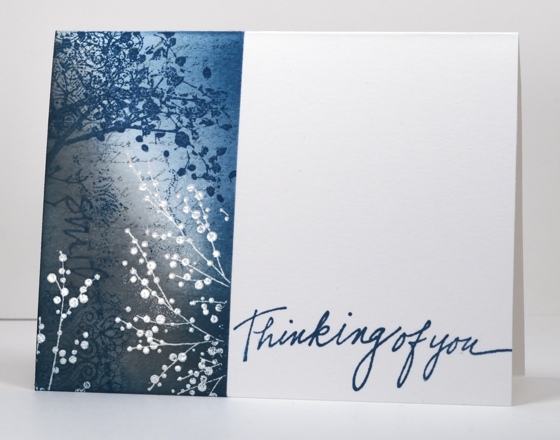
I made this one layer card weeks ago so I am no longer sure of my order of stamping. This is what I might have done:
- position a post-it note mask
- emboss winter berries in white
- sponge grey ink from bottom left hand corner and teal ink from top right hand corner but keep a centre strip paler to create a highlight area
- stamp letter background stamp in grey and lace border stamp in teal (lace stamp is probably patchy because I may have wiped some of the ink off on purpose.)
- stamp the word ‘smile’ and the berry branch in teal
I vaguely remember dropping a stamp on the panel at some point which almost made me toss the card. Sorry I can’t be more precise; I guess it really makes sense to write about the cards as soon as I make them!
I just realized that I can add this to Karen’s One Layer Wednesday challenge this week. It is a free for all so go and check it out
Supplies:
Stamps: Berry Branch, Lace Trims, Winter Berries, Letter Background, Edge to Edge (PB)
Inks: Memento Teal Zeal, London fog & Versamark (Tsukineko)
Also: white embossing powder
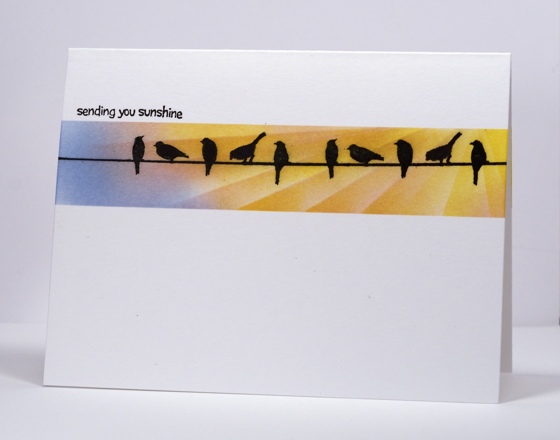
OLW 155 Silhouettes
Posted: September 2, 2013 Filed under: Birds on wire, CAS, OLW | Tags: CAS, Penny Black stamps, Tsukineko Memento inks 23 Comments
I’m not too late to add a card to Karen’s One Layer Wednesday challenge. I actually have two, neither of which turned out as I imagined but both meet the criteria. I masked both cards with post-it notes leaving a one inch panel each time where I embossed the birds and sponged the sky.
On the card above I sponged over a torn mask repositioning and using different colours each time. On the card below I sponged over a straight edge then repositioned and sponged again several times to represent the sun’s rays.
One night I was sitting watching one of my son’s soccer games and there was quite a noise coming from nearby the field. When I looked to see what it was I saw hundreds of birds perched on electricity wires. It was an astounding sight.
Supplies
Stamps: Birds on a wire, Summer Fun (PB)
Inks: Memento Summer Sky, Dandelion, Cantaloupe, Angel Pink & Versafine Onxy Black(Tsukineko)
Water Stamped Grasses
Posted: August 29, 2013 Filed under: Aspire, CAS, Watercolour | Tags: CAS, Penny Black stamps, Tsukineko Memento inks 14 Comments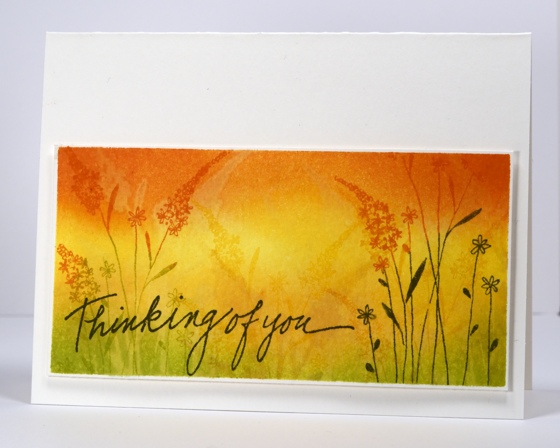
After stamping the Queen Anne’s lace with water I tried the technique again with a different stamp. I masked a rectangle then used ink to sponge the background with green, yellow and orange tones. I then painted water onto my stamp and stamped several times along the panel. You can see a clear water stamped impression on the left hand side but the others are less obvious. To finish I inked the same grass stamp in green and orange and stamped it several times before adding the sentiment
The card and the panel are cut from 140lb weight water colour paper.
By the way if you are looking for One Layer Wednesday this week Karen is hosting a Silhouette challenge which I hope to play along with soon.
Supplies:
Stamps: Aspire, Thinking of You (PB)
Inks: Memento Cantaloupe, Tangelo, Pear Tart, Olive Grove (Tsukineko)
Cardstock: Fabriano 25% cotton hot pressed watercolour paper
OLW 154 One-One-One
Posted: August 21, 2013 Filed under: CAS, Dazzling, OLW | Tags: CAS, Penny Black stamps 13 Comments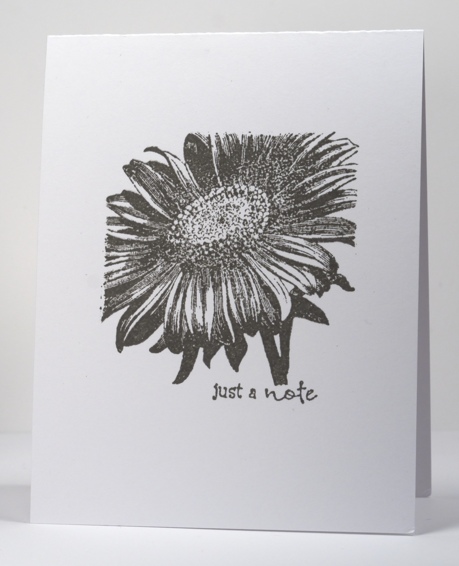
This week’s One Layer Wednesday Challenge is to use one image stamp, one ink colour and one sentiment stamp to create your card. We might have done something a little like this before but I think it makes us think about keeping it simple which is one of our aims on this challenge.
I used a single flower stamp but masked a square first to limit how much of the stamp showed. My colour choice was grey which is a little unusual for a flower but I have seen some very striking grey images on cards lately so I thought I would give it a go.
OLW 154 Rules
1. A one-layer card is defined as a single layer of card stock folded in half. No other layers of paper allowed.
2. Make a card using only one image stamp, one colour and one sentiment stamp
3. Post your card somewhere online and link back to it here using the InLinkz button on the sidebar. If linking to a blog post, please be sure to link to the specific post and not your blog’s home page.
4. The most important rule of all…HAVE FUN!

Supplies:
Stamps: Wishes, Dazzling (PB)
Inks: Versafine Smokey Gray(Tsukineko)
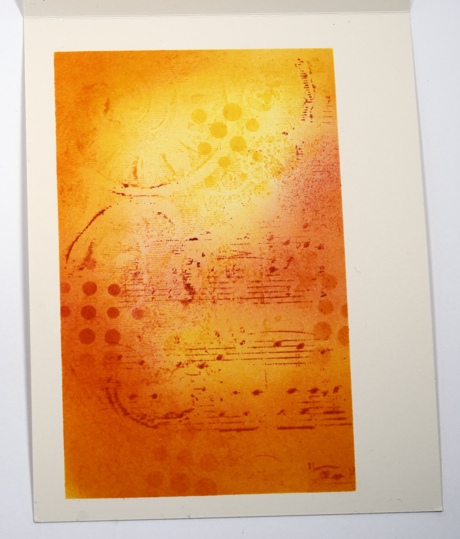
Golden days
Posted: August 1, 2013 Filed under: CAS, Irises | Tags: CAS, Penny Black stamps, Tsukineko Memento inks 11 Comments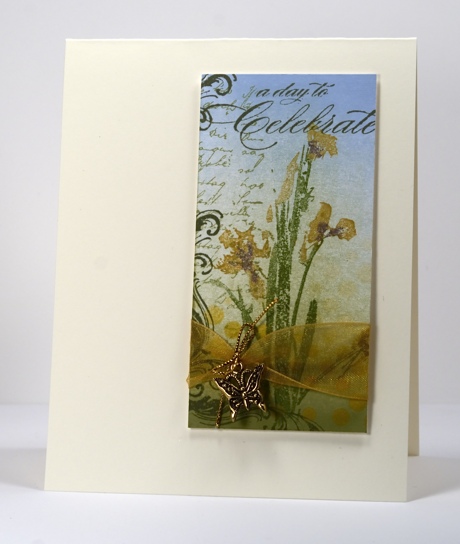
Although it is a little dreary and wet today we have been enjoying beautiful days of sunshine lately so a golden theme seemed appropriate.
The little panel started out as a bigger experimental panel onto which I brayered blue and green ink. I then coloured the iris stamp with markers spritzed it, then stamped. I added some script on the left, some flourishes around the edges and finally a sentiment. Once trimmed I had to decide where and on what sized card I would place the panel. I played around with a landscape orientation for quite a while but it just wasn’t working for me so I settled on popping up the panel on a portrait oriented card base instead. You will probably realize that adding a charm is a first for me but I really liked the gold accents in the ribbon, charm and cord. They helped highlight the summer feel of the panel.
Hope you are enjoying some sunshine too.
Supplies:
Stamps: Gratitude, Irises, Letter Background PB)
Inks: Memento Summer Sky, Cantaloupe, Grape Jelly, Pistachio, Olive Grove, Bamboo leaves & Versamark (Tsukineko)
Also: Gold organza ribbon, gold cord, butterfly charm from Lorraine’s stash
Five Butterflies
Posted: July 20, 2013 Filed under: CAS, Damask Pattern, Dies, Dots, Tagged | Tags: CAS, Penny Black creative dies, Penny Black stamps, Tsukineko Memento inks 11 Comments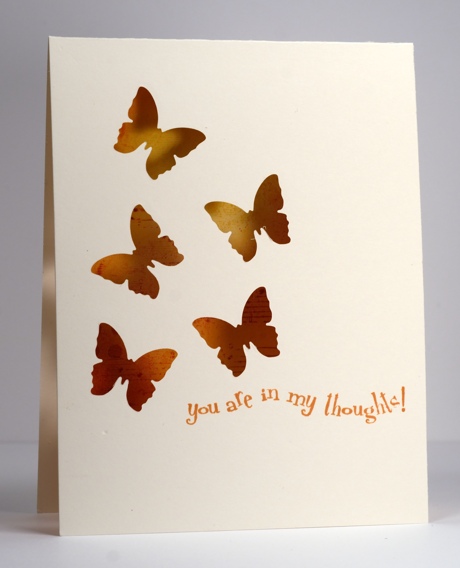
I tried for a while, recently, to make five butterflies work on a card and finally gave up and settled on three. With the help of the sketch from CAS(e) this Sketch #37 I managed to create a five butterfly card.
I have seen some wonderful cards lately where a die cut image reveals all the colour and pattern happening underneath so I decided to give it a try.
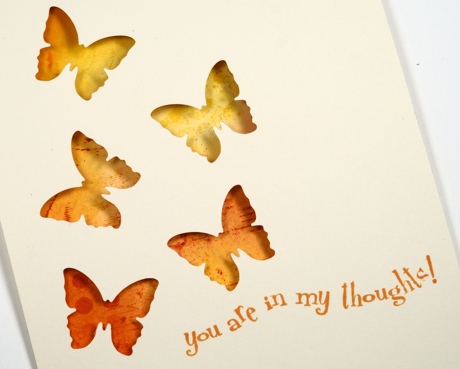
I cut my butterflies first using the butterfly die from the Tagged set , then masked an area inside the card to line up with what would be revealed through the butterflies. The collage pattern I created in the masked area is a combination of the damask pattern background and the music background along with sponging in warm yellow and orange tones. A dots mask die cut from a post-it note was sitting on the desk so I sponged a few dots through that too although I admit they weren’t entirely necessary!
The sentiment just seemed like the right one to choose with those butterflies weaving through the air like that.
Where will I write the greeting on this card I wonder?
Supplies:
Stamps: Damask Pattern, Music Background, In my Thoughts (PB)
Inks: Memento Tangelo, Love letter, Dandelion, Cantaloupe (Tsukineko)
Dies: Dots, Tagged
Dies Days 3: Flutters
Posted: July 10, 2013 Filed under: Background Stamps, CAS, Flutters | Tags: CAS, Faber Castell gelatos, Penny Black stamps 11 Comments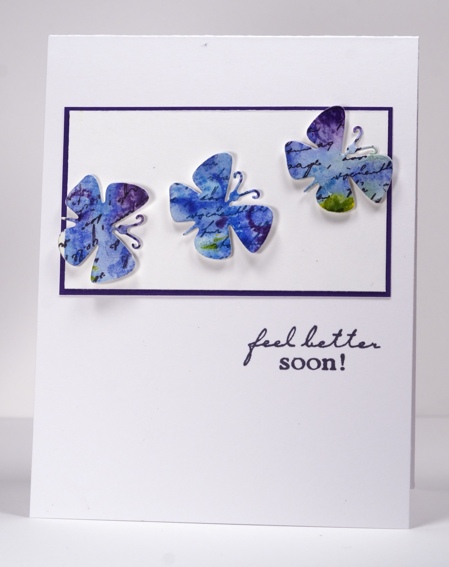
Penny Black released their new Creative Dies recently and are showcasing them everyday this week on the blog. I have been playing around with them so I you will see “Dies Days” here this week too.
To create today’s card I played with two new toys: the Flutters creative die from PB and the Faber Castell gelatos. I coloured and blended the gelatos with water on water colour paper. I wasn’t trying to make a pattern just a pretty blend of blues with a few yellow highlights. After die cutting the butterflies I added the letter background stamp over the top. The most time consuming part of this card was trying to arrange the butterflies; I actually had five that I was fiddling with but I ended up leaving the two big ones out. Maybe they will turn up another day.
Dies Days 1: Daisy Collage
Dies Days 2: Dots and Blossoms
Supplies:
Stamps: Letter background, Feel Better(PB)
Inks: Memento Nautical Blue, Versafine Imperial Purple (Tsukineko)
Gelatos: Blueberry, Lemon, Grape, Boysenberry, Cotton Candy
Dies: Flutters
Cardstock: Mix & Match Purple Mountain
Tulips and gelatos
Posted: July 5, 2013 Filed under: Blooming Garden, CAS, Watercolour | Tags: CAS, Faber Castell gelatos, Penny Black stamps 13 Comments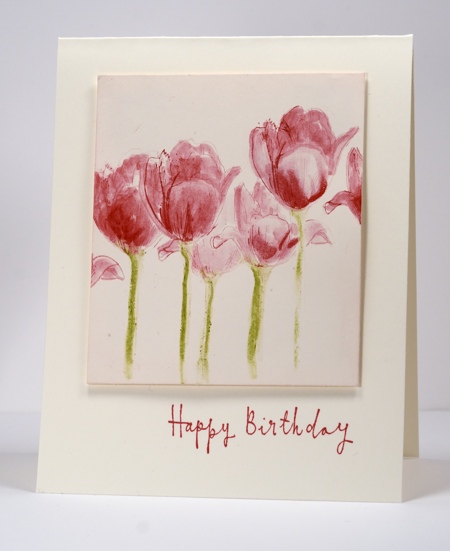
I recently bought a set of Faber Castell gelatos so tonight I had a little play with them. I will try describing how I created this little watercolour collection of tulips but I was experimenting a lot so don’t expect a coherent tutorial just yet. I fiddled with gelato on the stamp, then on the cardstock, then some on an acrylic block mixed with water until I was happy with the watercolour effect. To finish I inked up one side of each tulip on the stamp with a marker then restamped. I redrew the stems, which were looking very pale, with the edge of the gelato. This is just the beginning of my adventures with gelatos so when I am able create an effect more than once I will attempt to share what I have learnt. I sponged the panel ever so slightly round the edge with angel pink then popped it up on the card base.
Have a great weekend. My daughter returns from a tour to Cuba with her violin ensemble tomorrow so we are all looking forward to seeing her and hearing about the trip.
Supplies:
Stamps: Blooming Garden, Reflection (PB)
Inks: Memento Angel Pink, Love letter (Tsukineko)
Also: Faber Castell gelatos


