
Winter Sunset
Posted: August 13, 2015 Filed under: Etched Branches, Prancers, Stamped Landscapes | Tags: Faber-Castell Albrecht Durer Watercolour pencils, Fabriano Watercolour Paper, Penny Black stamps 11 Comments
I have another wintry scene today created back in January when it really did look like this outside! I used painter’s tape to mask the edges of the watercolour panel then frisket film to mask the snow while I painted the sky with colour picked up from my watercolour pencils. I stamped some trees before moving the frisket mask down to create more snow banks. Before I moved the frisket film each time I added twigs and scrub in the snow banks by stamping parts of the ‘Etched Branches’ stamp. Frisket film is a plastic film which is waterproof and sticky on one side making it perfect for masking with wet mediums like watercolour.
Occasionally I am asked in classes what to do when paint seeps under the masking tape around the edges of a panel. You can see it did so in a few places on the one above. Often I will do nothing and it will have some uneven edges to add to its uniqueness. If it looks too messy or unbalanced I sometimes trim or add a die cut to cover the offending area.
Don’t forget to keep checking the PB blog if you are interested in the new products from the ‘Especially for You 2015’ release. There are new cards everyday and a chance to win some new stamps and dies.
Supplies:
Stamps: Etched Branches, Amazing, Prancers (PB)
Inks: Walnut stain distress ink (Ranger)
Cardstock: Fabriano 100% cotton hotpressed watercolour paper
Also: Faber Castell Albrecht Durer watercolour pencils, Graffix frisket film
Winter view
Posted: August 8, 2015 Filed under: Prancers, Skyline, Stamped Landscapes | Tags: Fabriano Watercolour Paper, Penny Black stamps, Tsukineko Memento inks 6 Comments
Here is another wintry scene I created back in January for Splitcoaststampers. My first month with the Dirty Dozen was January and all the projects had to be finished and uploaded by the 13th. When I was planning my time and projects I did not know our children had planned a trip for my husband and I to celebrate our anniversary and birthdays. They had purchased air tickets, broadway tickets and a hotel room in New York for four days! Some cards were finished before I left on January 6th and a couple, including the one above, were finished when I returned. Inspired by our trip I created this card for the ‘All Cooped Up’ theme and could not imagine a better place to be cooped up in winter than an apartment overlooking Central Park. As you can see from our photo we enjoyed walking through the park in bright sunshine. Freezing cold but sunny.
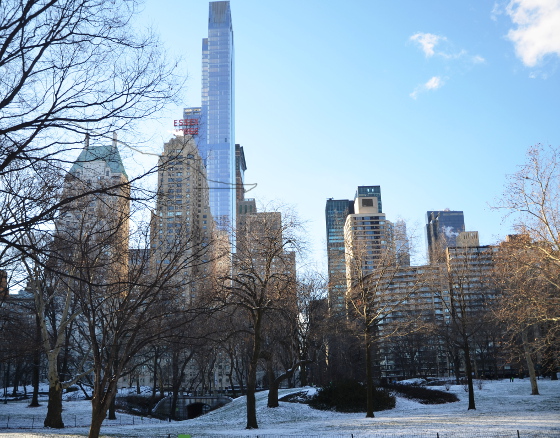
To create this scene I splattered masking fluid on watercolour paper with a spatter brush, then, when it was dry stamped partial imprints of the skyline stamp spritzing both the stamp and paper to make sure my colours blended. I used a brush to pick up and add more colour around the buildings to create the impression of a grey day. Before stamping the bottom buildings I added a snow bank mask so the base of the buildings and the trees would appear behind it.
Supplies:
Stamps: Skyline, Summer Fun, Prancers (PB)
Inks: Memento London Fog, Tuxedo Black, Paris Dusk (Tsukineko)
Cardstock: Fabriano 100% cotton hotpressed watercolour paper, Epic Black & Solar White cardstock(Neenah)
Also: Winsor & Newton masking fluid, Kemper spatter brush
Tannenbaum trio
Posted: August 6, 2015 Filed under: Stamped Landscapes, Tannenbaum | Tags: Bister, Penny Black stamps, Ranger Distress stains 10 Comments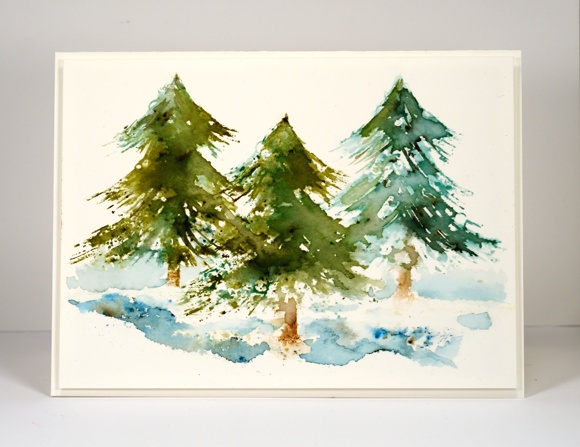
I had a look through my supply of Christmas stamps this week to find some tree stamps to experiment with. I love the ‘before the snow’ tree but it is nice to mix things up a little. Someone said at my class tonight, “You can never have too many tree stamps,” an opinion I entirely agree with. The tree stamp above comes with a decorative topper which I surgically removed ( don’t worry, I kept it in case I need it). I stamped each tree with distress stain first then painted over the stamping with a paintbrush. Next I added some bister and stamped again with water. I did the other trees the same way but varied the original stamping colour so the trees would all look a bit different. The bister moves differently each time which makes the trees more interesting. I painted some water below the trees and added bister powder to create snow banks. Often I will add blue for the sky and a sentiment but I was happy with this one the way it was so I didn’t risk messing it up with further stamping or painting.
By the way there is a brand new challenge on One Layer Simplicity hosted by our talented team member, Karen Dunbrook. It is called Strip Down, you had better check it out to find out exactly what’s required!
Supplies:
Stamps: Tannenbaum (PB)
Inks: Evergreen Bough, Forest Moss, Vintage Photo, Gathered Twigs distress stains/marker (Ranger)
Cardstock: Canson 100% cotton hot pressed watercolour paper & Green card
Also: Blue and Green bistre powder
Christmas Bister
Posted: June 29, 2015 Filed under: Before the Snow, Bister, CAS, Stamped Landscapes | Tags: Bister, Fabriano Watercolour Paper, Penny Black stamps 22 Comments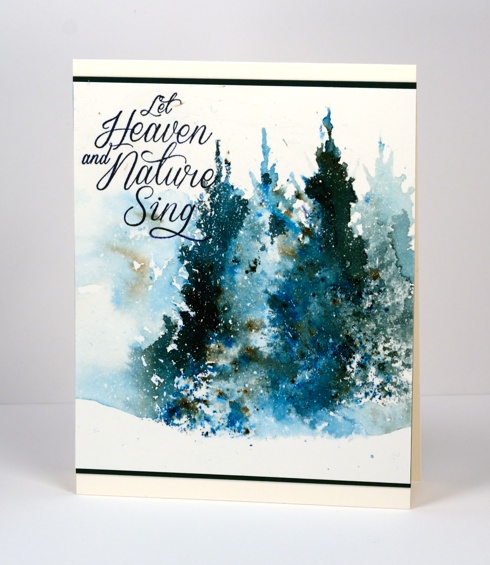
I know it is odd for me to throw a Christmas card up on the blog in June but I had to pair the green and blue bister powders with the beautiful ‘Before the Snow’ tree stamp. After watching the way the bister powders reacted in water I wanted to see if I could stamp an image with water then drop some powder onto the watery image. It took a bit of fiddling around, several re-stampings and a paintbrush for some extra shaping but my experiment did work and I will keep playing with the technique.
I had splattered my watercolour panel with masking fluid in advance so I would have flecks of snow. The powders created pretty blues and greens that I was not able to match with one ink pad so I stamped my sentiment twice first in green then in blue and ended up with a suitable match.
Don’t worry I’m not switching to winter stamping; I’ll be back with bright summery images soon!
Supplies:
Stamps: Before the Snow, Season’s Wishes (PB)
Inks: Versafine Majestic Blue & Spanish Moss (Tsukineko) Blue and Green bister powders
Cardstock: Fabriano 100% cotton hot pressed watercolour paper & Green card
Also: Winsor & Newton Masking Fluid
Summer birthday
Posted: February 17, 2015 Filed under: Sprigs, Stamped Landscapes, Watercolour | Tags: Penny Black creative dies, Penny Black stamps, Ranger Distress inks 23 Comments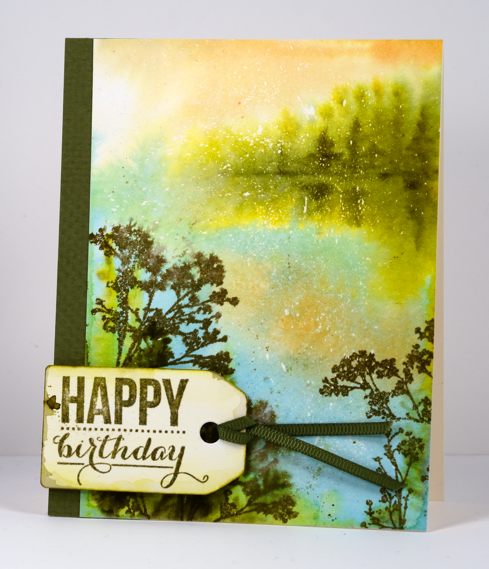
My husband and I both have February birthdays which meant hot summer days for the first 35 years of our lives. Now we celebrate in the bleak mid-winter!
For his birthday card this year I have gone with the warm tones of summer for inspiration. I managed better with this card than the anniversary card; I wrote in it and gave it to him before posting it here on the blog. To create this scene I started by flicking masking fluid onto my small watercolour block. Even though this isn’t a wintery scene some little flecks of white add interest and dimension to the scene. After the masking fluid dried I wet the whole panel and painted the trees and reflections in the distance, the sky and the water with brushes. In the foreground I stamped several stamps from the ‘sprigs’ set onto the wet paper and let them bleed into the surrounding area. When the paper dried a bit I stamped a couple more sprigs which stayed more distinct. I die cut a tag and splashed some of the same colour over it before adding a sentiment and ribbon.
Supplies:
Stamps: Sprigs , Sprinkles & Smiles (PB)
Creative Dies: Tagged (PB)
Inks: Dried marigold, forest moss, frayed burlap, crushed olive distress inks (Ranger) Versafine Spanish Moss (Imagine Crafts/Tsukineko)
Cardstock: Fabriano hot pressed watercolour paper, Olive green cardstock & ribbon
Warm wishes for a cold winter’s day
Posted: January 3, 2015 Filed under: CAS, Stamped Landscapes, Watercolour, Winter Song | Tags: Fabriano Watercolour Paper, Penny Black stamps, Ranger Distress stains 35 Comments
These birch trees are my favourite element of the intricate Winter Song stamp so I decided to isolate them for a scene of their own. I inked them with a weathered wood distress marker and left the rest of the stamp uninked. Weathered wood is a pale grey which is perfect for painting and drawing over the top. As usual I stamped on Fabriano hot pressed watercolour paper. The background colour is distress stains painted on with a waterbrush. I defined the edges and markings on the trees with a black marker, painted some grey shading on the trunks then added the sentiment in black. I am fussy about the cardstocks matching so I mounted this panel on a thin burgandy card then made the card base from cold pressed watercolour paper which is the same colour as the panel but adds some texture.
Thank you for the kind Christmas wishes left on my blog and in my inbox. I appreciated them all. I hope your new year is off to a good start; mine has been pretty busy with a bunch of stamping and creating I can’t share with you just yet!
Supplies:
Stamps: Winter Song, Joy Filled (PB)
Inks: Barn Door, Dusty Concord, Victorian China, Aged Mahogany, Weathered Wood distress stains (Ranger) Tuxedo Black memento marker (Imagine Craft/Tsukineko)
Cardstock: Fabriano 100% cotton hot pressed watercolour paper, Strathmore cold pressed watercolour paper, burgandy cardstock
Falling Snow Video Tutorial
Posted: November 26, 2014 Filed under: Prancers, Stamped Landscapes, Tutorial | Tags: Fabriano Watercolour Paper, Penny Black stamps, Tsukineko Memento inks, Tutorial 16 Comments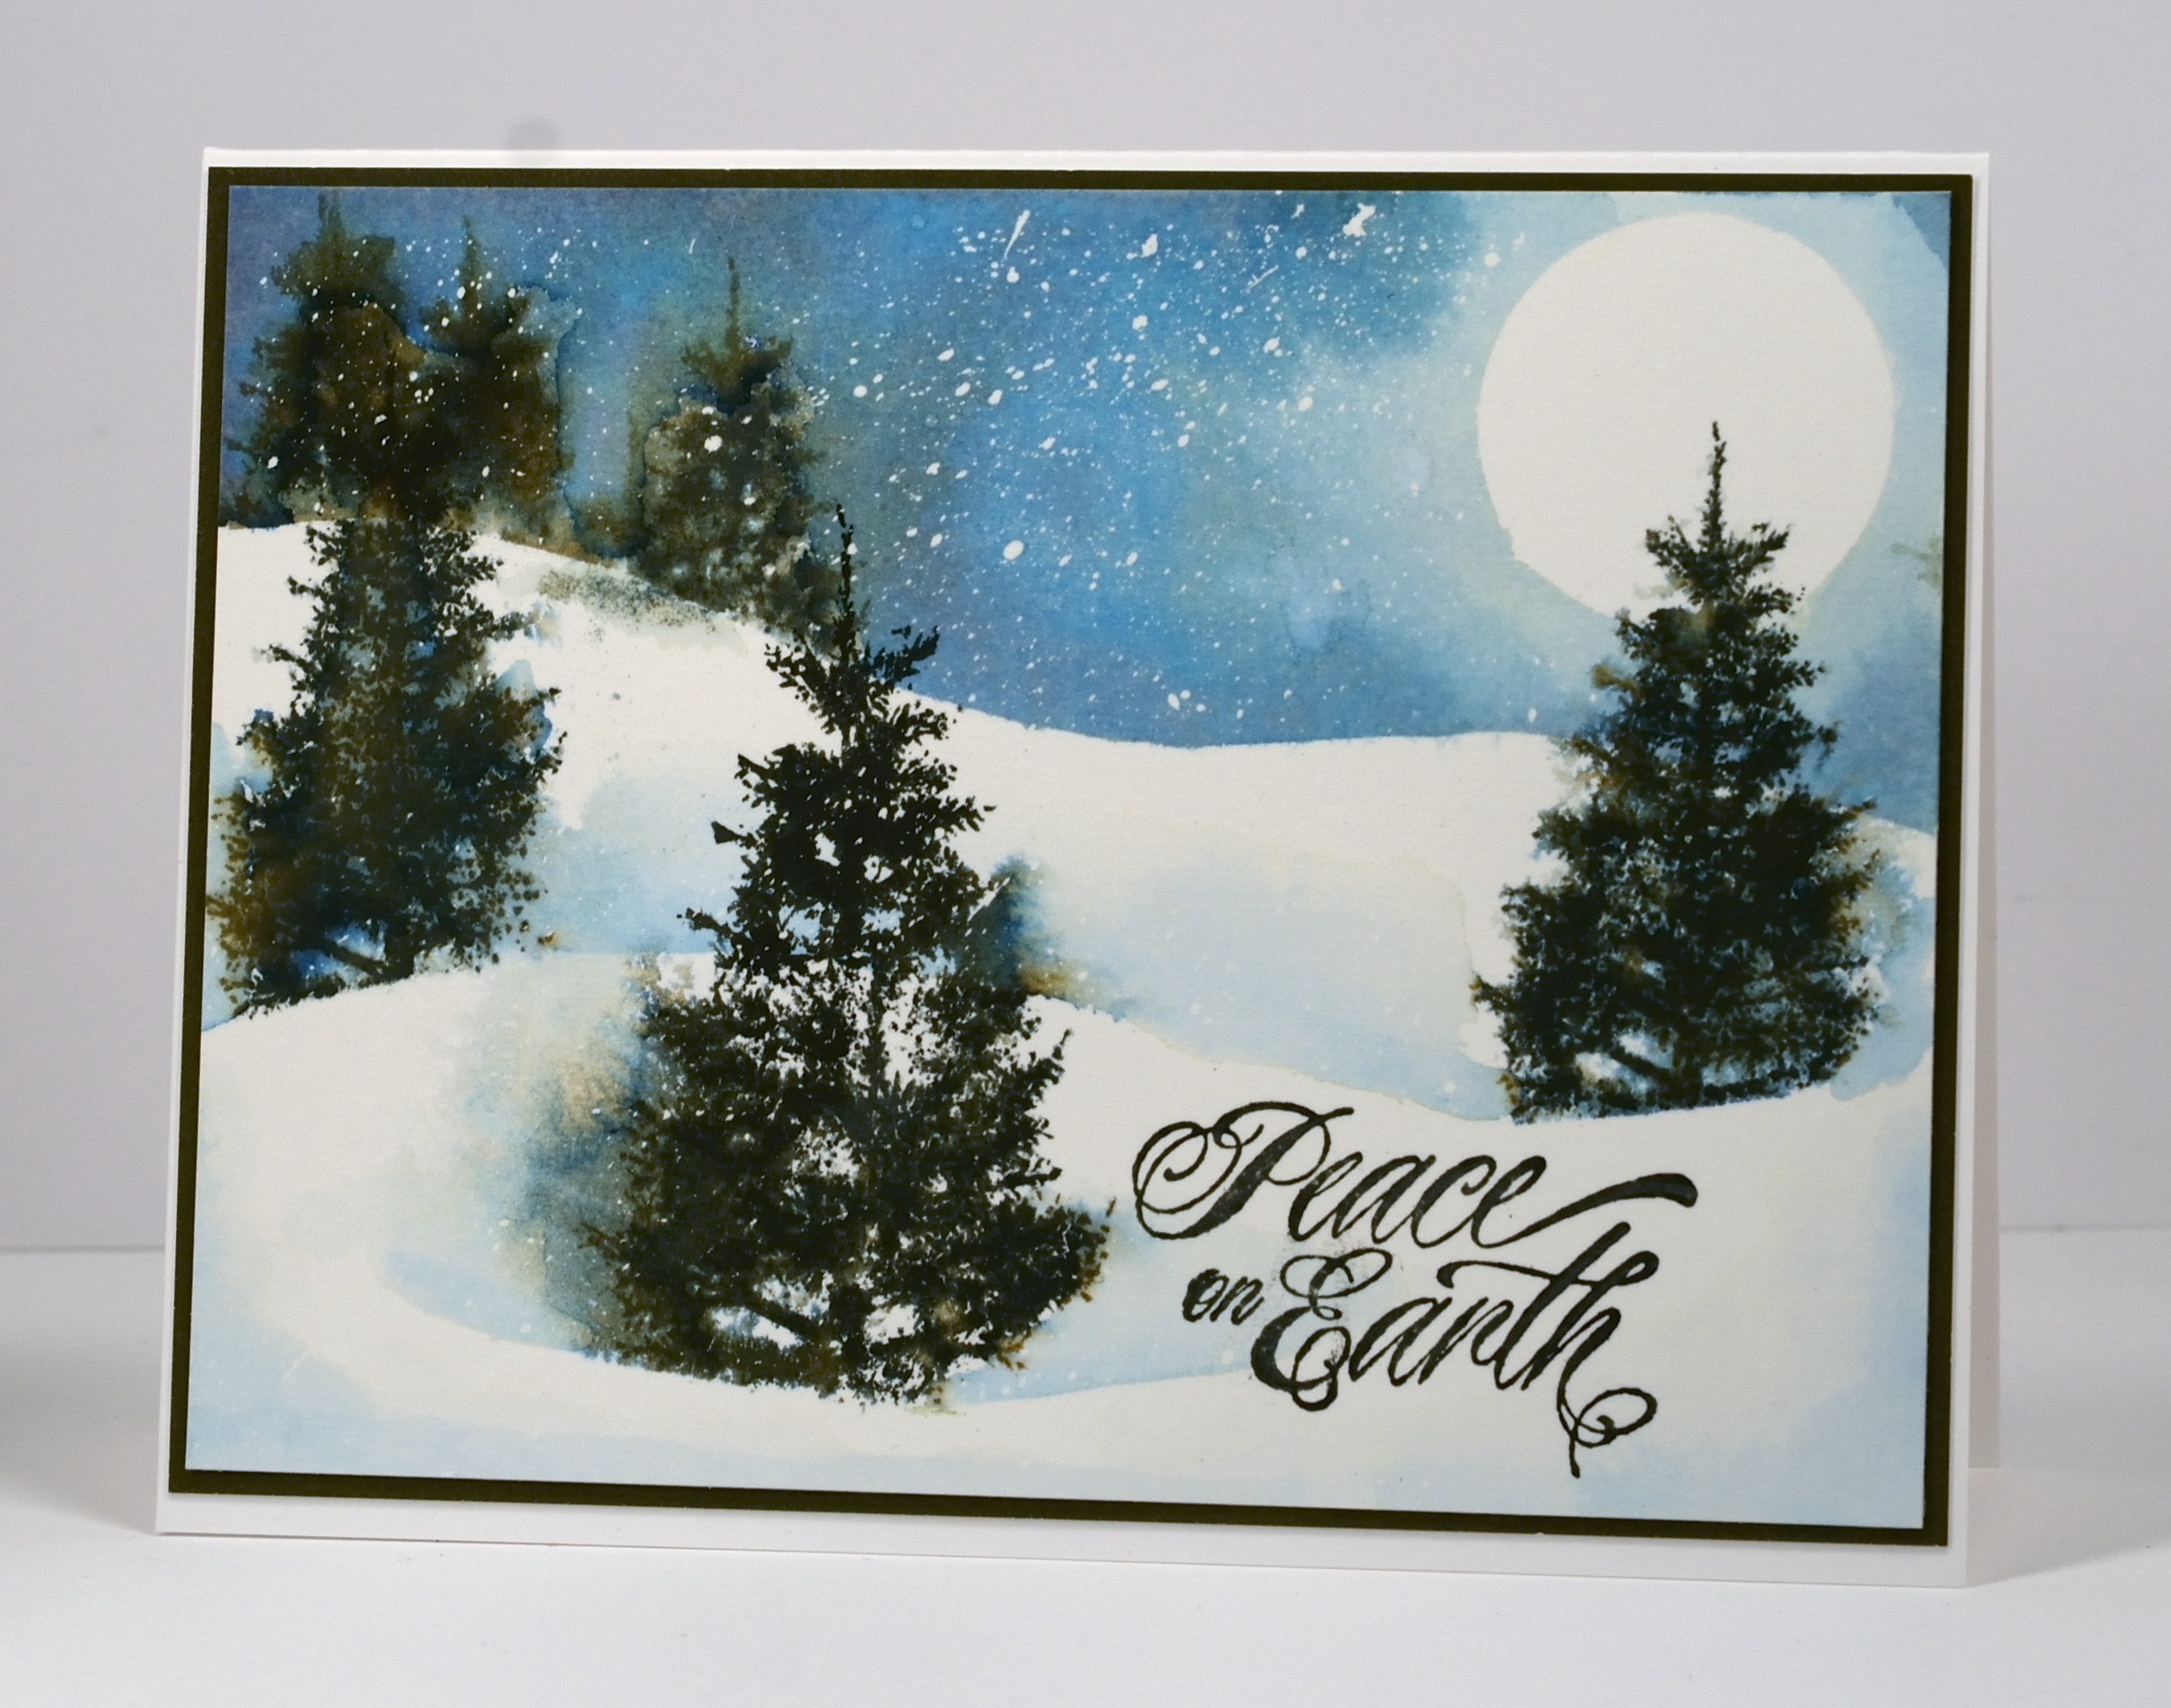
Today’s tutorial is one I created for Splitcoast Stampers. Splitcoast posts a new technique tutorial every Wednesday and in today’s I show how to create the look of falling snow on a watercolour card. I created both a photo and video tutorial for Splitcoast.
The video took me a few attempts so I have four slightly different versions of the card which supports my claim that watercolour techniques never give you the same result twice. The picture above is the first one I created and the one featured in the photo tutorial. It has quite a bit of masking fluid snow in the sky; the one in the video ended up with a lot less. I mention in the video that I have stopped using post-it notes to mask when I do watercolour scenes. I now use frisket film, a reusable, repositionable plastic film which doesn’t disintegrate when it gets wet. It is called Grafix Extra Tack Prepared Frisket Film.
I have another video showing in detail how to apply and remove the masking fluid here.
Supplies:
Stamps: Prancers, Hello Winter(PB)
Inks: Memento Nautical Blue, Bahama Blue, Northern Pine inks (Imagine Craft/Tsukineko)
Cardstock: Fabriano 100% cotton hot pressed watercolour paper, Neenah Solar White 110lb cardstock, Olive Green cardstock
Also: Winsor & Newton masking fluid, Kemper Spatter brush
Inch by Inch 4: Vintage Skyline
Posted: November 20, 2014 Filed under: Skyline, Stamped Landscapes | Tags: Faber-Castell Albrecht Durer Watercolour pencils, Inchie Arts, Penny Black stamps 16 Comments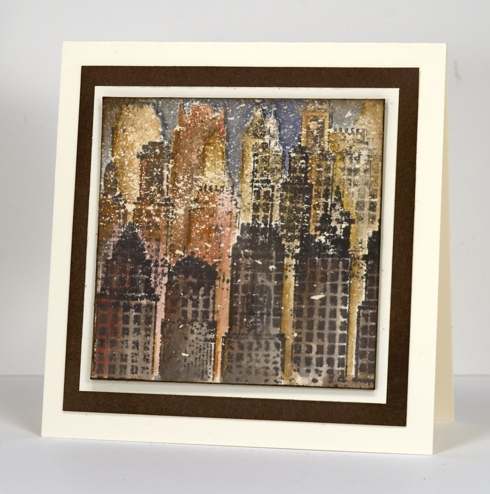
From a snowscape to a vintage cityscape my Inchie experiments continue. I never would have guessed when I first saw this skyline stamp that it would become such a favourite. Working on a 3″square splattered with masking fluid, I stamped ‘Skyline’ several times, never a full impression just the top of the buildings and without reinking so that the foreground images were darker than the background. I added colour with several earth tone watercolour pencils layering and blending colour until I was happy with the values and shadows. I mixed a blue and green to make a dark colour for the sky then added brown over the top to make it more muted. Finally I removed the masking fluid to reveal the cream flecks which I think make it look like an old damaged photo.
Deciding what to turn it into was difficult. I would have liked to create a notebook but time was not on my side so I made a card. I tried a patterned background, a portrait oriented and a landscape oriented rectangular card and two different sentiments before deciding less was once again more. Don’t forget more inchie arts inspiration on the Penny Black and the Inchie Arts blogs.
Supplies:
Stamps: Skyline (PB)
Inks: Memento Rich Cocoa (Imagine Crafts/Tsukineko)
Pencils: Albrecht Durer watercolour pencils (Faber Castell)
Cardstock: Neenah Natural White 110lb cardstock, Inchie Arts 3″ cream square, Penny Black mix & match Sticks and Stones paper
Also: Winsor & Newton masking fluid
Inch by Inch 3: Mini Snowscape
Posted: November 19, 2014 Filed under: CAS, Prancers, Stamped Landscapes | Tags: Inchie Arts, Penny Black stamps 6 Comments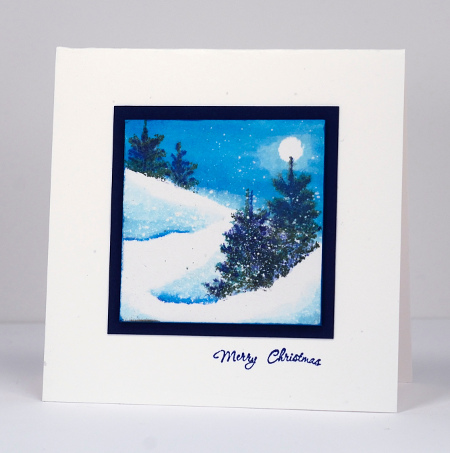
A mini snowscape was a must with the Inchie Arts squares so for day 3 I watercoloured a tiny scene using distress inks and memento inks. I used the same techniques I’ve used on previous snowscapes, a punched mask for the moon, a cut mask for the hill side and snowbanks and of course a splatter of masking fluid to create the appearance of falling snow. I have a tutorial showing the process on a larger scale here. When I was creating my masking fluid tutorial recently I splattered quite a few inchies at the same time so I would have a few ready when inspiration struck. The trees on this little scene were stamped in Memento Northern Pine ink which is my first choice for stamping pine trees. I added some Paris Dusk ink to the trees with a marker as they were looking a little flat. The teeny sentiment is a result of stamp surgery performed on a circular stamp from the Hello Winter set. The finished card is 3.5″ square.
If you are wondering where to buy art squares there is a list of retailers on the Inchie Arts blog. Don’t forget to visit both the Penny Black and the Inchie Arts blogs for more inspiration and giveaways.
Supplies:
Stamps: Prancers, Hello Winter (PB)
Inks: Memento Northern Pine, Paris Dusk ink (Imagine Crafts/Tsukineko) Chipped Sapphire, Salty Ocean distress ink(Ranger)
Cardstock: Neenah Solar White 110lb cardstock, Navy cardstock, Inchie Arts 2″ white square
Also: Winsor & Newton masking fluid
Reflections
Posted: November 13, 2014 Filed under: Prancers, Stamped Landscapes | Tags: Penny Black stamps, Tsukineko Memento inks 20 Comments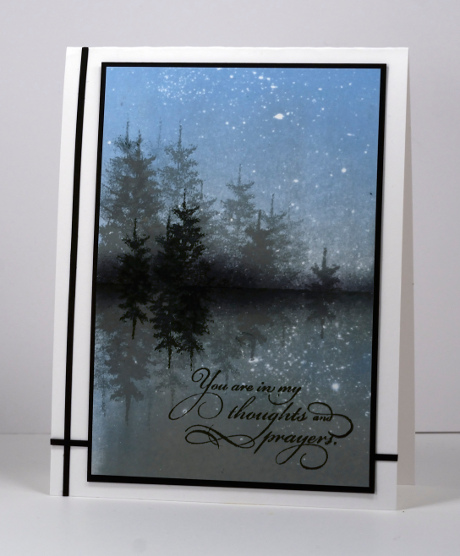
What started out as a brayering experiment turned into a simple peaceful scene, perfect for the sympathy card I needed this week. On top of some splattered masking fluid I brayered memento summer sky ink and memento London fog ink with overlap of the two colours in the middle. I positioned a frisket film mask across the panel and stamped trees in both grey and black ink. Next I positioned the mask over the stamping so I could stamp in the reflecting water. Because the frisket film is transparent I was able to line up the trees when I stamped them as reflections. I also added a bit of sponging at the edge of the water.
When I came to finish the card I tried adding some cord and ribbon but nothing was quite right. I settled on some very thin strips of the same black cardstock I used to mat the panel.
Supplies:
Stamps: Prancers, Eloquence (PB)
Inks: Memento Summer Sky, London Fog, Tuxedo Black(Imagine Craft/Tsukineko)
Cardstock: Neenah Solar White 110lb cardstock, black cardstock
Also: Winsor & Newton masking fluid, Grafix frisket film


