2 for 1 with Delicate Pines
Posted: November 20, 2024 Filed under: delicate pines, Finetec paints, Penny Black | Tags: Fabriano Watercolour Paper, Finetec artist mica watercolour paint, Penny Black stamps, Ranger Distress inks 4 Comments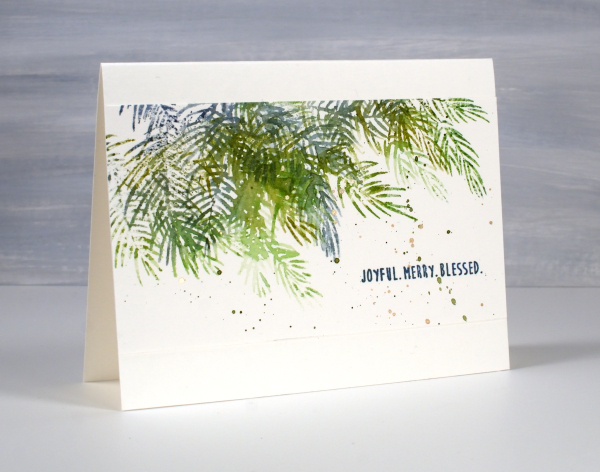
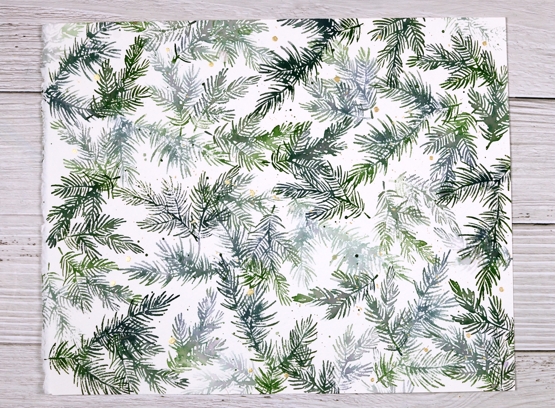
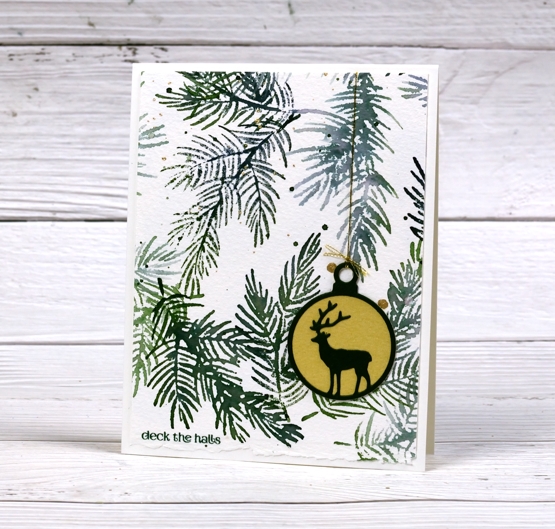
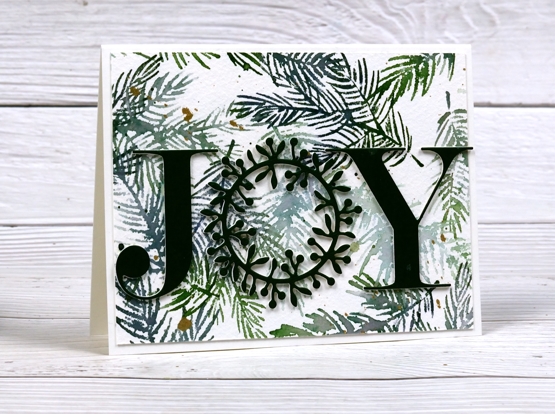
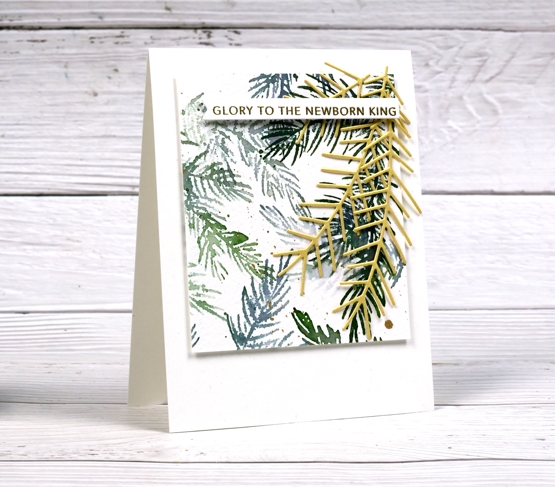
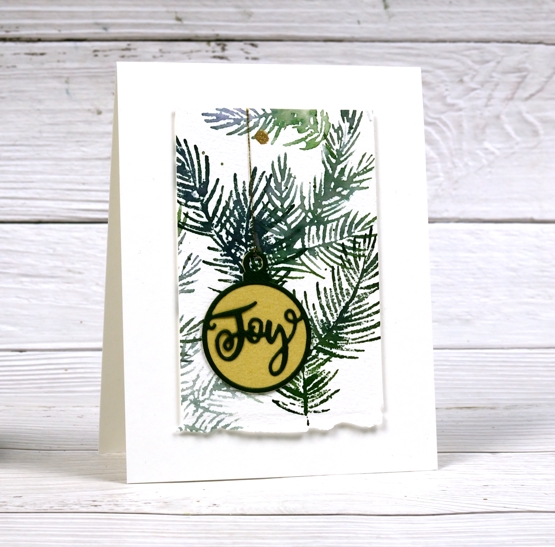
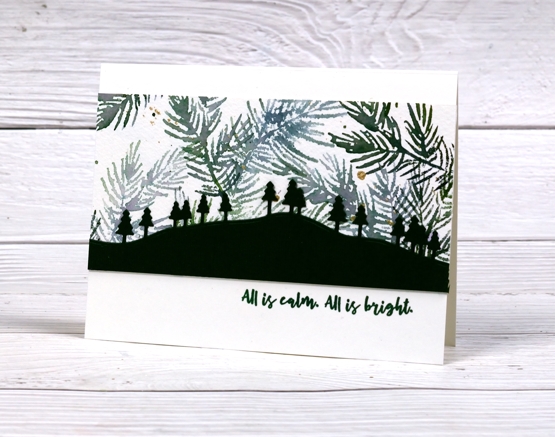
Although I don’t tend to make exactly the same card in large numbers I do like a quick and simple way to make a few similar cards at the same time. To create these pine needle cards I started with a watercolour panel larger than an A4 card. It was about 5¾” x 6″ and I placed it in the stamp positioner with the long side tucked right against the long side of the positioner.
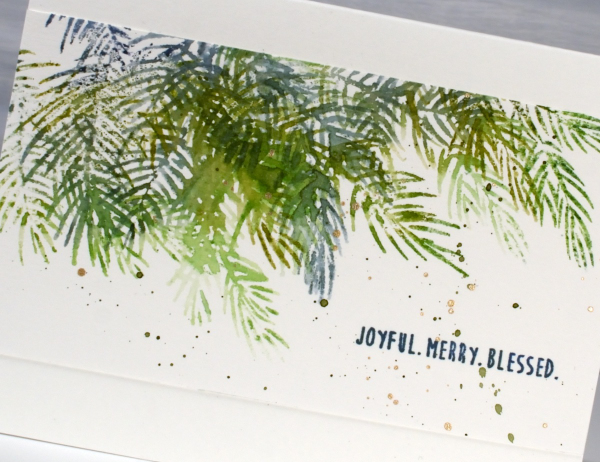
Using the two of the three Penny Black ‘delicate pines‘ stamps positioned to stamp along the top edge of the panel I inked them with a few green and blue distress inks. Before stamping I spritzed the stamp lightly so the different greens would blend on the stamp and then on the paper. I then moved the stamps around so I could use the third stamp and get some overlapping branches. Without moving the stamps I turned the watercolour panel 180° and repeated the stamping steps. The panel ended up with a border of pine branches on each side. I cut the panel in half and trimmed the sides so I had two 5½” x 3″ panels to add to card bases.

I finished off both panels with a sentiment from the PB ‘jolly snippets‘ set and some green and gold splatter. Simple yet pretty. Today’s post features affiliate links to The Foiled Fox. If you buy through these links I receive a small commission at no extra cost to you.
2021 BuJo – December theme
Posted: December 2, 2021 Filed under: brilliance, Bullet Journal, delicate pines, Dingbat notebooks, Hand lettered, Penny Black, Taylored Expressions | Tags: Bullet Journal, Dingbats notebook, Hand lettering, Penny Black stamps, Staedtler watercolour brush pens, Taylored Expressions 3 Comments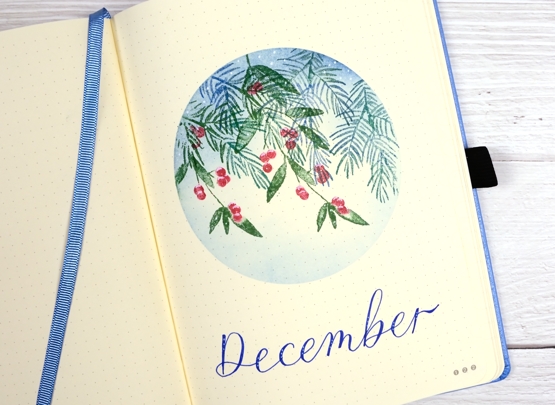
I didn’t have a lot of time to spend setting up my December pages; I can’t even believe it is December honestly. It’s a busy week but I had a snowflake idea for the theme and a bit of a plan which you can see did not happen at all. But that is ok because I can save my snowflake plan for January or February or March or Ap…….

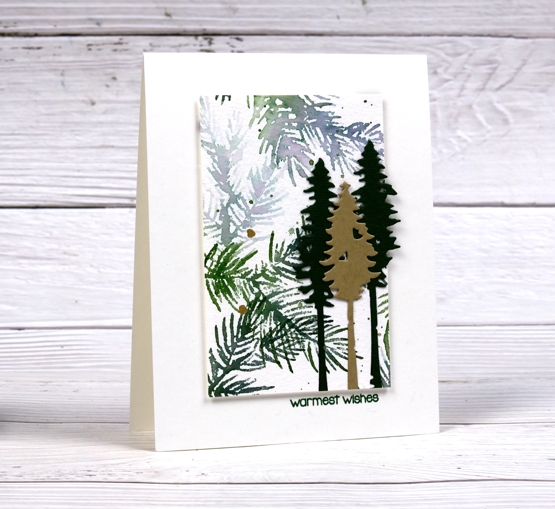
After creating the large panel for my recent stack of PB ‘delicate pines’ Christmas cards the stamp set was still on my table along with its buddy the PB ‘brilliance’ stamp set. I decided to use them together for some festive foliage. I used a mix of distress greens and blue along with a red marker for the berries and a white gel pen for the frost.
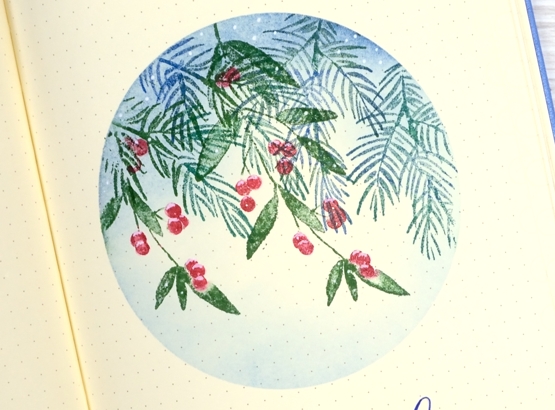
I reused a frisket film mask which I saved after creating October’s title page and stamped foliage from both PB ‘brilliance’ and ‘delicate pines’ sets. I blended over the stamping with prize ribbon distress ink then dotted white around the circle and on top of the red berries.

The to-do page and the calendar page have simple foliage stamping and some lettering with Pentel Flair pens.

I have used masking in quite a few of my pages this year; I might need to come up with a new favourite technique for next year. I hope your December is off to a good start. Because I can’t believe it is December I have a discount code for the Floral Faves class, Winter Wonder class and the Colour Clues class. If you use HTDEC you will get 20% off. If you are interested in giving an online class as a gift please get in touch so I can help you make it happen.
Supplies
(Compensated affiliate links used when possible)
Delicate Pines – 9 Ways!
Posted: November 29, 2021 Filed under: delicate pines, Dies, gift card pocket, joyful ornaments, jubilation, juniper, onramental branch, Penny Black, tall trees, Taylored Expressions, trees and hills | Tags: Catherine Pooler inks, Penny Black creative dies, Penny Black stamps, Taylored Expressions, Tsukineko Versafine inks 8 Comments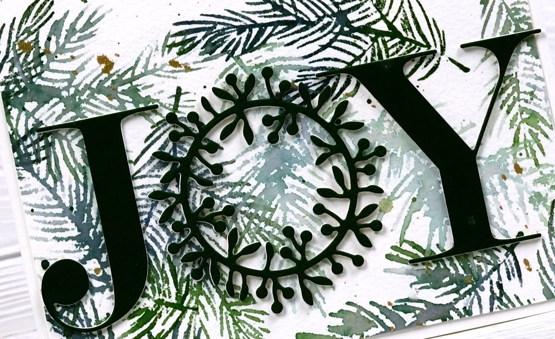
Welcome to a long post with quite a few photos!
When I last counted up the names on my Christmas card list and the number of cards I have completed the two numbers were not close to matching. I decided a quick way to grow the stack of cards would be to stamp a big panel then slice it up to make several cards.
Turns out this idea was not all that quick. It took a while to make these cards because although they are from the same stamped panel, they are still all different. The photo above shows the original panel stamped with Penny Black’s new ‘delicate pines’ set of 3 stamps and two Catherine Pooler inks. After the stamping I added ink splatter then gold paint splatter.
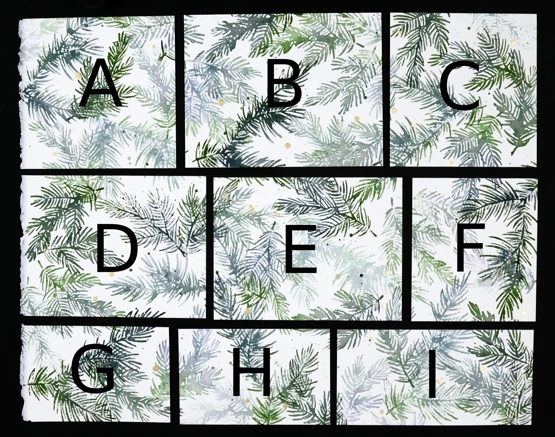
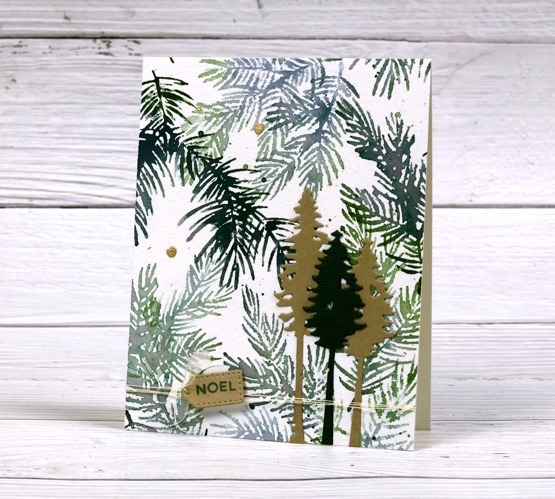
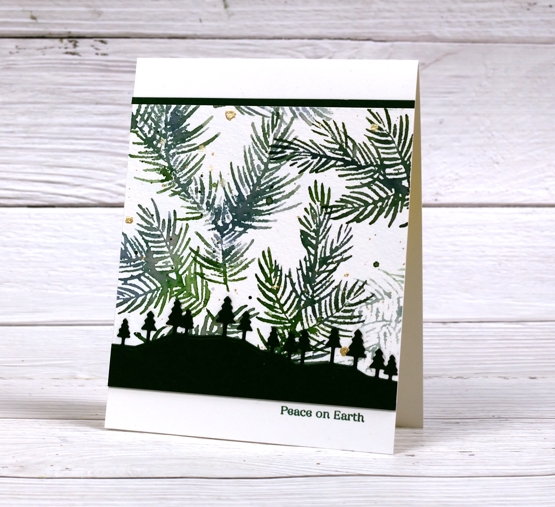
I kept the deckle edge on the 11″x14″ cold pressed watercolour panel and sliced up the panel lengthwise first. A,B & C are all 4¼” wide, D,E & F are all 4″ wide which left G,H & I all 2¾” wide. Below are all the finished cards. I used some pale gold, Bazzill avocado green and kraft cardstocks for the die cuts and framing. I used versafine clair rainforest ink to add sentiments and some linen twine here and there. All the cards are shown below with the size of the stamped panel portion included underneath (all the finished cards are 4¼”x 5½”)
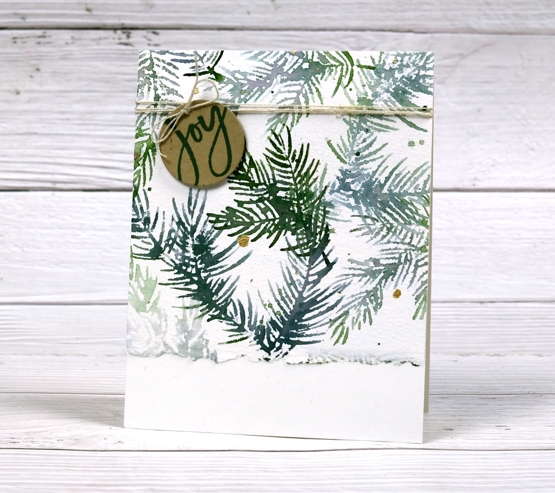
A. 4¼ x 4½
B. 4¼ x 5½
C. 4¼ x 4⅛
D. 4 x 5¼
E. 4 x 5¼
F. 4 x 3½
G. 2¾ x 4¼
H. 2¾ x 4¼
I. 2¾ x 5½
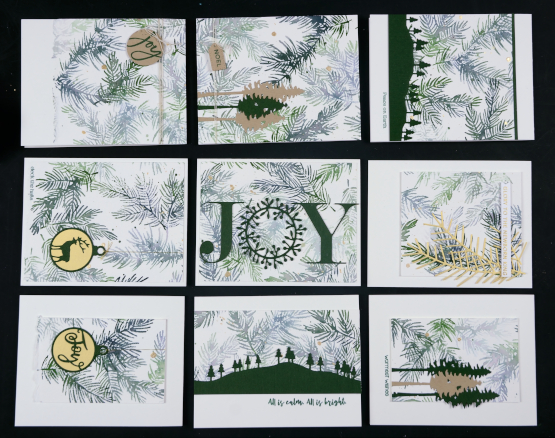
The finished cards above are in the places that correspond to the labelled photo up at the beginning of the post. I had them laid out on a cutting mat on the floor beside me as I put them all together so I didn’t get them mixed up. I wanted you to see how I used each size in a different way.
I hope you find some inspiration from these cards. Remember that three of my online classes are on sale until the end of November. Use the code HTNOV to get a 25% discount on the Floral Faves class, Winter Wonder class and the Colour Clues class.
The stores I have affiliate links with are also having sales right now (isn’t everyone?) I have put the links in the right hand side bar of the blog for easy access. Just click on the store name and start shopping!
Supplies
(Compensated affiliate links used when possible)