
Winter Thank you
Posted: December 20, 2017 Filed under: Nature's Friend, snowy village, Stamped Landscapes, Woodland Beauty | Tags: Penny Black stamps, Ranger Distress inks, Ranger Distress stains 5 Comments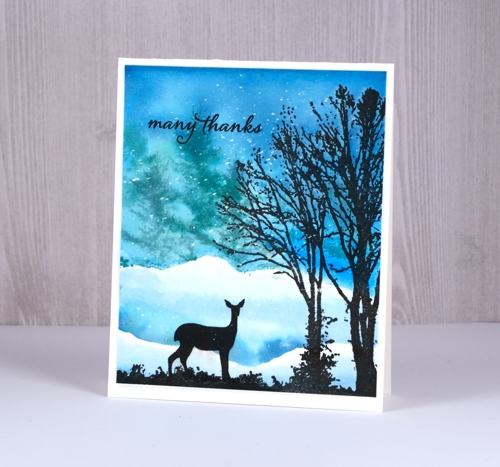
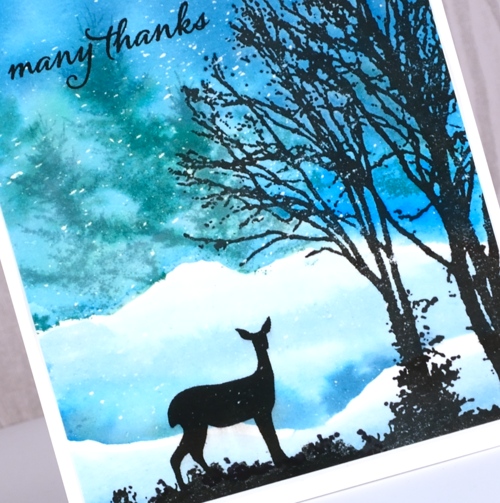
I’m a guest over at the Foiled Fox blog today; you know that is one of my favourite places to share my cards. With less than a week until Christmas I have switched to making thank you cards. This one combines several Penny Black stamps, one from this year and others from Christmasses past. All the snow falling is the effect created when painting over splattered masking fluid. After the painting has dried I rub off the masking to reveal little white dots – snow! The black stamping is done with pigment inks to preserve the sharp defined edges of the trees and deer. The soft tree shapes in the background are stamped in distress inks to enable blending and bleeding into the watercolour sky.
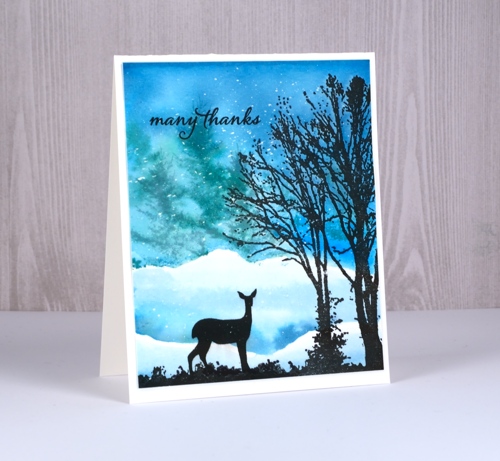
The whole process is described in detail on the Foiled Fox blog and supplies are listed below.
Supplies
Stamps: snowy village, nature’s friends, woodland beauty, happy snippets


Inks: versafine onyx black, evergreen bough distress ink


Distress Stains: salty ocean, faded jeans, evergreen bough


Hot pressed watercolor paper

Also: masking fluid, stamping platform


Circle sky
Posted: December 19, 2017 Filed under: snow covered | Tags: Penny Black stamps, Ranger Distress inks 6 Comments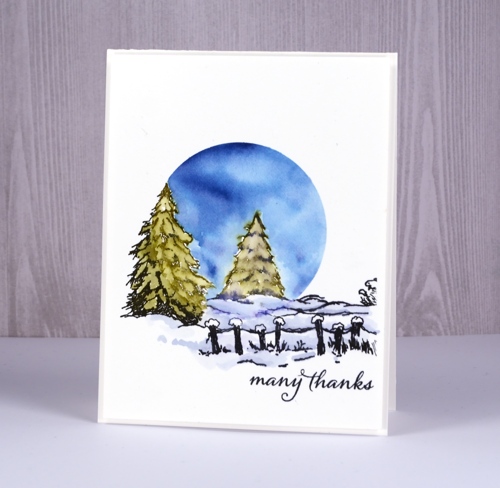
Today’s card is a bit of an experimental piece. I don’t think I would do it quite the same next time but it turned out ok. I used a stamp positioning tool so I could stamp inside my circle mask and outside my circle mask with different colour schemes. I die cut a circle from frisket film (a removable adhesive backed plastic film) and used both the positive and negative pieces for this card. I positioned the negative piece first on hot pressed watercolour paper then stamped the tree stamp from the PB ‘snow covered’ set in forest moss and chipped sapphire ink. I blended the forest moss ink to fill the tree shapes and the chipped sapphire to colour the snow banks then painted the sky with diluted chipped sapphire ink. I dried the painted area then placed the circle mask over the stamping and removed the negative mask. With the painted section covered I inked the stamp in versafine onyx black ink and stamped the rest of the scene. Basically what was inside the circle was in colour, outside the circle was black, white and grey.

I added a sentiment then popped up the panel with some foam.
Supplies
Stamps: snow covered, happy snippets


Ink: versafine onyx black, forest moss distress, chipped sapphire distress


Hot pressed watercolour paper

Also: foam, frisket film
Berry bramble
Posted: December 15, 2017 Filed under: Berry bramble | Tags: Penny Black stamps, Ranger Distress inks, Ranger Distress stains, WOW embossing powders 12 Comments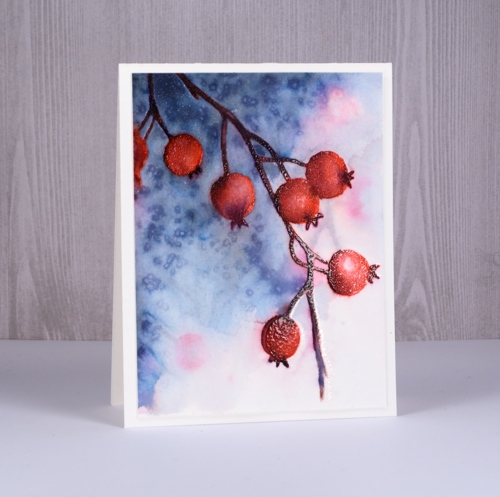
Sometimes it is fun to rediscover and incorporate some techniques you haven’t used for a while. I love to splatter masking fluid over watercolour paper to create the look of falling snow but sometimes I don’t think about it in advance or just don’t want to wait long enough for the masking fluid to dry. Salt to the rescue! While salt does not create bright white dots it does make lighter areas and pretty patterns that look a little like snow or fairy lights.
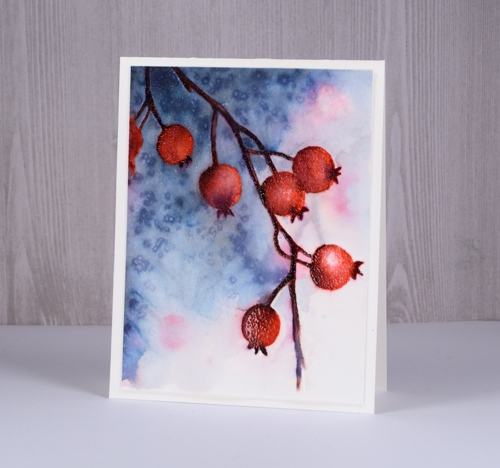
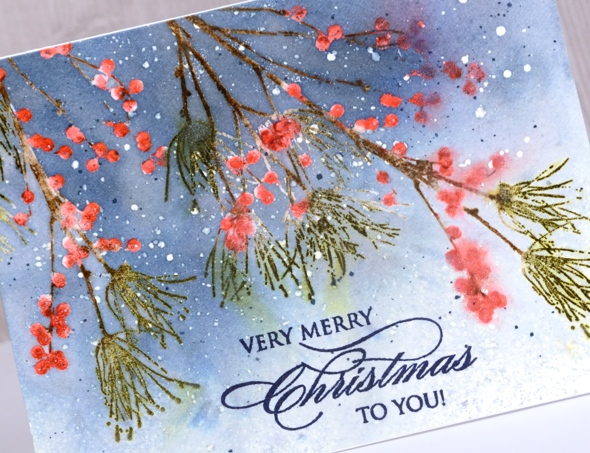
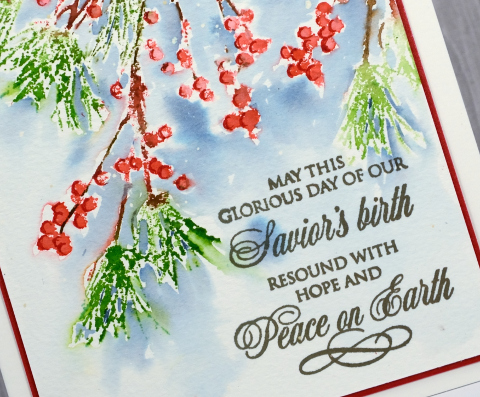
You can see some pale pink and brown pattern in the background of the scene; to create this I wet the whole panel, inked the stamp with festive berries and ground espresso distress markers and stamped it onto the damp paper. I dabbed at the inky impression immediately with a paper towel so I would have soft shapes that would not overpower the foreground image.After drying the panel completely I put it in my stamping platform for all the berry work. First I inked and stamped the whole stamp with festive berries distress ink.
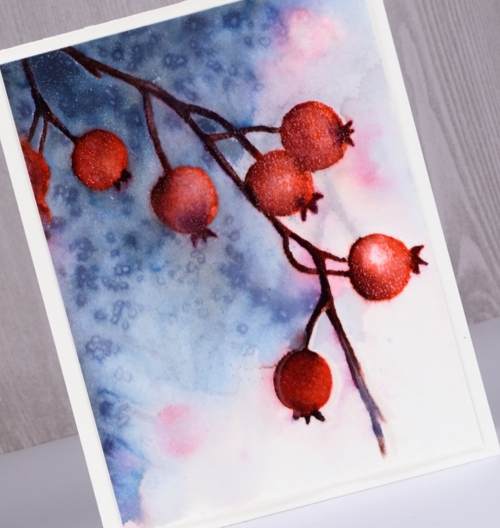
Next I switched to markers and added shading to the berries and darker colours to the twigs and calyx. (yes, of course I had to look that up!) I used barn door and aged mahogany to add depth and shadow to the berries. I used chipped sapphire and ground espresso to darken the stems and calyx. After I had added colour I used a small paint brush and water to blend the stamped colour. Once the panel dried I embossed the berries with versamark and clear powder which gave them a frosty, shiny look. The embossing made them waterproof so I was able to add weathered wood stain to the panel without diluting the berries. I kept the stain dark on the left and diluted it with water on the right then sprinkled salt to created the speckled effect. I decided not to add a sentiment yet as I think this one might be a winter birthday card not a Christmas card. I popped up the whole panel on some foam and added it to a natural white card base.
Supplies
Stamps: berry bramble

Inks: festive berries distress ink, versamark


Distress markers: barn door, chipped sapphire, aged mahogany, ground espresso


Distress stain: stormy sky

Hot pressed watercolour paper
Also: Tonic stamping platform, WOW clear gloss superfine embossing powder, salt
Berry speckled Christmas
Posted: November 28, 2017 Filed under: Berry speckled | Tags: Penny Black stamps, Ranger Distress inks, Ranger Distress stains 11 Comments
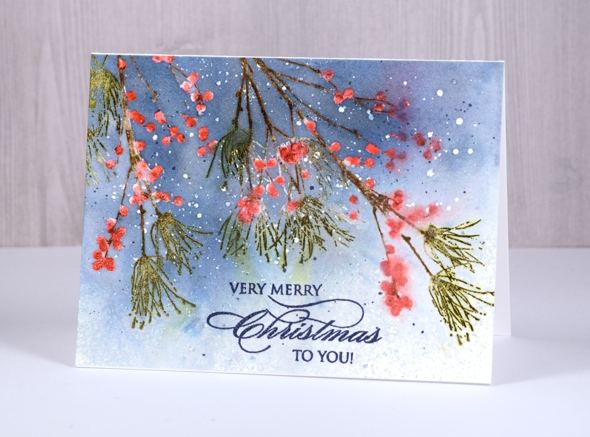
I am happy to be sharing this card over on The Foiled Fox blog today. I used a combination of distress markers to colour the berry branches first then, once they were dry, I clear embossed over the top so they would resist the masking fluid I splattered and the sky I painted next. The process is described in detail over on the Foiled Fox blog so pop over and check it out.
This was definitely a project where a stamp positioner came in handy to do all the colouring first and embossing after.
Supplies
Stamps: berry speckled, sweetest moments


Inks: forest moss distress ink, versamark


Distress Markers: festive berries, frayed burlap, gathered twig, barn door, forest moss


Paper: Neenah solar white cardstock, hot pressed watercolour paper

Also: stamping platform, masking fluid, WOW clear gloss superfine embossing powder


Under the trees
Posted: November 13, 2017 Filed under: under the trees | Tags: Penny Black stamps, Ranger Distress inks, Ranger Distress stains, Tsukineko Versafine inks 5 Comments
So many of the stamps from the ‘Be Merry’ release are suitable for seasons other than winter and occasions other than Christmas. For this card I used the ‘under the trees’ stamp, masked out the little critters, snowflakes and gift and chose a warm colour scheme to make an autumn card. I stamped the ‘under the trees stamp in versafine vintage sepia ink. I cut a little post-it mask to protect the area where the critters and hanging snowflakes were as well as wiping ink off the circles in the sky so they wouldn’t stamp either. I left the stamp in the stamp positioning tool for re-stamping later. I began by paint a pale wash of tumbled glass distress stain over the whole piece of hot pressed watercolour paper keeping the edges darker than the centre. I added some forest moss, crushed olive, mustard seed, spiced marmalade painting around the trees and ground as well as painting some loose background trees into the damp panel.
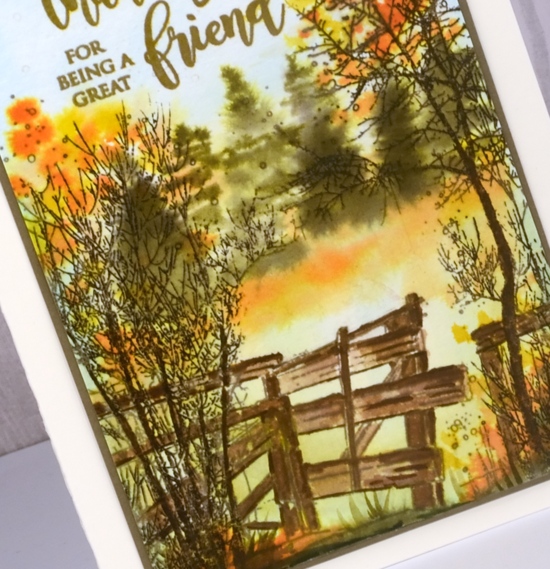
I dried the panel before painting the wooden fence so the distress stains would not bleed out of the stamped image as in the background area. I used gathered twig and vintage photo distress stains to paint the fence then dried the panel again so I could restamp in the stamp positioner. By the time I had added all the blended colour the original stamped trees and bushes were less prominent so I inked them with a ground espresso marker and re-stamped and then painted over until they stood out once more.
To finish it off I stamped a sentiment from Penny Black’s ‘happy wishes’ set in fossilised amber distress ink then versafine vintage sepia several times over the top.
Supplies
Snowy Perch
Posted: November 8, 2017 Filed under: Snowy Perch | Tags: Faber-Castell Albrecht Durer Watercolour pencils, Penny Black stamps, Ranger Distress inks 14 Comments
This little bird and its snowy perch are all part of one stamp. It took me a bit of playing to work out how I wanted to colour the stamped image. I have another card to share where I took a slightly different approach. I started by stamping the whole stamp with antique linen distress ink. Using a pale ink with a detailed stamp helps me see the whole image so I can add colours one by one using a stamp positioning tool. I coloured with both a mix of inks added to the stamp and watercolour pencils added to the stamped image. I inked the branch and twig sections of the stamp with several brown inks (listed below) and blended the stamping with water.
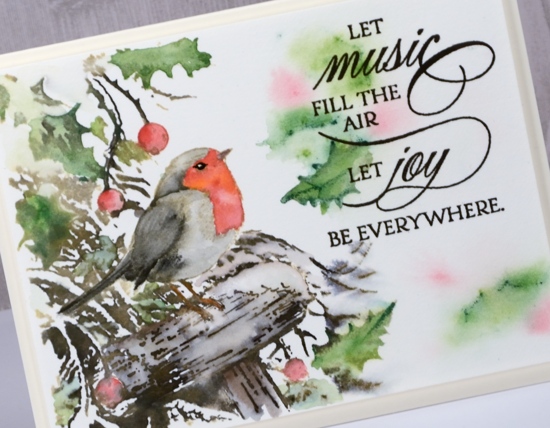
I used a wet paintbrush to pick up colour from watercolour pencils to apply colour to the bird, berries and leaves. By working wet into wet I was able to paint a lighter colour first then add either a darker colour or more of the same colour to darken a shadowed area. You can see I added a lot more water to the leaves on the right hand side so they appeared less prominent and more suitable as a background for the sentiment. Once all the colouring was finished I used a fine tip black pen to make sure the eye stood out. I trimmed the panel then popped it up on craft foam.
Thanks for dropping by.
Supplies
Stamps: snowy perch, sweetest moments

Inks: antique linen, vintage photo distress inks (Ranger), versafine vintage sepia, espresso truffle memento marker (Tsukineko), black micron pen (Pigma)
Paper: 100% cotton hot pressed watercolour paper (Fabriano)
Pencils: juniper green, sap green, dark carmine, light orange, black & cold greyIV Faber Castell Albrecht Durer watercolour pencils
Season’s greetings
Posted: September 21, 2017 Filed under: Berry speckled | Tags: Fabriano Watercolour Paper, Penny Black stamps, Ranger Distress inks, Ranger Distress stains, Tsukineko Memento inks, WOW embossing powders 4 Comments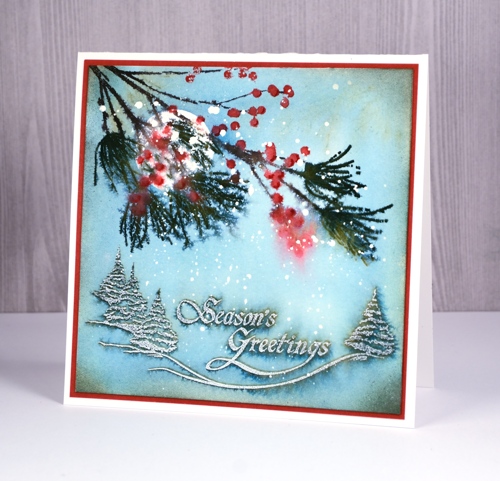
I have yet more snow on the blog today with this wintry berry branch over a snow dusted sentiment. The look is a little vintage again but with muted colours rather than lots of brown. I have some old Christmas cards of my mothers tucked away somewhere I should pull them out because this look reminds me of some of them.
I began with a splattering of masking fluid over a piece of hot pressed watercolour paper. Once dry, I positioned the panel in a stamp positioning tool and stamped the ‘tree & greeting stamp’ from ‘A Festive Season’ set in memento northern pine ink. I removed the panel from stamp positioner but left the stamp in place. In the top left corner I stuck a circle of frisket film to mask a moon shape then painted over the whole panel with water. Colour bled out of the northern pine ink and started filling the panel; I added faded jeans distress stain so I could cover the whole piece with diluted blue/green colour. Once the panel was dry I removed the mask and placed the panel back in the stamp positioner away from the ‘tree & greeting’ stamp so I could place the ‘berry speckled’ stamp to overlap some of the moon. I inked and stamped one colour at a time with the following markers: berries – candied apple distress marker, needles – northern pine memento marker, and branch & twigs – espresso truffle and rich cocoa memento markers.To soften the look of the branch I spritzed it and let some colour bleed into the surrounding area. When dry I added shadows on the berries with the bullet tip of the candied apple marker.

Supplies
Vintage snow covered
Posted: September 19, 2017 Filed under: dressed in snow, snow covered | Tags: Penny Black stamps, Ranger Distress inks 8 Comments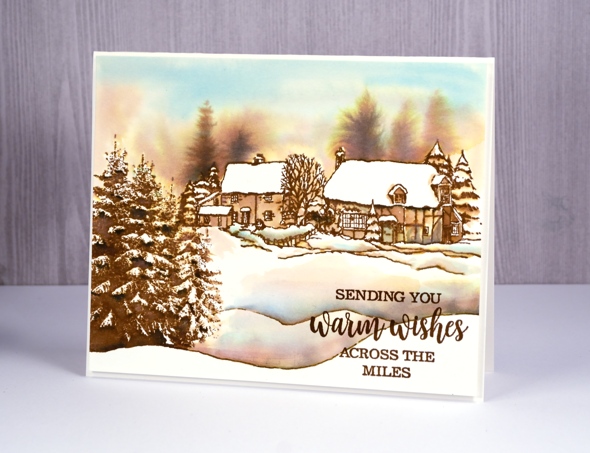
I have a sweet little snowy scene to share today, done in a vintage style with distress products. Distress inks are designed to react with water so they are perfect for this type of project. I did all the stamping in vintage photo distress ink then blended afterwards. Even if the ink has dried you can still blend and dilute it with water. To create this little scene I used two stamps. The foreground trees on the left hand side are part of the ‘dressed in snow’ stamp. I inked the trees and the edge of the snowbank with vintage photo ink, made sure I wiped away ink that ended up on any other parts of the stamp then stamped it on hot pressed watercolour paper. I then positioned the house scene from the ‘snow covered’ set further up the panel on the right and stamped that in vintage photo also.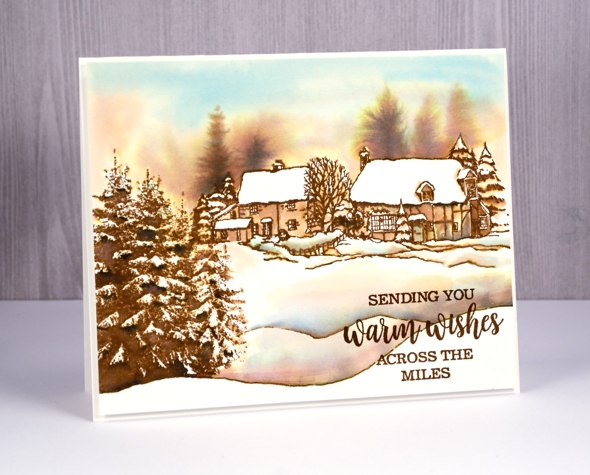
My plan in painting this scene was to blend the brown along with some blue and black into the areas that were not snow covered and leave the snow with little or no blended colour. I pressed some broken china, vintage photo and black soot distress inks onto an acrylic block to use as watercolor paint. I used a round watercolour brush with a good point and painted water along the top of the roofs and trees so that some brown ink bled out of the lines. I painted water into the whole sky area adding some extra brown and blue inks to fill the sky. I also painted over the dark areas on the evergreen trees and added a little black ink but left the ‘snow’ untouched. While the sky area was still damp I dropped in some brown ink to look like trees in the background. I used a small round watercolour brush to paint the houses, using water to blend the stamped ink but also adding a little extra brown or even black for shadows and extra depth. To add extra snow banks and extend the stamped ones I used the bullet tip of the vintage photo marker then blended more colour above the lines for shadows.
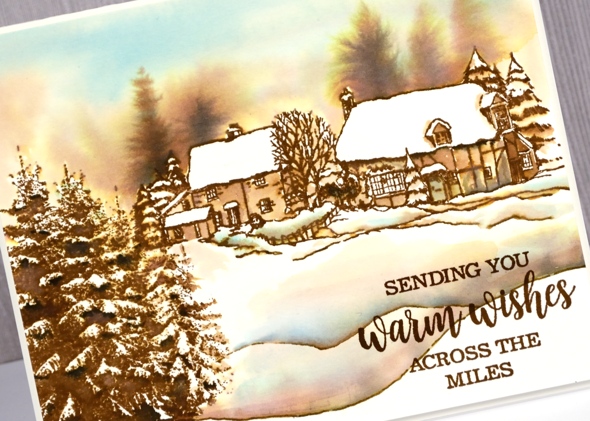
I always like to send a few snowy scenes to my Australian friends and family who are enjoying a summer Christmas so I chose an appropriate sentiment from the ‘joy & happiness’ set.
Supplies
Stamp: Dressed in Snow, snow covered, joy & happiness (PB)
Inks: vintage photo, tumbled glass, black soot distress inks (Ranger)
Paper: Hot pressed watercolour paper (Fabriano)
Berry Speckled
Posted: August 16, 2017 Filed under: Berry speckled, Uncategorized | Tags: Fabriano Watercolour Paper, Penny Black stamps, Ranger Distress inks, Ranger Distress stains 9 Comments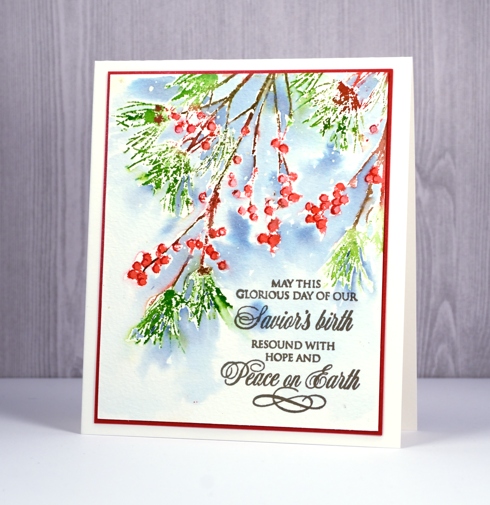
This branch, ‘berry speckled’, is definitely one of my favourites from the new Penny Black release ‘Be Merry‘. It is pretty on its own but will combine well with other Christmas foliage I’m sure. I decided to watercolour with it, and used a stamp positioning tool to help me add colours one at a time. I worked on hot pressed watercolour paper with masking fluid lightly splattered over it. First I inked the berries in festive berries distress stain and stamped them, next I did the pine needles in peeled paint distress stain and finally the twigs in gathered twigs distress marker. I dried all the initial stamping then added the background blue by painting water close to the edges of the stamping then adding stormy sky distress stain to the wet areas.
Once all the ink and stain was dry I added definition to the berries with a candied apple distress marker. I removed the masking fluid to reveal little white dots, added the sentiment in smokey gray versafine ink and matted the panel in red.
Supplies
Stamps: berry speckled, peace & love (PB)
Inks: festive berries, peeled paint, stormy sky distress stains & candied apple, gathered twigs distress markers (Ranger) smokey gray versafine (Tsukineko)
Paper: hot pressed watercolour paper, red cardstock
Also: masking fluid
Wildflowers blue
Posted: August 7, 2017 Filed under: Bright Blossoms vol 1&2, Brusho, French Script, Wildflowers Vol 2 | Tags: Brusho, Darkroom Door stamps, Ranger Distress inks, Ranger Distress stains, WOW embossing powders 7 Comments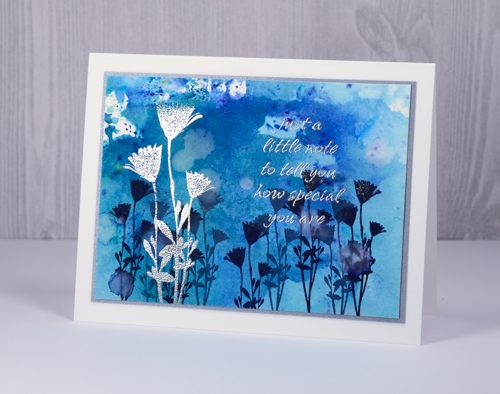
I have a couple more cards that came out of my session with the Darkroom Door Wildflowers vol 2 stamps recently. I began by making blue watercolour backgrounds with brusho paints on hot pressed watercolour paper. Rather than apply the paint directly to the paper, I sprinkled it on a craft sheet, spritzed, then pressed the paper into the paint. I was able to pick up paint that was almost in crystal form as well as soft blended sections.
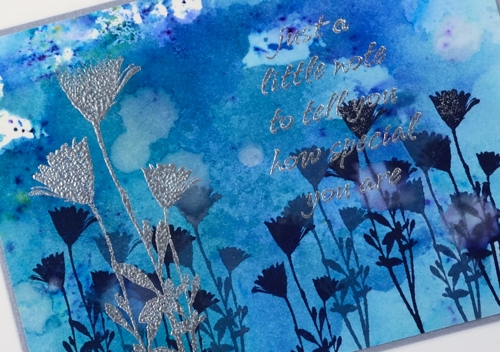
In the Wildflowers vol 2 set there is a large and a small version of the same flower so I used the small stamp on the panel above to create a base of flowers in chipped sapphire and stormy sky distress inks. I shook water droplets onto the panel to create pale watermarks here and there. Once the panel was dry I wiped an anti-static powder pillow across it and embossed the flowers and a sentiment from Bright Blossoms vol 1 in silver over the top of the blue. The silver catches the light depending on the angle but is tricky to capture with the camera.
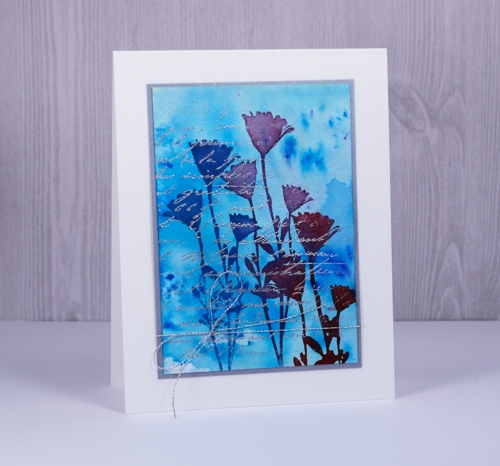
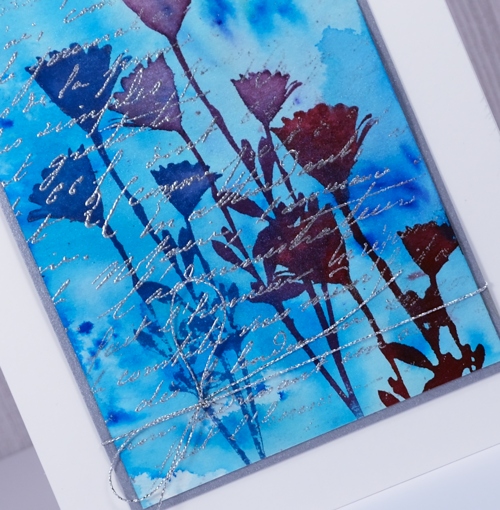
On my second card I created the painted background the same way then stamped the flower three times in different distress stains. Once again I embossed over the top with silver, this time using a partial stamping of the French Script background stamp. I framed both panels in silver cardstock and added silver thread around the second panel before attaching to white card bases.
Supplies
Stamps: Wildflowers vol 2 , French Script, Bright Blossoms vol 1 (Darkroom Door)
Inks: chipped sapphire, stormy sky distress inks & blueprint sketch, seedless preserves, aged mahogany distress stains (Ranger) versamark (Tsukineko)
Paper: Neenah solar white, hot pressed watercolour paper, brushed silver cardstock
Paint: prussian blue, cobalt brusho (Colourcraft)
Also: silver cord, silver embossing powder


