
Summer Sun Collaboration with Faber Castell
Posted: June 12, 2014 Filed under: Fresh Breeze, Fuchsia, Gelatos, Mixed Media, Tutorial | Tags: Faber Castell gelatos, Faber Castell Paper Crafter Crayons, Faber Castell Textural Accents, Penny Black creative dies, Penny Black stamps, Tutorial 4 Comments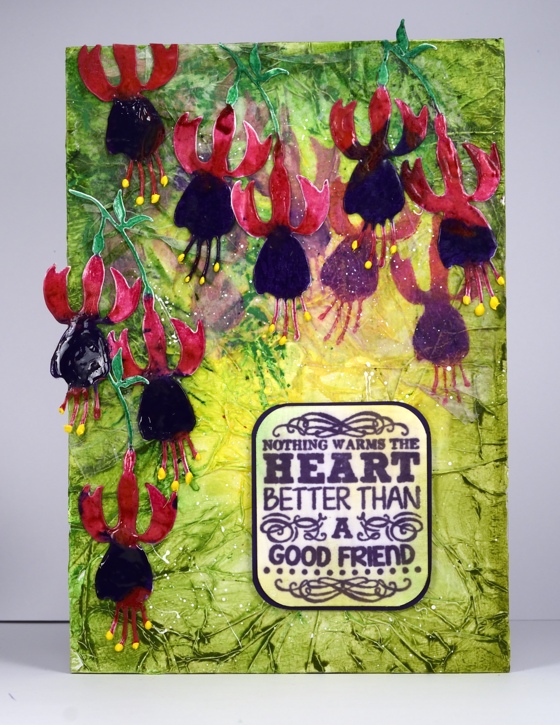
All this week there is a special collaboration occuring between Faber-Castell Design Memory Craft and Penny Black. There are projects on the PB blog using Paper Crafter Crayons and Double Scoop Gelatos AND you’ll find projects from the Faber-Castell Design Memory Craft designers on their blog featuring PB stamps. Visit both Penny Black and Faber Castell Memory Craft for details of giveaways.
.
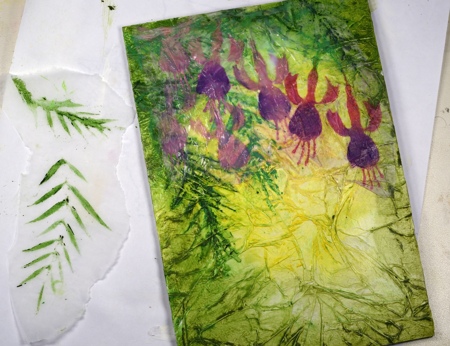
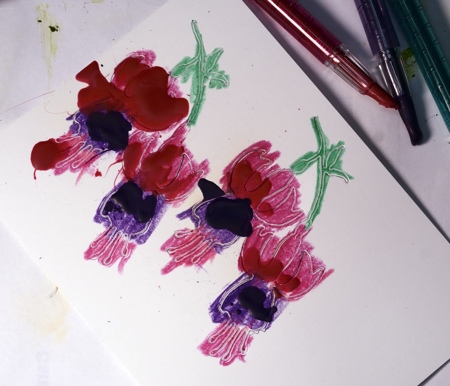
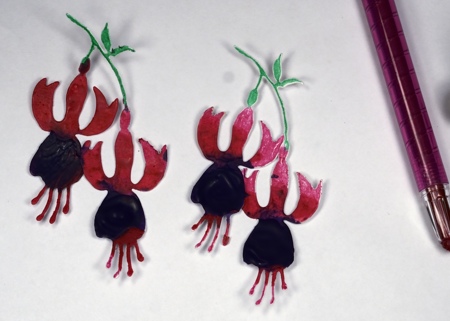
I decided to create a mixed media panel, a rare occurrence for me. I really enjoyed playing with the Textural Accents and the gorgeous colours in the Paper Crafter crayons and gelatos. (if you click on the tutorial pictures you will see more detail)
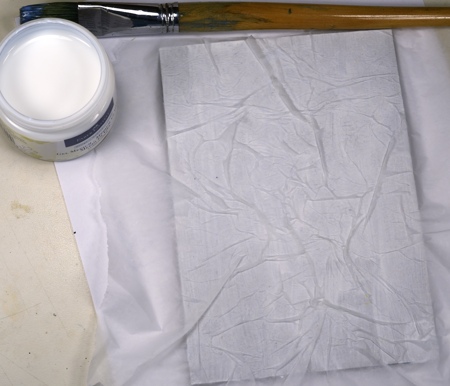
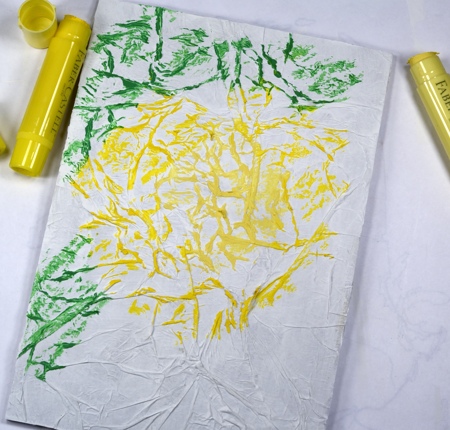
Next I spritzed with water and blended the colours with my fingers.
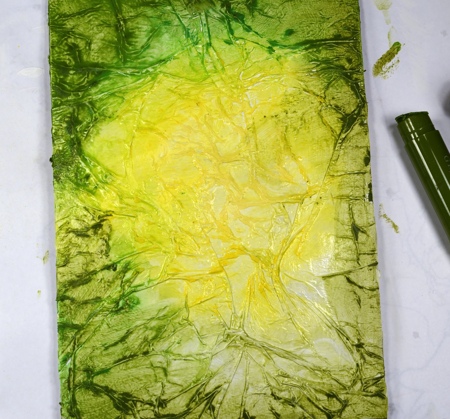
Using stencil plastic I created a stencil using the Fresh Breeze die. (I can’t find the packaging for the stencil plastic so I am not sure what brand but it was sold specifically for creating your own stencils. In order to cut it with a Big Kick I used a metal shim in the sandwich) I applied colour through the stencil with gelatos.
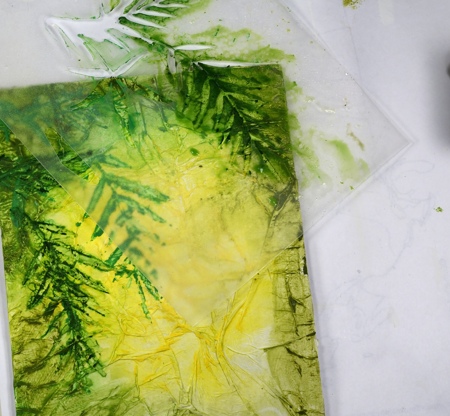
Next I spritzed with water and blended the greens with my fingers through stencil.
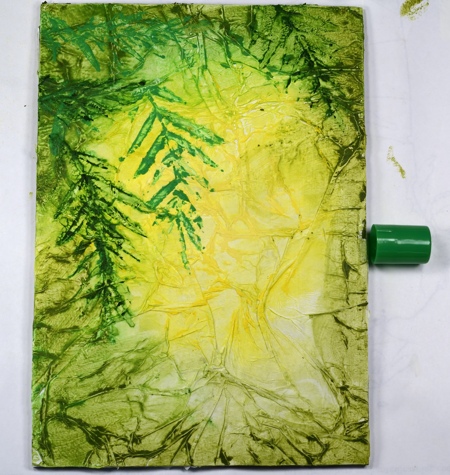
I created another stencil using the Fuchsia die and applied colour to tissue paper with lime, lavender, grape and guava gelatos, then blended with my fingers.
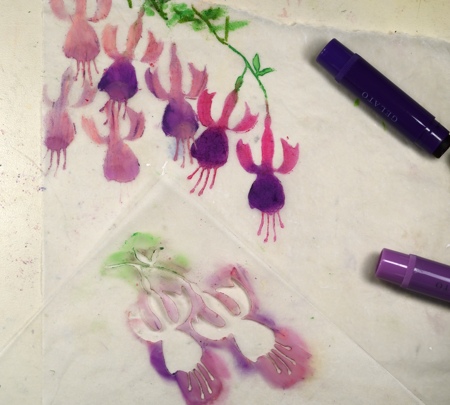
I stenciled some Fresh Breeze leaves with green gelatos on tissue paper and attached both tissue panels to the main panel with Gel Medium. The gelatos on tissue gave the flowers a background misty look that was exactly what I was after.
In other related and creative news, there is likely to be another lull here on the blog in the next few weeks. My daughter’s prom is in two weeks and the dress making countdown starts today! If I have a chance I will update you otherwise please understand that I am creating with tulle and silky fabric instead of paper and cardstock for the next little while.
Supplies:
Stamps: Truly Great (PB)
Creative Dies: Fuchsia, Fresh Breeze (PB)
Gelatos: Faber Castell
Paper Crafter Crayons: Faber Castell
Textural Accents: Gesso, Gel Medium, Glaze (Faber Castell)
Paper: Thick natural coloured cardboard, White 140lb smooth, Tissue paper, PB Mix & Match Periwinkle Paper
Nature’s Song
Posted: June 3, 2014 Filed under: Heathers, Nature's Song | Tags: Penny Black creative dies, Penny Black stamps, Tsukineko Memento inks 5 Comments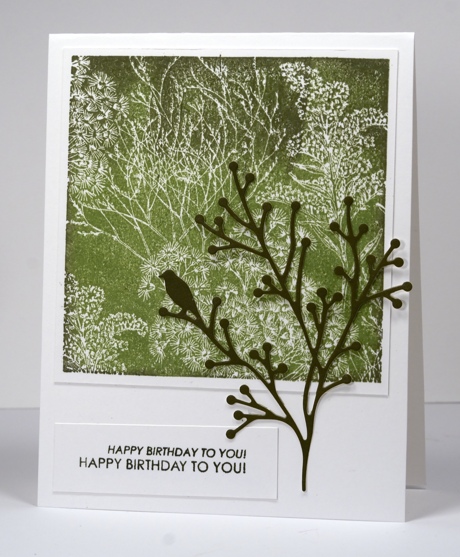
I know there has been very little activity here lately. The season of track meets, soccer tournaments and end of year events is upon us! I created this one a while ago thinking it could squeak by as a masculine card. I know it has flowers in the background but the colour scheme is more about foliage than petals!
I inked the ‘Heathers’ background stamp with Memento Pistachio & Olive Grove inks, spritzed them so they would blend a little then stamped on a white panel. I cut the branch from Olive Grove paper using the ‘Nature’s Song’ die and added a sentiment in Olive Grove ink.
Thanks for stopping by.
Supplies:
Stamps: Heathers, Wishing You (PB)
Inks: Memento Olive Grove, Pistachio (Tsukineko)
Creative Dies: Nature’s Song (PB)
Cardstock: Neenah Classic Crest Solar White 110lb smooth, Penny Black Olive Grove Mix & Match paper
Stamp & Doodle
Posted: May 28, 2014 Filed under: Floral Tapestry, Tutorial | Tags: Fabriano Watercolour Paper, Penny Black stamps, Ranger Distress stains, Tutorial 16 Comments
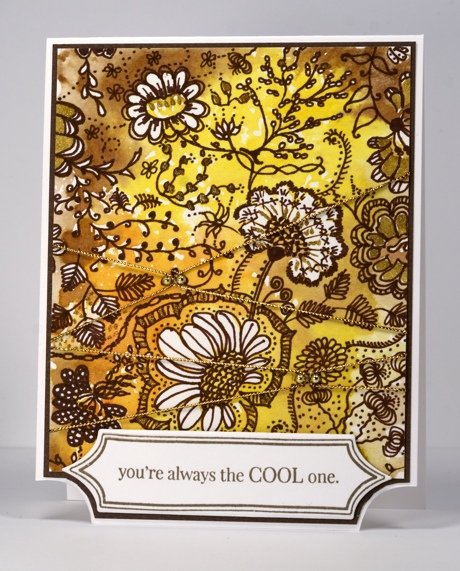
I created this card from a stamped panel that was sitting around on my work table waiting for inspiration. I stamped the “Floral Tapestry” background stamp in Distress stains on watercolour paper. After stamping once I spritzed the stamp and stamped again on another piece of paper, then did it again so I had several panels sitting around, each one a little paler than the previous one. I think this one was the palest panel but it still had plenty of colour and the negative images of the flowers and leaves were clear enough to doodle around. If you watch the video you will see my doodling process. I did not have a plan; I just defined the flower shapes and added leaves, twirls and squiggles in and around them. When I was almost finished I decided a few gold highlights would be nice so I added them with a Wink of Stella pen.
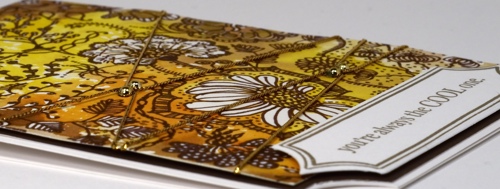
I trimmed the floral panel and criss-crossed some gold cord over it. I added two gold half pearls in each place where the cord crossed and stuck the cord down with glossy accents. The cord did not want to stay in place but with a little pressure on top it finally did! After die-cutting the banner I decided to trim the dark brown mat and cardbase to co-ordinate.
Supplies:
Stamps: Floral Tapestry, Amazing! (PB)
Dies: Triple Banner (PB)
Inks: Versafine Vintage Sepia (Tsukineko) Vintage Photo, Spiced Marmalade, Mustard Seeds Distress stains (Ranger)
Cardstock: Neenah Classic Crest Avon Brilliant White 110lb smooth , Fabriano 100% cotton hot pressed watercolour paper
Lookin’ Good
Posted: May 20, 2014 Filed under: Above Par, Watercolour | Tags: Faber-Castell Albrecht Durer Watercolour pencils, Fabriano Watercolour Paper, Penny Black stamps 2 Comments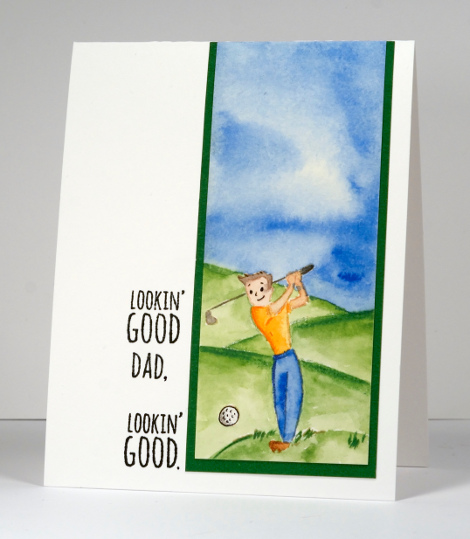
To colour this little golfer I stamped first in Memento Desert Sand ink to give myself a pale outline I could easily paint over. I then picked up colour from my watercolour pencils with a waterbrush and painted the golfer, the greens and the sky. I added a few little details with a 0.05mm fine line marker before I matted the panel in green and added a sentiment.
There will be inspiration for masculine cards all week on the Penny Black blog. (Make sure you check yesterday’s post; Cathy’s Potting Shed card is superb) If you are like me you probably don’t make enough masculine cards; I really need to build up my supply. This one won’t work for me as my Dad does not play golf; my husband doesn’t either so my children won’t be needing to grab it. They can get creative themselves for Father’s Day in Canada; I have until September to create something for Father’s Day in Australia.
Supplies:
Stamps: Above Par, …Lost Without You (PB)
Inks: Memento Desert Sand,(Tsukineko) Black Soot Distress ink ( Ranger) Prismacolour Fine Line Marker
Pencils: Albrecht Durer Watercolour pencils (Faber Castell)
Paper: Fabriano 100% cotton hot pressed watercolour paper, Neenah Classic Crest Solar White 110lb smooth, PB Mix & Match Spring Meadow Paper
Ten Tulips
Posted: May 18, 2014 Filed under: Promise Me, Triple Banner, Watercolour | Tags: Fabriano Watercolour Paper, May Arts ribbon, Penny Black creative dies, Penny Black stamps, Tsukineko Memento inks 8 Comments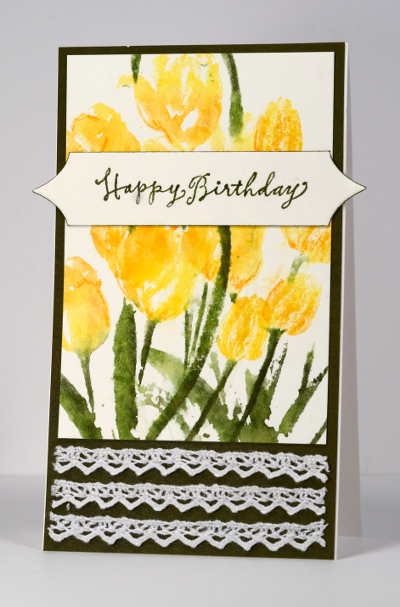
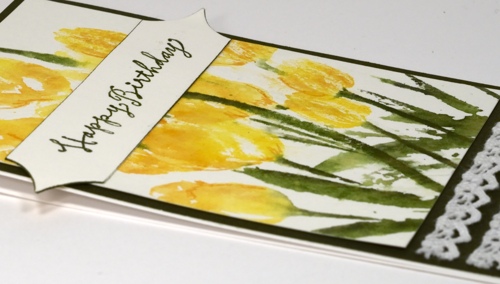
The Tulip Festival finishes tomorrow so I am glad I can slip one more tulip card in before the end. I worked on this one latish last night and all did not go according to plan. I stamped the tulips first on watercolour paper and they were fine. It was in the finishing off that I had problems. But I will go back to the beginning and explain my process.
I began by inking just the flower heads in Memento Dandelion and Cantaloupe using markers. I spritzed before stamping them at the top of the panel. I stamped just the tulip heads twice, one set under the other and the third time inked the stems and leaves as well. I was happy with the whole panel even the bit that is now covered by a large sentiment banner. I matted with Olive card stock and decided to attach the three strips of lace; I am still not sure if I like the lace there but I decided to stick with it. The panel is long and thin as you can see so it was difficult to work out where to put a sentiment on a 4.25×5.5 inch card base. I tried a sideways sentiment or a small sentiment beside the lace but neither looked right. Anyway, to make a long story a little shorter I stamped the sentiment on the tulips, messed it up and had to either cover the mess or crop the panel. I decided to cover it with a die cut banner and make a very narrow card so the points of the banner could go over the edge.
“Over the Edge” just happens to be the current challenge at Addicted to CAS and it’s a birthday card featuring May Flowers so I will join in at Seize the Birthday as well.
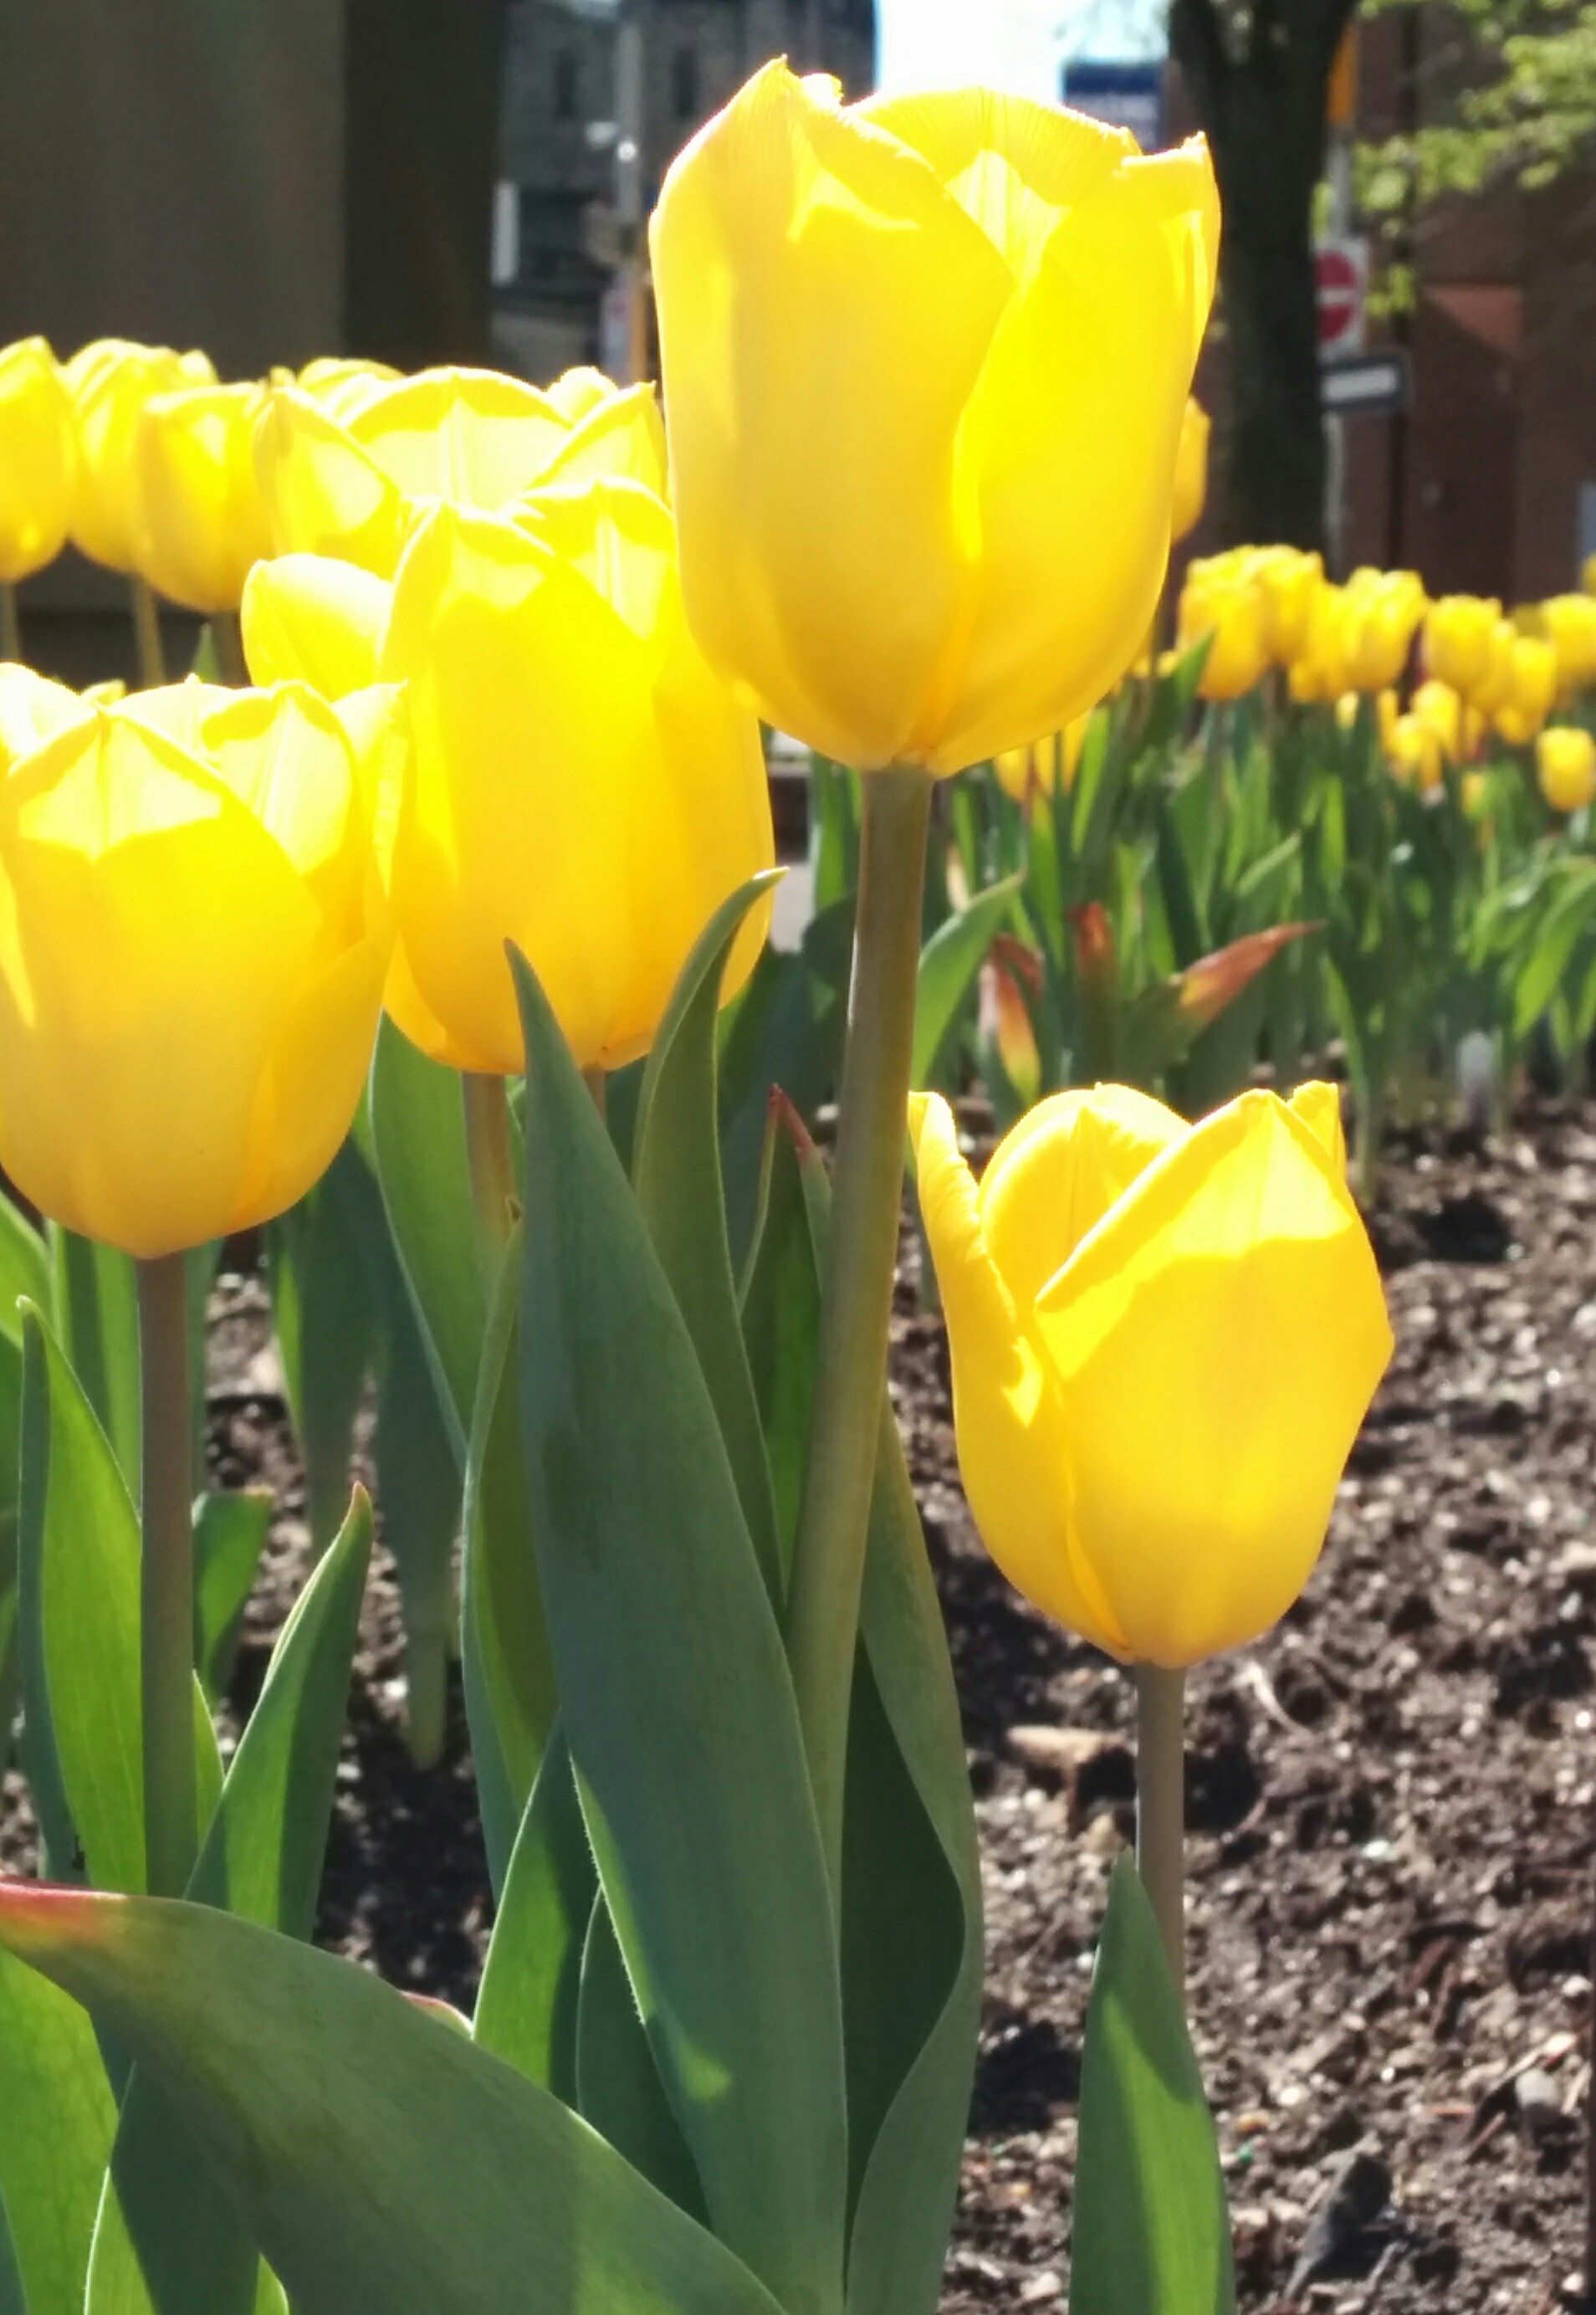
This morning we were down town having a coffee before church and I snapped these tulips in the sunshine.
Supplies:
Stamps: Promise Me, Tweet Wishes (PB)
Inks: Memento Dandelion, Cantaloupe, Bamboo Leaves & Olive Grove markers (Tsukineko)
Creative Dies: Triple Banner
Cardstock: Fabriano 100% cotton hot pressed watercolour paper, Neenah Classic Crest Avon Brilliant White 110lb smooth, Penny Black Olive Grove Mix & Match Papers
Also: Crochet Trim ribbon (May Arts Ribbon)
Four Tulips
Posted: May 14, 2014 Filed under: Blooming Garden, CAS, Watercolour | Tags: CAS, Faber-Castell Albrecht Durer Watercolour pencils, Fabriano Watercolour Paper, Penny Black stamps, Tsukineko Memento inks 4 Comments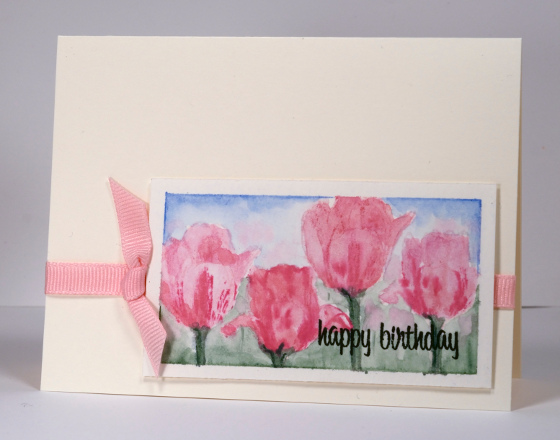
The tulip festival continues in Ottawa and here on my blog. I pulled out all my PB tulip stamps and have them on my desk waiting for inspiration. I can’t promise I will use them all during the festival but I will have a few more for you.
To create this little scene I stamped the tulips from the transparent set Blooming Garden twice in Memento Angel Pink. I then painted the petals with colour from a couple of watercolour pencils (listed below). I inked some of the detail lines on the stamp with a Memento Rose Bud marker and stamped over the painted petals to finish off the flower heads before painting the stems in green. I used the same green to fill in the lower background and a blue watercolour pencil for the sky. I then dabbed some pink watercolour ‘paint’ into both the green and the blue to suggest more tulips in the background.
The taped edge of the panel framed the picture which I popped up on dimensional tape over a strip of ribbon.
Supplies:
Stamps: Blooming Garden, Special Wishes (PB)
Inks: Memento Angel Pink, Northern Pine , Rose Bud marker (Tsukineko)
Cardstock: Fabriano 100% cotton hot pressed watercolour paper, Neenah Classic Crest Natural White 110lb smooth
Also: Albrecht Durer watercolour pencils True Blue 148, Pink Madder Lake, 129, Pine Green 267 (Faber-Castell)
Six Tulips
Posted: May 12, 2014 Filed under: CAS, Efflorescence, Watercolour | Tags: CAS, Fabriano Watercolour Paper, Penny Black stamps, Ranger Distress stains 9 Comments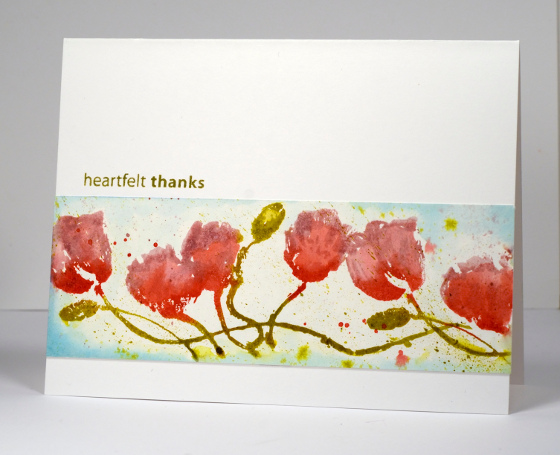
I am continuing with my Tulip Festival theme, an idea inspired by a regular visitor to Bits & Pieces. (Thanks, Karen) On this card I have a watery array of tulips stamped with distress stains on watercolour paper. Distress inks are designed to react with water and each other which makes them great for blending on flowers, patterns, backgrounds etc. I inked the tulips on the stamp with Victorian Velvet first then added a touch of Barn Door at the base of each bloom. I inked the buds and stems with Crushed Olive and stamped on watercolour paper. I then used a waterbrush to blend the two colours together. To frame the panel I diluted some Tumbled Glass distress stain and painted around the edges pulling the colour into the centre and diluting it further to fade it out. Finally I flicked red and green inks over the panel, attached it to the card base and added a sentiment.
I haven’t visited any of the tulip beds yet but I did drive by the canal yesterday and saw there were plenty in bloom. Are they blooming where you are?
Supplies:
Stamps: Efflorescence, Amazing (PB)
Inks: Versafine Spanish Moss (Tsukineko) Barn Door, Crushed Olive, Victorian Velvet, Tumbled Glass Distress stains (Ranger)
Cardstock: Neenah Classic Crest Avon Brilliant White 110lb smooth, Fabriano 100% cotton hot pressed watercolour paper
Two Tulips
Posted: May 11, 2014 Filed under: CAS, Dainty | Tags: CAS, Faber-Castell Albrecht Durer Watercolour pencils, Penny Black creative dies, Penny Black stamps, Tsukineko Memento inks 8 Comments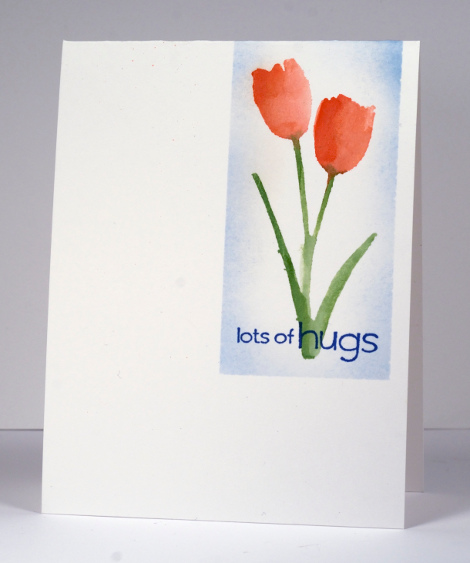
When I set out to make this card I had two things in mind. I wanted tulips to mark the beginning of the Tulip Festival here in Ottawa and I wanted to use the current sketch at CAS(E) this sketch. I did not plan to make it one layer at all; the sketch really looks like at least a two layer to me. I made a stencil in masking paper (removable grocery sticker paper) with the new tulip die from Penny Black. It’s called ‘Dainty’ and I can see myself reaching for it often. I stuck the mask down and painted with a waterbrush picking up colour from watercolour pencils. I did not lay down too much ‘paint’ or water; the card base is not watercolour paper so I didn’t want it to warp or soak through to the back.
My daughter came along at this point and commented on my ‘floating tulip’. It did need grounding; I just hadn’t worked out a method at that point. Anyway, I left it as I had promised to take my daughter shopping for a dress to wear to her Academic Dinner on Thursday. We arrived at the mall at 4:30 clueless that it was going to close at 5:00! First store, second dress, happy girl, thankful mother.
I came back to my card, masked and sponged a frame around it then looked for a suitable sentiment. My plan was to stamp the sentiment in green so it would double as some grass but none of my green inks matched the leaves. I was about to settle for less than the best green when the it occurred to me that a dark blue might work. It did.
And the card just happens to also work for the One Layer Simplicity challenge, Fabulous Flowers.
Supplies:
Stamps: Sweet Wishes PB)
Dies: Dainty (PB)
Inks: Memento Summer Sky, Danube Blue (Tsukineko)
Pencils: Albrecht Durer Watercolour Pencils Vermillion 117, Sap Green 167 (Faber-Castell)
Cardstock: Neenah Classic Crest Natural White 110lb smooth
Golden Blooms
Posted: May 6, 2014 Filed under: CAS, One-Layer Simplicity challenge, Petal Power | Tags: Penny Black stamps, Ranger Distress stains, Tsukineko Memento inks 19 Comments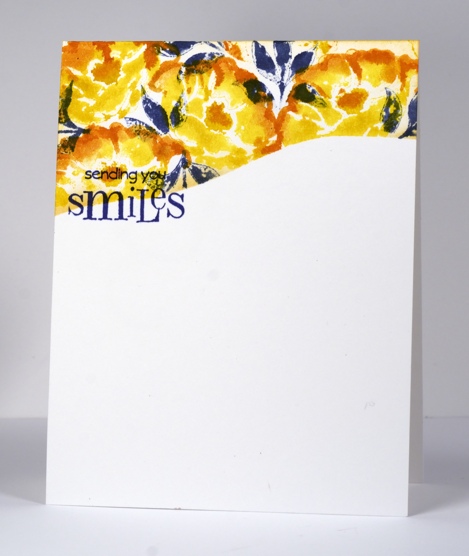
After years of avoiding yellow and orange tones in clothes and fabrics I am really enjoying using their bright warmth in stamping these days. I especially like the combination of yellow, orange and navy. I know leaves are rarely navy but orange and navy are opposite on the colour wheel so they create a contrasting stable colour scheme. I chose three colours to participate in this week’s Less is More challenge and the layout is inspired by the CAS(E) this sketch for the week. I just realized I can link up with our current One Layer Simplicity Challenge also to use flowers on a one layer card.
I cut a curved mask to cover the lower two thirds of the card base then chose three stamps from the transparent set Petal Power. I inked the solid petal stamp with mustard seed distress stain and added spiced marmalade along the petal edges. I then inked the co-ordinating outline stamp with just spiced marmalade on the top edge and stamped over the blooms. I stamped a few leaves in chipped sapphire distress stain and added the sentiment in Memento Paris Dusk.
Supplies:
Stamps: Petal Power, Sweet Wishes (PB)
Inks: Memento Paris Dusk (Tsukineko) Chipped Sapphire, Spiced Marmalade, Mustard Seeds Distress stains (Ranger)
Cardstock: Neenah Classic Crest Solar White 110lb smooth
One Layer Poppy
Posted: May 3, 2014 Filed under: One-Layer Simplicity challenge, Poppy Time, Sun Catcher | Tags: CAS, Fabriano Watercolour Paper, Penny Black stamps, Penny Black stencils, Ranger Distress stains, Tsukineko Memento inks 20 Comments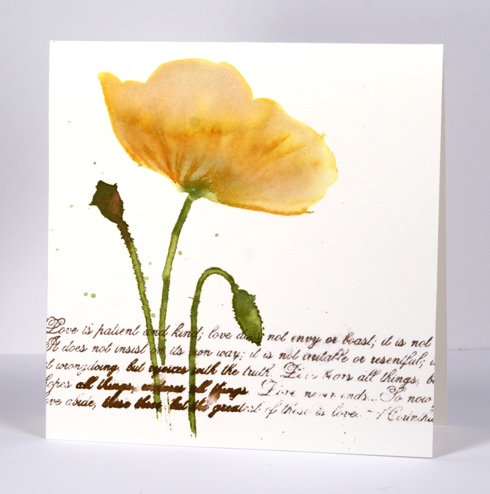
The new One Layer Simplicity Challenge is to make a card with flowers on it. There is already a gorgeous array of floral inspiration on the blog and you have until May 24th to add yours. The current Mod Squad challenge is to make a one-layer card so my poppy card meets the criteria there also.
To create this watery poppy I positioned the ‘Sun Catcher Stencil’ then painted the flower head in water. While it was very wet I added both Mustard Seed and Victorian Velvet Distress stains to the water and blended them with a paintbrush. I used the co-ordinating ‘Poppy Time’ stamp to stamp the stems, bud and seed head then used a paintbrush to immediately fill them with distress stains. By this stage the poppy head had dried a bit so I inked some of the stamp with ink to add a few veins to define the petals. I added the verses from 1 Corinthians in a mix of Memento ink and distress stain allowing some to blur and some to bleed. The piece of watercolour paper already had two ink drops on it so I carefully added a few more rather than going overboard with the flicking technique I have been using lately.
Thanks for dropping by. I hope you enjoy the rest of your weekend.
Edited to add: If you are interested in an “Introduction to Stamping” class there are a few spaces left in the class I am teaching at “Crop-A-While” in Orleans on Thursday May 8th. Please click on the store link for more details and contact the store to register.
Supplies:
Stamps: Poppy Time, Love Chapter (PB)
Stencil: Sun Catcher
Inks: Memento Rich Cocoa (Tsukineko) Vintage Photo, Mustard Seed, Victorian Velvet, Peeled Paint Distress Stains & Wild Honey, Peeled Paint Distress inks (Ranger)
Cardstock: Fabriano 100% cotton hot pressed watercolour paper












